• Skip to primary navigation
  • Skip to main content
  • Skip to primary sidebar
  • Skip to footer

Steel Raven Farms

Where muck boots meet ground.

  • Animals
    • Chickens
    • Farm Dogs
    • Goats
  • Garden
    • Compost
    • Garden Projects
    • Seeds and Plants
    • Garden Journal
    • Working With Food
      • Recipes
      • Freezing Foods
      • Dehydrating Foods
      • Canning Tips And Tricks
        • Canning Inventory Sheets
  • Helpful Info
    • Welcome to the Homestead!
    • Emergency Preparedness
    • Frequently Asked Questions
    • Goal Setting
    • Project List
    • Shop Digital Products
      • Hay Calculator
      • Farm Expense And Income Tracker
      • Goat Crash Course: 101
      • Garden Journal Prompts
      • Schedule C Tracker
      • Schedule C Tracker
      • The Homestead Bundle
  • The Truths
  • Episode List
  • Start Here
    • Privacy Policy
    • Affiliate Disclosure
    • Let’s Get in Touch
    • Members Only Library
    • Welcome To Our Homestead

Leigh

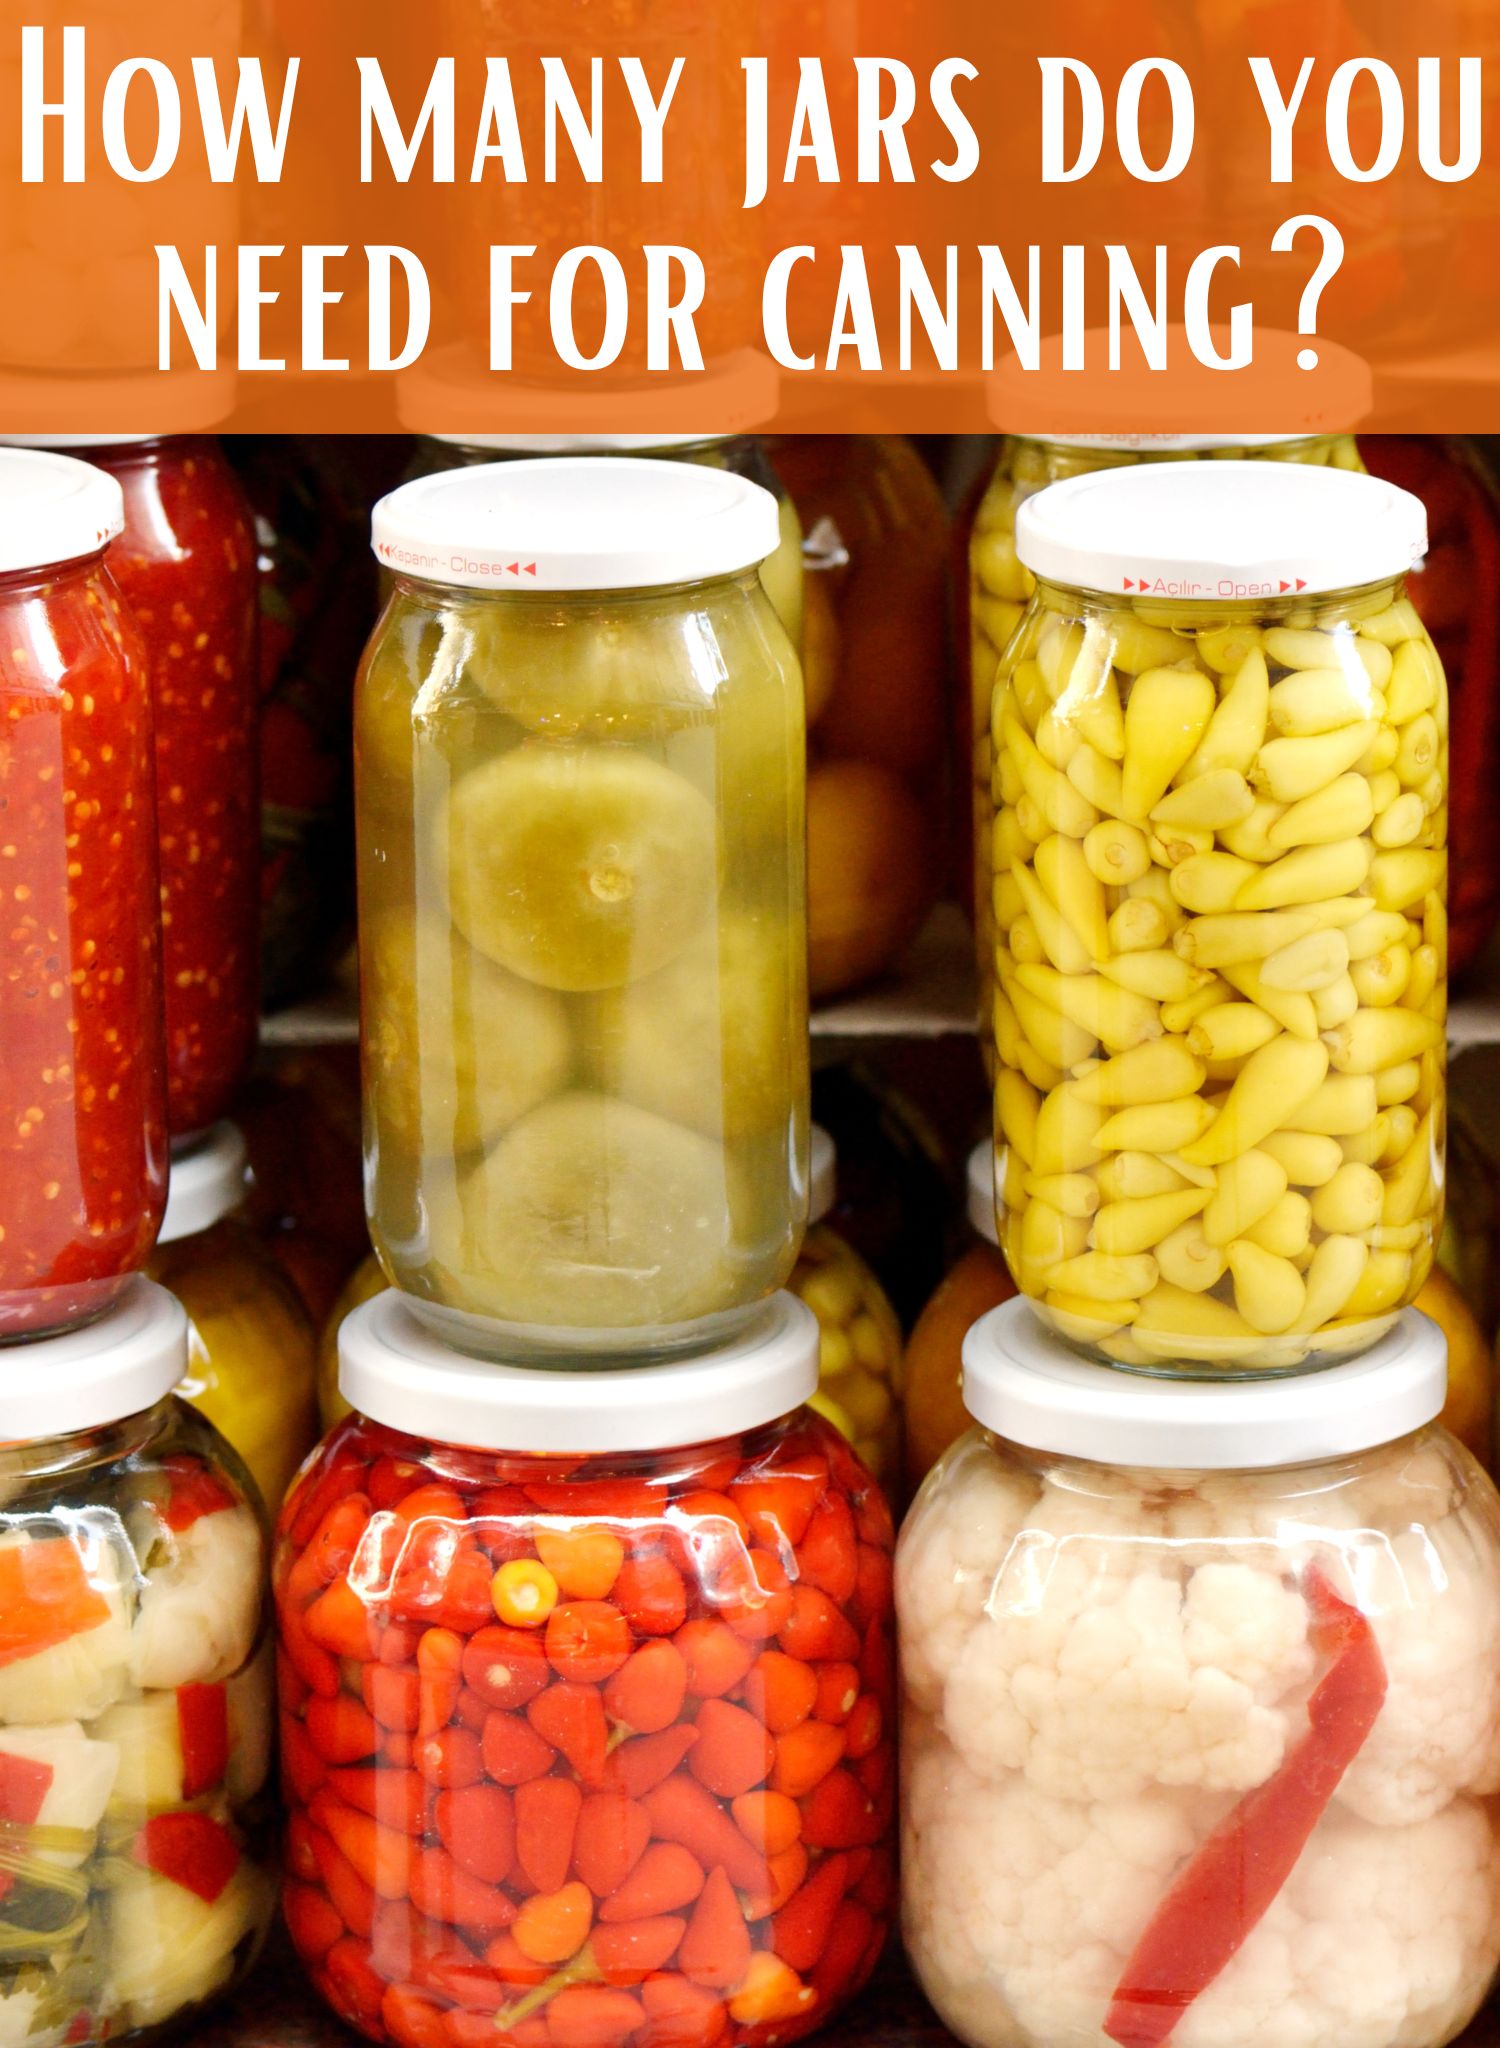
How Many Jars Do You Need For Canning?

May 7, 2024 by Leigh Leave a Comment

Well, the short answer is all of them. No, I am not exaggerating. When you are gardening to produce food for your family, chances are you would like to preserve some of that harvest for the rest of the year. Or if you are trying to take advantage of a produce sale? Better to have too many jars than not enough. While you can Google recipes all day long, I am more interested in the nitty gritty deals that most people forget to tell you about. Like how many jars do you need for canning? That all depends on your goals.
The Ultimate Homesteader’s Starter Bundle – Only $47!

Get the tools you need to stay organized, track profits, and manage your homestead with ease!

Includes:
✅ Schedule F Tracker – Simplify tax prep
✅ Profit Calculator – Track earnings
✅ Hay Calculator – Plan livestock feed
✅ Garden Journal – Digital & printable
✅ Herd Health Tracker – Monitor animal care
✅ Simple Budget – Manage finances
✅ Backyard Homestead eBook – Essential tips

$99 value – now just $47! Start your homesteading journey today!

Buy Now

Before We Jump In

I’ve written a couple posts on canning, so I don’t feel the need to sound like a broken record. But if you haven’t already, check out my post on gearing up for canning season, my homestead buying guide, and my shelving systems. Trust me, you will be glad you did…. at least for the shelves.

Next, we need to ask some questions before we determine how many jars you need for canning. If you are a beginning homesteader or canner, you will need to answer some questions like the ones below.

Are you looking to supply food for the entire year?

If you are looking to supply your family with an entire year of tomato sauce, you need to look very carefully at how much tomato sauce you currently buy or make. For us, we eat spaghetti about once a week. That means I need at a minimum 52 jars of tomato sauce.

The next question is, is that enough? For us, 52 jars would be gone in about six months. Because we also make chili and other things with tomato sauce. Or we will double or triple recipes because we need left overs for work. It’s the same way with green beans, corn, peas, pickles, etc. If I only can enough for what we use, we will be out in no time. That lesson was learned the hard way.

If you are new to heating with firewood and are looking to master the finer points of it. We’ve got a great eBook that goes in depth of what tools you should consider, how and where to stack, how to build a fire and so much more!

Buy Now

How many people are you feeding?

We are a family of four. But we homeschool and work 24-48 hour shifts. That means that we need left overs. Also we have two growing boys and that means we are also feeding I’m hungry, it’s not mine, and I didn’t do it. So when I am making my projection list for canning, I round WAY up.

What is your skill level with canning?

If you are a novice canner, you need to really consider if you are capable of canning more complex items like soups or stews. It’s not that soups and stews are SO hard to do. It’s actually more of a do you understand the actual process of canning.

For example; if your favorite soup has noodles, do you know that the noodles will turn to mush and become inedible. Same thing with rice, zucchini and other foods that are not as hardy. I’m a advanced but not pro level canner. I still make mistakes. So I know that I need to pay attention or all that hard work will be for not.

Before we get too far into this, I have a great course on the basics of goat care. I call it Goat Crash Course: Goat 101. In this course, I explain things like types of shelter, types of feeds and hays, basic assessments and so much more! Check it out!

Buy Now

Where are you going to put the jars?

I am extremely lucky that I have a full basement. I have sectioned off an entire food storage room. When it’s finished it will have walls, air vents, and a dehumidifier. Jared has also built me these fantastic shelves.

BUT if you don’t have that, you really need to consider how much you can actually can. If you have a tiny pantry, no basement, or other place to put them, you need to get really creative with where stuff will go.

I’ve seen under the bed storage systems for jars that will blow your mind. Keep in mind that your jars should be stored in a cool, dark place. So in a garage that is not temperature controlled probably isn’t the best idea.

Are you buying produce, or are you growing it?

We buy and grow a lot of our produce. Unfortunately, we can’t grow everything we need right now. That’s okay. It’s in the works to grow all the corn we need for a year. But it’s not here yet. If there are financial or garden space constraints, it’s better to identify them now.

Either way, knowing where you are going to source what goes in your jars is another key point in figuring out how many jars you need for canning.

The Ultimate Homesteader’s Starter Bundle – Only $47!

Get the tools you need to stay organized, track profits, and manage your homestead with ease!

Includes:
✅ Schedule F Tracker – Simplify tax prep
✅ Profit Calculator – Track earnings
✅ Hay Calculator – Plan livestock feed
✅ Garden Journal – Digital & printable
✅ Herd Health Tracker – Monitor animal care
✅ Simple Budget – Manage finances
✅ Backyard Homestead eBook – Essential tips

$99 value – now just $47! Start your homesteading journey today!

Buy Now

How far away is your local store?

Our local Wal-Mart is about 25 minutes from us. So if I run out of jars, lids, or anything else, I can get to it pretty quickly. The downside is, when it’s canning season in a farming community, there are no jars. You would be lucky to find anything.

Last year, I bought brand new cases of jars because Wal-Mart had no lids! The only way I could get them was to buy the entire set up. Which is fine! I needed more jars anyways.

If your local store is more than an hour away, I would make sure to always have extra jars on hand. Maybe 1 or 2 cases per type of jar.

So how many jars do you need for canning?

I hate to break it to you, but there is no magic formula here. After you answer the questions above, you can get a much better idea for how many you need. BUT I’m not going to leave you hanging. If you are a beginning homesteader and you are trying to figure out a realistic number, I will tell you what I did.

Our herd health bundle helps you keep track of your herd’s health. Includes the goat assessment, herd check sheets AND Herd Health Tracker!

Buy Now

I buy 2 cases per size, per person, per meal.

And yes, it is a TON of jars. Part of my yearly canning list looks something like this:

52 quarts and pints of corn

52 quarts and pints of green beans

104+ quarts of tomato sauce

50 quarts and 25 pints each of: chicken noodle soup base (no noodles), beef stew, enchilada soup, taco soup, beef roast, potato soup, and chili.

25 pints of salsa

25 quarts of pickles

50 quarts each of pinto, black, kidney beans

100+ jars of potatoes

We are a family of 4 and again, we need to have enough for left overs, lunches, if the boys are home alone for the day, etc. This helps to make sure that even if we don’t eat all that corn, we have some for next year.

Are you getting overwhelmed in the garden? Stressed? Or just not enjoying the garden like you used to? Check out our garden prompts! We send out weekly emails that get you back in the garden and out of your head! Turn the garden back into a place of love and joy instead of frustration and headache!

Subscribe Now!

How many jars do YOU need?

Figuring out how many jars you actually need is going to come down to how much you enjoy canning, your storage, and your finances. Some people can’t afford to drop $12-$20/ person/ meal on jars.

At the end of the day, it’s really about what you can afford. If you can only afford two cases at a time, get them! Trust me, you will use them eventually. As you get more comfortable with canning, or you need to start making your own dog food, thanks Bear, you will appreciate having those extra cans.

Also please for the love of all that is good in this world, pick up lids every single time you see them! Come canning season, they have disappeared! Or you can buy reusable lids like Tattler. PS go to their website, they are a TON cheaper!

If you like the content I put out, feel free to buy us a coffee! It helps keep this site running, marketing and the goats in grain!

Buy me a coffee

If you like this post, feel free to share it and follow us below on our social media accounts!

  • Facebook
  • Pinterest
  • Instagram
  • YouTube
  • TikTok
  • Spotify
  • Threads

Filed Under: Canning, Garden, How To's Tagged With: Canning, cooking, Homestead, kitchen

JOIN TO OUR MAILING LIST!

Leave us your email to receive new posts and special offers for members only! Don't miss a thing!

Recent Posts

  • Fall Garden Guide
  • Top Mistakes With Goats
  • How To Bond With Your Goats

Should You Deworm Your Goats?

May 4, 2024 by Leigh Leave a Comment

There is no simple answer to this. Some farmers will deworm monthly. Others, like me, only deworm when there is a positive fecal or other significant signs or symptoms of needing dewormer. Answering the question should you deworm your goats, isn’t one that is easy to answer. Instead, I’ll tell you what we do and some options that you can use for your goats and farm.

goat kidding

Before we get too far into this, I have a great course on the basics of goat care. I call it Goat Crash Course: Goat 101. In this course, I explain things like types of shelter, types of feeds and hays, basic assessments and so much more! Check it out!

Buy Now

Does Your Goat Have Worms?

Every goat has worms. Period. It is not necessarily a bad thing for goats to have them. The issue is when the goat becomes stressed like with labor, travel or when you are in a high parasite area. Georgia has an insane parasite load, especially in the summer and worms will kill your goat. So then you have to deworm and the vicious cycle starts all over.

Our Main Parasites

The main parasites in my area, and we deal with commonly, are Barber Pole, Coccidia, and lung worms. What happens is that the worm or eggs are shed when the goat poops. It then attaches to grass and when the goat eats the grass, they get re-infected with worms.

Goats will naturally not eat grass or browse that is too short unless there is no other option. They usually eat down to about 4-6 inches and then will move on. This will expose the worm larvae and the sun should kill it.

Unfortunately, if you are not rotating your pastures often enough or feeding on the ground, you will get your goats sick. The sun will not have enough time to kill the larvae or worms themselves and you will end up back in the same boat you were in before.

So the best way to stop this cycle is to allow 90 days between each pasture to allow the grass or browse to get tall enough for the goats to eat it. Sometimes this isn’t possible but do the best you can, even if it’s just between two pastures.

Why you shouldn’t deworm your goats every month

Just like with antibiotics, you should only use dewormers if necessary. The more you use antibiotics, whether for yourself or your livestock, the less likely they are to work. Every sniffle doesn’t require antibiotics. It’s the same way with dewormers.

If you over use a dewormer, the dewormer simply will not work as effectively as before… And they aren’t making new dewormers! Since so many goat farmers have overused dewormer, we are already at the point where dewormers aren’t working. Now, we have to use two different dewormers over the course of several days or weeks to get the same results.

Our herd health bundle helps you keep track of your herd’s health. Includes the goat assessment, herd check sheets AND Herd Health Tracker!

Buy Now

We use cydectin and safe guard at the same time, and have had good results. But again, I will treat for worms with a positive fecal. Or whenever their FAMACHA is low, poor body condition, or other sign that the goats need dewormer. But I try really hard to only do deworm with fecals.

There will come a time when those dewormers are no longer effective. I’ve actually talked to some goat people in other parts of the country that have said that those dewormers are not longer effective for them either.

Holistic Care VS Deworming Your Goat

There are quite a few other things that can be done to help manage parasite loads. The first is pasture management. We touched on pasture rotation above, but it goes far beyond that. Pasture management is also making sure that your pasture isn’t being used by too many animals for too long, or not being taken care of between rotations. Only you will know if you have too many animals for too long on YOUR pasture. But if you are not rotating your pasture at all, expect to have issues with parasites.

Another way to help control parasites holistically is to feed or plant things that are known to kill parasites. Pumpkin seeds are high in tannins which are a natural dewormer. Same with garlic, oregano, clove, turmeric, cayenne pepper, and copper bolus.

If you can get your hands on it, seeding your pastures with some Sericea Lespedeza. This is a natural dewormer that has been studied extensively by Fort Valley State University. They have found that goats that ingest this plant regularly have virtually zero parasites…. Which is amazing!

The Ultimate Homesteader’s Starter Bundle – Only $47!

Get the tools you need to stay organized, track profits, and manage your homestead with ease!

Includes:
✅ Schedule F Tracker – Simplify tax prep
✅ Profit Calculator – Track earnings
✅ Hay Calculator – Plan livestock feed
✅ Garden Journal – Digital & printable
✅ Herd Health Tracker – Monitor animal care
✅ Simple Budget – Manage finances
✅ Backyard Homestead eBook – Essential tips

$99 value – now just $47! Start your homesteading journey today!

Buy Now

Breeding For Hardiness

I’m going to step up on my soap box for a minute here…. As someone who screwed up myself.

Another thing that you should be doing is breeding for hardiness. Especially in high parasite areas like the southeast. Sure, that blue eyed beauty is great, but if you are having to deworm her constantly, is she really that great?

I know this is a sore subject for a lot of goat owners, and probably not something that you want to hear…. BUT. Breeding for hardiness is what will save the future of these goats.

Before you think I’m being preach-y, I did it too! I wanted beautiful, blue eyed mini Nubians throughout my herd… Until I noticed that I was having to deworm those goats constantly. Every summer. But those mutt goats? Thrived! I have never HAD to deworm those mutts. Why? Because they were genetically hardy.

So really think about what you are purchasing, breeding and allowing to keep breeding. Because at the end of the day, livestock are not pets and should not always be treated that way.

***Steps off the soapbox****

So What Do We Do?

The best thing that we could possibly do is stop the unnecessary use of dewormers. Stop deworming every single month and start running fecals to see if your herd truly needs to be dewormed. Our fecals run us $22 for a herd fecal through the vet.

If your comfortable with a microscope, eager to learn, or got some cash to burn you can get a microscope, mcmaster slides, solution, and 1cc syringes for about $220 depending on where you are. There is also a really in depth video on YouTube that is pretty informative.

Also, learn how to do herd checks and FAMACHA tests to make sure they are healthy. When you are used to seeing them “normal” it is very easy to tell when they are sick. We have a book that we keep updated with any treatments done, fecals and results and more.

goat kidding

Before we get too far into this, I have a great course on the basics of goat care. I call it Goat Crash Course: Goat 101. In this course, I explain things like types of shelter, types of feeds and hays, basic assessments and so much more! Check it out!

Buy Now

You can see the pages that we use here on our product page. This really helps us keep up with who is gaining/losing weight, when vaccines are due, and so much more. We keep it in our livestock binder to keep everything on hand.

At the end of the day, you have to choose what is right for your animal. I am not here to tell you otherwise. I just want to tell you what we do and why we do it. I strongly disagree with the overuse of medication of any form, however, I am not afraid to use it when necessary. Necessary being the key and most important word.

If you like the content I put out, feel free to buy us a coffee! It helps keep this site running, marketing and the goats in grain!

Buy me a coffee

If you like this post, feel free to share it and follow us below on our social media accounts!

  • Facebook
  • Pinterest
  • Instagram
  • YouTube
  • TikTok
  • Spotify
  • Threads

Filed Under: Animals, Goats Tagged With: Goats, Homestead, Livestock Medications

JOIN TO OUR MAILING LIST!

Leave us your email to receive new posts and special offers for members only! Don't miss a thing!

Recent Posts

  • Fall Garden Guide
  • Top Mistakes With Goats
  • How To Bond With Your Goats

How To Keep Your Livestock Cool In Summer

April 30, 2024 by Leigh 7 Comments

It’s hot, humid and over all icky to be outside in Georgia right now. I’m pretty sure it’s the same everywhere, but I feel like Georgia slowed down to pass the state trooper and decided to “open ‘er up” once it was clear. It went from comfortable mid to upper 70’s to devil’s armpit in less than 24 hours. Not to mention we came back from Yellowstone where it was a balmy 40*! We were a little climate shocked to say the lest. Oh, and our AC doesn’t work, so we are having to use fans and window units. But what do you do with the animals that can’t come inside? How do you keep your livestock cool in summer?

Before we get too far into this, I have a great course on the basics of goat care. I call it Goat Crash Course: Goat 101. In this course, I explain things like types of shelter, types of feeds and hays, basic assessments and so much more! Check it out!

Buy Now

Keeping Your Livestock Cool In Summer

It doesn’t really matter if you have cattle, sheep, goats, chickens or just dogs and cats. There are universal truths about how to keep your livestock cool in summer that can actually keep them alive. Some are basic “Duh’s” but some of these may be new to you.

Clean Water

Every single day, multiple times a day, you need to be out there checking to make sure that they have plenty of cool water. Depending on your watering system this may just be a couple buckets in the shade. Or maybe a water trough that has a frozen gallon milk jug in it.

Regardless, it needs to be clean and fresh every single day. We have these 5 gallon buckets for our goats and we have four of them throughout the pastures and fill them on average 3x a day. On the super hot or humid days we will fill the buckets part of the way with ice to help keep the water cool. We are also planning on getting a 50 gal stock tank once the current kids are a little bigger.

Shade

It is so important for any animal or human to have access to shade when they are outside. Nothing will dehydrate an animal (including humans) quicker than being stuck in the hot sun with no shade. If you don’t have access to shade for your animals, or their shelter is in the sun, you can grab a couple of shade canopies for less than $40 depending on the sizes you choose.

We are lucky enough that all three pastures have a ton of shade so we don’t need the canopy but I would definitely look into it if you don’t.

    Electrolytes

    All animals require electrolytes, but in the summer it is especially important to have more on hand. We buy these, but have also bought Bounce Back, and Electrolytes Plus. Remember that not all electrolytes are equal. I use Bounce Back as my standard and as long as the other brands are close, I’ll buy it in a pinch.

    I will say, right now Bounce Back is expensive on Amazon but pretty affordable at Tractor Supply. Also, as a side note, Electrolyte Plus WILL FIZZ! You have been warned. I still have orange goat-r-aid on my ceiling.

    We usually will put a 5 gallon bucket out of electrolytes and then another with regular water. As we refill buckets throughout the day, we don’t add anymore electrolytes and let it get watered down. The next day we dump and refill

    Keep Their Coats Clean

    Much like with dogs, if their coat is matted, clumped, or dirty, they will have a hard time staying cool. The breeze, if there is one, can not get through to their skin. That will trap heat and cause them to get or stay hot. We brush out their winter coats, if they haven’t already blown them, when the weather maintains 70*. We also give their hooves a good trimming as well. This is also the time that they get any meds, copper bolus’, and vaccines.

    Be careful when using water to cool your animals! I know they seem hot, but when you get their coats wet, it will trap all that body heat to them.

    Also, unless your animals needs to be sheared, do not shave your animal! It doesn’t matter if it is a dog, cat, cattle, etc I have found it does more harm than good. I’ve got dogs with double coats and yes, I see them panting, but I know that the minute they get shaved, they have lost the ability to regulate their temperatures.

      Air Flow

      We all know that when it gets hot, we just want a breeze to blow through to cool us off. If you live in an area that doesn’t get a lot of wind or air movement, consider getting a solar powered fan. You can pick the size that you need but the end result is the same, get the air moving. If you’ve got electricity in your barn, then get a bigger fan. Your goats will thank you.

      Cold Treats!

      We freeze fruit and veggies in muffin tins with water. This gives them a cold treat on hot days. We have also frozen whole watermelons, cantaloupes, etc. We do this mostly for chickens but the goats love them too.

      Make sure whatever you are giving you animal, they are allowed to eat!

        But what if they get too hot?

        Much like dogs, goats will pant when they get too hot. Unlike dogs, however, this is kind of a last ditch effort in cooling themselves down. If they are panting, you need to start working to get them cooled down, right now.

        What are some signs and symptoms of a hot goat? Panting or labored breathing, poor FAMACHA, lethargic, high temperature, etc.

        In the post about what to have on hand for goats, you need to first get a rectal temperature. Their temps should be between 101-102ish. A little higher or lower is not a big deal but more than a degree in either direction needs to be monitored. More than 2 degrees and you need to start warming or cooling.

        Then check their FAMACHA. The card below will show you how to do it and what the color is. The FAMACHA tells you if they are anemic or not. If they are anemic, they do not have the blood volume necessary to handle stress well. If they can’t handle stress, like a heat emergency, they are less likely to bounce back. There is MUCH more to a FAMACHA than this, but for the sake of this post, a score under 3 is going to require a lot more care to get them healthy.

        FAMACHA Card

        Next, get bottoms of their legs in some cool (not cold) water. We don’t want to shock their system but we need to get them cooling down quickly. But do not lay them down in the water. The problem is that their fur will act like a wet blanket and keep all that heat inside. Instead, only put cool water on “bare” skin like the utters, belly, or behind their knees. All areas were their coat should be thinner.

        I bring cold, hot, or otherwise sick goats in the house. My house is relatively comfortable, despite the lack of an HVAC system. This will passively cool them. You can also put them in your bath tub to ensure they are getting cool water in a place that is designed to get wet.

        Tractor Supply

        Also, try to get some cold water into them, if they won’t drink it then you need to drench them. Recheck their temperature every five minutes or so to make sure they are cooling down. We don’t want that temperature to go too low because then we have to start warming them back up.

        Keep at it until their temperature comes down. And it should come down. Hot things will generally cool off when cold things are put on them. The most important thing is to move with a purpose but without shocking the goat.

        If you like the content I put out, feel free to buy us a coffee! It helps keep this site running, marketing and the goats in grain!

        Buy me a coffee

        If you like this post, feel free to share it and follow us below on our social media accounts!
        • Facebook
        • Pinterest
        • Instagram
        • YouTube
        • TikTok
        • Spotify
        • Threads

        Filed Under: Animals, Chickens, Goats, How To's, Pigs Tagged With: Chickens, Goats, Summer

        JOIN TO OUR MAILING LIST!

        Leave us your email to receive new posts and special offers for members only! Don't miss a thing!

        Recent Posts

        • Fall Garden Guide
        • Top Mistakes With Goats
        • How To Bond With Your Goats

        Canning Dried Peas

        April 27, 2024 by Leigh Leave a Comment

        Jump to Recipe

        I combed the internet looking for how to can dried peas and came up with very little. Most posts where about canning beans with a little footnote about canning dried peas. Below I’m going to walk you through the step by step process of how to take those little dried marbles and turn them into a shelf stable jar of food that saves me a ton of time.

        goat kidding

        Before we get too far into this, I have a great course on the basics of goat care. I call it Goat Crash Course: Goat 101. In this course, I explain things like types of shelter, types of feeds and hays, basic assessments and so much more! Check it out!

        Buy Now

        Why Not Buy Canned Peas At The Store?

        The short answer is because it’s expensive. A single can of good quality peas is easily $1.50 by me, but I’m cheap and the store brand is usually about $.60. When I buy food, I buy a lot in one shot. So by the time all is said and done, I’ve spent about $15 to $36 on 24 15oz cans of peas. Is that a lot? No. But I feel better knowing that the only thing in my jar of peas is peas.

        The other part is that whole dried peas are a ton cheaper as well. I can buy a 10# of whole split peas for $15. Plus, if they are kept “right” they can last for a long time on the shelf just like they are. If I don’t want to can 10# of peas in one go, I can put them in a mylar bag with some oxygen absorbers and store it.

        The reason I choose to can dried peas is because dried peas take a LONG time to cook. I have zero desire to stand in my kitchen that long so I go ahead and can them.

        Canning Dried Peas

        This recipe is the one I came up with a couple years ago and just followed the guidelines for beans. If you are a strict follower of the Ball Bible? Maybe not follow this recipe. I found Ball’s recipe produces very mushy peas that did not hold well. Since I don’t mind breaking the rules and this recipe is mine, you take on all risks associated with following it. I’ve never had a problem in all the years I’ve canned like this, but I can’t guarantee your kitchen or skills.

        This method of canning peas is called dry canning. I’m not really sure why because when you dry can potatoes, you don’t add any liquid, on this one you do. I think the difference between the two is that when you are done, your peas should have soaked up most of the water.

        You can find all the supplies you need on this blog post.

        Step 1:

        You should always be in the practice of soaking your peas or beans. This helps get all the dirt and debris off your peas and that was in the bag. However, I’ve never soaked peas or beans because there has never been a problem. I do rinse them though.

        Step 2:

        If you have soaked your peas, GENTLY, scoop your peas with either a cup (for quarts) or half cup measuring cup (for pints) and put them in your mason jar. If you haven’t soaked them, you don’t have to be as careful but I wouldn’t be overly rough either. Also, I suggest wide mouth but whatever works for you. At this point you can add salt if you wish, we don’t. 1 teaspoon for quarts 1/2 teaspoon for pints.

        Step 3:

        I work in batches, so I only fill however many jars my canner will hold. Also, I only can peas in pint jars. I don’t have a lot of use for a quart of peas. So I will fill 10 jars with peas, then fill the rest with water leaving 1″ head space. This allows for expansion of the pea.

        Save on Seeds

        Step 4:

        Fill your canner with the recommended water amount. My Presto 23-Qt with 3 quarts of water but be sure to check your manufacture recommendations. Then add your filled jars to the canner.

        Step 5:

        Bring your canner up to pressure by using your manufacture recommendations. I will usually fill my canner with 3 qts of hot water and put the burner on high. Then as my canner is reaching temperature, I will fill my jars with hot water. After about 5 minutes I will secure the lid. 10 minutes after that I add my weight. I process for meat times 90 minutes for quarts and 75 minutes for pints. For my altitude I use a 15# weight.

        Logo 468x60

        Step 6: When you are done processing your jars, let the canner naturally depressurize. This can take a long time but don’t rush it! Once it’s depressurized, you can use your jar grabber and take your jars out to cool on a towel. Make sure to label!

        That’s really it!

        Pressure Canning Dried Peas

        I’m going to give it to you straight, you CAN can dried peas. But just because you can, doesn’t mean you should. Pressure canning dried peas creates a mush that is hard to get out of a jar. On top of that, they are extremely mushy and not a good texture.

        I would not throw away the pints and pints of peas in my basement, because I think they could be put in stews or made into split pea soup. But to eat as a side? Probably not.

        I will still purchase dried peas and I will probably put them in an instapot before I canned them again. Not my favorite way to enjoy peas.

        That being said, I would definitely dehydrate or freeze them.

        Can Dried Peas

        Pressure Canning Dried Peas

        Print Recipe Pin Recipe
        Ingredients Equipment Method

        Ingredients
          

        • 5 Lbs Whole Peas
        • Salt if desired

        Equipment

        • 1 Pressure Canner
        • 2 Cases Pint Jars
        • Basic Canning Supplies

        Method
         

        1. Rinse peas and disguard any rocks, bugs, etc that may be in the bag. I've never had this problem so to be fair, I don't usually rinse.
        2. Scoop 1 cup of peas into a quart jar or 1/2 cup into a pint jar
        3. Fill the rest of the way with water, making sure to leave 1" headspace
        4. Optional! Add 1 teaspoon for quart or 1/2 teaspoon for pint
        5. Fill your pressure canner with water to manufacture recommended level
        6. Add jars to canner
        7. Process for 90 minutes for quarts or 75 minutes for pints
        8. Allow canner to completely depressurize before opening
        9. Once depressurized, pull out jars and place on a towel until you hear the beautiful *ping*
        10. If any jars fail to seal, refrigerate and use within 4 days.
        11. Be sure to label your jars!

        Filed Under: Canning, Canning Recipes, Recipes Tagged With: Canning, cooking, kitchen

        JOIN TO OUR MAILING LIST!

        Leave us your email to receive new posts and special offers for members only! Don't miss a thing!

        Recent Posts

        • Fall Garden Guide
        • Top Mistakes With Goats
        • How To Bond With Your Goats

        A More Realistic Way To Raise Meat Chickens

        April 27, 2024 by Leigh Leave a Comment

        If you have watched any YouTube-r, TikTok-er, or other social media influencer, you’ve probably seen them butcher and process 50-100 chickens in one shot. Maybe you tried that and it didn’t work. Or maybe you are currently doing that but it’s just not working well for you, your family and your schedule. You are not alone. So how do we raise meat chickens?

        How We Used To Raise Meat Chickens

        Before we bought our property, we researched like crazy. We wanted to be as prepared as possible. Also, we knew that there was going to be a ton of trial and error. That was okay. We were learning as we went and are still learning. But one of the biggest lessons we learned on the homestead was that raising meat chickens 50-100 at a time, simply doesn’t work for us.

        Tractor Supply

        I talked about a lot of the things we did in our post about Raising Meat Chickens Humanely. There were somethings that I didn’t mention in that post though. The first is that butchering out 50 chickens in one shot is freaking hard. We only had 25 that made it out of our first batch, and I’m not going to lie, I won’t do that again.

        Another thing that we learned was that the space that 25, 50 or 100 chickens take up is a lot. If you don’t have that space, then this may not be a good option. And it’s not just freezer space. If you aren’t going to free range them, you have to have a ton of tractors which means moving them a lot. If you do free range them and put them up at night? It’s still a lot of space for you to find.

        Processing them is another issue when it comes to space. You’ve got to have a ton of coolers or other ways to store the meat until it’s ready for the freezer. If you’re going to freeze them whole? That’s another huge space taker. Parting the chicken out is good and will save space, but not a lot.

        How Do We Raise Meat Chickens Now?

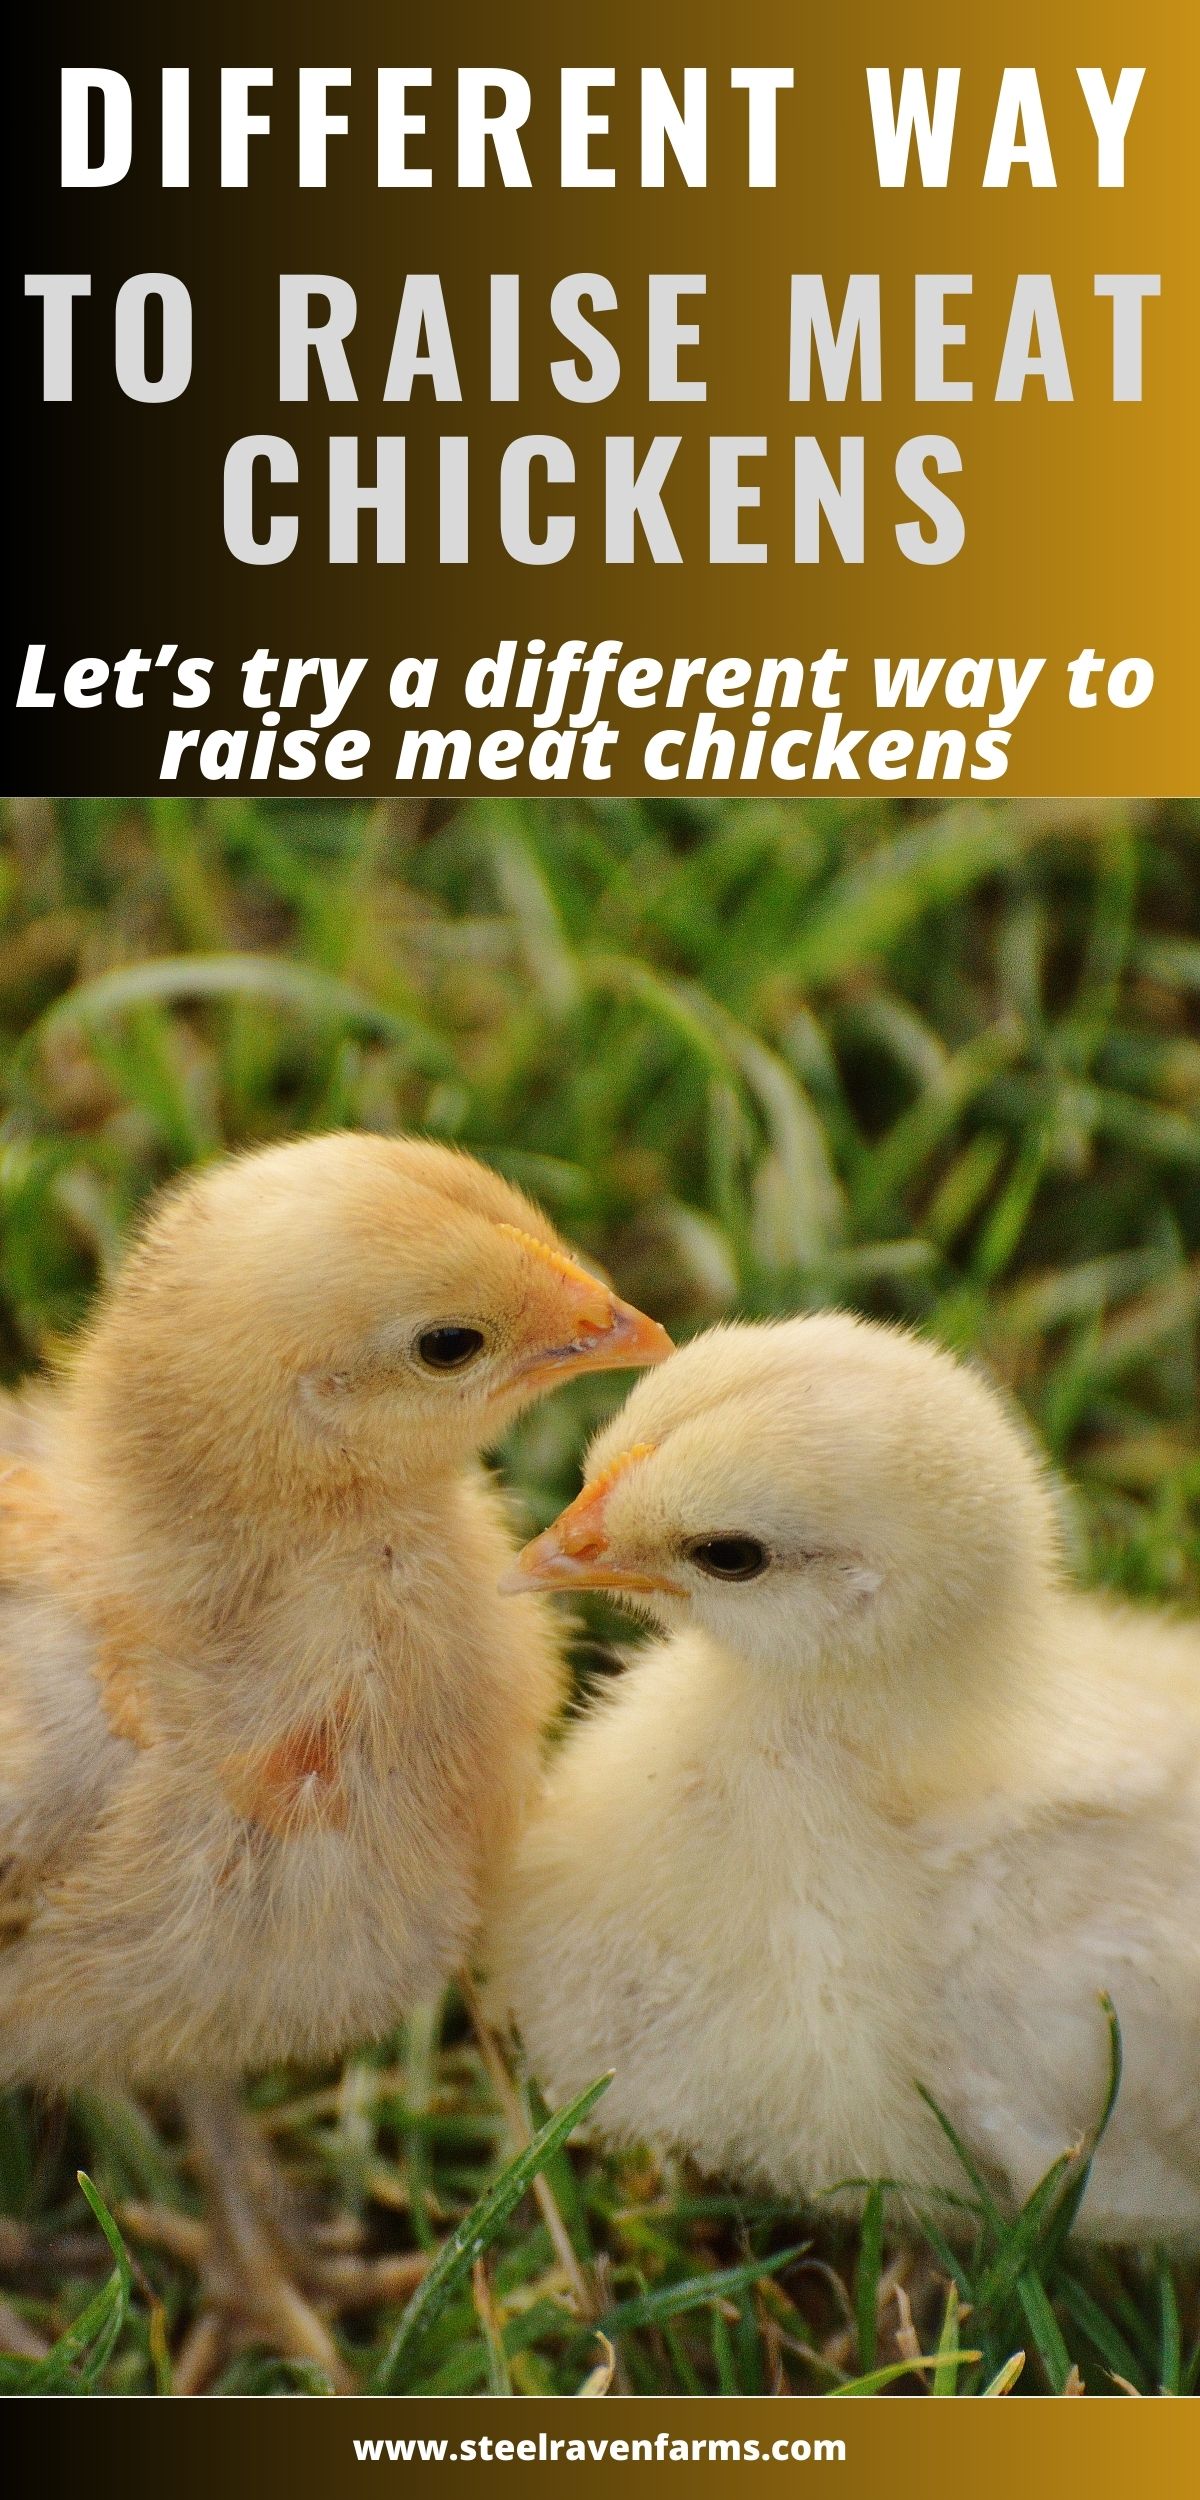
        We purchase our chicks from McMurrary Hatchery and we’ve gone with their Big Red Broilers. We still purchase 100 chicks at a time and it can be a ton of work. But we have found that we don’t always get 100 chickens in our freezer. Sometimes that because of predators or sickness. Other times we recruit help or put on a class and give some of those chickens away.

        When it comes to the decision on which chickens to raise for meat, it will always come down to your preference and your farm needs. I’ll dive more into that in a second.

        On our farm, the best part about the Big Red Broilers is that they take longer to get to weight and they don’t all get to weight at the same time. This sounds counter productive, right? YouTube University says that you should get the Cornish Cross so that all the chickens are ready to go at 8 weeks. But this doesn’t work for us.

        Because of our work schedules, we cannot devote an entire weekend to butchering 50-100 chickens. We just can’t. It would involve taking time off work and that’s more counter productive.

        Our Butchering Day

        Our butchering day isn’t an actual day… it’s weeks. Again, this may seem counter productive to some but if we can’t get time off work or if not all of our chickens are ready at the same time, we can’t do them all on one day.

        So what we do is set up our butchering area (which is on our driveway) and leave it set up for a couple of weeks. We will find the chickens that are at butchering weight and we will butcher them that day. This is usually 5-10 depending on what all we have going on that day, how many chickens are ready, etc. We put them in coolers full of salt and ice water. Then we will part them out into thighs, breasts, legs, and wings. After we have gotten what we need, we take the chicken back and put it on the stove for bone broth.

        Everything is cleaned up and “put away” in the butchering area until we have another 5-10 that are ready to go. This will go on until all the chickens are butchered. Usually, it only takes a couple weeks to get every chicken done and in the freezer.

        While this may not seem ideal to many, it works well for us.

        Why Does This Work So Well For Us?

        The reason we love the Big Red Broilers is because the meat is much more tender and tastes better. Another reason is because they have more time to get to weight. Usually, they hit weight around 12-16wks. This gives us a whole month to butcher them.

        Again, for someone (like myself) that will work themselves into the ground to get a job done, this isn’t ideal. But one of the lessons I have learned with homesteading is that you don’t have to do everything in one day, season or year. Working yourself into the ground is not ideal, especially when you are dealing with sharp knives and lives.

        It’s okay for it to take weeks to butcher the chickens.

        Have you ever tried to make 100 chickens worth of bone broth? Have you ever tried to pluck 100 chickens in one day? Do you know what to do with 100 chickens worth of blood? PS, that’s about 5 gallons of blood.

        Because we have tried it, and it just doesn’t work for us.

        Getting Help Or Giving A Class

        Sometimes, you HAVE to butcher 20-50 in one day. There’s no way around it. Everyone is ready and you’ve got to get it done. When this happens, we recruit help or put on a class. Keep in mind the difference between the two things though.

        Putting on a class means that you are teaching people how to butcher a chicken. This means that you have to walk people through the steps one by one. And it takes time! People have questions and they want to make sure they are dispatching animals as humanely as possible. I’m all about it! But when I have to get it done, the last thing I want to do is teach.

        Recruiting help means that the people that are coming know how to butcher chickens and are going to help you do it. I don’t have to make sure they know what their doing.

        Both of these things have their purpose and I love teaching people. But when we have 50 chickens that are ready to go and I need to get them in the freezer, that is not the right time to put on a class.

        So make sure that when you are reaching out for help, you are getting help. And give them a couple chickens for their help!

        Raise Meat Chickens The Way YOU Want To

        Whether you raise a years worth of chickens and butcher them in one shot, or you spread it out like we do, the most important thing is that you do it humanely and in a way this is right for you. The greatest thing about homesteading is that there is no right or wrong way. You can have livestock or not. You could love cattle and not chickens.

        If you dread processing day because it’s a multi day affair? Try doing smaller batches. Or raise two batches of meat chickens a year. Hell, do four batches if it make sense for you!

        Regardless of how you do it, just know that you are feeding your family the best possible chicken you can.

        If you like the content I put out, feel free to buy us a coffee! It helps keep this site running, marketing and the goats in grain!

        Buy me a coffee

        If you like this post, feel free to share it and follow us below on our social media accounts!

        • Facebook
        • Pinterest
        • Instagram
        • YouTube
        • TikTok
        • Spotify
        • Threads

        Filed Under: Animals, Chickens, How To's Tagged With: Chickens, Chicks, meat chickens

        JOIN TO OUR MAILING LIST!

        Leave us your email to receive new posts and special offers for members only! Don't miss a thing!

        Recent Posts

        • Fall Garden Guide
        • Top Mistakes With Goats
        • How To Bond With Your Goats

        How To Set Up A Garden Journal

        April 23, 2024 by Leigh Leave a Comment

        Much like everything else that is homestead related, there is no one size fits all approach to a garden journal. I wish there was because it would make it easier to just have someone tell you what to do and it work 100% of the time. Unfortunately, that’s not the case. The next best thing that we can do is try different things until something works. Today, I’m going to show you how I set up a garden journal and give you the high points of how to start yours.

        garden journal

        Before we get too far into this post, I wanted to give a suggestion about keeping a garden journal. A digital garden journal is a fantastic way to keep track of past, present and future gardens. Our Digital Garden Journal is a great way to keep up with everything without getting too overwhelmed.

        Buy Now

        What Is A Garden Journal

        A garden journal is exactly what it sounds like. It’s a journal that details your gardens throughout the years. Yes, years. In the first year, you may notice a high infestation of Japanese beetles. In your journal you would make note of the beetles, an estimate of how many beetles, when you first noticed them, what plants they were attracted to, any treatments you did to get rid of them, etc. The next year as you look through your journal, you remember that you had a problem last year, and you can be proactive this year.

        How To Set Up A Garden Journal

        Everyone will have a different set up based on what they are growing, where they live, and so on. But here are some starting points. If you aren’t sure where to start, you can purchase my garden journal printable in our general store.

        The Binder

        I think that the best thing you could do is to purchase a binder for your garden journal. I use this binder because I like that it doesn’t take up a lot of space on my desk. Plus, when I am out in the greenhouse working on seeds or out in the garden, it’s not this huge bulky thing. I also like using a binder because I can move pages around from year to year.

        I have a bullet journal and while I love it, it is hard to find what I am looking for since it is chronologically done. Not a bad thing, but if I can’t remember when I did something, it was lost. Being able to look back and see that last year I planted 100 tomato seeds and only 80 germinated tells me a lot about the seeds, soil, watering, etc if I have that information available.

        The Dividers

        I have a TON of dividers in my garden journal, but again, I want simple and easy to find. I use these mini dividers to match my mini binder. For your dividers, you need to think about the things that you want to track. Do you want to track how many seedlings you bought? Or are you planting your own seeds? Do you want to keep track of your soil tests? What about expenses? These are all things that you need to think about so that you can keep track accordingly.

        I like to know what seeds I started and when. Then I want to know my soil tests, pests and what seeds I saved. When our orchard stops getting attacked by goats, I would like to know when I pruned, harvested, and more.

        Loose Paper

        I use loose leaf sheets to take notes, brainstorm, etc. I get the college rule and blank to make sure that if I want to design a garden bed, I can design it on a blank sheet and write on the lined sheets. I store all the excess paper in the back of the binder. I also use sheet protectors on the important pages.

        cropped-3.jpg

        Are you looking for garden journal prompts, but aren’t interested in a weekly email? Check out our 365 Garden Journal Prompts! This is an amazing, all in one, yearly product that you only pay for once.

        Buy Now!

        For example: If I go into the greenhouse and I am working on transplants, I don’t want the pages to get dirty. Or if I have designed a garden bed, I want to be able to take that page out of the binder and take it with me to the bed. By having a sheet protector on it, I don’t have to worry as much about it getting destroyed.

        Using Your Garden Journal

        After getting your journal set up, you should start filling it out with the information you have. In your soil test section, you should fill out previous years soil test results. Be sure to separate years with a line or something so that you don’t get confused. If you don’t have that information anymore? Or this is your first garden? No worries, do the best you can.

        When you start your seedlings, be sure to write where you purchased your seeds from. This will help you decide if that was a good buy. If you buy seeds, make sure to put where you bought them from. In your Pest section, make sure to keep track of what pests came when and how you treated for them. This will help you because next year, you can say, “In 2022, the Japanese beetles came in April and only hit the apple trees.” In 2023, you can make sure to have beetle traps or other treatments already in place.

        Tractor Supply

        I am the type that will write down everything because I will forget it. We had a great pepper harvest last year, but I know it could have been better if I had known only water them every 4-6 days. Because of my garden journal, I know not to water the peppers as often.

        Another cool thing about my garden journal is that I have a harvest/ preservation section. This section tells me how much food I need to harvest and preserve from my gardens. I know that we eat a TON of green beans. Like, I can 100 quart jars of green beans and it’s usually gone by April. That tells me that I need to harvest at least 200# of green beans. Because I know these things, I know I need to plant a minimum of 200 pole bean plants. Same with corn and peas.

        If you are looking for a great way to keep track of your gardens for years to come, check out our Digital Garden Journal. It’s a digital spreadsheet that helps you manage not only your seedlings but also your seed inventories, soil testing, orchard, harvests and so much more.

        Buy Now

        Lastly, in my garden journal, I have a list of monthly chores that I need to do. This helps me stay on track with the needs of my garden. Because our goal is to reduce our grocery bill by 75% in 5 years and our feed bill by 80% in 2 years, I need all the help I can get. It not only tracks the weeding, watering and planting, but it also tells me when exactly when to do those things. In April I have final fill of the garden beds, lay final layer of compost, plant after April 15th, weed weekly until seedlings are established, and so on. That way there is no guess work about what I need to do.

        If you haven’t checked it out yet, you can find my garden journal printable in our general store here. There are a ton of different planners on the internet but none of them fit the style that I was going for, so I created my own.

        Are you getting overwhelmed in the garden? Stressed? Or just not enjoying the garden like you used to? Check out our garden prompts! We send out weekly emails that get you back in the garden and out of your head! Turn the garden back into a place of love and joy instead of frustration and headache!

        Subscribe Now!

        If you like the content I put out, feel free to buy us a coffee! It helps keep this site running, marketing and the goats in grain!

        Buy me a coffee

        If you like this post, feel free to share it and follow us below on our social media accounts!

        • Facebook
        • Pinterest
        • Instagram
        • YouTube
        • TikTok
        • Spotify
        • Threads

        Filed Under: Garden Tagged With: Canning, Garden, Gardening, Homestead, kitchen, veggies

        JOIN TO OUR MAILING LIST!

        Leave us your email to receive new posts and special offers for members only! Don't miss a thing!

        Recent Posts

        • Fall Garden Guide
        • Top Mistakes With Goats
        • How To Bond With Your Goats

        Avoiding Homestead Burnout

        April 20, 2024 by Leigh Leave a Comment

        As I was writing about our 2022 goals and planning our 2023 goals, I realized something. I’ve hit burnout. As a medic, I am very, very familiar with burnout. But maybe you don’t know the signs and symptoms of burnout and you may not know how to fix it. Or you didn’t think you could burnout doing something you enjoy and are passionate about, but you’re ready to throw in the towel. Before you do that, let me see if I can help in avoiding homestead burnout.

        Avoiding Homestead Burnout

        The Ultimate Homesteader’s Starter Bundle – Only $47!

        Get the tools you need to stay organized, track profits, and manage your homestead with ease!

        Includes:
        ✅ Schedule F Tracker – Simplify tax prep
        ✅ Profit Calculator – Track earnings
        ✅ Hay Calculator – Plan livestock feed
        ✅ Garden Journal – Digital & printable
        ✅ Herd Health Tracker – Monitor animal care
        ✅ Simple Budget – Manage finances
        ✅ Backyard Homestead eBook – Essential tips

        $99 value – now just $47! Start your homesteading journey today!

        Buy Now

        What Is Burnout?

        Burnout is, at it’s core, being overly stressed. The powers that be (psychiatrists) believe that it is work related. While I don’t disagree, I feel like it is more encompassing than that.

        Your children can burn you out. That job you love, can burn you out. Those animals you love? Can burn you out. Your beautiful homestead? WILL burn you out. Why? Because burnout is stress and even the things we love most in the world, stress us out.

        If you don’t know how to identify burnout, then you will never be able to cope with it.

        But What Is Homestead Burnout?

        Homestead burnout is no different than work burnout. It’s feeling overwhelmed with all the things that need to be done. Apathy when it comes to chores, projects or other upgrades to the homestead. A lack of empathy with those around you. It’s also a kind of depression, not wanting to get out of bed/house to take care of your farm, life, etc. Homestead burnout can also be trying to push through and failing miserably. Or, lastly, anxiety.

        Identifying Burnout

        Do your animals no longer bring you joy, or not as much?

        Everything you touch seems to turn to shit?

        The thought of planning your garden causes so much anxiety that you avoid it at all costs?

        The last thing you want to do is start another project?

        You and your spouse are not on the same page?

        Logo 468x60

        You are staying in your house more and more instead of working your property?

        Constant fatigue?

        Pain?

        Congratulations, if you’ve answered yes to literally any of these, you are courting with burnout. If you answered yes to the majority of these, you are burned out.

        I can’t talk for any other career field, but as a medic, I know more about burnout then I care to admit. Not only because I’ve had it, but because I’ve watched great medics and EMT’s lose the battle with burnout. In an effort of full disclosure, my homestead is my exit strategy for burnout. BUT I’ve put everything I have into my homestead, and guess what? It’s burned me out too.

        Coping With Homestead Burnout

        The crappy part is that even if you are burned out because of your homestead, there really isn’t much you can do about it, right? The animals, gardens, children, etc don’t just go away when you say, “That’s it! I’m stressed and I can’t function with this anymore.” Because guess what? You still have to slog out to feed and water the animals. There’s still weeds to pick and eggs to collect. There’s nothing we can do about it….

        Or is there something you can do about it?

        Save on Seeds

        Things That “They” Say To Try

        These think tanks that like to tell us how to minimize stress, reduce burn out, etc are obviously upper management and don’t get their hands dirty. For those of us in healthcare, it’s like them saying “I know you asked for increase staffing, higher pay and better equipment, but here’s a pizza party instead.”

        I say this because “They” are saying things like “Have a support system” or “Get some sleep”…. and in the real world that doesn’t happen. I can’t just get more sleep. Trust me, I’ve tried. I have a support system. But guess what? They’re burned out too. So what are some ACTUAL ways to help relieve burnout?

        If you are struggling with burnout and not sure where to start, there are several really good books out there to help identify and cope with burnout. I found this one and this one to be pretty helpful. Buuuuuttttttt. When I’m burned out the last thing I want to do is read books about burnout.

        Identify What Is Causing Your Stress

        Identify the things that are stressing you out. Really think about what is happening in your life that is causing your stress levels to be so high. There may not be much you can do about those stresses, but at least by identifying what they are, you can start looking at ways to reduce those. The first step in fixing a problem is realizing you have one, right? Same thing here.

        If you are struggling to figure out what is stressing you out, simply look at the things you are avoiding. This may not look like active avoidance, “I refuse to weed the garden.” Instead, it could look something like, “I’m too busy to weed the garden, I’ll do it later.” Lately, I have been avoiding my goats. Not purposefully, but avoiding all the same. I just don’t hang out with them like I used to because I feel this all consuming drive to get all the things done. This resulted in not realizing that they are all covered in chewing lice and now I’m behind the eight ball on treatment.

        Reduce Stress

        Now, that you know what is causing your stress, you can start to take steps to reduce it. Unlike normal burnout, it may not be as simple as walking away from that job or cutting back hours. Again, you can’t just stop homeschooling the kids. You can’t just stop being a farmer. But there are things you can do and the first is ask for help.

        When you reach out for help, you need to be willing to accept that help in whatever form it comes in. This is really hard for us women. We want it done THIS way. But when you are at your wits end, sometimes done is better than not done, even if it’s not the way you would do it. You can always fix it your way later.

        You can put off that project until you’re ready to tackle it. It’ll still be there.

        You can spend an extra 10 minutes playing with your goats. Everything else can wait.

        You can make that homemade bread. If it sucks? The pigs can eat it.

        Reducing stress doesn’t include doing nothing. Sometimes it’s as easy as doing something you WANT to do, instead of HAVE to do. But if doing nothing works, then do nothing for a short time every day and call it your meditation time.

        Tractor Supply

        Understand that it doesn’t all need to be done right now

        For the last twenty years or so, we have had it crammed into our head that tomorrow is never promised. So we have been killing ourselves trying to get everything done. Go see that play, hang out with friends, get the garden in, homeschool the kids, work more, save more. More, More, More.

        But trust me, there’s always tomorrow. Yes, I understand that tomorrow is never guaranteed. But would you rather die stressed with almost everything done, or happy with a million unfinished projects. Personally, I want both. But I also understand that by stressing myself out getting everything done, I am not happy. Jared isn’t happy. And the farm suffers.

        Subscribe to Craft Beer Club Today!

        Learn Something New

        This may seem counter productive because we are trying to reduce stress, but learning something new or different can help ease stress. How? Because when we are learning, we tend to give ourselves grace. We’re just learning, right? It’s okay to get it wrong because you understand that you can’t be an expert in something you are just learning.

        Whenever I’m burned out, I pick a new craft, book, baking technique and start to learn it. This really helps pull my focus off the things that are burning me out, and pulls me back to learning which is something I love.

        Are you getting overwhelmed in the garden? Stressed? Or just not enjoying the garden like you used to? Check out our garden prompts! We send out weekly emails that get you back in the garden and out of your head! Turn the garden back into a place of love and joy instead of frustration and headache!

        Subscribe Now!

        Work On An Easy Project

        When you have the anti-Midas touch, sometimes it’s really easy to get even more stressed and burned out. No matter what you are doing, everything turns to crap. But find a project that doesn’t require a lot of brain power from you. Or something you’ve done a million times and probably won’t screw up. Then go do it.

        Part of burnout is depression. You just don’t care about whatever it is that you’re doing. But by working on a project that is easy, you are doing something. Even if it’s just taking out the trash or cleaning off your desk. That alone will help you beat back that depression. And if you just can’t, that’s okay too. At least you tried.

        How I Deal With Homestead Burnout

        I’m not going to lie, usually I step back and punt. That means that I just don’t do the chores or I fall back on planning, cleaning, organizing, or my Finish Line Goals. I am beyond blessed that I have that option, and I know it. There are times when I simply cannot gather up the gumption to build a fence, work on the gardens, or literally anything else. So I ask for help, and do something else.

        If that’s not an option and I have to do the things that are burning me out, I do it carefully and slowly. There’s nothing more frustrating that things not going how you want or need them to go.

        Lastly, I go play in the dirt. For some reason, that is my reset. It doesn’t have to be anything major, either. Simply watering my plants or spreading grass seed is enough to remember that not everything has to be done the way I want it or think it should be. And that’s okay.

        How Can You Deal With Burnout?

        The reality is that you will burn out at sometime. Probably multiple times. That’s okay! You are normal. Identify that you are burned out, figure out (if possible) what is specifically burning you out, and then step back or go slower. Or don’t do it at all. Remember, at the end of the day, it’ll get done or it won’t. And both of those answers are just fine.

        If you like the content I put out, feel free to buy us a coffee! It helps keep this site running, marketing and the goats in grain!

        Buy me a coffee

        If you like this post, feel free to share it and follow us below on our social media accounts!

        • Facebook
        • Pinterest
        • Instagram
        • YouTube
        • TikTok
        • Spotify
        • Threads

        Filed Under: Homestead Planning, How To's Tagged With: Animals, burnout, Chickens, Goats, homeschool, kitchen, stress

        JOIN TO OUR MAILING LIST!

        Leave us your email to receive new posts and special offers for members only! Don't miss a thing!

        Recent Posts

        • Fall Garden Guide
        • Top Mistakes With Goats
        • How To Bond With Your Goats

        Using A Metal Shed For A Chicken Coop

        April 16, 2024 by Leigh

        I have been browsing the internet for weeks trying to figure out something for a new coop. We’ve got more chicks and ducks coming and nowhere to put them. So I started researching the different types of chicken coops and I couldn’t find anything I really liked. And to be honest, the wood coop that we have now, is starting to really stink, even after we clean it really well. I think using a metal shed for a chicken coop may work. Maybe.

        Why We Chose A Metal Shed For A Chicken Coop

        ***Make sure to read the updates at the bottom to see how it’s actually working***

        We have seriously out grown our old coop. When we bought it, we weren’t really planning on having a ton of chickens. Our thought was, chickens are pretty easy so let’s get a couple. By a couple I mean 15 but only 9 survived. After offering our extra eggs for sale and current state of the supply chain, we have decided to grow our flock. We are hoping that this will allow us to make a little bit of money but also sustain us food wise. You can read about our new flock here. 

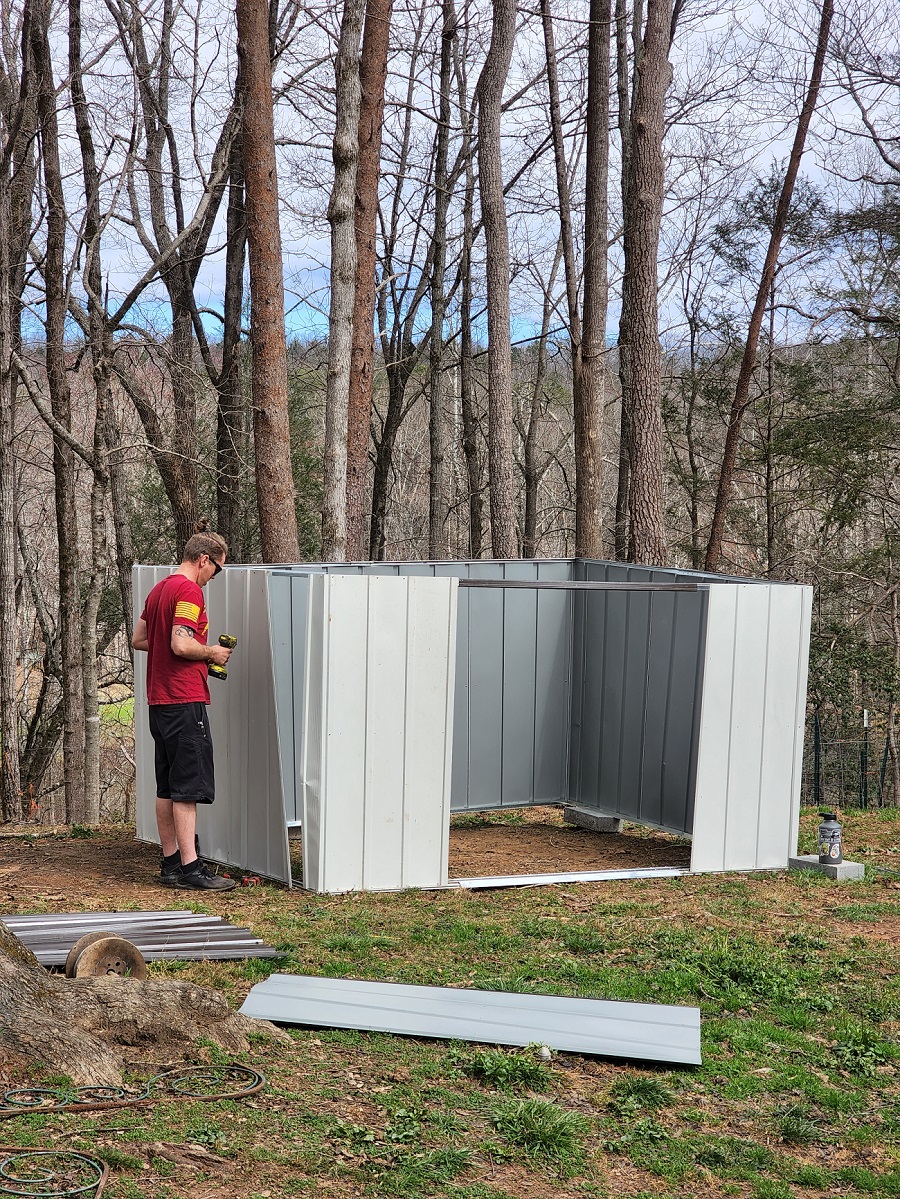
        Since, we will also be getting 20 ducks around the end of March AND the 36 chickens, we want to make sure there is plenty of room for all of them. I think this 8×10 metal shed will work great. It’s got plenty of space and if we can hang the new laying boxes and roosting bars, there will be plenty of room for the ducks to nest.

        Also since we allow them to free range throughout the day, there shouldn’t be any problems with space during the day.

        Now before anyone gets all up in arms about it, we know some of the problems with a shed like this as well as ducks and chickens in the same coop. First, we will be installing gables and vents to make sure that the heat can escape in the summer. They will also have frozen bottles on the ground to keep cool. Not to mention we made sure that the coop is in a shady area.

        Save on Seeds

        We will also be adding boards and hardware cloth to the bottoms to ensure it as predator proof as possible. The ducks and chickens can cohabitate in the same coop as long as they have their own spaces. The ducks will be on one side and the chickens on the other. I’m sure we will find more problems as we go but we will see.

        Jared working on the new Coop

        We will always be as transparent with our readers. In that vein, we want to make sure that you don’t make the same mistakes we have. Or if you decide to make the mistake, at least do it differently.

        You can also check out this from Redfin article as well! “Whether you’re planning to raise chickens at home in Asheville, NC, Eugene, OR, or Burlington, VT, check out this Redfin article we were featured in on 5 Chicken Coop Ideas For A Thriving Flock“

        Summer Update

        So this coop was built in the spring before it got really hot. What we have found is that the coop does not get super hot at night like we thought. Since we allow them to free range throughout the day and only put them inside the coop at night when the sun has gone down. We have not noticed a HUGE temperature increase.

        Don’t get me wrong, it’s still hot at night and it’s warm in the coop, but I was thinking like fatally hot and it’s not. We have been averaging 80* nights and the coop is 90* but also has fans blowing the hot air out.

        One of the things we have noticed is that NONE of the animals want to go in their respective houses at night. That includes the goats. I think a lot of it is that it’s just too hot. When they are outside they can move around and find cool ground.

        The chickens and ducks seem to prefer being outside during the summer and that’s fine. We have predator lights up around the property and so far we haven’t seen any signs of them being taken in the night.

        I’ll update back after winter and let you know how that goes. But for right now the coop is working.

        Winter Update

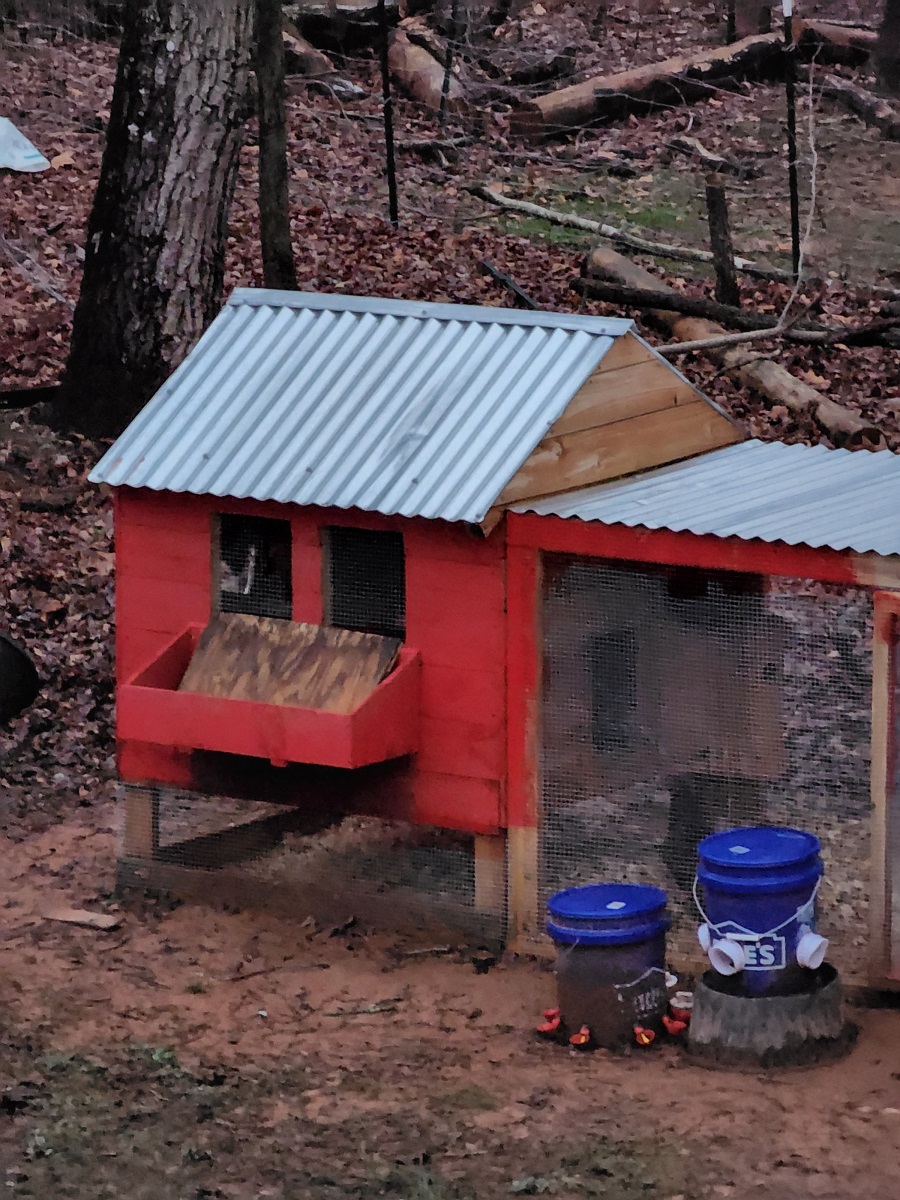
        We have moved the chickens and ducks back into the red coop. The metal shed has turned into a flop…. Well, not completely. The shed rusted from the ground up. No matter how much pine shavings we added, the odor was completely foul. The chickens also didn’t seem as healthy either. It seemed to take them longer to get through molt and they stopped laying eggs way sooner than they should have.

        When we moved them back to the red coop, their feathers seemed to get brighter and they seemed happier. Now, this is all speculation and we don’t have scientific proof, but I feel like the shed was not a good option for long term keeping.

        We plan to convert the shed back into a shed and just put our various building materials in it. I would suggest looking into different types of chicken coops and leave the metal shed alone.

        Using A Metal Shed For A Chicken Coop…. The Final Update

        As of this writing (2024), we have turned this shed into a home for broody hens and a brood coop for new chicks. For this purpose, the metal shed has turned out to be excellent. We went through and painted all the rust, patched holes, and general upkeep of the shed. We noticed that the broody hens and new chicks all thrived.

        I think the main problem with using a metal coop as a permanent coop is the severe lack of air flow, extremely low light, and everything tends to stay damp without a good heat source. Since we fixed everything and have made it a temporary home for these chicks/ hens, it has turned out VERY well and is something we will continue to do.

        If you like this post, feel free to share it and follow us below on our social media accounts!

        • Facebook
        • Pinterest
        • Instagram
        • YouTube
        • TikTok
        • Spotify
        • Threads

        Filed Under: Animals, Chickens, How To's, Projects Tagged With: chicken coop, Chickens, Chicks, Ducks, Eggs, Homestead, metal coop

        JOIN TO OUR MAILING LIST!

        Leave us your email to receive new posts and special offers for members only! Don't miss a thing!

        Recent Posts

        • Fall Garden Guide
        • Top Mistakes With Goats
        • How To Bond With Your Goats

        Welcome to The Homestead

        April 13, 2024 by Leigh Leave a Comment

        We are excited to bring you along for the journey. On this blog you will find a ton of posts about goats, gardening and homesteading. We wanted to let other people know that you don’t have to have hundreds of acres, tons of livestock or even generations of knowledge. We wanted our blog to be different. So welcome to the homestead!

        The Ultimate Homesteader’s Starter Bundle – Only $47!

        Get the tools you need to stay organized, track profits, and manage your homestead with ease!

        Includes:
        ✅ Schedule F Tracker – Simplify tax prep
        ✅ Profit Calculator – Track earnings
        ✅ Hay Calculator – Plan livestock feed
        ✅ Garden Journal – Digital & printable
        ✅ Herd Health Tracker – Monitor animal care
        ✅ Simple Budget – Manage finances
        ✅ Backyard Homestead eBook – Essential tips

        $99 value – now just $47! Start your homesteading journey today!

        Buy Now

        Welcome To The Homestead

        Both Jared and I grew up as city kids. The hustle and bustle something that we never really wanted. As time went on and we got older, we realized that city life is not what we wanted. It is not what we want for our boys. So we decided to do something about it. We were breaking our back trying to save as much money as possible to get our homestead. Since we are both paramedics and after working 36-60 hour straight shifts for two years, we finally did it. We purchased our homestead.

        We just celebrated 15 years of marriage

        Shortly after buying the homestead, we got our first chickens.  They are pretty cool little critters and really, what homestead is complete without a couple chickens. We started with 15 and lost a couple. Now we are in the ballpark of 50. But I wanted something a little different. So I started looking into other critters that would be low maintenance while also being semi profitable.

        George and His Ladies

        Enter the goats

        I’m not going to lie, I didn’t want goats. I had heard the horror stories. They are escape artists, they die easily, they can’t actually eat everything, and so on. They are pretty much everything BUT low maintenance and semi profitable. But Jared wanted goats, so we got the goats. Man, I was so wrong! I love those critters! They are seriously the best. Bella is a challenge and I am going to make her love me. But Champ? The girl below? She is the best girl. She is actually going to be giving us babies soon!

        Champ

        After adding our first couple goats, we wanted even more. So we added more goats, then some goats had babies and now we are at 12. We are hoping to have a few more and that will allow us to start milking regularly. That milk will then help us reduce our dependence on the grocery store.

        Since owning goats for several years now, we have decided to, temporarily, move away from registered lines and start working on building a resistant herd with great milk lines. We have also learned to deal with the question of what to do with boys.

        Sending bucks to processing has been a hard choice but definitely one that needed to be made. Unfortunately, when you breed animals, you have to face the hard reality of what to do with them if you can sell them. Livestock are not companion animals, although there are some exceptions, and treating them like pets will only break your heart.

        We have also created a Goat Crash Course for those that were in our same position. Brand new and with no mentor.

        goat kidding

        Before we get too far into this, I have a great course on the basics of goat care. I call it Goat Crash Course: Goat 101. In this course, I explain things like types of shelter, types of feeds and hays, basic assessments and so much more! Check it out!

        Buy Now

        On To The Ducks

        Ever since I was a kid, I have loved ducks. They are such cool creatures. Jared finally okayed a few ducks and meat ducks. While they are messy and their pool stinks to high heaven, no matter how often we drain it, I love those guys. We also gained our neighbors guinea. Apparently she was unhappy living with them.

        Tractor Supply

        Since owning the chickens and the ducks, we have come to realized a couple things. One, chickens get into EVERYTHING when they are not contained in some fashion. So free ranging chickens isn’t really a great idea. Two, ducks free range beautifully and don’t get into as much trouble as the chickens.

        While I am not a huge fan of duck eggs, their antics and meat keep them around the homestead.

        The Garden

        We have also been working hard on our gardens and general clean up of the property. Our property was not set up for homesteading before we bought it. So we have been slowly but surely working through the property and clearing out old debris, trash, and other things. We are hoping to have it safe enough soon to let the goats roam bigger areas to keep the brush in line.

        The Ultimate Homesteader’s Starter Bundle – Only $47!

        Get the tools you need to stay organized, track profits, and manage your homestead with ease!

        Includes:
        ✅ Schedule F Tracker – Simplify tax prep
        ✅ Profit Calculator – Track earnings
        ✅ Hay Calculator – Plan livestock feed
        ✅ Garden Journal – Digital & printable
        ✅ Herd Health Tracker – Monitor animal care
        ✅ Simple Budget – Manage finances
        ✅ Backyard Homestead eBook – Essential tips

        $99 value – now just $47! Start your homesteading journey today!

        Buy Now

        The garden has been a huge pain in the backside as well. Between not being able to get all my seedlings started and then the ducks eating what I managed to plant, the garden is finally in. I was also able to harvest our first cucumbers!

        We are gearing up to start our fall garden and I am ridiculously excited! Our summer harvest has been good, considering it’s our first garden here, but I’m hoping the fall garden will be even better. Our second garden was a bit better but not at all what we thought it was going to be. We have learned a ton about gardening in this area.

        One of the biggest things I learned about the garden is protecting the soil! I never really put much thought into the soil and how to build it. I just thought you put things in the ground and they grew. I didn’t realize that building healthy soil, naturally, helped to bring in better harvests. Who knew!?

        Our garden this year (2024) is set to be our best yet!

        Building A Greenhouse

        Last year, the major project was building a greenhouse. Jared absolutely nailed it and I love my greenhouse. It has become my sanctuary when things get hard. Jared poured so much love into that greenhouse and I can feel it every time I walk into it.

        Not everyone can build a greenhouse, or really need one. But I do highly recommend at least entertaining the subject if it is possible for you.

        Welcome To The Homestead

        We will be adding to our homestead as this blog progresses and we want you to be along for the ride. So share and follow us on social media and welcome to the Homestead!

        Are you getting overwhelmed in the garden? Stressed? Or just not enjoying the garden like you used to? Check out our garden prompts! We send out weekly emails that get you back in the garden and out of your head! Turn the garden back into a place of love and joy instead of frustration and headache!

        Subscribe Now!

        If you like the content I put out, feel free to buy us a coffee! It helps keep this site running, marketing and the goats in grain!

        Buy me a coffee

        If you like this post, feel free to share it and follow us below on our social media accounts!
        • Facebook
        • Pinterest
        • Instagram
        • YouTube
        • TikTok
        • Spotify
        • Threads

        Filed Under: Our Homestead Tagged With: beginners, Chickens, Ducks, Eggs, Goats, Homestead

        JOIN TO OUR MAILING LIST!

        Leave us your email to receive new posts and special offers for members only! Don't miss a thing!

        Recent Posts

        • Fall Garden Guide
        • Top Mistakes With Goats
        • How To Bond With Your Goats

        Commands To Teach Farm Dogs

        April 9, 2024 by Leigh Leave a Comment

        Everyone is different on how they train dogs. Some are highly intense and want to teach their dogs commands with hand signals, a clicker, and all the things. Others are so laid back that they barely train their dogs. Then you have those in the middle (myself) that really just want my dogs to have some simple, basic commands that are easy to train and follow. But when you start teaching your new farm dog commands, it may mean life or death. Because I don’t know where you are in your journey, I am going to give you my commands to teach farm dogs and how to actually teach them.

        The Ultimate Homesteader’s Starter Bundle – Only $47!

        Get the tools you need to stay organized, track profits, and manage your homestead with ease!

        Includes:
        ✅ Schedule F Tracker – Simplify tax prep
        ✅ Profit Calculator – Track earnings
        ✅ Hay Calculator – Plan livestock feed
        ✅ Garden Journal – Digital & printable
        ✅ Herd Health Tracker – Monitor animal care
        ✅ Simple Budget – Manage finances
        ✅ Backyard Homestead eBook – Essential tips

        $99 value – now just $47! Start your homesteading journey today!

        Buy Now

        Commands To Teach Farm Dogs

        I am going to make a lot of assumptions here because if I don’t, this is going to take FOREVER to explain. Besides my attention span being short, I have other things to do. Like train my own dogs, plant, milk, etc. So in effort to keep this as basic, short and simple as possible we are going to assume some things.

        One, you have some basic idea of how to train a dog. This means that you understand that if you are training to get your dog to learn sit, you know that you will have to gently (but firmly) push their butt down as you say sit, then give the treat. If you don’t know how to do those things, I suggest highly that you save this post, and go watch YouTube videos on how to train a dog to sit. Then come back for the rest of this post.

        Two, we are going to assume that you know that when you and/or the dog has had enough training. If you are getting frustrated, they are not going to work with you. Dogs are incredibly smart creatures and they are more in tune with you than you realize. So if you are frustrated or pissed off, that is going to come through and the dog will thin you are frustrated or pissed off at it.

        Three, you understand that working WITH your dog is more important than being the master of your dog. You will get more out of your dog by asking instead of demanding. Unless it is a true life or death situation, you do not need to dominate your dog to get your point across.

        Four, I don’t know why I even need to bring this up, but again, your bond is the most important thing you can have with your dog. Don’t ruin your bond because you are not getting your way.

        Fifth, we are assuming you have already been working with the dog on their name, learning their behaviors, etc.

        Tools For Training

        You do not have to go all out when training dogs. I talked about the various tools that I use when training farm dogs here. But some other tools that you would probably want to have on hand are below:

        Training Pouch– This thing is absolutely necessary, especially if you are working from the ground up. I used to carry a bunch of treats in my pocket, and sometimes still do, but if I am doing a serious training session, I pull out the pouch.

        Training Treats– Now, I am ALL about using dog food as treats because it works really well. Honestly, you may not need treats or food at all depending on your dogs needs. Some dogs prefer treats, others want praise and still others want a toy. So figure out what reward they want and use it. But when I am training my dogs, I use training treats because we are past the dog food as a reward stage.

        That’s really it for a lot of these commands. I don’t train them to go to a board or place.

        Let’s get to training!

        Are you getting overwhelmed in the garden? Stressed? Or just not enjoying the garden like you used to? Check out our garden prompts! We send out weekly emails that get you back in the garden and out of your head! Turn the garden back into a place of love and joy instead of frustration and headache!

        Subscribe Now!

        My favorite commands and how I teach them

        Sit, Stay And Down

        I know, you came to learn about training farm dogs! This is basics! But let me tell you about the phase, “Paramedics save lives, EMT’s save Paramedics”. The idea behind this phrase is that I can do ALL these things to save your life, but if I don’t go back to the basics of care, none of it matters. For example, I am trained to defibrillate your heart should it stop beating. But that part doesn’t matter if I can’t breathe for you and get your heart pumping manually.

        So we start with the basics.

        Teaching your dog to sit, down and stay are the most basic and most important commands because if you can get your dog to sit and trust you enough to stay, they get all the good things. If they can’t lay down and rest for a minute, they are going to end up getting hurt or hurting someone else. The very first thing I teach every single dog that comes into my home is how to sit and down. Stay is a take or leave command for me. Rarely do I need my dogs to stay put. If I do, I just put them in the house or their crates.

        I’m not going to bore you with how to teach sit because again, we are assuming you know how to get your dog to sit. If not, go to YouTube and come back.

        Come

        If you are teaching your dog to be off leash like I teach at the end of this blog post, you are already teaching your dog to come. But to be honest, I don’t have an actual command for getting them to come to me. Though, I guess you could say that the know the word or maybe it’s the tone. Usually, when it’s time to go back in the house, I yell out some version of “Come on, guys.” And the dogs all race to house.

        Whatever command you are going to use to get your dogs to come to you, make sure you stick with it. This is the command that your dogs will associate with great things like coming inside, getting on the couch or bed, and generally being with you.

        The Ultimate Homesteader’s Starter Bundle – Only $47!

        Get the tools you need to stay organized, track profits, and manage your homestead with ease!

        Includes:
        ✅ Schedule F Tracker – Simplify tax prep
        ✅ Profit Calculator – Track earnings
        ✅ Hay Calculator – Plan livestock feed
        ✅ Garden Journal – Digital & printable
        ✅ Herd Health Tracker – Monitor animal care
        ✅ Simple Budget – Manage finances
        ✅ Backyard Homestead eBook – Essential tips

        $99 value – now just $47! Start your homesteading journey today!

        Buy Now

        Bed

        Giving your dog their own space is incredibly important, especially when you have multiple dogs. Our dogs go into crates when we feed them, when we leave the house, or when we have company over. This one can take a while to learn because some dogs have never been crated. Kodi cannot be crated because he absolutely refuses to crate. We’ve tried everything. Short of shoving his 130# butt into the crate, he’s not going. So he stays loose with Bear, but they still have a “bed” and they go there when it’s time to settle.

        To teach Bed (or whatever name you want to give the crate), I simply put their food in the crate and say go to Bed. They have to go into the crate to get their breakfast or dinner, and as time goes on, they learn that the crate is a great place.

        Also, don’t underestimate the value of other dogs knowing their crates. I did not teach Fenrir Bed. He picked it up from Blu and us placing his food bowl in the crate.

        Leave It

        This command is the second most important command on a farm. When your dog is locked in on something, like a chicken, it is important that you can get their attention away from that object. Or if they are digging to China, you to be able to get them to stop.

        The way I teach this command is actually pretty simple and it’s a daily training thing.

        First, I take the dog outside and let it play. When the dog locks onto something, I call their name. When they look at me, I praise the hell out of them. After a few times, I will say something like, “Blu, Leave It“. This introduces the command. Then rinse and repeat. This can take a few times for them to really understand what you are wanting and you should be prepared to intervene if necessary.

        If they don’t respond when I call their name, I will usually do something to get their attention. Something like a gentle tug on the leash (attached to their prong collar because we are training) or throw a stick, ball, toy, etc near them to break their concentration. When they look at me, I praise them. Then I will slowly start to introduce their name and the command Leave It.

        Check out our Microgreens at True Leaf Market

        Quiet

        This is one that has been freestyled (which I go over at the bottom) because I can’t stand barking dogs. If the dog has something to bark about, ok. But barking to bark drives me insane. So I accidentally, on purpose, taught the dogs that when I get up to check to see what they are barking at, if it’s nothing (or I can’t see anything) I will tell them to Quiet.

        If I see something, I tell them good job and then go sit down. They are still barking like crazy because there is something there, but at least they warned me. Which is all I want them to do.

        Before we get too far into this, I have a great course on the basics of goat care. I call it Goat Crash Course: Goat 101. In this course, I explain things like types of shelter, types of feeds and hays, basic assessments and so much more! Check it out!

        Buy Now

        Drop It

        We have all had the situation where the dog has something you do not want them to have. Whether it’s a ball for playing fetch, or a dead animal, we want them to spit out what’s in their mouth. On a farm, it is even more important because there are a bunch of things it could be. Last year, the dogs found the hole that contained the pig head…. Do we need to talk about the absolute horror of watching your dog carry around a pig head?

        How to teach Drop It? With great patience.

        Actually, the trick is offer a higher value treat as a trade. The other trick is to not treat it like a game. Which is weird because that’s how we are going to train it.

        The easiest way to teach Drop It is by teaching the dog to play fetch. We start with a reward, most often a ball but Blu prefers sticks, and we shake it in front of them to get them excited, and then throw it just far enough for them to be able to get it while still on leash. Or further if they are allowed off leash. When they bring it back, a lot of people just yank the ball or stick out of the dogs mouth.

        I’m sorry, but my dogs have very large teeth, and while I’m not opposed to shoving my hand down their throat if the situation calls for it, I am not doing that for a ball. So I teach Drop It, by putting them in a sit and then telling them to Drop It. Telling the dog to sit signals that you need their attention. This is when I will either take it from them, gently, or I will throw another ball or stick. It really depends on the dog.

        Save on Seeds

        This particular command takes time because you have to figure out how YOUR dog will actually drop that high value treat or toy.

        In the case of the pigs head, we tried various ways to get them to drop the head, but nothing worked. We had to wait until they lost interest enough that we could call them into the house. Then we disposed of the head deeper in the ground, much further away.

        Easy

        This is a very important command that all dogs should know, regardless of type of dog, where you live, etc. It is invaluable to be able to put your dog at ease in stressful situations. Unfortunately, the only way to really teach Easy is to put in action. This is going to be an on going thing that will change and adapt based on your dog.

        If you are new to heating with firewood and are looking to master the finer points of it. We’ve got a great eBook that goes in depth of what tools you should consider, how and where to stack, how to build a fire and so much more!

        Buy Now

        The reason why this command is so important is because your dog simply does not understand what is happening. Imagine with me that you are going to a new country with completely different customs than yours. No one speaks your language and you don’t speak theirs. You have fallen and broken your leg. How absolutely frustrating, terrifying, and nerve wracking would it be to try and navigate care?

        This is every single day with your dog. They do not understand what you are wanting and every new experience can be absolutely terrifying. Not to mention there is this big goon trying to communicate with you.

        So I teach Easy in a very soothing, laid back way. If I see my dog starting to get amped up, or freaked out, everything stops. I go to the dog and love on them and whisper Easy. Once they have calmed down, we will either return to what we were doing, or we will take a break.

        An example of using it would be taking the dog to the vet. You know that you have an appointment in 3 months. So one of the ways that you could do this is by getting the dog in the car now. You notice the dog getting anxious, give them some love and a treat and say Easy as they start to calm down. Once the car has been mastered, and they can be trusted, take them to a pet friendly store and just walk with them. Anytime you see them getting worked up, stop and love on them. Whisper Easy to them and give them treats (or other rewards) until they calm.

        Tractor Supply

        Unfortunately, we don’t always know what is going to set a dog off. But if we can build a solid bond and then work through that bond, you will see your dog start to turn to you before they even get freaked out.

        To give a real life example, all of the dogs hate when we go down to the range for practice. In fact, the only dog that will tolerate it is Bear, everyone else has to be put in crates. Bear knows that he will get his ear muffs put on, with a neck gator over the muffs and his head. Then we all walk down the range. He’s nervous and already shaking but he desperately wants to go with us. He will cry, howl, and go nuts if we leave him. So we keep working with him on it. While down at the range, someone is in charge of Bear. They love on him and give him treats and when he has had enough, he goes back up to the house.

        There are voluntary and involuntary situations that you and your dog are going to find yourselves in. But having a command that the dog knows will comfort them? Man, that has made all the difference with our dogs. I could ask Bear to do ANYTHING and he would do it because I have worked with him and comforted him every time he gets worked up.

        The Ultimate Homesteader’s Starter Bundle – Only $47!

        Get the tools you need to stay organized, track profits, and manage your homestead with ease!

        Includes:
        ✅ Schedule F Tracker – Simplify tax prep
        ✅ Profit Calculator – Track earnings
        ✅ Hay Calculator – Plan livestock feed
        ✅ Garden Journal – Digital & printable
        ✅ Herd Health Tracker – Monitor animal care
        ✅ Simple Budget – Manage finances
        ✅ Backyard Homestead eBook – Essential tips

        $99 value – now just $47! Start your homesteading journey today!

        Buy Now

        Freestyling Commands

        One last thing to be aware of is that you will end freestyling a lot of your training. You can read every training blog or book and watch all of the videos. But at the end of the day, I have found most of my training is freestyle.

        What is freestyle training? It is simply telling your dog what to do, over time, and them doing it.

        For example, we can nudge the dog three times on the bed and they know to get down.

        Another example is when we are standing around talking or whatever. All of our dogs will come up, sit down, and place their head against our hip to be loved on. We never taught them that.

        We taught them to not to go out an open door just by making them sit at the door to go outside. If they don’t sit, they don’t go outside. This has morphed into being able to leave the door open and them not going outside because we didn’t let them out. It’s the weirdest thing.

        You don’t have to use my commands to teach farm dogs

        You may have a totally different idea for leave it, drop it, sit, down, stay, etc. Use whatever works for you. But always keep it simple. If you can pronounce the word or change the word constantly, your dog is going to get really confused.

        Keeping commands simple and easy to follow will always be the most successful.

        Also don’t worry if it takes your dog longer to learn something. Just stay with it.

        Lastly! Make sure that whatever commands you teach, your entire family uses! I can’t tell you how many times Jared or the boys would irritated that the dog wasn’t doing what it was told, only to find out they used the wrong word.

        Other Posts From Training A Farm Dog Series

        How I Train My Farm Dogs

        How To Train Farm Dogs

        Tips, Tools and Hacks For Training Farm Dogs

        Best Breeds For Farm Dogs

        Commands For Training Farm Dogs

        If you like the content I put out, feel free to buy us a coffee! It helps keep this site running, marketing and the goats in grain!

        Buy me a coffee

        If you like this post, feel free to share it and follow us below on our social media accounts!

        • Facebook
        • Pinterest
        • Instagram
        • YouTube
        • TikTok
        • Spotify
        • Threads

        Filed Under: Animals, Farm Dogs Tagged With: dogs, farm dogs, homestead dogs, training dogs, training farm dogs

        JOIN TO OUR MAILING LIST!

        Leave us your email to receive new posts and special offers for members only! Don't miss a thing!

        Recent Posts

        • Fall Garden Guide
        • Top Mistakes With Goats
        • How To Bond With Your Goats
        • « Go to Previous Page
        • Page 1
        • Interim pages omitted …
        • Page 9
        • Page 10
        • Page 11
        • Page 12
        • Page 13
        • Interim pages omitted …
        • Page 23
        • Go to Next Page »

        Primary Sidebar

        WELCOME

        WELCOME

        My name is Leigh and I am the lead chaos creator here at Steel Raven Farms. You will see throughout this blog that I am the crazy goat lady.

        I am married to my high school sweetheart, Jared and we have two amazing boys.

        FOLLOW ME

        • Amazon
        • Facebook
        • Instagram
        • Pinterest
        • TikTok

        GET UPDATES!

        Leave us your email to receive new posts and special offers for members only! Don't miss a thing!

        In all the years that I’ve been growing a garden, the fall garden has steadily remained my favorite. Which is funny because I don’t really like any of the brassicas, which is what most people know the fall garden for. I prefer the root vegetables and cool air. But I have learned over the years…

        Read More

        • Animals
          • Chickens
          • Farm Dogs
          • Goats
        • Garden
          • Compost
          • Garden Projects
          • Seeds and Plants
          • Garden Journal
          • Working With Food
            • Recipes
            • Freezing Foods
            • Dehydrating Foods
            • Canning Tips And Tricks
              • Canning Inventory Sheets
        • Helpful Info
          • Welcome to the Homestead!
          • Emergency Preparedness
          • Frequently Asked Questions
          • Goal Setting
          • Project List
          • Shop Digital Products
            • Hay Calculator
            • Farm Expense And Income Tracker
            • Goat Crash Course: 101
            • Garden Journal Prompts
            • Schedule C Tracker
            • Schedule C Tracker
            • The Homestead Bundle
        • The Truths
        • Episode List
        • Start Here
          • Privacy Policy
          • Affiliate Disclosure
          • Let’s Get in Touch
          • Members Only Library
          • Welcome To Our Homestead

        Footer

        • Email
        • Facebook
        • Instagram
        • Pinterest

        COME AND GET IT!

        Leave us your email to receive new posts and special offers for members only! Don't miss a thing!

        · Midnight Theme

        Copyright © 2026 · Midnight Theme on Genesis Framework · WordPress · Log in