• Skip to primary navigation
  • Skip to main content
  • Skip to footer

Steel Raven Farms

Where muck boots meet ground.

  • Animals
    • Chickens
    • Farm Dogs
    • Goats
  • Garden
    • Compost
    • Garden Projects
    • Seeds and Plants
    • Garden Journal
    • Working With Food
      • Recipes
      • Freezing Foods
      • Dehydrating Foods
      • Canning Tips And Tricks
        • Canning Inventory Sheets
  • Helpful Info
    • Welcome to the Homestead!
    • Emergency Preparedness
    • Frequently Asked Questions
    • Goal Setting
    • Project List
    • Shop Digital Products
      • Hay Calculator
      • Farm Expense And Income Tracker
      • Goat Crash Course: 101
      • Garden Journal Prompts
      • Schedule C Tracker
      • Schedule C Tracker
      • The Homestead Bundle
  • The Truths
  • Episode List
  • Start Here
    • Privacy Policy
    • Affiliate Disclosure
    • Let’s Get in Touch
    • Members Only Library
    • Welcome To Our Homestead

Canning Recipes

How To Can Corn

December 21, 2024 by Leigh Leave a Comment

Jump to Recipe

Whether you got a great deal at the grocery or your garden has exploded, learning what you can do with surplus corn is great. There are so many uses for corn; feed for livestock, food for people, dry it for popcorn or dry it for corn meal. The options when it comes to corn are endless. But today, I want to show you how to can corn.

What do you need?

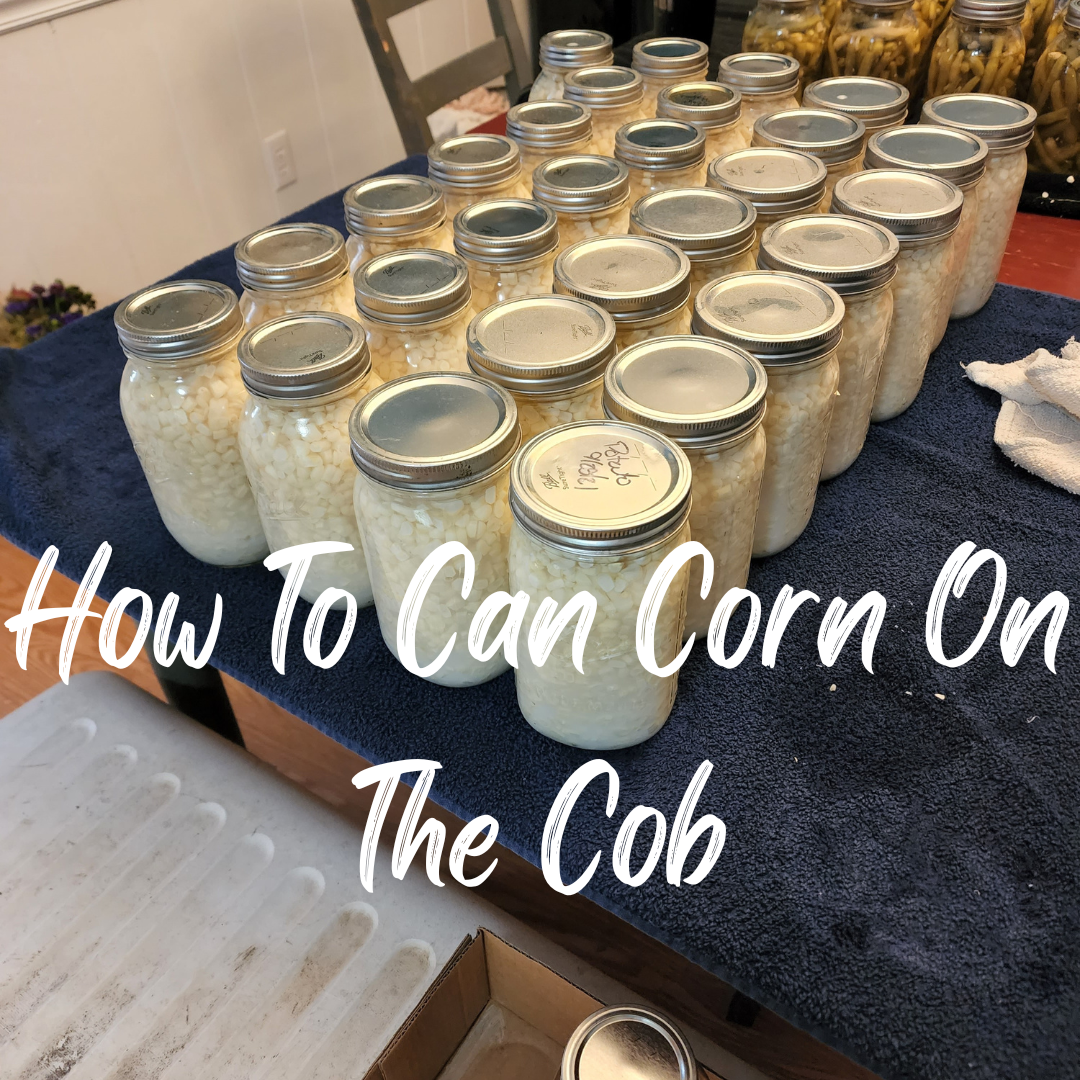
Corn- We had approximately 120 ears of corn and it didn’t take us long to get it all processed. It also yielded us 32 quart jars

A Pressure Canner– we have two of these that run pretty much non stop since they only hold 7qts each

Canning Tools

Jars– Pints or quarts will work

Either a corn de-cobber like this or a knife and a bunt pan

Salt is optional. We don’t use it but if you want to, make sure you have enough salt for the amount of corn you have

Don’t forget to add these items to your Walmart cart and have them do the shopping for you! It saves time and a ton of money.

Shucking Your Corn

120 ears of corn is a lot and I absolutely despise shucking corn. I will snap green beans until my fingers fall off, but shucking corn? No thank you. This is usually Jared’s job because he really enjoys it. It’s his version of green beans. If I had two bushels of green beans to go through, and he had two five dozen bags of corn? We would be in heaven. We both turn our brains off and let the beauty of our homestead take over.

After he shucked all the corn, he put it into our huge cooler filled with water. The husks and silks go to the chickens and compost for the garden. I guess we could have given it to the goats but they weren’t interested in the husks.

De-Cobbing Your Corn

There’s a million ways to skin a cat, and getting kernels off a corn cob is no different. We have tried a ton of different gadgets over the years. To be honest, the best one we have found is a knife. Those gadgets may work for a specific size of cob, or only once. The knife is going to work 100% of the time. So if you want to “waste” your money, any of those linked will work…. maybe.

We use a knife and bunt pan or just a knife and a cookie sheet. Nothing fancy. The downside of using this method is that it can dull your blades because you are constantly smacking the knife into the metal. But I like sharpening my knives so that’s not a deal breaker.

Tractor Supply

As you are getting all those delicious kernels off your cobs, keep in mind that the corn milk will spray EVERYWHERE. Don’t keep open drinks, electronics or anything that shouldn’t get wet anywhere near where you are working. Oh, and it’s extremely sticky.

As we de-cob the corn, we put all the kernels in a smaller clean cooler filled with clean water. This starts the soaking process.

After the corn has soaked for thirty minutes to one hour we will either change the water and let it soak again or we will go ahead and get it into jars. The reason we would resoak is if the water was completely white. If you don’t want to soak, don’t mind the milk, etc. Don’t soak or resoak. It won’t hurt anything.

Prepping For Canning

Once your kernels have soaked, it’s time to get them into jars. The first step to this is to make sure your jars are clean with no chips, cracks, dings, or dents. Usually, I just give them a quick wash and let them dry while I’m getting my canner ready.

I have two Presto 16qt canners and they hold seven quart jars. So when I can corn, it’s a multi day process. I also have a three burner camp stove that I can on to help keep the heat down in the house. I’m hoping to get one of these bad boys soon, but at $500 it’s a little steep right now. The trade off is the ability to stack quart jars in it.

Logo 468x60

Getting my canner ready simply means making sure that the canner is safe to operate per my manuals instructions. Mine uses 3qts of water and once that’s in, I put it on the camp stove to get it boiling.

Back to the kernels, I start draining/straining out the kernels from the water and adding them to my jars. Once filled to a 1″ headspace, I add fresh water, wipe the rim with a damp vinegar rag and place the lid and ring. Remember only fingertip tight. That means you should only use your finger tips to tighten the ring, not your bicep.

They go into the canner as they are ready. Once my canner is filled and the water is ALMOST boiling, I will put the lid on and lock it. I usually let me canner vent for 5-10 minutes depending on how full it is. Meaning, if it’s filled with pints, I usually go 10 and quarts 5. But follow your canners instructions. Place your weight and wait for your weight to jiggle or rock. Then slowly start to lower the stove temp until the weight is barely moving. We don’t want the weight to blast off into space.

Tractor Supply

Corn is processed at 55 minutes for pints and 85 minutes for quarts at 10# but if your elevation is over 1000 feet, go with 15#.

I also have a quick reference guide that you can download get in my members only section. Sign up below and you will be emailed the password.

It’s Done Processing, Now What?

Depending on your set up, you can just turn the burner off and let the canner depressurize naturally. Or if you have a camp stove and the other side is in use, you can CAREFULLY move the canner somewhere it can cool down. When I say careful, I mean be friggin careful! Seriously, no one needs to have their face melted off because the weight moved. If you’re using your stove at home, do not slide it. Pick it up. If you can’t pick it up. Just don’t even touch it. Seriously, it’s not worth the risk.

After the canner has cooled and the pressure valve has dropped, you can crack the lid and allow some heat to escape. I usually wait 10-20 minutes and then remove the lid completely. Once the contents have stopped boiling, I will unload the canner and place all the jars on a toweled surface.

That’s it!

It’s not hard to can corn at home. And it definitely beats store bought every day. But I’m sure you have some questions. So…..

How many ears fit into a quart or pint jar? It takes approximately 4 ears of corn per quart or two per pint…. Ish

Do you use salt? We don’t, but that’s only because we choose to season our food when we cook it.

Is there a zero waste method? Sure, you can boil down the cobs and make corn cob jelly. You can also drink the milk. Our zero waste method is to give it all to the animals. They love it.

What if I don’t like canned corn? You can absolutely freeze it instead. Just layer a cookie sheet with parchment paper and do a single layer of corn. Once frozen, put into a freezer bag.

What if I have extra jars but not a full canner? You can put them in the fridge for immediate eating or you can freeze them. Another option is to can water. This will give you sterile water in case of emergencies.

What if I don’t have coolers? Or a big cooler? Work in batches. If we know that each jar takes approximately 2-4 depending on the jar, then only do a full canner full at a time, and store the rest in the fridge. You can also use a clean sink.

If you like the content I put out, feel free to buy us a coffee! It helps keep this site running, marketing and the goats in grain!

Buy me a coffee
  • Facebook
  • Pinterest
  • Instagram
  • YouTube
  • TikTok
  • Spotify
  • Threads

Canning Corn on the Cob

This is the fastest and easiest way to can corn on the cob
Print Recipe Pin Recipe
Ingredients Equipment Method

Ingredients
  

  • 1 Corn on the cob
  • 1 Tbsp Per Quart jar Optional

Equipment

  • 1 Pressure Canner
  • 1 Canning Tools
  • 1 Jars Look in the post above for the rough conversions on how many jars you will need

Method
 

  1. Start by shucking your corn and getting as many of the little hairs off.
  2. Grab either your de-cobber or knife and start cutting the corn off the cob. This can be tricky so watch your fingers.
  3. Place corn in clean water to help get the milk out. You may have to rinse and repeat if your corn was really milky
  4. Using funnel, scoop corn into jars leaving 1" headspace
  5. Fill with water again, leaving 1" headspace.
  6. Remove any bubbles with chopsticks, straw, or other debubbling tool
  7. Wipe rim with damp vinegar towel.
  8. Add lid and ring and put into canner
  9. Fill canner with water to manufacture recommendation. Ours is 3 quarts
  10. Set it on the stove and get the water heating, we usually put ours on high as we are loading it
  11. Once the canner is loaded, place your lid per manufacture instructions.
  12. We let our canner vent for 5-10 minutes then place the weight on the vent pipe.
  13. Once the weight starts rocking, slowly decrease the stove temp until the weight is just barely rocking.
  14. Let this process for 85min for quarts and 55 for pints
  15. Once the time is done, remove from heat and let the canner cool and depressurize naturally. This usually takes about 30-45min depending on processing time
  16. Once the canner is safe to open, remove lid and, if the contents of your jar are not obviously boiling, pull the jars out with the jar grabby thing and place on a towel to cool completely
  17. Remove rings and wash threads. Corn is extremely sticky so the rings may be hard to remove. Not doing so can lead to mold, rust and rotten food.
  18. Wash the threads of your jar (where the rings were) with warm soapy water. Write the date and store

Filed Under: Canning, Canning Recipes, Recipes Tagged With: Canning, Chickens, cooking, Goats, Homestead

JOIN TO OUR MAILING LIST!

Leave us your email to receive new posts and special offers for members only! Don't miss a thing!

Recent Posts

  • Fall Garden Guide
  • Top Mistakes With Goats
  • How To Bond With Your Goats

How To Start Canning

October 22, 2024 by Leigh 1 Comment

Y’all! It’s canning season! I am beyond excited! Over the next few months I will be sharing with you ALL (okay, most) of the canning recipes that I have accumulated over the years. From things like salsa and broths to more complex stews and soups. I’ll also show you how we can basics like corn, green beans, and beans. But today? Today I want to talk to you about how to start canning.

How To Start Canning

I have always been fascinated by the idea that I didn’t have to go to the grocery store to buy food. You mean I could have a garden and animals that provided food for me? And I could put in a little work and have healthy food throughout the year. I also didn’t need a million freezers to store food and have to worry about a power failure? So I started researching, because that’s what I do when I don’t understand something.

I found out that canning is actually pretty simple. Put the food in a jar, tighten, and put it into a waterbath canner or pressure canner, and set the timer. The hard part comes in knowing which way to process the foods and for how long. If you don’t allow the “pearl clutchers” to get in the way, you can have shelves and shelves full of healthy food that will last for a couple years.

With this knowledge in hand, I went to work. I started with canning apple sauce and over the years, I have canned hundreds, if not thousands of jars of food.

how to start canning

Take the fear out of canning

What do I mean by pearl clutchers? Well, these are the people that whole heartedly agree that what the USDA, FDA and Ball say, you must do. There is a ton of fear about canning that is perpetuated by these organizations. They make it feel like the only thing you can can are jelly, jams, and a couple of soups. To give you an example: The Ball Book Of Canning says you cannot can chili with beans but on the next page, you can can ham and bean soup. That doesn’t make any sense.

Tractor Supply

So my take on it is this: if the store can put it in a can, or Grandma didn’t kill her entire family, then it’s probably okay to eat. If I follow basic kitchen cleanliness while I cook, follow proper canning times? It’s probably okay. When I take the jar off the shelf to make it, and it looks good, smells good and I boil it for 10 minutes? It’s probably okay to eat.

how to start canning

Random tangent

The latest update from the CDC says that in 2018 there were 242 cases of botulism in the US. Of that, only 18 were foodborne. Only 3 of those cases were linked to home canned food. You can read the full article here. Does it happen? Absolutely. But there are 329.5 million people in the US as of 2020. That means that your chance of consuming botulism is pretty close to zero.

Logo 468x60

Do your research, find solid recipes, and get to canning. It will be okay.

Let’s Get Started

So you have decided to take the plunge and start canning. But what do you need to get started? My friends over at Southern Dream Homestead has a great blog post on canning and I highly suggest it. But the short version is this:

You will need a huge pot that can handle a fair amount of jars. Most home canners use something similar to this one. I like it simply because I can use the pot for various other things. When I am pressure canning, I use huge pots for soups and stews making 36 Quarts at a time. This can also be used as an old fashion stock pot and as a water bath canner. The utility is great!

A good pressure canner will go a long way. I have two of them that I run at the same time during canning season. This one from Amazon is about $130 as of this writing. Shop it around and look at Walmart, Target or other stores. They may have it cheaper. Edit to add: Here is a link for a pressure canner from Walmart.

Arguably, the most important thing when it comes to canning is great recipes. This is the cookbook that I refer back to every year and I love it. I have made several of soups/ stews in this cook book and they are absolutely divine. The chicken chowder and enchilada soup are family favorites. Do yourself a favor and get either the hardback or spiral version. Paperback cookbooks do not last long in the kitchen.

Some other cookbooks I like are: Ball’s Cook Book, The Homestead Canning Cookbook, and Meals In A Jar.

I also have a quick reference guide that you can download get in my members only section. Sign up below and you will be emailed the password.

Lastly, you need tools. This one is a bit more expensive, but the tools feel a little more quality than some of the others. Regardless, you should probably get a couple sets of jar grabbers, funnels, ladles, etc. This is a good kit, but always get extra jar grabbers and funnels. You will always need more than you have.

You may have noticed that I left out jars. Get Ball Mason Jars, period. Yes, you may have some success with other jars. You may even find some obscure brand that holds up amazing. However, Ball is tried and true for a reason, their jars will literally stand the test of time. But PLEASE don’t buy them from amazon. You are going to pay through the nose for them.

The best place I have found for mason jars is Wal-Mart. Depending on where you live, your prices will vary, but I can get a case of quart mason jars for around $16 and a case of pint for $12. Half gallons come in a 6pk for $12. Amazon wants to double or triple that price. So shop around. Oh, and stock up on lids whenever you can find them.

Save on Seeds

Finally, get yourself some good sturdy shelves. You do not want to spend an entire summer canning your heart out, getting burns, and sore muscles to have your plastic shelves fail. I’ve got a great tutorial on how we built our canning shelves and after several years, we still love them.

So get your supplies and get started in the kitchen. I promise you, when you don’t want to sweat your butt off making dinner, that can of chili or chicken noodle soup is going to taste amazing. You can find my make ahead pickle brine and green bean recipes by clicking the links. Those are two very easy ways to get started on your canning journey.

how to start canning

If you like this post, feel free to share it and follow us below on our social media accounts!

  • Facebook
  • Pinterest
  • Instagram
  • YouTube
  • TikTok
  • Spotify
  • Threads

Filed Under: Canning, Canning Recipes, How To's Tagged With: Canning, cooking, Homestead, kitchen, Welcome

JOIN TO OUR MAILING LIST!

Leave us your email to receive new posts and special offers for members only! Don't miss a thing!

Recent Posts

  • Fall Garden Guide
  • Top Mistakes With Goats
  • How To Bond With Your Goats

Make Ahead Pickling Brine

October 15, 2024 by Leigh 8 Comments

Jump to Recipe

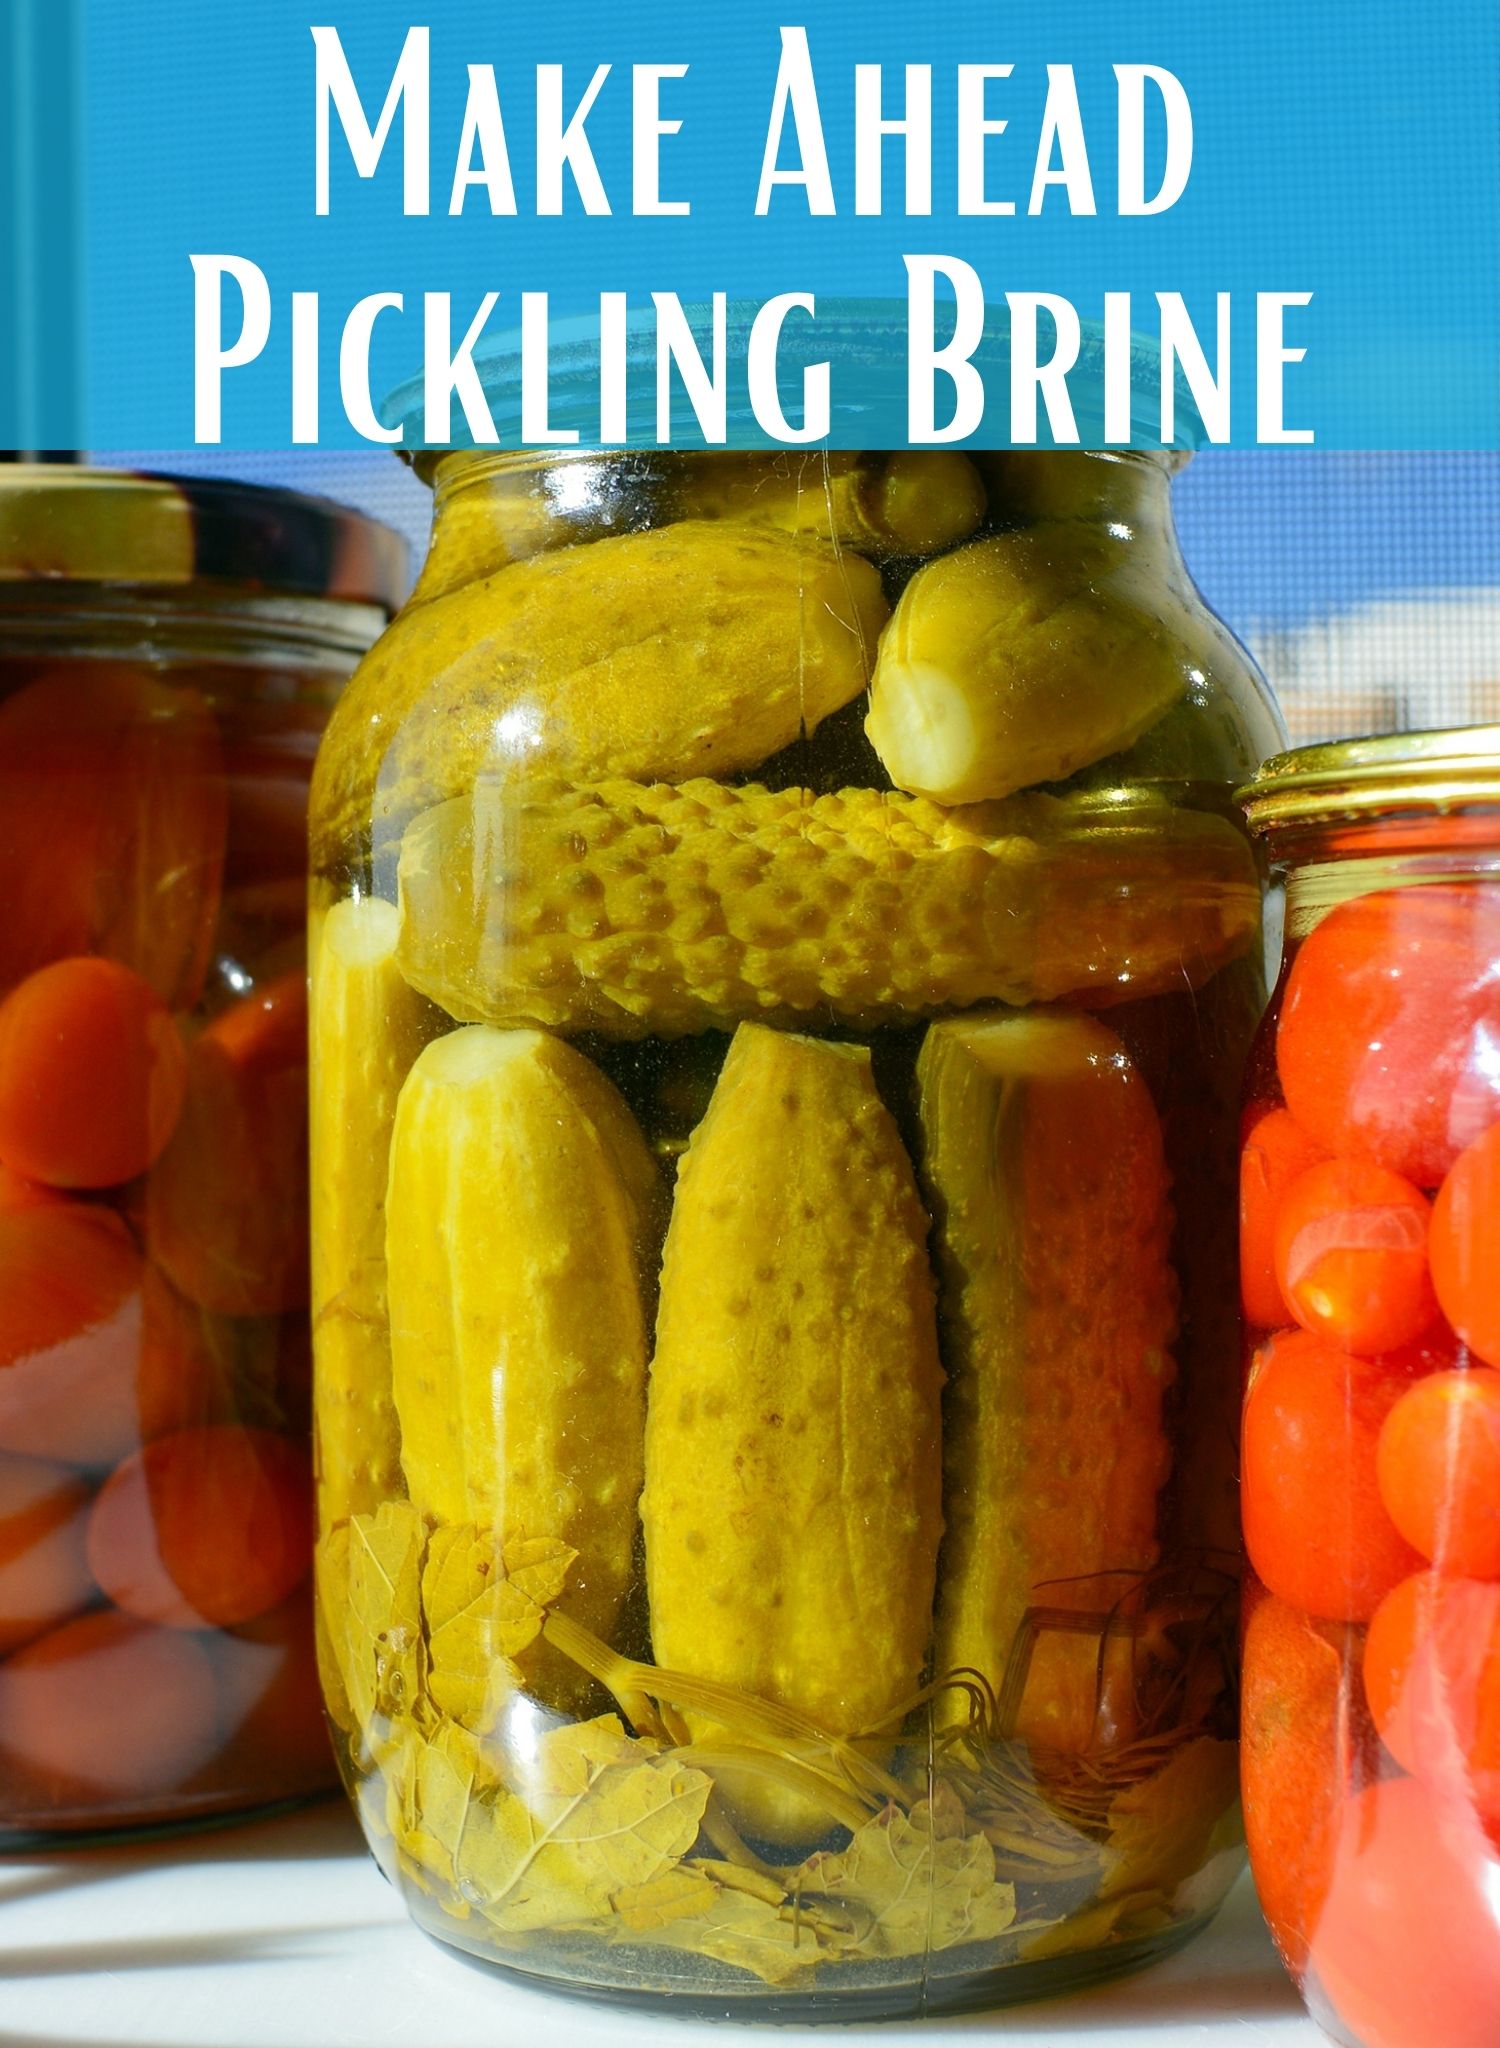
If your garden is anything like mine, we’ve got a couple of pickling cucumbers every day, but never enough to can a big batch of dill pickles. Or you’ve got a couple of peppers but can’t do much with them because there’s only five today, 3 tomorrow and 17 on Wednesday. Welcome to the world of gardening, right? If you think there’s nothing you can do about it, think again! I’ve got a solution to your pickle…. see what I did there? Read on for my pickling brine and famous dill pickle recipe.

The Ultimate Homesteader’s Starter Bundle – Only $47!

Get the tools you need to stay organized, track profits, and manage your homestead with ease!

Includes:
✅ Schedule F Tracker – Simplify tax prep
✅ Profit Calculator – Track earnings
✅ Hay Calculator – Plan livestock feed
✅ Garden Journal – Digital & printable
✅ Herd Health Tracker – Monitor animal care
✅ Simple Budget – Manage finances
✅ Backyard Homestead eBook – Essential tips

$99 value – now just $47! Start your homesteading journey today!

Buy Now

What Is Pickling Brine?

Simply put, pickling brine is just the solution that is going help preserve your fruits or veggies. The brine is vinegar, salt, and water. That’s it. Some people add sugar to cut the vinegar and salt down but I don’t. When I want a pickle, I want it to be salty, vinegar-y, and delicious.

pickling brine

What can you use Pickling Brine for?

Anything. Literally. Obviously pickles is the first choice but I have used left over brine for brisket, pulled pork, marinades, and Jared’s Bloody Mary’s. The options are endless. We will also pickle peppers, onions, carrots and okra. You can even use it in some fruits if you want. The best part is that you can make a batch, throw it in the fridge or on the shelf and always have it on hand.

How to make the Brine

The brine is so easy to make, you can’t screw it up. The recipe is 10c of water, 3/4c salt, and 2c vinegar. Don’t worry, I have a recipe card at the bottom for my favorite dill pickles. You can add sugar and the ratio for the recipe above is 1-1.5c sugar.

Also, you do not need fancy pickling/ canning vinegar or salt. Skip the upcharge on those items, they are pretty much the same as regular salt or vinegar. I do use pink Himalayan salt but that’s just because that’s what I always have on hand.

pickling brine
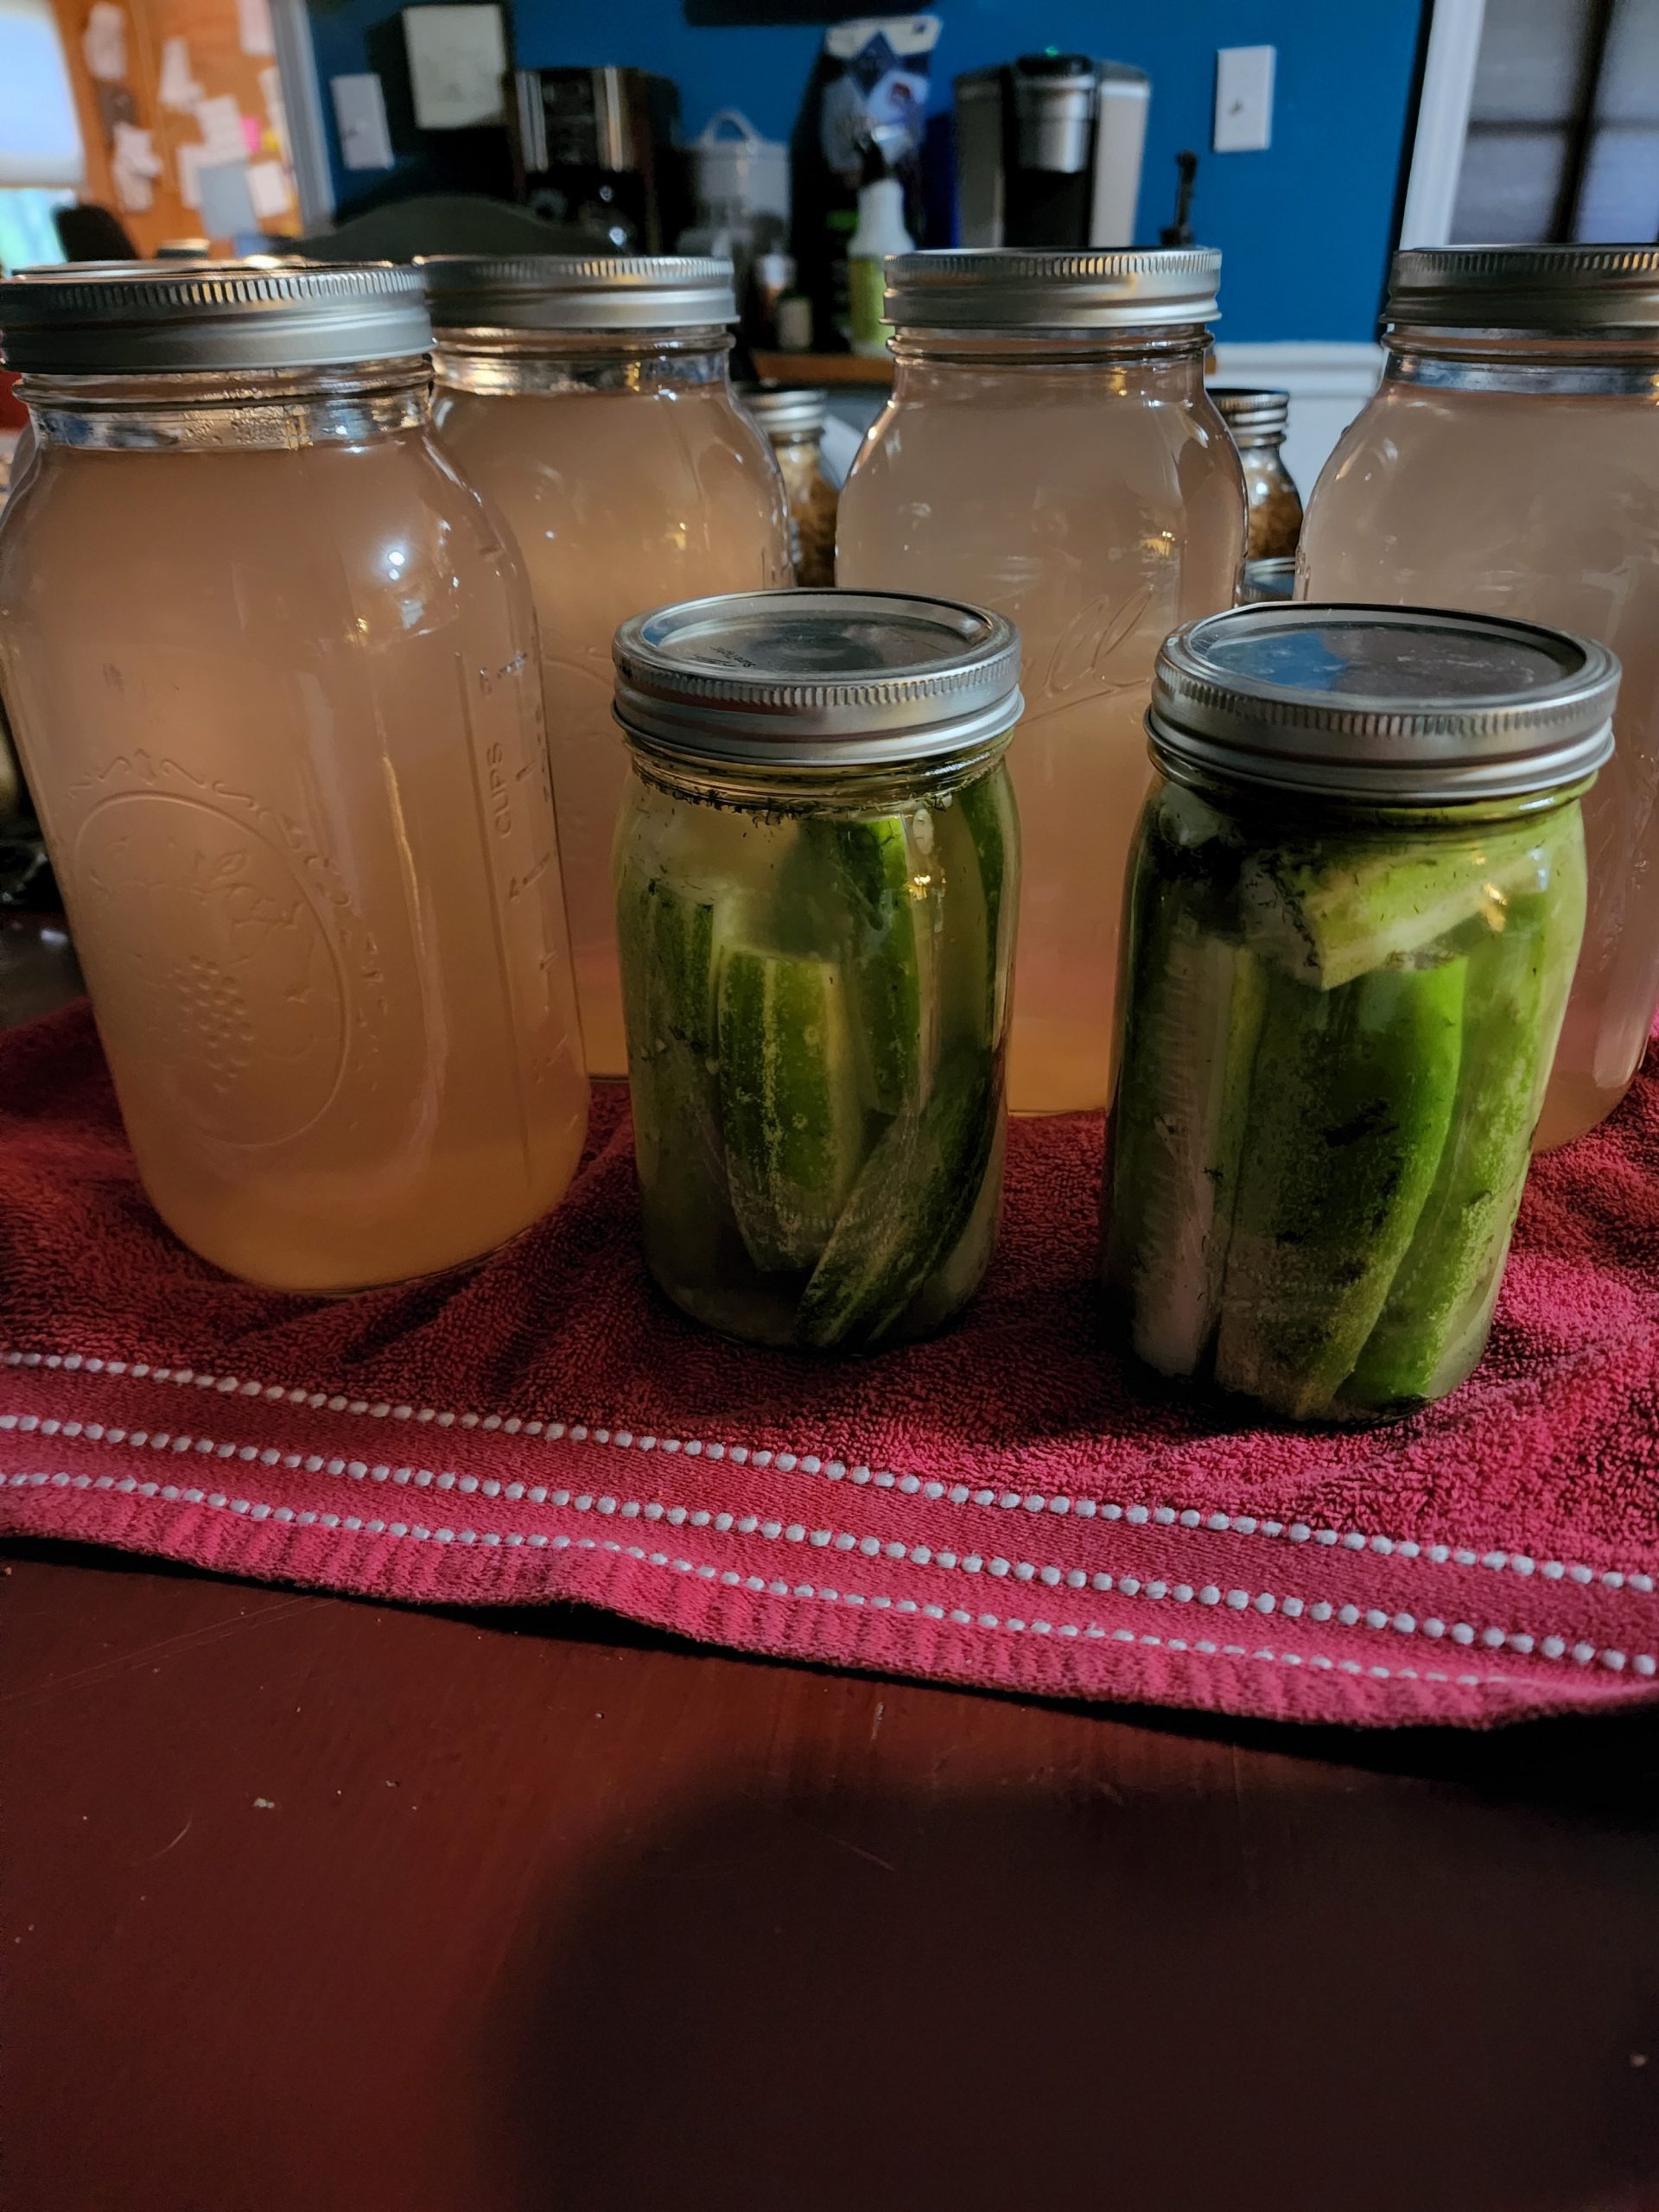
The reddish/brown tinge is due to horrible lighting in my kitchen and the pink salt

I add all of the ingredients above to a big stock pot of water. Also, I use stainless steel pots because it’s not reactive…. and it’s the only thing I have on hand that will handle the quantity I make. Next, use hot water to start dissolving the salt and bring everything to a boil.

Once it’s boiling I will can it into whatever size mason jars I have, wipe the rim, add a ring and lid, then wait for the glorious pings. I do not process them in a canner.

If I don’t get a ping, I just throw that one in the fridge to use first. Why don’t I water bath it? Because the pH of the pickling solution (without sugar) is 3.2. Not many organisms are going to grow in that. And the heat from the boiling brine will create a vacuum seal from the jar. But if you want to water bath can this to make sure that it is shelf stable, you just need to process for 15 minutes for quarts and 25 for half gallon.

All of that being said, I cannot guarantee the safety of your food. If you follow this recipe, you do it at your own risk. I don’t know if you, your kitchen, or cooking utensils are clean/ sterile or how knowledgeable you are on canning. I have to say all of this because… lawyers.

Now, do you want the recipe for crunchy home canned dill pickles? Remember, you do this at your own risk because not only will you eat every single jar in one day, but you will also be *gasp* open kettle canning all of this.

pickling brine
Fresh canned dill pickles

What is open kettling?

Before we get started too far into the recipe, I’ve had a lot of people ask what is open kettle canning. Simply put, it is using HOT food in HOT jars with HOT liquid. For this example, we are using hot jars that have been sterilized and kept hot with hot water. We are using a boiling brine and clean/ fresh cukes. Since the jar is hot and sterile combined with the boiling brine which is highly acidic, you don’t have to process.

As a side note, you can also heat your jars in your oven once sterile. I will put my jars, lids and rings in the oven at about 250*. This reduces your risks of shattering and having to handle jars full of hot water.

The problem with home canned pickles and salsa specifically is that the veggies get turned to mush when they are heated for cooking and then heated again during the water bath. Even the most stout veggies are going to be mushy when you heat them too long. A cuke and tomato? Forget it. They will not stand up and you will end up with mushy pickles and soup for salsa.

The term open kettle was first found in 1914 as a form of home preservation, but stopped in the 1980’s. Many canners still use open kettle to preserve tons of foods. Some of us, myself included, only open kettle HIGHLY acidic foods. So the choice is yours, I choose to do research and figure things out on my own.

Home Canned Dill Pickles

5 from 3 votes
Open Kettled Homemade Dill Pickles
Print Recipe Pin Recipe
Prep Time 2 hours hrs
Cook Time 0 minutes mins
Servings: 7 Quarts
Ingredients Equipment Method

Ingredients
  

  • 10 Cups Water
  • 2 Cups White Vinegar
  • 3/4 Cups Salt
  • 15ish Pickling cucumbers You can use any cukes just make sure that they are approx 6in long and not overripe
  • 7ish Tablespoons Diced Garlic
  • 7ish Bay Leaves
  • 7ish Tablespoons Dill Leaves You can use fresh dill at at least one medium sprig PER jar

Equipment

  • 1 15 qt Stock pot Larger if you are doubling or tripling recipe
  • 1 Ladle
  • 1 Whisk
  • 7 Qt Wide Mouth Mason Jars
  • 1 Debubbler
  • Can Grabber
  • Canning Funnel

Method
 

  1. Making Your Brine
  2. Add Water, vinegar and salt to stock pot and get it to boiling, stirring occasionally to dissolve salt
  3. Start working on Cucumbers
  4. Fill a bowl or sink with ICE COLD water
  5. Cut off both ends of cuke then slice for spears, chips, or whatever pickle you want
  6. Place in cold water as you get your jars ready
  7. Start heating your jars, lids and rings. You can do this by running your jars through a sterilizing cycle in your dishwasher, placing in your oven on 250 or in hot water. It doesn't really matter as long as they are clean and hot.
  8. **Please use a jar grabber, hot pad, or something, these jars are hot and the brine needs to stay boiling**
  9. Once your brine is boiling and ready, Take hot jar and add 1T garlic, 1T Dill (or sprig), 1 Bay leaf to the bottom
  10. Add your cukes, You are going to pack them in there so make sure to be careful
  11. Put your canning funnel on top and then ladle your HOT brine over cukes, leaving 1" head space.
  12. Wipe rim with vinegar towel, add lid and ring then set aside on a towel to start cooling
  13. Repeat until you are out of cukes or brine.
  14. Place a towel over all of the jars and listen for the pings over the next couple hours.
  15. Whatever doesn't ping, place in refrigerator. But give it a couple of days before you eat it so they are actually pickled.
  16. If you have left over brine, go ahead and fill any HOT jars you have. Same as above. Place funnel and ladle in brine
  17. Wipe rim, add lid and ring and set with the others to cool under a towel.

If you like the content I put out, feel free to buy us a coffee! It helps keep this site running, marketing and the goats in grain!

Buy me a coffee
  • Facebook
  • Pinterest
  • Instagram
  • YouTube
  • TikTok
  • Spotify
  • Threads

Filed Under: Canning, Canning Recipes, How To's, Recipes Tagged With: Canning, Pickles, Planning, Projects, Recipes

JOIN TO OUR MAILING LIST!

Leave us your email to receive new posts and special offers for members only! Don't miss a thing!

Recent Posts

  • Fall Garden Guide
  • Top Mistakes With Goats
  • How To Bond With Your Goats

How To Pressure Can Green Beans

July 20, 2024 by Leigh 2 Comments

Jump to Recipe

I am extremely picky when it comes to green beans. I cannot stand mushy green beans. The thought of the skin of the green bean scraping against my teeth is enough to make me want to vomit. So the only way I will buy, can or otherwise consume green beans is frenched green beans. Today, I went to my local farmers market for strawberries. Yes, they are worth the two hour round trip drive and I saw they had bushels of green beans! Score! So today I’m going pressure can green beans.

The Ultimate Homesteader’s Starter Bundle – Only $47!

Get the tools you need to stay organized, track profits, and manage your homestead with ease!

Includes:
✅ Schedule F Tracker – Simplify tax prep
✅ Profit Calculator – Track earnings
✅ Hay Calculator – Plan livestock feed
✅ Garden Journal – Digital & printable
✅ Herd Health Tracker – Monitor animal care
✅ Simple Budget – Manage finances
✅ Backyard Homestead eBook – Essential tips

$99 value – now just $47! Start your homesteading journey today!

Buy Now

Pressure Canning Green Beans

The first thing you need is fresh green beans. Straight from the garden is the best but today we are working with what we’ve got. I got a bushel which is about 30# of green beans and will yield about 25 quart jars of beans. This is not precise. Sometimes a bushel is only 25# and only 18# of usable green beans. So be prepared for less or more.

You’ll need a couple bowls, cold water for soaking, jars, pressure canner and the assorted tools that go with pressure canning.

Let’s Get Snapping

You’ll need a couple bowls so you can snap to your hearts content. This is seriously my favorite part. No one wants to help because it’s pretty mindless which is why it’s my favorite part. Last year I snapped two bushels of green beans in six hours. I took my time and got to watch my farm. I watched the goats play, the chickens scratch, and my boys help Jared build. All while I took a load off.

If you don’t know how to snap beans, it’s very simple. Snap off the ends at about 1/2 inch, roughly. Throw the ends in a bowl. Then snap the bean in half or thirds depending on how big you want your pieces. Just work through your bushel/ bag.

If you have goats or chickens, they will love you for giving them the ends. All of the animals fight over the beans, tops and bottoms and of course anything that gets dropped on the floor.

Soak Your Beans

Next clean your sink or a cooler and let them sit in cool water for about 30 minutes. You don’t have to do this step but I feel like it gets all the dirt and grime off your beans. You can do this before you start snapping, go for it, it’s totally up to you.

Also, I will “agitate” the water with my hands to help scrub off any dirt or debris that is on the beans.

I like using a cooler because I can just dump the processed beans straight into a cooler of cool water on the porch and I don’t have to move. Which is ideal considering I usually process 40-50 quarts of green beans at a time.

French Cut Green Beans

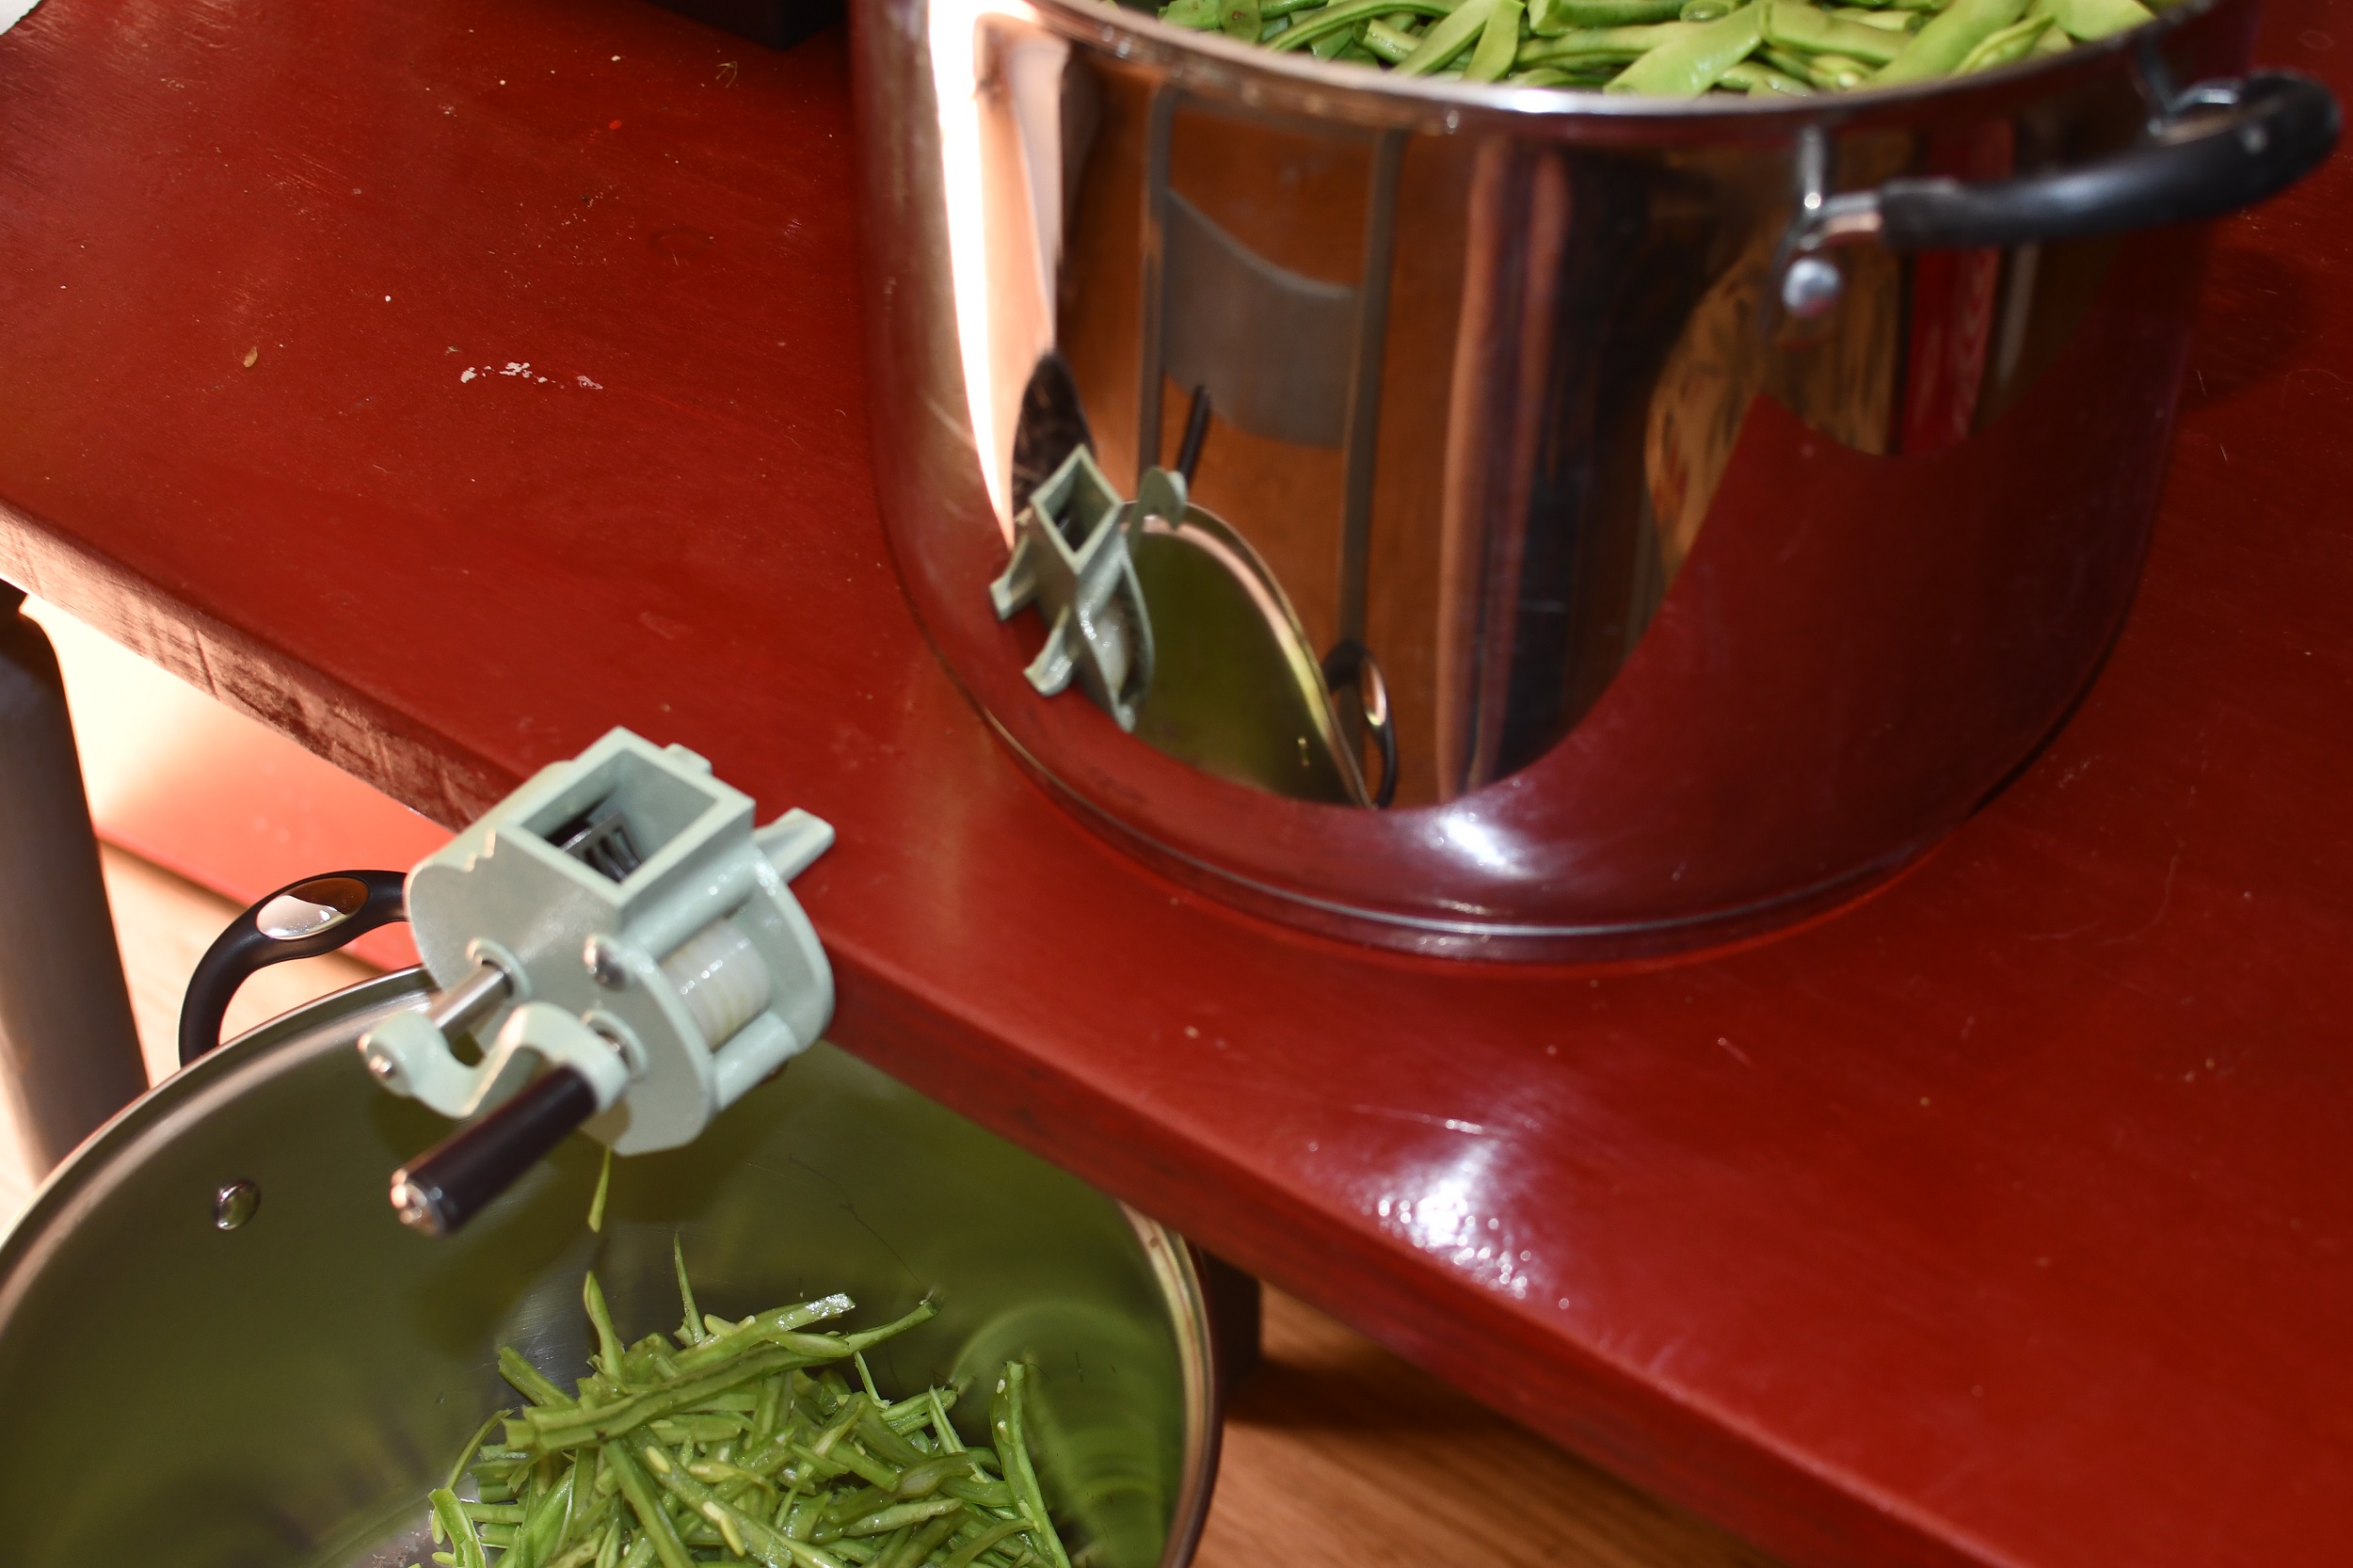
Once they are clean, I run them through the frencher. If you don’t have a frencher or don’t want french cut beans just skip this step. But make sure that you snap your beans a little smaller about an inch long.

If I am canning green beans, which is the entire point of this post, I only can French cut green beans. So you’ll need a frencher like this one and while I love it, it does get stuck if the bean is too big or too hard. It also requires you to attach it to a counter, table, etc and sometimes it just doesn’t work that well. But it’s the best crank version and I don’t like the manual ones.

Get Your Canner Ready

Next, get your canners ready. You need a pressure canner. I have two similar to this one but mine don’t have the gauge. You don’t HAVE to have the gauge. If you head to your local Wal-Mart they should have one that doesn’t have a gauge. While you’re at Wal-Mart go ahead and get at least two cases of quart mason jars. Ball is the most common, but Azure Standard has some really great jars as well. Also pick up the tool pack that has a canning funnel, canning tongs, and the de-bubbler. It should look like this.

Your specific canner should tell you how much water to put into it. My canner says three quarts. It will not fill the canner, and you don’t want it to. Go ahead and fill it to your manufactures instructions and get the water boiling.

Pack Your Green Beans Into Jars

While waiting on your water to boil, you’re going to start packing your jars. Using your funnel and clean hands start packing your green beans into your jars. I usually pack till the green beans are about an inch and a half from the top. I usually push down to get as many beans in as possible but you also don’t want to pack it so full. Set it off to the side until you have a canner full. This is usually seven-ten quart jars depending on the size of your canner.

Once you have a full canner ready (not in the canner yet), go ahead and fill each jar with room temperature water till you have 1″ head space. Head space refers to the space from the top of the food/water to the top of the jar. Next, you’re going to use the de-bubbler to get all the air bubbles out.

I’m not going to lie to you, I gently tap the jar on the counter until all the bubbles are at the top. It’s worked well for me, usually because I can’t find the de-bubbler thing. Add more water to the jar to maintain the 1″ head space.

Then wipe the rim of the jar with a paper towel or rag dipped in vinegar. Put the lid and then ring on to finger tip tight and you are ready to put them in the canner. I usually place them in the canner all at once so that nothing starts cooking before I’m ready.

Loading Your Pressure Canner

By the time you are ready to start adding your jars, your water should be boiling or close. Go ahead and place your jars in the canner and place the lid per your canners instructions. The normal process for most canners is to let the canner vent for ten minutes before placing your weight on the vent. But again, follow your canners instructions.

My canners have a pressure lock that will pop up once it has come to pressure and shortly after that the rocker will rock. Your canner may be different.

Once the weight starts to rock, or you are up to your PSI on your gauge, you start your time. I will also usually drop the temp on the burner at this point too. I have it on high to get everything up to pressure but will usually drop it to medium to medium high once the weight is rocking. You only want the weight to rock about once every few seconds. Usually mine just gently jiggles.

Green beans need to be processed for 25 minutes. Depending on your altitude will depend on your actual times. I process mine at 25 minutes at 15 PSI for quarts because I am over 1000 feet above sea level.

PS Loading a canner is pretty universal. That process is pretty much the same for everything you are going to pressure can except headspace, time and pressure (Your PSI will never change unless you love altitude).

After Processing Your Pressure Canned Green Beans

When time is up, simply turn off the heat and wait about ten minutes. After that you can move your canner off the burner. Some people move it before, some never touch it. It’s up to you. If I’ve got multiple canners going, I will pull mine off the burner.

You MUST let your canner depressurize naturally! This is none negotiable. At best, you will ruin your food. At worst you can warp your canner or blow up your kitchen. Let’s not do that.

Once the pressure lock drops you can remove ONLY the weight. Once the pressure lock drops and you have removed the weight, give it about ten minutes or so and then you should be able to crack the canner open.

There will be steam that comes out so please be careful. Leave the lid on for another ten minutes or so. The other way you can do it is just put your canner off to the side and let it set for about an hour to hour and a half. This should give it plenty of time to depressurize naturally. When in doubt, leave it alone.

Unloading Your Canner

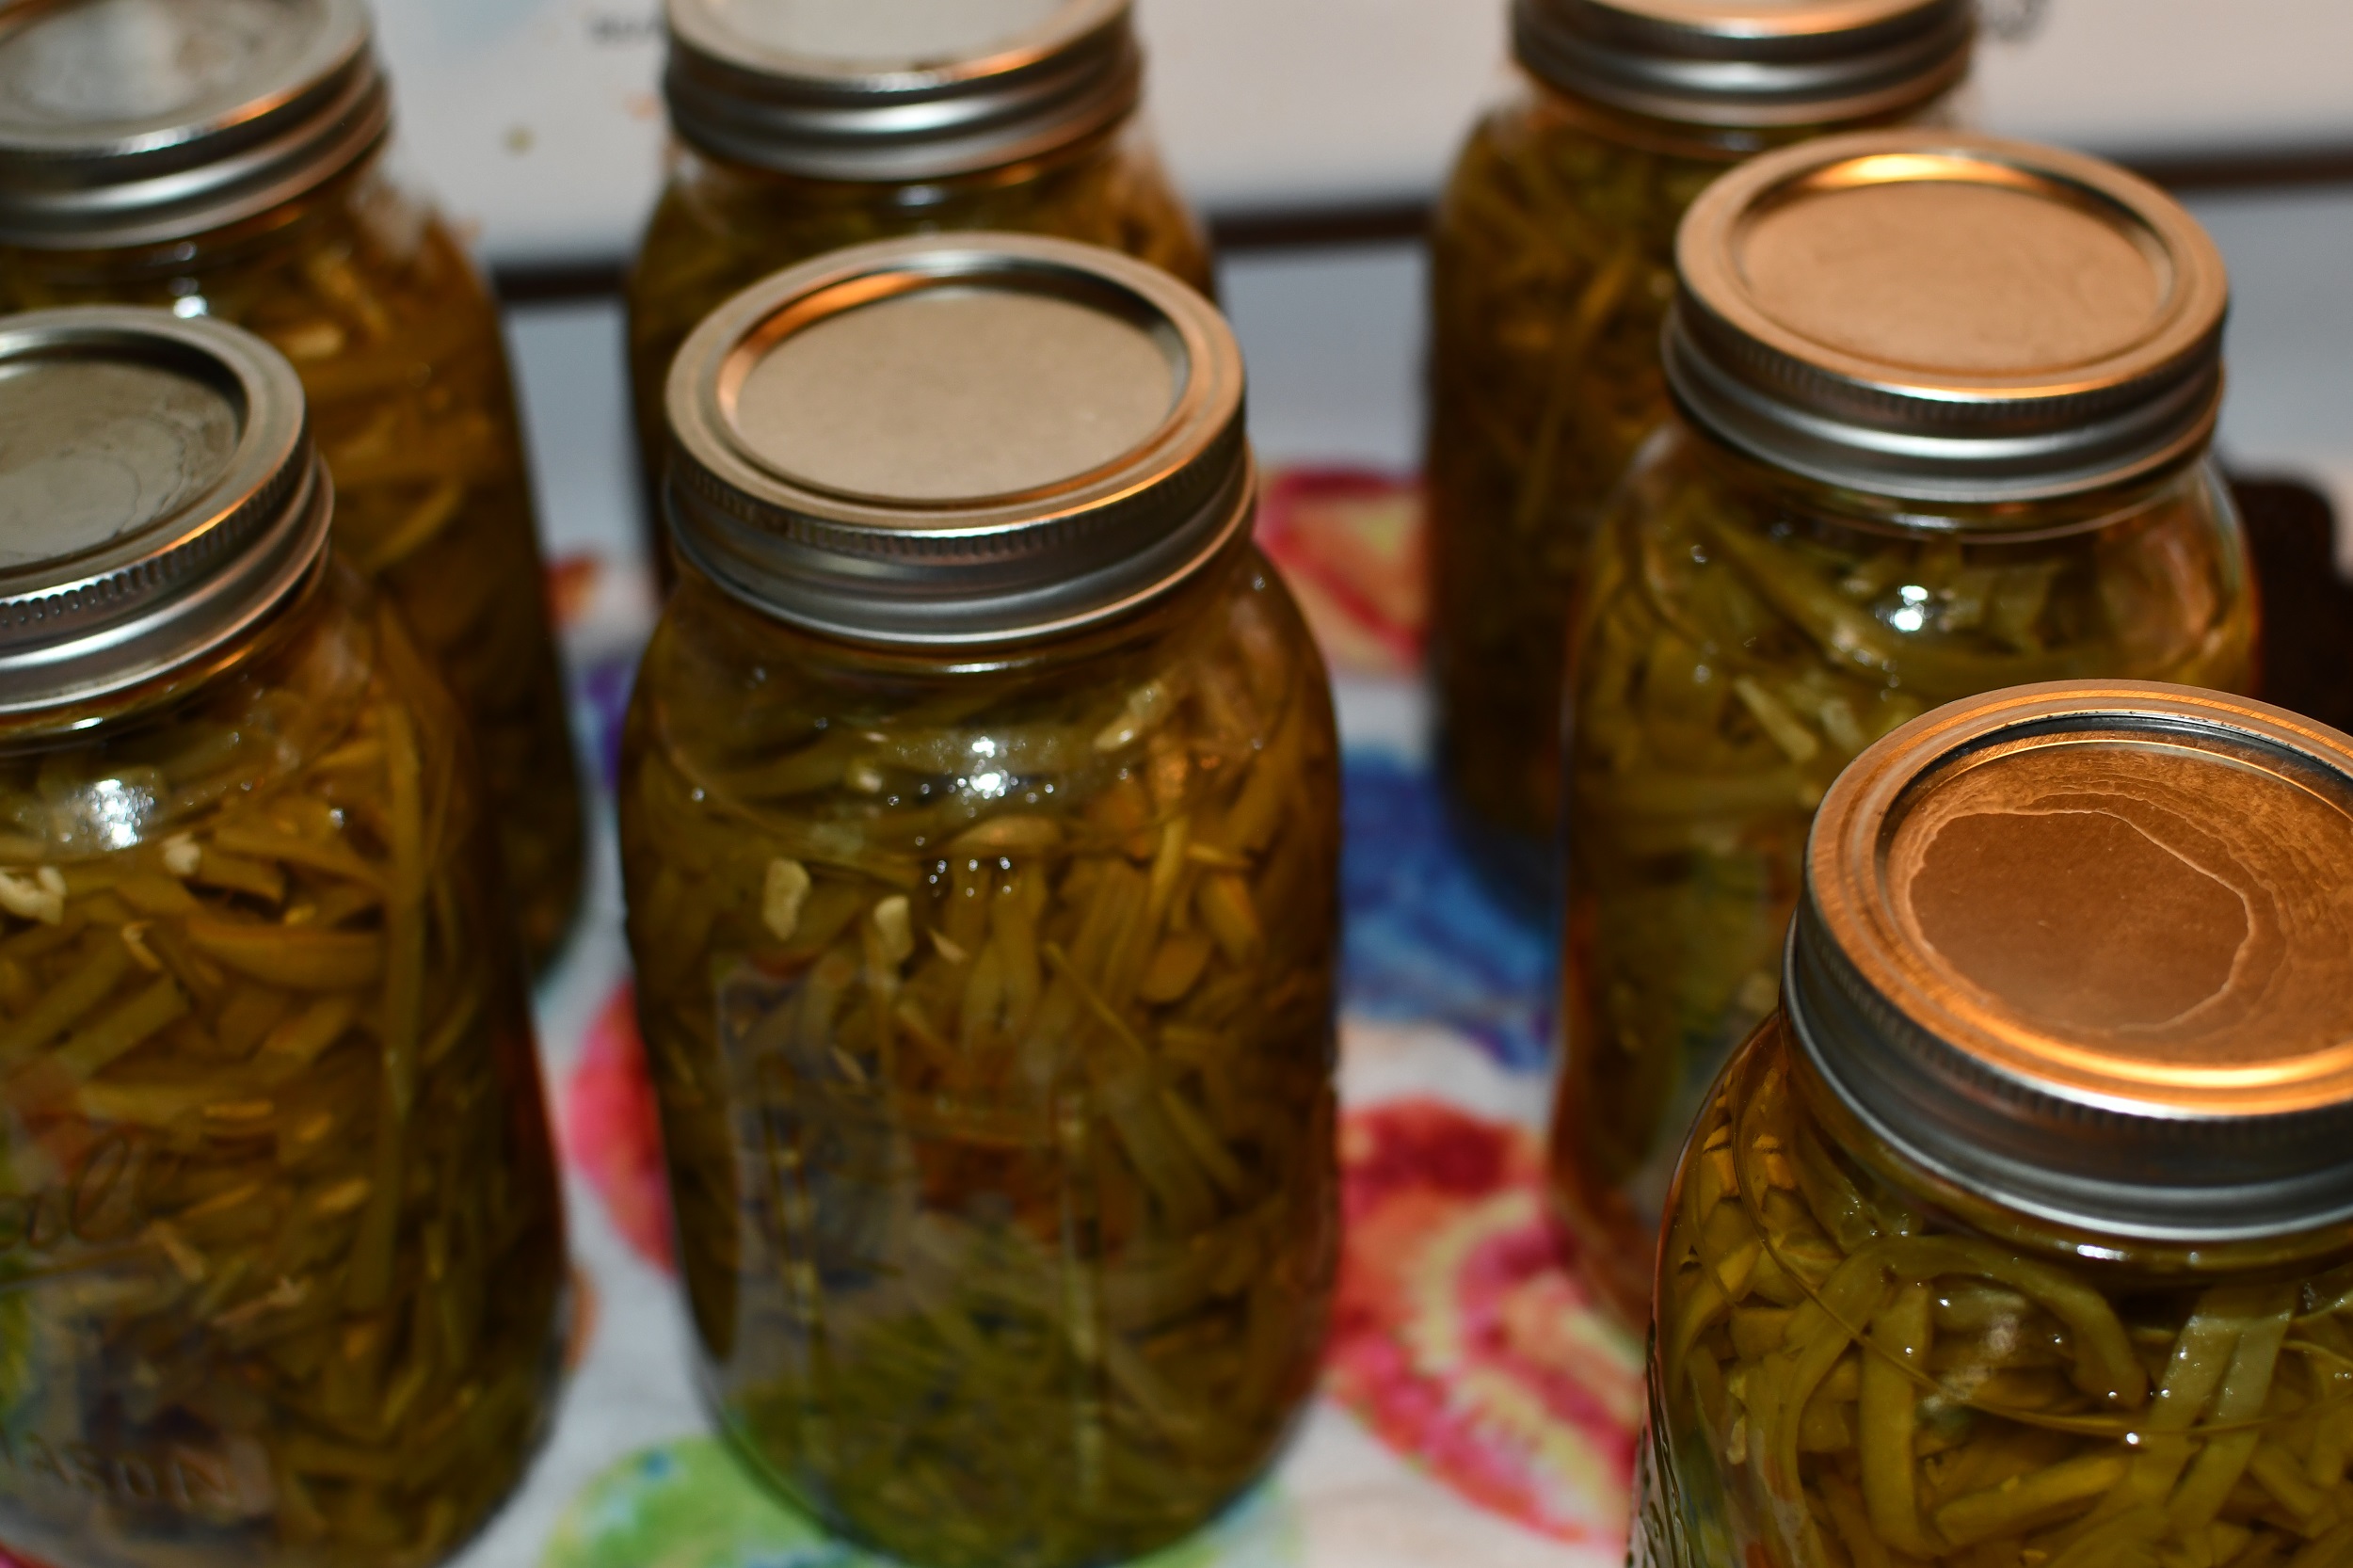
You can then take the lid off and carefully lift out the jars using the jar tongs. Again, be very careful. The contents of the canner and jars are still extremely hot. I put the jars on a folded towel to start to cool. Within 24hrs you will hear the sweet pinging of success! You can test your seal after 24hrs by pressing down on the lid. If there is give, it’s not sealed. If it sealed, you won’t feel or hear anything when you press it.

Anything that is not sealed needs to go into the fridge or be eaten within a couple of days.

Also, please, please, please remove your rings from the jars before storage. Normally, I am very much your kitchen, your rules. But on this one, I’m going to be a little more vocal…. The reason we remove rings from jars is because if that jar becomes unsealed for any reason, you will never know it if the ring is still on. As temperatures change in your storage area, seals can break. As bacterial get in and start growing, it could re-seal itself.

I’ve had a few jars that we forgot to take the ring off of and pulled months later? There was no way to tell that the lid resealed and the food inside looked perfectly fine. But there was a film on the top of the food. So be careful. Was the food safe, maybe? I wasn’t willing to risk it. So do yourself a favor and remove the rings.

But that’s it! You will love your green beans!

If you like the content I put out, feel free to buy us a coffee! It helps keep this site running, marketing and the goats in grain!

Buy me a coffee
Print Recipe
Print

Pressure Canned French Cut Green Beans

The best green beans that you can make and can yourself.
Prep Time6 hours hrs
Active Time2 hours hrs
Total Time8 hours hrs

Equipment

  • 1 Pressure Canner
  • 1 Canning Kit Funnels, Canning Tongs, and Debubbler
  • 1 Green Bean Frencher
  • 2 Cases of Quart Jars You can use pints but get double the amount
  • All Bowls and Stock pots You will probably need every last one by the time this is all said and done

Materials

  • 1 bushel Green Beans

Instructions

  • Snap your green beans by snapping off the top and bottom. Then snap them into desired lengths. I tend to snap mine in 2in sections but it's not a big deal if they are longer or shorter
  • Rinse beans well. I usually have a big stock pot full of water and I just throw the beans into that as I snap
  • Once you are either done snapping or you have filled your first pot, drain the water. Now you will start frenching. If you are using the crank tool then make sure you've got a pot under it. Start feeding your green beans through it.
  • When you arms feel like jello from cranking, take a break and fill up your pressure canner with water to per manufacture instructions. Mine says 3qts.
    Get it on the stove to start boiling.
  • Next start filling your jars with green beans. I tend to pack my jars pretty full. Fill with room temperature water, wipe the rim with a vinegar rag and place a lid and ring on it. Tighten ring to finger tight.
    Set it off to the side
  • Once you have a full canner of jars, gently set the jars into the canner. If the water is already boiling you can secure your canning lid. Follow manufacture instructions on using your canner. Every single one is different.
  • Process for 20 minutes for pints and 25 for quarts at 10# of pressure. Adjust for altitude.
  • When processing is over allow canner to depressurize naturally. This could take a couple hours depending on your model so be prepared.
  • Once canner is cool and safe to open, bring your jars out and allow them to cool. Listen for the ping and check your seals the next morning. Anything that doesn't seal, put in the fridge and eat within a couple of days.

If you like this post, feel free to share it and follow us below on our social media accounts!

  • Facebook
  • Pinterest
  • Instagram
  • YouTube
  • TikTok
  • Spotify
  • Threads

Filed Under: Canning, Canning Recipes, How To's Tagged With: Canning, cooking, green beans, Homestead, kitchen, pressure canning, Recipes

JOIN TO OUR MAILING LIST!

Leave us your email to receive new posts and special offers for members only! Don't miss a thing!

Recent Posts

  • Fall Garden Guide
  • Top Mistakes With Goats
  • How To Bond With Your Goats

Canning Dried Peas

April 27, 2024 by Leigh Leave a Comment

Jump to Recipe

I combed the internet looking for how to can dried peas and came up with very little. Most posts where about canning beans with a little footnote about canning dried peas. Below I’m going to walk you through the step by step process of how to take those little dried marbles and turn them into a shelf stable jar of food that saves me a ton of time.

goat kidding

Before we get too far into this, I have a great course on the basics of goat care. I call it Goat Crash Course: Goat 101. In this course, I explain things like types of shelter, types of feeds and hays, basic assessments and so much more! Check it out!

Buy Now

Why Not Buy Canned Peas At The Store?

The short answer is because it’s expensive. A single can of good quality peas is easily $1.50 by me, but I’m cheap and the store brand is usually about $.60. When I buy food, I buy a lot in one shot. So by the time all is said and done, I’ve spent about $15 to $36 on 24 15oz cans of peas. Is that a lot? No. But I feel better knowing that the only thing in my jar of peas is peas.

The other part is that whole dried peas are a ton cheaper as well. I can buy a 10# of whole split peas for $15. Plus, if they are kept “right” they can last for a long time on the shelf just like they are. If I don’t want to can 10# of peas in one go, I can put them in a mylar bag with some oxygen absorbers and store it.

The reason I choose to can dried peas is because dried peas take a LONG time to cook. I have zero desire to stand in my kitchen that long so I go ahead and can them.

Canning Dried Peas

This recipe is the one I came up with a couple years ago and just followed the guidelines for beans. If you are a strict follower of the Ball Bible? Maybe not follow this recipe. I found Ball’s recipe produces very mushy peas that did not hold well. Since I don’t mind breaking the rules and this recipe is mine, you take on all risks associated with following it. I’ve never had a problem in all the years I’ve canned like this, but I can’t guarantee your kitchen or skills.

This method of canning peas is called dry canning. I’m not really sure why because when you dry can potatoes, you don’t add any liquid, on this one you do. I think the difference between the two is that when you are done, your peas should have soaked up most of the water.

You can find all the supplies you need on this blog post.

Step 1:

You should always be in the practice of soaking your peas or beans. This helps get all the dirt and debris off your peas and that was in the bag. However, I’ve never soaked peas or beans because there has never been a problem. I do rinse them though.

Step 2:

If you have soaked your peas, GENTLY, scoop your peas with either a cup (for quarts) or half cup measuring cup (for pints) and put them in your mason jar. If you haven’t soaked them, you don’t have to be as careful but I wouldn’t be overly rough either. Also, I suggest wide mouth but whatever works for you. At this point you can add salt if you wish, we don’t. 1 teaspoon for quarts 1/2 teaspoon for pints.

Step 3:

I work in batches, so I only fill however many jars my canner will hold. Also, I only can peas in pint jars. I don’t have a lot of use for a quart of peas. So I will fill 10 jars with peas, then fill the rest with water leaving 1″ head space. This allows for expansion of the pea.

Save on Seeds

Step 4:

Fill your canner with the recommended water amount. My Presto 23-Qt with 3 quarts of water but be sure to check your manufacture recommendations. Then add your filled jars to the canner.

Step 5:

Bring your canner up to pressure by using your manufacture recommendations. I will usually fill my canner with 3 qts of hot water and put the burner on high. Then as my canner is reaching temperature, I will fill my jars with hot water. After about 5 minutes I will secure the lid. 10 minutes after that I add my weight. I process for meat times 90 minutes for quarts and 75 minutes for pints. For my altitude I use a 15# weight.

Logo 468x60

Step 6: When you are done processing your jars, let the canner naturally depressurize. This can take a long time but don’t rush it! Once it’s depressurized, you can use your jar grabber and take your jars out to cool on a towel. Make sure to label!

That’s really it!

Pressure Canning Dried Peas

I’m going to give it to you straight, you CAN can dried peas. But just because you can, doesn’t mean you should. Pressure canning dried peas creates a mush that is hard to get out of a jar. On top of that, they are extremely mushy and not a good texture.

I would not throw away the pints and pints of peas in my basement, because I think they could be put in stews or made into split pea soup. But to eat as a side? Probably not.

I will still purchase dried peas and I will probably put them in an instapot before I canned them again. Not my favorite way to enjoy peas.

That being said, I would definitely dehydrate or freeze them.

Can Dried Peas

Pressure Canning Dried Peas

Print Recipe Pin Recipe
Ingredients Equipment Method

Ingredients
  

  • 5 Lbs Whole Peas
  • Salt if desired

Equipment

  • 1 Pressure Canner
  • 2 Cases Pint Jars
  • Basic Canning Supplies

Method
 

  1. Rinse peas and disguard any rocks, bugs, etc that may be in the bag. I've never had this problem so to be fair, I don't usually rinse.
  2. Scoop 1 cup of peas into a quart jar or 1/2 cup into a pint jar
  3. Fill the rest of the way with water, making sure to leave 1" headspace
  4. Optional! Add 1 teaspoon for quart or 1/2 teaspoon for pint
  5. Fill your pressure canner with water to manufacture recommended level
  6. Add jars to canner
  7. Process for 90 minutes for quarts or 75 minutes for pints
  8. Allow canner to completely depressurize before opening
  9. Once depressurized, pull out jars and place on a towel until you hear the beautiful *ping*
  10. If any jars fail to seal, refrigerate and use within 4 days.
  11. Be sure to label your jars!

Filed Under: Canning, Canning Recipes, Recipes Tagged With: Canning, cooking, kitchen

JOIN TO OUR MAILING LIST!

Leave us your email to receive new posts and special offers for members only! Don't miss a thing!

Recent Posts

  • Fall Garden Guide
  • Top Mistakes With Goats
  • How To Bond With Your Goats

Easy Meal Prep Ideas

August 13, 2023 by Leigh Leave a Comment

Everyone knows that you should meal prep, right? We know that it saves money, it’s healthier, and can save a ton of time. But the reality is that sometimes, it’s absolutely…. boring. Some people can’t stand the thought of eating the same thing over and over again. Others love the ease of meal prep but just don’t have the time. Or if you’re like me, you have 3 jobs, homeschool, homestead and run a blog. I absolutely LOVE left overs, but I just don’t have a lot of time to make 2-3 different meals a day for 4 people for 5-7 days. I just can’t do it. But I am going to start this series why I meal prep, how I save money, and the ease of doing it. So let’s get started with my easy meal prep ideas.

easy meal prep ideas

Why Should You Meal Prep

The better question is, why don’t you meal prep? Is it because of time constraints or money concerns? The thought of making a week’s worth of veggies sound like a terrible idea? Maybe you don’t know how?

But I’ve got you covered! The meals that I will be dropping over the next couple of weeks will not take any additional time and will save you money. Well, unless you use a more expensive ingredient. The recipes are easy to follow, make and reheat. I feed 3 growing boys (yes, the husband is included there) on these meals and I’m not stranger to a good meal either.

At the end of the day, you should meal prep because it’s easier than constantly try to make various meals every night for dinner. Or figure out what you are going to do for lunch for the next week. The dreaded question of what’s for dinner is finally answered!

My Meal Prep

Well, first let me disclose my definition of meal prep…. it’s left overs. That’s it. But there is a lot more to it than that. First, when I make my meal plan (which you can see in our members only area), I look at the entire family’s schedule. For example, in July I worked about 100 hours a week between my three jobs. August wasn’t much better. Jared was working on my greenhouse and I didn’t want him to have to try to figure out what to do for dinner. So when I made my meal plans, I made sure that when I worked a 48 hour shift, I had plenty of left overs. Or when it was Jared’s turn to cook dinner, he had plenty of left overs to choose from. Or the random days that the boys were home alone for a few hours, they had virtually whatever they wanted.

Sign up below to receive access to multiple freebies. Look for an email with the password and instructions to access our members only area.

How I Meal Prep

Above I said I make a meal plan after looking at the schedules. But the easy part is that I double or triple the recipe. Yup, when I make tacos, I double the recipe so I can have tacos, nachos, or burritos. When I need to use up some eggs? I make a huge batch of my breakfast scramble. Then I end up with breakfast burritos or breakfast bowls.

easy meal prep ideas

Tools For Meal Prep

Containers

You can use whatever containers you want. Really, there is no wrong container to use. Well, if you use paper, they aren’t going to last long. But glass or plastic are good choices. I personally use these, these and these. When I meal prep, I am putting up anywhere from 2-20 meals. So glass isn’t an affordable option for me. However, one really good option is mason jars with plastic lids.

Labels

When you are meal prepping you want to know when you cooked something and what it is. Sometimes, it’s just not easy to tell what something is in a container. Or when you cooked that batch of rice. I like these labels because they have been pretty easy to use and remove. These are dissolvable which I like.

Misc. Items

I would recommend having huge stock pots whenever possible. When you are trying to mix up a batch of spaghetti in a small pot? Disaster. I have these in 22Qt and 20qt (I have 2 of these).

Also, grab an instapot. I have used it to cook a frozen chuck roast that are fall of the bone tender in just a couple hours. I’ve also made huge batches of beans, rice, etc. It’s a very handy little gadget.

Logo 468x60

Easy Meal Prep Ideas

I am currently working on the recipes for you guys. But like most of us that are looking to start meal prepping, I am insanely busy. I am working on the spaghetti first and will keep them coming as the weeks progress. But I wanted to give you ideas to get you started with your own meals that you already cook at home.

Kitchen Journal

Also, I highly recommend getting a kitchen journal. The reason is because you will find that something you make doesn’t freeze well. Or you find that you don’t like the taste of second day pasta. Or a certain recipe is fantastic when it is tripled. It’s better to write it down than forget it. Your journal doesn’t have to be anything crazy, I use these bullet journals for everything.

Make A List

I know you are probably hoping for some recipes. But before I start dropping those recipes, I want you to think about your own meals that you make. Do any of them taste good reheated? Write those down. Then I want you to think about your standard sides that you make every week. Write those down too. Things like pasta, rice, mixed veggies, mashed potatoes, roasted veggies, etc. How many of those can you make ahead? Then I want you to think about any combinations that you can put together. Once you have made your list, we are going to start brainstorming various ways to use it.

Combining For Easy Meal Prep Ideas

To give you some examples, my meal plan will look something like this:

Breakfast

S: Sausage, bacon, eggs, biscuits

M: Breakfast Bowl

T: Breakfast Burrito

W: Breakfast Bowl

Th: Breakfast Burrito

F: Breakfast Bowl

S: Slow Cooker French toast

Lunch

S: Pasta Salad

M: Steak with noodles

T: Steak sandwiches

W: Shredded chicken with rice and mixed veggies

Th: Steak Nachos

F: Spaghetti

S: mac n cheese with shredded chicken

Dinner

S: Steak with rice and mixed vegies

M: Spaghetti with garlic bread

T: Whole Chicken with noodles and mixed veggies

W: Tacos with Spanish rice and beans

Th: Pork chops with rice and mac n cheese

F: Homemade Pizza

S: Chicken Veggie Soup

easy meal prep ideas

Now before you get overwhelmed, because I KNOW it’s a lot, start with your dinners first. What are you going to have for the week? Once that is figured out, you can try to figure out what you want to do with your left overs. Or you can purposefully make extras so you can have them later.

Explaining My Easy Meal Prep Ideas

For example, on Sunday pasta salad is for lunch. Look at all the times you have pasta for the week. The answer is 8 times. While that may seem like a lot, and it kind of is, you are looking at 21 meals for the week. If you make rotini noodles like these, you can make all of your pasta at once. This is where that kitchen journal will come in handy. I know that one box of pasta is enough for lunch for our family. Also, I know that one box of pasta is enough for a side for my family. So by the time everything is all said and done, I only need 4 boxes of pasta for 7 meals and I need 2 or 3 for spaghetti night.

But you’re not going to add any sauce or seasoning to this pasta. Instead, you are going to make all of your boxes (except for the spaghetti night) and then toss the pasta with oil, and separate into containers. So if you used 5 boxes of pasta, you’ll use 5 bowls. Same with your rice.

Let’s check out meats next. I have steak 4 times on the menu. I talked about cow sharing here, and that’s the only reason I can afford to have steak as often as we do. But if you don’t cow share, this one may be a little more difficult. When I cook steak for the family, I usually do the “good” steak; ribeye, sirloin, etc. But when you are cooking in batches, a flank steak or round is just as good for steak nachos, or steak sandwiches.

Finally, Saturday night we are having chicken veggie soup. But the more accurate term would be a Brunswick stew. You know, the stew that puts everything but the kitchen sink in it? This soup is the end of the week, left overs are going to the pigs meal. Any unseasoned rice, no sauced pasta, meats, veggies, etc is getting added into this pot. And it is freaking amazing….90% of the time. Sometimes, it’s not very good and we just plan for a hodge podge meal of whatever is left over. The meal plan above would be a good hodge podge or stew. The combinations we have come up with over the years is unusual. Steak nachos with mac n cheese for example.

But What About Breakfast

Really, any meal that you can put in a crock pot is a winner at this house. For breakfast, I will usually start them in the evening before bed so it’s hot and ready in the morning. I have a tiny crock pot I reserve for this. I’ve done breakfast scrambles, french toast, oatmeal, etc and the all time favorite tends to be the scramble.

But usually what I do is pick a time where I am going to be off for at least 6 hours. Then I make 5# of bacon, 5doz scrambled eggs, 5# of southern style hashbrowns, 3# of sausage, and 3# of diced/ chunked ham. I cut the bacon to bite sized bits and cook everything separately. Then I get these bowls and assemble. It’s a ton of work. But it will literally feed us for months.

These bowls do great in the freezer and I pull out enough for Jared and I to take to work, as well as a couple extra for the boys. It’s a lot of work on the front end, but man does it save time in the mornings.

The Easy Part Of Easy Meal Prep Ideas

You don’t have to have entire boards on Pinterest to have easy meal prep ideas. Instead, look at what you are already making and see if you can make a little extra for lunch for a couple days. It doesn’t have to be Insta-worthy. It just has to feed you, save some money and be healthy.

I will keep posting recipes under this tag and category as well as on my other social media, which you can find below.

  • Facebook
  • Pinterest
  • Instagram
  • YouTube
  • TikTok
  • Spotify
  • Threads

Filed Under: Canning Recipes Tagged With: cooking, Eggs, Homestead, kitchen

JOIN TO OUR MAILING LIST!

Leave us your email to receive new posts and special offers for members only! Don't miss a thing!

Recent Posts

  • Fall Garden Guide
  • Top Mistakes With Goats
  • How To Bond With Your Goats
  • Animals
    • Chickens
    • Farm Dogs
    • Goats
  • Garden
    • Compost
    • Garden Projects
    • Seeds and Plants
    • Garden Journal
    • Working With Food
      • Recipes
      • Freezing Foods
      • Dehydrating Foods
      • Canning Tips And Tricks
        • Canning Inventory Sheets
  • Helpful Info
    • Welcome to the Homestead!
    • Emergency Preparedness
    • Frequently Asked Questions
    • Goal Setting
    • Project List
    • Shop Digital Products
      • Hay Calculator
      • Farm Expense And Income Tracker
      • Goat Crash Course: 101
      • Garden Journal Prompts
      • Schedule C Tracker
      • Schedule C Tracker
      • The Homestead Bundle
  • The Truths
  • Episode List
  • Start Here
    • Privacy Policy
    • Affiliate Disclosure
    • Let’s Get in Touch
    • Members Only Library
    • Welcome To Our Homestead

Footer

  • Email
  • Facebook
  • Instagram
  • Pinterest

COME AND GET IT!

Leave us your email to receive new posts and special offers for members only! Don't miss a thing!

· Midnight Theme

Copyright © 2026 · Midnight Theme on Genesis Framework · WordPress · Log in