• Skip to primary navigation
  • Skip to main content
  • Skip to primary sidebar
  • Skip to footer

Steel Raven Farms

Where muck boots meet ground.

  • Animals
    • Chickens
    • Farm Dogs
    • Goats
  • Garden
    • Compost
    • Garden Projects
    • Seeds and Plants
    • Garden Journal
    • Working With Food
      • Recipes
      • Freezing Foods
      • Dehydrating Foods
      • Canning Tips And Tricks
        • Canning Inventory Sheets
  • Helpful Info
    • Welcome to the Homestead!
    • Emergency Preparedness
    • Frequently Asked Questions
    • Goal Setting
    • Project List
    • Shop Digital Products
      • Hay Calculator
      • Farm Expense And Income Tracker
      • Goat Crash Course: 101
      • Garden Journal Prompts
      • Schedule C Tracker
      • Schedule C Tracker
      • The Homestead Bundle
  • The Truths
  • Episode List
  • Start Here
    • Privacy Policy
    • Affiliate Disclosure
    • Let’s Get in Touch
    • Members Only Library
    • Welcome To Our Homestead

Leigh

How Much Hay Does Your Goat Need?

March 2, 2024 by Leigh Leave a Comment

No matter where you live, there’s a really good chance that you will need to feed your goats hay to get them through winter. If you live in the south, you probably won’t need a ton. But if you have an actual winter, you probably want to make sure you have enough. To figure out how much hay you need, we’ll need to ask some questions first.

goat kidding

Before we get too far into this, I have a great course on the basics of goat care. I call it Goat Crash Course: Goat 101. In this course, I explain things like types of shelter, types of feeds and hays, basic assessments and so much more! Check it out!

Buy Now

Questions to ask yourself

How many goats do you have? How long do you need to hay your goat? Are you breeding your goats? What kind of storage do you have for hay?

I wish it was a simple equation but the reality is you don’t want to find out you were wrong in the middle of a snow storm. But I am going to give you the high points and what we do with our goats. By the end of this post, you can go into fall and winter with a rough idea of how much hay you’ll need.

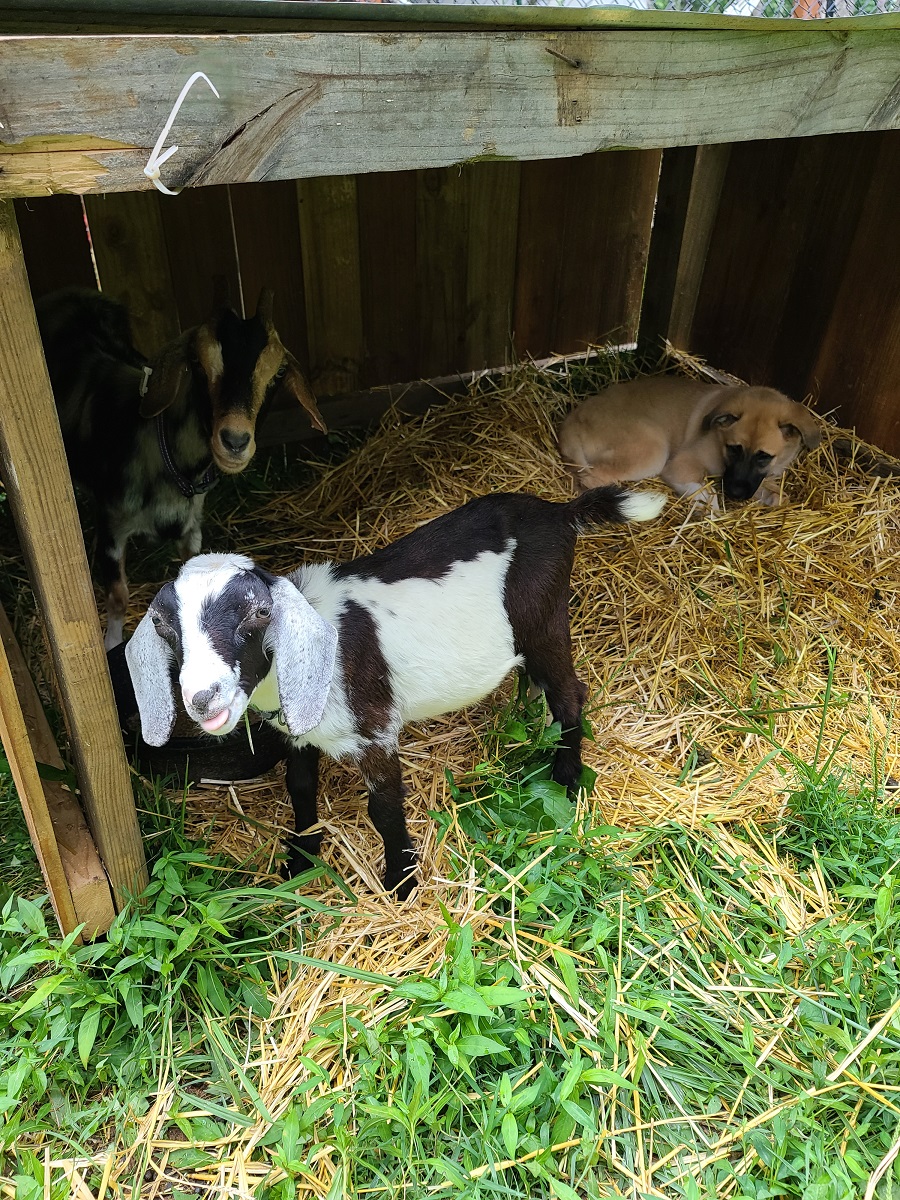
Oakley and Bailey the goats
Oakley and Bailey

Before we get started I want to address something. Yes, I am writing this post in March. Why am I writing a post about how much hay you need for winter in the spring? Because being prepared is key for getting your livestock through winter. It doesn’t matter if you are in a mild winter climate like Georgia, or being buried in feet of snow every winter like Alaska. Knowing how much hay your goats need will get your goats through winter without losing body condition or worst case, a goat.

Save on Seeds

How Many Goats Do You Have? And Are You Breeding?

The key to successfully getting your animals through winter is know how many mouths you are feeding and how much they should eat. While this may seem like a no brainer, you must also consider how many additional animals may be coming to your homestead. We ended up picking up two more goats in January, had we not planned for extra hay, we would have been short because we now have two more mouths to feed.

Bella scratching her side because her pregnant belly gets in the way

You also need to consider if any of your does are pregnant, or could become pregnant. If you only get the minimum needed for each goat, and now your doe needs more hay because she is pregnant, you will be short. Or worse case, you don’t have enough for when the babies are ready to eat.

Logo 468x60

How Long Is Your Winter? Where Are You Storing Your Hay?

In Georgia, we have an extremely mild winter. Sure it gets cold and wet, but it doesn’t snow a lot and we usually have some sort of greenery for goats to eat. It is certainly not enough for them to eat throughout winter, but we do have some grasses that will grow year round here. When we start figuring up how much hay we need, we look at how much we got last year, and how long that lasted us. We also figure up how many months we will use hay.

For us, we want the ability to start giving them hay by mid to end October and have enough to carry them to the end of April. Now, we don’t start getting cold enough for our pastures to start hibernating until probably November. Our grass also usually starts growing in March, but having that extra cushion allows us to not worry if we get a freak snow storm in March, which has happened.

Jared also built a hay barn that is about fifty feet from our goat barn. While that is certainly a pain some days, especially when it is raining. It adds a layer of security that if the hay catches fire, which it’s prone to doing, our goats are safe. We tweaked his original design so that it’s easier to load. He’s also going to make an opening so that the goats can still get hay if they run out.

So How Much Hay Do You Need?

The general rule of thumb is 2-4 pounds of hay per day per goat. Or if you know their weight, 2-4% of their weight per day. Before we start looking at how much hay you need, I have a hay calculator in our general store that will make all this math a LOT easier. All you have to do is put the weight of your animal (estimating is fine), the percentage you want to feed per day and the amount of days you want to feed for. On the second page, there is a hay tracker that allows you to see where you bought your hay previously, how much you bought, how much you spent and so on.

The Hay Calculator:

If you aren’t math-y (don’t worry I’m not either), check out our Hay Calculator. It literally does ALL of the math for you and gives you totals based on what you want your goals.

On the second page, you can track where you’ve bought hay, what you spent and how long it lasted.

Buy the Hay Calculator

So let’s crunch some numbers. When we ordered our hay this year we got fescue/ Bermuda mix and we got two strand square bales. We had four goats, but our Texas died before we actually started using the hay. But we figured that each goat weighed 50# and we wanted to make sure that we had plenty of hay. So our equation looked like this

50# x .04= 2#/ day

2#x4 goats= 8#/ day

30 days in a month x 8 months= 240 days

8#x 240 days=1920# of hay

Tractor Supply

I know two tons of hay sounds like a lot, and it is. But if we had minimized what we needed:

30# x .02= .6#/ day

.6#x4 goats= 2.4#/ day

30 days in a month x 8 months= 240 days

2.4#x 240 days=576# of hay

We would have run out of hay in December. Let’s not mention that we wouldn’t have had enough to feed the two new goats we got in January. So knowing these figures allowed us to figure out how much hay we needed and we actually rounded down to about 1600# of hay.

The Hay Calculator:

If you aren’t math-y (don’t worry I’m not either), check out our Hay Calculator. It literally does ALL of the math for you and gives you totals based on what you want your goals.

On the second page, you can track where you’ve bought hay, what you spent and how long it lasted.

Buy the Hay Calculator

Now the second question of where to put the hay comes into question. Because we didn’t have a place to put a round bale of hay, nor anyway to move it into the pens, we opted for 2 strand square bales. Not only did we not have space, but putting all our eggs in that basket seemed like a bad idea. If any portion of that round bale molded and we fed it to the goats, they could all die. So we went with square bales.

Jared built our hay barn so that we could house the hay without it getting wet but still had plenty of ventilation, which decreases the chances of it molding, composting, or any other nasty that would make it unusable. When we ordered our hay we ordered 28 bales of hay to get everyone though winter. That’s about 1600# and we only paid $200 for it.

Tractor Supply

This year we will have twelve goats to get through winter and we have been seeding our pasture to make sure they had plenty of options, especially in winter. To give you a break down of how much hay we are planning for and the corresponding math.

Our seven girls total weight= approximately 525#

Our five bucks/wether= approximately 600#

1125# goat x .04 & .02= 45# of hay/ day or 22# of hay/day

30 days x 45 (and 22)= 1350# or 660#

Logo 468x60

Long feed (September to April) X High Weight= 10,800#

Long Feed X Low Weight=5280#

Short Feed (November to March) X High Weight=6750#

Short Feed X Low Weight=3330#

If all of that is just a lot of information and hard to keep up with? Just head over to our hay calculator and you can purchase the much easier version.

Save on Seeds

Now we average the highest number and the lowest number: 10,800# and 3,300#= 7,050# of hay.

Why do we average it? Because they aren’t only going to eat hay. They get alfalfa pellets and grain as well. Plus they will eat branches, dead leaves, etc. So they won’t need the full 45# of hay per day. But they might. And as I said before, I would rather have too much than not enough. And let’s face it, they are going to waste a fair amount of it.

Is there an easier way to do this? Absolutely. I could just multiply by .03 instead but I like having the high and low numbers. If I am aiming for 10k # of feed and only hit 5k #, then I know I will have to buy extra grain, alfalfa pellets, or beet pulp.

So how much hay do you need to get through winter? Use the formula above to figure it out and remember, it is better to have too much than not enough.

If that was a little too much to handle, don’t forget you can use the hay calculator to make it a TON easier

The Hay Calculator:

If you aren’t math-y (don’t worry I’m not either), check out our Hay Calculator. It literally does ALL of the math for you and gives you totals based on what you want your goals.

On the second page, you can track where you’ve bought hay, what you spent and how long it lasted.

Buy the Hay Calculator

If you like the content I put out, feel free to buy us a coffee! It helps keep this site running, marketing and the goats in grain!

Buy me a coffee

If you like this post, feel free to share it and follow us below on our social media accounts!
  • Facebook
  • Pinterest
  • Instagram
  • YouTube
  • TikTok
  • Spotify
  • Threads

Filed Under: Animals, Frequently Asked Questions, Goats Tagged With: Goats, hay, Homestead

JOIN TO OUR MAILING LIST!

Leave us your email to receive new posts and special offers for members only! Don't miss a thing!

Recent Posts

  • Fall Garden Guide
  • Top Mistakes With Goats
  • How To Bond With Your Goats

Cleaning Cast Iron- The Easy Way

March 2, 2024 by Leigh Leave a Comment

I was reading a forum the other day that absolutely shocked me. A lady was freaking out because she had scratched her cast iron and the advise that she got ranged from “You can never use it again” to “It’s cast iron!” If cast iron can be handed down through generations and that’s all the old homesteaders and farmers had? There’s very little you can do to break it. Unless you get cheap cast iron. But cleaning cast iron doesn’t have to be hard or difficult.

The Ultimate Homesteader’s Starter Bundle – Only $47!

Get the tools you need to stay organized, track profits, and manage your homestead with ease!

Includes:
✅ Schedule F Tracker – Simplify tax prep
✅ Profit Calculator – Track earnings
✅ Hay Calculator – Plan livestock feed
✅ Garden Journal – Digital & printable
✅ Herd Health Tracker – Monitor animal care
✅ Simple Budget – Manage finances
✅ Backyard Homestead eBook – Essential tips

$99 value – now just $47! Start your homesteading journey today!

Buy Now

Cleaning Cast Iron Isn’t Rocket Science

Using cast iron isn’t hard. Cleaning cast iron is not hard. But for some reason there are a lot of people out there that think that this is the holy grail of pans that must not be tarnished and never used. Cast iron cookware has been around for thousands of years. They didn’t have rubber sponges, soft spatulas and other nifty gadgets we have today. So use it, clean it, and enjoy it.

PS: No cast iron was hurt in the making of this post. Although, I think Jared considered killing me when he saw the state of the skillet.

Logo 468 x 60

How to Clean Cast Iron

In my other cast iron post, I talked about how to cook with cast iron and briefly touched on how to clean it. This post is about the various ways to clean cast iron. None of these methods are wrong. In fact, some people throw their cast iron in the dishwasher *gasp*. Others use soap, the horror! But technically speaking, they aren’t wrong to do so. Lodge says “You can use a small amount of soap”, in their post about cleaning cast iron.

I do use soap to clean cast iron. But I cannot think of a reason that I would throw it in the dishwasher…. I’m sure I would though. Instead, what I do is a mix of different cleaning methods based off of how nasty the pan got.

When Jared saw this pan, I really thought divorce was coming. But he just raised his eye brow at me when I told him I was doing it for a blog post. He said, “fix it” and walked away. So that’s what I did.

The Ultimate Homesteader’s Starter Bundle – Only $47!

Get the tools you need to stay organized, track profits, and manage your homestead with ease!

Includes:
✅ Schedule F Tracker – Simplify tax prep
✅ Profit Calculator – Track earnings
✅ Hay Calculator – Plan livestock feed
✅ Garden Journal – Digital & printable
✅ Herd Health Tracker – Monitor animal care
✅ Simple Budget – Manage finances
✅ Backyard Homestead eBook – Essential tips

$99 value – now just $47! Start your homesteading journey today!

Buy Now

Cleaning Cast Iron: Step 1

If your pan is a caked, baked, and nasty, fill it approximately half way with water and set it to boil for about 5-10 minutes. As you are letting it boil, start scraping the bottom of the pan to help get everything unstuck.

Boiling water in ANY pan allows the pan to heat up without any additional scorching to the food stuck inside it. As you become accustomed to cooking and cleaning cast iron, you will find that the hotter the pan, the less things stick to the pan. Which is pretty cool.

During the boiling
After boiling and rinsing.

Step 2:

Scrape off any stuff that still stuck on the bottom of the pan with a scrubber or scraper. I use one like this. If the mess in the pan isn’t that bad, I will skip the boiling step and just scrape the pan. Either way the pan is clean and that’s what matters.

The downside to using a chainmail scrubber is that it can scratch the seasoning. So being very diligent in your seasoning after use is going to be key here.

Step 3:

Now we add a fat of your choosing. I like avocado oil because it has a higher smoke point and that is really important when breaking down the oil and getting it to start seasoning the pan. But you can use grapeseed, corn, peanut and canola.

Save on Seeds

This step is very important for creating that glassy, non stick surface. But again, there are a million different ways that people season their pans. Some put a thin layer of oil on a paper towel and smear it all over the pan, some put a dollop of oil in the pan (shown below) and heat the pan. I don’t think it matters as long as the pan is hot and that oil moves around to coat the pan.

The Ultimate Homesteader’s Starter Bundle – Only $47!

Get the tools you need to stay organized, track profits, and manage your homestead with ease!

Includes:
✅ Schedule F Tracker – Simplify tax prep
✅ Profit Calculator – Track earnings
✅ Hay Calculator – Plan livestock feed
✅ Garden Journal – Digital & printable
✅ Herd Health Tracker – Monitor animal care
✅ Simple Budget – Manage finances
✅ Backyard Homestead eBook – Essential tips

$99 value – now just $47! Start your homesteading journey today!

Buy Now

Some people also do this in the oven to allow for the entire pan to heat up, spread the oil, and bake in. Again, it doesn’t really matter. As long as the oil gets into the crevices of the pan, you are good to go.

Step 4:

Once the oil has moved around the pan and coated the bottom and sides, let the pan cool. If I can touch the handle, I will wipe out the excess oil and allow to finish cooling until it’s safe to hang up.

Add some oil and coat the bottom and sides of the pan
Nice glassy surface and it’s ready for storage

Tips for Cleaning Cast Iron

Pre-seasoned cast iron

If you have just bought your cast iron and it came pre-seasoned, go ahead and just repeat steps 3 and 4. I normally season a brand new pan 2-3 times before I am ready to use it. In my head, that pan is not seasoned enough for use. If I don’t want to go through the seasoning process, I just cook bacon in that pan for a couple of weeks.

Stuck on messes

For stubborn stuck on messes that boiling and scraping aren’t getting off, I will take salt and some water and scrub with that. Sometimes, it just needs a little extra muscle. This is very rare. If that doesn’t work, you can use salt and a half lemon. You’ll need to rinse thoroughly and then season multiple times but it should get it off.

If it is super stuck, I bring out the big guns. I use oven cleaner (outside) and wash with Dawn dish soap. My goal is to strip the pan down as far as I can and start the seasoning process over. I’ve had to do this with a couple of pans that got too nasty for regular methods to work.

Restoring cast iron

If you are getting a yard sale find, or Granny has given you a pan that came from the basement, I would put a sheet of aluminum foil on the rack of the oven and set it to 500. Put the pan upside down and let it go for about 2 hours.

If you have a self cleaning oven, use that setting. Be warned it will smoke like crazy and stink to high heaven. If you have the option of doing on a grill outside, I prefer that way. After that, just repeat steps 3 and 4 until there is a nice layer of seasoning on the pan. It will take time and maybe a few repeated attempts.

Logo 468x60

It is not hard to clean cast iron from the left and make it look like the right. Just a little bit of patience and elbow grease and you will have a pan that will last you and your family a life time.

If you like the content I put out, feel free to buy us a coffee! It helps keep this site running, marketing and the goats in grain!

Buy me a coffee

If you like this post, feel free to share it and follow us below on our social media accounts!

  • Facebook
  • Pinterest
  • Instagram
  • YouTube
  • TikTok
  • Spotify
  • Threads

Filed Under: Working With Food Tagged With: cast iron, cooking, Homestead, kitchen

JOIN TO OUR MAILING LIST!

Leave us your email to receive new posts and special offers for members only! Don't miss a thing!

Recent Posts

  • Fall Garden Guide
  • Top Mistakes With Goats
  • How To Bond With Your Goats

March Garden Chores

March 1, 2024 by Leigh Leave a Comment

Y’all!!! Spring is here! Well, that depends on which meteorological or astronomical seasons. But regardless, spring is either here or coming up soon! Can you tell I’m excited? The spring garden doesn’t usually do well for us here in the Southeastern US. But there is still a ton of stuff to do and I’m here to give you my March garden chores so that you can prepare your garden.

Are you getting overwhelmed in the garden? Stressed? Or just not enjoying the garden like you used to? Check out our garden prompts! We send out weekly emails that get you back in the garden and out of your head! Turn the garden back into a place of love and joy instead of frustration and headache!

Subscribe Now!

March Garden Chores

March starts the crazy season for us on the homestead. But the March garden chores can be broken down into 3 main categories: seeding the garden, cultivating the beds, and building the garden. This is also the same time that I am still gathering any tools that I may need that I didn’t get in February. While that may seem kind of lame after I just said it’s a crazy season, but keep reading and I’ll explain.

Seeding The Garden

This is hands down the most time consuming thing when it comes to the garden. Not only does it take a lot of time, it also takes a lot of mental energy. You’ve got to figure out how many seeds you are going to start, how many cups you have, how much space you have, etc.

For me, I use Seedtime to help me figure out exactly how many seeds to plant and when to start them. Seedtime has definitely made my weekly garden task list easier to manage and less of a guessing game. The garden planning feature is great on it’s own, but I tend to throw my plan out the window during the height of planting….. It’s something I’m working on.

If you are interested in learning more about my favorite garden planner. I highly recommend Seedtime! This planner has been instrumental in helping me plan out my gardens with WAY more efficiency than I could ever expect! It has also reduced overwhelm, stress, and calmed my ADD/ADHD!

More Info!

The other big part about seeding the garden is making sure that I actually have plenty of stuff to start seeds. This year, we are selling plant starts, so not only am I starting all of our seeds for our family and farmer’s market produce, but I’m also starting seeds for plant sales.

That means I need to make sure that I have plenty of pots, trays, seeds, soil, and compost. I use these seed trays, these pots, and these carry trays from Bootstrap Farmer for our personal plants and farmer’s market produce. I use these pots from Grower’s Solution for all of our plant starts that we are selling.

Logo 468x60

Cultivating Garden Beds

This is going to look different from year to year depending on your own beds. This year, we completely changed our big garden. We are installing raised beds throughout the garden to help build the soil faster. There were a lot of reasons that went into building raised beds, but at the end of the day, we now have to cultivate them.

What is cultivating? In short, it’s just preparing the beds for planting. That may look like breaking the soil just enough to be able to get your plants in there, pulling weeds, or amending beds.

In the kitchen garden, cultivating looks like taking a couple loads of goat bedding and soil to each bed and filling them up a bit more.

In the big garden, we won’t start cultivating beds until closer to April. This is mostly due to the fact that we haven’t gotten them built yet…. oops.

But the biggest part about cultivating is making sure that all the weeds are out, leaves from fall are moved to the compost pile, and you are ready to plant.

cropped-3.jpg

Are you looking for garden journal prompts, but aren’t interested in a weekly email? Check out our 365 Garden Journal Prompts! This is an amazing, all in one, yearly product that you only pay for once.

Buy Now!

Building The Garden

If you are in March, your garden should already be built. BUT if you’re anything like us, you are probably still building your garden because the timeline got pushed until the breaking point. In our defense, we both work full time jobs, homeschool and February-April is kidding season. So we are slammed trying to get everything done.

We start planting our gardens around April 15th, pending a frost free 10 day forecast, which means every single bed must be built, filled and prepped by April 1st. If we are not building beds, like in our kitchen garden, it looks like repairs, cleaning up, adding compost, soil, or animal bedding.

Building the garden also looks like fencing, gates, seating areas, trellising, and other supports. So even if you aren’t building beds, you may need to be thinking about and sourcing these items. We may not be able to get the gates installed, so we will end up falling back on using pallets. That means that I need to get ahold of pallets and gate hardware. Or figuring out how to get cattle panels to the farm and then up up for trellising.

Our big garden is also getting a gazebo/ pergola this year. In fact, we can’t even finish building the back left side of the garden until the gazebo is built. We are doing this to make sure that we have PLENTY of space between beds and aren’t trying to squeeze things where they don’t fit.

Gathering Tools

Everyone is different when it comes to their planting times. That means that you may not be ready to start seeds yet. But you still need to start gathering up any tools, pots, soil, compost, seeds, etc. If you are a new gardener, you may not know exactly what tools you need. Or maybe you’re not ready to start your own seeds. That’s totally cool.

The main tools that you will need are a good set of pruners (I prefer Fiskars brand). There are a ton of different kinds of pruners, but getting a small and larger set will get you started. I would also suggest getting at least two… you will lose them.

I would also suggest a good set of hand tools. I’m not saying you should get this set, but I would suggest that you get at least the hand trowel, cultivator and large trowel.

March Garden Chores: Planting!

For us, we are usually able to start planting stuff in March. I’ll be planting carrots, broccoli, cabbage and cauliflower around the first of the month. Hopefully, our cool nights will allow us to actually get a harvest….

What are your March garden chores?

If you like the content I put out, feel free to buy us a coffee! It helps keep this site running, marketing and the goats in grain!

Buy me a coffee

If you like this post, feel free to share it and follow us below on our social media accounts!
  • Facebook
  • Pinterest
  • Instagram
  • YouTube
  • TikTok
  • Spotify
  • Threads

Filed Under: Garden Tagged With: Canning, compost, Garden, seeds

JOIN TO OUR MAILING LIST!

Leave us your email to receive new posts and special offers for members only! Don't miss a thing!

Recent Posts

  • Fall Garden Guide
  • Top Mistakes With Goats
  • How To Bond With Your Goats

What Does Homestead Mean?

February 27, 2024 by Leigh Leave a Comment

There is no hard fast definition for what homestead means. For some people a homestead means completely off grid with no reliance on anyone but themselves. Others believe that homesteading means growing their own vegetables. But as time goes on, the meaning changes for those people as well. Regardless of what this means to others, I am going to tell you what homesteading means to me and what it has come mean as well.

The Ultimate Homesteader’s Starter Bundle – Only $47!

Get the tools you need to stay organized, track profits, and manage your homestead with ease!

Includes:
✅ Schedule F Tracker – Simplify tax prep
✅ Profit Calculator – Track earnings
✅ Hay Calculator – Plan livestock feed
✅ Garden Journal – Digital & printable
✅ Herd Health Tracker – Monitor animal care
✅ Simple Budget – Manage finances
✅ Backyard Homestead eBook – Essential tips

$99 value – now just $47! Start your homesteading journey today!

Buy Now

What Does Homestead Mean

Well, the formal definition of homestead I pulled from Oxford Dictionary is:

“A house, especially farm, and outbuildings.”

The good thing about that definition is that it’s as broad and vague as how homesteaders, or aspiring homesteaders define homesteading.

Really, any piece of property can be a homestead! You don’t HAVE to have hundreds of acres. You can homestead on a city lot or out in the country.

What Does Homestead Mean To Me?

At first, homesteading meant a way to take care of my family without relying so much on others. The thought of being at the mercy of grocery stores to have my food was slightly worrisome. If we couldn’t get food, where would we be? Not having access meat, veggies, fruit, dog or cat food, has the potential for disaster. There were a ton of holes in our food security.

It meant learning skills and building a legacy for my children. Things like building barns, fences, and gardens. It meant learning how to cook from scratch.

Delicious biscuits

Learning Skills Ma Ingle Would Have Been Proud Of

From scratch cooking is surprisingly easy. I wonder if we were raised to believe that it was so much harder so that there was more reliance on boxed and canned meals. Since being on the homestead, we have learned a ton when it comes to cooking, canning, and other food related skills.

Homesteading can mean bringing animals into this world, learning how to milk and make cheese and processing animals. It means learning to depend on yourself in ways that you never really valued or thought you could do.

I learned that if I can raise my own hens, I can get eggs that I don’t have to go to the store for. I could raise my own meat birds and rabbits to help save on meat costs. Also, I learned that if I learn to preserve those things, I can have them on stand by and make everything easier.

Save on Seeds

Sometimes meanings change

But as time has gone by and the continued strain on our supply chain, homestead has come to mean other things as well. It means being prepared and stocking up on items that we use a lot of: coffee, tea, noodles, canning jars and lids, and other necessities. Making sure that we have enough supplies if another snow storm hits. Will we have plenty of firewood, canned food, and fuel for the chainsaws and other equipment?

If you are a farmer/ homesteader and looking for a way to track your income and expenses, I highly recommend our Schedule F Tracker! We have been using it for years and it is the easiest, fastest and best way that we have found to keep track of the money spent on the homestead.

Buy Now

Homesteading means community. We realize that we are stronger together and we stand with our neighbors when times are good and we help pick them up when they have hard times. It’s knowing that they will stand with us in our hard times too.

Logo 468x60

It has also come to mean finding random eggs in the hay barn, playing with goats, and impatiently awaiting the arrival of Champ’s babies.

Update: She gave us a beautiful doeling that we named Stella.

It means caring for the new chicks that will not only give us eggs but also lay our next meat chickens. Homesteading means learning new skills, facing challenges, and not giving up. It means doing the things you thought you couldn’t, only to realize that you are more than capable of building fences, buildings, and fixing all the things.

Poor Champ is uncomfortable as she comes to the end of her pregnancy.

What Homesteading Doesn’t Mean

I can tell you that homesteading doesn’t mean judging others. Whether you have a quarter acre in the city or a hundred acres in the country, you are still homesteading regardless of if you purchase your food from a grocery store or farmers market, or if you grow your own.

It doesn’t mean being unaffected when creatures die or need to be butchered. For some people, taking the life of a chicken is okay, but it still affects them in some way, even if it’s only gratitude.

The Hay Calculator:

If you aren’t math-y (don’t worry I’m not either), check out our Hay Calculator. It literally does ALL of the math for you and gives you totals based on what you want your goals.

On the second page, you can track where you’ve bought hay, what you spent and how long it lasted.

Buy the Hay Calculator

Homesteading doesn’t mean easy. There is no part of this life that is easy. If you are hauling lumber for a barn or feed to your animals, homesteading is hard work. It can be heart and back breaking when you have to put down your favorite bottle baby because she got sick.

You can’t be lazy and a homesteader. There is simply too much to do. Gardening, canning, working with livestock and more, there is not a ton of downtime. But when you see the fruits of your labor? It’s worth every aching joint, pulled muscle, cut and bruise.

New Chicks

What Does Homestead Mean?

I don’t know that homesteading has a meaning. I think homesteading is a spirit. It’s the spirit of being less dependent on the power grids, grocery stores, and other commodities. These people who want to homestead do it because they want to be independent. Whether that is a completely or partially independent, is not the point. Homesteaders simply want to take care of themselves and their community. Which is what homestead means to us.

Banner 468x60

I think that as long as people want to take ownership of their little plot of land, we will keep the spirit of homesteading alive. I think as long as people desperately want to learn the skills of their ancestors, they will lead a full and productive life. And I think that as long as we are here fighting for our community and independence, we will see the resurgence of a way of life that mixes the old with the new. And we will be better for it.

What does homesteading mean to you?

If you like the content I put out, feel free to buy us a coffee! It helps keep this site running, marketing and the goats in grain!

Buy me a coffee

If you like this post, feel free to share it and follow us below on our social media accounts!
  • Facebook
  • Pinterest
  • Instagram
  • YouTube
  • TikTok
  • Spotify
  • Threads

Filed Under: Animals, Canning, Chickens, Garden, Goats, How To's, Our Homestead, Pigs Tagged With: Animals, Homestead

JOIN TO OUR MAILING LIST!

Leave us your email to receive new posts and special offers for members only! Don't miss a thing!

Recent Posts

  • Fall Garden Guide
  • Top Mistakes With Goats
  • How To Bond With Your Goats

Bringing Goats to the Homestead

February 24, 2024 by Leigh Leave a Comment

I could write a million blog posts on my goats. In fact, I have an entire category created for them, including our breeding pages. They are amazing creatures that really do make everything better. When I am stressed, upset, or just need a breather, I head to our goat pens and just hang out with them. They are seriously my favorite critter on the homestead. But it wasn’t always the case. Bringing goats to the homestead wasn’t my first choice, but I’m really glad we did it.

goat kidding

Before we get too far into this, I have a great course on the basics of goat care. I call it Goat Crash Course: Goat 101. In this course, I explain things like types of shelter, types of feeds and hays, basic assessments and so much more! Check it out!

Buy Now

Before Goats Came To The Homestead

When we were set to actually close on our homestead, we knew we wanted to raise rabbits, chickens, maybe a pig or two. But I had done some research on goats and I was pretty resistant to the idea. I’m sure anyone that wants to homestead has heard that goats are escape artists. They will find the smallest of holes and your entire herd is gone. We have heard that they eat everything and are hard to kill. Or my personal favorite, goats are entry level livestock. Uh, no. This is wrong. Except the escape artist part.

Save on Seeds

After all of that research, I quickly realized that goats were a lot more work than I wanted to start with on the homestead. We would need to have two because they get lonely. They cannot eat everything, in fact more things will make them sick then they can actually eat! The fencing had to be waterproof and even then they would still get out. This is not how I want to start this adventure.

Bellatrix and Voldemort

But Jared Wanted Goats

While we were working on clearing fencing and brush, Jared says, “Let’s get goats. They will be like long term lawn mowers.” After the research I had done, I really didn’t want to. But I really dislike telling Jared no. So off we went to get goats.

If you are a farmer/ homesteader and looking for a way to track your income and expenses, I highly recommend our Schedule F Tracker! We have been using it for years and it is the easiest, fastest and best way that we have found to keep track of the money spent on the homestead.

Buy Now

We got two mini Nubians simply because we liked the way they looked. But we had absolutely no clue what we were doing. We wanted animals that were going to eat brush and very low maintenance. That is not what we got.

Not Entry Level Livestock

Voldemort came to us loaded with worms. The guy we got him from said they treated him and said he would be fine. We got Bella and V on July 4th and by end of July, he was dead. When we took him to the vet the day prior, she said she had never seen a worm load as high as his was. We were told to prepare for him to die.

Barber pole worms attach to the lining of the intestines so when the worms died off, there was a very high chance that he would bleed out internally. If that didn’t kill him, the dewormer we were forced to use, may kill him. He died the next day.

Since goats are herd animals, they will escape to find a new herd. Bella was without a friend for four days. In those four days, I was scrambling to find a new goat, she escaped three separate times. But, I found three new goats to bring to the homestead. Midas came first but he was a Drama King! Seriously, he was a nightmare for a brand new goat owner!

Drama King

Then Champion and Texas came the day after Midas. We were doing okay at that point. We got everyone together after a quarantine, which I didn’t know was a thing until Midas’ breeder told us. Que a hasty fence build. But we were getting there. We were learning and I was doing all the research I could on them. I had officially fallen in love with them!

What we learned about goats:

That day at the vet, we learned all about FAMACHA scores, dewormer resistance, and basic care of goats. But I was heartbroken. Bella was, and still is extremely skittish, but V? He wanted all the love. He was so sweet. When we lost him, I told Jared that I wanted to sell Bella. I couldn’t stand the heartbreak of losing another goat. But he wanted to keep trying.

Tractor Supply

Then tragedy struck again. Texas got really sick. We had no idea. I posted on one of my Facebook groups about how he was fading and I didn’t know what to do. Unfortunately, we were not prepared and we lost him the next morning.

Education is king

Since then, I have turned into a goat nerd and have read every thing I can get my hands on about goats. I am part of several goat groups on Facebook and we have an amazing vet. Now, I feel like I have a better handle on what is going on with these babies. At least now I have people and resources that I can use to help keep my babies healthy.

Save on Seeds

I don’t think anyone can learn all there is about goats. They like to create new ways of un-aliving themselves. Jade just learned that she can jump on top of our propane tank. Finn learned the hard way that jumping off of things leads to hurt shoulders.

goat kidding

Before we get too far into this, I have a great course on the basics of goat care. I call it Goat Crash Course: Goat 101. In this course, I explain things like types of shelter, types of feeds and hays, basic assessments and so much more! Check it out!

Buy Now

Since bringing home our first goats, our herd has grown to 12. Here in a few months we will be welcoming two new does to start our meat goat program. We have also fought off six different cases of mountain laurel poisoning.

We came through all of this because we learned.

Banner 468x60

A Year Later

In the year since owning goats, we have learned a ton. I have helped pull two of the four kids born on the farm. We learned how to train goats on a milk stand. How to flip dominant goats to make sure they don’t hurt you. We’ve also learned that giving goats injections is totally different than giving them to humans. We learned how to castrate.

We’ve learned how much hay we need, what kind of foods they love, how to tell if they’re in labor and so much more.

Goats are seriously amazing and I do highly encourage people to get them. They are really cool critters that have amazing personalities. But they are not entry level livestock. They will escape. Goats die WAY easier than anyone lets on. But man they are so much fun!

The Hay Calculator:

If you aren’t math-y (don’t worry I’m not either), check out our Hay Calculator. It literally does ALL of the math for you and gives you totals based on what you want your goals.

On the second page, you can track where you’ve bought hay, what you spent and how long it lasted.

Buy the Hay Calculator

If you like the content I put out, feel free to buy us a coffee! It helps keep this site running, marketing and the goats in grain!

Buy me a coffee

If you like this post, feel free to share it and follow us below on our social media accounts!

  • Facebook
  • Pinterest
  • Instagram
  • YouTube
  • TikTok
  • Spotify
  • Threads

Filed Under: Goats Tagged With: Goats, hay calculator

JOIN TO OUR MAILING LIST!

Leave us your email to receive new posts and special offers for members only! Don't miss a thing!

Recent Posts

  • Fall Garden Guide
  • Top Mistakes With Goats
  • How To Bond With Your Goats

Quieting The Pantry

February 20, 2024 by Leigh Leave a Comment

I talked about starting a stricter diet at the end of last year (December 2023) and there are some truly amazing things that have happened as a result. I’ve lost some weight, which is always nice but never my goal. I noticed a significant improvement in my stomach pains, bloat, etc. But the coolest part about this stricter diet is the quieting the pantry.

Quieting In The Pantry

The Ultimate Homesteader’s Starter Bundle – Only $47!

Get the tools you need to stay organized, track profits, and manage your homestead with ease!

Includes:
✅ Schedule F Tracker – Simplify tax prep
✅ Profit Calculator – Track earnings
✅ Hay Calculator – Plan livestock feed
✅ Garden Journal – Digital & printable
✅ Herd Health Tracker – Monitor animal care
✅ Simple Budget – Manage finances
✅ Backyard Homestead eBook – Essential tips

$99 value – now just $47! Start your homesteading journey today!

Buy Now

Quieting The Pantry

In October 2023, I got really sick. Like, overnight stay in the hospital sick because I couldn’t stop vomiting. They had me so doped up on anti-psych meds (because you can’t puke if you’re unconscious) and I was still vomiting through them. Finally, we were able to get it somewhat under control and they started me on some pretty stout meds to take home for “correcting” the stomach acid, easing the vomiting, etc. But I knew that if I wanted to get better, I needed to change my diet.

Diets Vs Lifestyle Changes

Now, I’ve said it before that we eat “healthy” about 85% of the time. Sometimes, we just can’t because of our jobs. Other times, because of stress. But for the most part, we don’t consume a lot of junk food. Things like soda, candy, and other overly processed foods are a treat if they ever happen at all.

I started looking into various “elimination diets” as a way to heal my gut. But all of the diets seemed to be a band aid. Think about it, you diet to lose weight. Or maybe you diet so that you can figure out what is causing an issue (me). But at the end of the day, a diet means that you plan on going back to the way you were eating after the thing is corrected, with maybe a couple of adjustments. But that’s not what I wanted.

I wanted to completely, maybe even radically, change the way we were eating. Even if it was only one step at a time. I wanted to move my family away from the loud pantry.

What Is A Quiet Pantry?

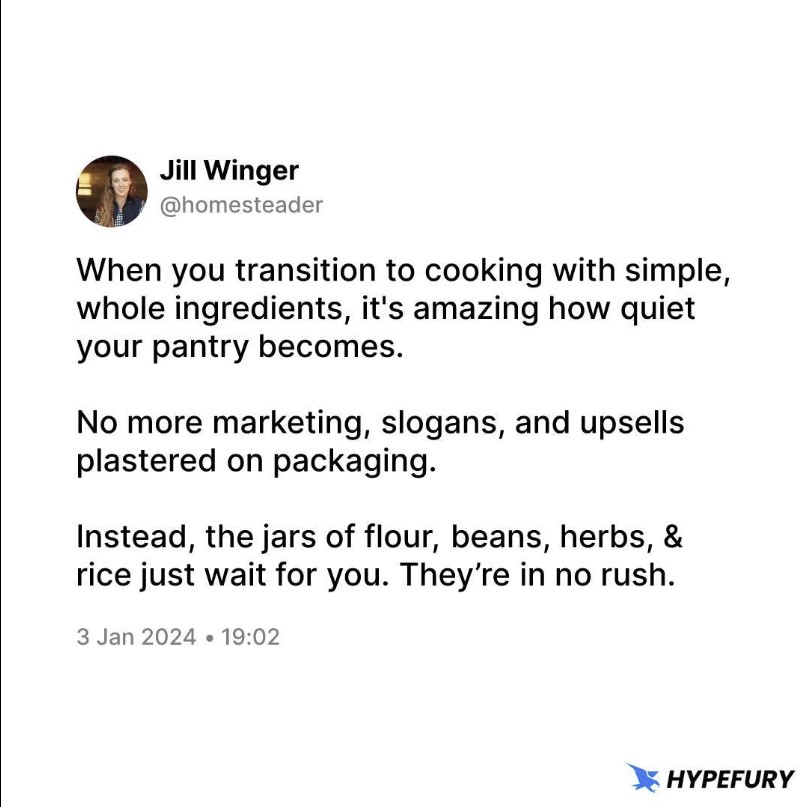
Well, to be honest, I didn’t know what a quiet pantry was until I had one. Jill Winger over at The Prairie Homestead nailed the one feeling that I have been coming back to over the last several months. But I just couldn’t put my finger on why I felt so much better opening my cabinets. My pantry, now full of jars of rice, soups, dehydrated veggies, and many more simple ingredients, had become quiet.

As I look at my pantry, I don’t see the hydrogenated oils masquerading as cheese. Or quick boxes of pasta that somehow only needed a few ingredients from me to turn into a “delicious” meal. I no longer see “quick”, “easy”, or “ready to serve” keywords jumping out at me. The bright packaging has been replaced by clear jars. Where you can clearly see what you are getting. And as odd as it is, the stress of figuring out what’s for dinner has just about vanished.

Now, I am not the type of person to throw out food. I will continue to use it until it’s gone or I will give it to the chickens. But over the last several months, there are less of those keywords in my pantry. It’s so cool, opening my cupboards and seeing jars and jars of dried beans, flour, rice, and other simple ingredients. And the fact that I know how to cook with them!

If you are new to heating with firewood and are looking to master the finer points of it. We’ve got a great eBook that goes in depth of what tools you should consider, how and where to stack, how to build a fire and so much more!

Buy Now

When I tell you that figuring out what to do for dinner has gotten easier, it really has. But not in the way you’re probably thinking. When you get stuck in the drag of “quick”, “easy”, or “ready to eat” your creative energy gets stuck in neutral. I’ll go over more of that below.

Quieting The Pantry Has Extended To The Fridge

I am a coffee junkie. Actually, to be fair, I am a creamer junkie. I absolutely love flavored creamers. My favorite was Cinnamon Toast Crunch from Coffee Mate. But in 2021-2022 it was difficult to find, then as time went on, it was harder and harder to find other creamers that I liked. I will make my own creamers from goat milk, but if I don’t have goat milk, I don’t have creamer. When I got sick in October, I knew that the first thing to go needed to be the creamer.

goat kidding

Before we get too far into this, I have a great course on the basics of goat care. I call it Goat Crash Course: Goat 101. In this course, I explain things like types of shelter, types of feeds and hays, basic assessments and so much more! Check it out!

Buy Now

Why? Well, most commercial, flavored creamers are not actually diary. Those creamers are mostly oil and most oils are made from either soy or corn…. Do I need to go on?

After cutting the creamer, I started really looking at the rest of the stuff in the fridge. Y’all, I didn’t realize how much junk was in my fridge. Looking past the creamer, we also had a ton of sauces, marinades, and other processed stuff. It really opened my eyes to just how much junk we were still consuming. But it also clued me in to how much we were still relying on the store for things that I can make.

And The Freezer!

I don’t know how your freezer looks. But in our freezers, it looks like about 90% meat. But there are still a fair amount of packing. Not as much as it could be, and it’s definitely a lot better than what I was expecting. But realizing just how much of the non-meat products in there were probably not good for us either. I love frozen corn, but the vast majority of corn bought from a store is going to be GMO. I don’t think I need to go in depth about why that isn’t ideal….

The Ultimate Homesteader’s Starter Bundle – Only $47!

Get the tools you need to stay organized, track profits, and manage your homestead with ease!

Includes:
✅ Schedule F Tracker – Simplify tax prep
✅ Profit Calculator – Track earnings
✅ Hay Calculator – Plan livestock feed
✅ Garden Journal – Digital & printable
✅ Herd Health Tracker – Monitor animal care
✅ Simple Budget – Manage finances
✅ Backyard Homestead eBook – Essential tips

$99 value – now just $47! Start your homesteading journey today!

Buy Now

Freeing Your Creative Energy

When you allow the quieting of the pantry to actually take affect, it forces you to become more creative with dinner. And as weird as it sounds, it makes figuring out what’s for dinner a lot easier. For example, you can transform basic rice into chicken flavored rice with chicken bullion or stocks. Add in some peppers, beans and corn (non-gmo of course) and you’ve got dirty rice. Throw in some shredded chicken or andouille sausage and you’ve got a meal.

By giving yourself the creativity to make dinner fun, you end up with some really fun recipes that are quick, easy, and HEALTHY!

Last night, we had chicken tacos. They were absolutely delicious and not one thing came out of a box, can or packaging. No taco seasoning packets, plastic wrapped tortillas, or box and packet of flavoring for the rice.

The other really cool thing about having these very basic staples in your pantry is that when you know you’ve got something getting ready to go bad, you can plan a meal around it. Or you just need to use up the very last of this item, you can just throw it in the pot. To give you an example, every week I make a Brunswick stew style dinner. This is literally any fresh produce that is about to turn, or the very last bit of dehydrated leeks that need a home.

cropped-3.jpg

Are you looking for garden journal prompts, but aren’t interested in a weekly email? Check out our 365 Garden Journal Prompts! This is an amazing, all in one, yearly product that you only pay for once.

Buy Now!

Grocery Shopping Is Cheaper!

For years, we have been conditioned to think that eating from scratch or “healthy” is too expensive. And yes, it can be. When you are talking about getting two weeks worth of groceries and half of your meals are “quick”, “easy”, or “ready to eat”, yea it’s going to be more expensive. Or when $75 of your food budget goes to creamer **raises hand** yes, it’s going to get expensive.

Since the quieting in the pantry, I have cut our grocery budget in half. Now, some of that is because we have bulk purchased rice, beans, sugar, etc. But the other part of that is because I am more deliberate in what I am buying. I am not buying prepackaged meals, or cans of soup. We are also using more meat instead of filling the plate with over processed junk.

Quieting The Pantry Takes Time

You can absolutely go nuts and clean out the pantry, fridge and freezer. Or you could slowly use everything up. I’m not going to tell you how to cook your dinners. But I will say that if you are not a strong cook, it can be VERY difficult to move away from packaged foods and dinners.

To be honest, I’m kind of in between a strong cook and great cook. There are a lot of meals that I do really well… Tacos for example. But there are still others that I am learning. When you walk into ANYTHING that you are learning, please give yourself grace. Your dinner may not look just like the recipe. That’s okay! Just don’t give up!

If you like the content I put out, feel free to buy us a coffee! It helps keep this site running, marketing and the goats in grain!

Buy me a coffee

If you like this post, feel free to share it and follow us below on our social media accounts!

  • Facebook
  • Pinterest
  • Instagram
  • YouTube
  • TikTok
  • Spotify
  • Threads

Filed Under: Working With Food Tagged With: cooking, Eggs, Goats, Homestead

JOIN TO OUR MAILING LIST!

Leave us your email to receive new posts and special offers for members only! Don't miss a thing!

Recent Posts

  • Fall Garden Guide
  • Top Mistakes With Goats
  • How To Bond With Your Goats

Our Best Dual Purpose Chickens

February 17, 2024 by Leigh Leave a Comment

When we first brought chickens to the homestead, we started with 25 chicks. As we became victims of chicken math, we have grown our flock to about 50-75…. They are really hard to count. While I don’t LOVE the thought of dual purpose chickens, there is a need to have a good solid laying hen, that can produce good meat animals. So, these are our best dual purpose chicken breeds.

The Ultimate Homesteader’s Starter Bundle – Only $47!

Get the tools you need to stay organized, track profits, and manage your homestead with ease!

Includes:
✅ Schedule F Tracker – Simplify tax prep
✅ Profit Calculator – Track earnings
✅ Hay Calculator – Plan livestock feed
✅ Garden Journal – Digital & printable
✅ Herd Health Tracker – Monitor animal care
✅ Simple Budget – Manage finances
✅ Backyard Homestead eBook – Essential tips

$99 value – now just $47! Start your homesteading journey today!

Buy Now

Why More Chickens?

Bringing more chickens home is a multi-layered answer. First, we sell eggs. That means that we need more eggs than our current eight hens can keep up with. Seriously, I’ve got a wait list going on. Second, we want to be able to hatch chicks and sell those babies to others. Third, and most sensitive to people, we want meat. Having the additional 24 laying hens will up our production in all of those areas. Since the third reason is so controversial I want to briefly touch on it.

We eat meat, as I am sure many of us do. But with the rising prices of everything, the cost of meat is skyrocketing. I don’t know about you but I can’t afford to keep having to fork out hundreds of dollars a month on meat. And going vegetarian is not a viable option either. Let’s not mention the living conditions of some of these chicken houses. You can read more about my choice to raise our own meat chickens here.

But to expand a little more, when you raise meat chickens you normally hear about the Cornish X. These birds are not genetically modified but they have been bred from several other breeds of chickens to get big as fast as possible. That’s fine with me. We raised fifty of them over winter. But I’m not going to lie, they don’t taste good.

I’m not sure if it’s because they were allowed to free range, we waited to butcher a little too long or what, but I’m not a fan of the meat. But to keep with the point, my issue with the Cornish X is: what happens when I can’t order them? I want to close the holes in our food security as much as possible. So having to order them from a hatchery doesn’t make a lot of sense.

Banner 468x60

So we made sure to order chicks that are all dual purpose breeds. We have Dark Brahmas, Sussex, Ancona, Dorking, Black Cochins, and New Hampshire’s. They are also pretty good egg producers with a mix of cream, white, and brown eggs. Lastly, we made sure to get a couple of breeds that are good mothers. We wanted to have the ability to leave the eggs and let them hatch them out.

cropped-3.jpg

Are you looking for garden journal prompts, but aren’t interested in a weekly email? Check out our 365 Garden Journal Prompts! This is an amazing, all in one, yearly product that you only pay for once.

Buy Now!

Our thinking was, if the power goes out for several days (which we are prone to here), we don’t want to rely completely on an incubator. I’ll keep you up to date on how they are doing but for now, they are warm, happy, and loving their box.

Our Best Dual Purpose Chickens

Speckled Sussex- Our Sussex’s have been absolute rockstars when it comes to doing chicken things. They have been fantastic in the garden and have single “winged” taken out about half of our Japanese Beatle population. They are also fantastic mothers. Sussex are a fairly fast growing chicken with good meat to bone ratio. But be forewarned, it takes them about 6-8 months to get to a decent size.

Black Australorp- I have to say, I don’t really care for the Australorp. They are not very friendly and tend to be pretty flighty. But they produce great eggs and hit a good butcher weight faster than the Sussex. Honestly, I would love to get more of these guys, but having them panic and run away from us is a big sticking point for me.

Barred Rock- This is my second favorite dual purpose chicken. The biggest down side is that they really are a laying chicken more than a meat chicken. They take forever to get to a decent butcher weight. But they will absolutely rock it with eggs. Plus they are a classic sight on the farm.

At the end of the day, any animal is a meat animal. The question becomes is it worth it to butcher them? Because if they are laying a ton of eggs but they are tiny? Keep letting them lay eggs. You could get more meals out of the eggs than the meat. But if they are eating a ton of food and only producing a couple eggs a week? It’s to the freezer.

You have to make that distinction.

The Next Generation

Since the original publication of this blog post, all of the girls are doing fantastic. We’ve had a few issues with predators, but nothing since losing our favorite fluffy foot (black cochin). We are starting to get some eggs from them as well.

We’ve also had a lot of success with our incubator and it has yielded us several roosters which will be butchered with the meat ducks… If I can get Jared to do it. If he can’t, I’m not really sure what we are going to do. I guess in the end we will have 10 jumbo pekins that we have to keep a close eye on for health issues.

The best part about this next generation is the peace of mind. I knew what I was trying to do when I ordered them. I wanted to create a system that reduced our dependence not only on the grocery store, but also hatcheries. To see that actually happening is pretty awesome.

The Ultimate Homesteader’s Starter Bundle – Only $47!

Get the tools you need to stay organized, track profits, and manage your homestead with ease!

Includes:
✅ Schedule F Tracker – Simplify tax prep
✅ Profit Calculator – Track earnings
✅ Hay Calculator – Plan livestock feed
✅ Garden Journal – Digital & printable
✅ Herd Health Tracker – Monitor animal care
✅ Simple Budget – Manage finances
✅ Backyard Homestead eBook – Essential tips

$99 value – now just $47! Start your homesteading journey today!

Buy Now

If you have any questions feel free to ask and I’ll get back to you. If you like this post feel free to share it on all your social media.

If you like the content I put out, feel free to buy us a coffee! It helps keep this site running, marketing and the goats in grain!

Buy me a coffee

If you like this post, feel free to share it and follow us below on our social media accounts!
  • Facebook
  • Pinterest
  • Instagram
  • YouTube
  • TikTok
  • Spotify
  • Threads

Filed Under: Animals, Chickens Tagged With: Chickens, Chicks, Eggs, Homestead, kitchen

JOIN TO OUR MAILING LIST!

Leave us your email to receive new posts and special offers for members only! Don't miss a thing!

Recent Posts

  • Fall Garden Guide
  • Top Mistakes With Goats
  • How To Bond With Your Goats

How We Cook With Cast Iron

February 13, 2024 by Leigh Leave a Comment

I don’t know about the rest of the world, but I know here in the south cast iron is king… or queen. Either way it rules the south with an iron fist and for good reason. Cast iron is easily the most versatile item in your kitchen. No need for six million pans, one cast iron skillet and a good Dutch oven/ stock pot is really all you need.  Big dinner or small, it can do it all. Yes, it’s corny but it’s true. There are so many benefits to cast iron that it is definitely worth using. Here’s why we cook with cook with cast iron.

Cast Iron Is King

For years I have been a firm believer in my non stick skillets and other cookware. Unfortunately, it doesn’t really last that long. We’re talking five years tops before the coating comes off the pan and into our food. Not to mention that most non stick coatings are toxic. After listening to me complain for years Jared, being from the south, asked, “Why not cast iron?”

The Ultimate Homesteader’s Starter Bundle – Only $47!

Get the tools you need to stay organized, track profits, and manage your homestead with ease!

Includes:
✅ Schedule F Tracker – Simplify tax prep
✅ Profit Calculator – Track earnings
✅ Hay Calculator – Plan livestock feed
✅ Garden Journal – Digital & printable
✅ Herd Health Tracker – Monitor animal care
✅ Simple Budget – Manage finances
✅ Backyard Homestead eBook – Essential tips

$99 value – now just $47! Start your homesteading journey today!

Buy Now

Why Not Cast Iron?

The main reason was simple: I’m not used to it. I grew up with everything crappy pots and pans to the best of the best. We wrecked every one of them. So when we made the move to the homestead, out went the non stick and in came the cast iron. The learning curve was huge. I had no clue what I was doing. But with Jared and YouTube’s help? I’ve got the glassiest cast iron on the planet. Well, not quite but we are getting there.

If you’re anything like I was, you have no idea what the best brand is, how to use it, or even how to cook with it. Rest assured, I’ve got you covered. After a ton of research, I could tell you just about everything when it comes to brands and oil. What’s the best, the worst, and the in between. But the reality is that it’s a lot of information. Or, I could just tell you what I did and you can take some of the learning curve out of it.

What Brand to Buy?

Well this one is pretty simple. Lodge. I don’t say this lightly, remember we beat the crap out of every single product that comes into this house. It has to stand up to that. So far my Lodge pans are the only ones that have done that. The other reason I’m a fan of Lodge is because I can find it at pretty much any store. Living in a rural community, that is important to me. I don’t want to have to go around the world to find what I need. Almost every town has a Wal-Mart or at least the next town over does, so it’s easy to find. If you live in an area where stores are minimal, here are some links to the cast iron I bought from them.

Lodge Pre-Seasoned 12in Cast Iron

Lodge 12in double handle pan (corn bread pan)

Lodge 13in Cast Iron

You can also buy them on Amazon here. If you are only looking for one or two to start with I suggest this one and this one.

If you are just starting out cooking with cast iron, I don’t recommend going to the yard/garage/junk sales. The reason I say don’t is this; do you know how to strip, grind, and season? If not, then maybe not start there. Let’s set you up for success instead of frustration and possible failure.

Wall with cast iron pans

Just be forewarned, it is addictive . You will end up with all the cast iron!

How To Cook With Cast Iron?

Again, it’s pretty simple. Turn on your burner, put your cast iron on it and add your fat. Once the pan is hot, start cooking. That’s pretty much it.

But You’ve Heard….

You’ll see groups, posts, articles, etc that will tell you that you can only cook certain things in cast iron. You’ve probably heard that you can’t use soap. Or that there are rules as to what can go into cast iron. Y’all! It is simply not true! I cook everything in cast iron. Everything! Gumbo, fish, eggs, you name it, it goes in the cast iron. I have used *gasp* soap on my cast iron. I’ve burnt cinnamon rolls on my cast iron…. Though that one almost ended in a fight between the hubbins and I….oops.

Maybe you’ve heard that you can’t use cast iron on electric stoves or glass top stoves? Literally, none of these things are true. But I feel like some guidelines would be helpful to those that don’t know anything about cast iron.

Cast Iron Guidelines

I was going to say rules, but I believe that rules (especially around cooking) are made to be broken. So here are some of my guidelines for cooking with cast iron.

Acidic Foods- Tomato bases, lemon juice or vinegar bases, and the like, should be treated with caution. I still do it, all the time in fact. But I make sure to clean, scrub and season my pan after every use. It’s not something I’m super worried about

Limited or No Soap- I’m not going to go in depth about using soap here because I go over it more below, but I feel like it needs to be repeated. If you are going to use soap on cast iron, try not to use harsh soaps that “cut grease”. You will wreck your seasoning with prolonged use. I use Mrs. Myers soaps on my cast iron and it hasn’t wrecked the seasoning.

Truly Non Stick- Uh, unless your pan has been used many times, seasoned many times, and so on. Your pan is probably not going to be non stick for a minute. It takes time to build up the layers of seasoning. I can cook eggs in my pan without them sticking, but not when we first got them. So make sure you are using a good fat and heating up your pan before cooking.

What Fat to Use?

This is totally up to you. I prefer the higher smoke points. For example: avocado oil has a smoke point of 520*. Grapeseed oil is 420*. Olive oil is 375*. Why is this important? The smoke point is when the oil starts to break down. The best temperatures to season cast iron is over 400*. That being said, I normally reach for grapeseed oil when searing, seasoning, or just general cooking.

Logo 468x60

Clean Up

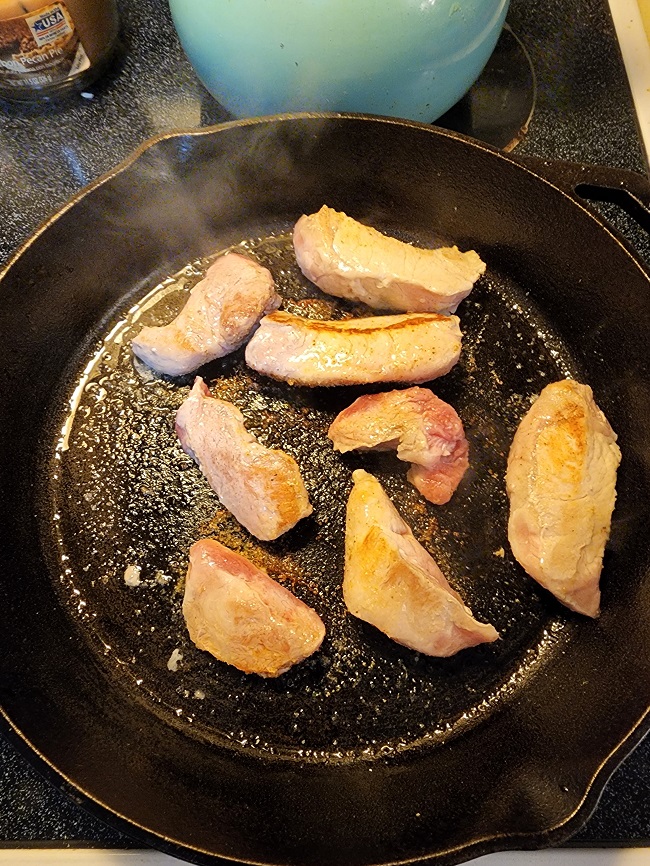
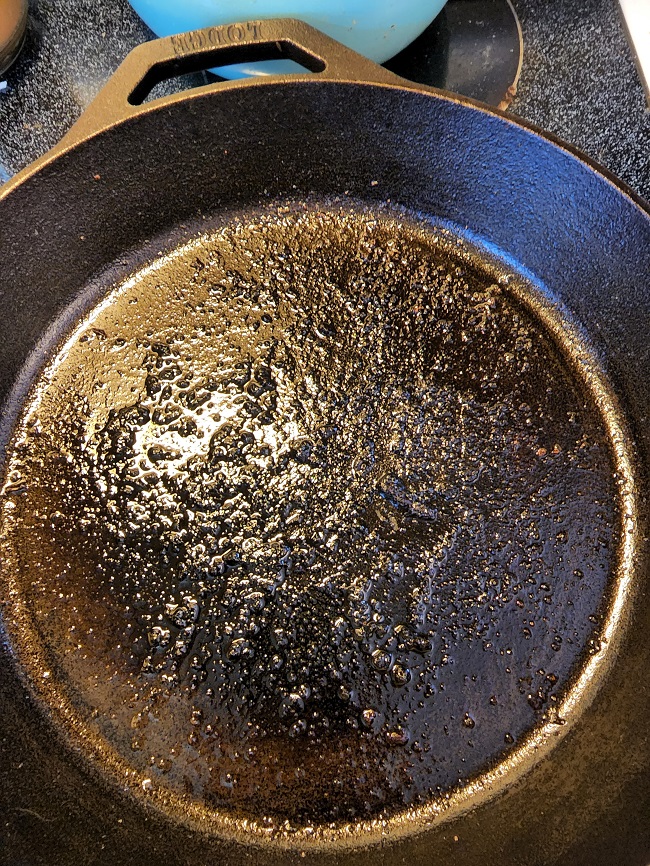
Clean up is just as easy as using it. However, you will hear every possible way to clean your cast iron. Jared boils water in it to help loosen up whatever is stuck on and then after a good rinse he will re-season it. I scrub whatever is stuck on off with one of these these. Other times, I will boil…. And even other times, I will was it with soap. It really all depends on what is going on with the pan and what we cooked.

When you have scrubbed off all your dinner and wiped it out, put back on the stove heat it back up, add a light smear of fat and let it absorb. Once that oil is moving, turn off the burner and let it cool. Once you can comfortably touch it, wipe out that excess oil and store it.

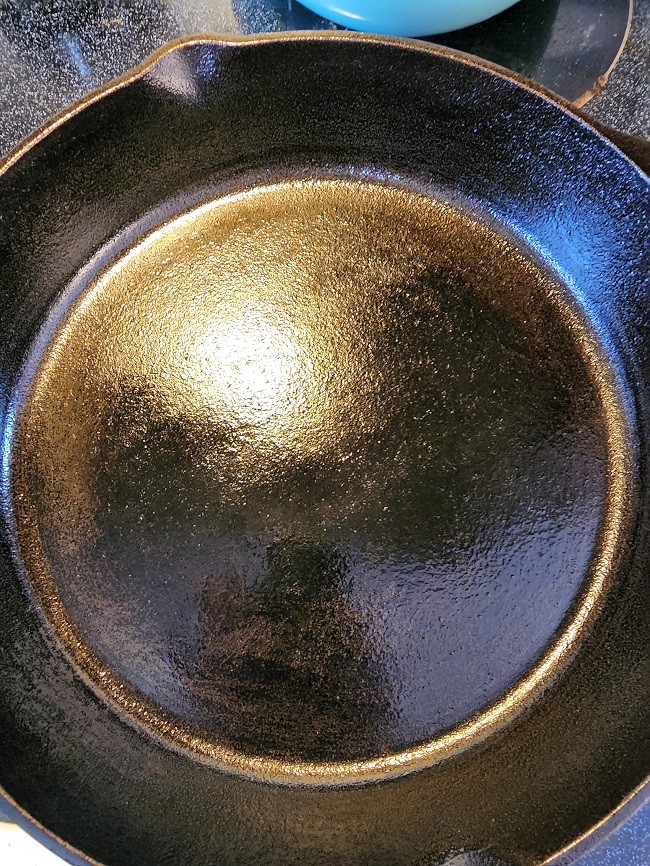
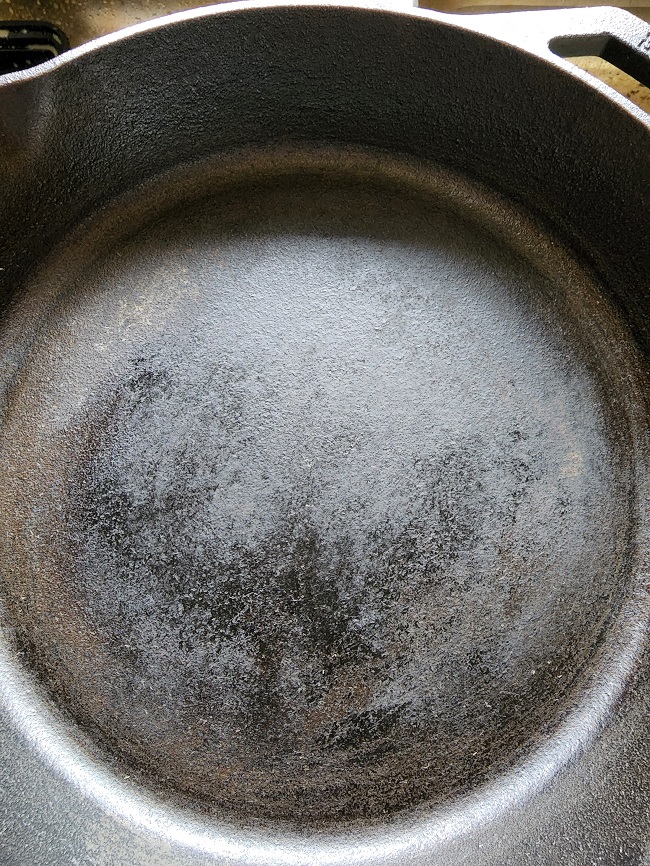
The pan above is clean but not oiled (seasoned). You can see in the middle that it still needs to be oiled. I will usually add grapeseed oil to a lint free towel and then smear the oil around. Once the pan is cool, I wipe out all the excess and then store.

Can You Use Soap?

I might lose some followers here, but yes, you can. And yes, I do. But I only use mild soaps like Mrs. Myers, or a Castile soap. The reason why is because the cast iron has gotten nasty for some reason. I don’t always do it and I immediately re-season it, but it does happen. So don’t feel bad about it. Your seasoning won’t come off just because you used soap. And if it does? Your pan wasn’t seasoned in the first place.

That’s pretty much it. If you have any questions feel free to let me know! If you like this post hit that subscribe button and share it!

If you like the content I put out, feel free to buy us a coffee! It helps keep this site running, marketing and the goats in grain!

Buy me a coffee

If you like this post, feel free to share it and follow us below on our social media accounts!

  • Facebook
  • Pinterest
  • Instagram
  • YouTube
  • TikTok
  • Spotify
  • Threads

Filed Under: Working With Food Tagged With: cast iron, cooking, fat, From Scratch, kitchen

JOIN TO OUR MAILING LIST!

Leave us your email to receive new posts and special offers for members only! Don't miss a thing!

Recent Posts

  • Fall Garden Guide
  • Top Mistakes With Goats
  • How To Bond With Your Goats

How To Fill A Raised Bed For Cheap

February 10, 2024 by Leigh Leave a Comment

If you are looking to build raised beds, you may be wondering how to fill a raised bed. Or you’ve already done some calculations and wrote off raised beds because they are so expensive. But I’m going to walk you through how we fill our raised beds and how it doesn’t have to be THAT expensive.

Are you getting overwhelmed in the garden? Stressed? Or just not enjoying the garden like you used to? Check out our garden prompts! We send out weekly emails that get you back in the garden and out of your head! Turn the garden back into a place of love and joy instead of frustration and headache!

Subscribe Now!

How To Fill A Raised Bed For Cheap

First, there are a ton of different ways to fill a raised bed. You can go expensive with a ton of soil, or you can fill it with various organic materials. I’m going to walk you through how we fill our 4ft wide x 20ft long x 2ft tall raised beds.

Using Trees To Fill A Raised Bed

Once Jared is done building the bed, I start gathering all the unusable logs on the property. We have had to take down a bunch of pines on the property. Even though we heat our home solely with firewood, we don’t burn pine in the house, but sometimes we will burn pine in the firepit. Instead, we use it in the gardens. We’ve used these pine logs as bed boarders and organic material for inside the beds.

If you are new to heating with firewood and are looking to master the finer points of it. We’ve got a great eBook that goes in depth of what tools you should consider, how and where to stack, how to build a fire and so much more!

Buy Now

These pines and other rotten logs will get put on the bottom of each bed. Usually, this will fill the beds about 50-60% with logs. If the logs aren’t very large or the bed isn’t close to half filled, we will add a second layer of logs. The goal is to completely cover the bottom half (ish) of the bed with these logs. Since trees tend to take FOREVER to breakdown, the idea is that you shouldn’t have to refill the bed that much every year.

The biggest concerns when using trees or logs to help fill your raised bed is going damaging your bed as you fill it, nitrogen depletion, and termites. Out of all of this list, the only thing I am truly worried about is damaging the bed as we fill. We use galvanized steel roofing panels for the walls of the bed and the frame is outside the bed. That means that if we just throw logs into the beds, they could damage the roof panels.

We aren’t going to have issues with termites because we use the steel roofing panels. And I’m not super worried about nitrogen depletion because we use cover crops, manure, etc to keep our soil healthy.

Smaller Branches Next

After we have placed a good layer of logs into the bed, we start filling the next 25% with sticks, branches, etc. The goal is to use as much of the “free” downed trees as possible before using expensive materials like pine shavings, compost and soil.

I don’t usually go crazy breaking these into smaller pieces. But I will jump into the bed and stomp around until they are broken. Again, I’m not going crazy here, but I want to use as much free stuff as possible so I don’t HAVE to purchase more than absolutely necessary.

If you are looking for a great way to keep track of your gardens for years to come, check out our Digital Garden Journal. It’s a digital spreadsheet that helps you manage not only your seedlings but also your seed inventories, soil testing, orchard, harvests and so much more.

Buy Now

Filling With Smaller Stuff

After I’ve gotten all the logs and branches to about 75% of the bed, I start adding the small stuff. I usually fill this to about 85%. This is the stuff that is going to breakdown very quickly. Usually, it breaks down in less than a year. What is the smaller stuff? It’s leaves, wood chips, pine shavings, etc. Again, I want to add as much free stuff as possible before I start adding my compost and soil.

My local power company drops off wood chips for us all the time so we don’t have to pay for those. And our property is mostly wooded, so we have a TON of leaves. We leave a ton of those leaves on the ground for the ecosystem but we do pick up some for the beds. But the pine shavings are my magic bullet.

We use the deep litter method for our livestock and poultry to keep them warm in the winter. So I’ve already paid for the pine shavings once. The pine shavings start to compost throughout the winter and they are “dirty” with animal poop and urine. This is great compost/ filler for my raised beds. Also, because it takes a bit longer for wood to start to fully break down, it adds structure to the soil.

Finally Adding Soil And Compost

One of the reasons that our raised beds don’t cost us a ridiculous amount to fill is because we only add about 4-6″ of soil/ compost. For our 4ftx20ft raised bed, that’s about 40cu ft of soil. Which is still a LOT, but compared to 160cu ft of soil, it’s not too bad.

The reason I don’t add more soil is because I don’t need to. Because of the animal bedding/ pine shavings, there is a ton of nutrients for the roots to grab onto.

Are you getting overwhelmed in the garden? Stressed? Or just not enjoying the garden like you used to? Check out our garden prompts! We send out weekly emails that get you back in the garden and out of your head! Turn the garden back into a place of love and joy instead of frustration and headache!

Subscribe Now!

Lastly!

Worms! I add one or two bait cups of red wiggler or earthworms. Normally, you wouldn’t have to, and you don’t have to. But I like to kick start new garden beds with as much help as I possibly can.

When it comes to adding worms, remember, you don’t have to do this. But I have found that it helps to jump start their work. Also, having them get all that fresh soil, pine shavings, etc composting as soon as possible is amazing.

If you are interested in learning more about my favorite garden planner. I highly recommend Seedtime! This planner has been instrumental in helping me plan out my gardens with WAY more efficiency than I could ever expect! It has also reduced overwhelm, stress, and calmed my ADD/ADHD!

More Info!

Filling A Raised Bed FAQ:

Why Not Fill To The Top?

If you did a quick calculation, you’ll notice that the logs take up 50-60%, the sticks another 25%, and small stuff fills the bed to 85%. Soil only covers another 4-6″ bringing the total volume of the bed to about 90% full.

The reason I don’t fill the bed to the tippy top is for a couple of reasons. One, I don’t want to risk the soil sitting against the wood. Two, I don’t want to risk soil running out of the bed and causing run off. Three, I want to have a good healthy layer of mulch in the bed.

If I fill the bed to the top with soil, the mulch will not stay put and soil will sit on the ledge of the garden bed.

cropped-3.jpg

Are you looking for garden journal prompts, but aren’t interested in a weekly email? Check out our 365 Garden Journal Prompts! This is an amazing, all in one, yearly product that you only pay for once.

Buy Now!

Why Not Fill With Soil?

My beds are 4ftx20ftx2ft. This means that I would have to spend about $400+ per bed on soil. Minimum. Not to mention that if I don’t put organic matter into the soil, the soil will lose nutrients and structure.

Also, having wood in the bottom allows that all important fungi to grow even better. This improves soil quality exponentially.

Why Not Use Hay As Filler?

There are two main problems with using hay as filler. One, hay is usually sprayed with herbicides, pesticides and sometimes fungicides. That means that I am putting those -icides into my raised beds where I am trying to ENCOURAGE that growth. At worse, plants won’t grow and at best they will be stunted.

The second issue with using hay as filler is that purchasing unsprayed hay is already expensive. Using it to fill a bed seems like a waste of money in my book. That’s not to say that I won’t use spent hay that the goats have dropped. But I wouldn’t just take a bale and put it right into my beds.

There is an added inconvenience of having little hay sprouts grow in the beds. In my mind, it’s not that big of a deal, but it may be a thing for some.

Doesn’t The Soil Settle Over Time?

Yes, it does. In fact, the first year, your soil levels could drop by up to half as the soil settles and starts filling those nooks and crannies. But if you fill the bottom of the bed with logs and stack them pretty tight, you won’t lose a ton of soil.

Also, I add pine shavings, grass clippings, etc to my garden throughout the season. So even if the soil levels drop, I’m still getting fresh compost developing. It takes a while for the soil levels to settle so be prepared for the long haul. But I love my raised beds and I really enjoy having them.

If you like the content I put out, feel free to buy us a coffee! It helps keep this site running, marketing and the goats in grain!

Buy me a coffee

If you like this post, feel free to share it and follow us below on our social media accounts!

  • Facebook
  • Pinterest
  • Instagram
  • YouTube
  • TikTok
  • Spotify
  • Threads

Filed Under: Garden, Garden Projects Tagged With: garden chores, garden journal, gardens, Homestead, Raised Beds, soil

JOIN TO OUR MAILING LIST!

Leave us your email to receive new posts and special offers for members only! Don't miss a thing!

Recent Posts

  • Fall Garden Guide
  • Top Mistakes With Goats
  • How To Bond With Your Goats

Dealing With Death On The Homestead

February 9, 2024 by Leigh 4 Comments

I really struggled with writing this post. I am the person that takes an animal death way harder than a human one. I don’t know why, maybe it’s my job or that I have attachment issues. But when an animal dies, I am a sobbing mess. It hurts in ways that I can’t describe. If you are reading this post, you probably feel similar. While death is a normal part of life, there is no easy way to handle it. Dealing with death on the homestead for those of us that feel it deeper, it’s a lot harder.

The Ultimate Homesteader’s Starter Bundle – Only $47!

Get the tools you need to stay organized, track profits, and manage your homestead with ease!

Includes:
✅ Schedule F Tracker – Simplify tax prep
✅ Profit Calculator – Track earnings
✅ Hay Calculator – Plan livestock feed
✅ Garden Journal – Digital & printable
✅ Herd Health Tracker – Monitor animal care
✅ Simple Budget – Manage finances
✅ Backyard Homestead eBook – Essential tips

$99 value – now just $47! Start your homesteading journey today!

Buy Now

Dealing With Death On The Homestead

We have lost more than our share of animals on the homestead and it never gets easier. We have lost goats, chickens, our dogs, and today a duckling. To be honest, the duckling was up there with the goats. I have always wanted a duck and now that I finally have 20, it tears my heart to know that she died. But knowing why they died and how to prevent it really helps me heal from it.

Dealing with death on the homestead is understanding that livestock are not pets. But it’s also understanding that animals will die. While that doesn’t absolve the guilt or heartache, understanding that when you farm you are going to do everything you can, and animals will die anyways. But at the same time, knowing that you are going to do everything in your power to help anyways.

goat kidding

Before we get too far into this, I have a great course on the basics of goat care. I call it Goat Crash Course: Goat 101. In this course, I explain things like types of shelter, types of feeds and hays, basic assessments and so much more! Check it out!

Buy Now

Understanding The Role Of Your Animal

While this may seem odd, when you understand the role of your animal, it really helps you plan their existence. For example, when we purchase meat birds, we know that their role is to end up in the freezer. That means that we will do everything in our power to make sure that every single day of their lives are as happy and humane as possible. But we are not going to take a meat animal to the vet and waste resources.

However, our milk goats have a role too. Their role is to provide milk and future meat animals. That means that when they are no longer filling their role, we have to make the decision to sell or butcher. During their time on the homestead, we will take them to the vet as needed and care for them to make sure they are happy, healthy and raised humanely.

Because you understand the role of your animal, it allows you to make decisions based on the role vs your need to care for animals as pets or companion animals. It sounds heartless, but you have to decide if you are a homestead or animal rescue.

Why the Why is so important

When you know why an animal died, not only does it help you from a practical stand point, it also helps you heal. I think that it’s because it can be a learning opportunity or simply because it absolves guilt. Either way I think it helps us heal while dealing with the death of our favorite animals.

Texas was my favorite goat. He was unbelievably vocal and would sing to me every time I came home from literally anywhere. Whether I was gone for a 24hr shift or a ride to the grocery store, it was always the same. He would bleat at me until I came to love on him. That was the best part of coming home.

He died because of polio. Goat polio is different from human polio but basically it is caused by thiamine deficiency or sulfur toxicity. My lack of knowledge and lack of medicines on hand did not help him and killed him. As unfortunate as it was, and as much as I beat myself up about it, there is a bright spot. No other goats will die because I didn’t know what I was doing.

Voldemort was our first goat that died. His was due to an extremely high parasite load. He had an unbelievable amount of barber pole worm, strongyle worms, and coccidia. It took us several days to realize that he was as sick as he was. When we got him to the vet, she told us that he was probably going to die. The worm load was just too high. If he didn’t die from the worm load, the internal bleeding of the worms suddenly being gone would kill him. We did everything we could but he still died.

With both goats, I poured over hundreds of articles, consulted with our vets and came up with a plan for future treatment. It will never bring back our babies, but at least now we know what to do, what to look for, and what to do to keep it from happening.

Learning From Mistakes

We have lost several chickens for several reasons; overcrowding, mareks, and predators. But we are learning how to raise our chickens in the best environment for them. They have plenty of access to open pasture. They are vaccinated from the hatchery for mareks. We keep an eye on their general condition to make sure that we catch potential injury or illness before it becomes a problem.

But today, we lost a duckling. It broke my heart. I tried everything I could think of but it was simply too late. Unfortunately, we don’t know why or how. We’ve got another one that is going down the same path but we are trying everything we can.

This is life though. Even more to the point, this is homestead life. Animals will die. Whether it’s because they are meat or because they are sick, hard labors, failed hatches, and more. It happens and it hurts.

My Advice For Dealing With Death On The Homestead

The best advice I can give you is don’t give up. Yes, it is hard and some days it doesn’t seem worth it. But I promise you it is. It’s worth the heartache for the good days. I would not give up a single second of owning goats because we lost Texas and Voldemort. I will always own dogs, despite having lost so many. The good out weighs the bad, every single time.

My second piece of advise is to honor their life. It doesn’t matter if they are meat animals or a beloved pet. It doesn’t matter if they’ve been with you for twenty years or twenty minutes, that life needs to be honored. If you can, have a cemetery for them. We have an old corral that we will never use and it is perfect. Baby bearded dragons, chicks, goats, and even toads that the dogs have killed go in there and get a flower seed planted with them. That is how I honor them.

goat kidding

Before we get too far into this, I have a great course on the basics of goat care. I call it Goat Crash Course: Goat 101. In this course, I explain things like types of shelter, types of feeds and hays, basic assessments and so much more! Check it out!

Buy Now

If you like the content I put out, feel free to buy us a coffee! It helps keep this site running, marketing and the goats in grain!

Buy me a coffee

If you like this post, feel free to share it and follow us below on our social media accounts!

  • Facebook
  • Pinterest
  • Instagram
  • YouTube
  • TikTok
  • Spotify
  • Threads

Filed Under: Animals Tagged With: Chickens, Chicks, duckling, Goats, Homestead

JOIN TO OUR MAILING LIST!

Leave us your email to receive new posts and special offers for members only! Don't miss a thing!

Recent Posts

  • Fall Garden Guide
  • Top Mistakes With Goats
  • How To Bond With Your Goats
  • « Go to Previous Page
  • Page 1
  • Interim pages omitted …
  • Page 11
  • Page 12
  • Page 13
  • Page 14
  • Page 15
  • Interim pages omitted …
  • Page 23
  • Go to Next Page »

Primary Sidebar

WELCOME

WELCOME

My name is Leigh and I am the lead chaos creator here at Steel Raven Farms. You will see throughout this blog that I am the crazy goat lady.

I am married to my high school sweetheart, Jared and we have two amazing boys.

FOLLOW ME

  • Amazon
  • Facebook
  • Instagram
  • Pinterest
  • TikTok

GET UPDATES!

Leave us your email to receive new posts and special offers for members only! Don't miss a thing!

In all the years that I’ve been growing a garden, the fall garden has steadily remained my favorite. Which is funny because I don’t really like any of the brassicas, which is what most people know the fall garden for. I prefer the root vegetables and cool air. But I have learned over the years…

Read More

  • Animals
    • Chickens
    • Farm Dogs
    • Goats
  • Garden
    • Compost
    • Garden Projects
    • Seeds and Plants
    • Garden Journal
    • Working With Food
      • Recipes
      • Freezing Foods
      • Dehydrating Foods
      • Canning Tips And Tricks
        • Canning Inventory Sheets
  • Helpful Info
    • Welcome to the Homestead!
    • Emergency Preparedness
    • Frequently Asked Questions
    • Goal Setting
    • Project List
    • Shop Digital Products
      • Hay Calculator
      • Farm Expense And Income Tracker
      • Goat Crash Course: 101
      • Garden Journal Prompts
      • Schedule C Tracker
      • Schedule C Tracker
      • The Homestead Bundle
  • The Truths
  • Episode List
  • Start Here
    • Privacy Policy
    • Affiliate Disclosure
    • Let’s Get in Touch
    • Members Only Library
    • Welcome To Our Homestead

Footer

  • Email
  • Facebook
  • Instagram
  • Pinterest

COME AND GET IT!

Leave us your email to receive new posts and special offers for members only! Don't miss a thing!

· Midnight Theme

Copyright © 2026 · Midnight Theme on Genesis Framework · WordPress · Log in