• Skip to primary navigation
  • Skip to main content
  • Skip to footer

Steel Raven Farms

Where muck boots meet ground.

  • Animals
    • Chickens
    • Farm Dogs
    • Goats
  • Garden
    • Compost
    • Garden Projects
    • Seeds and Plants
    • Garden Journal
    • Working With Food
      • Recipes
      • Freezing Foods
      • Dehydrating Foods
      • Canning Tips And Tricks
        • Canning Inventory Sheets
  • Helpful Info
    • Welcome to the Homestead!
    • Emergency Preparedness
    • Frequently Asked Questions
    • Goal Setting
    • Project List
    • Shop Digital Products
      • Hay Calculator
      • Farm Expense And Income Tracker
      • Goat Crash Course: 101
      • Garden Journal Prompts
      • Schedule C Tracker
      • Schedule C Tracker
      • The Homestead Bundle
  • The Truths
  • Episode List
  • Start Here
    • Privacy Policy
    • Affiliate Disclosure
    • Let’s Get in Touch
    • Members Only Library
    • Welcome To Our Homestead

How To's

Top Mistakes With Goats

January 13, 2026 by Leigh Leave a Comment

We all know that I love my goats. Probably more than most people. They are seriously the coolest creatures on our farm. But there are some very common mistakes with goats that I would love to clear up today. I’ve talked before about goats not being beginner livestock and I will say it again and again. Before you get into goats, lets learn somethings about them.

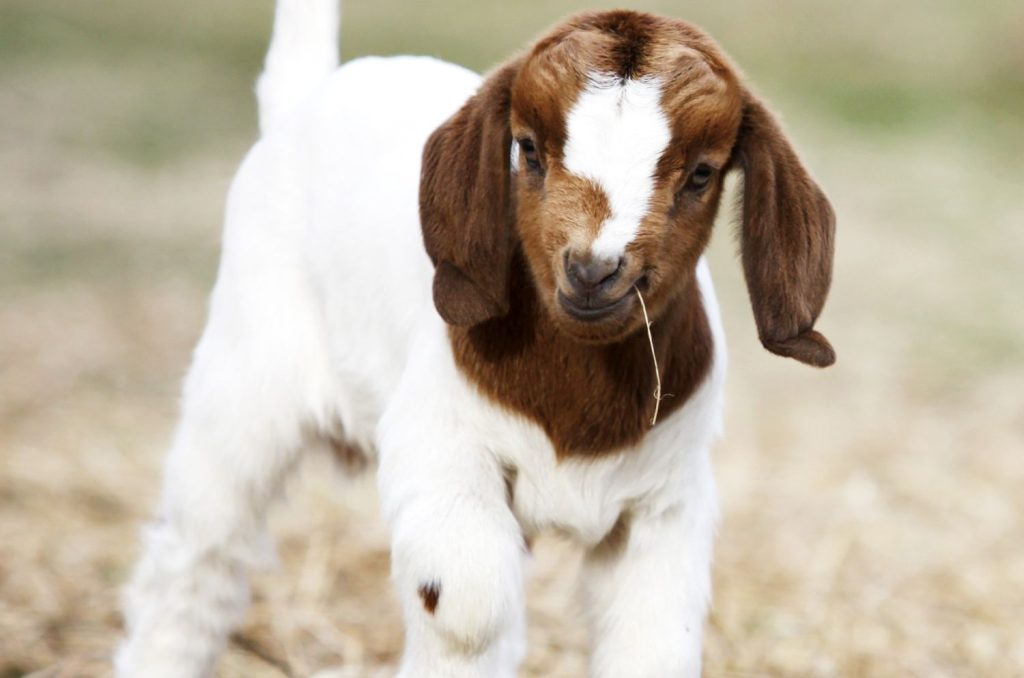
Before You Decide Goats Are “Hard”

Most frustration with goats comes from starting with the wrong assumptions — not from the goats themselves.

If you’re new to goats, bonding and trust come before routines or productivity:
👉 How I Bond With Goats on a Working Homestead

Most Common Mistakes With Goats

Goats Are Easy To Take Care Of

They are NOT the easiest thing to take care of. In fact, far from it! Out of all of my animals, the chickens are the easiest not the goats. We are constantly battling worms in the summer. Getting them through winter tends to be iffy if they had a ton of worms in the summer. Spring is kidding season. I think the only “safe” season is fall but we are still dealing with bucks in rut, worms, and feed.

We are currently battling coccidia with our kids and are trying like hell to keep everyone healthy. But unfortunately, summer in Georgia is a goat killer. Between the heat, worms, forage issues? It’s stressful. One of the ways that we combat the worms is by only worming when necessary. That includes coccidia. But summer is a scary time for us. Another way is pasture rotation and free ranging.

Brown and white goat

You Can Get One Goat

Goats are herd and prey animals. In order to feel safe and happy, they need other goats to hang out with. Without having a companion, they will get depressed, lonely, and will not thrive. Do yourself a favor and get two.

When we lost V and Bella was our only goat for two days, she literally Houdinied us every couple of hours. I don’t even remember how many times she took off. Finally, we had to tether her because she wouldn’t stay in the pin. As soon as we got Midas in with her? She never broke out again **knocks on all the wood**

While on the topic of only getting one goat, do yourself a favor and get two goats whenever you are bringing new goats into your herd. We have always brought home at least two goats every time we purchase new stock. The last time, we didn’t. Poor Phoenix doesn’t have anyone that will play with her. She is a lone goat in the herd because everyone is already paired up. Thankfully, she is a pocket goat and really just wants our attention. Which is fine, except we can’t always be out there with her.

You don’t HAVE to do this, but it does help transition if there is another new goat to buddy up with.

Goats Can Eat Anything

No. Just no. I saw a post on Marketplace a couple days ago for last years hay. Good for mulching, raised beds, or goats…. Excuse me? I can promise you, if you feed that kind of hay to your goats, they will die. Period. Moldy, old, dirty, hay will kill your goat. They really need horse quality hay because they can get sick so easily. Let’s not mention that they cannot eat a tin can.

When we got Oakley and Bailey, then Spike, Jade, and Sapphire, they got into mountain laurel. Thankfully, we were able to pull them through but it was touch and go for a minute. There are tons of toxic plants to them, and usually they are good about not eating it. But they are very curious creatures.

Goats Are Stupid

These creatures are more intelligent than dogs. They are also incredibly curious, which gets them into a ton of trouble. Champ knows how to get into pasture two, where she doesn’t belong. We have tried various ways to keep her out but none of them work. So she ends up in pasture two. A lot.

All of the goats know that if they scream loud enough, for long enough, they will get extra grain and alfalfa in the mornings. So no, they are not stupid.

We have trained our goats to feed buckets in case of a break out. We’ve trained them to a dinner bell like this, if they are too far away to hear the bucket. Goats are incredibly smart.

No Fence Will Hold A Goat

This is borderline when it comes to goats. I have noticed that if they are kept fat and happy they will probably not try to escape. BUT if they want something on the other side of the fence? They are going to go get it. We manage to keep two bucks from the girls simply by making sure that the fence is secure and they have a buddy.

There are some goats that cannot be contained without resorting to tethering. While that is not ideal, especially if you have high predator loads, you’ve got to do what you’ve got to do. We had to tether Bella until she became more comfortable with us. We also had to tether Midas because he was so stressed out when we brought him home.

Goats Only Eat Weeds

Not true! Goats prefer browse, which is plants with woody stems. However, goats are actually Growsers, meaning they will graze and browse. They will eat weeds, trees, hay, grasses, fruit, veggies, etc. Just like you prefer certain foods, so do they.

It is important to pay attention to what they are avoiding though. If you have a patch of some sort of weed, and the goats are eating everything but that weed, go ahead and remove that weed. It’s probably something that they shouldn’t eat.

Goats Are Not Intuitive Eaters

This is a pretty hot button topic among most goat owners. It’s kind of like the deworming or disbudding argument, you’ve got people for and against it. In that vein, I’m going to give you my opinion and experience, you do with it what you will.

My goats are intuitive eaters. If they have access to plenty of forage, they will not touch toxic plants like Mountain Laurel, Beefsteak plant, and Rhododendrons. But as soon as forage starts to die back and only toxic plants are available, they may start to eat it.

This goes for minerals as well. There is a huge debate about whether or not you should have free choice loose mineral or a mineral buffet. We’ve done both and have found that our goats will clear out entire buckets of one or two minerals and leave the rest alone. So again, I do think that goats are intuitive eaters.

Unfortunately, we do not have the time, space or set up to really have an effective mineral buffet, so we went back to free choice loose minerals.
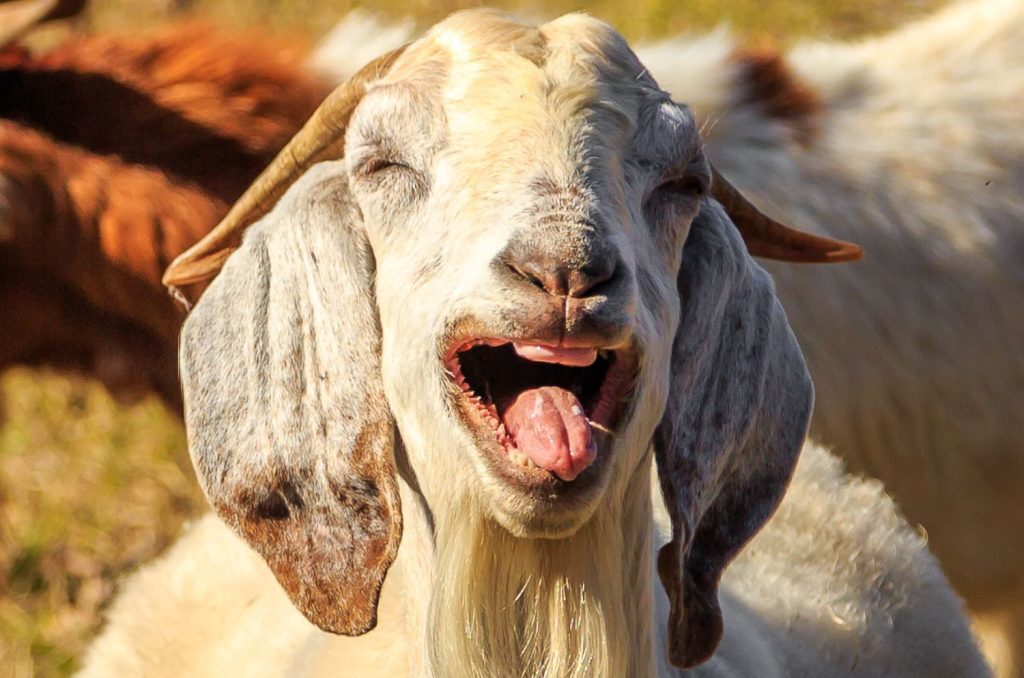
Once expectations are realistic, goats become far easier to live with.

👉 How I Build Trust and Routine With My Goats

These Are Just A Few Of The Mistakes I’ve Noticed

There are many, many more mistakes with goats but those are the biggest ones that I feel need to be addressed. I know that I have a ton of different posts about goats and sound like a broken record, but these really are important.

If you like the content I put out, feel free to buy us a coffee! It helps keep this site running, marketing and the goats in grain!

Buy me a coffee

If you like this post, feel free to share it and follow us below on our social media accounts!

  • Facebook
  • Pinterest
  • Instagram
  • YouTube
  • TikTok
  • Spotify
  • Threads

Filed Under: Animals, Goats, How To's Tagged With: Goats, Homestead, Welcome

JOIN TO OUR MAILING LIST!

Leave us your email to receive new posts and special offers for members only! Don't miss a thing!

Recent Posts

  • Fall Garden Guide
  • Top Mistakes With Goats
  • How To Bond With Your Goats

How To Bond With Your Goats

January 6, 2026 by Leigh Leave a Comment

If you are lucky enough to win over the love of a skittish goat, count yourself lucky. Bella is my most skittish goat and will run as fast and as far as her short little legs will take her if anyone comes anywhere near her. But when she is scared or hurting? She looks to me and that is pretty amazing. So if you have a skittish goat, or have a new goat that you are looking to bond with, here is a couple hacks to bond with your goats.

Bonding isn’t about making goats friendly — it’s about building trust so handling, health checks, and daily care don’t turn into a fight.

If you’re new to goats, start here first:
👉 What It’s Really Like to Raise Goats on a Working Homestead

Before Bonding With Your Goat

Before we get into bonding with your goats, I want to first address something. Unless your goat was born on your farm, your new goat is stressed to the max. They were ripped away from their herd, thrust into a box (or car, crate, whatever), and transported to a new farm. Then they were dumped in a fence with new goats and people that they don’t know. If you are bringing home babies? This is the first time without their momma. This goat is freaked out. No matter how good your intentions are, or how good of an owner you are, you are a stranger.

So before you thrust yourself on to them and then wonder why they are running away from you, give them some time to just be. Let them figure out where they are, who their new goat friends are, and the pecking order that they are now probably at the bottom of. Let them destress as much as possible. Realistically, this will probably take a couple weeks of regular feeding and treats. It could take longer depending on your goat.

Be prepared to deal with sickness. Whether that is in the form of diarrhea from a change in food, or a worm bloom from stress. Stay on top of their health!

You can get my goat assessment sheet for free by subscribing! The box is near the top of the page.

Bonding makes daily care easier — trimming hooves, checking eyes, monitoring health — all of it depends on trust.

This is how I structure daily animal care so it stays consistent without being overwhelming:
👉 My Realistic Homestead Daily Schedule

Bond With Your Goat: The Hacks

There are several different ways to bond with your goats, but at the end of the day it’s really up to your goat. Not every goat will be socialized. Not every goat wants to be around humans. More importantly, not every goat is going to trust humans. But with a little time and effort, you should be able to at least tame your goat enough to know their ticks and maybe, just maybe, get some snuggles.

When we got Bella and V, we realized that we were going to have our work cut out for us with Bella. At first, we thought she was just antisocial and didn’t want anything to do with us. After a while we realized that she was scared of us and didn’t trust us. Every time we had to grab her horns and force her where we need her to go, it set us back. But what were we supposed to do? We needed to trim her hooves, administer medications and just be able to care for her.

After V died and Bella was alone for a few days, I thought maybe she would start to trust us, but she seemed to distrust us even more. When we got Midas, he became very untrusting towards us because he spent the first two weeks with Bella. Since Bella wouldn’t come near us, neither would Midas. It took about six months before Midas would come near us willingly. So what can you do?

Hack #1: Time

Give them time. Let them decompress and learn that you are safe. Sometimes the best way to do that is to let them see you with your other goats.

Goats are very smart creatures and will see how you treat their herd mates and will judge you accordingly. So be patient.

Also, don’t rush. If you’ve got a spastic child (my Jaxson), maybe don’t let them love on the brand new, completely freaked out goat. If you are spastic (myself), be calm and understanding.

Hack #2: Pin Them Up

I talk about goat basics in my Goat Crash Course: Goat 101, but the biggest thing that we noticed with our new girls was that if we let them run wild in the pen, they would take longer to come around to us.

What we would do is put them on the small side of our barn that is used for laboring moms, moms that just kidded, or when we separate for goat sharing. This would keep them from running away from us and us having to chase them down. For a prey animal, being chased is literally the worse thing you could do.

When you keep them pinned up and bring them food and water, they see you as the giver of delicious nom noms. They also see that you are safe and won’t hurt them.

Hack #3:Treats

Seriously, treats are the best. We get “apple crack”, which is a goat probiotic in pellet form. Even Bella will come running for apple crack. A word of caution. Do not give empty calorie treats like crackers, cookies, etc. These can actually mess up their rumen and that is not good.

But anything can be a treat in moderation. We also give small pieces of apple, carrots, cucumbers, etc. They see it as a treat and it allows us to reinforce that they are safe and we are the bringers of delicious nom noms.

If you don’t have an issue with alcohol, get your goats drunk…. I’m only kind of joking. But the reality is that goats actually benefit from a beer occasionally. It helps their rumen function. Plus, it’s delicious.

Hack #4: Forced Snuggles

I did this with Bella and Spike with mixed success. A lot of people swear by this because it really does work. You basically force the goat to accept your love. The good news it is, it mostly works. Unless you have a Bella.

Bella LOVES to be snuggled when she is stuck in the barn, scared or laboring. If she is outside the barn? She totally forgets that I am a friend and I love her, and will run for the hills. But that’s okay because in the years that I’ve had her? She has become the sweetest snuggler I have. And she willingly gets on the milk stand and will let me love on her when I milk her, so I win.

Spike will tolerate the snuggles but he knows he can over power us very easily so we use caution around him.

Hack #5: Children

This is where that spastic child may actually help you out. Jaxson has no fear. Zero. Our rooster will beat the crap out of him and he comes back for more. It’s the same way with the goats. He doesn’t care if they want his love or not, they are getting it. He has managed to get these goats to realize they are friends, not food.

Children rarely have fear about something they perceive as cute and cuddly. It’s why your kid will randomly show up with a scorpion and while you are freaking out, they are asking to keep it….. Ask me how I know.

So let that child man-handle the goat, SAFELY! They will be the best of friends… maybe.

Accepting Defeat When You Try To Bond With Your Goats

If you have tried all of these things and nothing is working, chances are you have a Bella. That goat will probably never come around. We’ve had her for a few years now and we still have to work to get her. You will get there with your goat, but it’s going to take time.

When you have a “normal” goat that wants your affection, those five tips above usually works well. All of our other goats have come around within a month max. But sometimes it takes longer. Sometimes it’ll never happen. That’s okay. You have to keep trying and just try to manage the chaos.

Update For Those Interested

In the years that we have had Bella, she has given birth three times for us. And all those times she would cry for my attention. She only allows me and my oldest son to snuggle her newborn babies. She milks beautifully and has become an amazing goat for us. It does take time and effort.

I’ve read on so many Facebook pages of people saying get rid of the goat, freezer camp for the goat, etc and it breaks my heart. If we had listened to them, like a lot of new goat owners would, Bella wouldn’t be here. Neither would Ursula, Maverick or Goose.

For me, it’s no different than a difficult dog. The animal (regardless of species) is scared. But when you finally gain that trust? You have an animal that truly wants to spend time with you. Let’s you snuggle them and their babies. Brings you their babies. It’s truly amazing.

How do you get your goats to warm up to you?

Your Next Step

Bonding is the foundation — but routines are what keep that trust intact.

👉 How I Structure Daily Care for Livestock on a Working Homestead

If you like the content I put out, feel free to buy us a coffee! It helps keep this site running, marketing and the goats in grain!

Buy me a coffee

If you like this post, feel free to share it and follow us below on our social media accounts!

  • Facebook
  • Pinterest
  • Instagram
  • YouTube
  • TikTok
  • Spotify
  • Threads

Filed Under: Animals, Goats, How To's Tagged With: Goats, Homestead, tips

JOIN TO OUR MAILING LIST!

Leave us your email to receive new posts and special offers for members only! Don't miss a thing!

Recent Posts

  • Fall Garden Guide
  • Top Mistakes With Goats
  • How To Bond With Your Goats

How to Start A Homestead

December 30, 2025 by Leigh Leave a Comment

People across the country are concerned with the state of the grocery stores and supply chain. People who previously thought they could get anything they needed from a store, have quickly come to realize that is no longer the case. Shortages of basic necessities are becoming more common and leading many people to think about starting a homestead. But how to start a homestead?

Starting A Homestead

Most people don’t know where to start when it comes to farming, livestock, and other “farming” things. Well, welcome to the club. If you were not born into the lifestyle, and many of us weren’t, starting a homestead can be a daunting task. The good news is when you dive into the world of homesteading you will realize that it looks very different to everyone. Not mention the amount of resources available.

Before You Start a Homestead

“Starting a homestead” doesn’t mean doing everything at once.
It means choosing one system and building from there.

If you’re still figuring out what homesteading actually looks like in real life, start here:
👉 What Homesteading Really Means (and What It Doesn’t)

I talked in another posts that homesteading is a spirit, not a set of hard fast rules. I know homesteaders that live in a subdivision on less than an acre and others that have hundreds of acres. Some people love keeping pigs and some that don’t. We have goats, not everyone likes them. There are no rules to homesteading because homesteading is about independence, not acreage, livestock, and gardens.

Understanding Why You Want To Start A Homestead

I suggest really thinking about the why. Why do you want to homestead? What does homesteading look like to you? Can you do the things that you think a homestead is? What are your current capabilities and disabilities? Can you overcome them? What does the infrastructure of your homestead look like?

Our dream of homesteading started as a cabin in the woods fifteen years ago. As the world around us has changed, so has our dream. I wanted a garden for fresh produce, now I want a garden that will fully sustain us. Livestock? Nah, I’m good with my dogs and cats. Until we saw what the price of meat was doing. Your dreams can evolve and devolve and that’s just fine.

timing your vegetable garden (zone 8)

This Is Where Most People Get Stuck

Homesteading only works if you turn ideas into a plan — otherwise it becomes overwhelming fast.

This is the system I use to decide what to tackle first and what can wait:
👉 My Daily Homestead Schedule (What Actually Gets Done)

Let’s Start With Animals

Every new homesteader thinks they have to have pigs, cows, chickens, and other livestock when they start homesteading. We almost fell into this trap and thankfully cooler heads prevailed before we dove in head first. However, we have had our share of Uh-Oh’s and it has been a very expensive lesson to learn the hard way. We weren’t ready for goats and it has been a very steep learning curve. But worth every penny and heartbreak. So start small and grow from there.

Oakley and Bailey the goats
Oakley and Bailey

Chickens

Chickens are a great way to have that homestead feel, without all the extra work of a homestead. They are relatively easy creatures that don’t require around the clock work. Our chickens are set it and forget it. Once they were out of the brooder and into their coop, they had feed in the morning and night, and free range during the day. They also have access to plenty of water throughout the property. They don’t require a ton of upkeep.

Raising dual purpose meat chickens is also a great way to reduce your dependence on the grocery store without breaking the bank. You can have a steady stream of fresh eggs from hens and butcher the roos for meat. But there are some downsides to raising chickens, like escaping, predators, and getting into your garden.

Meat rabbits are another good animal to have on the homestead. Rhonda at The Farmer’s Lamp has a great post about the ins and outs of meat rabbits. Having meat rabbits allows you to close gaps in your food security and they don’t take up much space. Since it’s hard to automate their care, they are more work than chickens. But once you get used to what they need, it should only take about 10-20 minutes in the morning and evening. We will be adding them to the homestead this fall when its a little cooler. The biggest downside of rabbits is the cuteness factor. Many people will struggle to butcher them because they are really cute.

Brooding New Chicks

Goats

Goats are cool critters for the homestead. Unfortunately, I don’t recommend them for beginners. I say this as a beginner who had no clue what was happening and we have paid a hefty price for not knowing what I was doing. The value of learning about them mixed with the milk they give, possible meat, and income from breeding make them a good creature to have when starting a homestead.

If You’re Ready to Start, Start Small

The biggest mistake new homesteaders make is trying to do too much at once.

I start by setting a few realistic, seasonal goals and building systems around them:
👉 50 Realistic Homestead Goals to Start With

What About Gardens?

You do not need a acre garden when you are starting out. Yes, I am currently reminding myself of this right now as I am looking at my garden space, which is almost a half acre. You don’t need a greenhouses or other large, expensive purchases. Start small. Grow your tomatoes and peppers to make your salsa. Plant herbs and keep them alive. Make sure whatever you are planting you have a plan for. If you do not like cucumbers, do not plant 20 plants just because you think you should. Once you have a handle on what your family needs and what your land can produce, then you can start growing the size of your garden.

Learn how to preserve your garden so that you can enjoy your harvests well past summer. If you don’t know how to can, you can check out our canning page or go to YouTube, Pinterest, and Google for amazing resources. Also make sure that you have good storage for your jars of food. There is nothing worse than spending tons of time canning just to have your plastic shelves fail. If you don’t want to can and have some money to burn, invest in a freeze dryer.

Finances

Starting a homestead with no money is just not feasible. Whether you decide to make homesteading your fulltime job or simply a way to live more independently, you need to make sure your finances are in order before you start. Our first year homesteading cost us over $20,000 between buying fencing, animals, lumber, and vet bills. So make sure you have the ability to cover those expenses.

Setting up your infrastructure so that you can reduce costs over time is extremely important to your long term finances.

Your Next Step

If you’re serious about starting a homestead, the first thing you need isn’t land or animals — it’s a plan that fits your life.

👉 How I Structure My Homestead Day (So Things Actually Get Done)

Remember….

When everything is all said and done, you have to remember that starting a homestead comes down to your goals and your ability. You are only limited by your resourcefulness and imagination. There are no rules to what you have to do to be a homesteader. You don’t have to have or know everything to start a homestead. A dream, drive, and determination are all you need to start a homestead. Don’t get hung up on the details.

I hope this helps you start on the path to starting your own homestead. Leave us a comment below on your thoughts of starting a homestead.

If you like the content I put out, feel free to buy us a coffee! It helps keep this site running, marketing and the goats in grain!

Buy me a coffee

If you liked this post feel free to like, share, and find us on social media.

  • Facebook
  • Pinterest
  • Instagram
  • YouTube
  • TikTok
  • Spotify
  • Threads

Filed Under: Animals, Canning, Chickens, Garden, Goats, How To's, Our Homestead, Pigs Tagged With: Chickens, Chicks, cooking, Goats, Homestead, kitchen

JOIN TO OUR MAILING LIST!

Leave us your email to receive new posts and special offers for members only! Don't miss a thing!

Recent Posts

  • Fall Garden Guide
  • Top Mistakes With Goats
  • How To Bond With Your Goats

How To Build Canning Shelves

December 23, 2025 by Leigh Leave a Comment

Jump to Building Plans

I could write a million posts about canning. How to can, what to can and how much to can. But I think the best post I could write about is storing canned goods. For years, I have tried to figure out the best way to store the things I canned. But we could never figure out a way that I liked and allowed us to see and use those goods. At least until Jared came up with my shelves. In this post, I will show exactly how we build canning shelves.

Good Canning Shelves Are Hard To Find

We can a lot of food. When I say a lot, I mean hundreds of jars a year. It’s not uncommon for me to put up 50+ jars of tomato sauce, 50+ jars of green beans, and more. The reason we put up so much is because it’s cheap. Before buying this property, I could buy a half bushel of peaches for $10 and end up with 20-30 pints of diced or sliced peaches. I could buy two bushels of green beans for $40 and can 75 quarts of green beans. I was able to get farm fresh produce and preserve it for pennies compared to buying it at the store.

Once you start pressure canning staples like green beans, jars pile up fast.

If you’re pressure canning regularly, proper shelving isn’t optional — it’s part of the system.

Start here:
👉 How I pressure can green beans in my working pantry

First Attempt At Building Canning Shelves

The problem was where we were going to put all this food. As we have been homesteading, those canning numbers have quadrupled… Or more. I talked about how many jars you need in this blog post, but the reality is that you need a ton of jars, which means you need a TON of space. Not just for food, but also for all those empty jars.

Jared attempted to conquer the problem by building Frankenstein.

Frankenstein was 5ft tall by 4ft wide and 2ft deep. If you’ve been canning for more than a minute, you know that jars got lost in the back. It was sturdy and it worked, but within six weeks this thing was crammed full.

canning shelves
Meet Frankenstein

We attempted to fix the 2ft depth problem by putting cases of unused jars in the back. The problem with that is that when you need a case of jars, you have to pull all the jars out of the way to get to those empty jars.

We tried to just put empty boxes back there but that didn’t work either.

If I’m already set up to can, I always keep brine ready so I can move fast when produce comes in.

This is what I use to keep those shelves full:
👉 My Make-Ahead Pickling Brine for Fast Canning Days

Back to the Drawing Board

At this point, I was at a loss. I browsed Pinterest, Google, and canning groups on Facebook, but just couldn’t find what I was looking for. Plastic shelves aren’t sturdy. Metal shelves are held together by plastic clips. Premade shelves were expensive or the wrong size.

I told Jared, I wanted tall shelves that can hold several rows of jars. I wanted no more than three or four jars deep so jars don’t get lost. And I also wanted a lot of shelves on each unit. This is what my man came up with.

canning shelves
First of many shelves for my food storage room

I was in love. Not only with Jared but also with my amazing shelves. As canning season went on, we realized we needed more shelves for our canned goods. Not just the jars that I put up, but also the stuff that we bought in bulk like flour, sugar, grains, etc. So he kept building me shelves until we ended up with what we have now.

canning shelves

Are you getting overwhelmed in the garden? Stressed? Or just not enjoying the garden like you used to? Check out our garden prompts! We send out weekly emails that get you back in the garden and out of your head! Turn the garden back into a place of love and joy instead of frustration and headache!

Subscribe Now!

How We Built Our Canning Shelves

In total we have seven shelves that each hold approximately 300 jars each. This includes things like sugar, flour, coffee, rice, and extra jars just to name a few things. For now, I think we have enough shelves for canned goods but who knows what tomorrow will bring.

My friend over at Simple Living Homestead wrote an amazing blog post about all the different ways to store jars and lids. While I thought I had it all figured out, there are a couple of really useful items that I am looking at. Specifically, #5 the handmade wooden lid organizer! That would really come in handy, especially in the height of canning season when I lose everything. The canning tongs, rings, jars, my mind?

canning shelves

The measurements for theses shelves are 48″ wide by 12″ deep by 96″ tall. I believe we used 23 2x4x8 studs.

Building Your Canning Shelves

This build plan assumes that you have basic building knowledge. Also, depending on your set up (putting these in the basement, garage, or inside) will depend on what type of lumber you use. We use regular studs for ours because it’s in our basement and we don’t have a ton of water issues…. ***Knocks on all the wood**

You will need a tape measure, drill (and proper bit for screws), circular or miter saw, level and speed or T square.

You will need 23 2x4x8 and 2″ deck screws. Really, you could use nails or other screws but we used 2″ deck screws.

Step 1: Make your cuts. You need 24 48″ pieces (shelf boards) and 18 12″ pieces (brace boards).

Step 2: Make your end pieces. Take 2 2x4x8 and 2 12″ pieces. You are going to attach each 12″ piece at the top and bottom (in between the 2x4x8) of your long pieces. When they are level and square, screw in place. Do this twice. These are your end pieces.

Step 3: Take 3 of your 48″ boards and screw to bottom brace on each of your end pieces. Again, making sure that you are level and true. This shelf will only barely be off the floor. We use a 1″ scrap piece of wood to ensure even spacing between the shelf boards. Screw in place and stand up the unit.

Step 4: Measure 12″ from the bottom board. Make sure that a quart jar will fit under it. If it doesn’t, make some adjustments until it will. Add your brace on each side of your end pieces, make sure it is level and square, and screw in place. Repeat on the other end piece. Add your shelf boards (don’t forget to space them out) and screw in place.

Step 5: Repeat step 4 until all of your shelves are in place.

The top of the unit will not be 12″ and that’s okay. We use that for empty jar storage anyways.

What I Always Put on These Shelves First
Green beans are forgiving, store well, and are the backbone of my pantry.


If you’re stocking shelves for the first time,

Start here:
👉 How I pressure can green beans in my working pantry

Special Considerations For These Canning Shelves

Depending on where you put these shelves and your level of comfort, I would suggest some form of securing to the ceiling, wall, etc. I would not leave to chance these shelves falling over. Now, I have run into these shelves while trying to put up jars and they have held just fine. But better to be safe than sorry so take a little extra time and ensure that those precious jars are secured.

Once the Shelves Are Full, This Is What Keeps Them Useful

Otherwise jars get forgotten, dates get missed, and food gets wasted.

We use a simple canning inventory system to track:

  • what we canned
  • how much we have
  • and when it needs to be used

This keeps our pantry usable instead of overwhelming.

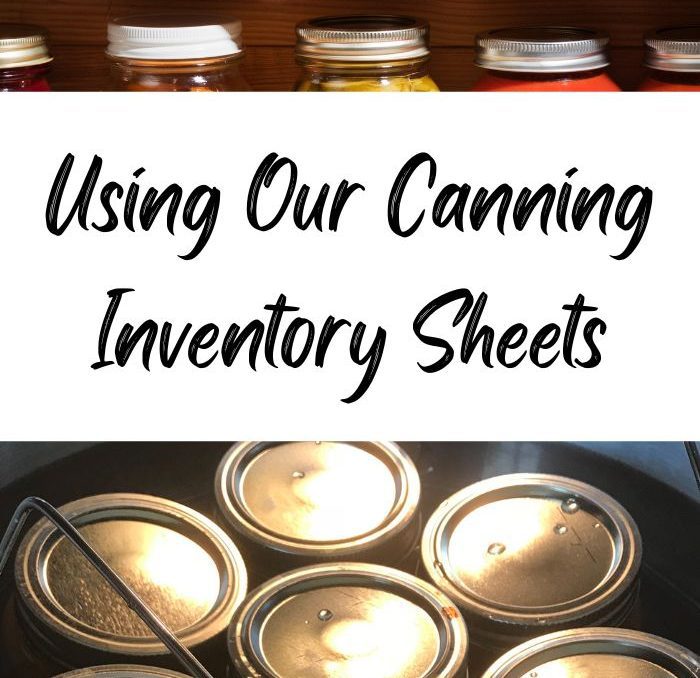
👉 The canning inventory sheets we use: Canning Inventory Sheets

Print

How To Build Canning Shelves

Shelves to fit your jars of home canned goodness without losing them. Each instruction is for one shelf. The above picture is two shelves with a middle brace.
Yield: 1 Upright shelf

Equipment

  • Tape Measure
  • Drill
  • Circular or miter saw
  • 4 1" Block of wood
  • Level
  • T Square or similar
  • Hammer

Materials

  • 23 2x4x8
  • A LOT 2" Screws we used decking screws

Instructions

  • Cut 24 48" pieces for shelves
  • Cut 18 12" pieces for braces
  • To make your end pieces, lay out 2 2x4x8's and attach 1 12" brace to the top and 1 12" brace to the bottom. Place the brace between the 2×4 so that your finished width is 15". Make sure your corners are square and level before you screw it together.
    Do this twice
  • Next attach 3 2x4x48" pieces to the bottom of your shelf. Use a 1" block in each space to ensure that your shelves are spaced evenly. Once the bottom row of shelves are done, you can stand up the unit so you are not on the ground.
  • Now you are going to attach the next brace 12" above your previous shelf. Double check that a quart jar will fit between your shelves. I can fit my half gallon jars as well but it's better to measure and adjust now than to have an entire shelfing unit that is wrong.
  • Keep going until you reach the top. The top shelf to the top brace is not 12", this is normal. I usually put extra jars or half gallon jars up on top.

Notes

We love these shelves and Jared was able to build these quickly and with relative ease. 
Always double check your measurements. We wanted 4ft shelves but if you don’t have that much room, change the width. 
We used 2″ decking screws but feel free to use whatever. As long as it’s long enough to go through the shelf and the brace, you’re good to go. Just don’t use nails
If you are in an area prone to earthquakes or have a dog like Blu, figure out a way to attach these to the wall. We used spare 2×4 chunks and attached them to the rafters. 
On the note of earthquakes or a dog like Blu, figure out a way to keep your jars from falling off the front or back. We used furring strips to help keep jars from crashing to the ground when Blu decides to go running through the basement.

I hope you enjoyed this article and if you need any help with measurements or how to do it, just leave a comment!

If you like the content I put out, feel free to buy us a coffee! It helps keep this site running, marketing and the goats in grain!

Buy me a coffee

If you like this post, feel free to share it and follow us below on our social media accounts!

  • Facebook
  • Pinterest
  • Instagram
  • YouTube
  • TikTok
  • Spotify
  • Threads

Filed Under: Canning, How To's, Our Homestead, Projects Tagged With: Canning, DIY, Homestead, Projects

JOIN TO OUR MAILING LIST!

Leave us your email to receive new posts and special offers for members only! Don't miss a thing!

Recent Posts

  • Fall Garden Guide
  • Top Mistakes With Goats
  • How To Bond With Your Goats

How to Use Social Media to Earn an Income on the Homestead

April 29, 2025 by Leigh Leave a Comment

Gone are the days when farming meant staying offline and off the grid. Today, some of the most successful homesteaders are using social media not just to share their lives—but to fund them. If you’re looking to make extra money while raising animals, growing food, or living a simpler life, creating a homestead social media plan could be one of the smartest moves you make.

Whether you want to start a YouTube channel, monetize your Instagram reels, or sell digital products on Pinterest, this guide will walk you through exactly how to turn your homestead content into consistent income.

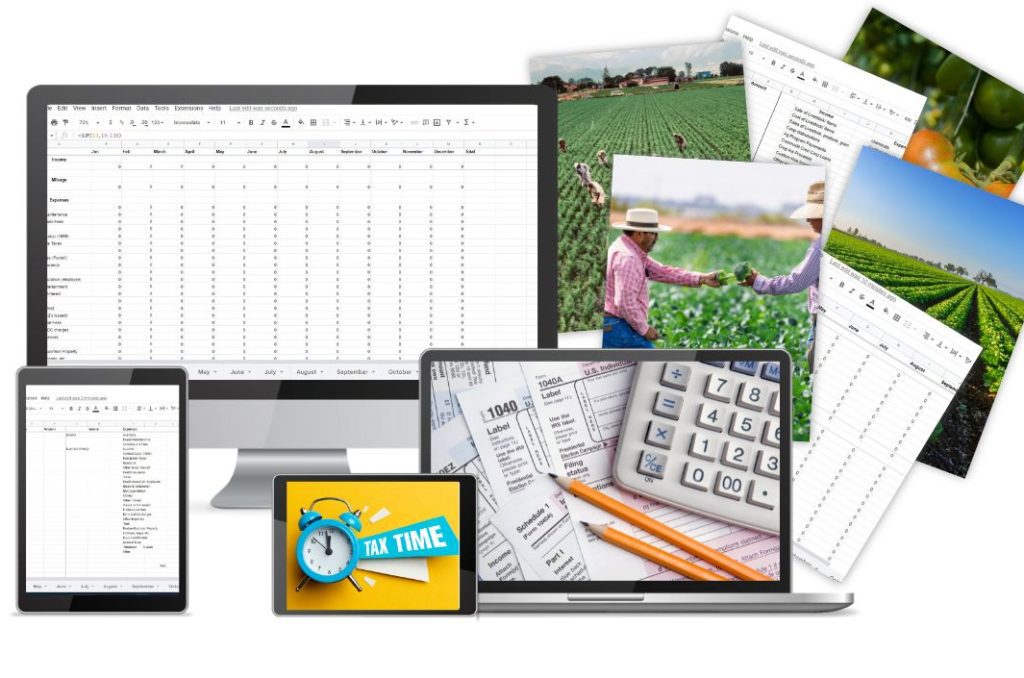
The Ultimate Homesteader’s Starter Bundle – Only $47!

Get the tools you need to stay organized, track profits, and manage your homestead with ease!

Includes:
✅ Schedule F Tracker – Simplify tax prep
✅ Profit Calculator – Track earnings
✅ Hay Calculator – Plan livestock feed
✅ Garden Journal – Digital & printable
✅ Herd Health Tracker – Monitor animal care
✅ Simple Budget – Manage finances
✅ Backyard Homestead eBook – Essential tips

$99 value – now just $47! Start your homesteading journey today!

Buy Now

Why Social Media Is a Powerful Tool for Homesteaders

As a homesteader, you already have what most content creators spend hours trying to fake—real life, real experience, and real value. People are hungry for authentic content: how to raise chickens, grow tomatoes, can green beans, make herbal salves, or balance motherhood with chores. You’re doing all that and more.

When you start sharing your journey, you:

  • Build community and trust
  • Establish yourself as an expert
  • Drive traffic to your blog, shop, or YouTube
  • Open doors to partnerships, sponsorships, and sales

The best part? You don’t need millions of followers to make money. With a clear homestead social media plan, even a small but loyal audience can create reliable income streams.

Are you getting overwhelmed in the garden? Stressed? Or just not enjoying the garden like you used to? Check out our garden prompts! We send out weekly emails that get you back in the garden and out of your head! Turn the garden back into a place of love and joy instead of frustration and headache!

Subscribe Now!

Step 1: Choose Your Social Media Platforms

You don’t have to be everywhere. The best platform is the one you’ll actually use consistently. Focus on 1–2 platforms that match your content style and target audience.

Here’s a breakdown of the most effective platforms for homesteaders:

Instagram
Great for visuals (gardens, animals, DIYs) and reels. Ideal for building community and growing quickly with daily posts and stories.

TikTok
Short-form video works well for quick tips, farm humor, or before-and-after projects. Viral potential is huge even with a small account.

YouTube
Perfect for long-form tutorials, project breakdowns, and vlogs. A great way to establish yourself as an expert and generate passive ad revenue.

Pinterest
Drives traffic to blogs, Etsy shops, and YouTube videos. Best for evergreen content like recipes, how-tos, and printables.

Facebook
Useful for joining homesteading groups, selling locally, and building a Facebook page or group for your audience.

Step 2: Define Your Niche and Audience

Before posting anything, get crystal clear on who you’re talking to. Not every homesteader has the same goals or challenges. Think about your ideal follower:

  • Are they beginner homesteaders looking to learn?
  • Moms trying to balance family and farm life?
  • Off-grid or self-sufficiency enthusiasts?
  • Gardeners wanting to grow food in small spaces?

Then, ask yourself what problems you can help solve. Your homestead social media plan should revolve around service, not just aesthetics.

Examples of niche focuses:

  • Raising goats for milk or meat
  • Canning and food preservation
  • Frugal and debt-free homesteading
  • Gardening in small spaces
  • Off-grid cooking and DIYs

The more specific you are, the easier it is to grow a loyal, engaged audience.

Step 3: Plan Your Content Strategy

Now it’s time to map out your content. The best strategy combines three types of posts:

1. Educational Content
Teach your audience something useful:

  • How to start seeds indoors
  • 5 mistakes new chicken owners make
  • How to use comfrey salve for wounds

2. Inspirational Content
Share your story, successes, and daily life:

  • A sunrise over your garden
  • A quote about simplicity
  • “Why we started homesteading”

3. Promotional Content
Invite your followers to buy or click:

  • Check out your blog post
  • Buy your ebook or course
  • Visit your Etsy shop

Use a monthly calendar to balance all three types. Pinterest-friendly posts and keyword-rich descriptions can dramatically increase traffic to monetized links.

Step 4: Create and Schedule Content Consistently

You don’t need to post every day, but you do need to be consistent. Pick a posting schedule you can stick to, like:

  • Instagram: 3 reels per week, 2 story days
  • TikTok: 1–2 videos daily
  • YouTube: 1 video every 1–2 weeks
  • Pinterest: 3–5 pins per blog post

Use tools like Later, Tailwind, Metricool, or Canva’s content planner to schedule your posts ahead of time. I use Metricool and have really enjoyed it and the ease of use. Plus, their free option is pretty robust.

Batch your content creation by filming or photographing multiple things at once—like your weekly chores, a harvest day, or a DIY project. Then break that footage into multiple reels, TikToks, or blog tutorials.

Step 5: Monetize Your Content

This is where your homestead social media plan turns into a paycheck. There are several ways homesteaders earn money from their content, even with small audiences.

1. Affiliate Marketing

Share your favorite tools, seeds, gear, or books and earn a commission.
Examples:

  • Amazon Associates
  • Homesteading toolkits or digital bundles
  • Seed companies or gardening supplies

2. Ad Revenue

Once you hit enough views or traffic, platforms pay you to run ads.

  • YouTube Partner Program (1,000 subs + 4,000 watch hours)
  • Pinterest (via blog traffic → Mediavine or Raptive ad networks)
  • TikTok Creator Fund (availability varies)

3. Digital Products

Sell printables, guides, planners, or courses.
Ideas:

  • Garden planning workbook
  • Monthly homestead checklist
  • Goat care guide or feed calculator
  • Online course on canning or microgreens

4. Brand Sponsorships

Once you build trust and engagement, brands may pay you for sponsored posts, product features, or reviews.

Start by tagging brands in your posts and writing honest reviews. As you grow, reach out with a media kit showing your audience size, engagement, and services offered.

5. Physical Products

Promote products you already make:

  • Goat milk soap
  • Farm-fresh eggs
  • Preserved foods or herbal remedies

Use your social media to drive traffic to your Shopify store, Etsy shop, or local pickup days.

Step 6: Build Your Funnel

To create consistent income, you need a funnel—a clear path from your social media post to a purchase.

Here’s an example funnel:

  1. Instagram reel shows you trimming goat hooves
  2. Caption links to your blog post on goat care
  3. Blog post offers a free goat health checklist in exchange for email
  4. Email series pitches your beginner goat-raising ebook

That’s how you turn a 30-second video into a $27 sale (or more).

Create content that leads people to:

  • Join your email list
  • Read your blog
  • Buy your product
  • Watch your YouTube channel

Step 7: Track What’s Working

Every platform gives you analytics—use them. Review each month:

  • Which posts got the most views or saves?
  • What drove the most traffic to your blog?
  • Which links got clicked the most?

Focus on what’s working and do more of it. Your homestead social media plan should evolve as you learn what your audience responds to best.

Tools like Google Analytics, Pinterest Analytics, and social media insights will guide your strategy.

Step 8: Stay Authentic and Serve First

People follow you for you. Don’t try to copy influencers with perfectly polished lives. Show your mud boots, garden fails, and behind-the-scenes struggles. That authenticity is your superpower.

When you focus on serving your audience—educating, inspiring, and connecting—the income naturally follows.

Be honest. Be consistent. Be kind. And the right followers (and opportunities) will come.

Final Thoughts on Creating a Homestead Social Media Plan

If you’re living the homestead life, you already have content worth sharing—and monetizing. Whether you want to supplement your income or create a full-time business, a solid homestead social media plan can turn your skills and stories into a steady source of income.

Start simple. Choose one platform. Create helpful content. Build your audience and serve them well. In time, you’ll grow a digital income stream that supports your homestead dreams.

If you like the content I put out, feel free to buy us a coffee! It helps keep this site running, marketing and the goats in grain!

Buy me a coffee

If you like this post, feel free to share it and follow us below on our social media accounts!

  • Facebook
  • Pinterest
  • Instagram
  • YouTube
  • TikTok
  • Spotify
  • Threads

Filed Under: Frequently Asked Questions, Homestead Planning, How To's, Start Here Tagged With: business, Chickens, Goats, Homestead, income

JOIN TO OUR MAILING LIST!

Leave us your email to receive new posts and special offers for members only! Don't miss a thing!

Recent Posts

  • Fall Garden Guide
  • Top Mistakes With Goats
  • How To Bond With Your Goats

How to Set Realistic Goals for Your Homestead

April 26, 2025 by Leigh Leave a Comment

When you start homesteading, it’s easy to dream big—chickens, goats, gardens, beehives, canning pantries, solar panels, and homemade everything. But without a clear plan, all those dreams can quickly turn into burnout. That’s why mastering homestead goal setting is one of the most valuable skills you can develop. In this guide, we’ll walk you through how to set achievable and realistic goals for your homestead that align with your lifestyle, budget, and time.

Whether you’re homesteading on a quarter-acre suburban lot or a 20-acre rural spread, smart planning is the key to long-term success and joy on the land.

The Ultimate Homesteader’s Starter Bundle – Only $47!

Get the tools you need to stay organized, track profits, and manage your homestead with ease!

Includes:
✅ Schedule F Tracker – Simplify tax prep
✅ Profit Calculator – Track earnings
✅ Hay Calculator – Plan livestock feed
✅ Garden Journal – Digital & printable
✅ Herd Health Tracker – Monitor animal care
✅ Simple Budget – Manage finances
✅ Backyard Homestead eBook – Essential tips

$99 value – now just $47! Start your homesteading journey today!

Buy Now

Why Homestead Goal Setting Matters

Homesteading isn’t just a lifestyle—it’s a deeply personal journey toward self-reliance, sustainability, and fulfillment. But with so many moving pieces, trying to do everything at once is a recipe for chaos. Homestead goal setting allows you to:

  • Stay focused on what matters most
  • Avoid wasting money or energy on the wrong projects
  • Build your skills in a steady, manageable way
  • Prevent overwhelm and burnout
  • Track your progress and celebrate your wins

Instead of spinning your wheels, you’ll move with intention—and that’s where the real magic happens.

If you are interested in learning more about my favorite garden planner. I highly recommend Seedtime! This planner has been instrumental in helping me plan out my gardens with WAY more efficiency than I could ever expect! It has also reduced overwhelm, stress, and calmed my ADD/ADHD!

More Info!

Step 1: Define Your Homestead Vision

Before setting any goals, step back and ask: Why am I homesteading?

Your personal “why” shapes every decision on your land. For example, do you want to:

  • Raise your own food to reduce grocery bills?
  • Teach your kids about nature and responsibility?
  • Create a profitable side hustle?
  • Live more sustainably or off-grid?

Your vision will determine your priorities. If you want to sell produce at the farmers market, a market garden becomes a higher priority than a dairy cow. If your goal is food security, then canning, meat rabbits, or a root cellar might top the list.

Pro tip: Write down your homestead vision and keep it somewhere visible—on your fridge, in your garden journal, or posted in the barn.

Before we get too far into this post, I wanted to give a suggestion about keeping a garden journal. A digital garden journal is a fantastic way to keep track of past, present and future gardens. Our Digital Garden Journal is a great way to keep up with everything without getting too overwhelmed.

Buy Now

Step 2: Assess Your Resources Honestly

Setting realistic homesteading goals starts with understanding what you’re working with. Take stock of your available:

  • Time – Are you working full-time? Homeschooling? Raising toddlers? Be honest.
  • Land – How much usable space do you have? Is it wooded, sloped, wet?
  • Budget – What can you afford to start with? Do you have savings set aside?
  • Skill Level – Are you brand new to gardening, livestock, or building?
  • Support – Are you doing this solo, or do you have help from family, friends, or neighbors?

You don’t need unlimited resources to start homesteading, but understanding your limitations helps you set smart, achievable targets. For instance, if you only have an hour a day, starting a full-scale garden and livestock operation simultaneously might not be feasible—but a small raised bed and a few hens could be perfect.

Our herd health bundle helps you keep track of your herd’s health. Includes the goat assessment, herd check sheets AND Herd Health Tracker!

Buy Now

Step 3: Break It Down by Season or Year

One of the best homestead goal setting strategies is to plan by season or by year. Instead of trying to do everything at once, divide your big picture into quarterly or monthly chunks.

Example Annual Goal: Become 50% food self-sufficient
Seasonal Breakdown:

  • Spring: Build raised beds and plant cool-season crops
  • Summer: Expand garden and preserve harvest
  • Fall: Raise and butcher meat chickens
  • Winter: Learn pressure canning and plan fruit trees

This method keeps you focused and makes your goals feel less overwhelming. It also gives you natural checkpoints to celebrate your wins and adjust plans as needed.

If you are new to heating with firewood and are looking to master the finer points of it. We’ve got a great eBook that goes in depth of what tools you should consider, how and where to stack, how to build a fire and so much more!

Buy Now

Step 4: Use SMART Goals

SMART goals are:

  • Specific – Clear and detailed
  • Measurable – You can track your progress
  • Achievable – It’s realistic with your current resources
  • Relevant – It supports your overall homestead vision
  • Time-bound – There’s a set deadline

Bad goal: “I want to grow more food.”
SMART goal: “Grow 75% of our salad greens from April to September using three 4×8 garden beds.”

SMART goals give you clarity and accountability. They help you stay on track and give you confidence as you move forward.

The Ultimate Homesteader’s Starter Bundle – Only $47!

Get the tools you need to stay organized, track profits, and manage your homestead with ease!

Includes:
✅ Schedule F Tracker – Simplify tax prep
✅ Profit Calculator – Track earnings
✅ Hay Calculator – Plan livestock feed
✅ Garden Journal – Digital & printable
✅ Herd Health Tracker – Monitor animal care
✅ Simple Budget – Manage finances
✅ Backyard Homestead eBook – Essential tips

$99 value – now just $47! Start your homesteading journey today!

Buy Now

Step 5: Prioritize What’s Most Important

You probably have a long list of dreams—fruit trees, bees, goats, solar panels, an orchard, a pond. And they’re all great! But doing everything at once is a fast track to burnout. Pick just 1–3 main goals per season and focus on doing them well.

Ask yourself:

  • What will have the biggest impact on our quality of life?
  • What aligns most with our values or needs right now?
  • What is time-sensitive (like spring planting)?

If your family is struggling with food bills, starting a garden and learning food preservation might be more urgent than building a chicken coop. You can always add more later.

The Hay Calculator:

If you aren’t math-y (don’t worry I’m not either), check out our Hay Calculator. It literally does ALL of the math for you and gives you totals based on what you want your goals.

On the second page, you can track where you’ve bought hay, what you spent and how long it lasted.

Buy the Hay Calculator

Step 6: Track Your Progress

Tracking your progress is not only helpful—it’s encouraging. When you see how far you’ve come, it builds momentum and motivation.

Ideas for tracking:

  • A garden journal or planner
  • A monthly homestead checklist
  • A whiteboard in your kitchen or barn
  • A simple spreadsheet
  • A visual tracker (like coloring in a jar for every quart canned)

You’ll be amazed how satisfying it is to check things off, track harvest totals, or log new skills you’ve learned.

The Ultimate Homesteader’s Starter Bundle – Only $47!

Get the tools you need to stay organized, track profits, and manage your homestead with ease!

Includes:
✅ Schedule F Tracker – Simplify tax prep
✅ Profit Calculator – Track earnings
✅ Hay Calculator – Plan livestock feed
✅ Garden Journal – Digital & printable
✅ Herd Health Tracker – Monitor animal care
✅ Simple Budget – Manage finances
✅ Backyard Homestead eBook – Essential tips

$99 value – now just $47! Start your homesteading journey today!

Buy Now

Step 7: Reassess and Adjust

Life on the homestead is unpredictable. Weather, animal health, family needs, and even burnout can derail the best-laid plans. That’s okay. The key is to expect things to change and stay flexible.

Set regular check-ins—monthly or seasonally—to review your goals:

  • What’s working?
  • What’s not?
  • What needs to be paused or scaled back?
  • What new opportunities have come up?

This reassessment is where real wisdom and growth happen. Flexibility is one of the most powerful homesteading tools you can develop.

Before we get too far into this, I have a great course on the basics of goat care. I call it Goat Crash Course: Goat 101. In this course, I explain things like types of shelter, types of feeds and hays, basic assessments and so much more! Check it out!

Buy Now

Step 8: Celebrate Small Wins

When you set realistic homesteading goals, even small wins matter. Maybe your first garden only yielded a few tomatoes. Maybe you only canned five jars of salsa. That’s still progress!

Celebrate it:

  • Take a picture
  • Post your success on social media
  • Share your homemade meal with friends
  • Mark it in your journal

Each step forward builds your confidence and your skill set. Every win is proof that you’re growing—literally and metaphorically.

The Ultimate Homesteader’s Starter Bundle – Only $47!

Get the tools you need to stay organized, track profits, and manage your homestead with ease!

Includes:
✅ Schedule F Tracker – Simplify tax prep
✅ Profit Calculator – Track earnings
✅ Hay Calculator – Plan livestock feed
✅ Garden Journal – Digital & printable
✅ Herd Health Tracker – Monitor animal care
✅ Simple Budget – Manage finances
✅ Backyard Homestead eBook – Essential tips

$99 value – now just $47! Start your homesteading journey today!

Buy Now

Goal Setting Examples by Homestead Focus

Here are some practical homestead goal setting ideas by category to inspire your plan:

Gardening Goals

  • Build 4 raised beds and plant spring crops
  • Grow and preserve enough tomatoes to make 12 jars of sauce
  • Start composting with kitchen scraps

Livestock Goals

  • Raise 25 meat chickens for freezer meat
  • Build a secure coop and start with 6 laying hens
  • Learn how to trim goat hooves or do a FAMACHA check

Food Preservation Goals

  • Water bath can 40 jars of jam or salsa
  • Learn pressure canning for broth and beans
  • Freeze enough zucchini to use all winter

Income or Business Goals

  • Sell $500 worth of produce at the farmers market
  • Start a blog or YouTube channel about your homestead journey
  • Offer farm tours or goat yoga classes once a month

Sustainability Goals

  • Line dry all laundry in summer
  • Reduce grocery store trips to once per month
  • Start using a solar oven or dehydrator

Family Goals

  • Teach kids how to plant, water, and harvest vegetables
  • Plan weekly outdoor family chores or animal care
  • Involve the whole family in harvesting and preserving food

Before we get too far into this, I have a great course on the basics of goat care. I call it Goat Crash Course: Goat 101. In this course, I explain things like types of shelter, types of feeds and hays, basic assessments and so much more! Check it out!

Buy Now

Final Thoughts on Homestead Goal Setting

The beauty of homesteading is that it’s not about perfection—it’s about progress. By learning how to set realistic goals, you give yourself the freedom to grow, learn, and enjoy your homestead without constant stress or overwhelm.

Whether you’re dreaming of living off-grid or just want to grow a few vegetables and keep chickens, homestead goal setting is your secret weapon. Start with what you have. Do what you can. And watch your homestead—and your confidence—flourish.

If you like the content I put out, feel free to buy us a coffee! It helps keep this site running, marketing and the goats in grain!

Buy me a coffee

If you like this post, feel free to share it and follow us below on our social media accounts!
  • Facebook
  • Pinterest
  • Instagram
  • YouTube
  • TikTok
  • Spotify
  • Threads

Filed Under: Frequently Asked Questions, Homestead Planning, How To's Tagged With: burnout, Chickens, Homestead, mental health, Planning

JOIN TO OUR MAILING LIST!

Leave us your email to receive new posts and special offers for members only! Don't miss a thing!

Recent Posts

  • Fall Garden Guide
  • Top Mistakes With Goats
  • How To Bond With Your Goats

How To Prepare Your Vegetable Garden

March 18, 2025 by Leigh Leave a Comment

It’s March, y’all! In just a few short weeks, we will be planting our first plants and I am ridiculously excited. There is not much more thrilling, mood enhancing, joyous, and prideful moment then harvesting your first vegetable from your garden. When you plant a bunch of peppers, harvest them, dehydrate them, and use them in your dinner? It’s an indescribable feeling. But in order to get there, you have to do some work to prepare your vegetable garden.

Before we get too far into this post, I wanted to give a suggestion about keeping a garden journal. A digital garden journal is a fantastic way to keep track of past, present and future gardens. Our Digital Garden Journal is a great way to keep up with everything without getting too overwhelmed.

Buy Now

Before You Prepare Your Garden

They say that the first thing you should do on your homestead is start with a garden. They would be right, unfortunately, most of us start with animals. We get attached to our critters and then end up with a poorly producing garden, or no garden. But your garden has the potential for being the most money saving thing on the homestead! So there are a couple things I like to do every year before I prepare my garden.

cropped-3.jpg

Are you looking for garden journal prompts, but aren’t interested in a weekly email? Check out our 365 Garden Journal Prompts! This is an amazing, all in one, yearly product that you only pay for once.

Buy Now!

Check Last Years Journal/ Notes

Every year, I keep a garden journal. Mine is multi-year so that I can look back and see what we did, how it worked, etc. This really helps because there are a ton of finer details of a garden that sometimes get missed. Like how much you watered your peppers? Did you use pig, chicken, goat manure? What variety of melon did you hate? This information is important to make sure that you don’t make the same mistakes, but also so that you can make sure you are doing the “right” thing for your gardens.

Prepare Your Vegetable Garden

Look At What You Preserved

If you are using a garden for fresh eating, then I would take notes on what you are eating, how much you ate, etc. If you preserve your garden, go to your pantry and figure out what all you have eaten, used, etc and determine how much you need for this years gardens. For example, I know that we average 2 quarts of spaghetti sauce a week. That means that I need to make sure that we have at least 100 quarts of spaghetti sauce by the time my tomatoes are done for the year. This will help you determine how many plants you need.

If you are interested in learning more about my favorite garden planner. I highly recommend Seedtime! This planner has been instrumental in helping me plan out my gardens with WAY more efficiency than I could ever expect! It has also reduced overwhelm, stress, and calmed my ADD/ADHD!

More Info!

Consider Your Animals Needs

If you have chickens, goats, pigs or other livestock, you should consider how much of their feed you could grow. This will look different for everyone based on the space they can dedicate to a garden and how many and the size of their animals, but this is something to consider.

We have the space to have a fairly large garden, that means that I can absolutely grow a fair amount of feed for my animals. I know that pigs and chickens can eat basically anything in my garden. The goats require a little more care to make sure that whatever they eat, won’t make them sick. But I know that all of my animals can eat corn, beets, tomatoes, peppers, etc. So I will plant extra for them.

The Ultimate Homesteader’s Starter Bundle – Only $47!

Get the tools you need to stay organized, track profits, and manage your homestead with ease!

Includes:
✅ Schedule F Tracker – Simplify tax prep
✅ Profit Calculator – Track earnings
✅ Hay Calculator – Plan livestock feed
✅ Garden Journal – Digital & printable
✅ Herd Health Tracker – Monitor animal care
✅ Simple Budget – Manage finances
✅ Backyard Homestead eBook – Essential tips

$99 value – now just $47! Start your homesteading journey today!

Buy Now

How To Prepare Your Vegetable Garden

On to what I know you are interested in.

Depending on your philosophies for gardening, you will want to go ahead and clear any debris, weeds, or other things you don’t want in your garden. Our garden is roughly 75ft by 100ft. That is just over triple the size of last years garden. We are going to be producing more of our animals feed this year which is why we are taking up more space.

Clearing The Garden

Because we are making the garden much, much bigger, we have to go in and clear a lot of debris from the previous owners, as well as a couple of dead trees that are in the way. We also have to pull a lot of briars and other browse that the goats didn’t get to last year. This actually works out well because we can actually replant the briars in an area that we are leaving for the goats. Win, win.

cropped-3.jpg

Are you looking for garden journal prompts, but aren’t interested in a weekly email? Check out our 365 Garden Journal Prompts! This is an amazing, all in one, yearly product that you only pay for once.

Buy Now!

Lay Out Fencing

Now, you don’t have to put up fencing around your garden. In fact, a lot of people don’t. But we free range a lot of our animals and the goats and pigs would absolutely DESTROY the garden if we didn’t protect it. Last year the ducks ate all of the garden and the goats used our baby fruit trees as scratching posts. So we learned to protect our food. Because we are expanding our garden, we removed the old fence and reused it when we put up the new one.

Before we get too far into this, I have a great course on the basics of goat care. I call it Goat Crash Course: Goat 101. In this course, I explain things like types of shelter, types of feeds and hays, basic assessments and so much more! Check it out!

Buy Now

Consider Additives

I consider anything that I add to my soil (including more soil) an additive. You should have a soil test done every year to make sure that you are only using additives that you need. Too much nitrogen can stunt your plants, even nitrogen loving plants like corn and tomatoes. You should also make sure that you aren’t adding hot manure straight to your soil.

All hot manure should be composted to make sure that it won’t burn your plants. Hot manure comes from pigs, chickens, horses, etc and should be aged or composted. Sheep, goat and rabbit manure are considered cold and could be put right on the plant with minimal adverse affects. However, I still allow my pig and chicken manure to compost in their bedding before adding it onto my plants. Just to be safe.

Other additives would be liquid fertilizers, pesticides, etc. This is where your philosophies will come into play. I do not spray or add anything to my plants. The reason is because I don’t feel like it’s necessary. I compost regularly for fertilizers, add mulch for weed protection and have chicken tractors in my gardens for fertilizer, weed control, and pest protection. I’ll be posting a whole post about our chicken tractors in the garden here soon.

The Ultimate Homesteader’s Starter Bundle – Only $47!

Get the tools you need to stay organized, track profits, and manage your homestead with ease!

Includes:
✅ Schedule F Tracker – Simplify tax prep
✅ Profit Calculator – Track earnings
✅ Hay Calculator – Plan livestock feed
✅ Garden Journal – Digital & printable
✅ Herd Health Tracker – Monitor animal care
✅ Simple Budget – Manage finances
✅ Backyard Homestead eBook – Essential tips

$99 value – now just $47! Start your homesteading journey today!

Buy Now

Sourcing Your Plants

No matter what plants you decide on, either starting your own seedlings or buying starts from the store, the simple fact that you are starting a garden is amazing! Don’t freak out about not having the “right” things. Starting a garden is the best part.

Starting Your Own Starts

This is hands down the most economical approach but it definitely requires patience and some start ups. I know that sometimes money is tight, but I highly recommend not skimping here because if you buy cheap, you will end up having to replace them every year. Ask me how I know. However, I finally got tired of trays breaking and having issues will too small pots and bought these from Bootstrap Farmer. I’ve had these pots and trays for YEARS and love them. I’ve left them outside to cook in the sun for an entire summer and they are still in great shape! These are the 1020 trays I use. These are the 2.5″ pots that I use.

The best part about starting your own seeds is that you have the ability to get a bunch of different varieties. I have 5 different tomato varieties and at least 8 different pepper varieties. I buy most of my seeds from True Leaf, Eden Brothers, Botanical Interests or Territorial Seed Company.

Buying Starts

Buying plant starts can be a great way to start your garden. Again, just starting a garden is fantastic, so don’t think you HAVE to start your own seedlings. A couple years ago, my ducks ate ALL of my starts. I found a local nursery that only charged me $2/ 4 pack tray. That’s a great price! Especially because big box stores charge $3-6 per plant.

The biggest downside to buying plant starts is the lack of variety. When you go to the store, you are probably never going to see luffa gourds. That’s sad because not only are they amazing sponges but luffa is great for goats!

cropped-3.jpg

Are you looking for garden journal prompts, but aren’t interested in a weekly email? Check out our 365 Garden Journal Prompts! This is an amazing, all in one, yearly product that you only pay for once.

Buy Now!

Prepare Your Beds

Whether you are planting in raised beds, in the ground, or in containers on your patio, you are moving in the right direction! Playing in the dirt is one of my favorite past times and it makes me unbelievably happy. There is nothing like it. I am very excited that you are getting ready to start on your gardens. Big or small doesn’t matter. Starting does.

Building Your Beds

If you are using a raised bed system, you should be building these in the late winter or early spring. For us, March is the last push to get any infrastructure for the garden done. This means building beds, sourcing soil, moving compost, etc. If you are building beds, you don’t want to run out of space half way through planting season and then get bogged down having to make multiple trips to the store for supplies.

Prepare Your Vegetable Garden

Laying Out Your Garden

If you are planting in the ground, you should have a plan of what you want your rows to look like. Where are you putting the peppers, tomatoes, rosemary? Are you going to work on companion planting? All of these things are very important to figure out BEFORE you get too far into planting. So do yourself a favor and spend a few minutes planning your rows.

Irrigation

For some reason most people think about watering their gardens last. I don’t really know why since it is possibly THE most important thing. But I am equally as guilty of this. Last year, it was a last minute, oh crap moment that resulted in 4 trips to Lowes to get more irrigation hose.

So do yourself a favor and put your garden in close to your water source, and figure out how much hose or water you need first. This year, the cost of drip hoses was going to be ridiculous, so we are toying with the idea of a sprinkler system. We haven’t decided yet. Because again, we are waiting till last minute….oops.

Get To Planting

This is the best part of any garden. Personally, I absolutely LOVE my kitchen gardens and raised beds. I don’t know what it is but when I get to play in the raised beds, it brings me indescribable joy. The big garden? Not so much. I love it, but I’ll hang in the kitchen garden thank you.

Whether you are planting in rows, raised beds or containers, the big thing to remember is spacing is important! You don’t want to stack your tomatoes too close, but peppers should be a little closer. Zucchini needs room, but beans can be 4in apart. Just remember to keep your spacing in mind as you plant.

The most important part of preparing your vegetable gardens? Enjoy it!

If you like the content I put out, feel free to buy us a coffee! It helps keep this site running, marketing and the goats in grain!

Buy me a coffee

If you like this post, feel free to share it and follow us below on our social media accounts!
  • Facebook
  • Pinterest
  • Instagram
  • YouTube
  • TikTok
  • Spotify
  • Threads

Filed Under: Garden, How To's Tagged With: Canning, cast iron, Chickens, cooking, Homestead

JOIN TO OUR MAILING LIST!

Leave us your email to receive new posts and special offers for members only! Don't miss a thing!

Recent Posts

  • Fall Garden Guide
  • Top Mistakes With Goats
  • How To Bond With Your Goats

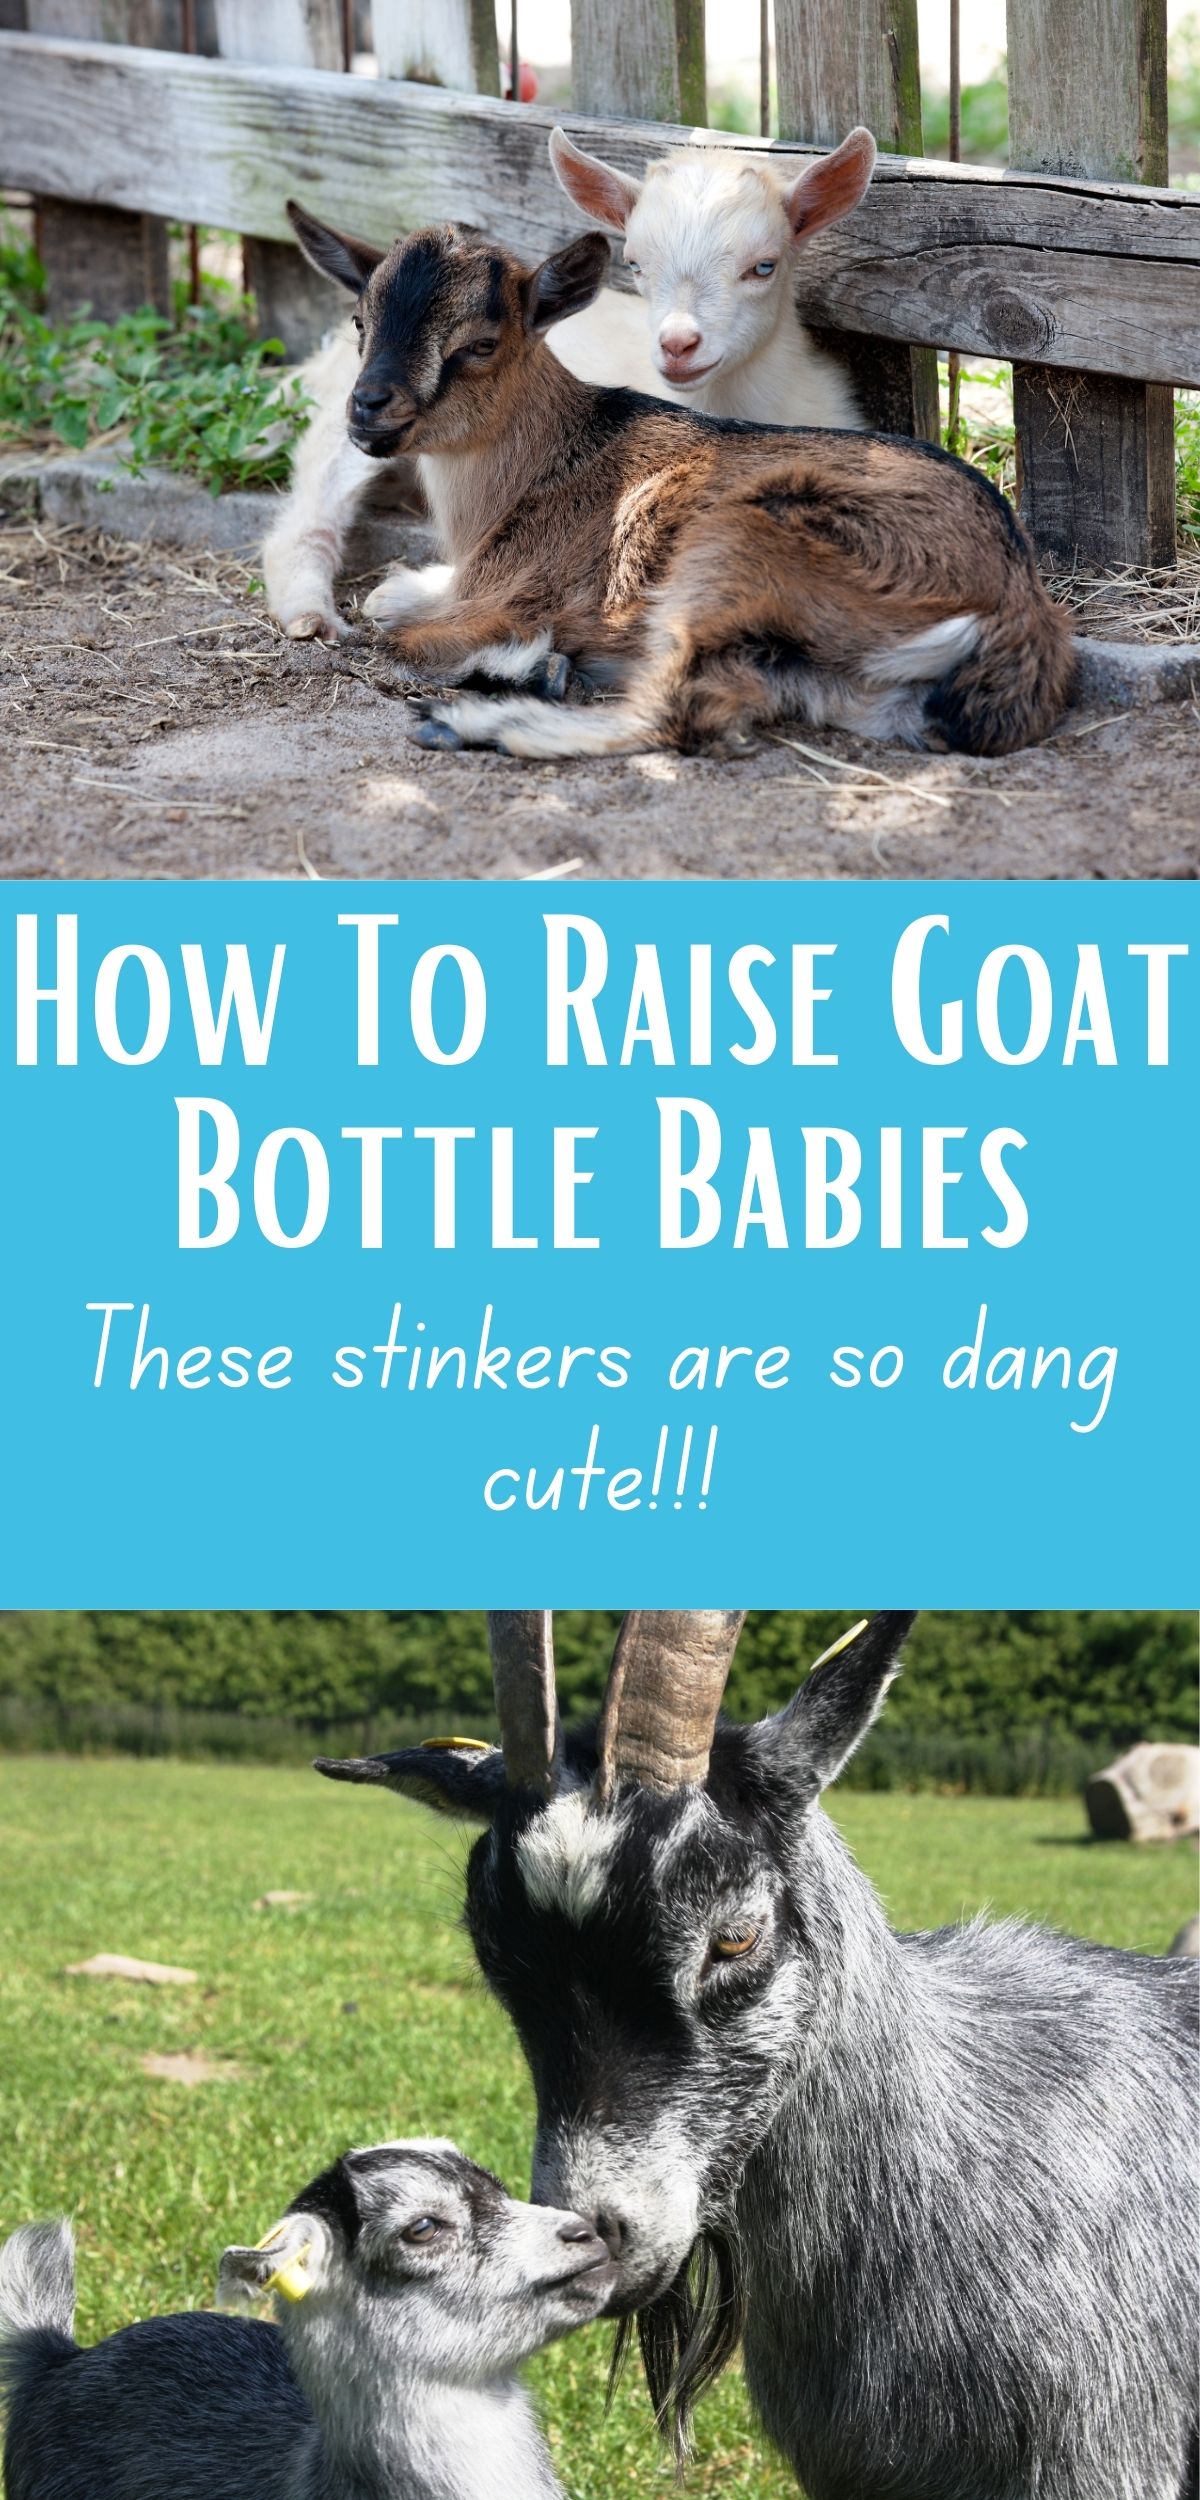
How To Raise Goat Bottle Babies

March 15, 2025 by Leigh Leave a Comment

If you are purchasing a bottle baby, have a momma who rejected a kid, or are planning to sell a bottle baby, there are some things you should know and be prepared for. Bottle babies are not for the faint of heart, there is a lot of involvement with them. You become their momma and in turn you end up with a creature that is so attached to you, it’s almost like your own kid. But to raise goat bottle babies, there are a few things you should know.

Before we get too far into this, I have a great course on the basics of goat care. I call it Goat Crash Course: Goat 101. In this course, I explain things like types of shelter, types of feeds and hays, basic assessments and so much more! Check it out!

Buy Now

First, let me preface this with: I am not a vet. I am simply a goat farmer that has done a ton of research and “experimented” on my herd. There has been a lot of trial and error…. and a lot of error. This information is from my vet and from my experience, as well as the experience of other goat farmers. I encourage you to speak with a vet or find a goat mentor local to you.

How To Raise Goat Bottle Babies

There are a lot of reasons that you may find yourself with a bottle baby. Some are fine, others are sad or scary. Regardless, here are somethings you should be aware of. If you bought bottle babies from a reputable breeder, there should be nothing “wrong” with them. This should be the easiest bottle baby you have. But unfortunately, there are a fair amount of situations where you may end up with a bottle baby that are not ideal.

Momma Rejected Or Died

While it’s a very sad situation, when momma doesn’t want to or can’t take care of her babies, you may have to pull the baby from her. Or on the other side of the spectrum momma has died and you now have babies to raise.

It’s Just Too Cold Outside

Sometimes, you have to make the decision to bottle a baby based on weather. Which is weird, I know. This late winter/ early spring has been extremely rainy. We are having weeks of rain with a day or two of sun. That means that our barn and pastures are a muddy mess. Not a great environment to raise babies in.

We are also in this weird weather pattern of cool/cold nights and 75* days. Because of that, we had to bring Bailey inside after she kidded triplets, because it was just so dang cold and wet. We seriously considered raising one of her kids inside just to give her some relief and to ensure that she could care for the other two better.

goat kidding

Before we get too far into this, I have a great course on the basics of goat care. I call it Goat Crash Course: Goat 101. In this course, I explain things like types of shelter, types of feeds and hays, basic assessments and so much more! Check it out!

Buy Now

Momma Had Too Many

Bailey gave us triplets this last season. If this had happened to almost any other goat, we probably would have been okay. But Bailey has tiny udders and doesn’t produce a ton of milk. We had to supplement with milk we had put up. If your doe birthed quads, quints, or sextuplets? Be ready to bottle raise some of them.

raise goat bottle babies

A First Time Freshener

Another reason you may have to raise goat bottle babies is because momma is a first time freshener and doesn’t have a clue what she is doing. Jade is struggling a little bit with her kids because she is really unsure how to handle them. She’s away from her sister for the first time and these things are smashing their face into her udders for milk. We had to catch/pull and then clean the babies because she was totally unprepared. This is all totally fine and normal, but you do need to be prepared.

We ended up having to pull Jade’s kids because she just wouldn’t take care of them. It was unfortunate, but we ended up selling one and keeping the other.

The Ultimate Homesteader’s Starter Bundle – Only $47!

Get the tools you need to stay organized, track profits, and manage your homestead with ease!

Includes:
✅ Schedule F Tracker – Simplify tax prep
✅ Profit Calculator – Track earnings
✅ Hay Calculator – Plan livestock feed
✅ Garden Journal – Digital & printable
✅ Herd Health Tracker – Monitor animal care
✅ Simple Budget – Manage finances
✅ Backyard Homestead eBook – Essential tips

$99 value – now just $47! Start your homesteading journey today!

Buy Now

How To Raise Goat Bottle Babies

Now to the meat and potatoes of this post. Raising goat bottle babies is probably no different than sheep and maybe cows. But I don’t have those creatures so I can really only speak about goats.

Raise goat Bottle Babies

Dam Raised or True Bottle Baby

The first thing you have to decide is whether you are going to pull the baby from momma completely or supplement feedings. Our goal is to keep kids with mommas for as long as possible. With Bailey, we “let” her be momma and we just supplemented. We started with 3x a day feedings and then dropped to one “big” bottle at night. If we had taken one of her babies to raise inside, it would have been a true bottle baby.

Bottles

There are some people that think the red teat nipple is the way to go. Others think a cheap baby bottle will work. Personally, I think fed is best, so do what you’ve got to do to get that baby to eat. We have the red teat nipples and our goats just don’t like them. We use cheap baby bottles and they work fantastic. If you are purchasing a bottle baby from a breeder, that breeder should be able to tell you exactly what bottle they are using and you can purchase that.

Tractor Supply

Replacer vs Whole Cows Milk

Whole cows milk is the replacement of choice for goat kids. Period. Actually, the replacement of choice would be goats milk. But if you can’t get that, cows milk is the best. There is a ton of research out there on the milk replacers vs whole cows milk but at the end of the day, cows milk is easier for your goat kid to digest. Whole cow milk is an animal milk but milk replacer is usually a bunch of different additives that may be too hard for your kid to digest and use.

But again, fed is best. So whatever you can afford and your kid will eat, is the way to go here.

Before we get too far into this, I have a great course on the basics of goat care. I call it Goat Crash Course: Goat 101. In this course, I explain things like types of shelter, types of feeds and hays, basic assessments and so much more! Check it out!

Buy Now

How Much To Feed

There is a TON of information about how much to feed your bottle baby and how often. But first you have to start with a weight. The ratio is about 1#= 2.5oz. So if your goat kid weighs about 5# you would feed approximately 12.5oz per day.

Also the age of your kid factors into how many times per day to feed it. A kid that is just born and is 3# would get 7.5oz of colostrum over 12 bottles.

Week 1: 6 Bottles

Week 2- 4: 4 Bottles

Week 5-8: 3 Bottles

Week 9-10: 2 Bottles

Week 11-12: 1 Bottle (start weaning)

****Weaning would be giving 1 bottle per day with less and less milk. I usually start reducing the bottles by 3oz and see how the kid does****

For example: Your goat kid is 3 weeks old and weighs 8# you would feed approximately 20oz over 4 bottles. Each bottle would contain 5oz.

Also, you should be weighing your kids at least once a week. This not only ensures that they are gaining weight but also making sure that you are adjusting your feeding amount as appropriate.

If you are interested in learning more about my favorite garden planner. I highly recommend Seedtime! This planner has been instrumental in helping me plan out my gardens with WAY more efficiency than I could ever expect! It has also reduced overwhelm, stress, and calmed my ADD/ADHD!

More Info!

Over Feeding vs Underfeeding

Goat kids will absolutely over eat if you let them. Momma’s have this instinct that tells them when the kid is done eating. But if you are momma, you may think that your kiddo is starving. They’re not. Trust me. If you are using the formula above and they are gaining weight steadily, they are just fine.

The biggest thing to watch for after a feeding is done, their belly should feel full-ish. It shouldn’t feel hard and it shouldn’t be sunken in. My suggestion is this: feed like the formula says for the first couple of days and feel their stomach. If it’s hard or rounded? Back off the milk just an ounce or so. If it’s sunken or they aren’t gaining weight? Up it an ounce or so.

goat kidding

Before we get too far into this, I have a great course on the basics of goat care. I call it Goat Crash Course: Goat 101. In this course, I explain things like types of shelter, types of feeds and hays, basic assessments and so much more! Check it out!

Buy Now

Temperatures: Milk and Kid

When it comes to goats of all ages, temperature is probably the most important thing you can master. If your goat is too cold or too hot, bad things can happen. Kids are no different and in fact it’s probably more important. When kids get too cold, they cannot digest the milk. If they can’t digest the milk? It will rot in their stomach. So make sure you are checking their temps before feeding. Before feeding, their temps should be between 101-103. If they are not warm enough, bring them inside to get warm and then feed them when they are at least 101*.

When it comes to milk, the temperature should be 103*. This is about the temperature that momma’s milk would be. Too cold and the kid could become hypothermic (cold). Too hot and the kid could scald their mouths. We check on the inside of our wrists, if it’s warm to hot (not burning) it’s the right temp. If it burns us? It will burn them.

cropped-3.jpg

Are you looking for garden journal prompts, but aren’t interested in a weekly email? Check out our 365 Garden Journal Prompts! This is an amazing, all in one, yearly product that you only pay for once.

Buy Now!

Tips and Hacks To Raise Goat Bottle Babies

Transitioning

If you are getting your bottle baby from a breeder, the kid should already be on either milk replacer or whole cow milk. If they aren’t, that breeder should send goat milk home with you to transition. When I sell our bottle babies, we send goat milk with them to start transitioning if we haven’t already transitioned them to whole cows milk. When we sold Bailey’s triplets, we were not anticipating selling them that quickly. But we sent a gallon of goat milk with the buyer. Then we dropped off another gallon and a half gallon because we wanted to make sure the transition was as smooth as possible.

Preparing For A Bottle Baby…. Just In Case

After our does kid, and depending on how many she gave us, we bring a pint mason jar with us every time we go outside. When we get singles, we milk out the colostrum of ONE teat over the next 24hrs. We do this so we have back up colostrum and a couple of times it has saved our babies. If we have twins or trips? We still bring out that jar and a bottle just in case one of the babies isn’t nursing great. Sometimes we do it at night to ensure that the kids go to bed with a full belly. But being prepared is key.

Subscribe to Craft Beer Club Today!

Enjoy It

Much like raising human children, raising bottle babies flies by. Next thing you know, they are jumping off the roof of your car… the goat kid not the human one. Unless you have a Jaxson, then it may be the house and not the car. Regardless, it is such a cool experience.

That kid will become a pocket pet for you and watching them get so excited to see you is pretty cool too. Not to mention when you are feeding them and that little tail is going a million miles a minute? Ridiculously cute. And while it’s a TON of work, it’s so worth it.

If you like the content I put out, feel free to buy us a coffee! It helps keep this site running, marketing and the goats in grain!

Buy me a coffee

If you like this post, feel free to share it and follow us below on our social media accounts!
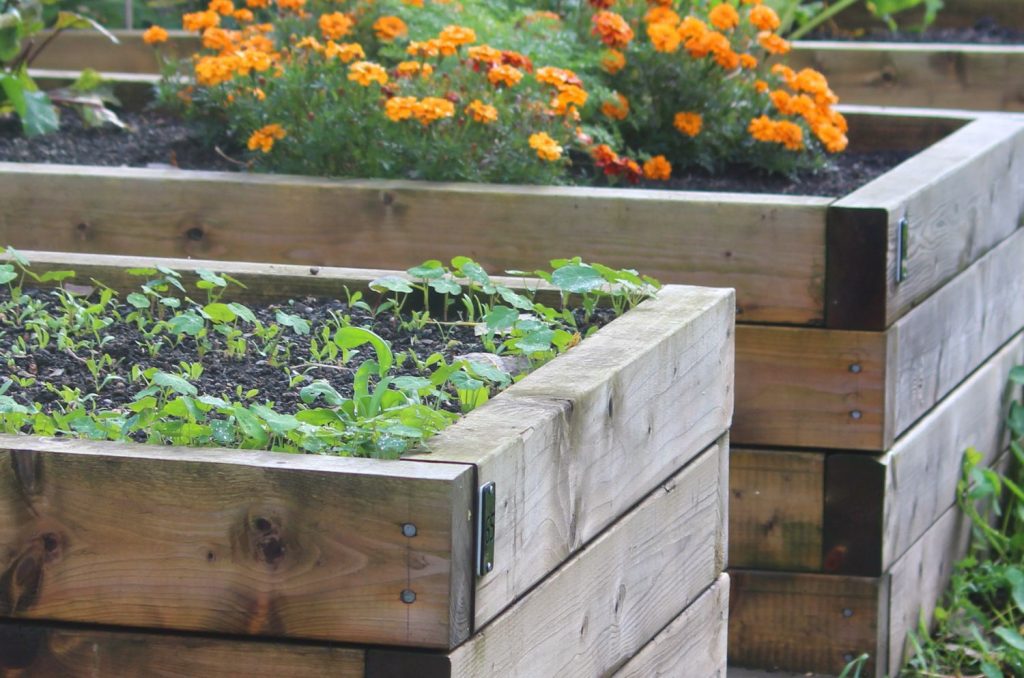
  • Facebook
  • Pinterest
  • Instagram
  • YouTube
  • TikTok
  • Spotify
  • Threads

Filed Under: Animals, Goats, How To's Tagged With: Bottle babies, Goats

JOIN TO OUR MAILING LIST!

Leave us your email to receive new posts and special offers for members only! Don't miss a thing!

Recent Posts

  • Fall Garden Guide
  • Top Mistakes With Goats
  • How To Bond With Your Goats

How To Raise Meat Chickens

March 11, 2025 by Leigh Leave a Comment

Chicken is the meat that is most consumed by Americans. Beef is a close second. But for those of us that are trying to live a more self sustaining lifestyle, chicken is the most available and easiest to raise when it comes to meat animals. But how do we do it humanely? How do we make sure that the quality of chicken doesn’t stop at the meat? Instead making sure that the entire existence of that meat chicken is happy, healthy and most importantly humane? It’s not hard to raise meat chickens but, it does take some work.

The Ultimate Homesteader’s Starter Bundle – Only $47!

Get the tools you need to stay organized, track profits, and manage your homestead with ease!

Includes:
✅ Schedule F Tracker – Simplify tax prep
✅ Profit Calculator – Track earnings
✅ Hay Calculator – Plan livestock feed
✅ Garden Journal – Digital & printable
✅ Herd Health Tracker – Monitor animal care
✅ Simple Budget – Manage finances
✅ Backyard Homestead eBook – Essential tips

$99 value – now just $47! Start your homesteading journey today!

Buy Now

****Warning Graphic Content*****

Potential Trigger Warning: If you are not interested in raising chickens for meat, please do not read this post.

How To Raise Meat Chickens

To start, purchase chicks that are from a reputable hatchery. I’m not trying to throw shade on any specific ones, but we use McMurray Hatchery. We tried them because other homesteaders speak highly of them. Now, we do too. We have ordered multiple batches of chickens and ducks from McMurray and couldn’t be happier with them. Other than a few losses, which is to be expected from any hatchery, all of our chickens and ducks have grown up to be very healthy and productive birds.

If you decide you want to hatch and raise your own chicks or simply cull your roos, then the process is still all the same. We use this incubator from Tractor Supply and love it. We have about a 85% hatch rate with it. If you don’t know, that’s pretty solid numbers.

Brooding

Most links provided are going to be from Amazon or TSC. You can find more information about our affiliate links policy here.

Brooding is when you allow your chicks to grow until they have most of their wings (usually around 3 weeks) and then transition them out of the brooder. There’s a couple ways to do brood them. I have a whole post on brooding chickens inside here, but I don’t recommend it for a lot of birds. If you are raising up 10 or 15, sure. But brooding any more than that and you’ll have a loud, stinky house… and no one wants that I use Tractor Supply Co for most of our supply needs and usually get feed from our local feed mill.

If you brood your meat chickens inside, you need to make sure that you are brooding them in an area with good airflow, is safe from predators and self injury, and has plenty of heat. I would also make sure that you put a tarp or something down. This will really help during clean up!

We use our metal shed, converted into an chicken coop/ quarantine pen and it has worked out really well for us. In fact, this is what I would recommend if you are brooding more than a few chicks.

But no matter where you brood your chickens, the process and supplies are still the same. We use these light fixtures and red lights from tractor supply. They have worked amazing for us. Also make sure you use some sort of bedding. I prefer this bedding from TSC and we use it for all of our animals.

Confining Your Meat Chickens

When we raise meat chickens, we like to keep them confined as they get closer to butcher time. Until then, we allow them to free range with the rest of the flock. At night they get put into A frame tractors that Jared built. As the chickens get bigger, they will start to spend more time in the tractors. We actually made these tractors so that we could have them work through the rows of the gardens to help with weeds and bugs.

raise meat chickens

If free ranging your meat chickens isn’t possible, these fences from Premier 1 are really good. We got this solar charger because Premier 1 tends to run low on inventory occasionally. I also got 2 orders of this 12v battery to run the fence. We’ve had a fair amount of luck with this set up. We also have a 6ft copper pipe to work as a ground. For the most part, we do not put our poultry in netting. That will probably change next spring, but for now we like having them free range the property. We do use the netting for our pigs.

The Ultimate Homesteader’s Starter Bundle – Only $47!

Get the tools you need to stay organized, track profits, and manage your homestead with ease!

Includes:
✅ Schedule F Tracker – Simplify tax prep
✅ Profit Calculator – Track earnings
✅ Hay Calculator – Plan livestock feed
✅ Garden Journal – Digital & printable
✅ Herd Health Tracker – Monitor animal care
✅ Simple Budget – Manage finances
✅ Backyard Homestead eBook – Essential tips

$99 value – now just $47! Start your homesteading journey today!

Buy Now

Which Breed of Chicks To Buy

This is a widely debated subject and to be honest, I don’t have an answer for you. I wrote a post about the best dual purpose chickens here. But at the end of the day, a meat chicken is going to be better for meat and a laying hen is going to be better for eggs.

When trying to figure out what breed of meat chickens you like, my suggestion would be to order a meat assortment from your hatchery. There are a couple of different birds that are specifically bred for quick growing meat. There are other breeds that grow a little slower but are a little bit healthier in terms of potential health problems. By getting a meat assortment from your hatchery, you can figure out which chickens you like the most.

We have ordered the Cornish X and we weren’t thrilled with it. It could be because we let them grow a little too much. Or let them free range a little too long. Either way, our next order was McMurrary’s Big Red Broiler and we really liked them. I rarely ate chicken when we had a freezer full of the CX, but we are almost out of the Red Broilers. They really are that good. We didn’t lose any to health problems that we know of.

If you are a farmer/ homesteader and looking for a way to track your income and expenses, I highly recommend our Schedule F Tracker! We have been using it for years and it is the easiest, fastest and best way that we have found to keep track of the money spent on the homestead.

Buy Now

Butchering Your Meat Chickens

The hardest day on any homestead is butchering day. While we are excited for the opportunity to fill our freezer, it can be heartbreaking to know how it happens. Some people don’t have a problem with butchering day. Other’s struggle with it. I’m the latter. No matter how many times we have butchered, it doesn’t get any easier.

Day Before Prep Work

There are a couple of things that we do before the butchering day that really helps us make the most of butchering day. The first and biggest thing that we do is to fast the chickens overnight. This helps make sure that their crop and other digestive organs are empty. It also helps us round up the chickens in the morning without stressing them out. We shake the bucket, and they come running. While this may seem like leading a lamb to slaughter, and it is, it also keeps everything low stress.

We also get all of our equipment ready the day before. From knives to kill cones, and the chicken pluckers. Radio/ bluetooth speakers are charged and ready to go. We’ve also got all of the hoses moved to where we are going to butcher and the tables are set up. Don’t forget to set up your scalder as well. We had a turkey frier set up and a long thermometer to make sure the temp stays around 140*. Finally, we fill all the coolers with ice. We’ve tried adding salt to some of the coolers to act as a brine but found that we didn’t like the meat nearly as much.

Finally, we get all the tractors moved up to the butchering area and set in the shade.

Are you getting overwhelmed in the garden? Stressed? Or just not enjoying the garden like you used to? Check out our garden prompts! We send out weekly emails that get you back in the garden and out of your head! Turn the garden back into a place of love and joy instead of frustration and headache!

Subscribe Now!

Day Of Processing

Once the scalder is at temperature and we are ready, we start working our way through the flock. After the bird has been killed and the head, feet, feathers and organs removed, we will put them in ice water to soak and allow the chicken’s body to go through the rigor mortis phases. Yes, gross, but this is how your chicken from the grocery store is handled as well.

We try to break down the chickens the same day we butcher, but we are usually exhausted. We break them down into 4 piece bags (4 breast or 4 quarters, etc). Then everything is vacuum sealed and thrown in the freezer. Sometimes we use these bags for whole chickens or these for smaller pieces. While we really like the vacuum seal bags, they do get very expensive, very fast. We will also freeze the head, feet and organs for dog food so that as much as possible is used.

Timing Your Meat Chickens

One of the things we have learned over the years is to time when you order and butcher your meat chickens. This may not seem very important, but let me tell you, it is probably the most important decision you could make that your future self will thank you for.

Most meat birds are ready between 8 and 16 weeks, depending on the breed. But you really need to think about what your weather is going to be like when they arrive and when it’s time to butcher. Trust me, this is an important factor that EVERYONE misses.

One year, we bought our birds in August and butchered in November. That was freaking miserable. We had to start a fire in our fire pit to warm up our hands as we went.

Another year, we bought our birds in February and butchered May/ June. We lost half our birds to the cold, despite having 4 heat lamps. Then come butchering day it was freaking HOT. Not to mention we were covered in yellow jackets and mosquitos.

We have found that our sweet spot is ordering in July to butcher in October. This has really been perfect for us. As the day progresses we can shed layers and we don’t have to worry as much about bugs. Not to mention that our ice lasts longer in the coolers, so we are able to leave our birds to soak overnight without worrying so much about getting them processed in time.

At the end of the day, you have to do what is right for your family, your farm and your checkbook.

If you like the content I put out, feel free to buy us a coffee! It helps keep this site running, marketing and the goats in grain!

Buy me a coffee

If you like this post, feel free to share it and follow us below on our social media accounts!

  • Facebook
  • Pinterest
  • Instagram
  • YouTube
  • TikTok
  • Spotify
  • Threads

Filed Under: Chickens, How To's

JOIN TO OUR MAILING LIST!

Leave us your email to receive new posts and special offers for members only! Don't miss a thing!

Recent Posts

  • Fall Garden Guide
  • Top Mistakes With Goats
  • How To Bond With Your Goats

Planning Your Garden

March 8, 2025 by Leigh Leave a Comment

At this point, I am going stir crazy to get my gardens going. I desperately want to get my hands in the dirt and get back outside. We only have about 30-45 more days of COLD weather before we will start warming up. To be honest, that is mind boggling. Our last frost date this year is around April 15th for our zone 8a. I couldn’t be more excited! But now is the time to start planting our spring seedlings and long summer plants. But how do you know what to plant? You start planning your garden.

If you are looking for a great way to keep track of your gardens for years to come, check out our Digital Garden Journal. It’s a digital spreadsheet that helps you manage not only your seedlings but also your seed inventories, soil testing, orchard, harvests and so much more.

Buy Now

Planning Your Garden

There are a ton of things that go into planning your garden. It’s not just “I want tomatoes and peppers.” It’s much more involved than that. But the good thing is, it’s not really a lot of work. Right now. As we go through this post, I’m going to show you the questions we ask and how we set up our plans to make sure we, and our animals, have plenty of food in the gardens.

What do you eat?

The first step in planning your gardens is determining what you want to eat. New gardeners will usually plant all sorts of things without really asking what they like to eat. They’ll take up huge beds or rows thinking that they MUST plant cucumbers, even though they HATE cucumbers.

But you? You are going to really think about the foods you like to eat, and plan accordingly.

Do you like tomatoes, cucumbers, squash, or berries? Figure it out and start working on how much you think you’ll need. I’ve got a post on what to plant in your veggie garden, to read more about this.

If you are interested in learning more about my favorite garden planner. I highly recommend Seedtime! This planner has been instrumental in helping me plan out my gardens with WAY more efficiency than I could ever expect! It has also reduced overwhelm, stress, and calmed my ADD/ADHD!

More Info!

How much do you eat it?

The next step is to decide how much of that plant you want. There are somethings to keep in mind here. Let’s take cucumbers and tomatoes here. Let’s say you absolutely LOVE cucumbers, but hate raw tomatoes. BUT you eat a ton of tomato sauce and you want to can it.

You should look at how much fruit a plant will give. A cucumber plant will yield approximately 10-15 (or more) cukes depending on when you pick them. Don’t need or want 100’s of cukes? Don’t plant a bunch of plants. A tomato plant will yield approximately 8-10# of tomatoes per plant. A quart jar of tomato sauce needs approximately 5# of tomatoes, roughly. If you are trying to put up a lot of tomato sauce, maybe plant a lot of plants.

The Ultimate Homesteader’s Starter Bundle – Only $47!

Get the tools you need to stay organized, track profits, and manage your homestead with ease!

Includes:
✅ Schedule F Tracker – Simplify tax prep
✅ Profit Calculator – Track earnings
✅ Hay Calculator – Plan livestock feed
✅ Garden Journal – Digital & printable
✅ Herd Health Tracker – Monitor animal care
✅ Simple Budget – Manage finances
✅ Backyard Homestead eBook – Essential tips

$99 value – now just $47! Start your homesteading journey today!

Buy Now

What kind of space do you have?

This is where I can’t really tell you how much or how little to plant. You’ve got to make those decisions based on your garden size. But I will tell you that you can absolutely get creative with your space. Tomatoes grow well in containers, so you don’t have to “waste” garden space on tomatoes if you can put them in pots on the back porch.

Planting plants like marigolds, mums or basil will not only help keep bugs off your plants help keep the soil healthy. When we are planting our raised beds, I plant something high, something low, and a root. For example, I will plant peppers, carrots and oregano in the same area.

cropped-3.jpg

Are you looking for garden journal prompts, but aren’t interested in a weekly email? Check out our 365 Garden Journal Prompts! This is an amazing, all in one, yearly product that you only pay for once.

Buy Now!

Lastly, look into vertical gardening. Running a couple cattle panels or other trellising could save you a ton of space and allow you to use more of your beds!

Companion planting

Usually, I will plant a row of tomatoes, peas, and onions or garlic. The tomato plant shades the peas. The peas put nitrogen back in the soil. And the garlic or onions will help deter pests. This idea is called companion planting and is really beneficial to your gardens.

I will also plant things like oregano, basil and catnip, along with other herbs, around the garden in hopes that it will also deter pests. Flowers do a great job of not only repelling insects but also attracting them. Japanese beetles will eat my marigolds but leave my vegetables alone.

Are you getting overwhelmed in the garden? Stressed? Or just not enjoying the garden like you used to? Check out our garden prompts! We send out weekly emails that get you back in the garden and out of your head! Turn the garden back into a place of love and joy instead of frustration and headache!

Subscribe Now!

Another option is planting multiple plots of the same vegetables in different areas. Or even planting things you don’t like, like cucumbers. Let the cucumber beetles, squash bugs and other pests that LOVE cucumbers, squash, melons, etc, eat the cucumbers that you don’t like in hopes of protecting the plants you love like your cantaloupe.

Let’s Get Planning

Draw it out

Drawing out what you are planning is a great way to visualize your space. First, let me apologize for the the horrible photo, but it’s what I’ve got. This is our plan for our main garden. As you can see it is scaled at 2ft per square.

This plan really helped because I was able to figure out exactly how much space I have and how much space can be used for plants, walkways, gates and more.

Space

Another big thing to remember when planning your garden is space. You need space to move between the rows of your garden and your plants need room to grow. A lot of new gardeners will cram as much as they can in their row or bed and then wonder why everything is stunted. They will put their seedlings in the ground and then think, “It looks so bare” and plant more…. I am SUPER guilty of this, even now.

But if you stick to the recommended spacing, it won’t look bare for long.

If you are new to heating with firewood and are looking to master the finer points of it. We’ve got a great eBook that goes in depth of what tools you should consider, how and where to stack, how to build a fire and so much more!

Buy Now

Using the chickens

So one of the things that we are doing this year, per our plan, is to get our chickens in the garden. Here in Georgia, we have a ton of bugs and a ton of weeds. Last year, our garden wasn’t amazing for a couple of reasons but the two biggest where bugs and weeds.

We plan to “plant” our chickens in the garden to help with bugs and weeds. We are building chicken tractors that will be 4ftx8ft. They will also have roosting bars, nesting boxes, feeders, etc in these tractors.

We noticed that we have had a lot of poultry loss over the last several years. We’re not 100% sure if it is from predators or the chickens just wandering off. So we will be putting the chickens in their tractors and then rotate them through the gardens. We’ll see how it works.

cropped-3.jpg

Are you looking for garden journal prompts, but aren’t interested in a weekly email? Check out our 365 Garden Journal Prompts! This is an amazing, all in one, yearly product that you only pay for once.

Buy Now!

Order your seeds

Once you have figured out what you are going to eat, how much, and where you are going to put it, it’s time to order your seeds. It is always preferred to save money and save your seeds, but sometimes you can’t do that. Either because you don’t have seeds to save, hybrids, or it’s just easier for you to buy them. I will usually place my seed orders in December or January, so now is the time to get this done.

I recommend Eden Brothers or Territorial Seed Company. I’ve had really great success with their seeds. They’ve also got some great flower bulbs as well.

When your seeds come in, start looking at when you need to plant them according to your last frost date. Mine is March 23rd so I’ve started planting my peppers, pumpkins, and other slower maturing plants. This will save you hundreds if not thousands of dollars.

Before we get too far into this, I have a great course on the basics of goat care. I call it Goat Crash Course: Goat 101. In this course, I explain things like types of shelter, types of feeds and hays, basic assessments and so much more! Check it out!

Buy Now

Start your seedlings

So there are a million different ways to do this. The first time we tried to start seedlings, we had poor germination and what did germinate, we didn’t know what it was. Now, we use this shelving unit in our living room next to the windows. Our living room stays warm and gets a lot of sun. Stay tuned for our greenhouse build!

The tray above is simply a 1020 tray that does NOT have holes. We do not water from the bottom. We mist and use domes to trap moisture and heat until they are established. The little pots inside? Simply amazing! I love these little pots. They have held up very well and I highly recommend them.

Lastly, and I cannot stress this enough. LABEL EVERY SINGLE PLANT! Don’t think for one second you will remember what plant this is! Seriously, trust me.

That’s pretty much it! I know it’s a lot but the biggest things to remember is this. Only plant what you will eat, unless you are using it as a companion or sacrificial plant. Leave plenty of room for your plants to grow. Start your own seedlings so you have more options and save money. And last? Remember, playing in the dirt is good for the soul.

If you like the content I put out, feel free to buy us a coffee! It helps keep this site running, marketing and the goats in grain!

Buy me a coffee

If you like this post, feel free to share it and follow us below on our social media accounts!

  • Facebook
  • Pinterest
  • Instagram
  • YouTube
  • TikTok
  • Spotify
  • Threads

Filed Under: Garden, How To's Tagged With: Garden, Goal Setting, Planning

JOIN TO OUR MAILING LIST!

Leave us your email to receive new posts and special offers for members only! Don't miss a thing!

Recent Posts

  • Fall Garden Guide
  • Top Mistakes With Goats
  • How To Bond With Your Goats
  • Page 1
  • Page 2
  • Page 3
  • Interim pages omitted …
  • Page 7
  • Go to Next Page »
  • Animals
    • Chickens
    • Farm Dogs
    • Goats
  • Garden
    • Compost
    • Garden Projects
    • Seeds and Plants
    • Garden Journal
    • Working With Food
      • Recipes
      • Freezing Foods
      • Dehydrating Foods
      • Canning Tips And Tricks
        • Canning Inventory Sheets
  • Helpful Info
    • Welcome to the Homestead!
    • Emergency Preparedness
    • Frequently Asked Questions
    • Goal Setting
    • Project List
    • Shop Digital Products
      • Hay Calculator
      • Farm Expense And Income Tracker
      • Goat Crash Course: 101
      • Garden Journal Prompts
      • Schedule C Tracker
      • Schedule C Tracker
      • The Homestead Bundle
  • The Truths
  • Episode List
  • Start Here
    • Privacy Policy
    • Affiliate Disclosure
    • Let’s Get in Touch
    • Members Only Library
    • Welcome To Our Homestead

Footer

  • Email
  • Facebook
  • Instagram
  • Pinterest

COME AND GET IT!

Leave us your email to receive new posts and special offers for members only! Don't miss a thing!

· Midnight Theme

Copyright © 2026 · Midnight Theme on Genesis Framework · WordPress · Log in