• Skip to primary navigation
  • Skip to main content
  • Skip to primary sidebar
  • Skip to footer

Steel Raven Farms

Where muck boots meet ground.

  • Animals
    • Chickens
    • Farm Dogs
    • Goats
  • Garden
    • Compost
    • Garden Projects
    • Seeds and Plants
    • Garden Journal
    • Working With Food
      • Recipes
      • Freezing Foods
      • Dehydrating Foods
      • Canning Tips And Tricks
        • Canning Inventory Sheets
  • Helpful Info
    • Welcome to the Homestead!
    • Emergency Preparedness
    • Frequently Asked Questions
    • Goal Setting
    • Project List
    • Shop Digital Products
      • Hay Calculator
      • Farm Expense And Income Tracker
      • Goat Crash Course: 101
      • Garden Journal Prompts
      • Schedule C Tracker
      • Schedule C Tracker
      • The Homestead Bundle
  • The Truths
  • Episode List
  • Start Here
    • Privacy Policy
    • Affiliate Disclosure
    • Let’s Get in Touch
    • Members Only Library
    • Welcome To Our Homestead

Leigh

Fall Garden Guide

August 17, 2026 by Leigh 15 Comments

In all the years that I’ve been growing a garden, the fall garden has steadily remained my favorite. Which is funny because I don’t really like any of the brassicas, which is what most people know the fall garden for. I prefer the root vegetables and cool air. But I have learned over the years that the fall garden is a chance to rest, grow when wanted, and accept that sometimes shit just doesn’t go as planned…and that’s okay.
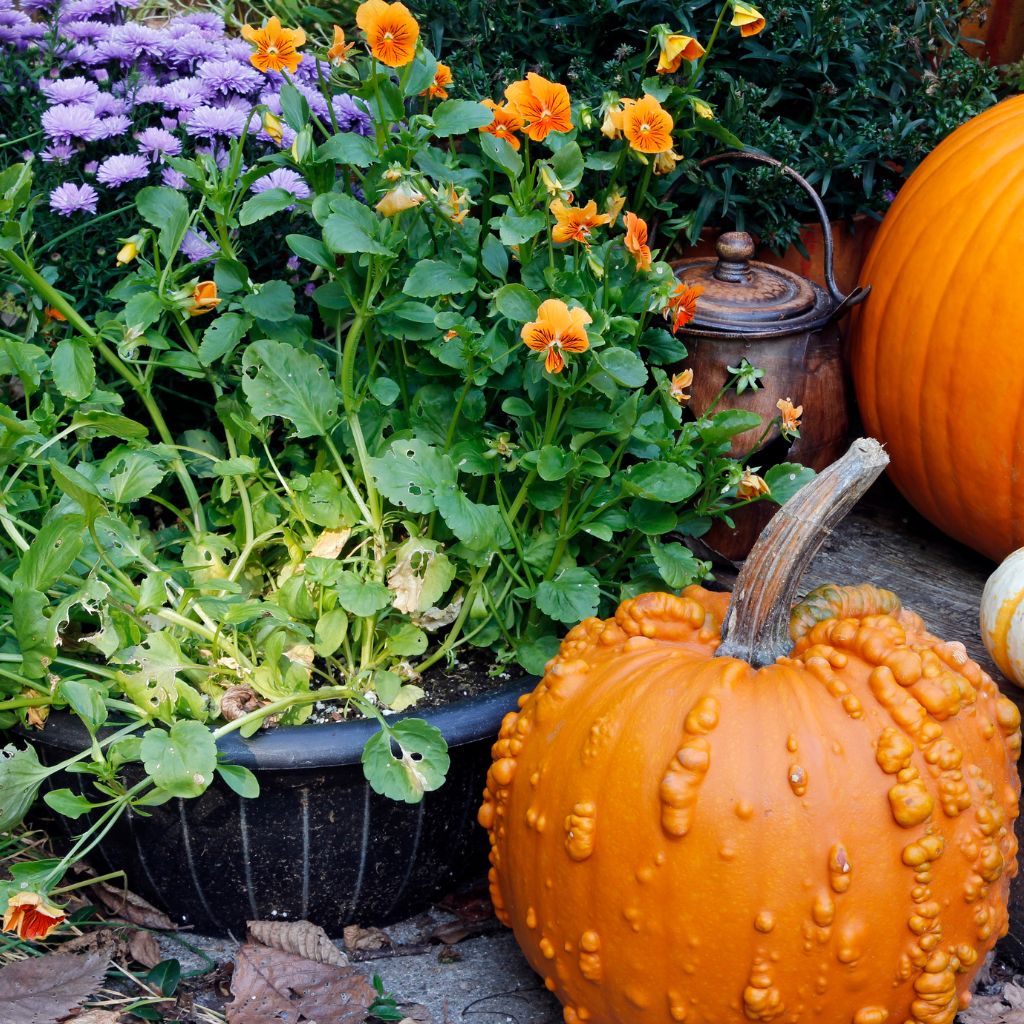
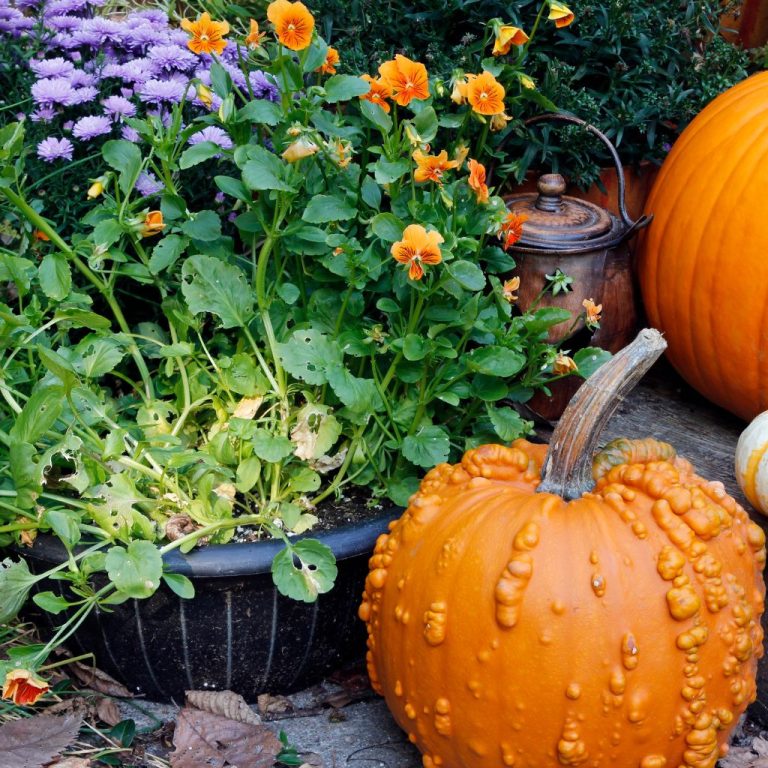
Pumpkins next to a black planter with flowers

For me, fall is when I spend most of my time in the garden. Yes, I spend time in my garden year-round. Spring is when I go through and start cleaning out or clearing beds. Summer is planting and harvest season. Winter is the time to rest and plan. But the fall? That’s where it’s at for me.

I am extremely heat-sensitive. I will get nauseous, short of breath, have headaches, feel dizzy, and more if I spend too much time in the heat, which makes living in Georgia fun. Not to mention, we have mosquitoes that will attack anyone who isn’t slathered in bug spray.

Then there are the fucking weeds! Seriously, learn about the benefits of mulching!

But a lot of that goes away in the fall, so it makes the fall garden that much more enjoyable.

So let’s get to it.

What is a fall garden?

It’s exactly what it sounds like, a garden that is grown in the fall. To be clear, this garden is going to look very different for every growing zone, microclimate, gardener, etc. There is no one-size-fits-all approach to any garden. Just because I live in Georgia with a long growing season doesn’t mean that I can follow the same principles for someone growing in California or Alaska.

As with everything, and I mean everything, trust but verify! If you took my list to an incredibly cold or hot climate, it may fail. So make sure that you stay curious and willing to learn!

There are some very important guiding principles for the fall garden:

1) Cool-weather plants go into a fall garden. These are things like those dreaded brassicas (like, really, who likes brussel sprouts?), root vegetables, and lettuces.

2) You really need to know your frost dates. These are the dates (in your climate) when temperatures will be cold enough to damage or kill your plants.

3) You need a plan for cold nights. This could be row covers, jugs of water, etc. But you do need some kind of plan for when the temps drop.

4) What do you like to eat? I know I keep harping on those poor brassicas, but my husband loves broccoli. He and my youngest like brussel sprouts, but my oldest and I hate them. Because I have people in my house who like these foods, and I like to grow shit, I grow them.

5) Have a plan! This includes purchasing and starting seeds, preparing beds and soil, etc.

Finally, you need to be prepared to fail. Seriously. And I’ll get to that; I promise.

What to plant

First thing first. What goes into a fall garden?

Anything cool/ cold hardy. This is where you are going to have to do some research and not rely on AI to help you out.

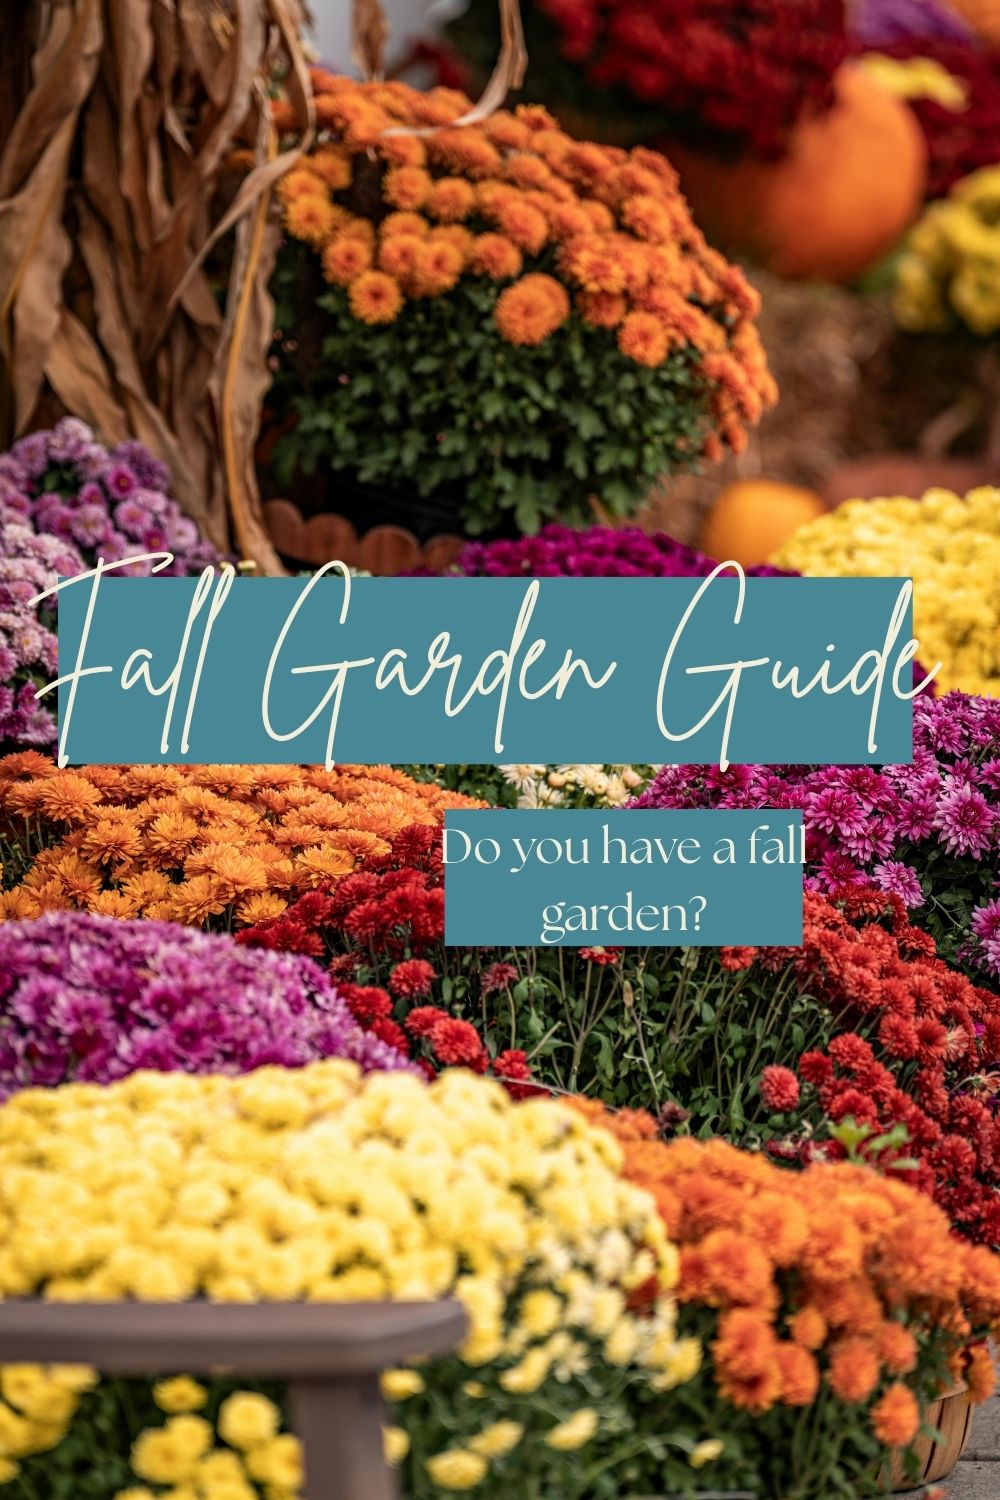
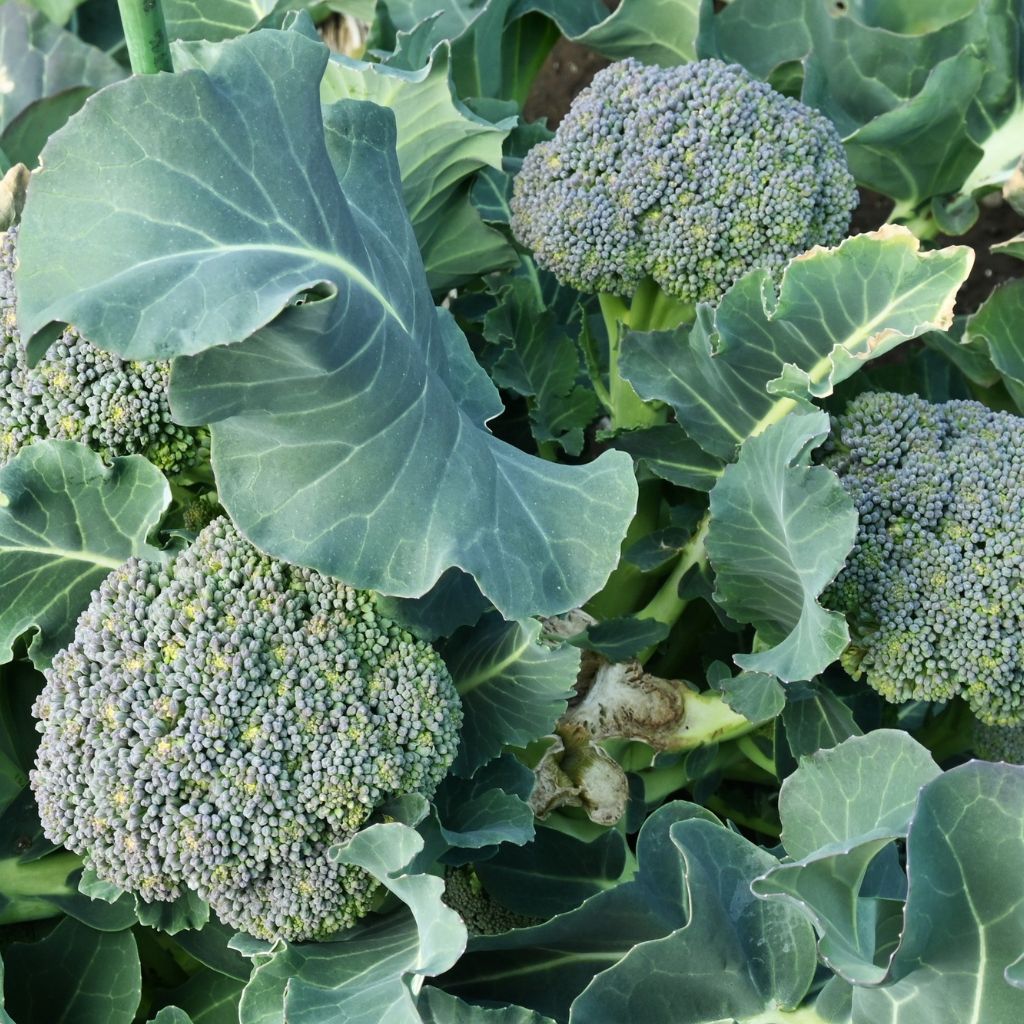
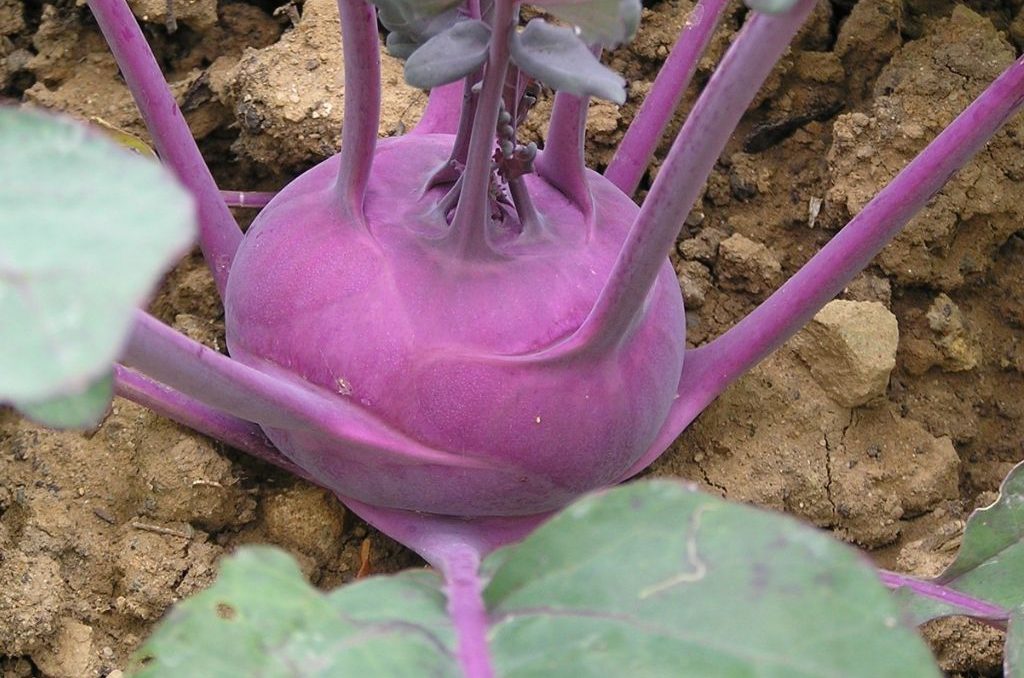
This is stuff like broccoli, cabbage, cauliflower, carrots, leeks, kohlrabi, leafy greens, and even things like cucumbers, peas, and beans. And depending on your fall/ winter seasons, you can even get some summer squashes in there too. A lot of herbs do well in fall gardens as well.

I am working on a list of vegetables and plants to grow by season, so stay tuned!

Just make sure you have plenty of time to harvest before your first frost.

To give you a real-world example:

It is August, which means that I will be starting all of my brassicas, squashes, and cucumbers in my greenhouse. But the vast majority of fall vegetables are actually direct-sown (DS). Things like peas, carrots, green beans, kohlrabi, etc get put straight in the ground.
When to plant

This is where the fall garden gets tricky.

First, you have to know your frost dates. It’s really easy to find out the frost dates in your area. Simply go to your favorite search engine and type in “frost dates for {your zipcode}”

My average frost dates are:

  • First frost: October 21st
  • Last frost: April 19th

Then, I look at what I want to plant and how long it takes to get to harvestable size.

For example: How long does it take for a cucumber to reach maturity?

  • About 50-70 days depending on variety.

Next, we count backwards from our first frost date. And no, you don’t have to do this on your fingers. Again, go to your search engine and type in “what date is 70 days before {first frost date}?”

That means that for my garden, I need to get that cucumber in the ground no later than August 12th. But remember, your frost dates are just an average. And there are ways to protect your plants beyond that frost date.

Now, the good news is that you don’t have to do this for every single vegetable. If you have several seeds that all take 70 days, then you just note that these seeds can all be planted at the same time.
Planning for cold nights

The next thing to plan for is cold nights. How are you planning on handling an early frost?

I could say that we use row covers and water jugs, but we don’t. Maybe it’ll happen next year (been saying that for years), but I doubt it.

But I can give you some options to research if you decide to go down that route: row covers, water jugs between plants, mulching, and cold frames are some really awesome ways that other gardeners use.

What do you like to eat?

This is probably the hardest thing for new gardeners to grasp. When someone gets bitten by the gardening bug, it’s not as simple as only grow what you eat. It’s exciting! And it’s not something unique to a specific season of the garden. I fucking HATE okra. Tell me why I planted an entire bed (4×8) for Hubbins, who literally didn’t do anything with it!

Or you have never prepared a cabbage in your life, but now you have fifteen of them in your garden. You don’t even know if you like them!

And to be clear, I am not saying don’t experiment. I experiment all the time. I grew three beds of kohlrabi and realized that I love them. That experiment worked out great. But it doesn’t always *looking at you okra*.

So figure out what you want to eat, figure out its growing requirements, and grow that. And leave some room for that alien looking plant that tastes like peppered apples.
Planning your fall garden

Figuring out when and what to plant is the “easy” part. If you’re like me, you already have stuff in the ground from your summer garden. Things that maybe aren’t ready to come out yet. So what do you do?

There isn’t really an easy answer for that. I wish it were as simple as having a dedicated fall garden space. But for a lot of people, that’s not an option.

Here’s what I do:

The plants that have already given me enough food get pulled. The plants that are sick or damaged, they get pulled.

If the plant is still healthy or still has some vegetables to give, I plant around it. The reality is that a broccoli plant isn’t going to get to a harvestable size before that other plant is ready to come out.

Another thing to note is that when to plant isn’t the same as when to start your seeds. For a lot of people, they purchase their plants from a nursery, and that’s that. But the reality is that gets fucking expensive. A single cabbage plant is going to run you around $5 at a nursery. You are paying $5 for the hope of a cabbage if you can keep it healthy and pest-free. You can buy an organic head of cabbage at the store for less than that.

But a pack of seeds normally runs about $3-5 and you get between 10-50 seeds!

So it’s financially better to start your own seeds.

Starting your seedlings needs to happen several weeks before transplanting, depending on your plants. But that means that you need seeds, soil, trays or cups, etc. Make sure that you have all of those before you start so you’re not waiting on a shipment before you can get started.

Prepare for failure

I know this sounds counterproductive, but the reality is that gardens fail all the time. Sometimes it’s because of drought or pests. Other times it’s because you got sick. Or, in our case, a storm destroyed a couple of garden beds and everything in them.

Life happens. Nature happens.

Knowing what you’re going to do if your garden doesn’t produce is key to not wanting to give up in the future.

Also, keep a journal! It doesn’t matter if it’s a spreadsheet, pocket notebook, or binder. Just have something that you can look back on and see what worked and what didn’t.

Make sure to save for later!
If you like this post, feel free to share it and follow us below on our social media accounts!
  • Facebook
  • Pinterest
  • Instagram
  • YouTube
  • TikTok
  • Spotify
  • Threads

Filed Under: Garden Tagged With: Garden, Gardening, Homestead

JOIN TO OUR MAILING LIST!

Leave us your email to receive new posts and special offers for members only! Don't miss a thing!

Recent Posts

  • Fall Garden Guide
  • Top Mistakes With Goats
  • How To Bond With Your Goats

Top Mistakes With Goats

January 13, 2026 by Leigh Leave a Comment

We all know that I love my goats. Probably more than most people. They are seriously the coolest creatures on our farm. But there are some very common mistakes with goats that I would love to clear up today. I’ve talked before about goats not being beginner livestock and I will say it again and again. Before you get into goats, lets learn somethings about them.

Before You Decide Goats Are “Hard”

Most frustration with goats comes from starting with the wrong assumptions — not from the goats themselves.

If you’re new to goats, bonding and trust come before routines or productivity:
👉 How I Bond With Goats on a Working Homestead

Most Common Mistakes With Goats

Goats Are Easy To Take Care Of

They are NOT the easiest thing to take care of. In fact, far from it! Out of all of my animals, the chickens are the easiest not the goats. We are constantly battling worms in the summer. Getting them through winter tends to be iffy if they had a ton of worms in the summer. Spring is kidding season. I think the only “safe” season is fall but we are still dealing with bucks in rut, worms, and feed.

We are currently battling coccidia with our kids and are trying like hell to keep everyone healthy. But unfortunately, summer in Georgia is a goat killer. Between the heat, worms, forage issues? It’s stressful. One of the ways that we combat the worms is by only worming when necessary. That includes coccidia. But summer is a scary time for us. Another way is pasture rotation and free ranging.

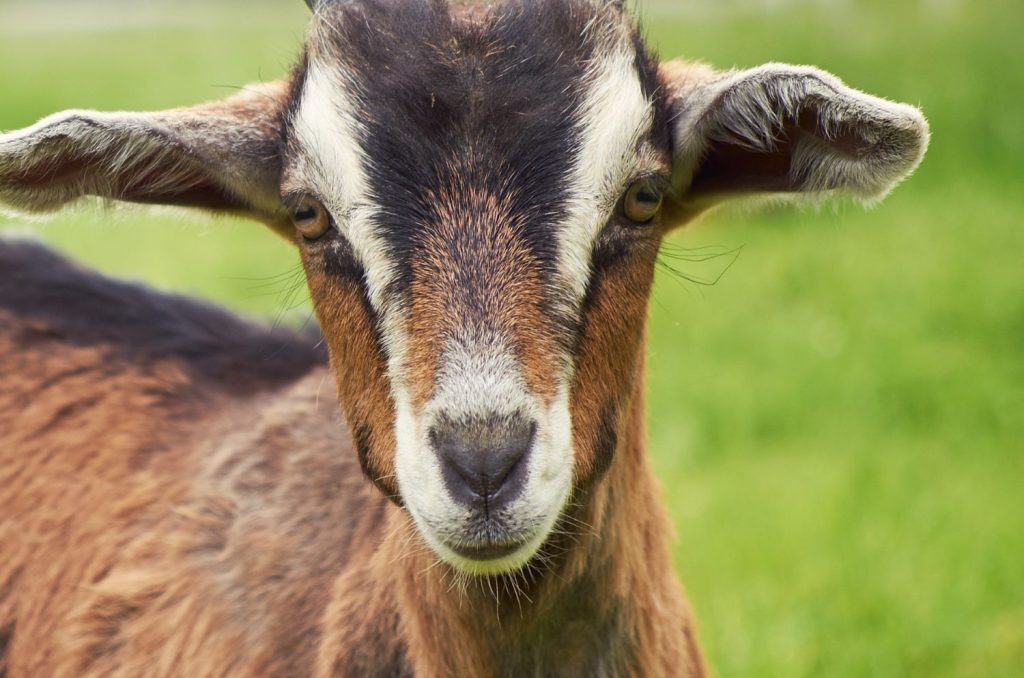
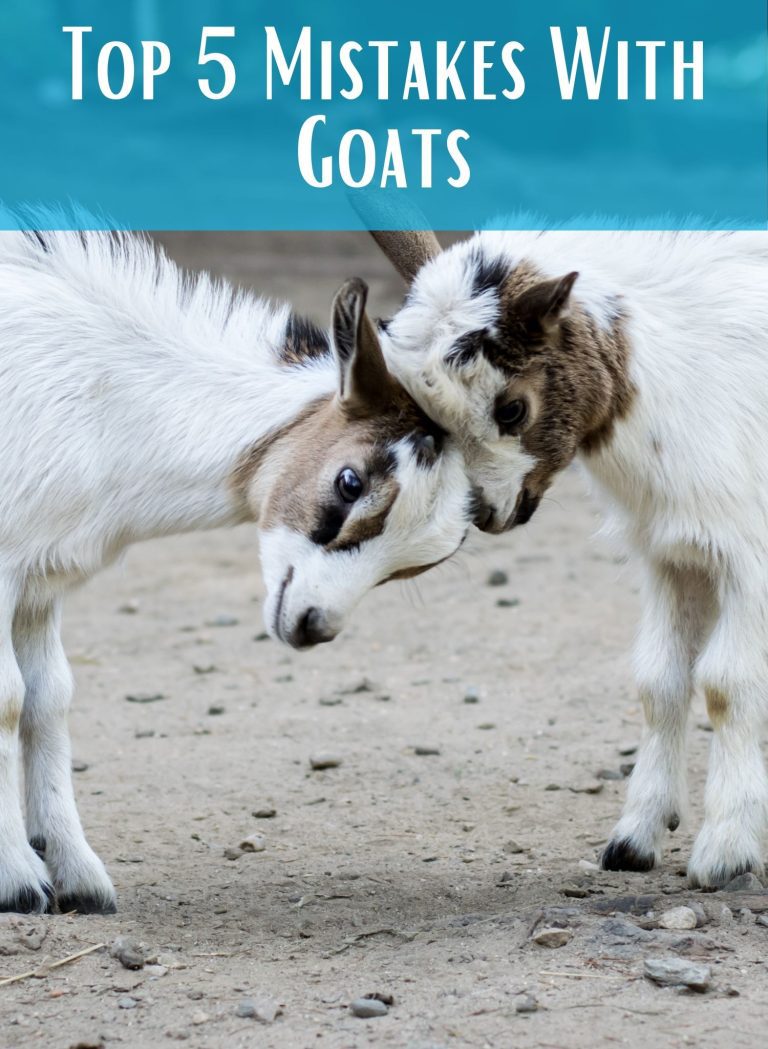
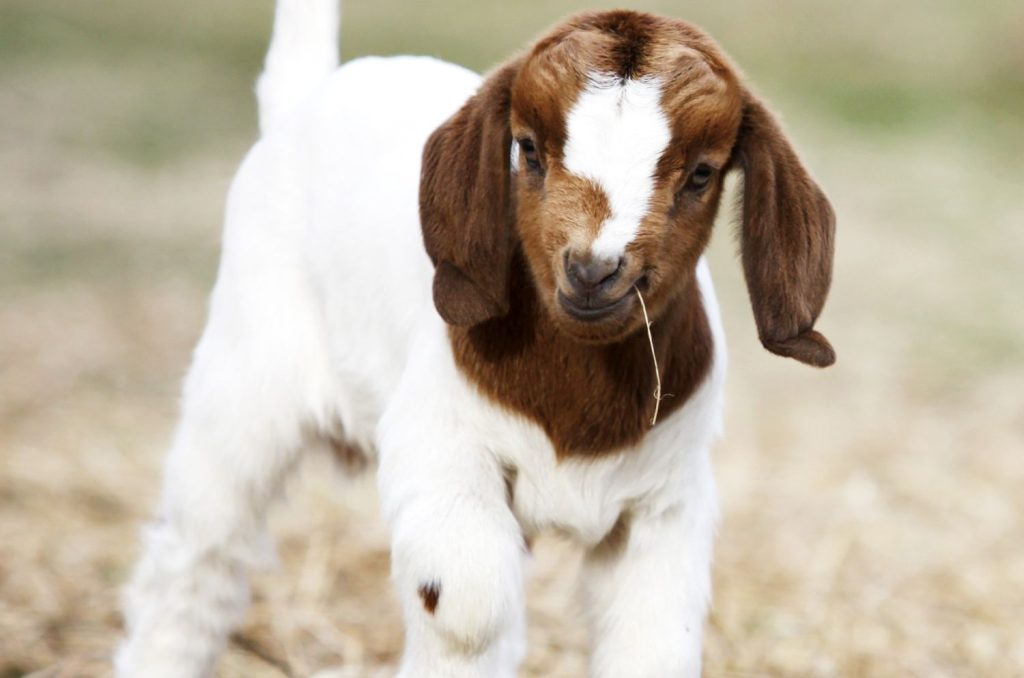
Brown and white goat

You Can Get One Goat

Goats are herd and prey animals. In order to feel safe and happy, they need other goats to hang out with. Without having a companion, they will get depressed, lonely, and will not thrive. Do yourself a favor and get two.

When we lost V and Bella was our only goat for two days, she literally Houdinied us every couple of hours. I don’t even remember how many times she took off. Finally, we had to tether her because she wouldn’t stay in the pin. As soon as we got Midas in with her? She never broke out again **knocks on all the wood**

While on the topic of only getting one goat, do yourself a favor and get two goats whenever you are bringing new goats into your herd. We have always brought home at least two goats every time we purchase new stock. The last time, we didn’t. Poor Phoenix doesn’t have anyone that will play with her. She is a lone goat in the herd because everyone is already paired up. Thankfully, she is a pocket goat and really just wants our attention. Which is fine, except we can’t always be out there with her.

You don’t HAVE to do this, but it does help transition if there is another new goat to buddy up with.

Goats Can Eat Anything

No. Just no. I saw a post on Marketplace a couple days ago for last years hay. Good for mulching, raised beds, or goats…. Excuse me? I can promise you, if you feed that kind of hay to your goats, they will die. Period. Moldy, old, dirty, hay will kill your goat. They really need horse quality hay because they can get sick so easily. Let’s not mention that they cannot eat a tin can.

When we got Oakley and Bailey, then Spike, Jade, and Sapphire, they got into mountain laurel. Thankfully, we were able to pull them through but it was touch and go for a minute. There are tons of toxic plants to them, and usually they are good about not eating it. But they are very curious creatures.

Goats Are Stupid

These creatures are more intelligent than dogs. They are also incredibly curious, which gets them into a ton of trouble. Champ knows how to get into pasture two, where she doesn’t belong. We have tried various ways to keep her out but none of them work. So she ends up in pasture two. A lot.

All of the goats know that if they scream loud enough, for long enough, they will get extra grain and alfalfa in the mornings. So no, they are not stupid.

We have trained our goats to feed buckets in case of a break out. We’ve trained them to a dinner bell like this, if they are too far away to hear the bucket. Goats are incredibly smart.

No Fence Will Hold A Goat

This is borderline when it comes to goats. I have noticed that if they are kept fat and happy they will probably not try to escape. BUT if they want something on the other side of the fence? They are going to go get it. We manage to keep two bucks from the girls simply by making sure that the fence is secure and they have a buddy.

There are some goats that cannot be contained without resorting to tethering. While that is not ideal, especially if you have high predator loads, you’ve got to do what you’ve got to do. We had to tether Bella until she became more comfortable with us. We also had to tether Midas because he was so stressed out when we brought him home.

Goats Only Eat Weeds

Not true! Goats prefer browse, which is plants with woody stems. However, goats are actually Growsers, meaning they will graze and browse. They will eat weeds, trees, hay, grasses, fruit, veggies, etc. Just like you prefer certain foods, so do they.

It is important to pay attention to what they are avoiding though. If you have a patch of some sort of weed, and the goats are eating everything but that weed, go ahead and remove that weed. It’s probably something that they shouldn’t eat.

Goats Are Not Intuitive Eaters

This is a pretty hot button topic among most goat owners. It’s kind of like the deworming or disbudding argument, you’ve got people for and against it. In that vein, I’m going to give you my opinion and experience, you do with it what you will.

My goats are intuitive eaters. If they have access to plenty of forage, they will not touch toxic plants like Mountain Laurel, Beefsteak plant, and Rhododendrons. But as soon as forage starts to die back and only toxic plants are available, they may start to eat it.

This goes for minerals as well. There is a huge debate about whether or not you should have free choice loose mineral or a mineral buffet. We’ve done both and have found that our goats will clear out entire buckets of one or two minerals and leave the rest alone. So again, I do think that goats are intuitive eaters.

Unfortunately, we do not have the time, space or set up to really have an effective mineral buffet, so we went back to free choice loose minerals.

Once expectations are realistic, goats become far easier to live with.

👉 How I Build Trust and Routine With My Goats

These Are Just A Few Of The Mistakes I’ve Noticed

There are many, many more mistakes with goats but those are the biggest ones that I feel need to be addressed. I know that I have a ton of different posts about goats and sound like a broken record, but these really are important.

If you like the content I put out, feel free to buy us a coffee! It helps keep this site running, marketing and the goats in grain!

Buy me a coffee

If you like this post, feel free to share it and follow us below on our social media accounts!
  • Facebook
  • Pinterest
  • Instagram
  • YouTube
  • TikTok
  • Spotify
  • Threads

Filed Under: Animals, Goats, How To's Tagged With: Goats, Homestead, Welcome

JOIN TO OUR MAILING LIST!

Leave us your email to receive new posts and special offers for members only! Don't miss a thing!

Recent Posts

  • Fall Garden Guide
  • Top Mistakes With Goats
  • How To Bond With Your Goats

How To Bond With Your Goats

January 6, 2026 by Leigh Leave a Comment

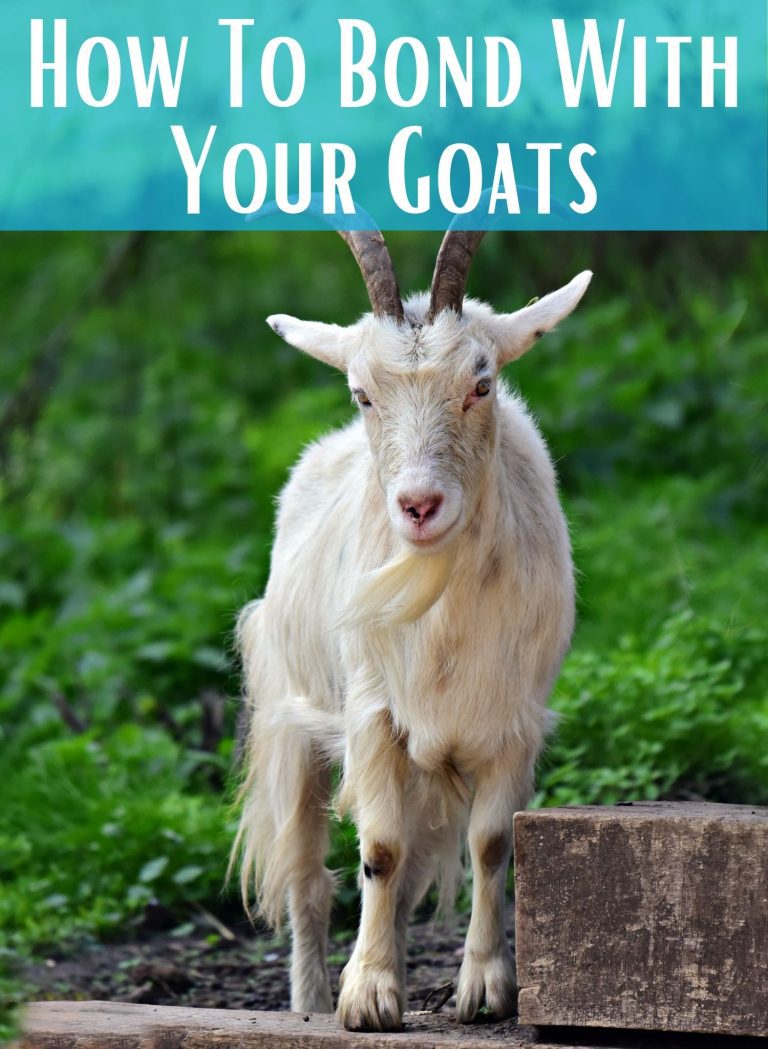
If you are lucky enough to win over the love of a skittish goat, count yourself lucky. Bella is my most skittish goat and will run as fast and as far as her short little legs will take her if anyone comes anywhere near her. But when she is scared or hurting? She looks to me and that is pretty amazing. So if you have a skittish goat, or have a new goat that you are looking to bond with, here is a couple hacks to bond with your goats.

Bonding isn’t about making goats friendly — it’s about building trust so handling, health checks, and daily care don’t turn into a fight.

If you’re new to goats, start here first:
👉 What It’s Really Like to Raise Goats on a Working Homestead

Before Bonding With Your Goat

Before we get into bonding with your goats, I want to first address something. Unless your goat was born on your farm, your new goat is stressed to the max. They were ripped away from their herd, thrust into a box (or car, crate, whatever), and transported to a new farm. Then they were dumped in a fence with new goats and people that they don’t know. If you are bringing home babies? This is the first time without their momma. This goat is freaked out. No matter how good your intentions are, or how good of an owner you are, you are a stranger.

So before you thrust yourself on to them and then wonder why they are running away from you, give them some time to just be. Let them figure out where they are, who their new goat friends are, and the pecking order that they are now probably at the bottom of. Let them destress as much as possible. Realistically, this will probably take a couple weeks of regular feeding and treats. It could take longer depending on your goat.

Be prepared to deal with sickness. Whether that is in the form of diarrhea from a change in food, or a worm bloom from stress. Stay on top of their health!

You can get my goat assessment sheet for free by subscribing! The box is near the top of the page.

Bonding makes daily care easier — trimming hooves, checking eyes, monitoring health — all of it depends on trust.

This is how I structure daily animal care so it stays consistent without being overwhelming:
👉 My Realistic Homestead Daily Schedule

Bond With Your Goat: The Hacks

There are several different ways to bond with your goats, but at the end of the day it’s really up to your goat. Not every goat will be socialized. Not every goat wants to be around humans. More importantly, not every goat is going to trust humans. But with a little time and effort, you should be able to at least tame your goat enough to know their ticks and maybe, just maybe, get some snuggles.

When we got Bella and V, we realized that we were going to have our work cut out for us with Bella. At first, we thought she was just antisocial and didn’t want anything to do with us. After a while we realized that she was scared of us and didn’t trust us. Every time we had to grab her horns and force her where we need her to go, it set us back. But what were we supposed to do? We needed to trim her hooves, administer medications and just be able to care for her.

After V died and Bella was alone for a few days, I thought maybe she would start to trust us, but she seemed to distrust us even more. When we got Midas, he became very untrusting towards us because he spent the first two weeks with Bella. Since Bella wouldn’t come near us, neither would Midas. It took about six months before Midas would come near us willingly. So what can you do?

Hack #1: Time

Give them time. Let them decompress and learn that you are safe. Sometimes the best way to do that is to let them see you with your other goats.

Goats are very smart creatures and will see how you treat their herd mates and will judge you accordingly. So be patient.

Also, don’t rush. If you’ve got a spastic child (my Jaxson), maybe don’t let them love on the brand new, completely freaked out goat. If you are spastic (myself), be calm and understanding.

Hack #2: Pin Them Up

I talk about goat basics in my Goat Crash Course: Goat 101, but the biggest thing that we noticed with our new girls was that if we let them run wild in the pen, they would take longer to come around to us.

What we would do is put them on the small side of our barn that is used for laboring moms, moms that just kidded, or when we separate for goat sharing. This would keep them from running away from us and us having to chase them down. For a prey animal, being chased is literally the worse thing you could do.

When you keep them pinned up and bring them food and water, they see you as the giver of delicious nom noms. They also see that you are safe and won’t hurt them.

Hack #3:Treats

Seriously, treats are the best. We get “apple crack”, which is a goat probiotic in pellet form. Even Bella will come running for apple crack. A word of caution. Do not give empty calorie treats like crackers, cookies, etc. These can actually mess up their rumen and that is not good.

But anything can be a treat in moderation. We also give small pieces of apple, carrots, cucumbers, etc. They see it as a treat and it allows us to reinforce that they are safe and we are the bringers of delicious nom noms.

If you don’t have an issue with alcohol, get your goats drunk…. I’m only kind of joking. But the reality is that goats actually benefit from a beer occasionally. It helps their rumen function. Plus, it’s delicious.

Hack #4: Forced Snuggles

I did this with Bella and Spike with mixed success. A lot of people swear by this because it really does work. You basically force the goat to accept your love. The good news it is, it mostly works. Unless you have a Bella.

Bella LOVES to be snuggled when she is stuck in the barn, scared or laboring. If she is outside the barn? She totally forgets that I am a friend and I love her, and will run for the hills. But that’s okay because in the years that I’ve had her? She has become the sweetest snuggler I have. And she willingly gets on the milk stand and will let me love on her when I milk her, so I win.

Spike will tolerate the snuggles but he knows he can over power us very easily so we use caution around him.

Hack #5: Children

This is where that spastic child may actually help you out. Jaxson has no fear. Zero. Our rooster will beat the crap out of him and he comes back for more. It’s the same way with the goats. He doesn’t care if they want his love or not, they are getting it. He has managed to get these goats to realize they are friends, not food.

Children rarely have fear about something they perceive as cute and cuddly. It’s why your kid will randomly show up with a scorpion and while you are freaking out, they are asking to keep it….. Ask me how I know.

So let that child man-handle the goat, SAFELY! They will be the best of friends… maybe.

Accepting Defeat When You Try To Bond With Your Goats

If you have tried all of these things and nothing is working, chances are you have a Bella. That goat will probably never come around. We’ve had her for a few years now and we still have to work to get her. You will get there with your goat, but it’s going to take time.

When you have a “normal” goat that wants your affection, those five tips above usually works well. All of our other goats have come around within a month max. But sometimes it takes longer. Sometimes it’ll never happen. That’s okay. You have to keep trying and just try to manage the chaos.

Update For Those Interested

In the years that we have had Bella, she has given birth three times for us. And all those times she would cry for my attention. She only allows me and my oldest son to snuggle her newborn babies. She milks beautifully and has become an amazing goat for us. It does take time and effort.

I’ve read on so many Facebook pages of people saying get rid of the goat, freezer camp for the goat, etc and it breaks my heart. If we had listened to them, like a lot of new goat owners would, Bella wouldn’t be here. Neither would Ursula, Maverick or Goose.

For me, it’s no different than a difficult dog. The animal (regardless of species) is scared. But when you finally gain that trust? You have an animal that truly wants to spend time with you. Let’s you snuggle them and their babies. Brings you their babies. It’s truly amazing.

How do you get your goats to warm up to you?

Your Next Step

Bonding is the foundation — but routines are what keep that trust intact.

👉 How I Structure Daily Care for Livestock on a Working Homestead

If you like the content I put out, feel free to buy us a coffee! It helps keep this site running, marketing and the goats in grain!

Buy me a coffee

If you like this post, feel free to share it and follow us below on our social media accounts!

  • Facebook
  • Pinterest
  • Instagram
  • YouTube
  • TikTok
  • Spotify
  • Threads

Filed Under: Animals, Goats, How To's Tagged With: Goats, Homestead, tips

JOIN TO OUR MAILING LIST!

Leave us your email to receive new posts and special offers for members only! Don't miss a thing!

Recent Posts

  • Fall Garden Guide
  • Top Mistakes With Goats
  • How To Bond With Your Goats

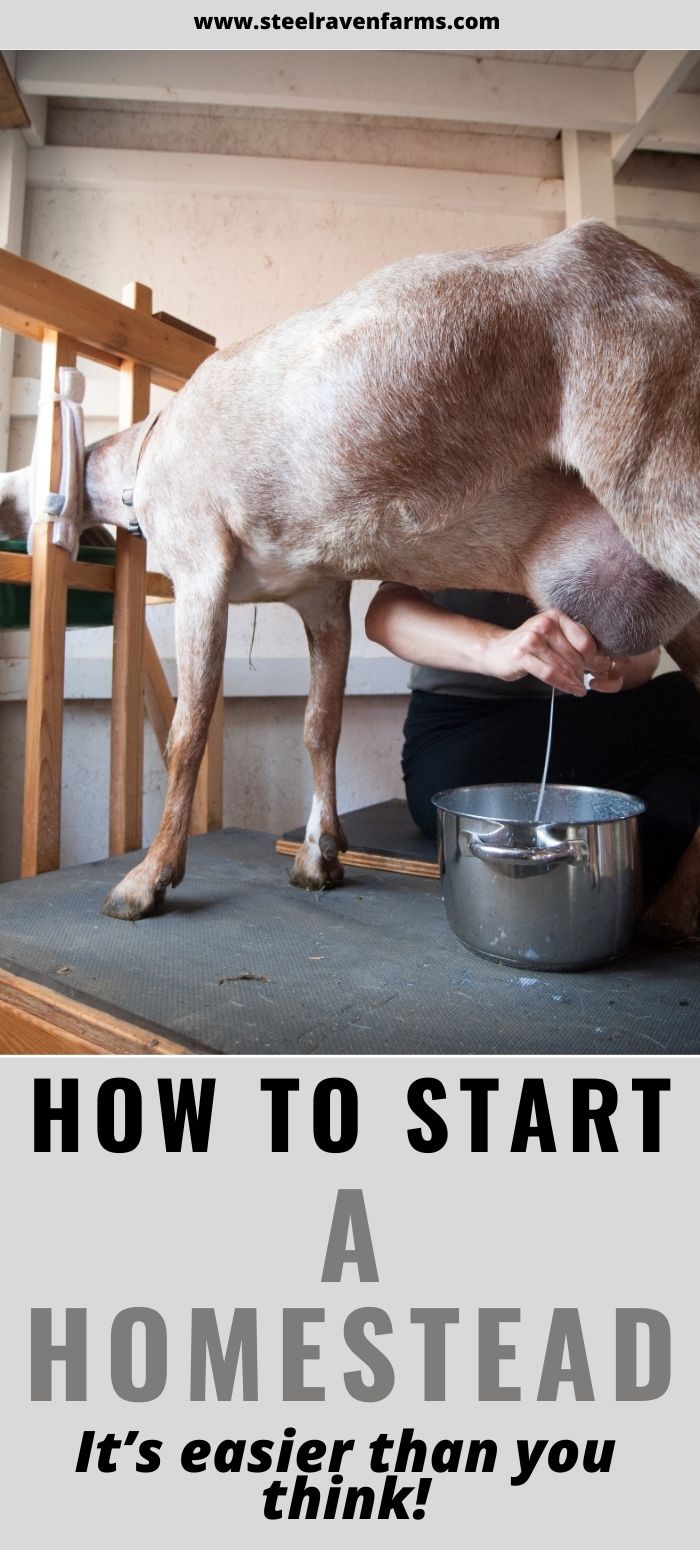
How to Start A Homestead

December 30, 2025 by Leigh Leave a Comment

People across the country are concerned with the state of the grocery stores and supply chain. People who previously thought they could get anything they needed from a store, have quickly come to realize that is no longer the case. Shortages of basic necessities are becoming more common and leading many people to think about starting a homestead. But how to start a homestead?

Starting A Homestead

Most people don’t know where to start when it comes to farming, livestock, and other “farming” things. Well, welcome to the club. If you were not born into the lifestyle, and many of us weren’t, starting a homestead can be a daunting task. The good news is when you dive into the world of homesteading you will realize that it looks very different to everyone. Not mention the amount of resources available.

Before You Start a Homestead

“Starting a homestead” doesn’t mean doing everything at once.
It means choosing one system and building from there.

If you’re still figuring out what homesteading actually looks like in real life, start here:
👉 What Homesteading Really Means (and What It Doesn’t)

I talked in another posts that homesteading is a spirit, not a set of hard fast rules. I know homesteaders that live in a subdivision on less than an acre and others that have hundreds of acres. Some people love keeping pigs and some that don’t. We have goats, not everyone likes them. There are no rules to homesteading because homesteading is about independence, not acreage, livestock, and gardens.

Understanding Why You Want To Start A Homestead

I suggest really thinking about the why. Why do you want to homestead? What does homesteading look like to you? Can you do the things that you think a homestead is? What are your current capabilities and disabilities? Can you overcome them? What does the infrastructure of your homestead look like?

Our dream of homesteading started as a cabin in the woods fifteen years ago. As the world around us has changed, so has our dream. I wanted a garden for fresh produce, now I want a garden that will fully sustain us. Livestock? Nah, I’m good with my dogs and cats. Until we saw what the price of meat was doing. Your dreams can evolve and devolve and that’s just fine.

timing your vegetable garden (zone 8)

This Is Where Most People Get Stuck

Homesteading only works if you turn ideas into a plan — otherwise it becomes overwhelming fast.

This is the system I use to decide what to tackle first and what can wait:
👉 My Daily Homestead Schedule (What Actually Gets Done)

Let’s Start With Animals

Every new homesteader thinks they have to have pigs, cows, chickens, and other livestock when they start homesteading. We almost fell into this trap and thankfully cooler heads prevailed before we dove in head first. However, we have had our share of Uh-Oh’s and it has been a very expensive lesson to learn the hard way. We weren’t ready for goats and it has been a very steep learning curve. But worth every penny and heartbreak. So start small and grow from there.

Oakley and Bailey the goats
Oakley and Bailey

Chickens

Chickens are a great way to have that homestead feel, without all the extra work of a homestead. They are relatively easy creatures that don’t require around the clock work. Our chickens are set it and forget it. Once they were out of the brooder and into their coop, they had feed in the morning and night, and free range during the day. They also have access to plenty of water throughout the property. They don’t require a ton of upkeep.

Raising dual purpose meat chickens is also a great way to reduce your dependence on the grocery store without breaking the bank. You can have a steady stream of fresh eggs from hens and butcher the roos for meat. But there are some downsides to raising chickens, like escaping, predators, and getting into your garden.

Meat rabbits are another good animal to have on the homestead. Rhonda at The Farmer’s Lamp has a great post about the ins and outs of meat rabbits. Having meat rabbits allows you to close gaps in your food security and they don’t take up much space. Since it’s hard to automate their care, they are more work than chickens. But once you get used to what they need, it should only take about 10-20 minutes in the morning and evening. We will be adding them to the homestead this fall when its a little cooler. The biggest downside of rabbits is the cuteness factor. Many people will struggle to butcher them because they are really cute.

Brooding New Chicks

Goats

Goats are cool critters for the homestead. Unfortunately, I don’t recommend them for beginners. I say this as a beginner who had no clue what was happening and we have paid a hefty price for not knowing what I was doing. The value of learning about them mixed with the milk they give, possible meat, and income from breeding make them a good creature to have when starting a homestead.

If You’re Ready to Start, Start Small

The biggest mistake new homesteaders make is trying to do too much at once.

I start by setting a few realistic, seasonal goals and building systems around them:
👉 50 Realistic Homestead Goals to Start With

What About Gardens?

You do not need a acre garden when you are starting out. Yes, I am currently reminding myself of this right now as I am looking at my garden space, which is almost a half acre. You don’t need a greenhouses or other large, expensive purchases. Start small. Grow your tomatoes and peppers to make your salsa. Plant herbs and keep them alive. Make sure whatever you are planting you have a plan for. If you do not like cucumbers, do not plant 20 plants just because you think you should. Once you have a handle on what your family needs and what your land can produce, then you can start growing the size of your garden.

Learn how to preserve your garden so that you can enjoy your harvests well past summer. If you don’t know how to can, you can check out our canning page or go to YouTube, Pinterest, and Google for amazing resources. Also make sure that you have good storage for your jars of food. There is nothing worse than spending tons of time canning just to have your plastic shelves fail. If you don’t want to can and have some money to burn, invest in a freeze dryer.

Finances

Starting a homestead with no money is just not feasible. Whether you decide to make homesteading your fulltime job or simply a way to live more independently, you need to make sure your finances are in order before you start. Our first year homesteading cost us over $20,000 between buying fencing, animals, lumber, and vet bills. So make sure you have the ability to cover those expenses.

Setting up your infrastructure so that you can reduce costs over time is extremely important to your long term finances.

Your Next Step

If you’re serious about starting a homestead, the first thing you need isn’t land or animals — it’s a plan that fits your life.

👉 How I Structure My Homestead Day (So Things Actually Get Done)

Remember….

When everything is all said and done, you have to remember that starting a homestead comes down to your goals and your ability. You are only limited by your resourcefulness and imagination. There are no rules to what you have to do to be a homesteader. You don’t have to have or know everything to start a homestead. A dream, drive, and determination are all you need to start a homestead. Don’t get hung up on the details.

I hope this helps you start on the path to starting your own homestead. Leave us a comment below on your thoughts of starting a homestead.

If you like the content I put out, feel free to buy us a coffee! It helps keep this site running, marketing and the goats in grain!

Buy me a coffee

If you liked this post feel free to like, share, and find us on social media.

  • Facebook
  • Pinterest
  • Instagram
  • YouTube
  • TikTok
  • Spotify
  • Threads

Filed Under: Animals, Canning, Chickens, Garden, Goats, How To's, Our Homestead, Pigs Tagged With: Chickens, Chicks, cooking, Goats, Homestead, kitchen

JOIN TO OUR MAILING LIST!

Leave us your email to receive new posts and special offers for members only! Don't miss a thing!

Recent Posts

  • Fall Garden Guide
  • Top Mistakes With Goats
  • How To Bond With Your Goats

How To Build Canning Shelves

December 23, 2025 by Leigh Leave a Comment

Jump to Building Plans

I could write a million posts about canning. How to can, what to can and how much to can. But I think the best post I could write about is storing canned goods. For years, I have tried to figure out the best way to store the things I canned. But we could never figure out a way that I liked and allowed us to see and use those goods. At least until Jared came up with my shelves. In this post, I will show exactly how we build canning shelves.

Good Canning Shelves Are Hard To Find

We can a lot of food. When I say a lot, I mean hundreds of jars a year. It’s not uncommon for me to put up 50+ jars of tomato sauce, 50+ jars of green beans, and more. The reason we put up so much is because it’s cheap. Before buying this property, I could buy a half bushel of peaches for $10 and end up with 20-30 pints of diced or sliced peaches. I could buy two bushels of green beans for $40 and can 75 quarts of green beans. I was able to get farm fresh produce and preserve it for pennies compared to buying it at the store.

Once you start pressure canning staples like green beans, jars pile up fast.

If you’re pressure canning regularly, proper shelving isn’t optional — it’s part of the system.

Start here:
👉 How I pressure can green beans in my working pantry

First Attempt At Building Canning Shelves

The problem was where we were going to put all this food. As we have been homesteading, those canning numbers have quadrupled… Or more. I talked about how many jars you need in this blog post, but the reality is that you need a ton of jars, which means you need a TON of space. Not just for food, but also for all those empty jars.

Jared attempted to conquer the problem by building Frankenstein.

Frankenstein was 5ft tall by 4ft wide and 2ft deep. If you’ve been canning for more than a minute, you know that jars got lost in the back. It was sturdy and it worked, but within six weeks this thing was crammed full.

canning shelves
Meet Frankenstein

We attempted to fix the 2ft depth problem by putting cases of unused jars in the back. The problem with that is that when you need a case of jars, you have to pull all the jars out of the way to get to those empty jars.

We tried to just put empty boxes back there but that didn’t work either.

If I’m already set up to can, I always keep brine ready so I can move fast when produce comes in.

This is what I use to keep those shelves full:
👉 My Make-Ahead Pickling Brine for Fast Canning Days

Back to the Drawing Board

At this point, I was at a loss. I browsed Pinterest, Google, and canning groups on Facebook, but just couldn’t find what I was looking for. Plastic shelves aren’t sturdy. Metal shelves are held together by plastic clips. Premade shelves were expensive or the wrong size.

I told Jared, I wanted tall shelves that can hold several rows of jars. I wanted no more than three or four jars deep so jars don’t get lost. And I also wanted a lot of shelves on each unit. This is what my man came up with.

canning shelves
First of many shelves for my food storage room

I was in love. Not only with Jared but also with my amazing shelves. As canning season went on, we realized we needed more shelves for our canned goods. Not just the jars that I put up, but also the stuff that we bought in bulk like flour, sugar, grains, etc. So he kept building me shelves until we ended up with what we have now.

canning shelves

Are you getting overwhelmed in the garden? Stressed? Or just not enjoying the garden like you used to? Check out our garden prompts! We send out weekly emails that get you back in the garden and out of your head! Turn the garden back into a place of love and joy instead of frustration and headache!

Subscribe Now!

How We Built Our Canning Shelves

In total we have seven shelves that each hold approximately 300 jars each. This includes things like sugar, flour, coffee, rice, and extra jars just to name a few things. For now, I think we have enough shelves for canned goods but who knows what tomorrow will bring.

My friend over at Simple Living Homestead wrote an amazing blog post about all the different ways to store jars and lids. While I thought I had it all figured out, there are a couple of really useful items that I am looking at. Specifically, #5 the handmade wooden lid organizer! That would really come in handy, especially in the height of canning season when I lose everything. The canning tongs, rings, jars, my mind?

canning shelves

The measurements for theses shelves are 48″ wide by 12″ deep by 96″ tall. I believe we used 23 2x4x8 studs.

Building Your Canning Shelves

This build plan assumes that you have basic building knowledge. Also, depending on your set up (putting these in the basement, garage, or inside) will depend on what type of lumber you use. We use regular studs for ours because it’s in our basement and we don’t have a ton of water issues…. ***Knocks on all the wood**

You will need a tape measure, drill (and proper bit for screws), circular or miter saw, level and speed or T square.

You will need 23 2x4x8 and 2″ deck screws. Really, you could use nails or other screws but we used 2″ deck screws.

Step 1: Make your cuts. You need 24 48″ pieces (shelf boards) and 18 12″ pieces (brace boards).

Step 2: Make your end pieces. Take 2 2x4x8 and 2 12″ pieces. You are going to attach each 12″ piece at the top and bottom (in between the 2x4x8) of your long pieces. When they are level and square, screw in place. Do this twice. These are your end pieces.

Step 3: Take 3 of your 48″ boards and screw to bottom brace on each of your end pieces. Again, making sure that you are level and true. This shelf will only barely be off the floor. We use a 1″ scrap piece of wood to ensure even spacing between the shelf boards. Screw in place and stand up the unit.

Step 4: Measure 12″ from the bottom board. Make sure that a quart jar will fit under it. If it doesn’t, make some adjustments until it will. Add your brace on each side of your end pieces, make sure it is level and square, and screw in place. Repeat on the other end piece. Add your shelf boards (don’t forget to space them out) and screw in place.

Step 5: Repeat step 4 until all of your shelves are in place.

The top of the unit will not be 12″ and that’s okay. We use that for empty jar storage anyways.

What I Always Put on These Shelves First
Green beans are forgiving, store well, and are the backbone of my pantry.


If you’re stocking shelves for the first time,

Start here:
👉 How I pressure can green beans in my working pantry

Special Considerations For These Canning Shelves

Depending on where you put these shelves and your level of comfort, I would suggest some form of securing to the ceiling, wall, etc. I would not leave to chance these shelves falling over. Now, I have run into these shelves while trying to put up jars and they have held just fine. But better to be safe than sorry so take a little extra time and ensure that those precious jars are secured.

Once the Shelves Are Full, This Is What Keeps Them Useful

Otherwise jars get forgotten, dates get missed, and food gets wasted.

We use a simple canning inventory system to track:

  • what we canned
  • how much we have
  • and when it needs to be used

This keeps our pantry usable instead of overwhelming.

👉 The canning inventory sheets we use: Canning Inventory Sheets

Print

How To Build Canning Shelves

Shelves to fit your jars of home canned goodness without losing them. Each instruction is for one shelf. The above picture is two shelves with a middle brace.
Yield: 1 Upright shelf

Equipment

  • Tape Measure
  • Drill
  • Circular or miter saw
  • 4 1" Block of wood
  • Level
  • T Square or similar
  • Hammer

Materials

  • 23 2x4x8
  • A LOT 2" Screws we used decking screws

Instructions

  • Cut 24 48" pieces for shelves
  • Cut 18 12" pieces for braces
  • To make your end pieces, lay out 2 2x4x8's and attach 1 12" brace to the top and 1 12" brace to the bottom. Place the brace between the 2×4 so that your finished width is 15". Make sure your corners are square and level before you screw it together.
    Do this twice
  • Next attach 3 2x4x48" pieces to the bottom of your shelf. Use a 1" block in each space to ensure that your shelves are spaced evenly. Once the bottom row of shelves are done, you can stand up the unit so you are not on the ground.
  • Now you are going to attach the next brace 12" above your previous shelf. Double check that a quart jar will fit between your shelves. I can fit my half gallon jars as well but it's better to measure and adjust now than to have an entire shelfing unit that is wrong.
  • Keep going until you reach the top. The top shelf to the top brace is not 12", this is normal. I usually put extra jars or half gallon jars up on top.

Notes

We love these shelves and Jared was able to build these quickly and with relative ease. 
Always double check your measurements. We wanted 4ft shelves but if you don’t have that much room, change the width. 
We used 2″ decking screws but feel free to use whatever. As long as it’s long enough to go through the shelf and the brace, you’re good to go. Just don’t use nails
If you are in an area prone to earthquakes or have a dog like Blu, figure out a way to attach these to the wall. We used spare 2×4 chunks and attached them to the rafters. 
On the note of earthquakes or a dog like Blu, figure out a way to keep your jars from falling off the front or back. We used furring strips to help keep jars from crashing to the ground when Blu decides to go running through the basement.

I hope you enjoyed this article and if you need any help with measurements or how to do it, just leave a comment!

If you like the content I put out, feel free to buy us a coffee! It helps keep this site running, marketing and the goats in grain!

Buy me a coffee

If you like this post, feel free to share it and follow us below on our social media accounts!
  • Facebook
  • Pinterest
  • Instagram
  • YouTube
  • TikTok
  • Spotify
  • Threads

Filed Under: Canning, How To's, Our Homestead, Projects Tagged With: Canning, DIY, Homestead, Projects

JOIN TO OUR MAILING LIST!

Leave us your email to receive new posts and special offers for members only! Don't miss a thing!

Recent Posts

  • Fall Garden Guide
  • Top Mistakes With Goats
  • How To Bond With Your Goats

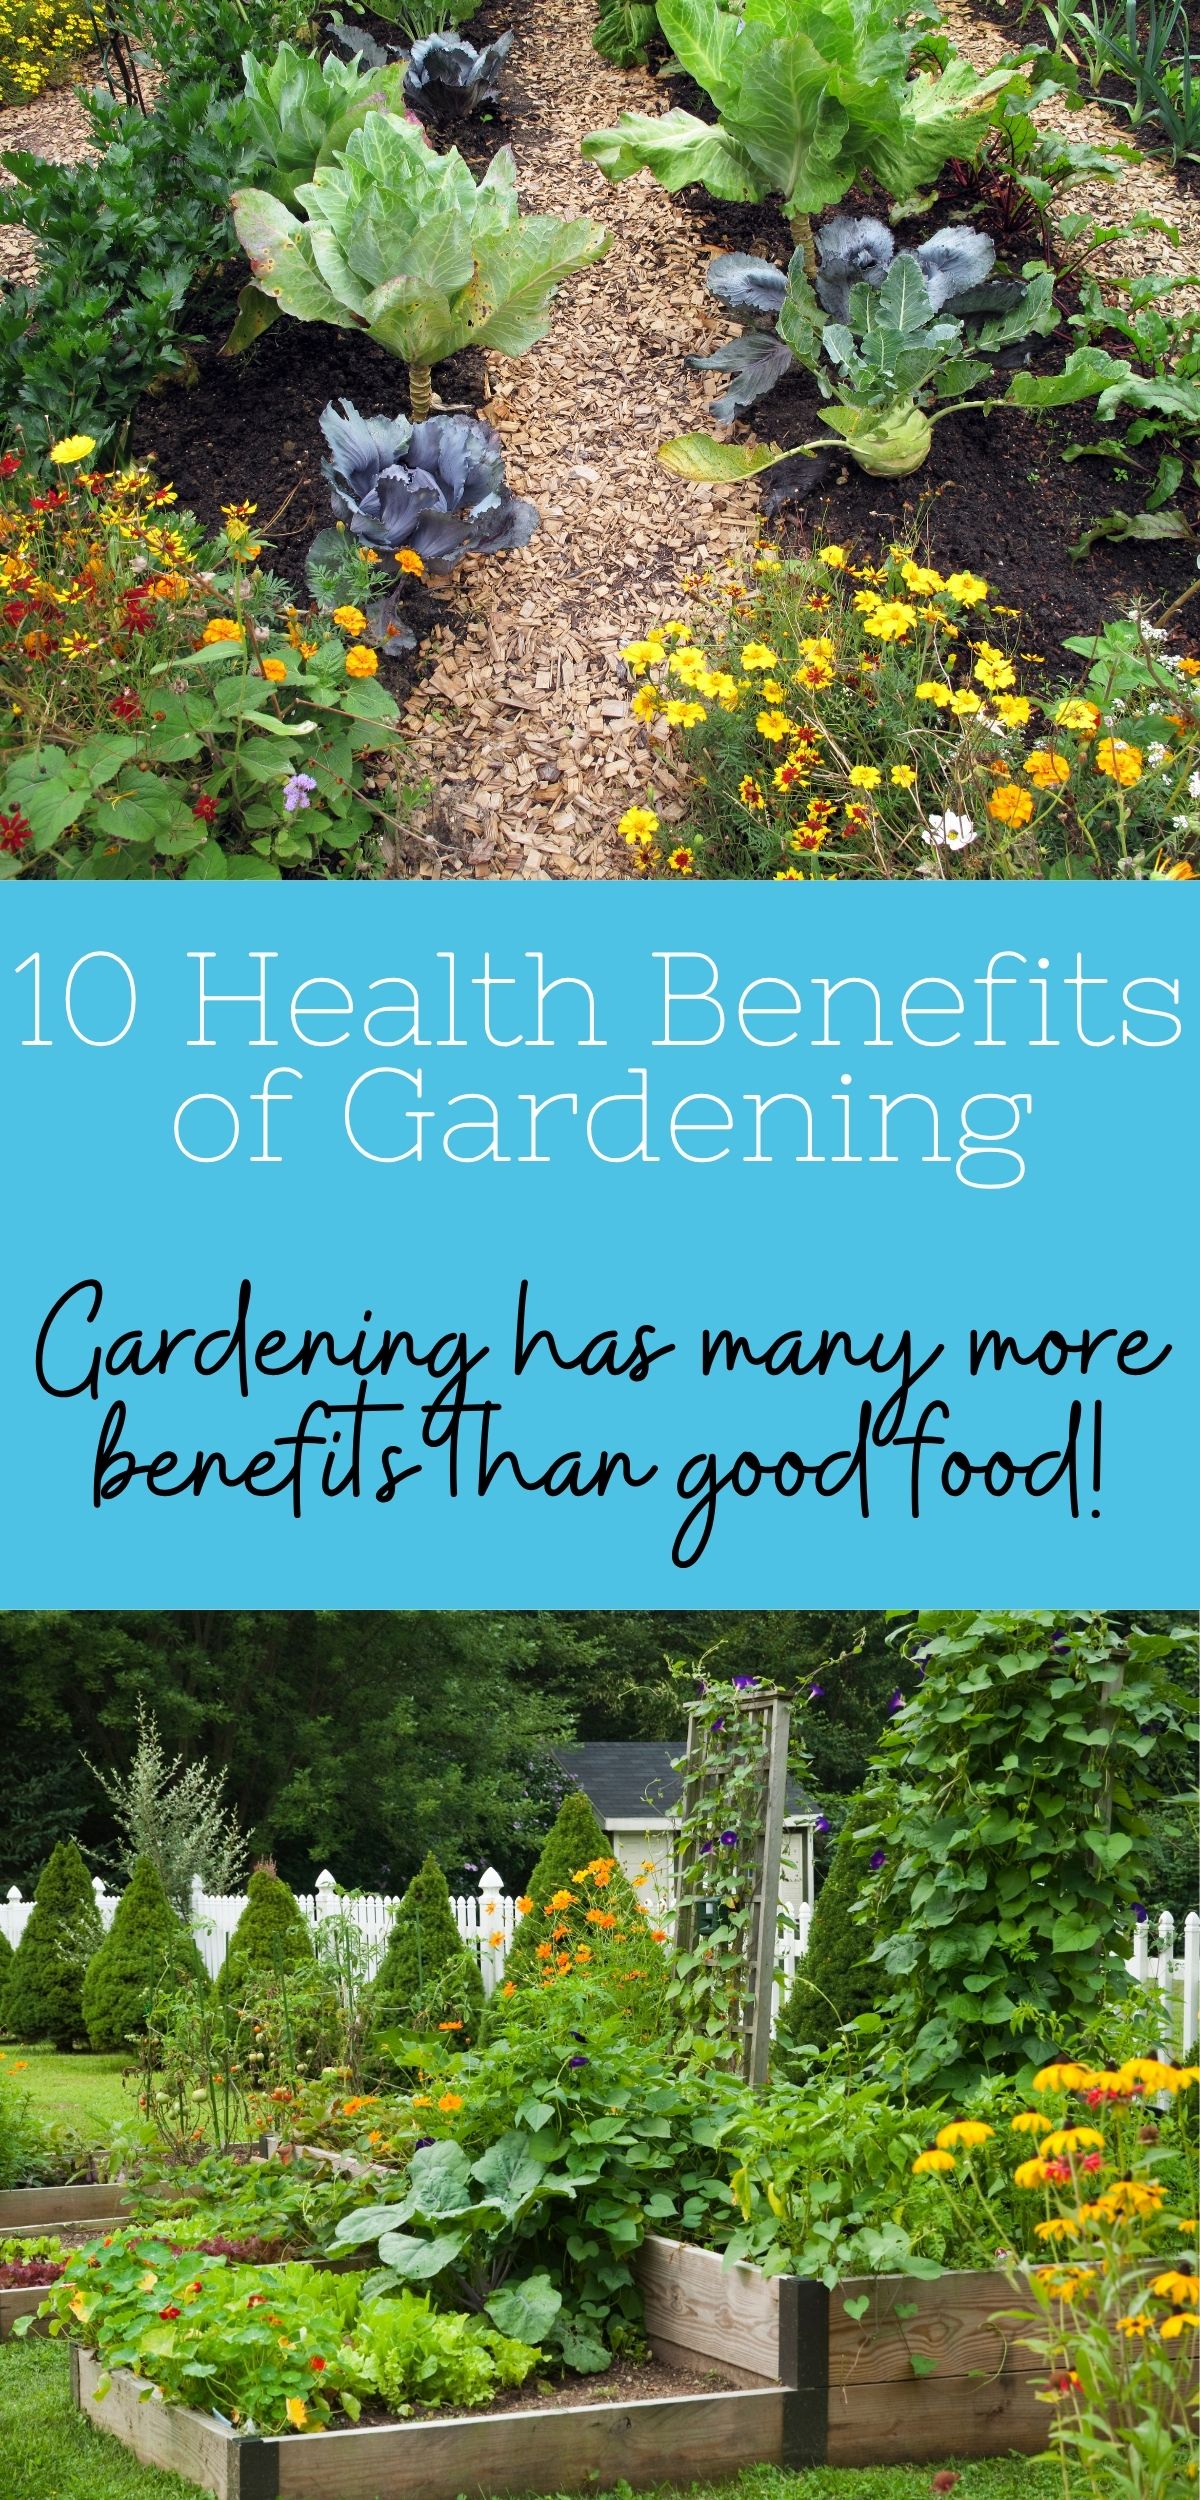
The Incredible Physical and Mental Health Benefits of Gardening

May 31, 2025 by Leigh Leave a Comment

Gardening has long been cherished as a way to grow food, beautify landscapes, and connect with nature—but its benefits go far beyond what’s visible on the surface. Whether you have a sprawling homestead or a few pots on your balcony, the simple act of digging in the dirt can significantly improve both your physical and mental well-being. In this post, we’ll explore the top health benefits of gardening, how it improves mental clarity and reduces stress, and why more people are turning to this age-old practice as a form of therapeutic self-care.

cropped-3.jpg

Are you looking for garden journal prompts, but aren’t interested in a weekly email? Check out our 365 Garden Journal Prompts! This is an amazing, all in one, yearly product that you only pay for once.

Buy Now!

1. Gardening is a Full-Body Workout

You might not think of gardening as exercise, but it’s one of the most functional forms of physical activity out there. Tasks like digging, raking, weeding, lifting pots, and hauling compost engage every major muscle group. This form of “stealth exercise” improves:

  • Cardiovascular health
  • Muscle strength
  • Flexibility
  • Hand-eye coordination

According to the Centers for Disease Control and Prevention (CDC), gardening for 30-45 minutes a day can burn up to 300 calories—the same as walking or moderate aerobic activity. It’s especially helpful for those looking for low-impact workouts that are gentle on the joints.

The Ultimate Homesteader’s Starter Bundle – Only $47!

Get the tools you need to stay organized, track profits, and manage your homestead with ease!

Includes:
✅ Schedule F Tracker – Simplify tax prep
✅ Profit Calculator – Track earnings
✅ Hay Calculator – Plan livestock feed
✅ Garden Journal – Digital & printable
✅ Herd Health Tracker – Monitor animal care
✅ Simple Budget – Manage finances
✅ Backyard Homestead eBook – Essential tips

$99 value – now just $47! Start your homesteading journey today!

Buy Now

2. Natural Stress Relief Through Gardening

In a world that moves fast and demands even faster responses, our nervous systems rarely get a break. That’s where gardening shines. Studies show that just 30 minutes spent working in a garden can lower cortisol levels, the hormone responsible for stress.

Why is this so effective?

  • Sunlight exposure boosts serotonin—a brain chemical associated with mood regulation.
  • Soil bacteria (Mycobacterium vaccae) can stimulate the production of serotonin and reduce anxiety.
  • Repetitive tasks, like weeding or pruning, act like active meditation.

Gardening provides a rare moment of stillness, offering a reset for overworked minds and anxious hearts.

cropped-3.jpg

Are you looking for garden journal prompts, but aren’t interested in a weekly email? Check out our 365 Garden Journal Prompts! This is an amazing, all in one, yearly product that you only pay for once.

Buy Now!

3. Gardening Improves Mood and Fights Depression

Gardening is now being recognized as a legitimate form of therapy, often referred to as “horticultural therapy.” Hospitals, schools, and rehabilitation centers are increasingly using garden-based programs to help people cope with depression, PTSD, trauma, and burnout.

Here’s how gardening supports emotional health:

  • Boosts dopamine: Achieving small wins like seeing sprouts or harvesting vegetables gives your brain a dopamine rush—the same reward chemical triggered by goal achievement.
  • Encourages mindfulness: Gardening forces you to slow down and focus on the present moment.
  • Creates a sense of purpose: Nurturing something and watching it grow instills a deep sense of meaning and responsibility.

People struggling with anxiety or depression often find that gardening reconnects them to life in a tangible, nurturing way.

The Ultimate Homesteader’s Starter Bundle – Only $47!

Get the tools you need to stay organized, track profits, and manage your homestead with ease!

Includes:
✅ Schedule F Tracker – Simplify tax prep
✅ Profit Calculator – Track earnings
✅ Hay Calculator – Plan livestock feed
✅ Garden Journal – Digital & printable
✅ Herd Health Tracker – Monitor animal care
✅ Simple Budget – Manage finances
✅ Backyard Homestead eBook – Essential tips

$99 value – now just $47! Start your homesteading journey today!

Buy Now

4. It Supports Heart Health and Lowers Blood Pressure

Regular physical activity from gardening doesn’t just tone muscles—it lowers blood pressure and supports heart function. A 2013 study published in the British Journal of Sports Medicine found that adults who gardened regularly had:

  • Lower risk of heart attack or stroke
  • Improved cholesterol levels
  • Better weight management

The movement, combined with the stress-reducing nature of outdoor activity, makes gardening a heart-smart habit that can be maintained well into old age.

cropped-3.jpg

Are you looking for garden journal prompts, but aren’t interested in a weekly email? Check out our 365 Garden Journal Prompts! This is an amazing, all in one, yearly product that you only pay for once.

Buy Now!

5. Gardening Boosts the Immune System

Did you know playing in the dirt can actually make you healthier?

Exposure to naturally occurring soil microbes helps your immune system regulate itself. As you work with compost, soil, and plants, your body:

  • Builds microbial diversity in your gut
  • Improves immune response
  • Reduces inflammation

The more time you spend outdoors and hands-on with soil, the stronger your body becomes at recognizing harmful bacteria and viruses.

The Ultimate Homesteader’s Starter Bundle – Only $47!

Get the tools you need to stay organized, track profits, and manage your homestead with ease!

Includes:
✅ Schedule F Tracker – Simplify tax prep
✅ Profit Calculator – Track earnings
✅ Hay Calculator – Plan livestock feed
✅ Garden Journal – Digital & printable
✅ Herd Health Tracker – Monitor animal care
✅ Simple Budget – Manage finances
✅ Backyard Homestead eBook – Essential tips

$99 value – now just $47! Start your homesteading journey today!

Buy Now

6. Encourages Better Sleep

Gardening can also contribute to better sleep, especially for those who struggle with insomnia or nighttime anxiety. Here’s why:

  • Increased exposure to natural daylight helps regulate your circadian rhythm.
  • Physical exertion naturally promotes sleepiness at night.
  • Reduction in stress hormones allows for deeper relaxation and rest.

People who garden consistently often report falling asleep faster and waking up more refreshed.

cropped-3.jpg

Are you looking for garden journal prompts, but aren’t interested in a weekly email? Check out our 365 Garden Journal Prompts! This is an amazing, all in one, yearly product that you only pay for once.

Buy Now!

7. Supports Brain Health and Focus

Engaging in gardening tasks has been shown to sharpen cognitive function and memory, particularly in older adults. A 2006 study found that gardening can reduce the risk of dementia by up to 36%.

Gardening improves brain health by:

  • Promoting problem-solving skills (like how to deal with pests or plan seasonal crops)
  • Increasing neural connections through repetitive, mindful action
  • Releasing brain-derived neurotrophic factor (BDNF)—a protein that supports long-term cognitive function

For anyone looking to improve focus, attention, or mental clarity, gardening offers a practical and enjoyable solution.

The Ultimate Homesteader’s Starter Bundle – Only $47!

Get the tools you need to stay organized, track profits, and manage your homestead with ease!

Includes:
✅ Schedule F Tracker – Simplify tax prep
✅ Profit Calculator – Track earnings
✅ Hay Calculator – Plan livestock feed
✅ Garden Journal – Digital & printable
✅ Herd Health Tracker – Monitor animal care
✅ Simple Budget – Manage finances
✅ Backyard Homestead eBook – Essential tips

$99 value – now just $47! Start your homesteading journey today!

Buy Now

8. Gardening Enhances Self-Esteem and Confidence

Few things are more empowering than creating a thriving garden from scratch. Gardening fosters:

  • Achievement: From planting a seed to harvesting a tomato, each success builds confidence.
  • Resilience: Failure to grow something teaches patience and problem-solving.
  • Creativity: Designing garden beds, choosing flowers, or experimenting with new crops activates the creative side of the brain.

The emotional rewards of gardening go hand-in-hand with increased self-worth and a positive outlook.

cropped-3.jpg

Are you looking for garden journal prompts, but aren’t interested in a weekly email? Check out our 365 Garden Journal Prompts! This is an amazing, all in one, yearly product that you only pay for once.

Buy Now!

9. Builds a Stronger Connection to Nature

In today’s technology-heavy world, many people feel disconnected from the natural rhythms of life. Gardening bridges that gap.

When you garden, you:

  • Develop seasonal awareness—learning to plant by moon phases, weather patterns, and temperature changes
  • Become more in tune with nature’s pace, encouraging rest and renewal
  • Foster a sense of environmental stewardship, which can be deeply grounding

This connection to nature alone can have a powerful therapeutic effect, lowering anxiety and promoting a sense of belonging in the world.

The Ultimate Homesteader’s Starter Bundle – Only $47!

Get the tools you need to stay organized, track profits, and manage your homestead with ease!

Includes:
✅ Schedule F Tracker – Simplify tax prep
✅ Profit Calculator – Track earnings
✅ Hay Calculator – Plan livestock feed
✅ Garden Journal – Digital & printable
✅ Herd Health Tracker – Monitor animal care
✅ Simple Budget – Manage finances
✅ Backyard Homestead eBook – Essential tips

$99 value – now just $47! Start your homesteading journey today!

Buy Now

10. Gardening Builds Community and Reduces Isolation

Loneliness is one of the leading contributors to poor mental and physical health. Gardening, especially in community gardens or through local garden clubs, creates natural opportunities to:

  • Socialize with like-minded individuals
  • Share tips, seeds, and harvests
  • Contribute to a greater cause, such as feeding others or beautifying shared spaces

Even if you garden solo, connecting online with gardening communities or sharing your progress can dramatically reduce feelings of isolation.

cropped-3.jpg

Are you looking for garden journal prompts, but aren’t interested in a weekly email? Check out our 365 Garden Journal Prompts! This is an amazing, all in one, yearly product that you only pay for once.

Buy Now!

Tips to Maximize the Health Benefits of Gardening

Want to make the most of gardening’s physical and mental benefits? Try these actionable tips:

  1. Stretch before and after gardening to prevent soreness.
  2. Garden in short sessions to avoid overexertion—especially in extreme weather.
  3. Stay hydrated and wear sun protection while working outdoors.
  4. Create a sensory-rich space with fragrant herbs, wind chimes, and bright flowers.
  5. Document your journey with a garden journal or photos—it reinforces positive feedback.
  6. Try companion planting to boost yields and reduce frustration with pests.

The Ultimate Homesteader’s Starter Bundle – Only $47!

Get the tools you need to stay organized, track profits, and manage your homestead with ease!

Includes:
✅ Schedule F Tracker – Simplify tax prep
✅ Profit Calculator – Track earnings
✅ Hay Calculator – Plan livestock feed
✅ Garden Journal – Digital & printable
✅ Herd Health Tracker – Monitor animal care
✅ Simple Budget – Manage finances
✅ Backyard Homestead eBook – Essential tips

$99 value – now just $47! Start your homesteading journey today!

Buy Now

Final Thoughts: A Simple Practice with Life-Changing Effects

The health benefits of gardening extend far beyond growing food or flowers. It strengthens the body, calms the mind, and heals the spirit in ways few other activities can. Whether you’re recovering from burnout, looking to get active, or seeking deeper purpose, gardening is a powerful tool that brings transformation through simple, intentional action.

So if you’re looking for a natural, inexpensive way to improve your well-being—grab a trowel, dig in the dirt, and let the healing begin.

If you like the content I put out, feel free to buy us a coffee! It helps keep this site running, marketing and the goats in grain!

Buy me a coffee

If you like this post, feel free to share it and follow us below on our social media accounts!

  • Facebook
  • Pinterest
  • Instagram
  • YouTube
  • TikTok
  • Spotify
  • Threads

Filed Under: Garden Tagged With: Canning, Garden, Homestead, kitchen

JOIN TO OUR MAILING LIST!

Leave us your email to receive new posts and special offers for members only! Don't miss a thing!

Recent Posts

  • Fall Garden Guide
  • Top Mistakes With Goats
  • How To Bond With Your Goats

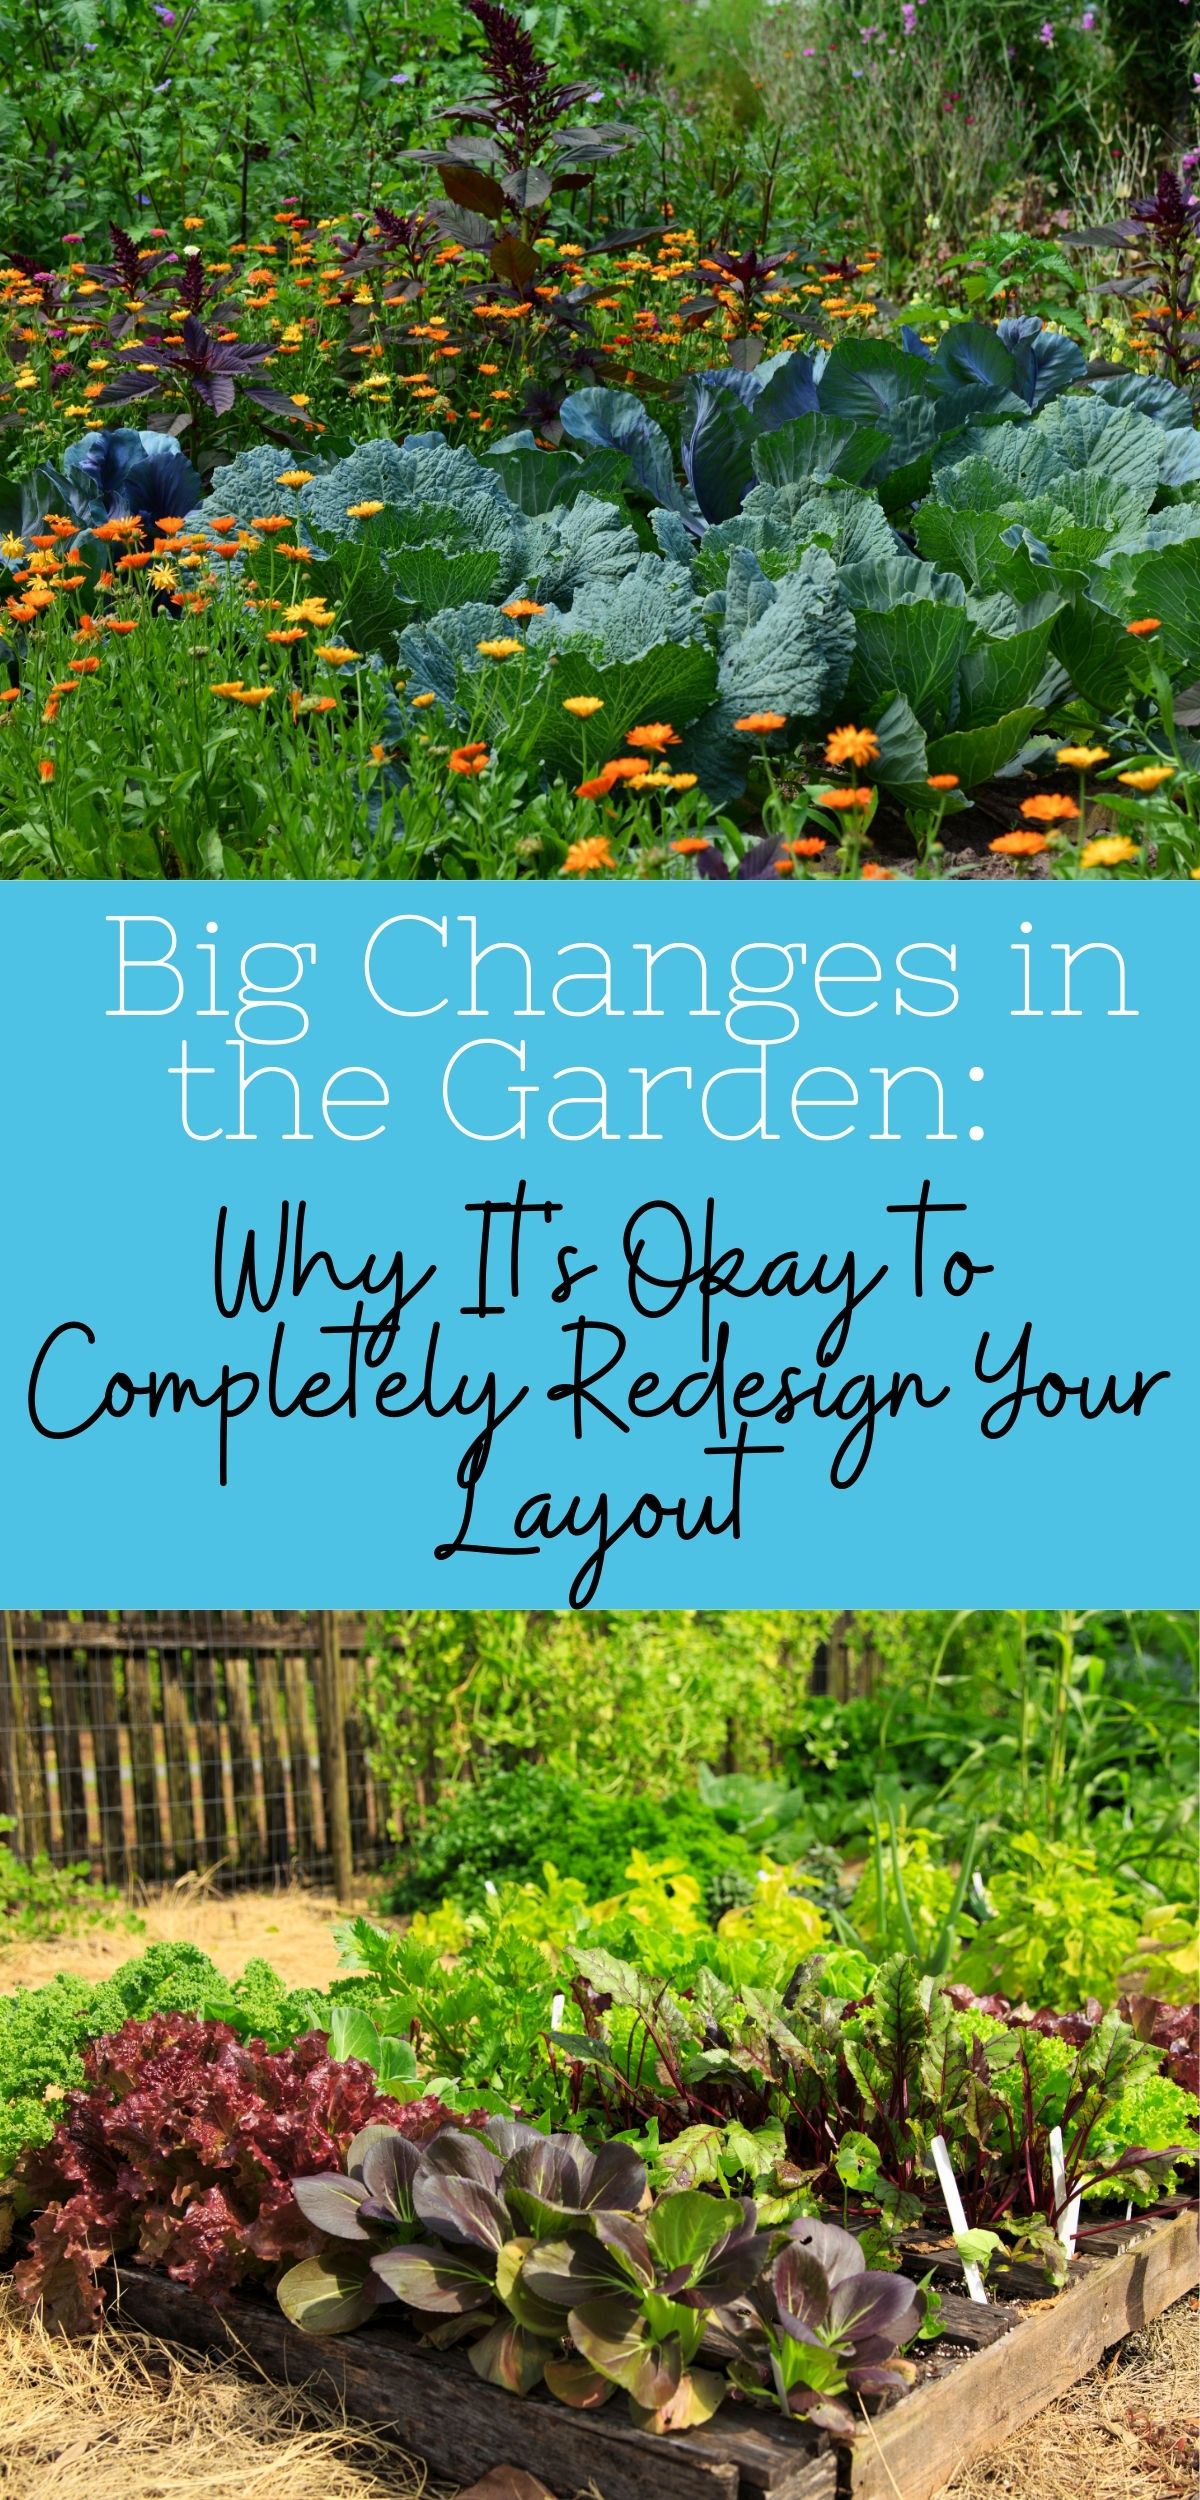
Big Changes in Your Garden: Why It’s Okay to Completely Redesign Your Layout

May 17, 2025 by Leigh Leave a Comment

You know that feeling when you walk through your garden and instead of joy, you feel frustration? Maybe the paths are too narrow. Maybe the tomatoes are in full sun while your herbs are frying by noon. Maybe the whole thing just isn’t working. And yet—there’s this little voice that says, “Well, this is just how it is now.” Let me tell you something loud and clear: you are allowed to make big changes in your garden.

The Ultimate Homesteader’s Starter Bundle – Only $47!

Get the tools you need to stay organized, track profits, and manage your homestead with ease!

Includes:
✅ Schedule F Tracker – Simplify tax prep
✅ Profit Calculator – Track earnings
✅ Hay Calculator – Plan livestock feed
✅ Garden Journal – Digital & printable
✅ Herd Health Tracker – Monitor animal care
✅ Simple Budget – Manage finances
✅ Backyard Homestead eBook – Essential tips

$99 value – now just $47! Start your homesteading journey today!

Buy Now

We all start our garden layouts with the best intentions. Maybe it was drawn out on paper. Maybe it was built with sweat and sore muscles. But sometimes, what works on paper doesn’t work in real life—and that’s okay. Just because you built something once doesn’t mean you’re stuck with it forever. The truth is, changing garden layouts is part of becoming a better gardener.

Let’s talk about why redesigning your garden is not only okay but often the smartest move you can make. I’ll share tips on how to do it right, mistakes to avoid, and why you shouldn’t make anything permanent until you’re absolutely sure.

cropped-3.jpg

Are you looking for garden journal prompts, but aren’t interested in a weekly email? Check out our 365 Garden Journal Prompts! This is an amazing, all in one, yearly product that you only pay for once.

Buy Now!

Why Changing Your Garden Layout Is Totally Valid

Gardening is a process of learning. No one gets it perfect on the first try. You change. Your needs change. Your soil changes. Your life changes. Maybe you now have less time, or maybe you’re growing more food than before. Maybe a tree grew taller and shaded out your beds. Maybe a drought changed the way your yard handles water. Whatever the reason, holding onto a broken layout because you feel guilty about changing it helps no one—not you, not your plants.

You’re not betraying your garden by moving things around. You’re evolving it. And honestly, some of the best gardens are the ones that have been through a few versions. The only mistake is thinking you have to keep something the way it is just because that’s how it’s always been.

Are you getting overwhelmed in the garden? Stressed? Or just not enjoying the garden like you used to? Check out our garden prompts! We send out weekly emails that get you back in the garden and out of your head! Turn the garden back into a place of love and joy instead of frustration and headache!

Subscribe Now!

Don’t Make Permanent Changes Until You’re Sure

If you take away only one tip from this post, let it be this: Don’t make permanent changes until you’re absolutely sure. What does that mean? It means don’t pour concrete paths or build permanent beds until you’ve lived with the layout for a while. It means sitting with the sun patterns, watching how the water drains, and giving yourself time to walk through the space before committing.

Use temporary materials first. Lay out your new paths with mulch and see how they feel underfoot. Mark bed edges with hose lines or stakes and string. Walk it. Work in it. See if it makes sense. Only then should you grab the shovel and start building.

Once you go permanent, it’s a lot harder to undo. So save yourself the pain (and the money) by testing your layout before you lock it in.

cropped-3.jpg

Are you looking for garden journal prompts, but aren’t interested in a weekly email? Check out our 365 Garden Journal Prompts! This is an amazing, all in one, yearly product that you only pay for once.

Buy Now!

Common Reasons Garden Layouts Stop Working

  • Overcrowding: What seemed like a cute kitchen garden is now a cramped mess where you can’t reach anything without stepping on something else.

  • Sun and shade shifts: Trees grow, shadows move, and what was once full sun is now partial shade.

  • Water drainage issues: You discover after a heavy rain that your main bed is basically a swamp.

  • Too much upkeep: You added more beds than you can reasonably manage, and now gardening feels like a chore.

  • Your goals changed: Maybe you started with flowers and now you’re growing food. Or you want to add a chicken coop. Your garden should reflect your priorities now, not what they were five years ago.

The Ultimate Homesteader’s Starter Bundle – Only $47!

Get the tools you need to stay organized, track profits, and manage your homestead with ease!

Includes:
✅ Schedule F Tracker – Simplify tax prep
✅ Profit Calculator – Track earnings
✅ Hay Calculator – Plan livestock feed
✅ Garden Journal – Digital & printable
✅ Herd Health Tracker – Monitor animal care
✅ Simple Budget – Manage finances
✅ Backyard Homestead eBook – Essential tips

$99 value – now just $47! Start your homesteading journey today!

Buy Now

How to Start Rethinking Your Layout

1. Observe Your Space

Spend a few days just observing. Where does the sun fall in morning, midday, and evening? Are there drainage issues? Is there a natural flow where you wish a path existed? Don’t grab a shovel yet—grab a notebook.

2. Prioritize Function Over Aesthetics

It’s okay to want a beautiful garden, but beauty fades when you’re frustrated every time you try to harvest your zucchini. Think about what you need the space to do. Do you want more food production? More walking space? Easier watering access? Put function first.

3. Sketch a New Plan

Start rough. Use pencil. Move beds around like puzzle pieces. Test out new layouts on paper before committing. If you’re visual, try chalking it out in your yard or laying down old cardboard boxes in the shape of future beds.

4. Build in Flexibility

Design with the idea that you might want to change it again later. That means using modular raised beds, temporary trellises, and mulch paths that can be easily reshaped. Flexibility keeps you from feeling boxed in by past decisions.

5. Avoid Invasive Mistakes

Now that you’re redesigning, take this moment to not repeat one of the most common garden regrets: planting aggressive, invasive plants directly into the ground.

Plants in the mint family, many ornamental grasses, and even things like lemon balm or comfrey will take over your space if given the chance. You’ll be battling them for years. The better option? Keep them in large pots, containers, or isolated raised beds that are easy to manage and contain.

Also, don’t just trust the plant tag. “Spreads easily” or “ground cover” is code for “you will regret this next year.”

cropped-3.jpg

Are you looking for garden journal prompts, but aren’t interested in a weekly email? Check out our 365 Garden Journal Prompts! This is an amazing, all in one, yearly product that you only pay for once.

Buy Now!

Smart Tips for Redesigning Without Regret

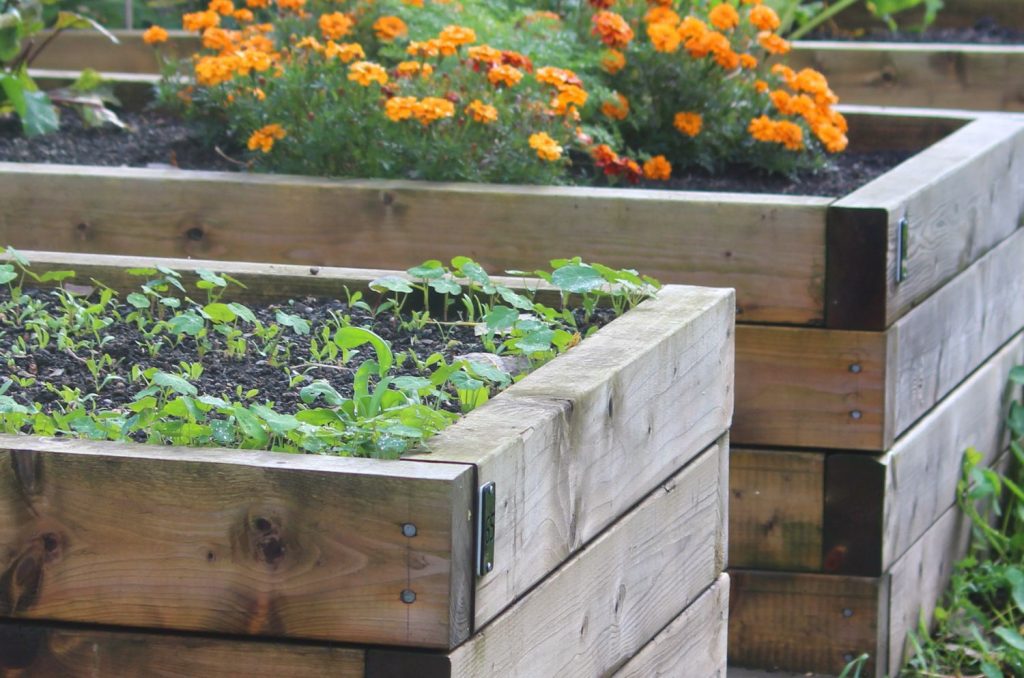
Use Raised Beds for Control
Raised beds give you clean edges, better soil control, and less compaction. They’re also easy to move or replace when built modularly. Consider 3×6 or 4×8 as standard sizes that are easy to reach from all sides.

Plan for Access
Leave enough room between beds for wheelbarrows, kneeling, or even a comfy chair. Trust me, two feet of pathway is never enough. Go for three feet minimum wherever you can. Most of our paths are at least four feet.

Group Plants by Needs
Cluster high-water plants near each other and close to your water source. Keep heat-sensitive crops in areas with afternoon shade. Design for success, not struggle.

Create Zones
Break your garden into zones: a herb zone near the kitchen, a production zone for heavy harvest crops, a perennial corner, a compost or tool area. This makes the garden feel intentional and easier to manage.

Think Seasonally
Where will the shade be in summer vs winter? Where do you want to plant garlic in the fall or early brassicas in spring? Make room in your layout to rotate and rest areas seasonally.

Use What You Have
Sometimes you don’t need new beds—you just need to move or reframe the old ones. Reuse lumber, repurpose bricks or rocks, and think creatively before hauling everything to the dump.

If you are interested in learning more about my favorite garden planner. I highly recommend Seedtime! This planner has been instrumental in helping me plan out my gardens with WAY more efficiency than I could ever expect! It has also reduced overwhelm, stress, and calmed my ADD/ADHD!

More Info!

What to Expect Emotionally

Changing a garden layout can bring up some weird feelings. Guilt. Doubt. Frustration. After all, you put time and love into building that first version. But just like pruning a plant, redesigning your garden is sometimes the healthiest thing you can do for long-term growth.

Let yourself mourn what didn’t work. Then get excited for what’s next. You’re not erasing your garden’s past—you’re building its future.

cropped-3.jpg

Are you looking for garden journal prompts, but aren’t interested in a weekly email? Check out our 365 Garden Journal Prompts! This is an amazing, all in one, yearly product that you only pay for once.

Buy Now!

Final Thoughts: Gardens Evolve, and So Should You

Let’s ditch the myth that your garden has to stay the same forever. You are allowed to redesign. You are allowed to say, “This isn’t working.” You are allowed to move every single bed and start fresh if that’s what brings you joy.

A good garden layout serves you, not the other way around. So if yours isn’t working—fix it. Rethink it. Rebuild it. Plant smarter. Move the mint. Rip out that soggy bed and turn it into a wildflower patch. Make a garden that works for who you are now.

Because if gardening has taught us anything, it’s that growth comes from change.

If you like this post, feel free to share it and follow us below on our social media accounts!

  • Facebook
  • Pinterest
  • Instagram
  • YouTube
  • TikTok
  • Spotify
  • Threads

If you like the content I put out, feel free to buy us a coffee! It helps keep this site running, marketing and the goats in grain!

Buy me a coffee

Filed Under: Our Homestead

JOIN TO OUR MAILING LIST!

Leave us your email to receive new posts and special offers for members only! Don't miss a thing!

Recent Posts

  • Fall Garden Guide
  • Top Mistakes With Goats
  • How To Bond With Your Goats

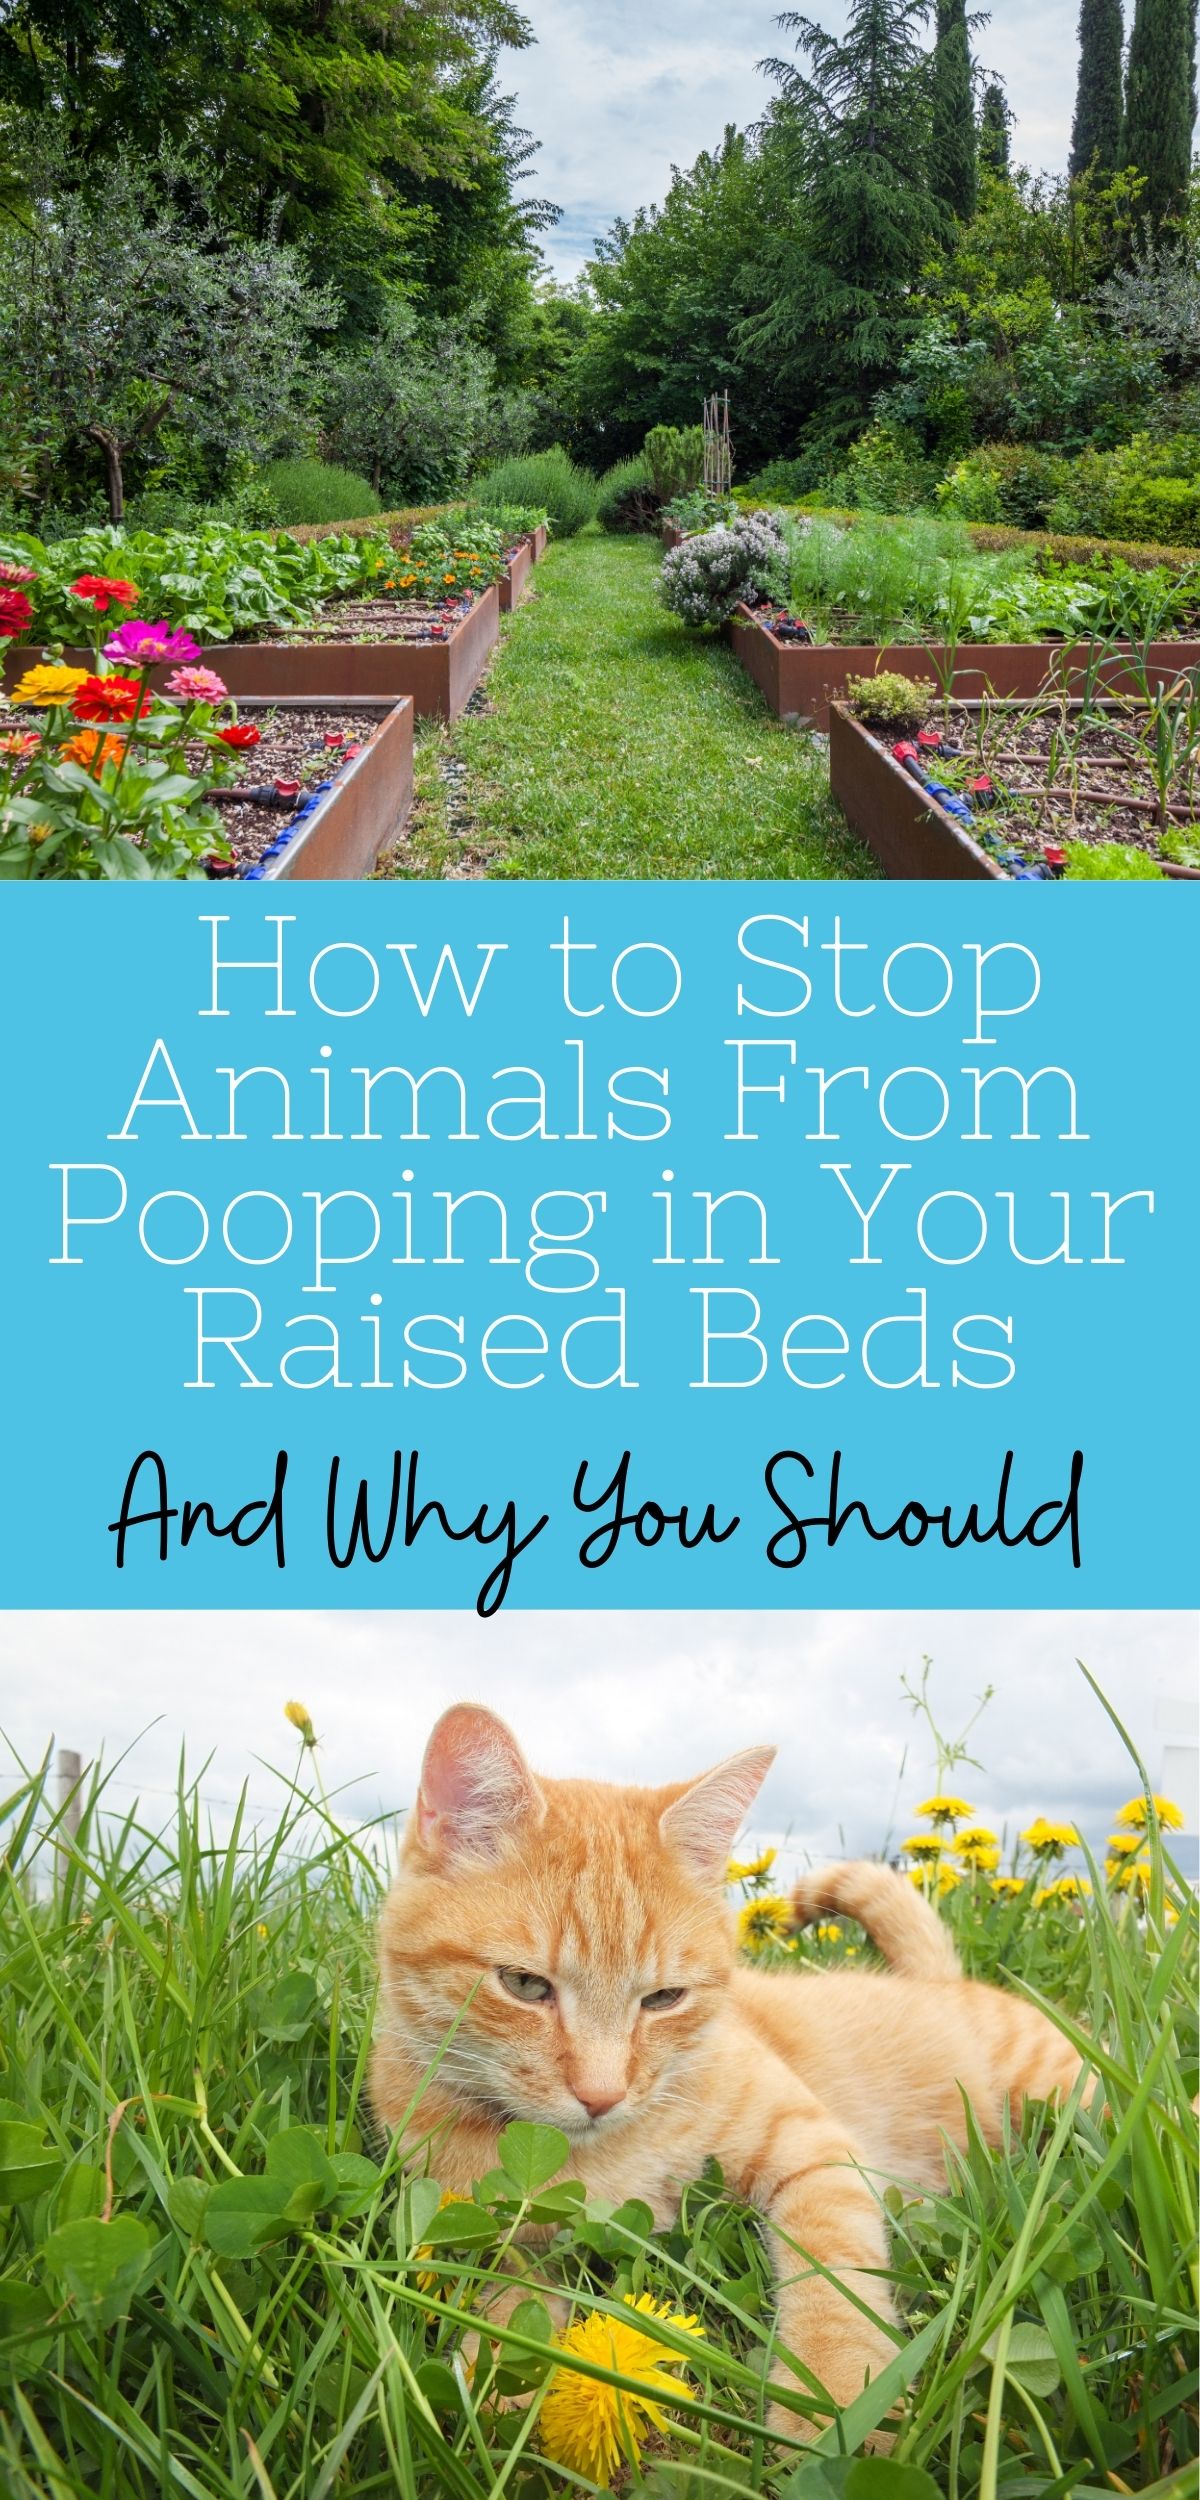
How to Stop Animals From Pooping in Raised Beds (And Why You Should)

May 13, 2025 by Leigh Leave a Comment

Let’s talk about something gross—but necessary: animals pooping in raised beds. I don’t mean just one stray incident. I’m talking about that moment when you go out to water your lettuce and find that your raised bed has become the neighborhood litter box. And not just for cats. Oh no. On our farm, we’ve dealt with stray cats, raccoons, possums, and even skunks treating our beautifully mulched soil like a five-star toilet. And it’s not just annoying—it’s dangerous.

If you’re here because you’re tired of scraping cat poop out of your kale bed or finding suspicious mounds in your spinach patch, you’re not alone. It’s one of those garden problems nobody warns you about until you’re knee-deep in contaminated compost. This post will cover the health risks, what animals might be responsible, and—most importantly—how to stop it, with real solutions that actually work, including the one that’s saved our sanity: cayenne pepper.

cropped-3.jpg

Are you looking for garden journal prompts, but aren’t interested in a weekly email? Check out our 365 Garden Journal Prompts! This is an amazing, all in one, yearly product that you only pay for once.

Buy Now!

Why Animal Poop in the Garden Is a Big Problem

I get it. Animals do what animals do. But when your raised beds become their preferred bathroom, it’s not just unsanitary—it can be a legitimate health hazard.

1. Parasites and Pathogens
Feces from cats, raccoons, and opossums can carry a laundry list of diseases you do not want near your food. Toxoplasmosis, roundworms, E. coli, and salmonella are just a few of the pathogens lurking in animal waste. Cat feces in particular are notorious for spreading Toxoplasma gondii, a parasite that can cause severe complications, especially in pregnant women and those with weakened immune systems.

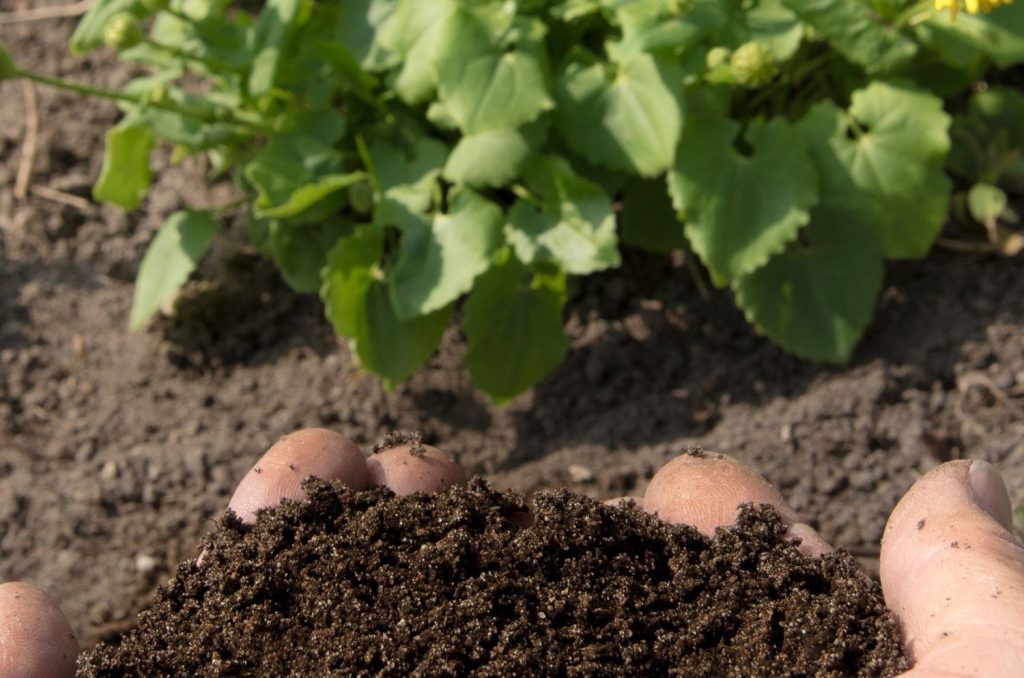
2. Soil Contamination
Even if you scoop it out, that poop doesn’t just sit there—it leaches into your soil. That beautiful compost you worked so hard to build can quickly become a breeding ground for bacteria. And once it’s in there, it’s hard to know whether your crops are safe to eat raw.

3. Damage to Plants
Beyond the contamination, digging behavior from animals using your raised beds can physically damage tender seedlings. Stray cats especially love to dig around freshly planted rows, treating your bed like a personal sandbox.

4. It’s Just Gross
Let’s be real. Nobody wants to reach into their kale and come back with more than they bargained for. It’s not a pleasant part of gardening, but it’s one that has to be dealt with.

cropped-3.jpg

Are you looking for garden journal prompts, but aren’t interested in a weekly email? Check out our 365 Garden Journal Prompts! This is an amazing, all in one, yearly product that you only pay for once.

Buy Now!

Who’s Pooping in Your Garden?

Before we dive into prevention, it helps to know your enemy.

  • Cats: Neighborhood strays or even your own outdoor cat will often use loose, fresh soil as a litter box. They especially love raised beds with nice fluffy soil or mulch.
  • Raccoons: Known for their communal “latrine” sites, raccoons will often return to the same spot over and over.
  • Opossums: Less frequent offenders but still possible. They’re mostly attracted to food scraps or compost, but they will go where they feel hidden and safe.
  • Dogs: Not as sneaky but certainly destructive. If your dog gets into your raised beds, you’ve got an entirely different cleanup job on your hands.
cropped-3.jpg

Are you looking for garden journal prompts, but aren’t interested in a weekly email? Check out our 365 Garden Journal Prompts! This is an amazing, all in one, yearly product that you only pay for once.

Buy Now!

Our #1 Solution: Cayenne Pepper

Let me just say—cayenne pepper works. On our farm, nothing has worked better at keeping the cats and raccoons out of the raised beds than a regular sprinkle of cayenne pepper powder or crushed red pepper flakes. They hate the smell, and even more than that, they really hate the burn when they try to dig or sniff around after you’ve applied it.

We’ve found the powder works better than flakes for a wide area application, but flakes last a bit longer in the rain. Here’s how to use it effectively:

How to Apply Cayenne Pepper to Raised Beds:

  1. Wait until your seedlings are up or apply before planting. Don’t sprinkle directly onto young, tender leaves.
  2. Lightly dust the surface of the soil, especially in corners and areas that have already been “used.”
  3. Reapply after watering or rain. It’s not permanent, but it builds a strong message over time: This is not your toilet.
  4. You can also mix it with a little water and dish soap for a DIY spray deterrent. Just make sure to avoid spraying it directly on edible leaves unless you rinse well before harvest.

PS: This also works to keep dogs from digging holes in your yard. It’s how we have trained our dogs for years.

If you are interested in learning more about my favorite garden planner. I highly recommend Seedtime! This planner has been instrumental in helping me plan out my gardens with WAY more efficiency than I could ever expect! It has also reduced overwhelm, stress, and calmed my ADD/ADHD!

More Info!

Other Effective Tips to Keep Animals Out of Raised Beds

1. Garden Netting or Mesh Covers
Floating row covers, bird netting, or even wire mesh laid across the bed can physically block animals from digging. You can install a light frame or use old tomato cages to support the netting and still allow sun and rain through.

2. Motion-Activated Sprinklers
Raccoons and cats hate being surprised. A motion-activated sprinkler set to go off when movement is detected can startle them enough to keep them away for good. You’ll have to keep a hose attached and water on at all times, so this may not be a great option.

3. Sharp Mulch or Chicken Wire
Cats in particular dislike walking on rough or pokey surfaces. Try a layer of pine cones, coarse wood chips, or even laying chicken wire just under the surface of your mulch. It makes digging uncomfortable, and they’ll quickly seek out easier terrain.

4. Predator Scents and Repellents
You can buy commercial repellents that mimic the smell of predators like fox or coyote. Some gardeners swear by them. Just check that they’re safe to use around edible plants and follow the instructions closely.

5. Planting Deterrents
Strong-smelling herbs like rosemary, lavender, and lemongrass can sometimes help deter cats and small animals from hanging around. Scatter them around the edges of your beds for a bonus bit of beauty and scent.

6. Secure Your Compost
Many critters are drawn to open compost bins full of food scraps. Make sure your compost pile is contained and covered, especially if you’re in an area with active raccoons or possums. You don’t want your garden to be their midnight buffet.

7. Garden Fencing (Even Mini Versions)
A simple 2-foot fence around your raised beds can do a lot to keep small animals out. It won’t stop raccoons completely (those bandits are crafty), but it does add a layer of inconvenience that can make your garden less appealing.

The Ultimate Homesteader’s Starter Bundle – Only $47!

Get the tools you need to stay organized, track profits, and manage your homestead with ease!

Includes:
✅ Schedule F Tracker – Simplify tax prep
✅ Profit Calculator – Track earnings
✅ Hay Calculator – Plan livestock feed
✅ Garden Journal – Digital & printable
✅ Herd Health Tracker – Monitor animal care
✅ Simple Budget – Manage finances
✅ Backyard Homestead eBook – Essential tips

$99 value – now just $47! Start your homesteading journey today!

Buy Now

What to Do If You Suspect Contamination

If you discover fresh animal feces in your raised bed, don’t panic—but don’t ignore it either.

Here’s what to do:

  1. Remove all visible feces carefully, using a trowel and gloves.
  2. Discard any vegetables that may have come into direct contact with waste.
  3. If the poop was in a planting area, consider removing the top few inches of soil and replacing it.
  4. Avoid planting root vegetables (like carrots or radishes) in that spot for the rest of the season.
  5. Wait at least 120 days before planting anything you plan to eat raw in that area—this aligns with USDA guidance for raw manure contamination.

Before we get too far into this post, I wanted to give a suggestion about keeping a garden journal. A digital garden journal is a fantastic way to keep track of past, present and future gardens. Our Digital Garden Journal is a great way to keep up with everything without getting too overwhelmed.

Buy Now

Prevention Is Easier Than Clean-Up

Once an animal picks a favorite potty spot, they will come back. Your best bet is to deter them immediately and consistently. Even if the poop problem seems small now, it can become a serious health issue later. And let’s face it—it ruins the joy of gardening when your harvest bed becomes a hazard zone.

Cayenne pepper is an easy, affordable place to start, and for us, it’s been a game changer. But combine it with physical barriers or deterrents, and you’ll drastically reduce the chances of repeat offenses.

cropped-3.jpg

Are you looking for garden journal prompts, but aren’t interested in a weekly email? Check out our 365 Garden Journal Prompts! This is an amazing, all in one, yearly product that you only pay for once.

Buy Now!

Final Thoughts: Reclaim Your Raised Beds

If you’ve ever found yourself cursing at a neighborhood cat or battling with a masked raccoon under moonlight, know this: you’re not alone. The struggle is real, and it’s not your fault. Raised beds are inviting. They’re warm, dry, and easy to dig in. To an animal, they might as well have a sign that says “Nature’s Bathroom—Open 24/7.”

But with the right mix of deterrents, persistence, and a dash of cayenne, you can reclaim your garden space. Keep your beds clean, your soil safe, and your harvests healthy—because you deserve to garden without fear of stepping in something unpleasant.

If you like this post, feel free to share it and follow us below on our social media accounts!

  • Facebook
  • Pinterest
  • Instagram
  • YouTube
  • TikTok
  • Spotify
  • Threads

If you like the content I put out, feel free to buy us a coffee! It helps keep this site running, marketing and the goats in grain!

Buy me a coffee

Filed Under: Animals, Farm Dogs, Our Homestead

JOIN TO OUR MAILING LIST!

Leave us your email to receive new posts and special offers for members only! Don't miss a thing!

Recent Posts

  • Fall Garden Guide
  • Top Mistakes With Goats
  • How To Bond With Your Goats

How to Avoid Garden Burnout (And What to Do If You’re Already There)

May 10, 2025 by Leigh Leave a Comment

Let’s be honest—gardening isn’t always the peaceful, soul-soothing activity we romanticize on Instagram. Sure, there are moments of magic—sun-warmed tomatoes, the buzz of bees, the scent of basil on your hands—but there are also the weeks where everything seems to fall apart. When the weeds outpace your willpower, the squash bugs stage a coup, and you’re staring at your green bean jungle wondering how you’ll ever preserve it all. If you’ve ever stood in your garden with your hands on your hips muttering “Why did I plant so much?”—this post is for you. Let’s talk about how to avoid garden burnout—the causes, the signs, how to prevent it, and what to do when you’re already knee-deep in it. Because sometimes the best thing you can do for your garden is to take care of you.

The Ultimate Homesteader’s Starter Bundle – Only $47!

Get the tools you need to stay organized, track profits, and manage your homestead with ease!

Includes:
✅ Schedule F Tracker – Simplify tax prep
✅ Profit Calculator – Track earnings
✅ Hay Calculator – Plan livestock feed
✅ Garden Journal – Digital & printable
✅ Herd Health Tracker – Monitor animal care
✅ Simple Budget – Manage finances
✅ Backyard Homestead eBook – Essential tips

$99 value – now just $47! Start your homesteading journey today!

Buy Now

Burnout in the garden is real. And it hits hard when the weather gets hot, the harvest comes fast, and your to-do list is longer than your trellis. If you’re feeling overwhelmed, exhausted, or like you want to torch the whole thing and start over, know this: you are not failing. You’re just human.

What Garden Burnout Really Feels Like

Burnout doesn’t always announce itself with fireworks. Sometimes it sneaks in quietly. You start by skipping a watering day. Then another. You avoid the garden altogether because “I’ll get to it tomorrow,” but tomorrow keeps slipping away. You feel guilty every time you look out the window. The thought of pulling one more weed or blanching one more batch of peas makes your chest tighten. That’s burnout talking.

And honestly? It usually stems from a mix of overcommitment, unrealistic expectations, and the pressure to “do it all”—grow it, harvest it, preserve it, cook it, photograph it, share it online. But real life doesn’t move at Pinterest speed.

cropped-3.jpg

Are you looking for garden journal prompts, but aren’t interested in a weekly email? Check out our 365 Garden Journal Prompts! This is an amazing, all in one, yearly product that you only pay for once.

Buy Now!

Common Causes of Garden Burnout

  • Planting too much: We get excited in spring. All those seed packets. All the dreams. Then come July, you’re harvesting more zucchini than one household could possibly consume and wondering what on earth possessed you to plant 99 tomato plants.

  • Pests and diseases: Nothing demoralizes a gardener like watching something you’ve nurtured for months get destroyed in a matter of days.

  • Preservation pressure: There’s a special kind of panic that sets in when the tomatoes ripen all at once and your freezer’s already full.

  • Unrealistic standards: Whether it’s the perfect rows you saw on TikTok or the pressure to feed your family entirely from your garden, sometimes we forget that even the most experienced homesteaders have crop failures.

  • Life outside the garden: Jobs, kids, health issues, bad weather—life doesn’t stop just because the beans need picking.

If you are interested in learning more about my favorite garden planner. I highly recommend Seedtime! This planner has been instrumental in helping me plan out my gardens with WAY more efficiency than I could ever expect! It has also reduced overwhelm, stress, and calmed my ADD/ADHD!

More Info!

How to Avoid Garden Burnout Before It Starts

Let’s talk prevention. Because sometimes all it takes is a few small tweaks in your garden rhythm to keep things sustainable.

1. Plant Less (Seriously, Less)
There’s no shame in downsizing. In fact, it’s one of the smartest things you can do. You don’t need to grow all the things every year. Choose a few crops you really love, the ones you use regularly and can manage. Grow intensively in a small space instead of spreading yourself thin across raised beds you’ll resent come July.

2. Succession Plant Smarter
Instead of planting everything at once, space out your sowing. This helps avoid the massive harvest drop that slams you all at once. It also keeps the garden feeling manageable over time. Do you really need all your lettuce to mature in the same week?

3. Set Boundaries With Preservation
You do not have to preserve everything. Let me repeat that for the overwhelmed gardener in the back: YOU DO NOT HAVE TO PRESERVE EVERYTHING. It’s okay to eat it fresh and compost the rest. Choose preservation methods that work for your time and energy level—maybe that’s freezing instead of canning, or dehydrating herbs instead of making infused oils.

4. Garden in Real Life, Not for the Internet
You don’t need the perfect trellis or weed-free rows. You don’t need to grow 17 types of heirloom tomatoes because a homestead influencer does. Grow what you eat, what brings you joy, and what works in your space.

5. Take Breaks (and Plan Them)
Schedule “off” days where you don’t touch the garden. Don’t harvest. Don’t weed. Let it be. This gives you a mental reset and helps the garden become a place of joy again, not just a chore list.

6. Build in Margin
Don’t plant right up to your energy limits. Assume something will go wrong—because it will. Build space into your schedule and expectations for imperfection, and you’ll be less likely to crash when the aphids hit.

7. Get Help If You Can
Even if it’s just a friend who’ll come weed for an hour while you catch up on harvesting. Community support—even in small doses—can take the pressure off more than you think.

cropped-3.jpg

Are you looking for garden journal prompts, but aren’t interested in a weekly email? Check out our 365 Garden Journal Prompts! This is an amazing, all in one, yearly product that you only pay for once.

Buy Now!

Signs You’re Already Burned Out

If you’re already in the burnout zone, here’s what that might look like:

  • You feel dread or guilt instead of joy when thinking about your garden.
  • You avoid going outside because it feels overwhelming.
  • You stop harvesting and let things rot because it’s just too much.
  • You fantasize about ripping everything out and starting fresh next year.
  • You feel like a failure (spoiler: you’re not).

So, what can you do about it?

If you are interested in learning more about my favorite garden planner. I highly recommend Seedtime! This planner has been instrumental in helping me plan out my gardens with WAY more efficiency than I could ever expect! It has also reduced overwhelm, stress, and calmed my ADD/ADHD!

More Info!

What to Do When Garden Burnout Hits

1. Give Yourself Permission to Quit
Yes, really. If it’s no longer serving you, it’s okay to rip it out. Compost the chaos. Cover the beds. Let it rest. You are not obligated to keep growing if it’s costing you your peace.

2. Take a Garden Sabbath
Give yourself a solid weekend (or week) where you ignore the garden guilt-free. Let it grow wild. Let it be imperfect. Step away and let your brain breathe.

3. Simplify What’s Left
Pick one or two beds to maintain, and let the rest go. Choose what matters most—maybe it’s the tomatoes you do want to can, or your herb spiral that brings you joy.

4. Outsource Preservation
Can’t keep up with preserving? Offer surplus to friends or neighbors. Trade veggies for someone else’s canning skills. Freeze stuff whole and deal with it later. It’s okay to punt.

5. Shift Your Focus to Joy
Go out with no tools. Just walk the garden. Touch the plants. Smell the mint. Watch the bees. Let yourself reconnect without a chore list. Sometimes, the way back to joy is through presence.

6. Learn for Next Year—Then Let It Go
What would you do differently? What was too much? Make a note, then release the guilt. Every gardener overplants at some point. It’s a rite of passage, not a moral failing.

7. Remember: It’s a Garden, Not a Performance
Your garden doesn’t have to be productive to be valuable. Sometimes it’s just a space to connect with the earth, even if the tomatoes flop and the cucumbers get bitter.

The Ultimate Homesteader’s Starter Bundle – Only $47!

Get the tools you need to stay organized, track profits, and manage your homestead with ease!

Includes:
✅ Schedule F Tracker – Simplify tax prep
✅ Profit Calculator – Track earnings
✅ Hay Calculator – Plan livestock feed
✅ Garden Journal – Digital & printable
✅ Herd Health Tracker – Monitor animal care
✅ Simple Budget – Manage finances
✅ Backyard Homestead eBook – Essential tips

$99 value – now just $47! Start your homesteading journey today!

Buy Now

Final Thoughts: Burnout Isn’t Failure—It’s Feedback

Gardening is one of the most rewarding things we can do, but it’s also one of the most demanding. The seasons move fast, the bugs are relentless, and the pressure (especially on homesteaders or those trying to feed a family) can be intense. If you’re feeling burnt out, it doesn’t mean you’re doing it wrong—it means your garden rhythm might need some adjusting.

Take a breath. Take a break. Your garden will forgive you. The soil is patient. And when you’re ready, you’ll return—maybe with a smaller plot, maybe with a new plan, maybe just to sit and soak in the sunshine.

But you’ll come back. Because beneath the burnout, you’re still a gardener. And that part of you never really quits.

If you like this post, feel free to share it and follow us below on our social media accounts!

  • Facebook
  • Pinterest
  • Instagram
  • YouTube
  • TikTok
  • Spotify
  • Threads

If you like the content I put out, feel free to buy us a coffee! It helps keep this site running, marketing and the goats in grain!

Buy me a coffee

Filed Under: Our Homestead

JOIN TO OUR MAILING LIST!

Leave us your email to receive new posts and special offers for members only! Don't miss a thing!

Recent Posts

  • Fall Garden Guide
  • Top Mistakes With Goats
  • How To Bond With Your Goats

How to Use Your Garden Harvest: Best Ways to Cook, Preserve & Store Fresh Produce

May 6, 2025 by Leigh Leave a Comment

A thriving garden is one of the most rewarding parts of gardening—but what happens when everything starts ripening at once? Suddenly, your counters are overflowing with tomatoes, zucchini, and herbs, and you’re racing the clock to use them all before they spoil. The good news is: there are dozens of effective, simple, and delicious ways to use and preserve your garden harvest for both short-term meals and long-term storage.

In this guide, we’ll cover the best uses and preservation methods for nine of the most common homegrown favorites: tomatoes, peppers, squash, green beans, peas, corn, pumpkins, onions, and herbs.

The Ultimate Homesteader’s Starter Bundle – Only $47!

Get the tools you need to stay organized, track profits, and manage your homestead with ease!

Includes:
✅ Schedule F Tracker – Simplify tax prep
✅ Profit Calculator – Track earnings
✅ Hay Calculator – Plan livestock feed
✅ Garden Journal – Digital & printable
✅ Herd Health Tracker – Monitor animal care
✅ Simple Budget – Manage finances
✅ Backyard Homestead eBook – Essential tips

$99 value – now just $47! Start your homesteading journey today!

Buy Now

🍅 Tomatoes

Tomatoes are one of the most versatile garden staples and one of the easiest to preserve.

Best Ways to Use:

  • Fresh eating: Sliced on sandwiches, chopped into salads, or as a base for bruschetta.
  • Cooked dishes: Soups, stews, pasta sauce, pizza sauce, chili, and casseroles.
  • Homemade salsa: Mix with onions, peppers, cilantro, and lime for a garden-fresh salsa.

Preservation Tips:

  • Canning: Make and can tomato sauce, diced tomatoes, or salsa.
  • Freezing: Core and freeze whole tomatoes to use later in soups or sauces (skins slip right off when thawed).
  • Dehydrating: Make sun-dried tomatoes or tomato powder for seasoning.

Before we get too far into this post, I wanted to give a suggestion about keeping a garden journal. A digital garden journal is a fantastic way to keep track of past, present and future gardens. Our Digital Garden Journal is a great way to keep up with everything without getting too overwhelmed.

Buy Now

🌶️ Peppers

Whether you grow bell peppers, jalapeños, or banana peppers, they are easy to use in daily meals and preserve for winter.

Best Ways to Use:

  • Stuffed peppers: Fill with rice, cheese, or ground meat.
  • Stir-fries: Add to meat or veggie dishes.
  • Salsa & hot sauce: A must for jalapeños or other spicy varieties.

Preservation Tips:

  • Freezing: Chop and freeze raw; great for soups and stir-fries.
  • Pickling: Slice and pickle hot or sweet peppers in vinegar.
  • Drying: String hot peppers to dry or use a dehydrator.

If you are interested in learning more about my favorite garden planner. I highly recommend Seedtime! This planner has been instrumental in helping me plan out my gardens with WAY more efficiency than I could ever expect! It has also reduced overwhelm, stress, and calmed my ADD/ADHD!

More Info!

🥒 Summer Squash (Zucchini, Yellow Squash, etc.)

Summer squash is notorious for overproducing—thankfully, it’s incredibly flexible in the kitchen.

Best Ways to Use:

  • Grilled or sautéed: Season with herbs and olive oil.
  • Zucchini bread: A classic sweet loaf that freezes well.
  • Zoodles (zucchini noodles): A low-carb pasta replacement.

Preservation Tips:

  • Freezing: Shred raw zucchini and freeze in bags for baking.
  • Dehydrating: Create chips or slices for soups and stews.
  • Pickling: Surprisingly tasty when brined with vinegar and spices.
cropped-3.jpg

Are you looking for garden journal prompts, but aren’t interested in a weekly email? Check out our 365 Garden Journal Prompts! This is an amazing, all in one, yearly product that you only pay for once.

Buy Now!

🥬 Green Beans

Green beans are easy to grow, pick, and preserve—making them a homestead favorite.

Best Ways to Use:

  • Steamed or roasted: A quick and healthy side dish.
  • Casseroles: Classic green bean casserole or stir-fried with garlic.
  • Salads: Cold bean salad with vinegar and herbs.

Preservation Tips:

  • Freezing: Blanch and freeze in batches.
  • Canning: Pressure can for shelf-stable storage.
  • Pickling: Make dilly beans for a tangy treat.

Are you getting overwhelmed in the garden? Stressed? Or just not enjoying the garden like you used to? Check out our garden prompts! We send out weekly emails that get you back in the garden and out of your head! Turn the garden back into a place of love and joy instead of frustration and headache!

Subscribe Now!

🟢 Peas (Snow, Snap, or Shelling Peas)

Peas add sweet, crisp flavor and store surprisingly well.

Best Ways to Use:

  • Stir-fries: Especially snow or sugar snap peas.
  • Soups and stews: Shelling peas add sweetness to brothy dishes.
  • Fresh snacks: Snap peas are delicious raw with dip.

Preservation Tips:

  • Freezing: Shell and blanch before freezing.
  • Dehydrating: Great for soups or powdered into pea protein.

Before we get too far into this post, I wanted to give a suggestion about keeping a garden journal. A digital garden journal is a fantastic way to keep track of past, present and future gardens. Our Digital Garden Journal is a great way to keep up with everything without getting too overwhelmed.

Buy Now

🌽 Corn

There’s nothing like a freshly harvested ear of sweet corn. But once it starts coming in, it comes fast.

Best Ways to Use:

  • On the cob: Boiled, grilled, or roasted.
  • Cut off the cob: Add to casseroles, soups, salsas, or cornbread.
  • Corn relish: A delicious way to use excess with peppers and onions.

Preservation Tips:

  • Freezing: Cut kernels and freeze raw or blanched.
  • Canning: Pressure can whole-kernel corn or corn chowder.
  • Drying: Dry for popcorn or cornmeal if using field corn.

The Ultimate Homesteader’s Starter Bundle – Only $47!

Get the tools you need to stay organized, track profits, and manage your homestead with ease!

Includes:
✅ Schedule F Tracker – Simplify tax prep
✅ Profit Calculator – Track earnings
✅ Hay Calculator – Plan livestock feed
✅ Garden Journal – Digital & printable
✅ Herd Health Tracker – Monitor animal care
✅ Simple Budget – Manage finances
✅ Backyard Homestead eBook – Essential tips

$99 value – now just $47! Start your homesteading journey today!

Buy Now

🎃 Pumpkin

Pumpkins aren’t just for carving. They’re packed with nutrients and make an excellent storage crop.

Best Ways to Use:

  • Puree: Use in pies, muffins, soups, and even smoothies.
  • Roasted: Serve in chunks as a hearty vegetable side.
  • Pumpkin seeds: Roast with seasoning for a healthy snack.

Preservation Tips:

  • Freezing: Roast, puree, and freeze in 1-2 cup portions.
  • Canning: Pressure can pumpkin chunks (not puree).
  • Dehydrating: Make pumpkin leather or powder for baking.
cropped-3.jpg

Are you looking for garden journal prompts, but aren’t interested in a weekly email? Check out our 365 Garden Journal Prompts! This is an amazing, all in one, yearly product that you only pay for once.

Buy Now!

🧅 Onions

Onions are a foundation ingredient in most savory dishes and store very well with little effort.

Best Ways to Use:

  • Sautéed or caramelized: Add to eggs, burgers, and casseroles.
  • Soups and stocks: Build flavor with every batch.
  • Pickled onions: Great for tacos, burgers, and sandwiches.

Preservation Tips:

  • Curing and storing: Allow to dry in a well-ventilated space before storing in mesh bags or crates.
  • Freezing: Dice and freeze raw.
  • Dehydrating: Make onion flakes or powder.

The Ultimate Homesteader’s Starter Bundle – Only $47!

Get the tools you need to stay organized, track profits, and manage your homestead with ease!

Includes:
✅ Schedule F Tracker – Simplify tax prep
✅ Profit Calculator – Track earnings
✅ Hay Calculator – Plan livestock feed
✅ Garden Journal – Digital & printable
✅ Herd Health Tracker – Monitor animal care
✅ Simple Budget – Manage finances
✅ Backyard Homestead eBook – Essential tips

$99 value – now just $47! Start your homesteading journey today!

Buy Now

🌿 Herbs

Herbs are the secret to elevating any meal—and they’re easy to dry or freeze.

Best Ways to Use:

  • Fresh cooking: Add basil to tomatoes, rosemary to potatoes, or mint to tea.
  • Herbal butters or oils: Blend into compound butters or infuse into olive oil.
  • Herbal teas: Use mint, lemon balm, or chamomile for homemade blends.

Preservation Tips:

  • Drying: Air dry, use a dehydrator, or microwave for small batches.
  • Freezing: Chop and freeze in ice cube trays with olive oil or water.
  • Vinegars and salts: Infuse herbs for flavored culinary staples.
cropped-3.jpg

Are you looking for garden journal prompts, but aren’t interested in a weekly email? Check out our 365 Garden Journal Prompts! This is an amazing, all in one, yearly product that you only pay for once.

Buy Now!

🧺 Tips for Managing a Large Garden Harvest

When the bounty is overwhelming, here are a few extra strategies to stay on top of it:

  1. Prioritize perishables: Use herbs, zucchini, and tomatoes first—they spoil quickly.
  2. Batch process: Set aside a weekend for canning or freezing sessions.
  3. Share or barter: Trade excess produce with neighbors or at the farmer’s market.
  4. Keep a preservation log: Track what you freeze, can, or dry each season.
  5. Use imperfect produce: Turn blemished veggies into sauces, soups, or broths.
  6. Animals: Give “bad” produce that can’t be eaten or preserved to your animals. This will help cut your feed bill.

The Ultimate Homesteader’s Starter Bundle – Only $47!

Get the tools you need to stay organized, track profits, and manage your homestead with ease!

Includes:
✅ Schedule F Tracker – Simplify tax prep
✅ Profit Calculator – Track earnings
✅ Hay Calculator – Plan livestock feed
✅ Garden Journal – Digital & printable
✅ Herd Health Tracker – Monitor animal care
✅ Simple Budget – Manage finances
✅ Backyard Homestead eBook – Essential tips

$99 value – now just $47! Start your homesteading journey today!

Buy Now

📝 Final Thoughts: Don’t Let Your Harvest Go to Waste

Growing your own food is one of the most satisfying things you can do—but learning how to use it all is just as important. With a solid plan to cook, can, freeze, or dry your garden harvest, you’ll be able to enjoy your hard work all year long—and save money in the process.

So whether you’re drowning in tomatoes or wondering what to do with all those green beans, just remember: nothing has to go to waste with a little prep and planning.

If you like this post, feel free to share it and follow us below on our social media accounts!

  • Facebook
  • Pinterest
  • Instagram
  • YouTube
  • TikTok
  • Spotify
  • Threads

If you like the content I put out, feel free to buy us a coffee! It helps keep this site running, marketing and the goats in grain!
Buy me a coffee

Filed Under: Our Homestead

JOIN TO OUR MAILING LIST!

Leave us your email to receive new posts and special offers for members only! Don't miss a thing!

Recent Posts

  • Fall Garden Guide
  • Top Mistakes With Goats
  • How To Bond With Your Goats
  • Page 1
  • Page 2
  • Page 3
  • Interim pages omitted …
  • Page 23
  • Go to Next Page »

Primary Sidebar

WELCOME

WELCOME

My name is Leigh and I am the lead chaos creator here at Steel Raven Farms. You will see throughout this blog that I am the crazy goat lady.

I am married to my high school sweetheart, Jared and we have two amazing boys.

FOLLOW ME

  • Amazon
  • Facebook
  • Instagram
  • Pinterest
  • TikTok

GET UPDATES!

Leave us your email to receive new posts and special offers for members only! Don't miss a thing!

In all the years that I’ve been growing a garden, the fall garden has steadily remained my favorite. Which is funny because I don’t really like any of the brassicas, which is what most people know the fall garden for. I prefer the root vegetables and cool air. But I have learned over the years…

Read More

  • Animals
    • Chickens
    • Farm Dogs
    • Goats
  • Garden
    • Compost
    • Garden Projects
    • Seeds and Plants
    • Garden Journal
    • Working With Food
      • Recipes
      • Freezing Foods
      • Dehydrating Foods
      • Canning Tips And Tricks
        • Canning Inventory Sheets
  • Helpful Info
    • Welcome to the Homestead!
    • Emergency Preparedness
    • Frequently Asked Questions
    • Goal Setting
    • Project List
    • Shop Digital Products
      • Hay Calculator
      • Farm Expense And Income Tracker
      • Goat Crash Course: 101
      • Garden Journal Prompts
      • Schedule C Tracker
      • Schedule C Tracker
      • The Homestead Bundle
  • The Truths
  • Episode List
  • Start Here
    • Privacy Policy
    • Affiliate Disclosure
    • Let’s Get in Touch
    • Members Only Library
    • Welcome To Our Homestead

Footer

  • Email
  • Facebook
  • Instagram
  • Pinterest

COME AND GET IT!

Leave us your email to receive new posts and special offers for members only! Don't miss a thing!

· Midnight Theme

Copyright © 2026 · Midnight Theme on Genesis Framework · WordPress · Log in