• Skip to primary navigation
  • Skip to main content
  • Skip to primary sidebar
  • Skip to footer

Steel Raven Farms

Where muck boots meet ground.

  • Animals
    • Chickens
    • Farm Dogs
    • Goats
  • Garden
    • Compost
    • Garden Projects
    • Seeds and Plants
    • Garden Journal
    • Working With Food
      • Recipes
      • Freezing Foods
      • Dehydrating Foods
      • Canning Tips And Tricks
        • Canning Inventory Sheets
  • Helpful Info
    • Welcome to the Homestead!
    • Emergency Preparedness
    • Frequently Asked Questions
    • Goal Setting
    • Project List
    • Shop Digital Products
      • Hay Calculator
      • Farm Expense And Income Tracker
      • Goat Crash Course: 101
      • Garden Journal Prompts
      • Schedule C Tracker
      • Schedule C Tracker
      • The Homestead Bundle
  • The Truths
  • Episode List
  • Start Here
    • Privacy Policy
    • Affiliate Disclosure
    • Let’s Get in Touch
    • Members Only Library
    • Welcome To Our Homestead

Homestead

Master Garden List

January 7, 2025 by Leigh Leave a Comment

At the end of every year, I go through all of my gardening stuff and make sure that I have everything that I need for the next season. As I was doing that, I realized that a lot of new gardeners may not have a clue about what all they will need. Then they end up making several hardware store runs or having to wait for packages to arrive. I decided to make my master garden list for you (there’s a printable at the end) so that you can avoid those hassles and make this year the best garden year yet!

cropped-3.jpg

Are you looking for garden journal prompts, but aren’t interested in a weekly email? Check out our 365 Garden Journal Prompts! This is an amazing, all in one, yearly product that you only pay for once.

Buy Now!

Master Garden List

I have broken this down into a couple of different sections, that include; tools/ extras, soil/ amendments, and seeds/bulbs. Then I’m going give you my master planting list for my family of 4 and our livestock. My hope is that you have everything you need to have a great garden season that doesn’t included last minute trips to the hardware store or unplanned seed orders.

Master Garden List- Tools

There aren’t many tools that I use regularly, but I have multiples of the items I use all the time. I do not need a ton of tools because of the way I grow my veggies and the way that I handle my soil. Because I do not till, I don’t need a tiller. Things like that. But I have a ton of shovels because there are four of us and when we do big work in the garden, we are all working. So let’s get into my list:

Hoses- Every year, we either buy new hoses or have to repair our old hoses. Do yourself a sold and don’t waste your money on the heavy duty, mac daddy hoses. They aren’t worth it. We’ve bought just about every brand out there and all of them have been destroyed within about 2 years. That being said, we aren’t gentle with our hoses. If you are, then buy the good hoses.

Sprayers- Again, don’t waste your money on super expensive sprayers and hose nozzles. We are lucky to get a full season out of them. And again, if you are gentle with your stuff, buy the expensive ones. We aren’t. But there are some things that the nozzle needs to do, shower and jet. I want power when I need it and I want gentle power on baby plants.

Hand Tools- I have three hand shovels for planting, but when it comes to filling me seed start trays, I use an old coffee mug that the handle has been broken off of. It just works better for me. But get yourself some good hand shoves, weeders, etc. This “kit” from Amazon is a good place to start if you aren’t sure which tools you want and which ones you’ll actually use.

Extra Tools To Make Life Easier

Shears/ Blades- Now, I am snobby when it comes to my hand tools. I am a Fiskars girl through and through. I have found that they stand up to a beating. Even the blades stay sharp and I am not careful. These little pruners have been a lifesaver for my hands. You should have at least two smaller pruners, a large branch cutter, and then a smaller leaf pruner. Honestly, if you’re short on cash, get the smaller pruners and be done. Whatever brand you choose, make sure that they are always sharp and try to remember to bring them inside….

Hemp/Jute/ String- Lastly, you will need string. Now, I prefer a natural fiber like hemp or jute, but that is more expensive than nylon or other fibers. You will need string for tying up tomatoes, peas, etc, or training squash. I’ve used old hay bale twine to fix gates and hang cattle panel. Do what makes sense for you. String has endless uses so make sure you’ve got plenty.

Soil/ Amendments

If you are starting your garden from scratch, or you just need a really, REALLY good brand of soil, I buy from Fox Farm. Yes, it’s incredibly expensive. But you are getting what you pay for. This soil has amazing microbes already thriving in it. And if you have dirt, but it’s not great, this soil will jump start your dirt and turn it into soil.

If you already have good soil, I recommend getting a soil test kit every year. I really like the My Soil test kits because it gives you suggestions for both organic AND conventional fertilizers based on your specific soil needs. They also tell you about your nutrient density and more. My Soil Test is who I will use every year.

I am incredibly picky about my soil and amendments but also incredibly lazy. I talked here about how I build my soil, so I don’t need a lot of soil amendments. In fact, I really only ever add goat bedding to fill the beds and that’s usually it.

BUT, if I am going to use any kind of amendments, it’s going to be OMRI listed and I need to be able to figure out where it came from. Things like fish emulsion, kelp, bone meal, etc are okay. And really, just doing the best you can here is the most important. Don’t get hung up on the details.

At the end of the day though, I know that I am not going to add any amendments to my soil. Not because the plants don’t need it, but because it’s just not something I’m thinking about. So again, do what you can.

Seeds/ Bulbs/ Tubers

I figure out my seed needs totally based on my seed horde and what grew well last year. This year (2025), we are focusing on putting up more food than we normally do. So we are focusing more on things like tomatoes for tomato sauce instead of cherry tomatoes for fresh eating and pickling cucumbers over slicers.

Typically, I bulk order my seeds from Botanical Interests, Eden Brothers, and Baker Creek Seed Company, with Botanical Interests being my favorite. My seed order is usually about $150, again depending on what I have left over from last year.

Every year, I order leeks, potatoes, sweet potatoes, and garlic. I haven’t successfully figured out how to start leeks yet but it’s something that I am continuing to work on. I also totally forget to set aside seed potatoes and garlic every year…. oops.

If you are looking to start your own seed horde and not sure where to start, I am working on my Master Planting List. But a good general rule of thumb is one or two packets of seeds for every type of plant that you know your family will eat. For example, if your family likes cucumbers, get one packet of slicers. But again, I get into the details of this in Master Planting List.

Master Garden List- Printable

If you would like to download my Master Garden List, sign up below and follow the prompts! Or if you are already subscribed to Steel Raven Farms, it is in the Member’s Only Library along with all my other downloads for you.

If you like the content I put out, feel free to buy us a coffee! It helps keep this site running, marketing and the goats in grain!

Buy me a coffee

If you like this post, feel free to share it and follow us below on our social media accounts!
  • Facebook
  • Pinterest
  • Instagram
  • YouTube
  • TikTok
  • Spotify
  • Threads

Filed Under: Garden, Homestead Planning Tagged With: flowers, Garden, Homestead, soil, soil testing, vegetables

JOIN TO OUR MAILING LIST!

Leave us your email to receive new posts and special offers for members only! Don't miss a thing!

Recent Posts

  • Fall Garden Guide
  • Top Mistakes With Goats
  • How To Bond With Your Goats

50 Homestead Goal Ideas

January 4, 2025 by Leigh Leave a Comment

With it being the start of a new year, a lot of homesteaders may be struggling to figure out exactly what to do with themselves and their homestead. Some people have already set their goals for the year and are chomping at the bit to get going. Others are still trying to figure out where last year went. But in either of those situations, here is my guide for homestead goal ideas and how to make your own.

The Ultimate Homesteader’s Starter Bundle – Only $47!

Get the tools you need to stay organized, track profits, and manage your homestead with ease!

Includes:
✅ Schedule F Tracker – Simplify tax prep
✅ Profit Calculator – Track earnings
✅ Hay Calculator – Plan livestock feed
✅ Garden Journal – Digital & printable
✅ Herd Health Tracker – Monitor animal care
✅ Simple Budget – Manage finances
✅ Backyard Homestead eBook – Essential tips

$99 value – now just $47! Start your homesteading journey today!

Buy Now

Homestead Goal Ideas

Before we get into my homestead goal ideas, I want to talk to you about how we set goals around here. First, we are going to talk about the do’s and don’ts of setting homestead goals. Then we are going to talk about actually selecting and timing your goals. Finally, I am going to give you my master list of how I come up with yearly goals. As always, I will explain everything below.

Do’s and Don’ts Of Homestead Goals

The very first thing that you need to do when you are figuring out your homestead goals is to be kind to yourself, family, and animals. If the stomach flu wipes out your family for the whole month of May and all of your plant starts die? Don’t panic. Just step back, be thankful that it’s over and do what you can. Be kind to yourself because getting down on yourself, your family or your animals doesn’t do any good.

Another don’t is to space out your goals. It’s very easy to set up and jam pack your entire year. And let me tell you, that will lead you to burnout faster than you can blink.

DO make sure that you’ve got back up plans in case something goes sideways. Don’t put all of your eggs in one basket.

DO make sure that you pick some Finish Line Goals (which I will explain more in a minute) to give yourself that little boost to push through the hard stuff.

Are you getting overwhelmed in the garden? Stressed? Or just not enjoying the garden like you used to? Check out our garden prompts! We send out weekly emails that get you back in the garden and out of your head! Turn the garden back into a place of love and joy instead of frustration and headache!

Subscribe Now!

Selecting Your Homestead Goals

One of the things that I love to do is create a brain dump for the year. This is a list of all the things I want to do or get done for the year. This is where I allow myself to dream big and go wild. There is nothing too big or too crazy to go on this list.

Once you have made your brain dump, start going through and, realistically, mark out anything that really can’t be done this year. For example, I want a new goat barn. This can be on the brain dump list, but cannot actually be done this year because we just don’t have time or materials for it.

After you have worked through your brain dump list, now we turn our goals into tasks and start scheduling them.

The Ultimate Homesteader’s Starter Bundle – Only $47!

Get the tools you need to stay organized, track profits, and manage your homestead with ease!

Includes:
✅ Schedule F Tracker – Simplify tax prep
✅ Profit Calculator – Track earnings
✅ Hay Calculator – Plan livestock feed
✅ Garden Journal – Digital & printable
✅ Herd Health Tracker – Monitor animal care
✅ Simple Budget – Manage finances
✅ Backyard Homestead eBook – Essential tips

$99 value – now just $47! Start your homesteading journey today!

Buy Now

Timing Your Goals For Maximum Potential

There’s a saying that a goal without a deadline is just a dream. Well, this is where we turn our dreams into goals and our goals into tasks.

As you look at your revised list of goals and dreams, I want you to really think about when the best time to do it would be. To give you an example from last year, we wanted to expand our big garden and install raised beds. We had two options, do it before planting season, or after.

Me being stubborn, I wanted it before. So this is how we did it; January we took down the old fencing and started cutting down trees. February was finishing the trees and putting the fence back up. March was building the beds and starting to fill them. April was filling the beds and starting to plant.

Timing your goals is extremely important in making sure that not only that you have enough time to get the goals done, but also making sure that you’re doing that goal in the right season. A good example for us is doing house projects in the cold months.

We do not do any upgrades to the house when it is warm or hot. The reason for this is because there are so many outdoor projects that need to be done that wasting time inside isn’t worth it. The other side is that we aren’t going to be spending a lot of time outside when it is too cold.

Another good reason to time your goals appropriately is something like building a shelter for your animals. We want to make sure that these types of projects are done BEFORE bad weather sets in.

Before we get too far into this, I have a great course on the basics of goat care. I call it Goat Crash Course: Goat 101. In this course, I explain things like types of shelter, types of feeds and hays, basic assessments and so much more! Check it out!

Buy Now

What Are Finish Line Goals

I wanted to give you my hack for not only setting goals but also something that helps my mental health on the days when I just can’t fathom going outside. I call these goals Finish Line Goals or FLG. These are small, easy to hit goals that make a big impact, either mentally or physically. These goals are a quick dopamine hit that really get me motivated to get moving.

FLG’s are great for those dreary days that you can barely get out of bed, let alone go feed the animals and they will look different for everyone. But in the list below, I will give you a bunch of my FLG to pull from or help create your own.

If you are new to heating with firewood and are looking to master the finer points of it. We’ve got a great eBook that goes in depth of what tools you should consider, how and where to stack, how to build a fire and so much more!

Buy Now

Master Homestead Goal Ideas

This list is off my master list that I use when I am floundering to figure out what I want do. Because a brain dump is great when you have a bunch of ideas floating around in your head. This master list is great when you either have no idea where to start or so many ideas that you have become paralyzed with options.

The point of this list isn’t do answer the questions but to use it as a prompt to give you some ideas about what other goals you can do for the year.

  1. Chickens- Is their watering system working?
  2. Chickens- Does their feeding system work for them?
  3. Chickens- Is their shelter suitable for the weather?
  4. Chickens- Is there a new system that you want to try this year?
  5. Chickens- Is raising meat chickens “worth” it?
  6. Chickens- Am I getting enough eggs?
  7. Goats- Do they have access to free choice minerals that actually works?
  8. Goats- Is their shelter secure and keep out the weather?
  9. Goats- Do you have a section of your property that you want cleared?
  10. Goats- Do you have your breeding plan set up for the year?
  11. Goats- What is your plan with kids, milking, etc?
  12. Goats- Do I have time to milk my goats?
  13. Goats- Do I want to raise any meat goats?
  14. Garden- What did you grow last year that didn’t work?
  15. Garden- What did your soil tests say? What amendments do you need?
  16. Garden- How is your soil doing?
  17. Garden- Are you preserving your garden well?
  18. Garden- Do you need to expand or reduce your garden space?
  19. Garden- Is there something you want to change with the garden?
  20. Garden- Did we save seeds?
  21. Garden- Are you actually enjoying your garden?
  22. Garden- Are you tracking your garden with a journal, spreadsheet, etc?
  23. Food Storage- Did we use what we put up?
  24. Food Storage- Was there a preservation method that didn’t work well?
  25. Food Storage- Is there enough storage for the amount of food we put up?
  26. Food Storage- What can be improved with our food storage systems?
  27. Emergency Prep- Was there a power outage that we did not do okay with?
  28. Emergency Prep- Did we have what we needed in an emergency?
  29. Emergency Prep- Is there something that we could have done better?
  30. Emergency Prep-Did we run out of anything during an emergency?
  31. Emergency Prep- Where there any medical situations that I wasn’t prepared for?
  32. Emergency Prep- Where there any situations my animals didn’t do well with?
  33. Home- Is there anything within the home that we want to change?
  34. Home- Are there systems within the home that isn’t working?
  35. Home- Are there any big expenses that are coming up that need to be handled?
  36. Home- Is there a skill that I can learn that will help reduce the costs inside the home? (Think learning to do tile, plumbing, etc)
  37. Home- Can I reduce any monthly expenses without sacrificing comfort?
  38. Finances- Can I pay off any small debts?
  39. Finances- Is my budget working?
  40. Finances- Am I putting enough back into savings?
  41. Finances- What am I spending on subscriptions every month?
  42. Finances- Is my emergency fund big enough?
  43. Personal Goals- What is my reading goal this year?
  44. Personal Goals- Do I really want to become even more physically active?
  45. Personal Goals- Am I doing any self care?
  46. Personal Goals- Do I need any mental health care?
  47. Finish Line Goals- Repair hoses
  48. FLG- Hang new curtains, blinds, etc
  49. FLG- Change the blankets on the couch
  50. FLG- Deep clean one thing: bookshelf, desk, seed box, etc (one small thing that isn’t overwhelming)

If you are interested in learning more about my favorite garden planner. I highly recommend Seedtime! This planner has been instrumental in helping me plan out my gardens with WAY more efficiency than I could ever expect! It has also reduced overwhelm, stress, and calmed my ADD/ADHD!

More Info!

Homestead Goal Ideas

The list above is just a quick way to jog your creativity and give you something to use as a template. But feel free to use all of them. At the end of the day, your homestead is yours and you’ve got to figure out what works best for you and your homestead. I will tell you that you need to make sure that you work some sort of self care into your goals.

This could be something as simple as grounding in your garden or taking time off farm to do something for yourself.

Burnout is real and even though you love homesteading, too much, too quickly will lead to frustration, guilt and anger really quick. So make sure you are taking time for yourself.

If you like the content I put out, feel free to buy us a coffee! It helps keep this site running, marketing and the goats in grain!

Buy me a coffee

If you like this post, feel free to share it and follow us below on our social media accounts!

  • Facebook
  • Pinterest
  • Instagram
  • YouTube
  • TikTok
  • Spotify
  • Threads

Filed Under: Goal Setting, Homestead Planning Tagged With: Chickens, Garden, goals, Goats, Homestead

JOIN TO OUR MAILING LIST!

Leave us your email to receive new posts and special offers for members only! Don't miss a thing!

Recent Posts

  • Fall Garden Guide
  • Top Mistakes With Goats
  • How To Bond With Your Goats

How To Build Raised Garden Beds

December 28, 2024 by Leigh Leave a Comment

While it’s definitely easier to just buy a raised garden bed, kits or other premade/ prefabricated beds, I do think that building them from scratch is a great way to go. I’ll explain why in a minute. The idea of using raised beds was, at first, a ridiculous idea to me. I’ve got great soil, why do I need a bed? But after our first garden flopped, maybe learning how to build raised garden beds is a better idea.

cropped-3.jpg

Are you looking for garden journal prompts, but aren’t interested in a weekly email? Check out our 365 Garden Journal Prompts! This is an amazing, all in one, yearly product that you only pay for once.

Buy Now!

What are raised garden beds?

Simply put, it is a structure that sits on the ground that you add soil, compost and other organic material to grow things. That’s it. But it is definitely more than that. You see, our soil in Georgia is usually red clay. But there’s a reason why Georgia is a huge agricultural state, we can grow just about anything in this soil. That also means that our weeds are super plants, too.

A raised bed is a great way to keep weeds from growing and stealing water and other nutrients from your plants.

Raised beds also help those with ailments or disabilities that can’t be on their knees in a garden.

Also raised beds help create a designated spot for fruits or vegetables that you want to save seeds from.

And they look prettier.

Susan over at Learning and Yearning as a great guide to raised beds. I took a lot of inspiration from her and Kathi over at Oakhill Homestead when I was brainstorming, designing and building our raised garden beds.

Are you getting overwhelmed in the garden? Stressed? Or just not enjoying the garden like you used to? Check out our garden prompts! We send out weekly emails that get you back in the garden and out of your head! Turn the garden back into a place of love and joy instead of frustration and headache!

Subscribe Now!

To Buy Or Build A Raised Bed

Well, that’s the question, isn’t it? There are somethings you need to consider when it comes to building a raised bed. Things like your skill level, cost of materials, and customization. If you are not handy with tools or don’t have any skill, building a raised bed may not be a good option. The cost of lumber is extremely high in some parts of the country and that makes building one out of reach for some people. If you are looking for certain dimensions, building one may be a better option.

When we were looking at raised beds, I wanted to conceal the area in front of our front porch. The gutters get overrun when it rains and creates a lot of issues with run off.

Our dogs like to dig and wreak havoc in the front yard. The goats like to hide under the porch and the chickens like to lay their eggs under there too.

So I wanted to help hide some of this as well as keep creatures out. In front of the front porch is a 12ft section on each side of the stairs. And one side has a walk way to the porch, and the other side is wide open. The raised beds/ planters had to be tall enough to keep goats from walking right up to it. Trying to find something that was prefabricated was going to either be insanely expensive or not the right size.

The Ultimate Homesteader’s Starter Bundle – Only $47!

Get the tools you need to stay organized, track profits, and manage your homestead with ease!

Includes:
✅ Schedule F Tracker – Simplify tax prep
✅ Profit Calculator – Track earnings
✅ Hay Calculator – Plan livestock feed
✅ Garden Journal – Digital & printable
✅ Herd Health Tracker – Monitor animal care
✅ Simple Budget – Manage finances
✅ Backyard Homestead eBook – Essential tips

$99 value – now just $47! Start your homesteading journey today!

Buy Now

It Was Better For Us To Build Raised Garden Beds

We found a couple of prefab’d raised beds like this one, and this one. But those are really expensive and still not the right fit for what we needed. So Jared and I brainstormed what we could do. I told him what I wanted: 2.5-3 feet wide, 12 feet long, and about 24 inches tall. He got to work designing and sketching and handed me a material list.

I went to Home Depot and got 45 dog ear pickets and 6 3x4x 8ft posts and he went to work. We also got some lattice to discourage the critters from going under the deck on the sides that would be open until we could build more beds.

cropped-3.jpg

Are you looking for garden journal prompts, but aren’t interested in a weekly email? Check out our 365 Garden Journal Prompts! This is an amazing, all in one, yearly product that you only pay for once.

Buy Now!

How To Build Raised Garden Beds

It was pretty easy for Jared to build the beds and he got them both done in a day.

He stared with cutting all of the lumber to size.

Cut List

Pickets- cut off the dog ear. Then find your half way point (should be 5′ 5″) and cut there. If you are doing a custom size, cut to that number

3×4- Cut in half

Take your extra pickets (we bought 5 extra) and cut those to 18 inches

Instructions

On a flat and level surface (unless you want your beds to follow the contour of the ground), screw each picket onto a 3×4 timber.

Do this with the front and back of your bed.

Line them up so that you can attach your side picket. Do the same for the other side. You should have a rectangle.

Then start attaching pickets all the way up until you have your desired height. Ours was four pickets high.

Then go in and screw those 18in pickets half way between the 3x4s to help stabilize the pickets to help keep them from bowing when the bed is filled with soil.

Prepping Your Garden Beds

To start, I highly recommend using a liner. Katie over at The Homesteading RD has a great article all about different liners and why you should use them. Now, we didn’t use the cedar like she suggested for two reasons; one, cedar is still pretty expensive and two, because I didn’t to go BACK out to the store. Instead, I used our woven ground cloth.

If you are going to use any kind of plastic or cloth for your beds, I suggest stapling it to the sides of your pickets. But make sure you use plenty of slack in your liner, the weight of the soil, compost and other filler will tear it.

If you are interested in learning more about my favorite garden planner. I highly recommend Seedtime! This planner has been instrumental in helping me plan out my gardens with WAY more efficiency than I could ever expect! It has also reduced overwhelm, stress, and calmed my ADD/ADHD!

More Info!

Filler

Since our beds were 12 feet long, 2.5 feet wide and 2 feet tall, we needed a TON of filler. Now, we could have gone and gotten a bunch of soil, but that’s expensive AND the soil will get compacted over time. That’s not what we want.

About 2 months ago, Jared went through the property and cut down a bunch of mountain laurel. If you don’t know, mountain laurel is extremely toxic to pretty much everything. But our goats didn’t get that memo and without fail someone always eats it and gets sick.

So I had this giant pile of laurel that needed to go. After a ton of research, including calling the Arbor Foundation, I found out that laurel doesn’t leach toxins as it decomposes. Score.

I filled the beds with as much laurel as possible. We cut down big branches and stuffed them in the bed, being careful not to puncture the liner. It took about half the pile but my beds were about 80% full.

I talk here about ways to fill your garden beds for cheap.

Compost

Next, Chase filled the beds with compost. He’s in that wonderful teenage stage where he likes to pick things up and put them down. Repeatedly. But hey, it works for me. He did a fantastic job and the beds were about 90% full….. Or so I thought.

I ordered my soil, peat moss and the rest of the things I needed for finishing off the rest of the area. Including Halloween Decorations.

I wish I would have realized before buying all of this that it was heavy. I knew it was heavy, but I guess I didn’t realize HOW heavy it would be.

Driving home, on curvy mountain roads was a test of not only my driving skills but also my patience. But we all made it home in one piece and nothing fell off the back of the truck. Score.

cropped-3.jpg

Are you looking for garden journal prompts, but aren’t interested in a weekly email? Check out our 365 Garden Journal Prompts! This is an amazing, all in one, yearly product that you only pay for once.

Buy Now!

Soil

What you fill your beds with is totally up to you. As I said above, I would highly recommend using some sort of filler that is decomposable and a liner. When it comes to soil, we used regular top soil since we were adding peat moss and already had compost and the laurel in the beds. Also, since we aren’t 100% sure what we will be planting in these beds long term, I didn’t want to put in something that was going to be highly acidic or alkalotic.

Plants

What does well in raised beds? Literally everything. I want these beds to house our garlic, onion, and carrots. I may even put our regular potatoes and sweet potatoes in there. Again, I’m not entirely sure. But for now, I threw in some great fall plants and we’ll see what they can do.

Our Take Away

We figured out that raised beds are a great way to go to help conceal the disaster of the front porch.

It takes a TON of soil and other filler to fill these beds so take that into consideration when building these things. Not just height but width and length too.

Logo 468x60

Run hardware cloth around the top if you want to keep chickens and goats out.

Do not compact the soil in these beds! As you add soil, spread it around so it can fill holes in your filler but don’t cram it in there.

The beds themselves only cost about $60 each to build but ended up running us about $100 each to fill. Keep that in mind when you start this project.

If you like the content I put out, feel free to buy us a coffee! It helps keep this site running, marketing and the goats in grain!

Buy me a coffee

If you like this post, feel free to share it and follow us below on our social media accounts!

  • Facebook
  • Pinterest
  • Instagram
  • YouTube
  • TikTok
  • Spotify
  • Threads

Filed Under: Garden, How To's, Projects Tagged With: Garden, Goats, Homestead

JOIN TO OUR MAILING LIST!

Leave us your email to receive new posts and special offers for members only! Don't miss a thing!

Recent Posts

  • Fall Garden Guide
  • Top Mistakes With Goats
  • How To Bond With Your Goats

How To Can Corn

December 21, 2024 by Leigh Leave a Comment

Jump to Recipe

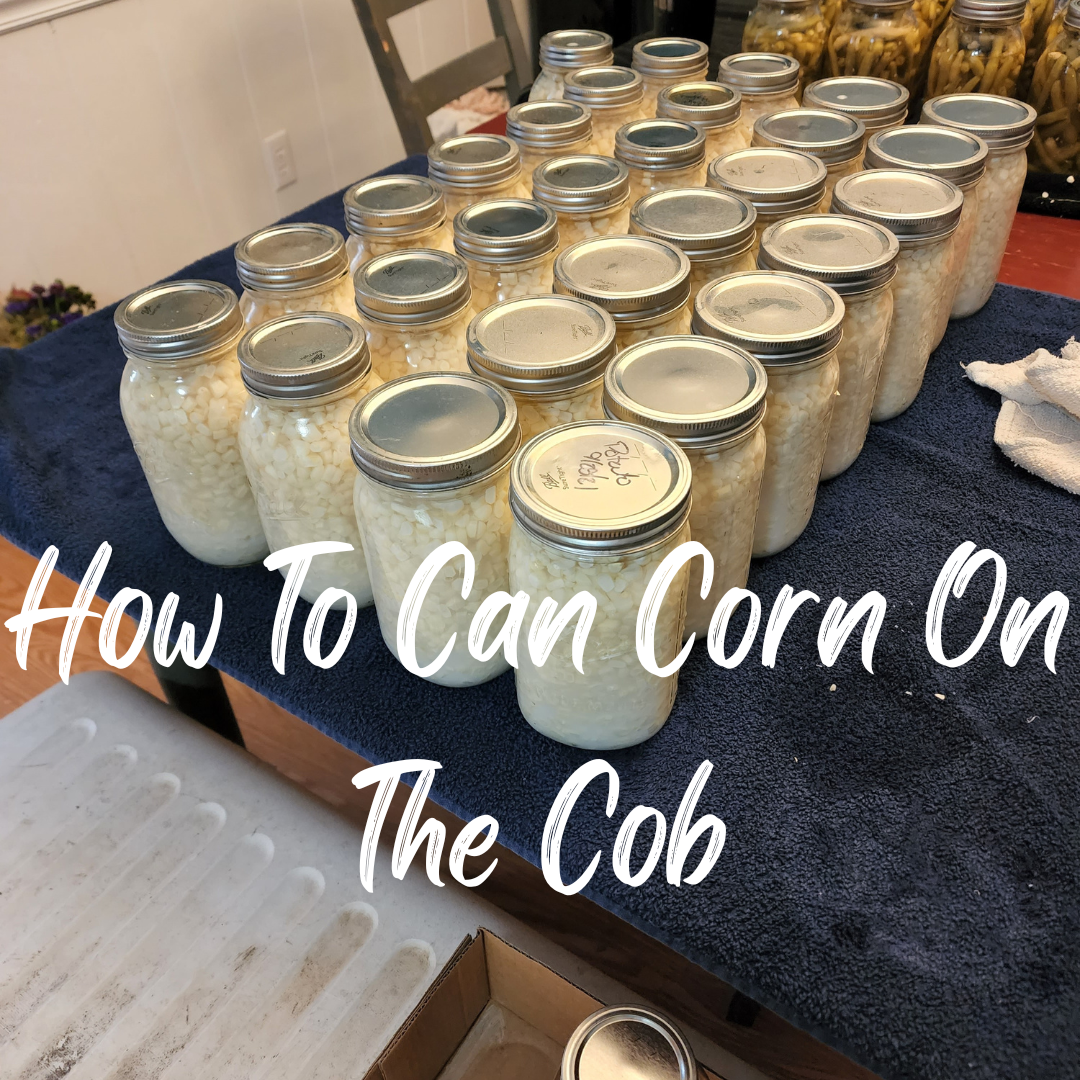
Whether you got a great deal at the grocery or your garden has exploded, learning what you can do with surplus corn is great. There are so many uses for corn; feed for livestock, food for people, dry it for popcorn or dry it for corn meal. The options when it comes to corn are endless. But today, I want to show you how to can corn.

What do you need?

Corn- We had approximately 120 ears of corn and it didn’t take us long to get it all processed. It also yielded us 32 quart jars

A Pressure Canner– we have two of these that run pretty much non stop since they only hold 7qts each

Canning Tools

Jars– Pints or quarts will work

Either a corn de-cobber like this or a knife and a bunt pan

Salt is optional. We don’t use it but if you want to, make sure you have enough salt for the amount of corn you have

Don’t forget to add these items to your Walmart cart and have them do the shopping for you! It saves time and a ton of money.

Shucking Your Corn

120 ears of corn is a lot and I absolutely despise shucking corn. I will snap green beans until my fingers fall off, but shucking corn? No thank you. This is usually Jared’s job because he really enjoys it. It’s his version of green beans. If I had two bushels of green beans to go through, and he had two five dozen bags of corn? We would be in heaven. We both turn our brains off and let the beauty of our homestead take over.

After he shucked all the corn, he put it into our huge cooler filled with water. The husks and silks go to the chickens and compost for the garden. I guess we could have given it to the goats but they weren’t interested in the husks.

De-Cobbing Your Corn

There’s a million ways to skin a cat, and getting kernels off a corn cob is no different. We have tried a ton of different gadgets over the years. To be honest, the best one we have found is a knife. Those gadgets may work for a specific size of cob, or only once. The knife is going to work 100% of the time. So if you want to “waste” your money, any of those linked will work…. maybe.

We use a knife and bunt pan or just a knife and a cookie sheet. Nothing fancy. The downside of using this method is that it can dull your blades because you are constantly smacking the knife into the metal. But I like sharpening my knives so that’s not a deal breaker.

Tractor Supply

As you are getting all those delicious kernels off your cobs, keep in mind that the corn milk will spray EVERYWHERE. Don’t keep open drinks, electronics or anything that shouldn’t get wet anywhere near where you are working. Oh, and it’s extremely sticky.

As we de-cob the corn, we put all the kernels in a smaller clean cooler filled with clean water. This starts the soaking process.

After the corn has soaked for thirty minutes to one hour we will either change the water and let it soak again or we will go ahead and get it into jars. The reason we would resoak is if the water was completely white. If you don’t want to soak, don’t mind the milk, etc. Don’t soak or resoak. It won’t hurt anything.

Prepping For Canning

Once your kernels have soaked, it’s time to get them into jars. The first step to this is to make sure your jars are clean with no chips, cracks, dings, or dents. Usually, I just give them a quick wash and let them dry while I’m getting my canner ready.

I have two Presto 16qt canners and they hold seven quart jars. So when I can corn, it’s a multi day process. I also have a three burner camp stove that I can on to help keep the heat down in the house. I’m hoping to get one of these bad boys soon, but at $500 it’s a little steep right now. The trade off is the ability to stack quart jars in it.

Logo 468x60

Getting my canner ready simply means making sure that the canner is safe to operate per my manuals instructions. Mine uses 3qts of water and once that’s in, I put it on the camp stove to get it boiling.

Back to the kernels, I start draining/straining out the kernels from the water and adding them to my jars. Once filled to a 1″ headspace, I add fresh water, wipe the rim with a damp vinegar rag and place the lid and ring. Remember only fingertip tight. That means you should only use your finger tips to tighten the ring, not your bicep.

They go into the canner as they are ready. Once my canner is filled and the water is ALMOST boiling, I will put the lid on and lock it. I usually let me canner vent for 5-10 minutes depending on how full it is. Meaning, if it’s filled with pints, I usually go 10 and quarts 5. But follow your canners instructions. Place your weight and wait for your weight to jiggle or rock. Then slowly start to lower the stove temp until the weight is barely moving. We don’t want the weight to blast off into space.

Tractor Supply

Corn is processed at 55 minutes for pints and 85 minutes for quarts at 10# but if your elevation is over 1000 feet, go with 15#.

I also have a quick reference guide that you can download get in my members only section. Sign up below and you will be emailed the password.

It’s Done Processing, Now What?

Depending on your set up, you can just turn the burner off and let the canner depressurize naturally. Or if you have a camp stove and the other side is in use, you can CAREFULLY move the canner somewhere it can cool down. When I say careful, I mean be friggin careful! Seriously, no one needs to have their face melted off because the weight moved. If you’re using your stove at home, do not slide it. Pick it up. If you can’t pick it up. Just don’t even touch it. Seriously, it’s not worth the risk.

After the canner has cooled and the pressure valve has dropped, you can crack the lid and allow some heat to escape. I usually wait 10-20 minutes and then remove the lid completely. Once the contents have stopped boiling, I will unload the canner and place all the jars on a toweled surface.

That’s it!

It’s not hard to can corn at home. And it definitely beats store bought every day. But I’m sure you have some questions. So…..

How many ears fit into a quart or pint jar? It takes approximately 4 ears of corn per quart or two per pint…. Ish

Do you use salt? We don’t, but that’s only because we choose to season our food when we cook it.

Is there a zero waste method? Sure, you can boil down the cobs and make corn cob jelly. You can also drink the milk. Our zero waste method is to give it all to the animals. They love it.

What if I don’t like canned corn? You can absolutely freeze it instead. Just layer a cookie sheet with parchment paper and do a single layer of corn. Once frozen, put into a freezer bag.

What if I have extra jars but not a full canner? You can put them in the fridge for immediate eating or you can freeze them. Another option is to can water. This will give you sterile water in case of emergencies.

What if I don’t have coolers? Or a big cooler? Work in batches. If we know that each jar takes approximately 2-4 depending on the jar, then only do a full canner full at a time, and store the rest in the fridge. You can also use a clean sink.

If you like the content I put out, feel free to buy us a coffee! It helps keep this site running, marketing and the goats in grain!

Buy me a coffee
  • Facebook
  • Pinterest
  • Instagram
  • YouTube
  • TikTok
  • Spotify
  • Threads

Canning Corn on the Cob

This is the fastest and easiest way to can corn on the cob
Print Recipe Pin Recipe
Ingredients Equipment Method

Ingredients
  

  • 1 Corn on the cob
  • 1 Tbsp Per Quart jar Optional

Equipment

  • 1 Pressure Canner
  • 1 Canning Tools
  • 1 Jars Look in the post above for the rough conversions on how many jars you will need

Method
 

  1. Start by shucking your corn and getting as many of the little hairs off.
  2. Grab either your de-cobber or knife and start cutting the corn off the cob. This can be tricky so watch your fingers.
  3. Place corn in clean water to help get the milk out. You may have to rinse and repeat if your corn was really milky
  4. Using funnel, scoop corn into jars leaving 1" headspace
  5. Fill with water again, leaving 1" headspace.
  6. Remove any bubbles with chopsticks, straw, or other debubbling tool
  7. Wipe rim with damp vinegar towel.
  8. Add lid and ring and put into canner
  9. Fill canner with water to manufacture recommendation. Ours is 3 quarts
  10. Set it on the stove and get the water heating, we usually put ours on high as we are loading it
  11. Once the canner is loaded, place your lid per manufacture instructions.
  12. We let our canner vent for 5-10 minutes then place the weight on the vent pipe.
  13. Once the weight starts rocking, slowly decrease the stove temp until the weight is just barely rocking.
  14. Let this process for 85min for quarts and 55 for pints
  15. Once the time is done, remove from heat and let the canner cool and depressurize naturally. This usually takes about 30-45min depending on processing time
  16. Once the canner is safe to open, remove lid and, if the contents of your jar are not obviously boiling, pull the jars out with the jar grabby thing and place on a towel to cool completely
  17. Remove rings and wash threads. Corn is extremely sticky so the rings may be hard to remove. Not doing so can lead to mold, rust and rotten food.
  18. Wash the threads of your jar (where the rings were) with warm soapy water. Write the date and store

Filed Under: Canning, Canning Recipes, Recipes Tagged With: Canning, Chickens, cooking, Goats, Homestead

JOIN TO OUR MAILING LIST!

Leave us your email to receive new posts and special offers for members only! Don't miss a thing!

Recent Posts

  • Fall Garden Guide
  • Top Mistakes With Goats
  • How To Bond With Your Goats

What Does Food Security Look Like?

December 10, 2024 by Leigh Leave a Comment

If you live in America or really any industrialized country, there is a good chance you have a ton of holes in your food chain. The vast majority of Americans don’t even know what food security is, it’s just not something they think about. As long as they can get to the store and buy their food, they are happy. Unfortunately, when the pandemic hit, it was eye opening for a lot of people. They learned that having an emergency food supply isn’t just about a zombie apocalypse. This series is here to help you identify and start to fill the holes in your food security.

The Ultimate Homesteader’s Starter Bundle – Only $47!

Get the tools you need to stay organized, track profits, and manage your homestead with ease!

Includes:
✅ Schedule F Tracker – Simplify tax prep
✅ Profit Calculator – Track earnings
✅ Hay Calculator – Plan livestock feed
✅ Garden Journal – Digital & printable
✅ Herd Health Tracker – Monitor animal care
✅ Simple Budget – Manage finances
✅ Backyard Homestead eBook – Essential tips

$99 value – now just $47! Start your homesteading journey today!

Buy Now

Why Food Security Is Important

I don’t understand why so many people don’t think about where their next meal is coming from. It’s mind boggling to me how many people just go about their life with no thoughts to the future. Most people don’t have a plan if their house catches on fire, let alone what they are going to do if they lose their job. Preppers have caught a bad name due to being hyper prepared but also due to propaganda. But those of us that have lost jobs, homes, or other life altering events know how important it is to have a back up plan.

Not all emergencies look the same, nor are they all on the same scale. For example, losing a job could be catastrophic for one family, but not a big deal for another. A week without power could cripple a family that relies on freezers to feed their family. A cancer diagnosis could financially ruin a family. But all of these are emergencies. But by having food security, it reduces one part of their emergency. Even if it’s small.

What Is Food Security

To start, we need to figure out what food security means to you and your family. To me, food security means having the ability to source and acquire the food, water, and other necessities my family and animals need to survive, at a minimum. If you don’t know what that looks like, you came to the right place.

Save on Seeds

In order to start filling food security holes, you need to first identify them. Then you can start figuring out how to close those holes. Remember, we are trying to source these items. Are you on a special diet? What do you know how to cook? What do you like to eat? What kind of storage do you have? What do your animals need to eat? These are all very important questions in closing food security holes.

The Ultimate Homesteader’s Starter Bundle – Only $47!

Get the tools you need to stay organized, track profits, and manage your homestead with ease!

Includes:
✅ Schedule F Tracker – Simplify tax prep
✅ Profit Calculator – Track earnings
✅ Hay Calculator – Plan livestock feed
✅ Garden Journal – Digital & printable
✅ Herd Health Tracker – Monitor animal care
✅ Simple Budget – Manage finances
✅ Backyard Homestead eBook – Essential tips

$99 value – now just $47! Start your homesteading journey today!

Buy Now

Let’s start answering some of those questions

If you are on a special diet like a cardiac, diabetic, or even lactose intolerant, getting emergency supplies is going to be harder to do. There is a ton of carbs and sodium in long term, commercial foods. Preserving your own foods is ideal, but it’s not necessarily long term.

Can you cook? If not, having pre-made, commercial meals may be the way to go. Especially if your culinary skills are limited. However, I would highly suggest you learn to cook more and also learn about the fundamentals of cooking.

Are you a picky eater? Or have someone in your home that is picky? Then you need to make sure that you’ve got foods that they like or can tolerate. It’s cruel to tell someone, “sucks to be you” in an emergency situation. So make sure you’ve got foods that they like. A side note to this, if you buy a pre packed survival meal kit like this, please make sure that you like EVERYTHING in it. It may save you some money now, but if you don’t like beef stroganoff, don’t waste your money on it.

What kind of storage do you have? We are blessed to have a basement/garage combo that we were able to retrofit with shelves and turn a 12×12 area into our food storage room. We’ve got tons of shelves and supplies to help us out. Everything from canned goods to extra jars as well as commercial, long term storage items. If you aren’t that lucky, where can you store your emergency supplies? A linen closet? Under the beds?

Lastly, what do your animals need to survive? It seems that most people forget to make sure they’re animals will be okay in an emergency situation. That means making sure that you’ve got medications, food, and water.

Tractor Supply

Why is this so important to me?

Well, recently we had to replace our well pump. I know you’re thinking, “Leigh, a well pump isn’t about food and food security.” But it is. Without water, all things will die.

When we moved on to our homestead, we were told that the well pump was pretty new but to have a couple of pump switches on stand by because the power would surge and cause the switch to fail. The first night we were here, the water cut off in the middle of my shower. I had to use bottled water to finish washing my hair. I called my step dad and the old owner trying to figure out what happened. The switch failed.

If you are new to heating with firewood and are looking to master the finer points of it. We’ve got a great eBook that goes in depth of what tools you should consider, how and where to stack, how to build a fire and so much more!

Buy Now

For the next several months we dealt with the water randomly cutting off or the water stopping if we ran the back spigot. Multiple plumbers came out and no one knew how to fix it. Then one morning, the water cut off completely.

Logo 468x60

This is a big problem, without water you cannot drink, shower, water crops or animals. Since the other plumbers couldn’t figure out the problem, I decided to call a well plumber. We were showering at the stations because we had no water at home and we were giving our animals bottled water. There was also a winter storm bearing down on us that was supposed to hit that weekend. The stores were running out of water. In short, we were screwed if we couldn’t get access water.

The well plumbers came out and said it was the well pump. When we explained it was a brand new pump, they said that everything we were describing; running out of water, low pressure, etc were all because of the pump. Once it was replaced, we never had another problem.

PS: Shortly after the well pump was fixed, that winter storm hit and we lost power for three days.

Subscribe to Craft Beer Club Today!

So how does this relate to food security?

Simple: if you do not have water, you cannot cook, clean, drink, or survive. Without that well pump, our animals would die of thirst. 

Some of the steps we took after this incident was to make sure that we always have 5 gallon jugs filled. We also have a pump to get water out of them. Then we have several IBC and 55 gallon totes around the property that we fill for animal water.

Our garden produces a lot of our veggies, if not all of them. This helps make sure that we have fresh veggies for today, but also canned veggies for later.

Then we have our animals, all of the animals on our homestead can survive off of what the homestead produces during the warm months. The chickens and ducks give us a ton of eggs and we’ve only selected dual purpose breeds so that we can butcher when we need to.

Our goats provide us with milk and we make our own cheeses, creamers, and even butter. We are also going to be purchasing Boer goats and breed them so that we can have meat from them as well.

Don’t live on a farm?

Don’t panic! Just because you don’t have a garden or animals, doesn’t mean that you can’t start preparing for an emergency! You can go on Amazon or Walmart.com and start looking at various long term, emergency food. We like Augason and Ready Wise, but do your research.

Also make sure you have manual can openers or keys like these. Oh and coffee!!!! Make sure you’ve got some form of caffeine because when the power goes out, nothing is better than hot coffee!

Food security includes water, food, and basic necessities like soap, medications, first aid, and clothes just to name a few things. So what can you do to start identifying holes in your food security and fixing them?

If you like the content I put out, feel free to buy us a coffee! It helps keep this site running, marketing and the goats in grain!

Buy me a coffee

If you like this post, feel free to share it and follow us below on our social media accounts!

  • Facebook
  • Pinterest
  • Instagram
  • YouTube
  • TikTok
  • Spotify
  • Threads

Filed Under: Emergency Preparation, Homestead Planning Tagged With: cast iron, Chicks, cooking, Eggs, food security, Goats, Homestead, kitchen, Welcome

JOIN TO OUR MAILING LIST!

Leave us your email to receive new posts and special offers for members only! Don't miss a thing!

Recent Posts

  • Fall Garden Guide
  • Top Mistakes With Goats
  • How To Bond With Your Goats

How To Save Money On Livestock Feed

December 7, 2024 by Leigh Leave a Comment

Whether you homestead on a large scale or small, livestock feed is expensive. To be fair, raising livestock in general is expensive. But with the holidays on us, plus supply chain issues and inflation, saving money is becoming more and more important. These tips are how we save money on livestock feed.

How To Save Money On Livestock Feed

  1. Just Add Water
  2. Grow it
  3. Microgreens or Sprouts- Another great way to stretch feed
  4. Buy in bulk
  5. Reduce animal numbers.

You could also make your own, but that is an entire post all on it’s own so make sure you subscribe below to be updated on that post!

Let’s talk about each one of these a little more in depth.

Before we get too far into this, I have a great course on the basics of goat care. I call it Goat Crash Course: Goat 101. In this course, I explain things like types of shelter, types of feeds and hays, basic assessments and so much more! Check it out!

Buy Now

Just Add Water

Soaking feed is number one for a reason. It is hands down the easiest, cheapest and fastest way to stretch your feed. All you need is a 5 gallon bucket with a tight lid for each different feed you plan to soak. For example: I soak/ ferment pig, chicken and goat feed, plus alfalfa and beet pulp, which I do together. So I have 4 buckets.

What’s the difference between soaking and fermenting? Time. If you leave your feed for too long in a bucket it should ferment. And if you leave it too long past that, it will mold. We soak our pig feed and the alfalfa/beet pulp overnight. The chickens and goats get fermented feed that we start 2-3 days prior and then add more as we go.

PS: if you ferment your pig feed for too long, or if there is corn in the feed, you will have drunk pigs…. Don’t ask how I know.

The Hay Calculator:

If you aren’t math-y (don’t worry I’m not either), check out our Hay Calculator. It literally does ALL of the math for you and gives you totals based on what you want your goals.

On the second page, you can track where you’ve bought hay, what you spent and how long it lasted.

Buy the Hay Calculator

Grow It

Right now growing isn’t as easy because it’s winter. But growing crops for your animals is hands down the cheapest way to reduce feed costs. In fact, I would dare say that if you have enough property, or not a lot of animals, you could feasibly never buy a bag of feed. Between grasses for grazing, pasture rotation, and then expanding your garden to grow corn, barley, buckwheat, winter squashes, and more, you could never buy a bag of feed. This could save you thousands of dollars a year for just a few seed packets. You can get almost all of your seeds from Territorial Seed Company or Eden Brothers.

Logo 468x60

What kind of fodder crops should you grow for your animals? That really depends on what animals you have and what they can eat. But corn is a great plant that is easy-ish to grow, store and feed out. Another good plant is pumpkins, and our animals love it. Winter squashes are another really great veggie that does well despite most attempts to kill it. It’s very easy to store and will last a long time in proper conditions. Another good option is putting your animals in your gardens after harvest. They can get all the left over yummies in there and clear your garden at the same time.

cropped-3.jpg

Are you looking for garden journal prompts, but aren’t interested in a weekly email? Check out our 365 Garden Journal Prompts! This is an amazing, all in one, yearly product that you only pay for once.

Buy Now!

Microgreens/ Sprouts

This one can get very in depth and long winded. But to give you the highlights: take a tray, add soil (you don’t have to use soil), add microgreen seeds (densely packed), and then soak. With proper lighting and care you can grow fodder for your chickens and even pigs and goats. The 104 Homestead has a great post on sprouting barley. The Homesteading RD also has a great post on the different microgreens and the process of growing them. Just make sure that your animals can eat the greens. Rainbow Heirloom Seed Co. has some great seeds on Amazon.

What kind and how much to feed? Honestly, we are just starting out with our microgreens and there just isn’t that much information out there on feeding microgreens to livestock. But I will say this, we are growing greens that they can eat the plant or seed of. So if goats can eat broccoli we will feed them half a tray of broccoli microgreens and see what happens. I’ll post more when we know more or find more research of it.

goat kidding

Before we get too far into this, I have a great course on the basics of goat care. I call it Goat Crash Course: Goat 101. In this course, I explain things like types of shelter, types of feeds and hays, basic assessments and so much more! Check it out!

Buy Now

Buy In Bulk

Buying bulk depends completely on two things; your ability to load/unload and your ability to store. When I talk about buying in bulk, I’m talking about half ton totes like these. We have neither the ability to unload or store, so buying in bulk isn’t really a good option for us per se. But we do get a discount on how many pounds of feed we buy at a time. At our feed store if we buy a total of 500# of feed, we get a discount on all of the feed. It doesn’t matter if it’s pig, chicken and goat. I can move and store 10 50# bags of feed, I cannot do that with a ton of pig, a ton of chicken and a ton of goat feed.

What do you need to load/unload and store? Dolly’s to start if you are planning to store in 55gal drums. But if you are buying those big 1 ton totes? You’ll need pallets, pallet jack, and probably a tractor to get it off the delivery truck. There are places that you can go and fill 55 gallon drums but you have to find them first.

Another caveat to this is to shop around. While I absolutely adore Tractor Supply, I cannot afford $25-30 for a 50# bag of chicken feed. Not when I can get a better quality for half the price at my feed store. So ask other homesteaders/farmers in your area where they go for feed.

The other thing that buying in bulk helps with is reducing the amount of feed bags laying around your garage….. Not that I have that problem.

Our herd health bundle helps you keep track of your herd’s health. Includes the goat assessment, herd check sheets AND Herd Health Tracker!

Buy Now

Reduce Your Animal Numbers

No one wants to talk about this, and for good reason. I don’t want to cull, sell or give away any of my animals. On our homestead we can’t keep around animals simply because they are cute. If an animal doesn’t have a purpose, they don’t stay on the farm. The best way to save money on feed is to not have so many animals to feed. It’s just the cold hard truth. If you are trying to reduce your spending, buying feed from the feed store isn’t going to reduce your spending.

If you are having trouble choosing who needs to go, ask your self this: who is the oldest? Who is the meanest? Who is the fattest? Who is the hardest to handle? This should start to help you narrow it down a bit. Again, while not ideal and it breaks my heart, I know who is on the chopping block if we ever get to that point.

Saving Money On Livestock Feed

There are a million different ways to feed your animals. But at the end of the day, feed is an expense that you need to be okay with. If you’re not, then you need to reconsider the amount and type of animals you are getting. Meat chickens require tons of feed but pigs can be maintained on kitchen scraps and good pasture. It’s all in how you want to raise your animals.

If you like the content I put out, feel free to buy us a coffee! It helps keep this site running, marketing and the goats in grain!

Buy me a coffee

If you like this post, feel free to share it and follow us below on our social media accounts!

  • Facebook
  • Pinterest
  • Instagram
  • YouTube
  • TikTok
  • Spotify
  • Threads

Filed Under: Animals, Chickens, Goats, How To's, Pigs Tagged With: Chickens, Eggs, feed, Goats, Homestead, Pigs

JOIN TO OUR MAILING LIST!

Leave us your email to receive new posts and special offers for members only! Don't miss a thing!

Recent Posts

  • Fall Garden Guide
  • Top Mistakes With Goats
  • How To Bond With Your Goats

How To Keep Livestock Warm In Winter

December 3, 2024 by Leigh Leave a Comment

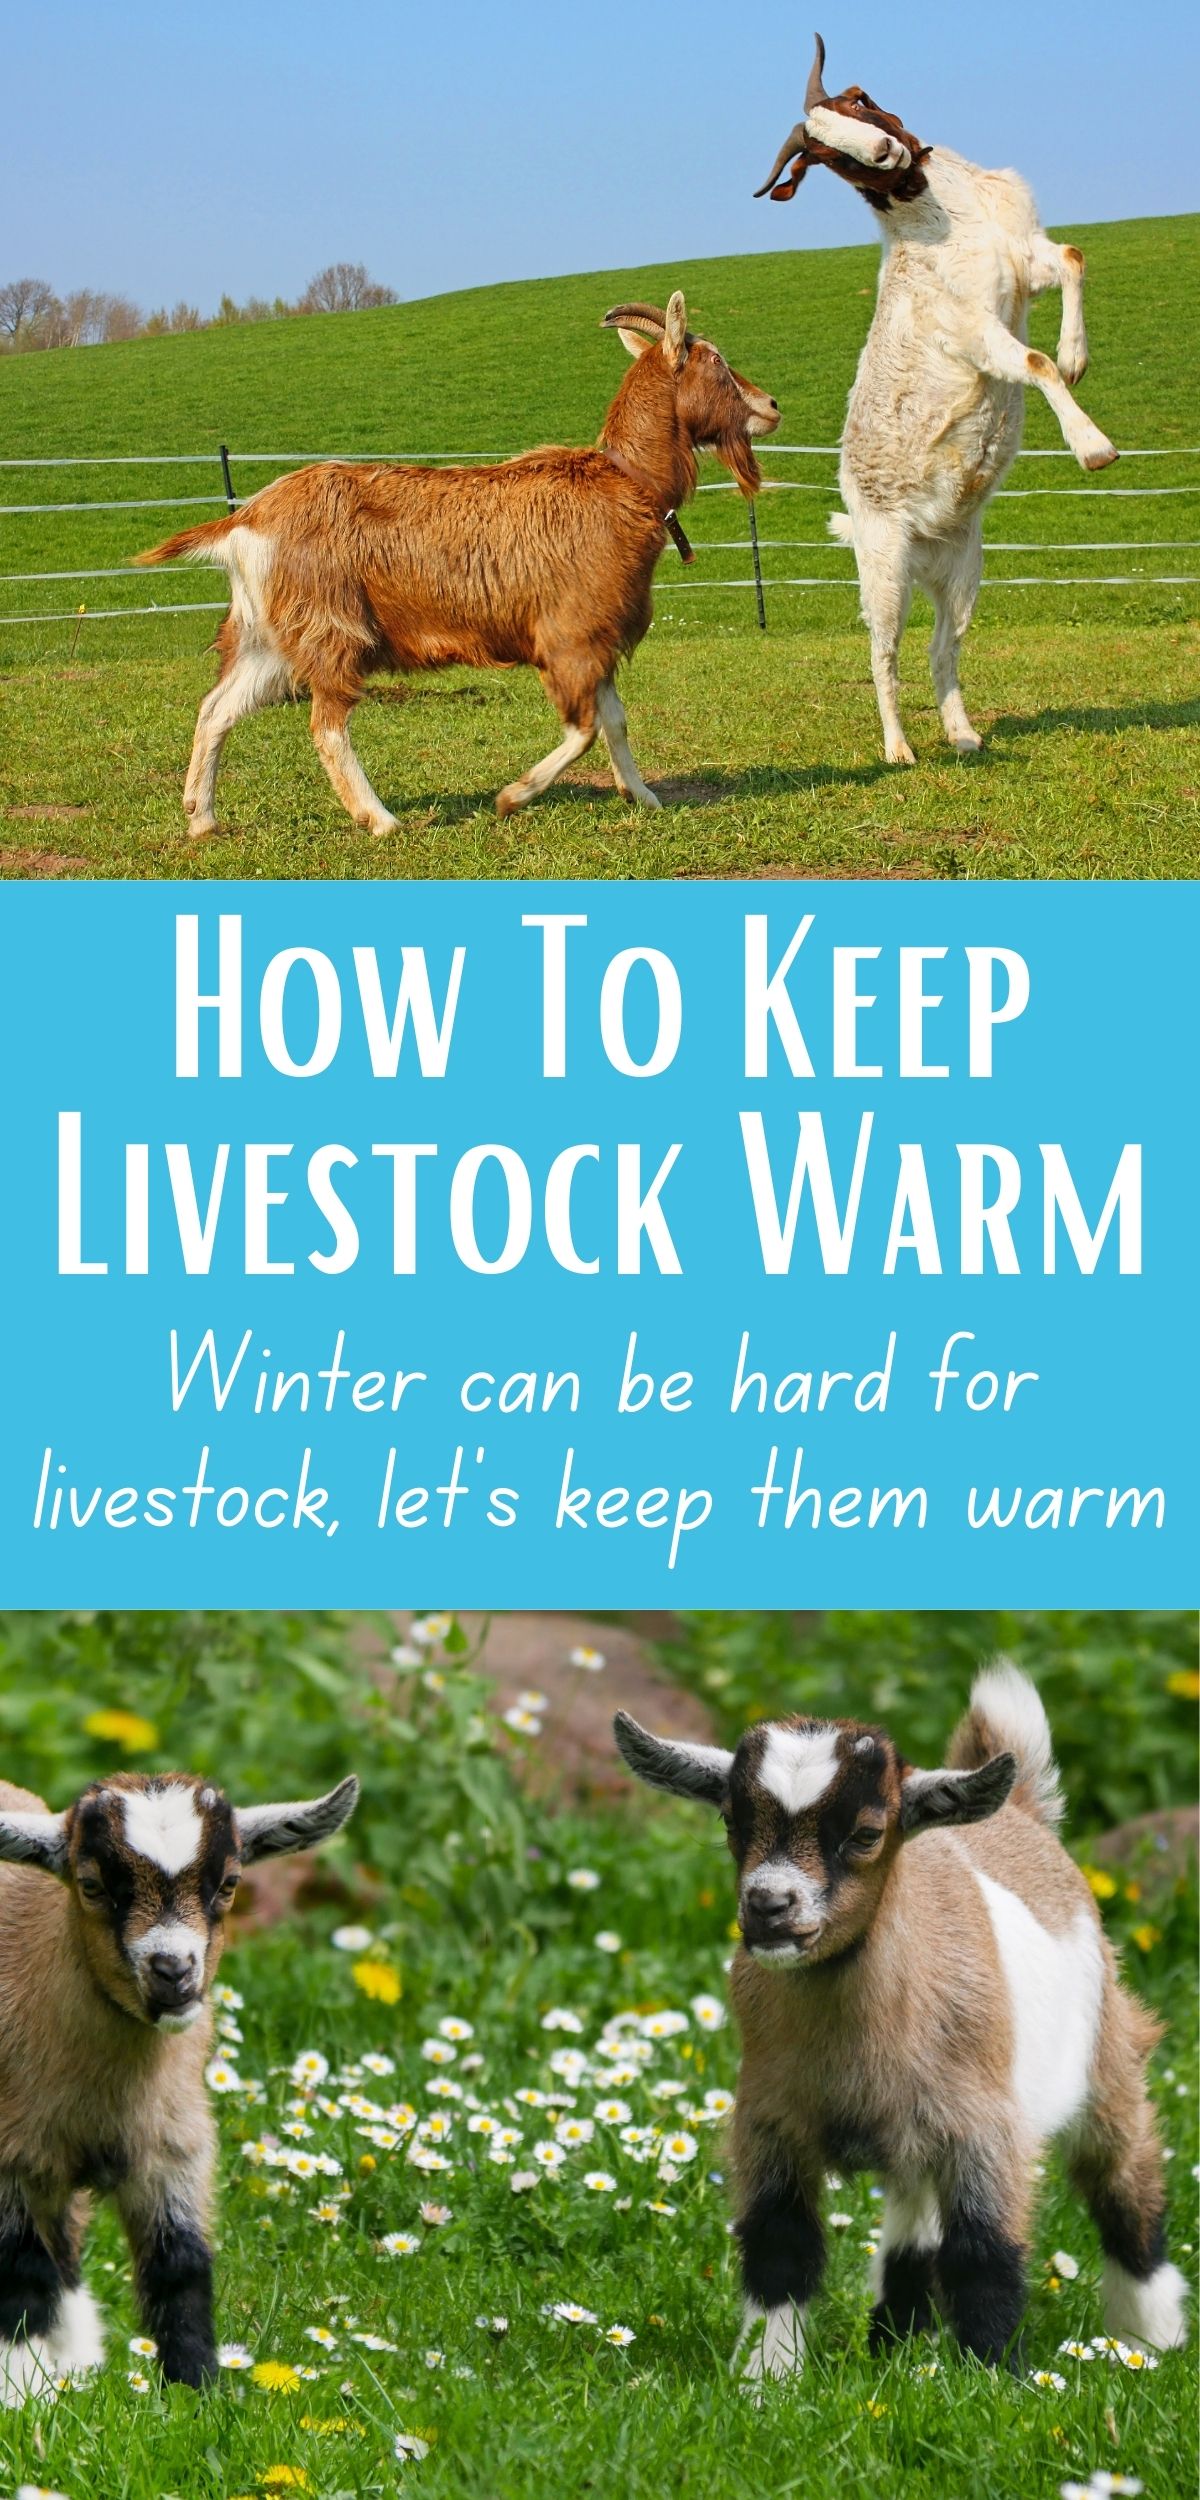
As I write this post, it is 12/2/2024 and it is 75* outside. While we live in a pretty mild winter climate here in Georgia, we do have some pretty cool/ cold weather. We’re not talking about -50 temperatures here. But we, and our animals, are not used to severe winter weather. Instead, we have hot/humid summers. No matter where you live, when it comes to taking care of livestock in the winter, there are a lot of things that you can do to help keep livestock warm in winter.

Before we get too far into this, I have a great course on the basics of goat care. I call it Goat Crash Course: Goat 101. In this course, I explain things like types of shelter, types of feeds and hays, basic assessments and so much more! Check it out!

Buy Now

Keeping Livestock Warm

There are a lot of different variables to consider before you just dump a load of pine shavings into their shelter and call it a day. You need to consider your climate, animals, and resources before you just start throwing options out there to see what sticks. If you live in an area that rains a lot but doesn’t get too cold, you may not need to worry so much about deep litter bedding and may need to focus more on where the shelter is located. If you live in a snow drift, maybe having a good barn or deep litter is the right way for you.

I’m going to go through all the considerations that you should consider before you pick a method. At the bottom of this post, I’ll go through all the different methods you can use to help keep your livestock warm in winter.

Logo 468x60

Climate

Where you live will ultimately depend on how much you have to do to keep livestock warm. If you live in the far north, you may need deep bedding, water bucket warmers, and draft free shelters. In the south, you can get away with a three sided shelter and hammer to break ice.

We live in the Northeast Georgia Mountains, basically the foothills of the Appalachian Mountains. Our summers are hot and humid, but our winters are pretty mild. Occasionally, we get snow but more often than not we get ice storms. Our winters tend to be very wet, too. That being said, we don’t REALLY need to operate with a deep litter method but we do anyways. Mainly because I want the compost I get out of it…. And my animals are spoiled.

Animals

Something that you need to consider is that the vast majority of animals do not require all the things we think they do when it comes to keeping them warm. They have great winter coats that will keep them nice and toasty warm. I talked in depth about body condition of goats in this post, but I want to further that. If your animal has good body condition, a healthy coat, and good food? They don’t need coats, blankets, or other methods to keep them warm in the winter.

In fact, most livestock don’t really need anything until the temperatures are steadily below 40*. Of course this assumes that they have good body condition, aren’t sick, etc. The key here is shelter and body condition.

Resources

The resources you may need; barns/shelters, heated waterers, pine shavings, etc are really all going to depend on what methods you decide work for you and your animals. Because not one size will fit all when it comes to your herd.

Methods To Keep Livestock Warm

Before you go dump resources, let’s talk about some situations and options.

You live in Illinois. Your average winter is 36in of snow fall and 27*. If you have one goat, one pig and a couple of chickens. You are probably going to want to consider a barn and the deep litter method. But if you’ve got 5 pigs and a couple of chickens, you could feasibly just have a good layer of straw or pine shavings and a 3 sided shelter.

You live in Maine. Your average snow fall is about 20ish inches and temperature is roughly 3*. But you live on the coast and it’s windy. You probably need a barn if you only have a few animals. If you have multiple of the same species, you could get away with only having a three sided structure.

Why? Well, when you have multiple of the same species, they will cuddle together to stay warm. If you only have a few of each kind, they may not snuggle up and that can cause their body temperatures to drop.

Finally, you live in Georgia. Your average snow fall is 1in a year (if your lucky) and temperature is 40*. But it’s Georgia so you may end up in a freak hurricane, tornado and snow storm in the same week. You’ve got one of a couple different types of animals. You could get away with a dog igloo and some straw. Literally. It doesn’t matter if you have 100 animals. Get more dog igloos. It’ll be cheaper.

Things You Can Do To Keep Them Warm

Deep Litter– This is probably my favorite during the winter but most hated chore in the spring. With a deep litter method, you pretty much dump a new bag of pine shavings or straw on top of the old bedding. Some people will spot clean the urine and feces, but we don’t. As the shavings, feces and urine break down (compost), it will create more heat for the goats. This method works well for us because we don’t have to worry as much if a goat gets “left out” by the other goats. Unfortunately, come spring, this is a monster chore.

Heaters– I’m not a fan of heaters in a barn because of the fire hazard. BUT sometimes they are necessary. Whether it’s small kids, piglets, or a really cold night, you do what you gotta do. I really like this one. The fire hazard is greatly reduced. Another option is to have all of your animals together in a barn. They can have their own separate areas but the more animals together, the more heat they will all produce.

Feed– This is a big one for ruminants, but all mammals create heat by digesting food. That being said, during the summer we don’t keep food in the barn. In the winter, they get a full bag of hay every night. If they eat it, they stay warm. If they spill it? They still stay warm with the bedding. Our animals have pretty much unlimited access to food during winter. While that may seem counter productive, especially when feed may be hard to come by, it will help ensure they survive the winter.

The Hay Calculator:

If you aren’t math-y (don’t worry I’m not either), check out our Hay Calculator. It literally does ALL of the math for you and gives you totals based on what you want your goals.

On the second page, you can track where you’ve bought hay, what you spent and how long it lasted.

Buy the Hay Calculator

Drafts/ Wind– If you are putting them in a three sided shelter, make sure that the wind can’t get in. Since most winter winds come from the north, make sure to face the opening to the south. But make sure to check your area and see which direction the wind comes from.

For drafts, this is similar to the winds, but a little different. We want airflow in the barn but not so much that it creates cold spots that the animals have to heat up. The best way to do this is to have south opening “vents”. On our barn, we just cut the T1-11 so that top was open on the south side.

Reducing Moisture– Hypothermia is a thing. We learned in childhood that after a day of playing in the snow or rain, we needed to come inside, take off our wet clothes and get warmed up. Well, it’s similar with livestock, except they can’t take off their clothes. We want to keep moisture reduced as much as possible. To do this, we make sure roofs don’t leak, rain can’t come in, and the ground is dry. The deep litter method can come in here because you can add bedding to the areas that are wet to help absorb them.

Maintaining Good Body Condition– I cannot stress this enough! If you are growing animals for meat, or you’ve got pregnant or lactating animals, you HAVE TO maintain good body condition. If your animal does not have good body condition going into winter, they will not be able to stay warm. We almost lost Champ this past winter due to poor body condition AND being pregnant. Everything she ate went to keeping herself warm and her babies alive.

Thankfully, everyone pulled through (except two still born kids). This year we have been on top of their feed and body conditions and hopefully, this won’t be a problem. If you are raising meat animals, it’s the same thing, if they are not fed enough they will lose their conditioning and they will eat to stay warm vs eat to get to market weight.

Save on Seeds

Heading Into Winter

Winter is a time to sit back, relax and enjoy your bounty from the year. It’s also a time for planning for next year. There are chores to do, but as a whole winter is a resting season. If you can prepare now, before it’s too cold, you will find yourself and your animals will be able to rest as well.

If you like the content I put out, feel free to buy us a coffee! It helps keep this site running, marketing and the goats in grain!

Buy me a coffee

If you like this post, feel free to share it and follow us below on our social media accounts!

  • Facebook
  • Pinterest
  • Instagram
  • YouTube
  • TikTok
  • Spotify
  • Threads

Filed Under: Animals, Chickens, Goats, How To's, Pigs Tagged With: Chickens, Chicks, Goats, Homestead

JOIN TO OUR MAILING LIST!

Leave us your email to receive new posts and special offers for members only! Don't miss a thing!

Recent Posts

  • Fall Garden Guide
  • Top Mistakes With Goats
  • How To Bond With Your Goats

How Much Grain To Give Your Goats

November 30, 2024 by Leigh Leave a Comment

This advice does not replace that of a Veterinarian! Please consult with your Vet if you have ANY questions about this post, what to feed or how to feed your animals!

Goats can live a very happy and comfortable life with no hay, grain, alfalfa, beet pulp or other feed from humans. BUT you better live in an area where they have 24/7/365 days of green browse to eat. It’s one of those sayings, “Just because you can, doesn’t mean you should.” And that is exactly why I wanted to give you a rough estimate of how much grain to give goats. But also some other things to increase their body condition.

Before we get too far into this, I have a great course on the basics of goat care. I call it Goat Crash Course: Goat 101. In this course, I explain things like types of shelter, types of feeds and hays, basic assessments and so much more! Check it out!

Buy Now

When to Start Adding Commercial Grains

There are several situations in which I would consider adding commercial grains to your feed rations and I will explain each one in depth.

  1. Body Condition– This is the most important in my opinion. If you have a goat that is thin, the first thing you need to do is get a fecal to make sure that their skinny-ness isn’t due to a high parasite load. A visit to the vet could also be in order to make sure they don’t have an illness that would keep them from gaining weight. Regardless, they need more groceries. But you want to make sure that you take care of any parasites that are stealing the nutrition or start a treatment on the goat so they can uptake those nutrients properly. You can find my post about body condition here.
  2. Reduced Browse– Goats love to eat browse and will travel far and wide for it. At least until it runs out. Or unless they are spoiled rotten like our girls. Then they want their morning grain, afternoon grain and evening grain.
  3. Pregnant or Lactating Does– Much like human women, pregnant does need more food to make sure that they not only maintain good body condition, but also ensure the kids are getting enough milk to stay healthy.
  4. Winter– If you live in an area that actually has seasons, winter can be harsh for your goats. Unless you are getting good quality hay, they are going to struggle to get enough nutrition from hay alone. So making sure they have quality feed is a great option.

Tractor Supply

What Kind Of Grain To Give Goats

As much as I want this answer to be cut and dry, and to provide you a link, that’s just not the case. First and foremost, this is solely based on your area and your goats. For us, we use Tucker Milling Dairy Goat in the pink bag. BUT if you don’t live in the southeast, you’re going to have a hard time finding that. So what can you do? Read the label.

You are looking for a grain that has ammonium chloride to help prevent and break up urinary calculi if you are going to give your bucks and wethers grain.

You also need to make sure that it is balanced with the right calcium to phosphorus ratio of 2:1 to 4:1 (C:P). To give you an example of what you are looking for check out the photo below.

If you read the ingredients, you will see that it’s got a bunch of good minerals, ammonium chloride and a C:P of about 2:1 to 4:1. This is a decent to good feed. The protein is a little low for dairy or meat goats but not absolutely terrible. We will feed this feed if our regular feed store ran out of our normal feed.

This feed, isn’t really that great. The C:P is about 1: .6. I was unable to see if it had ammonium chloride, the copper is a little low, the C:P isn’t great either.

But don’t fear! There are things you can do to increase your calcium and protein so that you can get a better mix for healthier goats.

Fixing Commercial Feeds

Sometimes, we just have to make do with what we can find. Whether that is financially because feed is freaking expensive, or supply issues. So what can you do? You can mix your own feeds without going broke. Here’s the jist:

Say you can only find the second bag of feed. One way to raise the C:P is to add in Alfalfa Pellets. Adding in an equal scoop of alfalfa pellets will put you somewhere around 3:1 to 4:1. You can also add in a SMALL amount of beet pulp.

Another thing that you may find is that your feed has too much calcium which is equally as bad, though for different reasons. The biggest being abnormal bone growth and throw their electrolytes out of whack. To fix feed that is too high in calcium is add in small amounts of barley, oats or BOSS (black oil sunflower seeds).

So How Much Grain To Give Your Goats?

If you look back on my post about How Much Hay Does Your Goat Need, you’ll see that I said about 2-4% of their body weight per day. Well, goats don’t need that much grain. In fact, that could probably kill them. BUT a good rule of thumb to get started is about 1# of grain per day. Now that being said, don’t just start giving your goat a pound of grain every day. They will scour (diarrhea). The best thing to do is give them a handful to start and slowly work your way up.

Be warned, once you start giving them grain, they will think they are starving to death if you don’t give them the amount THEY want. Stay strong, they don’t need an entire bag, despite what they say.

The Grain Ration We Give To Our Goats

Regardless of the reason we are giving grain to our goats, the ration looks something like this:

3 quarts of Tucker Milling Dairy Goat Feed (pink bag)

1# Black Oil Sunflower Seeds

.5# Beet Pulp (dry)

This gets put into a 5gal bucket and fermented. Most of the time we top dress with the BOSS so that they don’t sprout while in the water. Sometimes they do and it’s not a big deal.

They also have almost free choice of alfalfa pellets and Bermuda/ fescue hay.

They also get free choice goat minerals.

Tractor Supply

Most Important Takeaways

  • Calcium to Phosphorus ratio MUST be at least 2:1 to 4:1.
  • Bucks and wethers CAN have grain IF the calcium to phosphorus ratios are at least 2:1 to 4:1. Bucks are more prone to Urinary Calculi due to having a smaller urinary tract. It is usually caused by too much phosphate salts in the urine.
  • Balanced over time is okay as long as you are making sure to actually keep it balanced over time.
  • Invest in good scoops! This weight scoop is fantastic for making sure that you are not over doing feed. These scoops are practically indestructible. I mean obviously they can break, but ours haven’t yet and it’s been over a year.
  • Grain is great but too much is bad. So make sure you are paying attention to your animals.
  • Find a local feed store! We save SO much money every month by going to a local feed store than a large chain store. The average bag of feed is usually $15/ 50# bag vs $25/50# from TSC. That’s chicken and goat feeds. When we buying about 25 bags of feed a month, that’s a lot of money.

How much grain do you feed your goats?

If you like the content I put out, feel free to buy us a coffee! It helps keep this site running, marketing and the goats in grain!

Buy me a coffee

If you like this post, feel free to share it and follow us below on our social media accounts!

  • Facebook
  • Pinterest
  • Instagram
  • YouTube
  • TikTok
  • Spotify
  • Threads

Filed Under: Animals, Goats Tagged With: Goats, Homestead

JOIN TO OUR MAILING LIST!

Leave us your email to receive new posts and special offers for members only! Don't miss a thing!

Recent Posts

  • Fall Garden Guide
  • Top Mistakes With Goats
  • How To Bond With Your Goats

Why Is My Goat So Skinny

November 23, 2024 by Leigh Leave a Comment

When you have been raised around dogs and cats, you know when they are a little….chunky and you know when they are too skinny. But what happens when you are new to goats and have absolutely no idea what a goat should look like? Are you asking yourself why is my goat so skinny? Let’s talk about how to judge the body condition of a goat.

Before we get too far into this, I have a great course on the basics of goat care. I call it Goat Crash Course: Goat 101. In this course, I explain things like types of shelter, types of feeds and hays, basic assessments and so much more! Check it out!

Buy Now

Why Is My Goat So Skinny?

If you are new to the world of livestock, this is a very common question. If you have never had a ruminant, you will ask yourself this question 9283947239487239 times in the first year. The biggest thing you have to remember is that the body condition of cows, sheep and goats are totally different than a dog or cat. And if you’re anything like my family, the way we show our animals love is to feed them….a lot.

Champion

When we first got Champ, we noticed that she seemed a little skinny. Nothing terrible, but we didn’t know a whole lot about goats. From September through November, we realized that her body condition wasn’t fantastic, but she was eating and happy. Then in December through February, we got really excited because she was starting to get pretty chunky. We were over the moon because she was so thin when we went into winter, we were worried she may not have enough fat stores. Come March, we realized we had a really big problem.

Tractor Supply

She Wasn’t Chunky, She Was Pregnant

As someone who takes pride in my knowledge of animals, it was absolutely shocking when we figured out that she wasn’t chunky, she was pregnant. All that weight we thought she was gaining, turned out to be babies. When the babies dropped, we discovered that she was skin and bones. I felt terrible. We were told via the Vet and ultrasound, that she wasn’t pregnant. So we didn’t increase her feed. She had access to quality hay and occasionally grain, but nothing else. My poor girl had almost zero fat stores.

You can see her spine, the hollow between her rib and hips. Her body condition was about a 1.5-2.0

I recently uploaded this podcast about her death.

While I am incredibly grateful that she pulled through, it was really close. I refuse to allow any animal of mine to suffer due to my lack of education. We had already lost enough animals to that. I started devouring all the information on grain, pelleted grasses, hays, and other feeds that I could get my hands on. But one thing that “eluded” me was how to tell if your goat is fat or skinny.

Livestock Are Not Like Pets

Chances are, you have had a dog or a cat. When they are skinny, you can tell pretty easily. Same thing if they are carrying a little extra weight. And it’s almost always seen in their waist first. With livestock, specifically ruminants, that is not the case.

goat kidding

Before we get too far into this, I have a great course on the basics of goat care. I call it Goat Crash Course: Goat 101. In this course, I explain things like types of shelter, types of feeds and hays, basic assessments and so much more! Check it out!

Buy Now

Because of how a ruminants abdomen is set up, they don’t necessarily have a true waist like a dog. So to use that as a determining factor isn’t really going to work. Instead, you need to FEEL their “fat pads”. What that means is that you cannot correctly and adequately judge the body condition of a goat based solely on the way they look.

Logo 468x60

If you heard someone say “That animal has a little too much condition” and you were totally confused what they meant? They are saying that animal has too much fat. Sorry.

So What Is Body Condition Of A Goat

Body condition is simply the fat covering the body of an animal. The reason that this is so important is because it gives the farmer the ability to judge how much energy/fat reserves the animal has. The good thing is that there is a scale that you can use to figure out what body condition your animal has, and what you can do about it.

Areas To Check

There are three areas that you want feel on your goat. It’s important to remember that you are not trying to feel the bone, instead you are gently pressing to feel the layer of fat between the bone and the skin. It can take some practice. When going through the scale below, remember that pressure is minimal. If you are using a lot of pressure, you will not feel the fat layer. You will only feel the bone. If you think your goat is a 5.0, you are still not cramming down on the bony areas you are feeling. It’s still small amounts of pressure because what you are trying to feeling for that fat pad.

  1. Spine- You should feel the bony ridge on either side of the spine (technically it’s all the spine)
  2. Ribs- You should feel the space in between the ribs
  3. Sternum- You should feel the plate between the front legs on the chest

Tractor Supply

The Body Condition Scale

The biggest thing to remember is that this scale is a management tool just like the FAMACHA score cards. It is not an end all be all. Nor can you simply say, she’s skinny and needs more groceries. Unfortunately, it doesn’t work like that, and I explain more below.

The scale starts at 1.0 and goes to 5.0 and goes up in .5 increments. Where do you want your goat to live on the scale? We like our goats between 3.0 to 4.0. But depending on the circumstances we are okay with a 2.5.

Our herd health bundle helps you keep track of your herd’s health. Includes the goat assessment, herd check sheets AND Herd Health Tracker!

Buy Now

What Is The Scale?

Photo from Link (1.0)

1.0– Goat is going to be absolutely no fat on ANY of the three areas you check. You can see and feel the individual bones of the spine, spaces between ribs, and chest plate. These goats are extremely sick and unless turned around quickly, are probably going to die. Common causes is going to be poor husbandry, malnutrition, parasites and possibly diseases.

2.0-This goat has little to no fat along the spine. You can see ribs and there is some fat between the ribs but not a lot. Like a 1.0, there is a noticeable hollow between the hip bones and ribs.

3.0– Goats at a 3.0 should have a visible ridge on their spine but when it’s touched, there should be little give with the fat. You should be able to barely feel the ribs and should not be able to feel in between the ribs without some pressure. The chest plate should be padded.

Pic from Link (4.0)

4.0– This goat should be a chunk. You should not be able to see the top ridge of the spine and when you feel it, should not be able to feel without a fair amount of pressure. There should be no discernable difference in the ribs without considerable pressure. The fat on the chest plate should move.

5.0– This is a super chunk. This goat needs LESS groceries, despite what it tells you. There is absolutely no way to visibly decern the spine, ribs or chest plate. When you feel, you will not feel bones without A LOT of pressure.

What To Do With The Information From The Scale

I know, it’s a lot to unpack, but stick with me here. Above I said that the body condition score and the FAMACHA score are management tools, right? Ok, this is why it’s a management tool.

If you have a goat that is a 1.0-2.0, they are pretty thin and need to be evaluated for parasites, disease, pregnancy and husbandry. Remember, I screwed up husbandry, too, so don’t get upset here. But we need to figure out why. If the fecal is clear and you or your vet can’t find a reason for the goat to be skinny, give it some more food. Start small and go from there. If the fecal isn’t clear, start a worming protocol that you find effective. Don’t have a worming protocol? Talk to a vet. If you don’t have a Caprine vet, get on Facebook and go to Goat Emergency Team or Successful Goating With Rosie. I swear those two groups have saved my goats more often than I care to admit.

If you have a 3.0-4.0, keep doing what you’re doing but monitor closely for changes. Do they gain weight? Back off the feed. If they lose weight, get a fecal and up the feed.

5.0? Back off the groceries but also check for pregnancy for does. Bucks are almost always a feed issue, but could be something else.

But if you have a goat that has clear fecals, good FAMACHA, no illness, no pregnancy, but you can’t get it to gain weight? You may just have a thin goat. Monitor this goat closely for rapid declines. Champ is a thin goat. We can get her to a 3.0 and she will slide back to a 2.0-2.5 for no reason. Her fecals are clear, FAMACHA is good, and vet clears her health wise. We just roll with it and keep an eye on her. Not that she would let us ignore her. EVER.

My Favorite Girl

Why Is My Goat So Skinny?

There are a lot of reasons for your goat to be skinny. My first question is always, is she really skinny? If you are brand new to goats, you may think she’s skinny and she’s perfectly fine. Use the chart above to figure out if she’s skinny or just right.

Our herd health bundle helps you keep track of your herd’s health. Includes the goat assessment, herd check sheets AND Herd Health Tracker!

Buy Now

Another reason your goat may be skinny is a high parasite load. Most vets can run a fecal for around $25, depending on your area. Or you can reach out to an independent lab. Meadow Mist is a great one. Last I heard, they do their fecals for $6 each. If they have a high parasite load, treat and then revaluate.

Lastly, she could be pregnant or sick. If you can, have her evaluated by a vet to rule out any possible illnesses. If she was possibly bred, have a pregnancy test done. She may not be getting enough to sustain her and the babies.

I hope this helps you figure out what to do in terms of management with your goats. Goats try to un-alive themselves constantly. So staying on top of their care is really important.

Don’t forget to check out the crash course below

Before we get too far into this, I have a great course on the basics of goat care. I call it Goat Crash Course: Goat 101. In this course, I explain things like types of shelter, types of feeds and hays, basic assessments and so much more! Check it out!

Buy Now

If you like the content I put out, feel free to buy us a coffee! It helps keep this site running, marketing and the goats in grain!

Buy me a coffee

If you like this post, feel free to share it and follow us below on our social media accounts!

  • Facebook
  • Pinterest
  • Instagram
  • YouTube
  • TikTok
  • Spotify
  • Threads

Filed Under: Animals, Breeding, Goats, How To's Tagged With: Goats, Homestead

JOIN TO OUR MAILING LIST!

Leave us your email to receive new posts and special offers for members only! Don't miss a thing!

Recent Posts

  • Fall Garden Guide
  • Top Mistakes With Goats
  • How To Bond With Your Goats

Goat Milk Coffee Creamer

November 9, 2024 by Leigh Leave a Comment

Jump to Recipe

When life hands you lemons, you are supposed to make lemonade. Well, I did that yesterday. Today, well today there was a mishap in the freezer. Instead of letting it get the best of me, I decided to get a project done that I have been meaning to do, but never had the time…. Today was the day I was going to make a batch of goat milk coffee creamer, whether I wanted to or not.

Before we get too far into this, I have a great course on the basics of goat care. I call it Goat Crash Course: Goat 101. In this course, I explain things like types of shelter, types of feeds and hays, basic assessments and so much more! Check it out!

Buy Now

They say you shouldn’t cry over spilled milk

I don’t know who “They” are but I almost cried today when I went to put up two half gallon mason jars of goat milk. When I looked in our freezer, I saw that two jars had burst and I felt tangible pain. I started checking over my other jars and sure enough twelve half gallon mason jars were broken. I had a decision to make, either leave them in there and deal with each jar as we pulled them out to use it. Or fix it now while I had the chance. I’m not one to kick the can down the road, so I grabbed a milk crate and brought all twelve jars upstairs.

Finally after almost six hours, I finally had all of the milk melted, jars thrown away, and all twelve jars triple strained. I wanted to cry every time I found a glass shard, but this is precious milk. This is the only milk I can drink without stomach issues and when we have to help bottle feed, this is the milk we use. Not to mention, the only way I can get more is by breeding goats, and then waiting six months.

They work so hard on that milk!

After everything was all said and done, I had managed to salvage all the milk except a few drops, only to run out of freezer bags. **facepalm** This is my life.

Now, I am not 100% sure what caused the jar failure. I have frozen mason jars for years and never had an issue. If I had to guess, I would say either a head space problem or half gallon mason jars shouldn’t be frozen. It doesn’t really matter since I won’t do it again, but it would be nice to know for the future.

Anyways, the whole point is I have one and a half gallons of goat milk that I need to do something with. I could refreeze them, and I may still. But right now, I am making coffee creamer. I may even try my hand at making cheese so stay tuned.

How to make Goat Milk Coffee Creamer

I’m going to start this with saying this, you do NOT need goat milk to make your own creamer. Any milk will work. However, since I have goats and gut issues, I use goat milk.

Using a 1:1 ratio whisk your milk and condensed milk into a thick bottomed sauce pot. You can make your own condensed milk by adding about 2/3c sugar to 2c of milk. Stir until sugar is dissolved and then let simmer for about 30 minutes without stirring on low heat.

Allow it to heat for a few minutes to mix really well. If you are going to use any flavorings now is the time to add them. I’ll go over my flavorings below.

Tractor Supply

Pour into your creamer vessel, I use these if it’s going in the fridge, or old creamer containers if going into the freezer.

Allow to cool. Then store in either fridge or freezer.

That’s it! You don’t have to be some wizard to make creamer. If you don’t like “Foo Foo” creamer, just whisk your milk an condensed milk together. Done.

When you are ready to drink it, make sure to shake really well first.

Peppermint Mocha on the Left and Cinnamon Cake on the right

Flavorings

All flavorings are based on a quart, so adjust your recipe as needed. Also start with small amounts and then add more if you want. It’s harder to take away than to add more.

Peppermint Mocha

1T cocoa powder 1t peppermint extract (be careful with peppermint extract, it tends to taste very oily)

Cinnamon Cake

1T cinnamon, 1t butter extract, 1t cake batter flavoring

Banana Nut Bread

1t cinnamon, 1t butter extract, 1t cake batter flavoring, 1t maple syrup flavor, 1t banana flavor

Pumpkin Spice

1T Pumpkin spice flavor on this one, you can add additional cinnamon or cake batter to give it a more cake-y taste but test it first with just the pumpkin and see how you like it.

While I’m still mad about the jars breaking, I am glad that I was able to finally get around to making creamer for us. I just hate that it had to be like that. Oh, well.

Goat Milk Coffee Creamer

Print Recipe Pin Recipe
Cook Time 5 minutes mins
Servings: 1 Quart
Ingredients Equipment Method Notes

Ingredients
  

  • 14 oz Sweetened Condensed Milk
  • 14 Oz Milk
  • Flavorings

Equipment

  • 1 Thick bottomed pot
  • 1 Spatula
  • 1 Whisk
  • 1 Quart Container

Method
 

  1. Pour milk into thick bottomed pot and start heating on low
  2. Stir in condensed milk
  3. Add any flavorings you want
  4. Whisk together until combined. If using powdered flavorings this could take a while. Let sit for a few minutes and then whisk again. Repeat until most or all of the flavoring is dissolved
  5. Add to quart container and allow to cool before refrigerating

Notes

You can absolutely freeze this if you have a freezer safe container.

If you like the content I put out, feel free to buy us a coffee! It helps keep this site running, marketing and the goats in grain!

Buy me a coffee

If you like this post, feel free to share it and follow us below on our social media accounts!

  • Facebook
  • Pinterest
  • Instagram
  • YouTube
  • TikTok
  • Spotify
  • Threads

Filed Under: Goats, Recipes Tagged With: Goat Milk, Goats, Homestead, kitchen

JOIN TO OUR MAILING LIST!

Leave us your email to receive new posts and special offers for members only! Don't miss a thing!

Recent Posts

  • Fall Garden Guide
  • Top Mistakes With Goats
  • How To Bond With Your Goats
  • « Go to Previous Page
  • Page 1
  • Page 2
  • Page 3
  • Page 4
  • Page 5
  • Interim pages omitted …
  • Page 13
  • Go to Next Page »

Primary Sidebar

WELCOME

WELCOME

My name is Leigh and I am the lead chaos creator here at Steel Raven Farms. You will see throughout this blog that I am the crazy goat lady.

I am married to my high school sweetheart, Jared and we have two amazing boys.

FOLLOW ME

  • Amazon
  • Facebook
  • Instagram
  • Pinterest
  • TikTok

GET UPDATES!

Leave us your email to receive new posts and special offers for members only! Don't miss a thing!

In all the years that I’ve been growing a garden, the fall garden has steadily remained my favorite. Which is funny because I don’t really like any of the brassicas, which is what most people know the fall garden for. I prefer the root vegetables and cool air. But I have learned over the years…

Read More

  • Animals
    • Chickens
    • Farm Dogs
    • Goats
  • Garden
    • Compost
    • Garden Projects
    • Seeds and Plants
    • Garden Journal
    • Working With Food
      • Recipes
      • Freezing Foods
      • Dehydrating Foods
      • Canning Tips And Tricks
        • Canning Inventory Sheets
  • Helpful Info
    • Welcome to the Homestead!
    • Emergency Preparedness
    • Frequently Asked Questions
    • Goal Setting
    • Project List
    • Shop Digital Products
      • Hay Calculator
      • Farm Expense And Income Tracker
      • Goat Crash Course: 101
      • Garden Journal Prompts
      • Schedule C Tracker
      • Schedule C Tracker
      • The Homestead Bundle
  • The Truths
  • Episode List
  • Start Here
    • Privacy Policy
    • Affiliate Disclosure
    • Let’s Get in Touch
    • Members Only Library
    • Welcome To Our Homestead

Footer

  • Email
  • Facebook
  • Instagram
  • Pinterest

COME AND GET IT!

Leave us your email to receive new posts and special offers for members only! Don't miss a thing!

· Midnight Theme

Copyright © 2026 · Midnight Theme on Genesis Framework · WordPress · Log in