• Skip to primary navigation
  • Skip to main content
  • Skip to primary sidebar
  • Skip to footer

Steel Raven Farms

Where muck boots meet ground.

  • Animals
    • Chickens
    • Farm Dogs
    • Goats
  • Garden
    • Compost
    • Garden Projects
    • Seeds and Plants
    • Garden Journal
    • Working With Food
      • Recipes
      • Freezing Foods
      • Dehydrating Foods
      • Canning Tips And Tricks
        • Canning Inventory Sheets
  • Helpful Info
    • Welcome to the Homestead!
    • Emergency Preparedness
    • Frequently Asked Questions
    • Goal Setting
    • Project List
    • Shop Digital Products
      • Hay Calculator
      • Farm Expense And Income Tracker
      • Goat Crash Course: 101
      • Garden Journal Prompts
      • Schedule C Tracker
      • Schedule C Tracker
      • The Homestead Bundle
  • The Truths
  • Episode List
  • Start Here
    • Privacy Policy
    • Affiliate Disclosure
    • Let’s Get in Touch
    • Members Only Library
    • Welcome To Our Homestead

soil

Master Garden List

January 7, 2025 by Leigh Leave a Comment

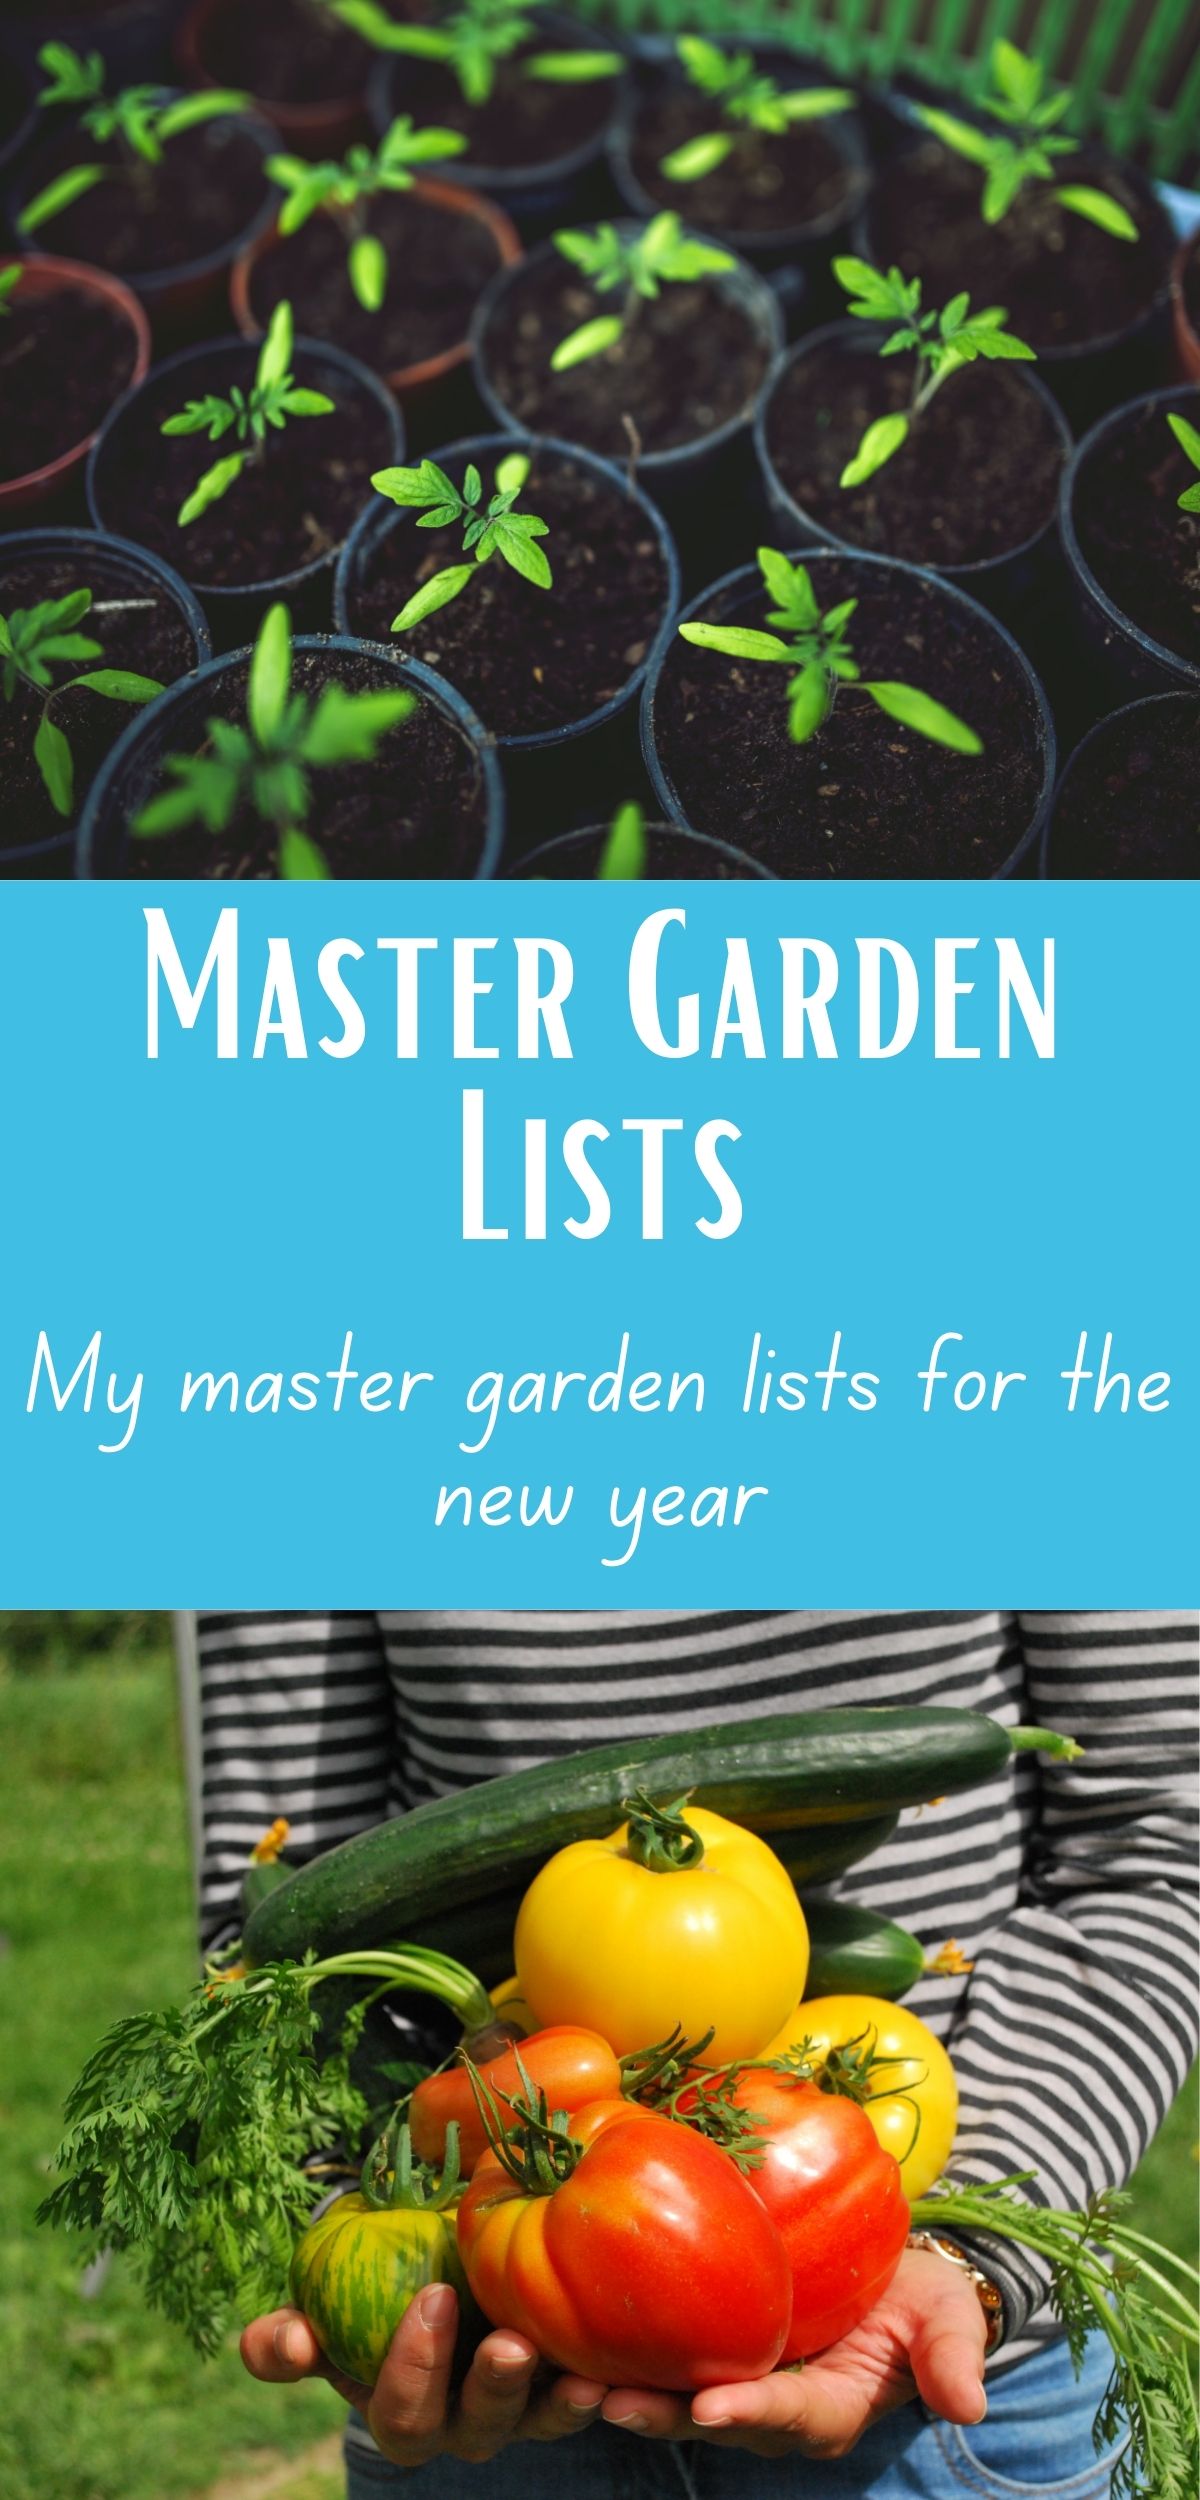
At the end of every year, I go through all of my gardening stuff and make sure that I have everything that I need for the next season. As I was doing that, I realized that a lot of new gardeners may not have a clue about what all they will need. Then they end up making several hardware store runs or having to wait for packages to arrive. I decided to make my master garden list for you (there’s a printable at the end) so that you can avoid those hassles and make this year the best garden year yet!
cropped-3.jpg

Are you looking for garden journal prompts, but aren’t interested in a weekly email? Check out our 365 Garden Journal Prompts! This is an amazing, all in one, yearly product that you only pay for once.

Buy Now!

Master Garden List

I have broken this down into a couple of different sections, that include; tools/ extras, soil/ amendments, and seeds/bulbs. Then I’m going give you my master planting list for my family of 4 and our livestock. My hope is that you have everything you need to have a great garden season that doesn’t included last minute trips to the hardware store or unplanned seed orders.

Master Garden List- Tools

There aren’t many tools that I use regularly, but I have multiples of the items I use all the time. I do not need a ton of tools because of the way I grow my veggies and the way that I handle my soil. Because I do not till, I don’t need a tiller. Things like that. But I have a ton of shovels because there are four of us and when we do big work in the garden, we are all working. So let’s get into my list:

Hoses- Every year, we either buy new hoses or have to repair our old hoses. Do yourself a sold and don’t waste your money on the heavy duty, mac daddy hoses. They aren’t worth it. We’ve bought just about every brand out there and all of them have been destroyed within about 2 years. That being said, we aren’t gentle with our hoses. If you are, then buy the good hoses.

Sprayers- Again, don’t waste your money on super expensive sprayers and hose nozzles. We are lucky to get a full season out of them. And again, if you are gentle with your stuff, buy the expensive ones. We aren’t. But there are some things that the nozzle needs to do, shower and jet. I want power when I need it and I want gentle power on baby plants.

Hand Tools- I have three hand shovels for planting, but when it comes to filling me seed start trays, I use an old coffee mug that the handle has been broken off of. It just works better for me. But get yourself some good hand shoves, weeders, etc. This “kit” from Amazon is a good place to start if you aren’t sure which tools you want and which ones you’ll actually use.

Extra Tools To Make Life Easier

Shears/ Blades- Now, I am snobby when it comes to my hand tools. I am a Fiskars girl through and through. I have found that they stand up to a beating. Even the blades stay sharp and I am not careful. These little pruners have been a lifesaver for my hands. You should have at least two smaller pruners, a large branch cutter, and then a smaller leaf pruner. Honestly, if you’re short on cash, get the smaller pruners and be done. Whatever brand you choose, make sure that they are always sharp and try to remember to bring them inside….

Hemp/Jute/ String- Lastly, you will need string. Now, I prefer a natural fiber like hemp or jute, but that is more expensive than nylon or other fibers. You will need string for tying up tomatoes, peas, etc, or training squash. I’ve used old hay bale twine to fix gates and hang cattle panel. Do what makes sense for you. String has endless uses so make sure you’ve got plenty.

Soil/ Amendments

If you are starting your garden from scratch, or you just need a really, REALLY good brand of soil, I buy from Fox Farm. Yes, it’s incredibly expensive. But you are getting what you pay for. This soil has amazing microbes already thriving in it. And if you have dirt, but it’s not great, this soil will jump start your dirt and turn it into soil.

If you already have good soil, I recommend getting a soil test kit every year. I really like the My Soil test kits because it gives you suggestions for both organic AND conventional fertilizers based on your specific soil needs. They also tell you about your nutrient density and more. My Soil Test is who I will use every year.

I am incredibly picky about my soil and amendments but also incredibly lazy. I talked here about how I build my soil, so I don’t need a lot of soil amendments. In fact, I really only ever add goat bedding to fill the beds and that’s usually it.

BUT, if I am going to use any kind of amendments, it’s going to be OMRI listed and I need to be able to figure out where it came from. Things like fish emulsion, kelp, bone meal, etc are okay. And really, just doing the best you can here is the most important. Don’t get hung up on the details.

At the end of the day though, I know that I am not going to add any amendments to my soil. Not because the plants don’t need it, but because it’s just not something I’m thinking about. So again, do what you can.

Seeds/ Bulbs/ Tubers

I figure out my seed needs totally based on my seed horde and what grew well last year. This year (2025), we are focusing on putting up more food than we normally do. So we are focusing more on things like tomatoes for tomato sauce instead of cherry tomatoes for fresh eating and pickling cucumbers over slicers.

Typically, I bulk order my seeds from Botanical Interests, Eden Brothers, and Baker Creek Seed Company, with Botanical Interests being my favorite. My seed order is usually about $150, again depending on what I have left over from last year.

Every year, I order leeks, potatoes, sweet potatoes, and garlic. I haven’t successfully figured out how to start leeks yet but it’s something that I am continuing to work on. I also totally forget to set aside seed potatoes and garlic every year…. oops.

If you are looking to start your own seed horde and not sure where to start, I am working on my Master Planting List. But a good general rule of thumb is one or two packets of seeds for every type of plant that you know your family will eat. For example, if your family likes cucumbers, get one packet of slicers. But again, I get into the details of this in Master Planting List.

Master Garden List- Printable

If you would like to download my Master Garden List, sign up below and follow the prompts! Or if you are already subscribed to Steel Raven Farms, it is in the Member’s Only Library along with all my other downloads for you.

If you like the content I put out, feel free to buy us a coffee! It helps keep this site running, marketing and the goats in grain!

Buy me a coffee

If you like this post, feel free to share it and follow us below on our social media accounts!
  • Facebook
  • Pinterest
  • Instagram
  • YouTube
  • TikTok
  • Spotify
  • Threads

Filed Under: Garden, Homestead Planning Tagged With: flowers, Garden, Homestead, soil, soil testing, vegetables

JOIN TO OUR MAILING LIST!

Leave us your email to receive new posts and special offers for members only! Don't miss a thing!

Recent Posts

  • Fall Garden Guide
  • Top Mistakes With Goats
  • How To Bond With Your Goats

How To Fill A Raised Bed For Cheap

February 10, 2024 by Leigh Leave a Comment

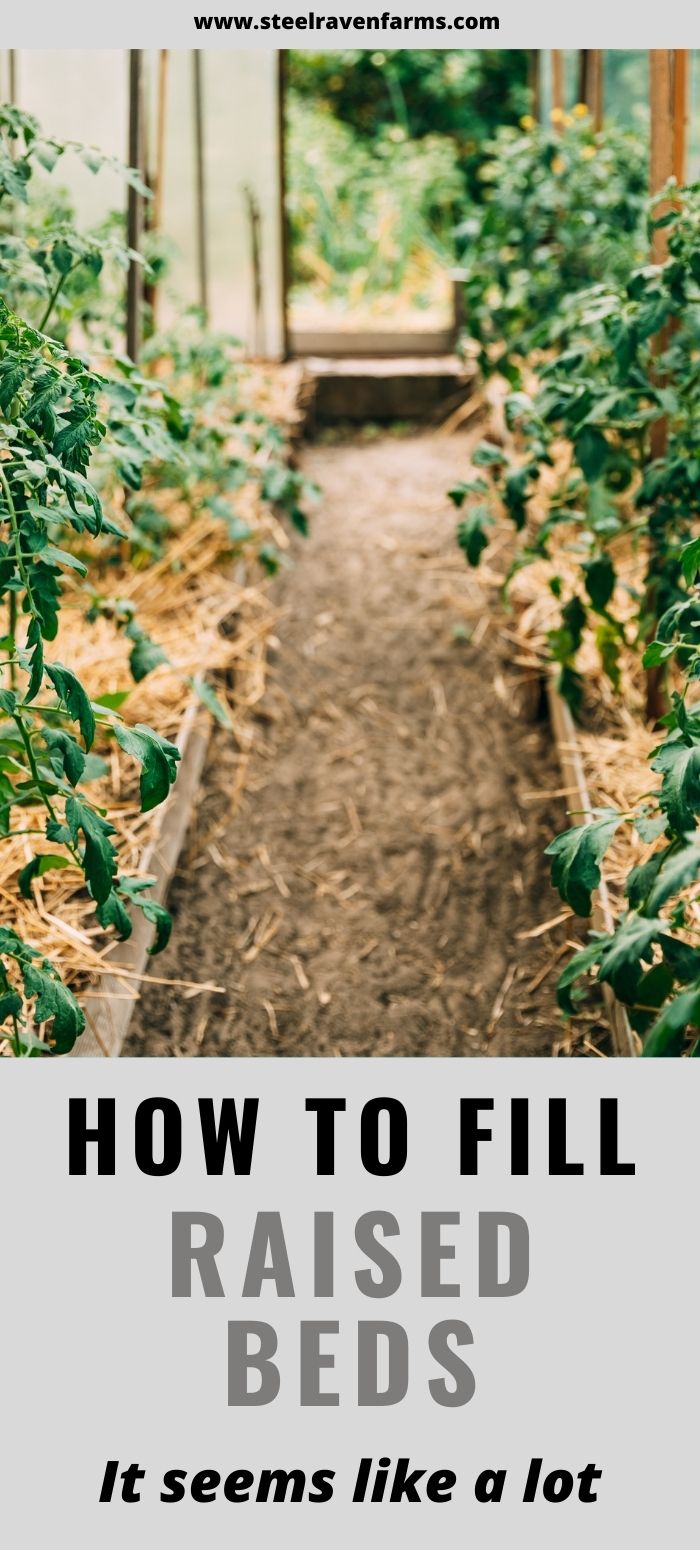
If you are looking to build raised beds, you may be wondering how to fill a raised bed. Or you’ve already done some calculations and wrote off raised beds because they are so expensive. But I’m going to walk you through how we fill our raised beds and how it doesn’t have to be THAT expensive.

Are you getting overwhelmed in the garden? Stressed? Or just not enjoying the garden like you used to? Check out our garden prompts! We send out weekly emails that get you back in the garden and out of your head! Turn the garden back into a place of love and joy instead of frustration and headache!

Subscribe Now!

How To Fill A Raised Bed For Cheap

First, there are a ton of different ways to fill a raised bed. You can go expensive with a ton of soil, or you can fill it with various organic materials. I’m going to walk you through how we fill our 4ft wide x 20ft long x 2ft tall raised beds.

Using Trees To Fill A Raised Bed

Once Jared is done building the bed, I start gathering all the unusable logs on the property. We have had to take down a bunch of pines on the property. Even though we heat our home solely with firewood, we don’t burn pine in the house, but sometimes we will burn pine in the firepit. Instead, we use it in the gardens. We’ve used these pine logs as bed boarders and organic material for inside the beds.

If you are new to heating with firewood and are looking to master the finer points of it. We’ve got a great eBook that goes in depth of what tools you should consider, how and where to stack, how to build a fire and so much more!

Buy Now

These pines and other rotten logs will get put on the bottom of each bed. Usually, this will fill the beds about 50-60% with logs. If the logs aren’t very large or the bed isn’t close to half filled, we will add a second layer of logs. The goal is to completely cover the bottom half (ish) of the bed with these logs. Since trees tend to take FOREVER to breakdown, the idea is that you shouldn’t have to refill the bed that much every year.

The biggest concerns when using trees or logs to help fill your raised bed is going damaging your bed as you fill it, nitrogen depletion, and termites. Out of all of this list, the only thing I am truly worried about is damaging the bed as we fill. We use galvanized steel roofing panels for the walls of the bed and the frame is outside the bed. That means that if we just throw logs into the beds, they could damage the roof panels.

We aren’t going to have issues with termites because we use the steel roofing panels. And I’m not super worried about nitrogen depletion because we use cover crops, manure, etc to keep our soil healthy.

Smaller Branches Next

After we have placed a good layer of logs into the bed, we start filling the next 25% with sticks, branches, etc. The goal is to use as much of the “free” downed trees as possible before using expensive materials like pine shavings, compost and soil.

I don’t usually go crazy breaking these into smaller pieces. But I will jump into the bed and stomp around until they are broken. Again, I’m not going crazy here, but I want to use as much free stuff as possible so I don’t HAVE to purchase more than absolutely necessary.

If you are looking for a great way to keep track of your gardens for years to come, check out our Digital Garden Journal. It’s a digital spreadsheet that helps you manage not only your seedlings but also your seed inventories, soil testing, orchard, harvests and so much more.

Buy Now

Filling With Smaller Stuff

After I’ve gotten all the logs and branches to about 75% of the bed, I start adding the small stuff. I usually fill this to about 85%. This is the stuff that is going to breakdown very quickly. Usually, it breaks down in less than a year. What is the smaller stuff? It’s leaves, wood chips, pine shavings, etc. Again, I want to add as much free stuff as possible before I start adding my compost and soil.

My local power company drops off wood chips for us all the time so we don’t have to pay for those. And our property is mostly wooded, so we have a TON of leaves. We leave a ton of those leaves on the ground for the ecosystem but we do pick up some for the beds. But the pine shavings are my magic bullet.

We use the deep litter method for our livestock and poultry to keep them warm in the winter. So I’ve already paid for the pine shavings once. The pine shavings start to compost throughout the winter and they are “dirty” with animal poop and urine. This is great compost/ filler for my raised beds. Also, because it takes a bit longer for wood to start to fully break down, it adds structure to the soil.

Finally Adding Soil And Compost

One of the reasons that our raised beds don’t cost us a ridiculous amount to fill is because we only add about 4-6″ of soil/ compost. For our 4ftx20ft raised bed, that’s about 40cu ft of soil. Which is still a LOT, but compared to 160cu ft of soil, it’s not too bad.

The reason I don’t add more soil is because I don’t need to. Because of the animal bedding/ pine shavings, there is a ton of nutrients for the roots to grab onto.

Are you getting overwhelmed in the garden? Stressed? Or just not enjoying the garden like you used to? Check out our garden prompts! We send out weekly emails that get you back in the garden and out of your head! Turn the garden back into a place of love and joy instead of frustration and headache!

Subscribe Now!

Lastly!

Worms! I add one or two bait cups of red wiggler or earthworms. Normally, you wouldn’t have to, and you don’t have to. But I like to kick start new garden beds with as much help as I possibly can.

When it comes to adding worms, remember, you don’t have to do this. But I have found that it helps to jump start their work. Also, having them get all that fresh soil, pine shavings, etc composting as soon as possible is amazing.

If you are interested in learning more about my favorite garden planner. I highly recommend Seedtime! This planner has been instrumental in helping me plan out my gardens with WAY more efficiency than I could ever expect! It has also reduced overwhelm, stress, and calmed my ADD/ADHD!

More Info!

Filling A Raised Bed FAQ:

Why Not Fill To The Top?

If you did a quick calculation, you’ll notice that the logs take up 50-60%, the sticks another 25%, and small stuff fills the bed to 85%. Soil only covers another 4-6″ bringing the total volume of the bed to about 90% full.

The reason I don’t fill the bed to the tippy top is for a couple of reasons. One, I don’t want to risk the soil sitting against the wood. Two, I don’t want to risk soil running out of the bed and causing run off. Three, I want to have a good healthy layer of mulch in the bed.

If I fill the bed to the top with soil, the mulch will not stay put and soil will sit on the ledge of the garden bed.

cropped-3.jpg

Are you looking for garden journal prompts, but aren’t interested in a weekly email? Check out our 365 Garden Journal Prompts! This is an amazing, all in one, yearly product that you only pay for once.

Buy Now!

Why Not Fill With Soil?

My beds are 4ftx20ftx2ft. This means that I would have to spend about $400+ per bed on soil. Minimum. Not to mention that if I don’t put organic matter into the soil, the soil will lose nutrients and structure.

Also, having wood in the bottom allows that all important fungi to grow even better. This improves soil quality exponentially.

Why Not Use Hay As Filler?

There are two main problems with using hay as filler. One, hay is usually sprayed with herbicides, pesticides and sometimes fungicides. That means that I am putting those -icides into my raised beds where I am trying to ENCOURAGE that growth. At worse, plants won’t grow and at best they will be stunted.

The second issue with using hay as filler is that purchasing unsprayed hay is already expensive. Using it to fill a bed seems like a waste of money in my book. That’s not to say that I won’t use spent hay that the goats have dropped. But I wouldn’t just take a bale and put it right into my beds.

There is an added inconvenience of having little hay sprouts grow in the beds. In my mind, it’s not that big of a deal, but it may be a thing for some.

Doesn’t The Soil Settle Over Time?

Yes, it does. In fact, the first year, your soil levels could drop by up to half as the soil settles and starts filling those nooks and crannies. But if you fill the bottom of the bed with logs and stack them pretty tight, you won’t lose a ton of soil.

Also, I add pine shavings, grass clippings, etc to my garden throughout the season. So even if the soil levels drop, I’m still getting fresh compost developing. It takes a while for the soil levels to settle so be prepared for the long haul. But I love my raised beds and I really enjoy having them.

If you like the content I put out, feel free to buy us a coffee! It helps keep this site running, marketing and the goats in grain!

Buy me a coffee

If you like this post, feel free to share it and follow us below on our social media accounts!

  • Facebook
  • Pinterest
  • Instagram
  • YouTube
  • TikTok
  • Spotify
  • Threads

Filed Under: Garden, Garden Projects Tagged With: garden chores, garden journal, gardens, Homestead, Raised Beds, soil

JOIN TO OUR MAILING LIST!

Leave us your email to receive new posts and special offers for members only! Don't miss a thing!

Recent Posts

  • Fall Garden Guide
  • Top Mistakes With Goats
  • How To Bond With Your Goats

How To Build Soil The Easy Way

December 9, 2023 by Leigh Leave a Comment

I’ve talked in depth about my winter reading consisting of Grow Your Soil and Dirt to Soil. I also talked about ways to improve your soil here. But today, I wanted to talk about the things we are doing this winter to actively build soil for the spring and summer gardens. There’s some repeating information from the posts I did before but I figured it would help to give a step by step, this is the exact thing we are doing, post to help you build soil. Now, please understand, I am no expert! But I know a thing or two.

Are you getting overwhelmed in the garden? Stressed? Or just not enjoying the garden like you used to? Check out our garden prompts! We send out weekly emails that get you back in the garden and out of your head! Turn the garden back into a place of love and joy instead of frustration and headache!

Subscribe Now!

Building Soil Doesn’t Have To Be Hard

In fact, there are really just three principles to building healthy soil. 1) Organic material 2) No till 3) Cover Crops

Done! Blog post over! But if you’re anything like me, figuring out when to add material, or what exactly no till is, or what in the world are cover crops, you’ve come to the right place. First, I want to give you an overview of how these things help your gardens and how you can use them. If you are looking for what we do in our gardens, jump down to Our Step By Step System.

Logo 468x60

Using Organic Material To Build Soil

The reason organic material is number one is because it’s the most important. We have Georgia red clay on 99% of our land. Sure, we have areas where no one has dug, tilled or scrapped. But the vast majority of our land is clay or rock. So what do you do with that kind of soil? Add more organic material to it!

To limit confusion, let’s talk about what organic material is. Organic material is any material that is natural. Some examples would be plant cuttings, leaves, sticks, mulch (not dyed), pine needles or shavings, and other material that you would find in nature. This can include dirt, rock, etc but because we are talking about building soil, we probably don’t want many, if any rocks.

Save on Seeds

No Till Helps To Build Soil

I think there is a ton of us that were taught that in order to have light, fluffy soil, you had to till it all the time. Or to get rid of weeds, the only thing is to till them under. And both of these things couldn’t be further from the truth.

Soil needs the bacteria, fungi, and other microbes to help build healthy soil. Every time we till, we are ripping the soil apart. We are killing all the good things, including bugs, to help with weeds? And I have yet to see tilled soil that doesn’t turn hard and compacted by middle of the season.

I’m not saying that there is no place for tilling in the garden. Because I think in certain situations it can be hugely beneficial. But I think the vast majority of the time, you shouldn’t need to till at all.

Using Cover Crops To Build Soil

Using cover crops when you are looking to build soil is huge! Mother Nature does not want to be naked and she will cover herself with weeds. But if we plant cover crops, her dirt will be covered. The other really amazing thing about cover crops is the ability to fix the soil. Depending on your soil’s deficiencies, you can plant to help correct them.

Usually, you are going to be deficient in nitrogen in the garden. Especially in the tomato, potato, corn or melon beds. One of the ways you can fix this is by planting clover, field peas, and other legumes.

Cover crops can be difficult to figure out. The most common question is when do you plant them? Too late in the season and they won’t sprout till spring. Too early and they are getting scorched.

cropped-3.jpg

Are you looking for garden journal prompts, but aren’t interested in a weekly email? Check out our 365 Garden Journal Prompts! This is an amazing, all in one, yearly product that you only pay for once.

Buy Now!

How We Build Soil

I don’t really have a great answer for you. But I’ll tell you what I do, and you can figure out if it would work for you.

First, we are in zone 7b/8a. Even with the new updated maps, I am still going to garden like I live in 7b to help minimize heartache. At least for the next couple years. Second, this is what we do and what works for our land. You should experiment and play with your garden to see what really works well for you.

To give you a glimpse into our garden, we have two gardens. The first is my kitchen garden (yes, mine) and it is about 500 sq ft of space. I’ve got 14 4×8 raised beds and then a bunch of planters, in ground plants, etc. Second, is our big garden and it is approximately 1,250 sq ft of garden space. Right now, the garden was a hodge podge of various spaces with trellising.

The plan for next years garden is: 80ftx120ft area with a chicken run, orchard, 16 4x20ft raised beds, 20 2x18ft in ground beds, and then spaces along the fence for plants. I’m going to take you along planning that space in another blog post as well as the podcast to follow.

When it comes to putting the three principles of building soil to use, I am going to give a couple examples at the end of this post. So feel free to skip towards the bottom if that’s all your interested in. I hope it clears up a lot of this information because I know it’s a lot.

Adding Organic Materials To Build Soil

During the winter, we will blow leaves into the gardens and use the leaves as mulch. We will also fill all of our beds with leaves, sticks, mulch, and pine needles. Since our pine shavings are being used as bedding, that part isn’t something we add until spring.

Usually, by end of November, most of our gardens are toast or getting that way. We will have some fall stuff like brussel sprouts, cabbage, etc that will over winter. The beds that are still active with plants is mulched well with leaves and sticks. But the beds that are going to bed will have all of the plants cut at soil level and laid in the bed to act as mulch.

Before we get too far into this post, I wanted to give a suggestion about keeping a garden journal. A digital garden journal is a fantastic way to keep track of past, present and future gardens. Our Digital Garden Journal is a great way to keep up with everything without getting too overwhelmed.

Buy Now

No Tilling In The Gardens

I’m not saying tilling is bad but I am saying we use tilling sparingly. For the most part, we don’t till our gardens at all. The big garden is getting a massive overhaul this winter and I couldn’t be more excited about it. I’ve got a blog post coming about it so stay tuned.

The hardest compacted areas are going to have raised beds placed over it. At this point, it’s going to take years and years to fix that soil. The next best option is to just put raised beds in. The other problem is that in that area, we deal with a lot of soil erosion because it’s on a slope. So raised beds are the best option.

Logo 468x60

One of the big reasons we chose no till is because of what just organic material can do for the soil. To give you an example, in the spring of 2023, we were forced to till just to get our tomatoes planted. The ground was like concrete. After getting the tomatoes and other plants in. We mulched heavily. Now, (winter of 2023) the ground is so soft and fluffy, you almost can’t walk on it because it shifts so easily.

Cover Crops Really Do Build Soil

On the of the biggest issues I see in gardens is bare earth, especially over winter. That soil is so dry and damaged, little is going to grow out of it. But if we throw down some seed, cover it with soil or leaves? We can have green in that area! And the green we want will suppress all the weeds!

Check out our Microgreens at True Leaf Market

We use a couple of different mixes, plus left over seeds to get a cover crop in the ground.

  • Garden Cover Crop- True Leaf Market- I like this blend a lot and have very few issues with it. I love the fact that I can put it in raised beds, the big gardens and even the yard to get some nom noms for the animals.
  • Brassica Cover Crop– True Leaf Market- This is one of my favorite blends for third reasons. First, I don’t have to worry about it “overgrowing” because it usually dies off in winter. Second, some brassicas have long taproots that will help bring nutrients from further down in the soil, up to the plants. Third, there are two root vegetable seed in this mix. That means that I don’t have to worry as much about compaction.
  • Dryland Pasture Cover Crop– True Leaf Market- Every grass in this mix is safe for my goats to eat. Since my goats free range, I like to allow them into the gardens whenever we are done with them. I want to make sure they have good, healthy food to eat. This is also what we plant in our orchard/ chicken so that they have something to eat.

Our Step By Step System For Building Soil

I told you I would give you a step by step guide, so here it is.

Bed is being put to bed

When we have a bed that is being put to bed for the winter, we want to prepare it as much as possible for spring planting.

  1. Cut all of the plants that are still in the bed at soil level and put in a pile outside of the bed.
  2. Broadcast a cover crop mix based on that beds needs and next years plans.
    • Example: In a tomato bed, we would plant a legume heavy mix.
    • We would also make sure that whatever mix we planted would have a winter kill if we plan to use the bed next year.
  3. Water well and, if possible, allow several days for germination.
  4. Once sprouted, or not if seed will go dormant, take all the cut plants and place in beds.
  5. Cover with more leaves or other organic materials as needed throughout winter.
  6. At planting time, cut all plants to soil level, and plant transplants.
    • If planting seed in that bed, you may need to cover with tarps to kill the cover crop first.

Banner 468x60

Bed is in use over fall/ winter

This would be a bed full of brassicas, root vegetables or other cold hardy plants. Obviously, we aren’t going to cut plants to soil level, though we could.

  1. No need for a cover crop in these beds!
  2. Mulch WELL around the plants without damaging them. We don’t want to smother them.
    • I use leaf litter the most in active beds because it helps insulate and breaks down slower.
  3. Once plants die, I cut whatever is left of the plant at soil level and use it as mulch.
  4. Usually, since our winters are so mild, I don’t need to worry about cover crops because my fall crops act as cover crops.
  5. At planting time, I will clear out the beds of anything that hasn’t broken down fully, put it in the compost bin, and then plant.
    • Depending on the soil level of the bed, I will just add more soil or compost on top of the mulch. It really depends on what that bed looks like come planting time.
  6. Once new plants are established, mulch.
Check out our Microgreens at True Leaf Market
cropped-3.jpg

Are you looking for garden journal prompts, but aren’t interested in a weekly email? Check out our 365 Garden Journal Prompts! This is an amazing, all in one, yearly product that you only pay for once.

Buy Now!

How do you build soil in your gardens?

I would love to hear about what you are doing to build soil in your gardens!

If you like the content I put out, feel free to buy us a coffee! It helps keep this site running, marketing and the goats in grain!

Buy me a coffee

If you like this post, feel free to share it and follow us below on our social media accounts!

  • Facebook
  • Pinterest
  • Instagram
  • YouTube
  • TikTok
  • Spotify
  • Threads

Filed Under: Compost, Garden, How To's Tagged With: chicken, compost, Garden, soil

JOIN TO OUR MAILING LIST!

Leave us your email to receive new posts and special offers for members only! Don't miss a thing!

Recent Posts

  • Fall Garden Guide
  • Top Mistakes With Goats
  • How To Bond With Your Goats

Review Of: Grow Your Soil

November 4, 2023 by Leigh Leave a Comment

I’ve told y’all many times that I am a soil nerd. I find it absolutely fascinating that you can go from poor soil to dark, rich soil in a season or two just by caring for the soil! The problem with a lot of books about soil is that they are DRY. If you aren’t interested in or have a decent foundational knowledge of biology and chemistry, you will struggle reading most books about soil. But Diane Miessler NAILED IT in her book Grow Your Soil.

Are you getting overwhelmed in the garden? Stressed? Or just not enjoying the garden like you used to? Check out our garden prompts! We send out weekly emails that get you back in the garden and out of your head! Turn the garden back into a place of love and joy instead of frustration and headache!

Subscribe Now!

My Thoughts On Grow Your Soil

First things first, the way that Diane writes is very similar to how I write, and therefore read. I was able to finish this book in about 2 days of completely uninterrupted reading. Well, except for sleeping. This book was a VERY easy read with a ton of really helpful tips and tricks for you to try in your own garden.

Diane’s Writing Style

The ease of reading makes this book not only an easy read, but allows you fully capture what she’s trying to tell you. As you’re reading, it really feels like you are hanging out talking to her. She has a sense of humor that comes through in her writing.

Also, she doesn’t use big, huge concepts and hard to understand words. While I’m not saying that it’s “simple”, this book is formatted for ANY gardener to enjoy it. I think this is very important when it comes to getting people to understand that building soil isn’t a complicated topic.

The Main Points

I don’t want to ruin the book for anyone, but I feel like hitting the high points would be beneficial if you are looking to purchase the book. Diane’s main points are:

Bring organic matter to the soil

Stop or limit use of inputs like pesticides and fertilizers

Cover crops are our friends

This is something that is echoed through every single book that I have read in regards to bringing your soil back to life. But one of the things that I really liked about Diane’s book, and her message was that it is more geared to the home gardener than Gabe Brown’s book Dirt to Soil, you can read my review on his book here.

While I really enjoyed Gabe’s book, it was harder to figure out how that works on a small scale farm or homestead. While we have acreage here, most of my garden space is in raised beds. I am able to put his teachings to work on my pastures with more success.

In Diane’s book, I feel like the information is actually geared to my garden space and what I am able to accomplish, which was great.

Where To Buy Grow Your Soil

I purchased my copy from Amazon, linked below. I’ve mentioned in the past that we don’t have a fantastic book selection in my town so I get most of my books from Amazon. You can also purchase from Barnes and Noble at $16.95 as of this writing.

I’m sure you could buy this book at a second hand store, but I can’t tell you that for sure.

What are you doing to actively grow your soil?

Let me know below what you have found that works well for building your soil!

If you like this post, feel free to share it and follow us below on our social media accounts!

  • Facebook
  • Pinterest
  • Instagram
  • YouTube
  • TikTok
  • Spotify
  • Threads

Filed Under: Compost, Garden Tagged With: Chickens, compost, Garden, Goats, soil

JOIN TO OUR MAILING LIST!

Leave us your email to receive new posts and special offers for members only! Don't miss a thing!

Recent Posts

  • Fall Garden Guide
  • Top Mistakes With Goats
  • How To Bond With Your Goats

Top 10 Ways To Improve Soil

October 19, 2023 by Leigh Leave a Comment

As we are steadily moving towards cooler months, and for some of you freezing already, now is a great time to start looking into ways to improve soil. You don’t have to do any of it right now, especially if it’s too cold to work the soil or grow a cover crop. But having these ideas in your journal as ways to improve soil will help in the long run.

10 Ways To Improve Your Soil

Mulch

Mulching is usually a forgotten chore in the garden but it is so important. I know what you’re thinking, “I don’t have any plants in the ground, why should I mulch?” Because mulching, no matter the season, keeps weeds at bay, puts organic matter back in the soil and helps retain moisture in the soil.

Save on Seeds

Cover Cropping

This is another huge thing that gets left out for most new gardeners. They think, well I’ve harvested what I need so I’m just going to rip out all of the plants. Then they don’t put any new plants to make sure that the soil stays covered.

I use this mix from True Leaf Markets for the kitchen garden. Depending on what I need in my big garden will depend on what mix (or self mix) I use. I usually try to do a mix that my chickens and ducks can eat on. But regardless of what you buy, something has to be planted in order to keep your ground soft and workable.

Organic Matter

This goes hand in hand with mulching and cover cropping. Soil needs to have organic matter to give it better structure. If you have ever lived in a place with clay soil, you know it is clumpy when wet or blows away if too dry. We want to change the structure of the soil by allowing roots to grow and create channels. The more growth and channels, the more water can be absorbed.

Low or No Till

Tilling isn’t bad per say, but over the last hundred years or so, we have come to realize that tilling may not be the best thing for the soil. When you till, you are ripping the soil apart and that means you are ripping apart the microbiomes that live in the soil. To make this more relatable, it would be like a nuclear bomb going off in your town every couple of months. Everything is destroyed and you have to rebuild season after season.

If you can limit the amount of destruction to the soil, you will have soil with better moisture retention and a lot less run off. Not to mention it’ll have the channels to retrieve nutrients from deeper in the ground.

Logo 468x60

Leaves and limbs

We’ve been taught to think that leaves and debris is something that must be hauled off. But you are getting rid of one of the best (and FREE) resources that our land gives us! Throw those leaves into the compost or straight onto a bed to act as mulch. Trust me, your garden will thank you for it.

There could be issues with the leaves and branches composting and sucking up a ton of nitrogen. But I have not seen that to be an issue. But I also cover crop with nitrogen fixers.

Animal Bedding

I talked in depth about using animal bedding as compost here. It is probably the best and easiest ways to fill up or top dress a garden bed. Especially, when you are looking for free or cheap materials for your garden beds.

You can also use pine shavings as mulch too.

Save on Seeds

Eliminate pesticides and synthetics fertilizers

When I read Gabe Brown’s Dirt to Soil, he mentions that when you use synthetics you are creating “lazy” plants. If the plant doesn’t have to work to get its nutrients because you give it to them, the plant isn’t going to be as hardy or give back to the soil. Same thing with pesticides. Even natural fertilizers and pesticides are creating a situation where the plant doesn’t have to defend or protect itself.

We don’t use any amendments to our beds except compost and animal bedding. That’s it. We learned very quickly that our plants were healthier and are better able to fend off pests if we just left them alone. So that’s what we do.

Animals

Animals are a phenomenal way to improve your soil! To put it very simply, you put an animal in a portable pen, give them some hay and let them be in that pen for 1-4 days depending on the animal size and size of pen. After you move them to a new area, seed where they were. If you can keep this up, they will slowly but surely fix your compacted soil!

Our pigs have been instrumental in bringing our property back! They turned hard, compacted clay, that a tiller couldn’t get into because of the rocks, into the softest black soil within 3 rotations!

Tractor Supply

Crop Rotation

We’ve all heard this one. You’ve got to rotate crops to keep pests, fungi, etc from becoming a problem. But it’s actually more than that. When you rotate your crops from a heavy nitrogen feeder to a nitrogen fixer, you are giving the soil a chance to recover. We want to make sure that we don’t put heavy feeders in the same place for about 3 planting seasons.

For example: You planted Corn in summer 2022, Squash in Fall of 2022, and Tomatoes in summer 2023. Your soil is going to be bone dry when it comes to nutrients. But if you were to plant beans, peas, and garlic in fall of 2022 instead of squash, you have broken the heavy feeder cycle without having to amend the beds with inputs.

Save on Seeds

Plants

Plants probably the most under rated way to improve soil health. I used to pull spent plants from the ground and give them to my chickens, goats, pigs, whatever. But when you rip out plants, you are taking all that carbon out of the soil. You are wrecking all those channels and creating more work for the soil microbiome to fix.

The best thing you can do when you are done with a bed is to just hit it with a weed eater, clippers, etc and just chop and drop it just above soil level. This will leave all that carbon (roots) in the ground to compost and feed the microbiome.

What are your favorite ways to improve soil health?

These are just my favorite ways to improve soil health. In fact, these are the only things I do and we have seen a HUGE improvement in planting. It used to be that we would have to use a drill attachment augur to be able to plant. Now, I can just stick my hand in the dirt and move the soil out of the way. How cool is that!?

If you like this post, feel free to share it and follow us below on our social media accounts!

  • Facebook
  • Pinterest
  • Instagram
  • YouTube
  • TikTok
  • Spotify
  • Threads

Filed Under: Garden Tagged With: compost, cover crop, Fodder, Garden, garden space, soil, vegetables

JOIN TO OUR MAILING LIST!

Leave us your email to receive new posts and special offers for members only! Don't miss a thing!

Recent Posts

  • Fall Garden Guide
  • Top Mistakes With Goats
  • How To Bond With Your Goats

Primary Sidebar

WELCOME

WELCOME

My name is Leigh and I am the lead chaos creator here at Steel Raven Farms. You will see throughout this blog that I am the crazy goat lady.

I am married to my high school sweetheart, Jared and we have two amazing boys.

FOLLOW ME

  • Amazon
  • Facebook
  • Instagram
  • Pinterest
  • TikTok

GET UPDATES!

Leave us your email to receive new posts and special offers for members only! Don't miss a thing!

In all the years that I’ve been growing a garden, the fall garden has steadily remained my favorite. Which is funny because I don’t really like any of the brassicas, which is what most people know the fall garden for. I prefer the root vegetables and cool air. But I have learned over the years…

Read More

  • Animals
    • Chickens
    • Farm Dogs
    • Goats
  • Garden
    • Compost
    • Garden Projects
    • Seeds and Plants
    • Garden Journal
    • Working With Food
      • Recipes
      • Freezing Foods
      • Dehydrating Foods
      • Canning Tips And Tricks
        • Canning Inventory Sheets
  • Helpful Info
    • Welcome to the Homestead!
    • Emergency Preparedness
    • Frequently Asked Questions
    • Goal Setting
    • Project List
    • Shop Digital Products
      • Hay Calculator
      • Farm Expense And Income Tracker
      • Goat Crash Course: 101
      • Garden Journal Prompts
      • Schedule C Tracker
      • Schedule C Tracker
      • The Homestead Bundle
  • The Truths
  • Episode List
  • Start Here
    • Privacy Policy
    • Affiliate Disclosure
    • Let’s Get in Touch
    • Members Only Library
    • Welcome To Our Homestead

Footer

  • Email
  • Facebook
  • Instagram
  • Pinterest

COME AND GET IT!

Leave us your email to receive new posts and special offers for members only! Don't miss a thing!

· Midnight Theme

Copyright © 2026 · Midnight Theme on Genesis Framework · WordPress · Log in