• Skip to primary navigation
  • Skip to main content
  • Skip to primary sidebar
  • Skip to footer

Steel Raven Farms

Where muck boots meet ground.

  • Animals
    • Chickens
    • Farm Dogs
    • Goats
  • Garden
    • Compost
    • Garden Projects
    • Seeds and Plants
    • Garden Journal
    • Working With Food
      • Recipes
      • Freezing Foods
      • Dehydrating Foods
      • Canning Tips And Tricks
        • Canning Inventory Sheets
  • Helpful Info
    • Welcome to the Homestead!
    • Emergency Preparedness
    • Frequently Asked Questions
    • Goal Setting
    • Project List
    • Shop Digital Products
      • Hay Calculator
      • Farm Expense And Income Tracker
      • Goat Crash Course: 101
      • Garden Journal Prompts
      • Schedule C Tracker
      • Schedule C Tracker
      • The Homestead Bundle
  • The Truths
  • Episode List
  • Start Here
    • Privacy Policy
    • Affiliate Disclosure
    • Let’s Get in Touch
    • Members Only Library
    • Welcome To Our Homestead

Homestead

Homestead Lessons: We Learn The Hard Way

August 24, 2024 by Leigh 7 Comments

Originally, this post was about the all the homestead lessons we learned the first year. But you never stop learning, especially when you homestead. So I wanted to go over all the homestead lessons we have picked up along the way. And the list keeps growing and growing.
The Ultimate Homesteader’s Starter Bundle – Only $47!

Get the tools you need to stay organized, track profits, and manage your homestead with ease!

Includes:
✅ Schedule F Tracker – Simplify tax prep
✅ Profit Calculator – Track earnings
✅ Hay Calculator – Plan livestock feed
✅ Garden Journal – Digital & printable
✅ Herd Health Tracker – Monitor animal care
✅ Simple Budget – Manage finances
✅ Backyard Homestead eBook – Essential tips

$99 value – now just $47! Start your homesteading journey today!

Buy Now

Homestead Lessons:

The Animals

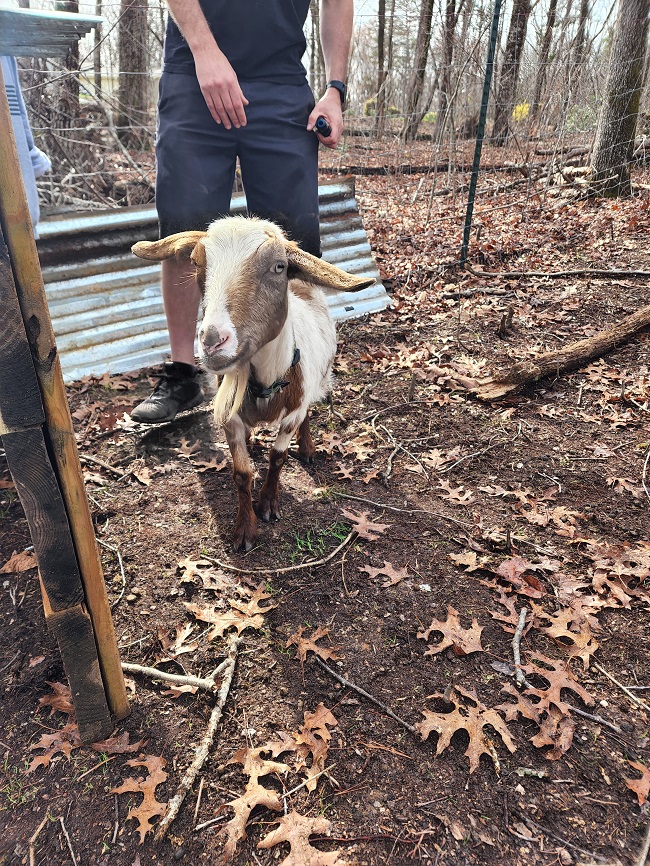
Goats are not entry level animals. Seriously, wait until you have good fencing, a good vet, and patience!

Goats eat WAY more than you think they do.

Goat math is a thing. I’m still confused how our numbers jumped from 2 to 7….. Now, we are hovering around 15.

Chickens are cool, roosters are not. I threaten George with the stock pot daily.

Learn how to butcher and process your own animals. But also give yourself grace because you don’t know how.

If you don’t have a solid plan for pigs, don’t even bother. They will destroy your gardens, pens, and sanity. Sure, sometimes they’re fine. But these are also not beginner animals.

Be prepared for a ton of clean up after processing those animals.

Chicken poop is slippery on concrete. Be careful when you start chasing chickens through your basement.

Animals will die. Yes, it’s hard. No, it doesn’t get any easier.
Building

Build it right the first time. I cannot tell you the amount of times we have had to rebuild fences.

But also understand that you will rebuild things. It’s inevitable.

Don’t let the husband borrow your tools. Ever. Seriously, don’t do it. This man has broken more tape measures….

You are way more capable than you think you are. So is your spouse.

Regardless if it’s going to take longer, get your kids involved with projects. They need to learn how to do this stuff too.

Budget for a project, and then double it. If you think it’s going to cost $400 to build a fence, make sure you’ve got at least $800 set aside.

Garden

Find a local farm stand. Even if you have a garden. It’s better to know where to get fresh produce if the garden fails…. or the chickens, goats or pigs wreck it.

Canning is addictive. Get more jars than you think you will ever need, then double it.

Enjoy the abundance, even when you are drowning in cucumbers.

Learn to start your own plants. It’s WAY cheaper.

Give your garden and yourself grace! You can’t know everything about every plant!

Keep a garden journal!

Buy the seeds…. yes, all of them.

Try new varieties. Even if you have ones you love, try different ones.

Plant the flowers. Yes, all of them.

Plant ALL the plants. Even if you think it’s too many. You would be surprised what can happen in a season…. Plus that’s extra for the animals.

Also, plant for your animals too. You may not have enough to sustain them, but any discount on my feed bill makes me happy.

Planning

Have a plan A, B, C, D and E. Maybe go ahead and plan for F, G and H too. Just to be safe.

Estimate how much firewood you will use, and then double it. Maybe triple if you live in a crazy weather state like Georgia.

Go ahead and stock up on the things you think you need. Not only is it cheaper in the long run, if you need to pull off your supply in an emergency, you will be glad you have it.

Patience is the biggest lesson you will learn.

An emergency fund is going to be your saving grace when you buy a house. But when you buy a homestead? You should probably triple the amount you think you’ll need.

You are going to blow through that emergency fund when your goats get sick, dog needs surgery, well pump goes out and water heater explodes all in one month.

Understand things are going to happen that are beyond your control. Roll with it. A good attitude will get you through it.

Start a blog to detail the antics and chaos of your life. In a year, you will look back and laugh.

Learn to say no. Especially to your husband when he says goats would be a great idea 2 months into owning your homestead.

You are living the life you always wanted in a way you never dreamed. You are blessed beyond measure.

A homestead is what you make it. It starts with HOME for a reason. Enjoy it.

Bear the freeloader

Since buying our homestead, I have learned so much. These are just a few of the homestead lessons we have picked up along the way. I could write 100 more and still not be at the end of my list. But it has been worth every single penny, sleepless night, and fight. I would not trade my life for the world and all the money. Here’s to the next year on the homestead. May it be as entertaining and interesting as the last.

If you like the content I put out, feel free to buy us a coffee! It helps keep this site running, marketing and the goats in grain!

Buy me a coffee

If you like this post, feel free to share it and follow us below on our social media accounts!
  • Facebook
  • Pinterest
  • Instagram
  • YouTube
  • TikTok
  • Spotify
  • Threads

Filed Under: Animals, Canning, Chickens, Goats, How To's, Our Homestead, Pigs, Projects Tagged With: Chickens, Goats, Homestead, Projects, Welcome

JOIN TO OUR MAILING LIST!

Leave us your email to receive new posts and special offers for members only! Don't miss a thing!

Recent Posts

  • Fall Garden Guide
  • Top Mistakes With Goats
  • How To Bond With Your Goats

Is 5 Acres Enough For A Homestead?

August 20, 2024 by Leigh Leave a Comment

There has been a self sufficient movement over the last couple of years. More people are wanting to become self sustaining. They want to be able to grow their own food, raise livestock, and be less reliant on others. Personally, I am ecstatic. But how big of a property do you need? 100 acres? 50? At least 20, right? Is 5 acres enough for a homestead? The answer is yes.

The Ultimate Homesteader’s Starter Bundle – Only $47!

Get the tools you need to stay organized, track profits, and manage your homestead with ease!

Includes:
✅ Schedule F Tracker – Simplify tax prep
✅ Profit Calculator – Track earnings
✅ Hay Calculator – Plan livestock feed
✅ Garden Journal – Digital & printable
✅ Herd Health Tracker – Monitor animal care
✅ Simple Budget – Manage finances
✅ Backyard Homestead eBook – Essential tips

$99 value – now just $47! Start your homesteading journey today!

Buy Now

Is 5 Acres Enough For A Homestead

Technically, we have just over 8 acres. But 2 acres of that is a pond, and another 1.5-2 acres is a giant hill that we can’t do a lot with. So, we have 5 usable acres. We have 30ish chickens, 17 ish ducks, and 10 goats that all need a place to live. There is also the garden that needs to go somewhere. Not to mention all the small projects that need land, like the orchard, clothesline, and *fingers crossed* the pool. Or the larger projects like the shop, greenhouse, and granny pods? 5 acres is enough for a homestead.

What Are Your Goals?

Do you want to be totally self sufficient? Is this a hobby? Are you supplementing your income? Why do you want to homestead? What does a successful homestead look like to you? When you can answer those questions you can start crafting your goals. Our goals are: Have the homestead be self sustaining and self funding. Mortgage paid off in less than 15 years. Animals provide food and/ or income. Land produces 75% or more food and 100% of firewood. Yes, 5 acres can do that.

By having clear goals and expectations, it allows you to focus your energy on the things that matter.

Save on Seeds

The Plan

In another post about homesteading, I talked about what homesteading means and starting a homestead. You really need to figure out what it means for you and how you want to make this property work for you.

Before you even decide on a property, or if you already have a property, you need to plan what you want to do with it. Do you want goats? What about chickens? Are you going to try and squeeze a cow or pigs in? What does your property look like? Is it hilly or flat? Do you have access to plenty of water? Are you going to garden for fun or for purpose? These are just some of the questions that you need to answer before you get into the guts of building up your homestead.

If you want goats, do you already have browse for them? Is the fencing goat proof? How long would it take you to put up good fencing and install a good pasture? Do you already have a barn? Is there a predator problem? Do you want to milk them? Breed them? If you can answer these questions you can start to plan.

goat kidding

Before we get too far into this, I have a great course on the basics of goat care. I call it Goat Crash Course: Goat 101. In this course, I explain things like types of shelter, types of feeds and hays, basic assessments and so much more! Check it out!

Buy Now

As a beginning homesteader, you are going to want chickens. At least every beginner that I have met does. But really think about how any eggs you eat. Jared usually eats 3 eggs a day but no one else really does. When we make breakfast for dinner, we normally go through about a dozen eggs. But what about expansion. Do you want to sell eggs? Do you want to sell chicks? Are you going to be a victim of chicken math? Are you going to raise meat birds?

What about raising larger livestock, do you want pigs or cows? With enough pasture land, you can have a cow on an acre. You could have several pigs as well. The key is knowing your space and maximizing it.

Banner 468x60

Get To Work On The Plan

Most people only need a 800 sq ft (or 200 sq ft per person) garden to feed their family of 4 for a year. That’s not really a ton of space when you are talking about having 5 acres. Since we can a ton and give it to family, we decided to triple that. Plus, tomato math is a thing. We also knew that we were going to put in an orchard and decided that strategically planting trees throughout the property would benefit us more than having trees in rows. This would help with shade and keep pests from demolishing the entire crop.

We decided that we wanted to up our egg production for sales as well as reducing our need for chicken at the store. Then we bought more chickens and all of them are dual purpose birds, meaning that they are both egg layers and meat birds. We are also looking into selling any extra chicks.

Then we bought ducks…. Initially, I bought 10 meat ducks and 10 egg ducks. After our losses, I’m pretty sure I now have a total of 17 pet ducks. I’m not sure if I can butcher these guys. The way I see it though, I have 10 production meat ducks and those guys can lay and hatch our meat ducks…. At least that’s what I’m telling myself.

Our goats are for milking and breeding. Goats are a long term investment. If we can keep them alive and healthy, and all our does produce milk and good kids, we are looking at making about $9,000-11,000/ year. Not counting vet, feed, fencing, etc. That’s also not counting cheese, butter, soap or lotion sales.

Stick To Your Plan

We went off plan by getting the goats. They are no where near returning their investment. But they are so damn cute that we let it slide. Unfortunately, we had to put pigs on the back burner because of it. Same with meat rabbits. Homesteading on 5 acres or less is totally doable, but I will say it again and again. Set your goals, prioritize them, and get your plan in motion.

I would love to hear how you are homesteading or planning to homestead your property.

If you like the content I put out, feel free to buy us a coffee! It helps keep this site running, marketing and the goats in grain!

Buy me a coffee

If you like this post, feel free to share it and follow us below on our social media accounts!

  • Facebook
  • Pinterest
  • Instagram
  • YouTube
  • TikTok
  • Spotify
  • Threads

Filed Under: How To's, Our Homestead Tagged With: Chickens, Chicks, Eggs, Goats, Homestead, Welcome

JOIN TO OUR MAILING LIST!

Leave us your email to receive new posts and special offers for members only! Don't miss a thing!

Recent Posts

  • Fall Garden Guide
  • Top Mistakes With Goats
  • How To Bond With Your Goats

Pros And Cons Of Disbudding Goats

August 17, 2024 by Leigh Leave a Comment

There is a ton of information about disbudding goats and everyone has an opinion. I’m a big fan of laying out the information and letting you make the decision that is best for you. There are a ton of pros and cons of disbudding goats. There’s also a ton for leaving the horns intact. At the end of the day, it’s your homestead, your rules.

Before we get too far into this, I have a great course on the basics of goat care. I call it Goat Crash Course: Goat 101. In this course, I explain things like types of shelter, types of feeds and hays, basic assessments and so much more! Check it out!

Buy Now

What Is Disbudding

Disbudding is simply removing the horn buds of a goat kid. There are several ways to do this but the two main ones are a disbudding iron and disbudding paste.

Disbudding Iron

The iron works pretty similarly to a branding iron and cauterizes around the horn buds. This stops growth and seals off the area to help prevent infection. By doing this it kills the horn producing cells and prevents new horn growth. The procedure will generally look like this: shave the area around the buds, place the kid in a disbudding box, while holding their head/ears apply the iron and rock back and forth for 5 seconds. Scrape the cap away and apply blue-kote to the area. Bucks will generally require another application called a figure 8.

Disbudding Paste

Disbudding paste is a caustic substance that slowly burns away at the horn and down to the skull. It will then destroy the horn creating cells. This can take 6 or more hours depending on the goat, horns, and more.

The general procedure looks something like clean the area and dry. Using gloves, apply paste to horns and place duct tape over the area. Monitor kid and be careful of letting him around other animals/ livestock. They could get this paste on them which could burn the other animal.

After 6 hours, check the site. If the tape comes off easily, wipe off left over paste and allow to dry completely before going back to mom. The biggest draw back is how the paste works. If you get this extremely caustic substance on you, you will have a chemical burn. Period. If this stuff gets on momma it will burn her, too.

With either process you can have scurs which is when not all the cells were killed and the goat grows a horn anyways. Most of the time it’s just a tiny piece of horn. Sometimes it continues to grow and can cause issues.

Pros And Cons Of Disbudding Goats

Like I said above, I’m not going to tell you one way or another which camp you should stay in. If you want to keep your goats horns intact, by all means. If you want to disbud, you could do that, too. Despite what both camps say, there is absolutely no right or wrong here.

Save on Seeds

Pros of Disbudding

Less chances of injury to self, humans, or other goats. I recently got a goat horn to the mouth while attempting to get Bella onto the milking stand. I thought she knocked out a tooth. Instead, I walked away with a good size bruise on my top lip. Bella’s horns are also the reason why we only got one doeling from Champ instead of three.

Bella rammed, flipped, and rolled Champ while she was pregnant. Champ ended up going into labor the next day and the first and third babies where not in the proper position. After talking with another breeder and the vet, they also believe that is why the kids died.

I’ve also heard stories of breaking horns off with fighting, mating, and just general goat antics. When the horn gets broken off, a lot of times it will open into the sinus cavity. This invites all sorts of bacteria into the cavity which is really, really close to the brain.

Logo 468x60

Less chance of them getting their horns hung into fencing, trees, and other impossible things that goats shouldn’t get into but do anyways. Listen, goats try to off themselves daily. If you think I’m joking, ask any goat owner the amount of times they’ve had to rescue their goat from something stupid. When you add horns into the mix, it is just easier for them to die.

Bella has gotten her horns hung up in the hay bag/net thing so many times, she has finally figured out how to get herself out. It took her two days to figure out how to get her head in and out of the fencing. But if a coyote was around when she actually got stuck in fencing, she would have been a sitting duck… well goat.

If you are looking to show your goats, they have to be disbudded.

Logo 468x60

Cons of Disbudding

Bella is the easiest goat to catch because she has a collar AND handles. But like a bicycle, those handles will hurt when jammed into your face.

Goat horns are awesome looking. As a matter of fact, I have a goat skull on my wish list and it wouldn’t look nearly as cool without the horns.

Another big con is that the horns protect from predators. Well, that and they have to have enough attitude to use those horns against a predator…. Which Bella does.

Bellatrix and Voldemort

The disbudding can cause rejection. While this doesn’t happen a lot, it can happen. When Finn and Bash were disbudded, Oakley rejected Finn and we had to take care of him for several days before she finally took him back. The burning of the horns and hair can cause rejection because the baby no longer smells like her kid.

It’s traumatic for the baby and for the humans. The reality is that you are taking a hot iron and pressing it into the skull of that baby. One slip and that baby can die. One jerk and you have 3rd degree burns. Not to mention screaming kid. It’s hard to handle.

Lastly and probably the most important, disbudded goats don’t cool down as well as horned goats. The horns have blood vessels that help keep the goats cool in the summer. We live in Georgia where it is hot and humid 7 months out of the year. I fill waterers several times a day because they go through it.

We Disbudded…. Until We Didn’t Anymore

When we got into goats, we drank the kool aide when it came to disbudding. It’s safer. It doesn’t hurt them. It’s fine.

But I really struggled with watching my babies in that box, panicking and screaming. Before I made the decision to “let them” keep their horns, I really paid attention to Bella. The arguments of horns getting stuck, while valid, hasn’t been a problem. The argument about safety? Yes, I’ve been popped by a goat horn…. a lot. It hurts, but not enough to relive the disbudding box.

The risk of serious injury or death from disbudded babies is a real thing. The shock of it can kill a goat kid. If you go too deep, you can puncture the skull.

The reality is that we aren’t going to be showing our goats. They are for milk, pets, and a way to make an income. That’s it. Plus I really like the way horned goats look.

https://www.wickedgoodcupcakes.com/shop-online/thinking-of-you-boxes

Pros And Cons Of Disbudding Goats

At the end of the day, you have to make the right decision for you and your herd. There is no right or wrong answer here. I do think that disbudding paste is more dangerous than a disbudding iron but again the choice is yours. All I ask is that you make the decision based on facts. There are a ton of pros and cons to both sides and you have to live with those choices. The 104 Homestead has this to say when it comes to disbudding.

Subscribe to Craft Beer Club Today!

But please, please remember that these are YOUR animals and YOU are their shepherd. You have to make the decisions you feel best for your herd. I won’t disbud my goats, but I have made that decision based on facts and experience. I hope you do the same.

If you like the content I put out, feel free to buy us a coffee! It helps keep this site running, marketing and the goats in grain!

Buy me a coffee

If you like this post, feel free to share it and follow us below on our social media accounts!

  • Facebook
  • Pinterest
  • Instagram
  • YouTube
  • TikTok
  • Spotify
  • Threads

Filed Under: Goats Tagged With: disbudding, goat kids, Goats, Homestead

JOIN TO OUR MAILING LIST!

Leave us your email to receive new posts and special offers for members only! Don't miss a thing!

Recent Posts

  • Fall Garden Guide
  • Top Mistakes With Goats
  • How To Bond With Your Goats

Homestead Daily Schedule

August 13, 2024 by Leigh Leave a Comment

On our homestead, this looks a little different than most. Due to our work schedules, one of us is gone 48 of 72 hours. Sometimes more. However, the goats still need to be milked, fed and let out. Chickens and ducks still need feed, water, and be let out. Dogs are also hungry and need to go to the bathroom. And all the other chores need to be done. So regardless of who is home, the daily schedule looks pretty much the same.

The Ultimate Homesteader’s Starter Bundle – Only $47!

Get the tools you need to stay organized, track profits, and manage your homestead with ease!

Includes:
✅ Schedule F Tracker – Simplify tax prep
✅ Profit Calculator – Track earnings
✅ Hay Calculator – Plan livestock feed
✅ Garden Journal – Digital & printable
✅ Herd Health Tracker – Monitor animal care
✅ Simple Budget – Manage finances
✅ Backyard Homestead eBook – Essential tips

$99 value – now just $47! Start your homesteading journey today!

Buy Now

What Is Our Homestead Daily Schedule?

As I mentioned above, our days are set up on a 3 day rotation. On the first day, I go to work and Jared is the responsible party until he goes to work the next day. Day 2 is when I come home and handle my portion of the homestead chores. On day 3 we are both home and try to squeak out as much time together as possible.

Day 1 Daily Schedule

This is my work day, so Jared is home with the boys. He usually gets up with me and we drink coffee and hang out for a few minutes before I head to work. Sometimes, he will tell me about what he has planned for the day. But more often then not, I don’t really care per say. The way I see it, he is a grown ass man and knows what he needs to do for the day. Unless there is something pressing, I don’t worry too much about what he’s doing.

That being said, most of the time he is working on whatever project we are doing. In the summer, it’s usually firewood. In the winter, it’s usually household projects. Spring is reserved for garden projects and fall is for yard clean up.

He also makes sure that the boys are doing their school work and the house doesn’t burn down.

Day 2 Daily Schedule

This is the day that he goes to work and I am coming home. Normally, I get home a little later in the morning. After getting myself cleaned up and my stuff put away, I get the boys started on their school work and I start working on whatever inside projects need to be handled. Sometimes this is blog or household work. Other times this could be getting seeds together and planted. It really depends on what the season is.

But I can tell you that the day after a 24 hour shift is left really loose. I have run calls all night and come home with a pile of chores that HAVE to get done and it’s awful. Instead, we give ourselves and each other grace when it comes to the day after shift. We just don’t put a lot of stuff on ourselves.

That being said, the goats still need to be checked and fed. Chickens and ducks still need to be fed and let out. The garden still needs to be harvested, planted or maintained. But we don’t stress about getting the to do list done.

Day 3 Daily Schedule

For me, the day starts around 8am. Blu gets her morning meds and mom needs coffee. The first set of dogs are let out and showers start. I will usually start a load of laundry and work on it throughout the day.

If I have goats in milk, my day starts a little earlier so that I can get them milked before they are screaming for their food and to be let out. I also do a quick glance at the herd to make sure everyone is healthy and happy.

After I get the goats done, I am in the garden first thing to beat the heat. I try to get things harvested before the heat of the day really hits. I will also try to get the first batches of preservation going. Whether it’s dehydrating tomatoes or squash or getting a canner filled. Depending on the season, I may be planting more in the garden.

I will also start the boys on their homeschool stuff for the day. As the day heats up, I scramble into the house to keep from overheating (y’all the Georgia heat is no joke!). I will work on the blog or general household tasks until it cools down enough to be able to go back outside.

Then it’s dinner time. After dinner, the boys take care of their chores. I finish up laundry and head to bed, where I read for about 4 hours.

Homesteading Daily Schedule With Kids

One of the biggest issues that I see new homesteaders, and hell even parents, making is that they don’t give their kids chores. You will overwhelm yourself and your partner if you do not let those kids earn their keep. We have a pay to play rule which means that if you want to play video games, watch TV or do what YOU want to do, you have to “pay” for that by doing your chores, school work, etc. So make sure that your kiddos are helping.

After everyone is done and animals are fed, we start working on school work, this is usually around 930-10. Jared and I have different views on this. Usually I let them unschool and Jared is more structured. Unschooling is when the child directs what they would like to learn about. I feel like this gives them the opportunity to learn about the things that interest them and helps them learn better. Jared prefers to help them with “normal” school work.

Neither way is wrong and the boys seem to enjoy having the flexibility. Win Win.

We get them involved with various aspects of homesteading to not only teach them how to do things that are necessary for survival if the SHTF but also because this is invaluable information. And this still counts as their schooling since they are learning things like how to follow the instructions on how to put together a metal shed. Or how much firewood makes a cord and then measuring the stack that they’ve made. They also get crash courses in animal husbandry if an animal gets sick and needs medications. They’ve also been a huge help in the garden and ask a ton of great questions. Most that I don’t have an answer to, so we ask google a lot of questions.

Don’t Beat Yourself Up

One of the things that I see a lot of new homesteaders do, especially those of us that work off farm, is that they feel like they have to do ALL the things, RIGHT NOW! That can’t be further from the truth. In fact, the opposite is more true; you have time. I talk about homesteading goals and preparation here, but the short version is figure out where you want to be, and take small actionable steps to get there.

Homesteading, while hard work, should NOT be so stressful that you don’t want or can’t do it. You don’t have to get everything done right now! Take a breath and give yourself kindness and grace to make at a reasonable pace. You don’t need to burn yourself out within the first year.

If you like the content I put out, feel free to buy us a coffee! It helps keep this site running, marketing and the goats in grain!

Buy me a coffee

If you like this post, feel free to share it and follow us below on our social media accounts!

  • Facebook
  • Pinterest
  • Instagram
  • YouTube
  • TikTok
  • Spotify
  • Threads

Filed Under: Animals, Canning, Chickens, Garden, Goats, Homeschool, How To's, Our Homestead, Pigs, Projects Tagged With: Canning, cast iron, Chickens, Chicks, cooking, Eggs, Goats, Homestead, kitchen, Welcome

JOIN TO OUR MAILING LIST!

Leave us your email to receive new posts and special offers for members only! Don't miss a thing!

Recent Posts

  • Fall Garden Guide
  • Top Mistakes With Goats
  • How To Bond With Your Goats

What Is A Fall Garden

August 10, 2024 by Leigh Leave a Comment

A fall garden is exactly what it sounds like, a garden that you grow in the fall. For those of us with extremely hot summers and no spring to speak of, fall is when we grow our cold/cool weather crops. Our winters aren’t as harsh so we can feasibly grow throughout the winter if we take some extra precautions. If you are looking to grow a fall garden, keep reading!

cropped-3.jpg

Are you looking for garden journal prompts, but aren’t interested in a weekly email? Check out our 365 Garden Journal Prompts! This is an amazing, all in one, yearly product that you only pay for once.

Buy Now!

What Is A Fall Garden?

Here in Georgia, our spring is not really spring. It’s a constant fluctuation between summer and winter… Most likely all four season in one day. From March until about mid May, we are struggling to figure out how to dress. Jeans, sweatshirt and boots in the morning, then tank tops and shorts in the afternoon, and back to winter clothes in evening/ night. It’s ridiculous. But in the fall, it is a mostly gradual decline in temperatures.

That means that we can actually get a cool weather garden in and will continue to produce, even into winter.

What To Plant In A Fall Garden

All cool weather things get planted in a fall garden. Brassicas like cabbage, cauliflower, broccoli, and brussel sprouts are great for fall gardens because you are less likely to have them bolt before they are ready.

Next are your root vegetables. These are things like carrots, radishes, turnips, beets, rutabagas and kohlrabi are fantastic in the fall garden. Not only do they grow well, but they taste better after a few frosty nights. I also like to plant leeks in the fall because they are hardy enough to handle the temps but they also taste a lot better too.

Finally, everything else. This includes greens like lettuce, kale, spinach, etc. Then you’ve got peas and some green bean varieties.

cropped-3.jpg

Are you looking for garden journal prompts, but aren’t interested in a weekly email? Check out our 365 Garden Journal Prompts! This is an amazing, all in one, yearly product that you only pay for once.

Buy Now!

When To Start A Fall Garden

This is really going to depend on your climate and what you are looking to plant. For our first frost dates (Oct 31 to Nov 15), we will plug in “how many days till (date)” into Google to see how many days we have.

For example, if we are wanting to start our seeds on August 15th, I would type into Google “How many days from August 15 2024 to November 15 2024?” Google spits out the answer of 92 days. Then I can start figuring out how many days each vegetable needs to get to harvest size. I put those dates and vegetables in my calendar.

If you don’t want to deal with all that, seedtime.com is a great way to put in what you want to grow, your frost dates and it will give you all the information you need.

If you are interested in learning more about my favorite garden planner. I highly recommend Seedtime! This planner has been instrumental in helping me plan out my gardens with WAY more efficiency than I could ever expect! It has also reduced overwhelm, stress, and calmed my ADD/ADHD!

More Info!

Starting To Rotate Out The Summer Garden

One of the hardest things to figure out is how in the world you are going to start taking down old plants and putting in your fall garden. It’s hard to cut down old plants to put in your winter garden. But it still needs to be done, especially if you have limited space.

I have a few guidelines for taking down plants that may help you. First is figuring out if the plant is healthy. If not, it’s got to go. Second, have I harvested all I need from that plant. When you are drowning in tomatoes, squash, cucumbers and put up all you need for winter, go ahead and pull the plant. Third, is what I am planting going to be “better” than what I’ve already got.

That last one is a little harder to figure out. You’ve got to make the decision on whether or not planting a cabbage plant is worth pulling tomatoes. Well, if you have put up all the tomatoes you need, or are over eating fresh tomatoes, then yea, pulling the tomato plant would be worth it. While tomatoes may be good right now, cabbage will be better in 60-120 days. So you’ve got to weigh what you have now vs what you will need in a few months.

Are you getting overwhelmed in the garden? Stressed? Or just not enjoying the garden like you used to? Check out our garden prompts! We send out weekly emails that get you back in the garden and out of your head! Turn the garden back into a place of love and joy instead of frustration and headache!

Subscribe Now!

When To Start Seeds/ Plants

One of the biggest issues you are going to have as a fall gardener is finding plants. Your best bet is to order seeds now (in July/ August) for fall starts. It is not likely that your local big box store is going to have many, if any, transplants come September.

For my climate and frost dates, I usually start my seeds around August 15th. This gives them plenty of time to get first leaves and grow a bit before I put them in the ground. Usually, mid to end September is fall garden planting for us so that gives those seeds about 6 weeks to really get going.

Also, really think about what you are purchasing if you manage to find a store that is selling plant starts. You can purchase a head of cabbage from the store for around $3. But a plant start is going to be around $5 for the plant. That doesn’t even make financial sense. Especially when you can purchase a pack of cabbage seeds for $3-4 and get about 30 or more plants.

If you are looking for a great way to keep track of your gardens for years to come, check out our Digital Garden Journal. It’s a digital spreadsheet that helps you manage not only your seedlings but also your seed inventories, soil testing, orchard, harvests and so much more.

Buy Now

When To Plant A Fall Garden

Planting a fall garden is going to rely heavily on your climate and garden. For us, seedlings started plants in August is a no no. They will bolt before they ever really get going. Or they will stunt because it’s still so hot. But I can direct seed after August 15th and by the time those plants germinate and start really going, we will cool down.

Just like in the summer garden, we have to watch the weather to make sure that we aren’t jumping the gun. It is a gamble to plant too early and risk everything dying because of the heat. A started plant won’t go in the ground until we are regularly under 80*, preferably under 75*. Shade cloths are a great way to help with this.

For us, this generally looks like starting seeds in August and planting mid to end September.

The Ultimate Homesteader’s Starter Bundle – Only $47!

Get the tools you need to stay organized, track profits, and manage your homestead with ease!

Includes:
✅ Schedule F Tracker – Simplify tax prep
✅ Profit Calculator – Track earnings
✅ Hay Calculator – Plan livestock feed
✅ Garden Journal – Digital & printable
✅ Herd Health Tracker – Monitor animal care
✅ Simple Budget – Manage finances
✅ Backyard Homestead eBook – Essential tips

$99 value – now just $47! Start your homesteading journey today!

Buy Now

Precautions For A Fall Garden

Precautions can look very different for everyone and even different for different parts of your garden. Some of the precautions we take is making sure to start seeds indoors until they have sprouted. Then we put them in a shady, cool area in the greenhouse. This sucks because the whole purpose of the greenhouse is to keep plants safe from Blu and Fenrir. But if it’s too hot, they won’t germinate. So into the house they come until it’s safe to put them outside.

Another precaution we take is watching the weather like a hawk. We look at 10 and 30 day forecasts to help make the best judgements on when to direct sow and when to transplant. Now, we live in Georgia so the weather is unpredictable, till it’s not. We know that summer is hot and winter is cold. But spring and fall are the wild cards. We could have a 90* day in November or a snow storm on March 1st.

If you did mess up your dates, or the weather didn’t cooperate, and you end up with super hot days, or freezing temps, don’t fret. At least not yet. You can mulch to help keep the ground cool and water plentiful. You can also water more often to help keep plants healthy. Another option is putting up shade cloth. This will help make sure that the plants don’t get scorched by the heat.

If it’s supposed to freeze or frost, and you have some plants that are a little too tender for that, you can throw sheets or blankets over the plants to help insulate them. I’ve used gallon jugs filled with water and set them between plants with a blanket over them to help keep them freezing. It works well for nights were we are going to get under freezing. But it’s not foolproof and you may still end up with damage.

I hope this helps!

Fall is the best time to garden because you have the ability to actually enjoy the garden without dying of heatstroke, getting eaten alive by bugs, or worrying about scorching your garden. So don’t forget about the fall garden!

If you like the content I put out, feel free to buy us a coffee! It helps keep this site running, marketing and the goats in grain!

Buy me a coffee

If you like this post, feel free to share it and follow us below on our social media accounts!

  • Facebook
  • Pinterest
  • Instagram
  • YouTube
  • TikTok
  • Spotify
  • Threads

Filed Under: Garden Tagged With: compost, Fall, fall garden, Garden, Homestead

JOIN TO OUR MAILING LIST!

Leave us your email to receive new posts and special offers for members only! Don't miss a thing!

Recent Posts

  • Fall Garden Guide
  • Top Mistakes With Goats
  • How To Bond With Your Goats

Can Homesteading Save Money

August 6, 2024 by Leigh 2 Comments

We can answer this right now, no. Homesteading will not save you money. In fact, homesteading will cost you money. A lot of money. In the first year we were on our homestead we exhausted our emergency fund four separate times. Can homesteading save money? No. Not at first. But in the long run, it will absolutely save you money. Just maybe not in the ways your expecting. Be sure to read to the end for the “pay offs” I’m talking about.

The Ultimate Homesteader’s Starter Bundle – Only $47!

Get the tools you need to stay organized, track profits, and manage your homestead with ease!

Includes:
✅ Schedule F Tracker – Simplify tax prep
✅ Profit Calculator – Track earnings
✅ Hay Calculator – Plan livestock feed
✅ Garden Journal – Digital & printable
✅ Herd Health Tracker – Monitor animal care
✅ Simple Budget – Manage finances
✅ Backyard Homestead eBook – Essential tips

$99 value – now just $47! Start your homesteading journey today!

Buy Now

Why Should You Homestead Then?

Homesteading is not necessarily about saving money. Sure, there are somethings that we have saved a ton of money on like eggs, milk, and chicken.

We no longer buy eggs because our chickens have solved that problem. We don’t have to buy chicken at the grocery store because we butcher our own. We don’t buy milk from the store unless we run out. But when you look at the $100/month we have saved by how much we have spent? We are solidly in the red.

Spend More To Make More?

Because the farm is an LLC, which I highly recommend you do, we are able to write off a lot for taxes. That being said, our first year’s return was eye opening. We spent over $3,000 in vet bills and another $5,000 on feed. That was only in six months. The following year we doubled that. That doesn’t include the well pump that went out, or the water heater. Or all the fencing and structures for the goats and chickens.

But homesteading is not about saving money. It’s about living off the land, having livestock, learning new skills, and being self sufficient. Of course homesteading means different things for different people.

The Ultimate Homesteader’s Starter Bundle – Only $47!

Get the tools you need to stay organized, track profits, and manage your homestead with ease!

Includes:
✅ Schedule F Tracker – Simplify tax prep
✅ Profit Calculator – Track earnings
✅ Hay Calculator – Plan livestock feed
✅ Garden Journal – Digital & printable
✅ Herd Health Tracker – Monitor animal care
✅ Simple Budget – Manage finances
✅ Backyard Homestead eBook – Essential tips

$99 value – now just $47! Start your homesteading journey today!

Buy Now

Homesteading Is A Long Game When It Comes To Saving Money

What I have found is that homesteading is a long term goal and commitment. You are probably not going to save money your first or your second year. If you are starting your homestead from the ground up, you will probably not see a positive until year five. But it really depends on your goals. If you want your homestead completely self sufficient but you are starting from scratch, it will take time. If you came into a property that has fencing, a barn, and garden. You are probably already ahead of the game.

Why Homesteading Doesn’t Save Money?

The reality is that you are going to spend money at first. Rarely, though it does happen, are you going to stumble onto a property that is absolutely perfect for you. You are going to have to spend money to make that property the way you want it.

I preach the importance of setting goals and figuring out your WHY. But probably the most important thing is to define what your vision of a successful homestead is. This is no different. When you are trying to set up your homestead, you want to make sure that you aren’t wasting money on things that don’t matter in the long run.

While you may not see a big financial gain, you will see the “pay off” in other areas.

When Does Homesteading “Pay Off”?

For us, homesteading started to pay off within the first year. But it’s probably not the way you’re thinking. When we bought our property, we defined, very quickly, what a successful homestead meant, and then wrote down our year one, five and ten year goals. That’s when we started to see the “pay off.”

Chickens Doing Double Duty

The pay off was a significant decrease in fleas and ticks. This was because the chickens free ranged and took care of those bugs. That meant that Jared and Jaxson weren’t being eaten alive. This made them happier and more likely to be outside.

The chickens also helped break up the compacted soil in the garden spaces. They ate the grubs and bugs that could destroy the next years crops. They’re manure became compost for the next years garden.

Their eggs are SO much better than anything you can get from the store. Bright orange yolks mean very healthy and happy chickens. But it also means that egg is packed with nutrients.

Another great thing about chickens is that we can incubate the eggs because we have a rooster. That means that technically, we never have to buy another batch of chickens. Which of course means that we will buy more chickens because… chicken math is a thing.

cropped-3.jpg

Are you looking for garden journal prompts, but aren’t interested in a weekly email? Check out our 365 Garden Journal Prompts! This is an amazing, all in one, yearly product that you only pay for once.

Buy Now!

Goats Earning Their Keep

Initially, we bought the goats to be long term lawn mowers. But after falling in love with these creatures, we started breeding and milking them. Their pay off has been a little slower because they are expensive creatures to maintain. But I realized very quickly that I could tolerate their milk.

Their pay off is in my health. For the first time in years, I am able to consume milk with pain. While I am not lactose intolerant, I do have issues with gut health. Their milk has helped ease that pain and has increased the good bacteria in my gut. Not to mention, I know exactly what is in their feed, hay, treats, etc.

Before we get too far into this, I have a great course on the basics of goat care. I call it Goat Crash Course: Goat 101. In this course, I explain things like types of shelter, types of feeds and hays, basic assessments and so much more! Check it out!

Buy Now

The Garden Producing

Gardening is probably the biggest way that we save money on the homestead. But again, not at first and not in the way you are probably thinking. Our big garden is getting a face lift in 2024 and that means a TON of money is getting dumped into it.

Like the budget for it is about $10,000 and includes the orchard, chicken runs, fencing, the gazebo and more. That’s okay, though. Because the amount of money it saves us isn’t about the weekly or monthly dollars saved at the grocery store.

It’s about the health benefits of the garden.

We do not spray our gardens with ANYTHING. There are no pesticides, herbicides or fertilizers used…. at all. It’s grown in soil that comes from our neighbors horse manure and our own animals bedding. Neither one of us deworm or use chemicals our animals unless absolutely necessary.

That means that our food from the garden is literally the healthiest thing we can consume on the planet. This pays off HUGE because we are filling our plates with food that is so nutrient dense, that it helps ward off sickness, disease and other issues that are common for people who eat the standard American diet.

goat kidding

Before we get too far into this, I have a great course on the basics of goat care. I call it Goat Crash Course: Goat 101. In this course, I explain things like types of shelter, types of feeds and hays, basic assessments and so much more! Check it out!

Buy Now

No, homesteading probably won’t save you money

But what homesteading will do is shorten your supply train. Homesteading will reduce your need on the grocery store. It will make you healthier, even if it’s only because you are more active. There are so many other pay offs when it comes to homesteading that it’s okay that it doesn’t save you a ton of money at first.

It will pay off in the end.

If you like the content I put out, feel free to buy us a coffee! It helps keep this site running, marketing and the goats in grain!

Buy me a coffee

If you like this post, feel free to share it and follow us below on our social media accounts!

  • Facebook
  • Pinterest
  • Instagram
  • YouTube
  • TikTok
  • Spotify
  • Threads

Filed Under: Animals, Canning, Chickens, Goats, How To's, Our Homestead, Pigs, Projects Tagged With: Canning, cast iron, Chickens, Chicks, cooking, Eggs, Goats, Homestead, kitchen, Welcome

JOIN TO OUR MAILING LIST!

Leave us your email to receive new posts and special offers for members only! Don't miss a thing!

Recent Posts

  • Fall Garden Guide
  • Top Mistakes With Goats
  • How To Bond With Your Goats

What to Plant in Your Vegetable Garden

July 30, 2024 by Leigh Leave a Comment

If you are new to gardening or homesteading, and you’ve been breaking your brain trying to figure out what to plant in your vegetable garden, allow me to help you! The main things I look at when planning a garden is what do I want to eat, how much space do I have, and leave room for experimenting.

cropped-3.jpg

Are you looking for garden journal prompts, but aren’t interested in a weekly email? Check out our 365 Garden Journal Prompts! This is an amazing, all in one, yearly product that you only pay for once.

Buy Now!

What To Plant In Your Gardens

Through the years, various gardens and designs, I have figured out a few things about gardening. The first is to always give more space to fruits and vegetables that you know you like. Next, is to figure out how much space I am willing to give to the stuff I like, but also the things I want to try. Finally, what do I want to try and grow.

I found Southern Dreams Homestead to have a great article for beginners and their gardens. They have a ton of great information and it’s really helpful if you don’t know what you’re doing. Learning and Yearning also has a great article about getting started with organic gardening.

cropped-3.jpg

Are you looking for garden journal prompts, but aren’t interested in a weekly email? Check out our 365 Garden Journal Prompts! This is an amazing, all in one, yearly product that you only pay for once.

Buy Now!

What fruits and vegetables do you like?

This is a very serious question that people usually get tripped up on. I despise raw tomatoes. I do not want it anywhere near my hamburger or salad. BUT I absolutely love salsa, ketchup, BBQ sauce, and more. That means I should probably not plant a ton of slicing tomatoes and plant more sauce or paste tomatoes. While, yes, Jared loves to eat raw tomatoes, he is the only one. So it doesn’t make a lot of sense to plant an entire row of slicers just for him. 

To figure out what to plant in your garden, I would sit down and really think about all the fruits and vegetables you like to eat. Then, I would think about all the cooked versions of those foods you like. Do you like pasta sauce? That’s tomatoes, peppers, onion, garlic, basil, oregano, etc. If you have the space in your garden to grow those things. Then do it!

Another thing to consider is your animals. If you have chickens or goats, you can absolutely grow extra squash for them. As you are figuring out what to plant, also think about all the things you can grow to help off set your feed bills.

Before we get too far into this, I have a great course on the basics of goat care. I call it Goat Crash Course: Goat 101. In this course, I explain things like types of shelter, types of feeds and hays, basic assessments and so much more! Check it out!

Buy Now

How Much to Plant?

Again this one is pretty simple, it comes down to space and what you like. Going back to my tomato example, out of the four of us, Jared is the only one that likes raw tomatoes. I’m not going to take up an entire row of space for slicers. But what I will do is plant a couple slicers and grape tomatoes so that he has something to snack on. The majority of my tomato space will be taken up with beefsteak or slicers.

But how much to plant? This is a varying formula that takes time to dial in. The best way to do this is to figure out how much each plant should produce and then figure out how much you need. As you grow, you will adjust how much you eat/ use but to start figure out how much you think you’ll eat and how much each plant should grow. Below is a how to become a victim of tomato math.

cropped-3.jpg

Are you looking for garden journal prompts, but aren’t interested in a weekly email? Check out our 365 Garden Journal Prompts! This is an amazing, all in one, yearly product that you only pay for once.

Buy Now!

What is tomato math?

Well, it’s the same as chicken and goat math. If I need two eggs a day for breakfast, I need at least ten chickens. That is chicken math. No, it doesn’t make any sense which is the point. Goat math is a little different because you start with two and then end up with nine and I’m still not really sure how that happened.

Tomato math is simply thinking that 25 plants is not nearly enough to sustain my family’s tomato needs and you end up with 150 plants and a ton of tomatoes. Not to mention trying to figure out what your going to do with 1,2000+ pounds of tomatoes.

The best way to figure out how much you need to plant is simple.

Figure out what the average yield for the type of plant: tomatoes are 8-10# per plant, peas are about 30 plants per person, potatoes are 5-10# per plant and so on. Then figure out how many pounds you need. I know we will go through about 100# per person for potatoes per year for cubed, shredded, whole, and fries. So I need 400#.

Then divide the number of pounds the plant yields to the number pounds you need;

Potatoes- 400/5=80 potato plants.

If you don’t know how many pounds you need, estimate and write down what you planted. When you harvest, write down the weight. Keep an eye on how much you are using and when it’s gone, figure up how many days until your next harvest. This is where garden journals are absolutely necessary!

Our herd health bundle helps you keep track of your herd’s health. Includes the goat assessment, herd check sheets AND Herd Health Tracker!

Buy Now

Experimenting With Your Garden

A lot of times, people only grow what they will eat. And that’s great if you are limited on space. But you are missing out on whole other varieties! I did a podcast about trying different varieties here. We didn’t know that we liked cabbage until we had it, same with broccoli, winter squash, radishes, etc.

Don’t be afraid to give some space to other plants in your garden. If you don’t like them, I’m sure your chickens will love them.

Are you getting overwhelmed in the garden? Stressed? Or just not enjoying the garden like you used to? Check out our garden prompts! We send out weekly emails that get you back in the garden and out of your head! Turn the garden back into a place of love and joy instead of frustration and headache!

Subscribe Now!

Try not to get overwhelmed

I know that is way easier said than done. At the end of the day, even planting one tomato plant is better than doing nothing at all. So don’t sweat it, just get out there and start digging in the dirt and enjoy the wonder of growing your own food.

If you decide to start seeds instead of buying plants, which I highly recommend, The Homesteading RD has a great guide for starting pepper plants. Since my own pepper starts didn’t do so well, I will be using some of these tips next year.

You can start big or small, it’s totally up to you. What you need to remember is that just by planting something you are doing something to decrease your dependency on the grocery store. It doesn’t matter that you didn’t harvest thousands of pounds of food. The reality is that you tried.

If your garden doesn’t produce a ton like you wanted it to, try again. I found these articles helpful for fall planting or just helping your soil through fall. Though Georgia doesn’t have much of a fall, more of a HOT, not so hot, freezing, hot…. you get the picture.

The Ultimate Homesteader’s Starter Bundle – Only $47!

Get the tools you need to stay organized, track profits, and manage your homestead with ease!

Includes:
✅ Schedule F Tracker – Simplify tax prep
✅ Profit Calculator – Track earnings
✅ Hay Calculator – Plan livestock feed
✅ Garden Journal – Digital & printable
✅ Herd Health Tracker – Monitor animal care
✅ Simple Budget – Manage finances
✅ Backyard Homestead eBook – Essential tips

$99 value – now just $47! Start your homesteading journey today!

Buy Now

Other Helpful Tips and Tricks

Over at Vintage Homestead, you can figure out how to take a soil samples. This is great for figuring out if you need extra nitrogen, fertilizer, or other materials added to your garden. Once you’ve taken your samples and have your results you can head over to Learning and Yearning to figure out how to add materials to your soil naturally.

If you’re anything like me and you want to know which plants like rhubarb and help them, head over to The Homesteading RD to take a look at what they have to say.

I am guilty of wanting to mulch everything in the garden and Learning and Yearning has a great article on how to avoid those pitfalls that comes with it.

If you like the content I put out, feel free to buy us a coffee! It helps keep this site running, marketing and the goats in grain!

Buy me a coffee

If you like this post, feel free to share it and follow us below on our social media accounts!

  • Facebook
  • Pinterest
  • Instagram
  • YouTube
  • TikTok
  • Spotify
  • Threads

Filed Under: Animals, Canning, Chickens, Garden, Goats, How To's, Pigs, Projects Tagged With: cooking, Homestead, Organic, Plants

JOIN TO OUR MAILING LIST!

Leave us your email to receive new posts and special offers for members only! Don't miss a thing!

Recent Posts

  • Fall Garden Guide
  • Top Mistakes With Goats
  • How To Bond With Your Goats

Building Your Own First Aid Kit

July 27, 2024 by Leigh Leave a Comment

Personally, I would look into building your own first aid kit because you can put everything that you want/ need in it. However, it’s going to get really expensive, really quick. The reason why first aid kits can be bought so cheap is because these companies buy the supplies in bulk and then build the kit. However, if you build your own, you get to build it specifically for your family and homestead.

The Ultimate Homesteader’s Starter Bundle – Only $47!

Get the tools you need to stay organized, track profits, and manage your homestead with ease!

Includes:
✅ Schedule F Tracker – Simplify tax prep
✅ Profit Calculator – Track earnings
✅ Hay Calculator – Plan livestock feed
✅ Garden Journal – Digital & printable
✅ Herd Health Tracker – Monitor animal care
✅ Simple Budget – Manage finances
✅ Backyard Homestead eBook – Essential tips

$99 value – now just $47! Start your homesteading journey today!

Buy Now

Building Your Own First Aid Kit

But one of the things I’ve found is that most commercial first aid kits aren’t enough. They aren’t bad at all, especially for a civilian/ non medical person. In fact, I would go so far as to say that commercial first aid kits are actually great, for those that don’t have a clue what to put in one. Or they don’t want the hassle of building their own. But commercial kits just don’t have enough stuff. There aren’t nearly enough gloves, medicines, tape, etc for most situations. Or if there’s enough of those things, there isn’t enough.

I talked here about the best first aid kits for homesteaders, and I stand by that post 100%. But if you are looking to build a more robust first aid kit, then keep reading! PS: this post is affiliate link heavy. If you would like to learn more about our affiliate links, click here.

This blog post is going to be laid out by type of first aid kit. For example, the first section would be for a car, tractor, UTV style kit and what I would put in it.

Please remember, this is coming from a paramedic, not a physician and is not meant to be medical advise.

goat kidding

Before we get too far into this, I have a great course on the basics of goat care. I call it Goat Crash Course: Goat 101. In this course, I explain things like types of shelter, types of feeds and hays, basic assessments and so much more! Check it out!

Buy Now

Building Small First Aid Kits

Small bags like this are absolutely fantastic for small places like your car, tractor, or UTV. You can cram a fair amount of things in this, but remember this is for small injuries or until you can get to a bigger bag or supply. We aren’t trying to stuff an entire first aid kit into this little bag.

For a small bag, I would keep things like band aids, 5 or so antiseptic wipes like these, 5 or so triple antibiotic packets, 1 or 2 compressed gauze like these, a pair of scissors, a CPR face shield, an emergency blanket and small packets of pain medicines like these. I would consider putting gloves in this bag, but you need to make sure they fit you.

A couple boxes of nitrile gloves will set you back about $8/ box but it’s worth it to make sure that you don’t have gloves that fit. Gloves that are practically sliding off your hands or break when you put them on because they are too small.

If you are of an age where you are at an increased risk for heart attack, I would recommend getting some aspirin packs as well but talk to your physician.

Are you getting overwhelmed in the garden? Stressed? Or just not enjoying the garden like you used to? Check out our garden prompts! We send out weekly emails that get you back in the garden and out of your head! Turn the garden back into a place of love and joy instead of frustration and headache!

Subscribe Now!

Building Your Own First Aid Kit: The Big Bag

This is a decent sized medium bag for building your own first aid kit. You can fit a lot in these bags and you don’t need to have a huge bag to do so. This bag could also fit in your car, truck or other every day ride. It can easily fit in a close, tractor compartment or even strapped to a UTV.

As with the small bag above, you are going put 5 or so antiseptic wipes like these, 5 or so triple antibiotic packets, 1 or 2 compressed gauze like these, a pair of scissors, a CPR face shield, a couple emergency blankets and small packets of pain medicines like these. If you have more space, or you think you could use it, put the entire box of these things into the bag. You don’t have to, but make sure that you have plenty.

You are also going to put in a couple tourniquets. While you may not think you need one, remember, the average response time for an ambulance to get to you is 8 minutes. If you live out in the country, it’s probably closer to 20 minutes. You can bleed out from your leg in less than 4 minutes. Get a tourniquet.

Bandaging and supplies are going to take up the majority of the bag, which is why it’s got it’s own section.

If you are new to heating with firewood and are looking to master the finer points of it. We’ve got a great eBook that goes in depth of what tools you should consider, how and where to stack, how to build a fire and so much more!

Buy Now

Bandaging Needs It’s Own Section

I was going to try and cram bandaging into each section but there is a lot of stuff to know and use when it comes to bandaging. So to try and stuff it into a few sentences wouldn’t work. Bandaging is not just for cuts but also for broken bones, head wounds, etc. So there are a lot of small pieces to make sure that you’ve got in your first aid kit.

Now, most commercial kits will send you like 4 4×4 gauze in packaging. Let me tell you that when I’ve got a patient who is bleeding, the last thing I’m trying to do is rip open packaging. You want to get what’s called a loaf. It’s a ton of 4×4 non sterile dressings. You’ll want to get some of those sterile gauze sure, but I prefer my loafs. Then you’re going to want some sort of wrap. I like these the best, but the elastic wraps are great too. Don’t forget tape!

Then, you need stuff for splinting. I like these universal splints because you can splint just about anything with them. If money is an issue, you don’t have to have splints. You can absolutely make them from just about anything as long as it fits to the injury and is doesn’t bend. So a stick, wooden spoon, T-post, you get the point. Just make sure that you secure it well so that it doesn’t move.

Pressure bandages are great for wounds that require pressure to stop the bleeding but you are a little busy with other things, like driving the tractor out of the pasture.

Now, combine or abdominal pads are fantastic for injuries. But don’t feel like you HAVE to get them. In fact, if you apply a couple 4x4s and a pressure bandage, you really don’t need abdominal pads. But they do have their place and I like them. These pads are great for big wounds that you are struggling to get the bleeding to stop.

The Ultimate Homesteader’s Starter Bundle – Only $47!

Get the tools you need to stay organized, track profits, and manage your homestead with ease!

Includes:
✅ Schedule F Tracker – Simplify tax prep
✅ Profit Calculator – Track earnings
✅ Hay Calculator – Plan livestock feed
✅ Garden Journal – Digital & printable
✅ Herd Health Tracker – Monitor animal care
✅ Simple Budget – Manage finances
✅ Backyard Homestead eBook – Essential tips

$99 value – now just $47! Start your homesteading journey today!

Buy Now

Miscellaneous Items For A First Aid Kit

I would get some form of eye wash. You do not have to get anything that is marked specifically for emergency use. Realistically, eye was is just saline. So get that. You can also use this for a wound wash as well. If you get a deep cut, this would help get all that nasty out from inside it.

Anti-choking device… Yes, I know we don’t want to think about it, but the reality is that if you have humans who eat, someone is going to choke one day. Unfortunately, most people either can’t or don’t know how to do abdominal thrusts to clear an airway. Or if you can’t get the leverage to do effective abdominal thrusts, you can’t clear the airway. Having a device similar to what is linked could literally save your or your family’s life.

CPR Masks– For same reason above, get one. The ones that I linked have a mount piece so you don’t have to get that mouth to mouth with Uncle Jim Bob. Now, the AHA is no longer recommending rescue breaths. But that doesn’t mean that you can’t or shouldn’t do it. And honestly, bystander CPR is literally the #1 reason that a lot of people walk out of the hospital after cardiac arrest. Because remember, the national average to get an ambulance is 7-8 minutes. After 6 minutes with no oxygen, you are brain dead.

The Ultimate Homesteader’s Starter Bundle – Only $47!

Get the tools you need to stay organized, track profits, and manage your homestead with ease!

Includes:
✅ Schedule F Tracker – Simplify tax prep
✅ Profit Calculator – Track earnings
✅ Hay Calculator – Plan livestock feed
✅ Garden Journal – Digital & printable
✅ Herd Health Tracker – Monitor animal care
✅ Simple Budget – Manage finances
✅ Backyard Homestead eBook – Essential tips

$99 value – now just $47! Start your homesteading journey today!

Buy Now

What You DON’T Need In A Kit

There are a ton of kits out there that have a lot of things that you will probably never use. Things like quick clot, benzoin swabs, cold packs, and more. You are literally wasting your money.

You don’t need suturing material for your first aid kit. You don’t need tongue depressors.

Tons of different style of band aids aren’t necessary either. You can literally use 4×4’s and pads until you can clean up the wound at home or get sutures at the emergency room.

Our herd health bundle helps you keep track of your herd’s health. Includes the goat assessment, herd check sheets AND Herd Health Tracker!

Buy Now

Take Aways For Building Your Own First Aid Kit

First and foremost, take the time to learn how to use the various supplies that you are purchasing. This goes for a commercial kit or one that you’ve build. Know what you are getting and how to use them.

Make sure to have multiple kits. I would have a first aid kit of some sort in every vehicle, UTV/ tractor, etc and then a fully stocked kit or go bag in the house. If we are going to be dangerous things like chain sawing, building, or anything that requires sharp tools, I would take a go bag with me. Mainly because your first aid kit does you no good in the house.

Remember, when it comes to first aid kits, you aren’t necessarily trying to fix the injury or illness right there. You are simply trying to stabilize it until you get help.

The only one that I can think of off the top of my head that you are trying to fix is when someone’s heart stops. That we need to fix right now. If you would like more information about how to do bystander CPR, check out Project Adam and watch the videos linked.

Also, remember to restock your bags after use. If you haven’t used them, I would make sure to go through and check them every 6 months or so. For us, it’s spring and fall.

If you like the content I put out, feel free to buy us a coffee! It helps keep this site running, marketing and the goats in grain!

Buy me a coffee

If you like this post, feel free to share it and follow us below on our social media accounts!

  • Facebook
  • Pinterest
  • Instagram
  • YouTube
  • TikTok
  • Spotify
  • Threads

Filed Under: Emergency Preparation Tagged With: emergency, First aid, Homestead, preparedness

JOIN TO OUR MAILING LIST!

Leave us your email to receive new posts and special offers for members only! Don't miss a thing!

Recent Posts

  • Fall Garden Guide
  • Top Mistakes With Goats
  • How To Bond With Your Goats

Best First Aid Kits For Homesteaders

July 23, 2024 by Leigh Leave a Comment

As a paramedic in real life, I am constantly shocked by how many people don’t have a basic first aid kit! You would be surprised how many times we are asked for band aids! That being said… I don’t have a first aid kit…. It’s more like a pantry. You should have a first aid kit of some sort, whether it is bought or built doesn’t matter. So today I wanted to talk to you about first aid kits but also the ones I have found that fit into the best first aid kits.

The Ultimate Homesteader’s Starter Bundle – Only $47!

Get the tools you need to stay organized, track profits, and manage your homestead with ease!

Includes:
✅ Schedule F Tracker – Simplify tax prep
✅ Profit Calculator – Track earnings
✅ Hay Calculator – Plan livestock feed
✅ Garden Journal – Digital & printable
✅ Herd Health Tracker – Monitor animal care
✅ Simple Budget – Manage finances
✅ Backyard Homestead eBook – Essential tips

$99 value – now just $47! Start your homesteading journey today!

Buy Now

Best First Aid Kits For Homesteaders

The best first aid kits are going to be ones that actually work. It doesn’t matter how much money you spend (or don’t), the best kit is going to be one that you use, is easy to carry, and actually has the supplies you need. At the very bottom of this post, I am going to give tell you what is in my first aid pantry and my “go bag”.

I’m going to list these kits out in price ranges so that you can find something within your budget. Towards the bottom of this post, I’m going to give you extra purchases. These are items that I think you could absolutely use but most kits doesn’t have this stuff in them.

If you are looking to build your own, I did this blog post to help you out.

I’m going tell you which one of these kits are FSA/HSA eligible. Lastly, this post is affiliate link heavy. If you would like to learn more about our affiliate links, click here.

Please remember, this is coming from a paramedic, not a physician and is not meant to be medical advise.

Our herd health bundle helps you keep track of your herd’s health. Includes the goat assessment, herd check sheets AND Herd Health Tracker!

Buy Now

Best First Aid Kits Under $50

General Medi– This first aid kit would be pretty good for in your car, tractor, 4 wheeler or side by side. It is not meant to be an end all be all. But it will work well until someone could get to you with a bigger kit. It’s also got a CPR mouth guard which is fantastic. But since AHA is moving away from rescue breaths this is really a non issue. It’s FSA/HSA eligible and it’s less than $30 as of this writing.

M2 Basics- This one is better because it has more wraps and other bandaging supplies. It’s has a hard case and is mountable, which will make it easier to have at the house. You could absolutely put it in your car, tractor, etc but it will take up more room. I couldn’t find if it was FSA/HSA eligible. It’s less than $50 as of this writing.

Be Smart First Aid Kit– This kit is also mountable and has pretty much the same as the other kits, but with one main difference, there’s medications in this kit. It is also mountable but again, this is not a small kit so you will end up not being able to store it easily in cars, tractors, etc.

cropped-3.jpg

Are you looking for garden journal prompts, but aren’t interested in a weekly email? Check out our 365 Garden Journal Prompts! This is an amazing, all in one, yearly product that you only pay for once.

Buy Now!

Best First Aid Kits Under $100

Comprehensive First Aid– This kit is significantly better than those listed above. It gives you splinting materials, trauma dressings, and more. This is the bag that should be coming with you when you are going out to work on the homestead. It’s under $100 but I think this one is worth the price point. I can’t find if it’s FSA/HSA eligible though.

Ever Ready First Aid Kit– This kit is a great compact little kit that has almost everything you need for just about any situation… except, it doesn’t have splinting supplies. Not a deal breaker because you can make do without but moving someone with a broken bone hurts. It is FSA/HSA eligible and as of this writing is $85.

Lightening X– This kit is made by first responders/ EMT’s, which is weird because this isn’t necessarily the kit I would make. BUT it is a good kit for a civilian to have and everything in it is usable. This kit would be more for someone that has some first aid knowledge since it’s not labeled. But again, it’s got a lot of good stuff in it. It’s about $90 and I can’t find if it’s FSA/HSA eligible.

goat kidding

Before we get too far into this, I have a great course on the basics of goat care. I call it Goat Crash Course: Goat 101. In this course, I explain things like types of shelter, types of feeds and hays, basic assessments and so much more! Check it out!

Buy Now

Best First Aid Kits Over $100

Most of these kits you are paying for the bag, not necessarily the items in it. So keep that in mind as you are looking at these.

Luminary Tactical– This is a great, but bulky first aid kit. It has some things that you will probably never use, like OPA’s, C-collar, and sutures. But it’s there if you do know how to use them. This kit is pricey at $200 but again, it’s robust and covers most of your bases. I can’t find if it’s FSA/HSA eligible.

Lightening X Tac Med– Lightening X makes the list again. This one is more geared for an event medical personnel stand point but it is still a solid first aid kit. I love the removable pouches so that you can just grab that one pouch instead of having to empty out your entire kit. Again, there are things that you will probably never use, like the mask and oxygen tubing but that’s not a deal breaker. This kit is pretty pricey coming in at $330 but it is FSA/HSA eligible.

Advanced Aventurer– This bag would be perfect for most civilian, non medical person. It has just about everything to cover you from minor sprains to lacerations and just about anything in between. It’s a good sized bag without being overbearing like the other two in this list. It’s not horribly priced but definitely not cheap at $300.

The Ultimate Homesteader’s Starter Bundle – Only $47!

Get the tools you need to stay organized, track profits, and manage your homestead with ease!

Includes:
✅ Schedule F Tracker – Simplify tax prep
✅ Profit Calculator – Track earnings
✅ Hay Calculator – Plan livestock feed
✅ Garden Journal – Digital & printable
✅ Herd Health Tracker – Monitor animal care
✅ Simple Budget – Manage finances
✅ Backyard Homestead eBook – Essential tips

$99 value – now just $47! Start your homesteading journey today!

Buy Now

Take Aways For Best First Aid Kits

The importance of a good, well stocked first aid kit cannot be underestimated. Unfortunately for most people, they don’t put enough thought into their first aid kid (or lack or one) until it’s too late. And people don’t put enough thought into HOW to use their first aid kit. If they even have one, they just throw it in the car or under the sink and never think about HOW to use what’s in it. So do yourself and your loved ones a favor and learn how to use the kit, how to do CPR, and how to bandage, splint, etc.

As much as you may not want to, please take the time to learn the basics of CPR, how to stop bleeding, place a tourniquet, and bandaging/ splinting. I can’t tell you how many people I’ve encountered over the years that have told me, I wish I would have learned how to do this. Because a lot of the time, it’s their family member on the line.

Imagine with me, just for a second, that you are building a shed and your son walks past a panel of sheet metal. He gets nailed on the leg with that sheet metal and he now has a deep laceration on his leg. He’s bleeding everywhere. What are you going to do? Do you have anything on hand to help stop the bleeding? Do you know how to stop the bleeding? What if it’s shooting blood out? Do you know what that means?

That scenario happened to us, here on our homestead. My youngest son was walking past sheet metal as him and Jared were building the metal chicken coop. Thankfully, we had rags and knew what to do. Thankfully, it wasn’t spurting blood. But that was a trip to the emergency room for 3 stitches to reattach the muscle and another 13 to close him up.

Injuries can happen to ANYONE and if you don’t know what to do, you will be in a bind. So get the first aid kit.

If you like the content I put out, feel free to buy us a coffee! It helps keep this site running, marketing and the goats in grain!

Buy me a coffee

If you like this post, feel free to share it and follow us below on our social media accounts!

  • Facebook
  • Pinterest
  • Instagram
  • YouTube
  • TikTok
  • Spotify
  • Threads

Filed Under: Emergency Preparation Tagged With: emergency planning, First aid, Homestead, preparedness

JOIN TO OUR MAILING LIST!

Leave us your email to receive new posts and special offers for members only! Don't miss a thing!

Recent Posts

  • Fall Garden Guide
  • Top Mistakes With Goats
  • How To Bond With Your Goats

How To Pressure Can Green Beans

July 20, 2024 by Leigh 2 Comments

Jump to Recipe

I am extremely picky when it comes to green beans. I cannot stand mushy green beans. The thought of the skin of the green bean scraping against my teeth is enough to make me want to vomit. So the only way I will buy, can or otherwise consume green beans is frenched green beans. Today, I went to my local farmers market for strawberries. Yes, they are worth the two hour round trip drive and I saw they had bushels of green beans! Score! So today I’m going pressure can green beans.

The Ultimate Homesteader’s Starter Bundle – Only $47!

Get the tools you need to stay organized, track profits, and manage your homestead with ease!

Includes:
✅ Schedule F Tracker – Simplify tax prep
✅ Profit Calculator – Track earnings
✅ Hay Calculator – Plan livestock feed
✅ Garden Journal – Digital & printable
✅ Herd Health Tracker – Monitor animal care
✅ Simple Budget – Manage finances
✅ Backyard Homestead eBook – Essential tips

$99 value – now just $47! Start your homesteading journey today!

Buy Now

Pressure Canning Green Beans

The first thing you need is fresh green beans. Straight from the garden is the best but today we are working with what we’ve got. I got a bushel which is about 30# of green beans and will yield about 25 quart jars of beans. This is not precise. Sometimes a bushel is only 25# and only 18# of usable green beans. So be prepared for less or more.

You’ll need a couple bowls, cold water for soaking, jars, pressure canner and the assorted tools that go with pressure canning.

Let’s Get Snapping

You’ll need a couple bowls so you can snap to your hearts content. This is seriously my favorite part. No one wants to help because it’s pretty mindless which is why it’s my favorite part. Last year I snapped two bushels of green beans in six hours. I took my time and got to watch my farm. I watched the goats play, the chickens scratch, and my boys help Jared build. All while I took a load off.

If you don’t know how to snap beans, it’s very simple. Snap off the ends at about 1/2 inch, roughly. Throw the ends in a bowl. Then snap the bean in half or thirds depending on how big you want your pieces. Just work through your bushel/ bag.

If you have goats or chickens, they will love you for giving them the ends. All of the animals fight over the beans, tops and bottoms and of course anything that gets dropped on the floor.

Soak Your Beans

Next clean your sink or a cooler and let them sit in cool water for about 30 minutes. You don’t have to do this step but I feel like it gets all the dirt and grime off your beans. You can do this before you start snapping, go for it, it’s totally up to you.

Also, I will “agitate” the water with my hands to help scrub off any dirt or debris that is on the beans.

I like using a cooler because I can just dump the processed beans straight into a cooler of cool water on the porch and I don’t have to move. Which is ideal considering I usually process 40-50 quarts of green beans at a time.

French Cut Green Beans

Once they are clean, I run them through the frencher. If you don’t have a frencher or don’t want french cut beans just skip this step. But make sure that you snap your beans a little smaller about an inch long.

If I am canning green beans, which is the entire point of this post, I only can French cut green beans. So you’ll need a frencher like this one and while I love it, it does get stuck if the bean is too big or too hard. It also requires you to attach it to a counter, table, etc and sometimes it just doesn’t work that well. But it’s the best crank version and I don’t like the manual ones.

Get Your Canner Ready

Next, get your canners ready. You need a pressure canner. I have two similar to this one but mine don’t have the gauge. You don’t HAVE to have the gauge. If you head to your local Wal-Mart they should have one that doesn’t have a gauge. While you’re at Wal-Mart go ahead and get at least two cases of quart mason jars. Ball is the most common, but Azure Standard has some really great jars as well. Also pick up the tool pack that has a canning funnel, canning tongs, and the de-bubbler. It should look like this.

Your specific canner should tell you how much water to put into it. My canner says three quarts. It will not fill the canner, and you don’t want it to. Go ahead and fill it to your manufactures instructions and get the water boiling.

Pack Your Green Beans Into Jars

While waiting on your water to boil, you’re going to start packing your jars. Using your funnel and clean hands start packing your green beans into your jars. I usually pack till the green beans are about an inch and a half from the top. I usually push down to get as many beans in as possible but you also don’t want to pack it so full. Set it off to the side until you have a canner full. This is usually seven-ten quart jars depending on the size of your canner.

Once you have a full canner ready (not in the canner yet), go ahead and fill each jar with room temperature water till you have 1″ head space. Head space refers to the space from the top of the food/water to the top of the jar. Next, you’re going to use the de-bubbler to get all the air bubbles out.

I’m not going to lie to you, I gently tap the jar on the counter until all the bubbles are at the top. It’s worked well for me, usually because I can’t find the de-bubbler thing. Add more water to the jar to maintain the 1″ head space.

Then wipe the rim of the jar with a paper towel or rag dipped in vinegar. Put the lid and then ring on to finger tip tight and you are ready to put them in the canner. I usually place them in the canner all at once so that nothing starts cooking before I’m ready.

Loading Your Pressure Canner

By the time you are ready to start adding your jars, your water should be boiling or close. Go ahead and place your jars in the canner and place the lid per your canners instructions. The normal process for most canners is to let the canner vent for ten minutes before placing your weight on the vent. But again, follow your canners instructions.

My canners have a pressure lock that will pop up once it has come to pressure and shortly after that the rocker will rock. Your canner may be different.

Once the weight starts to rock, or you are up to your PSI on your gauge, you start your time. I will also usually drop the temp on the burner at this point too. I have it on high to get everything up to pressure but will usually drop it to medium to medium high once the weight is rocking. You only want the weight to rock about once every few seconds. Usually mine just gently jiggles.

Green beans need to be processed for 25 minutes. Depending on your altitude will depend on your actual times. I process mine at 25 minutes at 15 PSI for quarts because I am over 1000 feet above sea level.

PS Loading a canner is pretty universal. That process is pretty much the same for everything you are going to pressure can except headspace, time and pressure (Your PSI will never change unless you love altitude).

After Processing Your Pressure Canned Green Beans

When time is up, simply turn off the heat and wait about ten minutes. After that you can move your canner off the burner. Some people move it before, some never touch it. It’s up to you. If I’ve got multiple canners going, I will pull mine off the burner.

You MUST let your canner depressurize naturally! This is none negotiable. At best, you will ruin your food. At worst you can warp your canner or blow up your kitchen. Let’s not do that.

Once the pressure lock drops you can remove ONLY the weight. Once the pressure lock drops and you have removed the weight, give it about ten minutes or so and then you should be able to crack the canner open.

There will be steam that comes out so please be careful. Leave the lid on for another ten minutes or so. The other way you can do it is just put your canner off to the side and let it set for about an hour to hour and a half. This should give it plenty of time to depressurize naturally. When in doubt, leave it alone.

Unloading Your Canner

You can then take the lid off and carefully lift out the jars using the jar tongs. Again, be very careful. The contents of the canner and jars are still extremely hot. I put the jars on a folded towel to start to cool. Within 24hrs you will hear the sweet pinging of success! You can test your seal after 24hrs by pressing down on the lid. If there is give, it’s not sealed. If it sealed, you won’t feel or hear anything when you press it.

Anything that is not sealed needs to go into the fridge or be eaten within a couple of days.

Also, please, please, please remove your rings from the jars before storage. Normally, I am very much your kitchen, your rules. But on this one, I’m going to be a little more vocal…. The reason we remove rings from jars is because if that jar becomes unsealed for any reason, you will never know it if the ring is still on. As temperatures change in your storage area, seals can break. As bacterial get in and start growing, it could re-seal itself.

I’ve had a few jars that we forgot to take the ring off of and pulled months later? There was no way to tell that the lid resealed and the food inside looked perfectly fine. But there was a film on the top of the food. So be careful. Was the food safe, maybe? I wasn’t willing to risk it. So do yourself a favor and remove the rings.

But that’s it! You will love your green beans!

If you like the content I put out, feel free to buy us a coffee! It helps keep this site running, marketing and the goats in grain!

Buy me a coffee
Print Recipe
Print

Pressure Canned French Cut Green Beans

The best green beans that you can make and can yourself.
Prep Time6 hours hrs
Active Time2 hours hrs
Total Time8 hours hrs

Equipment

  • 1 Pressure Canner
  • 1 Canning Kit Funnels, Canning Tongs, and Debubbler
  • 1 Green Bean Frencher
  • 2 Cases of Quart Jars You can use pints but get double the amount
  • All Bowls and Stock pots You will probably need every last one by the time this is all said and done

Materials

  • 1 bushel Green Beans

Instructions

  • Snap your green beans by snapping off the top and bottom. Then snap them into desired lengths. I tend to snap mine in 2in sections but it's not a big deal if they are longer or shorter
  • Rinse beans well. I usually have a big stock pot full of water and I just throw the beans into that as I snap
  • Once you are either done snapping or you have filled your first pot, drain the water. Now you will start frenching. If you are using the crank tool then make sure you've got a pot under it. Start feeding your green beans through it.
  • When you arms feel like jello from cranking, take a break and fill up your pressure canner with water to per manufacture instructions. Mine says 3qts.
    Get it on the stove to start boiling.
  • Next start filling your jars with green beans. I tend to pack my jars pretty full. Fill with room temperature water, wipe the rim with a vinegar rag and place a lid and ring on it. Tighten ring to finger tight.
    Set it off to the side
  • Once you have a full canner of jars, gently set the jars into the canner. If the water is already boiling you can secure your canning lid. Follow manufacture instructions on using your canner. Every single one is different.
  • Process for 20 minutes for pints and 25 for quarts at 10# of pressure. Adjust for altitude.
  • When processing is over allow canner to depressurize naturally. This could take a couple hours depending on your model so be prepared.
  • Once canner is cool and safe to open, bring your jars out and allow them to cool. Listen for the ping and check your seals the next morning. Anything that doesn't seal, put in the fridge and eat within a couple of days.

If you like this post, feel free to share it and follow us below on our social media accounts!

  • Facebook
  • Pinterest
  • Instagram
  • YouTube
  • TikTok
  • Spotify
  • Threads

Filed Under: Canning, Canning Recipes, How To's Tagged With: Canning, cooking, green beans, Homestead, kitchen, pressure canning, Recipes

JOIN TO OUR MAILING LIST!

Leave us your email to receive new posts and special offers for members only! Don't miss a thing!

Recent Posts

  • Fall Garden Guide
  • Top Mistakes With Goats
  • How To Bond With Your Goats
  • « Go to Previous Page
  • Page 1
  • Interim pages omitted …
  • Page 3
  • Page 4
  • Page 5
  • Page 6
  • Page 7
  • Interim pages omitted …
  • Page 13
  • Go to Next Page »

Primary Sidebar

WELCOME

WELCOME

My name is Leigh and I am the lead chaos creator here at Steel Raven Farms. You will see throughout this blog that I am the crazy goat lady.

I am married to my high school sweetheart, Jared and we have two amazing boys.

FOLLOW ME

  • Amazon
  • Facebook
  • Instagram
  • Pinterest
  • TikTok

GET UPDATES!

Leave us your email to receive new posts and special offers for members only! Don't miss a thing!

In all the years that I’ve been growing a garden, the fall garden has steadily remained my favorite. Which is funny because I don’t really like any of the brassicas, which is what most people know the fall garden for. I prefer the root vegetables and cool air. But I have learned over the years…

Read More

  • Animals
    • Chickens
    • Farm Dogs
    • Goats
  • Garden
    • Compost
    • Garden Projects
    • Seeds and Plants
    • Garden Journal
    • Working With Food
      • Recipes
      • Freezing Foods
      • Dehydrating Foods
      • Canning Tips And Tricks
        • Canning Inventory Sheets
  • Helpful Info
    • Welcome to the Homestead!
    • Emergency Preparedness
    • Frequently Asked Questions
    • Goal Setting
    • Project List
    • Shop Digital Products
      • Hay Calculator
      • Farm Expense And Income Tracker
      • Goat Crash Course: 101
      • Garden Journal Prompts
      • Schedule C Tracker
      • Schedule C Tracker
      • The Homestead Bundle
  • The Truths
  • Episode List
  • Start Here
    • Privacy Policy
    • Affiliate Disclosure
    • Let’s Get in Touch
    • Members Only Library
    • Welcome To Our Homestead

Footer

  • Email
  • Facebook
  • Instagram
  • Pinterest

COME AND GET IT!

Leave us your email to receive new posts and special offers for members only! Don't miss a thing!

· Midnight Theme

Copyright © 2026 · Midnight Theme on Genesis Framework · WordPress · Log in