• Skip to primary navigation
  • Skip to main content
  • Skip to footer

Steel Raven Farms

Where muck boots meet ground.

  • Animals
    • Chickens
    • Farm Dogs
    • Goats
  • Garden
    • Compost
    • Garden Projects
    • Seeds and Plants
    • Garden Journal
    • Working With Food
      • Recipes
      • Freezing Foods
      • Dehydrating Foods
      • Canning Tips And Tricks
        • Canning Inventory Sheets
  • Helpful Info
    • Welcome to the Homestead!
    • Emergency Preparedness
    • Frequently Asked Questions
    • Goal Setting
    • Project List
    • Shop Digital Products
      • Hay Calculator
      • Farm Expense And Income Tracker
      • Goat Crash Course: 101
      • Garden Journal Prompts
      • Schedule C Tracker
      • Schedule C Tracker
      • The Homestead Bundle
  • The Truths
  • Episode List
  • Start Here
    • Privacy Policy
    • Affiliate Disclosure
    • Let’s Get in Touch
    • Members Only Library
    • Welcome To Our Homestead

How To's

How To Keep Livestock Warm In Winter

December 3, 2024 by Leigh Leave a Comment

As I write this post, it is 12/2/2024 and it is 75* outside. While we live in a pretty mild winter climate here in Georgia, we do have some pretty cool/ cold weather. We’re not talking about -50 temperatures here. But we, and our animals, are not used to severe winter weather. Instead, we have hot/humid summers. No matter where you live, when it comes to taking care of livestock in the winter, there are a lot of things that you can do to help keep livestock warm in winter.
Before we get too far into this, I have a great course on the basics of goat care. I call it Goat Crash Course: Goat 101. In this course, I explain things like types of shelter, types of feeds and hays, basic assessments and so much more! Check it out!

Buy Now

Keeping Livestock Warm

There are a lot of different variables to consider before you just dump a load of pine shavings into their shelter and call it a day. You need to consider your climate, animals, and resources before you just start throwing options out there to see what sticks. If you live in an area that rains a lot but doesn’t get too cold, you may not need to worry so much about deep litter bedding and may need to focus more on where the shelter is located. If you live in a snow drift, maybe having a good barn or deep litter is the right way for you.

I’m going to go through all the considerations that you should consider before you pick a method. At the bottom of this post, I’ll go through all the different methods you can use to help keep your livestock warm in winter.

Logo 468x60

Climate

Where you live will ultimately depend on how much you have to do to keep livestock warm. If you live in the far north, you may need deep bedding, water bucket warmers, and draft free shelters. In the south, you can get away with a three sided shelter and hammer to break ice.

We live in the Northeast Georgia Mountains, basically the foothills of the Appalachian Mountains. Our summers are hot and humid, but our winters are pretty mild. Occasionally, we get snow but more often than not we get ice storms. Our winters tend to be very wet, too. That being said, we don’t REALLY need to operate with a deep litter method but we do anyways. Mainly because I want the compost I get out of it…. And my animals are spoiled.

Animals

Something that you need to consider is that the vast majority of animals do not require all the things we think they do when it comes to keeping them warm. They have great winter coats that will keep them nice and toasty warm. I talked in depth about body condition of goats in this post, but I want to further that. If your animal has good body condition, a healthy coat, and good food? They don’t need coats, blankets, or other methods to keep them warm in the winter.

In fact, most livestock don’t really need anything until the temperatures are steadily below 40*. Of course this assumes that they have good body condition, aren’t sick, etc. The key here is shelter and body condition.

Resources

The resources you may need; barns/shelters, heated waterers, pine shavings, etc are really all going to depend on what methods you decide work for you and your animals. Because not one size will fit all when it comes to your herd.

Methods To Keep Livestock Warm

Before you go dump resources, let’s talk about some situations and options.

You live in Illinois. Your average winter is 36in of snow fall and 27*. If you have one goat, one pig and a couple of chickens. You are probably going to want to consider a barn and the deep litter method. But if you’ve got 5 pigs and a couple of chickens, you could feasibly just have a good layer of straw or pine shavings and a 3 sided shelter.

You live in Maine. Your average snow fall is about 20ish inches and temperature is roughly 3*. But you live on the coast and it’s windy. You probably need a barn if you only have a few animals. If you have multiple of the same species, you could get away with only having a three sided structure.

Why? Well, when you have multiple of the same species, they will cuddle together to stay warm. If you only have a few of each kind, they may not snuggle up and that can cause their body temperatures to drop.

Finally, you live in Georgia. Your average snow fall is 1in a year (if your lucky) and temperature is 40*. But it’s Georgia so you may end up in a freak hurricane, tornado and snow storm in the same week. You’ve got one of a couple different types of animals. You could get away with a dog igloo and some straw. Literally. It doesn’t matter if you have 100 animals. Get more dog igloos. It’ll be cheaper.

Things You Can Do To Keep Them Warm

Deep Litter– This is probably my favorite during the winter but most hated chore in the spring. With a deep litter method, you pretty much dump a new bag of pine shavings or straw on top of the old bedding. Some people will spot clean the urine and feces, but we don’t. As the shavings, feces and urine break down (compost), it will create more heat for the goats. This method works well for us because we don’t have to worry as much if a goat gets “left out” by the other goats. Unfortunately, come spring, this is a monster chore.

Heaters– I’m not a fan of heaters in a barn because of the fire hazard. BUT sometimes they are necessary. Whether it’s small kids, piglets, or a really cold night, you do what you gotta do. I really like this one. The fire hazard is greatly reduced. Another option is to have all of your animals together in a barn. They can have their own separate areas but the more animals together, the more heat they will all produce.

Feed– This is a big one for ruminants, but all mammals create heat by digesting food. That being said, during the summer we don’t keep food in the barn. In the winter, they get a full bag of hay every night. If they eat it, they stay warm. If they spill it? They still stay warm with the bedding. Our animals have pretty much unlimited access to food during winter. While that may seem counter productive, especially when feed may be hard to come by, it will help ensure they survive the winter.

The Hay Calculator:

If you aren’t math-y (don’t worry I’m not either), check out our Hay Calculator. It literally does ALL of the math for you and gives you totals based on what you want your goals.

On the second page, you can track where you’ve bought hay, what you spent and how long it lasted.

Buy the Hay Calculator

Drafts/ Wind– If you are putting them in a three sided shelter, make sure that the wind can’t get in. Since most winter winds come from the north, make sure to face the opening to the south. But make sure to check your area and see which direction the wind comes from.

For drafts, this is similar to the winds, but a little different. We want airflow in the barn but not so much that it creates cold spots that the animals have to heat up. The best way to do this is to have south opening “vents”. On our barn, we just cut the T1-11 so that top was open on the south side.

Reducing Moisture– Hypothermia is a thing. We learned in childhood that after a day of playing in the snow or rain, we needed to come inside, take off our wet clothes and get warmed up. Well, it’s similar with livestock, except they can’t take off their clothes. We want to keep moisture reduced as much as possible. To do this, we make sure roofs don’t leak, rain can’t come in, and the ground is dry. The deep litter method can come in here because you can add bedding to the areas that are wet to help absorb them.

Maintaining Good Body Condition– I cannot stress this enough! If you are growing animals for meat, or you’ve got pregnant or lactating animals, you HAVE TO maintain good body condition. If your animal does not have good body condition going into winter, they will not be able to stay warm. We almost lost Champ this past winter due to poor body condition AND being pregnant. Everything she ate went to keeping herself warm and her babies alive.

Thankfully, everyone pulled through (except two still born kids). This year we have been on top of their feed and body conditions and hopefully, this won’t be a problem. If you are raising meat animals, it’s the same thing, if they are not fed enough they will lose their conditioning and they will eat to stay warm vs eat to get to market weight.

Save on Seeds

Heading Into Winter

Winter is a time to sit back, relax and enjoy your bounty from the year. It’s also a time for planning for next year. There are chores to do, but as a whole winter is a resting season. If you can prepare now, before it’s too cold, you will find yourself and your animals will be able to rest as well.

If you like the content I put out, feel free to buy us a coffee! It helps keep this site running, marketing and the goats in grain!

Buy me a coffee

If you like this post, feel free to share it and follow us below on our social media accounts!

  • Facebook
  • Pinterest
  • Instagram
  • YouTube
  • TikTok
  • Spotify
  • Threads

Filed Under: Animals, Chickens, Goats, How To's, Pigs Tagged With: Chickens, Chicks, Goats, Homestead

JOIN TO OUR MAILING LIST!

Leave us your email to receive new posts and special offers for members only! Don't miss a thing!

Recent Posts

  • Fall Garden Guide
  • Top Mistakes With Goats
  • How To Bond With Your Goats

Why Is My Goat So Skinny

November 23, 2024 by Leigh Leave a Comment

When you have been raised around dogs and cats, you know when they are a little….chunky and you know when they are too skinny. But what happens when you are new to goats and have absolutely no idea what a goat should look like? Are you asking yourself why is my goat so skinny? Let’s talk about how to judge the body condition of a goat.

Before we get too far into this, I have a great course on the basics of goat care. I call it Goat Crash Course: Goat 101. In this course, I explain things like types of shelter, types of feeds and hays, basic assessments and so much more! Check it out!

Buy Now

Why Is My Goat So Skinny?

If you are new to the world of livestock, this is a very common question. If you have never had a ruminant, you will ask yourself this question 9283947239487239 times in the first year. The biggest thing you have to remember is that the body condition of cows, sheep and goats are totally different than a dog or cat. And if you’re anything like my family, the way we show our animals love is to feed them….a lot.

Champion

When we first got Champ, we noticed that she seemed a little skinny. Nothing terrible, but we didn’t know a whole lot about goats. From September through November, we realized that her body condition wasn’t fantastic, but she was eating and happy. Then in December through February, we got really excited because she was starting to get pretty chunky. We were over the moon because she was so thin when we went into winter, we were worried she may not have enough fat stores. Come March, we realized we had a really big problem.

Tractor Supply

She Wasn’t Chunky, She Was Pregnant

As someone who takes pride in my knowledge of animals, it was absolutely shocking when we figured out that she wasn’t chunky, she was pregnant. All that weight we thought she was gaining, turned out to be babies. When the babies dropped, we discovered that she was skin and bones. I felt terrible. We were told via the Vet and ultrasound, that she wasn’t pregnant. So we didn’t increase her feed. She had access to quality hay and occasionally grain, but nothing else. My poor girl had almost zero fat stores.

You can see her spine, the hollow between her rib and hips. Her body condition was about a 1.5-2.0

I recently uploaded this podcast about her death.

While I am incredibly grateful that she pulled through, it was really close. I refuse to allow any animal of mine to suffer due to my lack of education. We had already lost enough animals to that. I started devouring all the information on grain, pelleted grasses, hays, and other feeds that I could get my hands on. But one thing that “eluded” me was how to tell if your goat is fat or skinny.

Livestock Are Not Like Pets

Chances are, you have had a dog or a cat. When they are skinny, you can tell pretty easily. Same thing if they are carrying a little extra weight. And it’s almost always seen in their waist first. With livestock, specifically ruminants, that is not the case.

goat kidding

Before we get too far into this, I have a great course on the basics of goat care. I call it Goat Crash Course: Goat 101. In this course, I explain things like types of shelter, types of feeds and hays, basic assessments and so much more! Check it out!

Buy Now

Because of how a ruminants abdomen is set up, they don’t necessarily have a true waist like a dog. So to use that as a determining factor isn’t really going to work. Instead, you need to FEEL their “fat pads”. What that means is that you cannot correctly and adequately judge the body condition of a goat based solely on the way they look.

Logo 468x60

If you heard someone say “That animal has a little too much condition” and you were totally confused what they meant? They are saying that animal has too much fat. Sorry.

So What Is Body Condition Of A Goat

Body condition is simply the fat covering the body of an animal. The reason that this is so important is because it gives the farmer the ability to judge how much energy/fat reserves the animal has. The good thing is that there is a scale that you can use to figure out what body condition your animal has, and what you can do about it.

Areas To Check

There are three areas that you want feel on your goat. It’s important to remember that you are not trying to feel the bone, instead you are gently pressing to feel the layer of fat between the bone and the skin. It can take some practice. When going through the scale below, remember that pressure is minimal. If you are using a lot of pressure, you will not feel the fat layer. You will only feel the bone. If you think your goat is a 5.0, you are still not cramming down on the bony areas you are feeling. It’s still small amounts of pressure because what you are trying to feeling for that fat pad.

  1. Spine- You should feel the bony ridge on either side of the spine (technically it’s all the spine)
  2. Ribs- You should feel the space in between the ribs
  3. Sternum- You should feel the plate between the front legs on the chest

Tractor Supply

The Body Condition Scale

The biggest thing to remember is that this scale is a management tool just like the FAMACHA score cards. It is not an end all be all. Nor can you simply say, she’s skinny and needs more groceries. Unfortunately, it doesn’t work like that, and I explain more below.

The scale starts at 1.0 and goes to 5.0 and goes up in .5 increments. Where do you want your goat to live on the scale? We like our goats between 3.0 to 4.0. But depending on the circumstances we are okay with a 2.5.

Our herd health bundle helps you keep track of your herd’s health. Includes the goat assessment, herd check sheets AND Herd Health Tracker!

Buy Now

What Is The Scale?

Photo from Link (1.0)

1.0– Goat is going to be absolutely no fat on ANY of the three areas you check. You can see and feel the individual bones of the spine, spaces between ribs, and chest plate. These goats are extremely sick and unless turned around quickly, are probably going to die. Common causes is going to be poor husbandry, malnutrition, parasites and possibly diseases.

2.0-This goat has little to no fat along the spine. You can see ribs and there is some fat between the ribs but not a lot. Like a 1.0, there is a noticeable hollow between the hip bones and ribs.

3.0– Goats at a 3.0 should have a visible ridge on their spine but when it’s touched, there should be little give with the fat. You should be able to barely feel the ribs and should not be able to feel in between the ribs without some pressure. The chest plate should be padded.

Pic from Link (4.0)

4.0– This goat should be a chunk. You should not be able to see the top ridge of the spine and when you feel it, should not be able to feel without a fair amount of pressure. There should be no discernable difference in the ribs without considerable pressure. The fat on the chest plate should move.

5.0– This is a super chunk. This goat needs LESS groceries, despite what it tells you. There is absolutely no way to visibly decern the spine, ribs or chest plate. When you feel, you will not feel bones without A LOT of pressure.

What To Do With The Information From The Scale

I know, it’s a lot to unpack, but stick with me here. Above I said that the body condition score and the FAMACHA score are management tools, right? Ok, this is why it’s a management tool.

If you have a goat that is a 1.0-2.0, they are pretty thin and need to be evaluated for parasites, disease, pregnancy and husbandry. Remember, I screwed up husbandry, too, so don’t get upset here. But we need to figure out why. If the fecal is clear and you or your vet can’t find a reason for the goat to be skinny, give it some more food. Start small and go from there. If the fecal isn’t clear, start a worming protocol that you find effective. Don’t have a worming protocol? Talk to a vet. If you don’t have a Caprine vet, get on Facebook and go to Goat Emergency Team or Successful Goating With Rosie. I swear those two groups have saved my goats more often than I care to admit.

If you have a 3.0-4.0, keep doing what you’re doing but monitor closely for changes. Do they gain weight? Back off the feed. If they lose weight, get a fecal and up the feed.

5.0? Back off the groceries but also check for pregnancy for does. Bucks are almost always a feed issue, but could be something else.

But if you have a goat that has clear fecals, good FAMACHA, no illness, no pregnancy, but you can’t get it to gain weight? You may just have a thin goat. Monitor this goat closely for rapid declines. Champ is a thin goat. We can get her to a 3.0 and she will slide back to a 2.0-2.5 for no reason. Her fecals are clear, FAMACHA is good, and vet clears her health wise. We just roll with it and keep an eye on her. Not that she would let us ignore her. EVER.

My Favorite Girl

Why Is My Goat So Skinny?

There are a lot of reasons for your goat to be skinny. My first question is always, is she really skinny? If you are brand new to goats, you may think she’s skinny and she’s perfectly fine. Use the chart above to figure out if she’s skinny or just right.

Our herd health bundle helps you keep track of your herd’s health. Includes the goat assessment, herd check sheets AND Herd Health Tracker!

Buy Now

Another reason your goat may be skinny is a high parasite load. Most vets can run a fecal for around $25, depending on your area. Or you can reach out to an independent lab. Meadow Mist is a great one. Last I heard, they do their fecals for $6 each. If they have a high parasite load, treat and then revaluate.

Lastly, she could be pregnant or sick. If you can, have her evaluated by a vet to rule out any possible illnesses. If she was possibly bred, have a pregnancy test done. She may not be getting enough to sustain her and the babies.

I hope this helps you figure out what to do in terms of management with your goats. Goats try to un-alive themselves constantly. So staying on top of their care is really important.

Don’t forget to check out the crash course below

Before we get too far into this, I have a great course on the basics of goat care. I call it Goat Crash Course: Goat 101. In this course, I explain things like types of shelter, types of feeds and hays, basic assessments and so much more! Check it out!

Buy Now

If you like the content I put out, feel free to buy us a coffee! It helps keep this site running, marketing and the goats in grain!

Buy me a coffee

If you like this post, feel free to share it and follow us below on our social media accounts!

  • Facebook
  • Pinterest
  • Instagram
  • YouTube
  • TikTok
  • Spotify
  • Threads

Filed Under: Animals, Breeding, Goats, How To's Tagged With: Goats, Homestead

JOIN TO OUR MAILING LIST!

Leave us your email to receive new posts and special offers for members only! Don't miss a thing!

Recent Posts

  • Fall Garden Guide
  • Top Mistakes With Goats
  • How To Bond With Your Goats

Homestead Infrastructure

November 2, 2024 by Leigh Leave a Comment

Over the last several weeks, Jared and I have been going through our budget and project list for 2023. We decided that this year, we were really going to focus on the infrastructure of the homestead. I knew we couldn’t be the only one, so I wanted to put together a post on homestead infrastructure and what it means.

The Ultimate Homesteader’s Starter Bundle – Only $47!

Get the tools you need to stay organized, track profits, and manage your homestead with ease!

Includes:
✅ Schedule F Tracker – Simplify tax prep
✅ Profit Calculator – Track earnings
✅ Hay Calculator – Plan livestock feed
✅ Garden Journal – Digital & printable
✅ Herd Health Tracker – Monitor animal care
✅ Simple Budget – Manage finances
✅ Backyard Homestead eBook – Essential tips

$99 value – now just $47! Start your homesteading journey today!

Buy Now

Every homestead is different, so every infrastructure plan is going to be different. But I wanted to go through our list of homestead infrastructure with you so that you can get some ideas on what you want to do with your own homestead infrastructure and why. If you have your own ideas, please list them in the comments below!

What Is Homestead Infrastructure

The first thing we need to do is define infrastructure: “the basic physical and organizational structures and facilities (e.g. buildings, roads, power supplies) needed for the operation of a society or enterprise.”(Dictonary.com).

But what does that mean for a homestead? We aren’t necessarily operating as a society, community or enterprise. We are also not necessarily building roads, grids, or buildings on a large scale. But that doesn’t mean that the same idea doesn’t work.

When I talk about homestead infrastructure, I’m talking about barns, sheds, and other outbuildings. I’m also talking about fencing, pastures and gardens. It comes inside the house in the form of canning, storage, freezers, and energy efficiency. As your coming up with ideas on what your infrastructure will be, think about all the things in your local community.

Grocery stores= garden, fruit trees, canning

Milk, cheese, butter, eggs and meat= cows, pigs, goats, chickens

Roads= Trails or walk ways to barns, livestock pens, gardens, etc

Grids like water, electric, gas= wells, solar, firewood

Schools, community center, grocery store= home

By setting up your own infrastructure, you are going to prepare yourself, family and homestead for future success. Also remember, if you can’t do something like build a barn or put in an acre garden, that’s okay too. Just work on the things you can do.

Logo 468x60

Why Infrastructure Is Important

When you are setting up your homestead, it is incredibly easy to get overwhelmed with the things you want to do or think you should do. I wrote a couple blog posts about setting goals, mistakes we’ve made, and things we have learned, but the biggest take away is that you need to know what you want, and how to get there.

Infrastructure on your homestead is so easily overlooked because you think you’re doing it with every project you do. But if you really stop and think about it, are you actually setting up something that is going to last for years to come, or are you simply reacting to the things you think you should be doing?

For example:

We bought goats on an impulse. Then as we bought more goats and as winter was barreling down on us, we decided to build a goat barn. They say hindsight is 20/20, and they are right. That first barn kind of works but is also kind of a disaster. Does it keep them dry? Sorta. Does it keep them warm? Yes. Will it keep predators out? Uh, maybe?

The barn is built right in a rain run off area. When we built it, we had no idea. But now it’s becoming an issue with all the summer rains we have gotten. The entire thing has about 2 inches of muck building up the sides, there are leaks in the roof and the “ventilation” we thought was a great idea? Not so much.

That being said, the infrastructure we put in? Isn’t working. That’s okay-ish. It’s a learning experience. But it’s also expensive.

Had we planned our infrastructure better it would save us money, time and a ton of frustration. That’s why it’s so important. But the learning part? That’s important, too.

Setting Up Your Homestead Infrastructure

For the planners, this is the best step. If you’re a do-er, find yourself a planner. I say that because I am a planner and I have about a million lists floating around for different projects and plans. In fact, I have a “hard copy” of my Pinterest in a 3″ binder. Jared is a do-er. He has zero desire to plan and that is just fine.

Our list of infrastructure is five pages typed and while yours doesn’t have to be that long, it does need to be that thorough. What does it need to have on it? Check out the example below:

Project: Goat Barn

Dimensions or Specs: Current: 8×13, Increase to 12×16. Current “milking area” will turn into a weaning pen and new milk parlor and kidding space created. Door from inner barn to milking area to avoid having to haul goats outside to be milked. Inner barn area will be increase to 8×10 minimum. Storage area in kidding/milking area for milking supplies. Bedding racks to get them off the ground. Gutters to IBC’s to help with water.

Resources On Hand: current barn will be torn apart, bleached/cleaned and painted. Materials that are reusable will be reused.

Resources Needed: t1-11, studs, paint, new hardware, more roofing, plywood or similar for bedding racks, screws, concrete pavers to get wood off the ground and possibly gravel in barn and in dry lot that will be created around the barn

Plan of Action: Jared and I will build a couple new goat shacks so the girls can have a place to go for the days that their barn will be moved. Barn will be torn down, cleaned and painted. New area for barn will be cleared and leveled. Water run off trenches will be “installed” to divert water from barn. Pavers placed and walls built. Interior built and painted. Pavers for milking area. Gravel, if decided, will go into inner barn, weaning area and dry lot.

Estimated cost: $1000

Homestead Infrastructure Ideas

Below are just a few of the things on our infrastructure list and each one has it’s own Project Planning Worksheet in my binder

  • IBC’s for firewood and water
  • Fencing for new livestock
  • Meat animals
  • Fence in Upper Garden
  • Goat Barn
  • Firewood/wood lot
  • Energy Efficiency
  • Yard hydrants
  • Solar panels
  • Generator
  • Hay Barn
  • Outdoor kitchen/ butchering area
  • Erosion control
  • Food Storage Room
  • Well Bladder
  • Attic Gables

Before you get overwhelmed, remember, this is MY entire 2023 focus. Paralysis by analysis is a thing and you don’t need to get overwhelmed. Make a list and see what you can do. See what it’s going to take for you to do those things. Then get to work.

If you like the content I put out, feel free to buy us a coffee! It helps keep this site running, marketing and the goats in grain!

Buy me a coffee

If you like this post, feel free to share it and follow us below on our social media accounts!

  • Facebook
  • Pinterest
  • Instagram
  • YouTube
  • TikTok
  • Spotify
  • Threads

Filed Under: Animals, Canning, Chickens, Garden, Goats, How To's, Our Homestead, Pigs

JOIN TO OUR MAILING LIST!

Leave us your email to receive new posts and special offers for members only! Don't miss a thing!

Recent Posts

  • Fall Garden Guide
  • Top Mistakes With Goats
  • How To Bond With Your Goats

Prepping Firewood For Winter

October 29, 2024 by Leigh Leave a Comment

If you heat with firewood, you know the drill because every year it’s the same. But for those that are new to heating with firewood, I wanted to get you ahead of the game. It’s not as easy as lighting a fire and going about your business. There is a lot of time, energy and muscle that goes into heating with firewood. I spoke about it a lot in this post. It’s also not a winter only thing. But by prepping firewood for winter now, or even earlier, you will be warm and cozy.

If you are new to heating with firewood and are looking to master the finer points of it. We’ve got a great eBook that goes in depth of what tools you should consider, how and where to stack, how to build a fire and so much more!

Buy Now

How to start prepping firewood for winter

Every year is the same for us, we pick out trees in the spring/ early summer that need to come down because they are dead or dying. Then Jared takes them down and turns them into rounds. We haul the rounds to our woodlot at the back of the property to be split. Then they season until they are ready or needed. But there are a couple things that you should take into account when prepping firewood for winter. Things like location, stacking, tools and types of wood.

Location

The first step is to locate an outside space that is about 20-30 feet from your home, with good drainage, sunlight, and airflow.

You don’t want your firewood pile to be too close to the house because of bugs. But you also don’t want it too far away because a hike through the woods in a blizzard is no fun. I have found that the sweet spot is usually about 20-30 feet. If you have the ability to put it next to concrete, like a driveway? That helps too because there is now a physical barrier between your wood pile and home.

Drainage is another thing to consider when looking for a spot for your wood pile. You want to make sure that you have adequate drainage so that your wood pile isn’t sitting in a puddle of water after a hard rain. Our farm is mostly hills so finding a spot that will drain water away from the pile but was still close was a chore. Also we have our wood pile up on pallets and this helps keep it off the ground but cinderblocks work just as well.

Lastly, you want to consider the amount of sunlight that will reach your wood pile. Ideally, you will have your pile in a sunny location that is semi protected from the rain and with good airflow. Without airflow and sun, your wood pile will take forever to dry. This late in the game (September) you need all the help you can get.

PS don’t tarp your wood pile! I KNOW it’s tempting. But if you tarp it there will not be enough airflow to dry out the wood. Condensation will build under the tarp and keep things damp. If you will remember to take it off after a storm? Sure, you can tarp it. But don’t leave it on there.

Stacking Firewood

If you ask my boys how to stack firewood, they’ll tell you, “In a pile?”

Save on Seeds

But there is more to it than that, and they know it, too. The biggest thing to remember when stacking firewood is to get it up off the ground and to stack bark side up. I’m sure we know why stacking on the ground is bad but indulge me as I explain it to those who may not know.

When you stack firewood straight on the ground you are going to introduce a ton of moisture to the wood. Not only from the ground, but also when it rains the water will hit the ground and splash up. Or if that bottom row stays damp, that moisture will travel through that wood, if only because it can’t dry, and not allow the next row to dry. That goes directly against what we are trying to do, right? We want the wood to be dry and free of rot before we put it in our fireplace, insert or stove.

By keeping firewood off the ground, we are also increasing airflow. If air can move under the wood, it will dry faster. But the most important? All that hard work of cutting, chopping, stacking, etc will be for not, if it rots.

The other part of stacking is keeping the bark side up. Obviously, sometimes you can’t and that’s okay. But keeping the bark side up will allow water to roll off and not absorb into the wood. A moisture meter will be your best friend when it comes to checking if your wood is dry enough to burn. Usually you want about 20% moisture or less.

Lastly, stacking in a # way is unnecessary unless you are trying to dry wood faster. Those stacks are easily knocked over and having to restack firewood is not on my list of good times.

Tools for prepping firewood for winter

Table Grinder– Sharpening your axe or other tools is a great way to extend their life.

Axe- A good axe will get you far with chopping firewood. We use a log splitter for the most part but we will also use an axe.

Hatchet– We use ours to help chop kindling and other smaller pieces that the axe is simply too big for.

Gas powered log splitter- We will be getting this log splitter here in a few months. The electric one works, but a gas one is a lot stronger.

Tractor Supply

Electric log splitter– This guy is a work horse. I really like using him but the downside is that we can only go so far with an extension cord. It also doesn’t have a ton of muscle to drive through some of the larger or wetter pieces of wood. BUT I would absolutely buy this one again. It has been worth every single penny.

If you are new to heating with firewood and are looking to master the finer points of it. We’ve got a great eBook that goes in depth of what tools you should consider, how and where to stack, how to build a fire and so much more!

Buy Now

Moisture Meter– As I said above, you will want to check the moisture of your wood to make sure it is drying. We’ve got this one and another brand and it has done well for us.

Types Of Wood

First and foremost, any wood is good wood when you are cold. BUT, there are dangers to using certain woods or green wood. Creosote is a thing and it’s pretty dangerous. So let’s talk about types of woods to use.

Hard woods like maple, ash, birch, oak and walnut are great for burning hotter longer. They also don’t produce a ton of smoke.

Tractor Supply

Soft woods like pine, fir, and cedar are okay and can be used but they don’t burn as hot and will usually be gone quickly.

Green woods are what are really bad for your stove, fireplace or chimney. Green wood produces a ton of creosote and smoke.

If you would like a copy of my firewood eBook, you can order it here!

If you like the content I put out, feel free to buy us a coffee! It helps keep this site running, marketing and the goats in grain!

Buy me a coffee

If you like this post, feel free to share it and follow us below on our social media accounts!

  • Facebook
  • Pinterest
  • Instagram
  • YouTube
  • TikTok
  • Spotify
  • Threads

Filed Under: How To's, Our Homestead

JOIN TO OUR MAILING LIST!

Leave us your email to receive new posts and special offers for members only! Don't miss a thing!

Recent Posts

  • Fall Garden Guide
  • Top Mistakes With Goats
  • How To Bond With Your Goats

Our Homestead Buying Guide

October 26, 2024 by Leigh Leave a Comment

I’ve been getting asked a lot, “Where do you buy x?” So I figured I would take the time to list out where we buy the stuff for our goats, chickens, canning, seeds, garden stuff, and other odds and ends that we have used and really like. This is a VERY link heavy post, so here is our affiliate disclosure again. It doesn’t cost you a penny, but it does help us here on the homestead. The other thing is that I am not going to push you to buy anything that we have not already bought, tested and liked/loved. You don’t need that and to be honest, that’s not who I am. Here is the Homestead Buying Guide.

The Ultimate Homesteader’s Starter Bundle – Only $47!

Get the tools you need to stay organized, track profits, and manage your homestead with ease!

Includes:
✅ Schedule F Tracker – Simplify tax prep
✅ Profit Calculator – Track earnings
✅ Hay Calculator – Plan livestock feed
✅ Garden Journal – Digital & printable
✅ Herd Health Tracker – Monitor animal care
✅ Simple Budget – Manage finances
✅ Backyard Homestead eBook – Essential tips

$99 value – now just $47! Start your homesteading journey today!

Buy Now

PS: if you don’t have a Honey account and you shop online a ton, I highly suggest you download it. You can use my code here. They are great because it can automatically search for coupon codes and you earn cash back on purchases. I’ve earned $300 in the last year. It’s worth the minimal effort AND you can add items to your honey list which will tell you when prices have dropped or if it’s at the lowest price.

Livestock

Goats

You can read any of my posts involving my goats here.

goat kidding

Before we get too far into this, I have a great course on the basics of goat care. I call it Goat Crash Course: Goat 101. In this course, I explain things like types of shelter, types of feeds and hays, basic assessments and so much more! Check it out!

Buy Now

We get most of our goat gear from Tractor Supply. Their prices can be higher than a local feed store on some things but cheaper on others. For example; my local feed store has alfalfa pellets for $17.99/ 50# bag. Tractor supply has theirs for $19.99 as of this writing.

Buckets– We get these for feed, water, and so many other things. They are really useful.

Troughs- We use two different kinds. This one is the one we hang on the fence at different points to give them feed, alfalfa, or whatever else. We use this one for portability or if we are hanging a temporary feeder in a kidding pen for them.

Balling Gun– This helps us get pills down into the goats without having to worry about getting bitten. Yes, that happens a lot.

Tractor Supply

Hoof Trimmers- We’ve bought two of these, and I’m a fan of this one. It just seems sturdier and I like it better. BUT this one from TSC is fine too. It’s not that I don’t like it per se, I just prefer the orange one. If you’ve got some money to spend, I would HIGHLY suggest the Hoof Boss. I’ve seen it used and it does a fantastic job. It is on our wish list of things to buy.

Meds- Now, I’m going to say this. We treat a lot of aliments on our homestead. But we also have an amazing vet that we can call any time… almost. But having a few meds on hand is going to save you a ton of heartache. Meds to get from a vet: Thiamine, Banamine and a good antibiotic. Things to have on hand that you can get from a feed store: Red Cell, Probiotics, Safeguard or Cydectin (or your choice of dewormer), electrolytes, Iron, B-complex, and Copper Wire Bolus. On the copper wire, make sure you get kids or adults based on what you have.

Chickens

You can read about how we brood chickens here. The list below are links to the items we have bought.

Incubator- We use this one and have had great success with it. The only thing I don’t like is the size. I wish it were bigger but beggar and choosers.

Brooder lights- We have used CHE’s like this one, but it can cause the chickens to attack other chickens. So a red light and housing is what you really need. We also use pine shavings for bedding for both the goats and the chickens.

Tractor Supply

Feed- When we have chicks, we start them on a medicated feed. This helps with cocci and other harmful organisms. Remember, you really only need a week or two worth of this feed. What we do is feed approximately 1#/ chick. If you have two chicks, you would need 2#, if you have 50 you need 50#. This is not perfect, it’s really a guess. When we do our meat chickens, we buy one bag of medicated chick start and than it’s regular chick feed after that.

Feeders/waterers- We use this feeder when they are little, and this one when they are bigger. However! If you’ve got some money to spend or you are only interested in buying one thing, this is the feeder you need. I love it! AND we can hang it, which really does decrease the mess. It also works fantastic with the ducklings.

When chicks are little, they need a ton of water, but they are also extremely messy. So finding one that isn’t going to make a mess but also be easy to fill has been difficult. This waterer is good, not great, but it will get the job done when they are little. As they get bigger, we use this one. We found that the metal ones did not hold up well at all. If you have a waterer you love, let me know in the comments.

House Supplies

Canning

Alright! I’ve been waiting to do this one!

Canners- This is my water bath canner and this is my pressure canner. I’ve got two of the presto pressure canners and I love them. One of these days, I am going to get this mack daddy. I can process 19 quarts a time. Which replaces BOTH of my other canners. The price tag is steep at around $500 but it’s got a life time warranty and it’s worth every penny.

Logo 468x60

Jars- All I’m going to say is this: when you think you have enough, double it. Then double it again. Here’s why. I have over a thousand jars. When I can, I can for an entire year. So when I am figuring out how many jars of tomato sauce I need for the year, it’s not a couple dozen. I can 104+ quart jars. When I can green beans, it’s not a couple pints. It’s 146+ quarts and 146+ pints. Same with corn. Soups and stews is another big ticket item in my house. We are talking 200 quarts and 200 pints-ish. Sometimes it’s more. That’s already 600 quart jars that I need. So while you may not need that many, be prepared that you will need more than you think.

Funnels- Yall, you will never, and I mean never have enough funnels. I love the metal funnels and I have at least 6 of them. Make sure to get wide mouth and regular!

Jar grabby things- Get a bunch of these too. You will lose them or the handles will break while you are mid canning.

https://www.wickedgoodcupcakes.com/shop-online/thinking-of-you-boxes

Books- Canning cookbooks are some of the best investments that you can make. This book is hands down the best period. Buy it. She’s got a ton of amazing soups in there and they are divine. This is another really good one with some great recipes. If you are new to canning, I will recommend getting a Ball Book. There is a ton of great information in them. BUT after you get some experience, or after doing your own research, take it with a grain of salt. Some of the recipes are extremely convoluted and contradictory. Lastly, I’m not a Prepper, per se. BUT I do put up my own food because after the pandemic, I realized that relying on the grocery store isn’t a super smart idea. That being said, this book has some great recipes, ideas, and more for being self reliant.

Check back for more items as we find them and add them to the list!

If you like this post, feel free to share it and follow us below on our social media accounts!

  • Facebook
  • Pinterest
  • Instagram
  • YouTube
  • TikTok
  • Spotify
  • Threads

Filed Under: Animals, Canning, Chickens, Goats, How To's, Our Homestead, Pigs, Projects Tagged With: Canning, cast iron, Chickens, Chicks, cooking, Eggs, Goats, Homestead, kitchen

JOIN TO OUR MAILING LIST!

Leave us your email to receive new posts and special offers for members only! Don't miss a thing!

Recent Posts

  • Fall Garden Guide
  • Top Mistakes With Goats
  • How To Bond With Your Goats

How To Start Canning

October 22, 2024 by Leigh 1 Comment

Y’all! It’s canning season! I am beyond excited! Over the next few months I will be sharing with you ALL (okay, most) of the canning recipes that I have accumulated over the years. From things like salsa and broths to more complex stews and soups. I’ll also show you how we can basics like corn, green beans, and beans. But today? Today I want to talk to you about how to start canning.

How To Start Canning

I have always been fascinated by the idea that I didn’t have to go to the grocery store to buy food. You mean I could have a garden and animals that provided food for me? And I could put in a little work and have healthy food throughout the year. I also didn’t need a million freezers to store food and have to worry about a power failure? So I started researching, because that’s what I do when I don’t understand something.

I found out that canning is actually pretty simple. Put the food in a jar, tighten, and put it into a waterbath canner or pressure canner, and set the timer. The hard part comes in knowing which way to process the foods and for how long. If you don’t allow the “pearl clutchers” to get in the way, you can have shelves and shelves full of healthy food that will last for a couple years.

With this knowledge in hand, I went to work. I started with canning apple sauce and over the years, I have canned hundreds, if not thousands of jars of food.

how to start canning

Take the fear out of canning

What do I mean by pearl clutchers? Well, these are the people that whole heartedly agree that what the USDA, FDA and Ball say, you must do. There is a ton of fear about canning that is perpetuated by these organizations. They make it feel like the only thing you can can are jelly, jams, and a couple of soups. To give you an example: The Ball Book Of Canning says you cannot can chili with beans but on the next page, you can can ham and bean soup. That doesn’t make any sense.

Tractor Supply

So my take on it is this: if the store can put it in a can, or Grandma didn’t kill her entire family, then it’s probably okay to eat. If I follow basic kitchen cleanliness while I cook, follow proper canning times? It’s probably okay. When I take the jar off the shelf to make it, and it looks good, smells good and I boil it for 10 minutes? It’s probably okay to eat.

how to start canning

Random tangent

The latest update from the CDC says that in 2018 there were 242 cases of botulism in the US. Of that, only 18 were foodborne. Only 3 of those cases were linked to home canned food. You can read the full article here. Does it happen? Absolutely. But there are 329.5 million people in the US as of 2020. That means that your chance of consuming botulism is pretty close to zero.

Logo 468x60

Do your research, find solid recipes, and get to canning. It will be okay.

Let’s Get Started

So you have decided to take the plunge and start canning. But what do you need to get started? My friends over at Southern Dream Homestead has a great blog post on canning and I highly suggest it. But the short version is this:

You will need a huge pot that can handle a fair amount of jars. Most home canners use something similar to this one. I like it simply because I can use the pot for various other things. When I am pressure canning, I use huge pots for soups and stews making 36 Quarts at a time. This can also be used as an old fashion stock pot and as a water bath canner. The utility is great!

A good pressure canner will go a long way. I have two of them that I run at the same time during canning season. This one from Amazon is about $130 as of this writing. Shop it around and look at Walmart, Target or other stores. They may have it cheaper. Edit to add: Here is a link for a pressure canner from Walmart.

Arguably, the most important thing when it comes to canning is great recipes. This is the cookbook that I refer back to every year and I love it. I have made several of soups/ stews in this cook book and they are absolutely divine. The chicken chowder and enchilada soup are family favorites. Do yourself a favor and get either the hardback or spiral version. Paperback cookbooks do not last long in the kitchen.

Some other cookbooks I like are: Ball’s Cook Book, The Homestead Canning Cookbook, and Meals In A Jar.

I also have a quick reference guide that you can download get in my members only section. Sign up below and you will be emailed the password.

Lastly, you need tools. This one is a bit more expensive, but the tools feel a little more quality than some of the others. Regardless, you should probably get a couple sets of jar grabbers, funnels, ladles, etc. This is a good kit, but always get extra jar grabbers and funnels. You will always need more than you have.

You may have noticed that I left out jars. Get Ball Mason Jars, period. Yes, you may have some success with other jars. You may even find some obscure brand that holds up amazing. However, Ball is tried and true for a reason, their jars will literally stand the test of time. But PLEASE don’t buy them from amazon. You are going to pay through the nose for them.

The best place I have found for mason jars is Wal-Mart. Depending on where you live, your prices will vary, but I can get a case of quart mason jars for around $16 and a case of pint for $12. Half gallons come in a 6pk for $12. Amazon wants to double or triple that price. So shop around. Oh, and stock up on lids whenever you can find them.

Save on Seeds

Finally, get yourself some good sturdy shelves. You do not want to spend an entire summer canning your heart out, getting burns, and sore muscles to have your plastic shelves fail. I’ve got a great tutorial on how we built our canning shelves and after several years, we still love them.

So get your supplies and get started in the kitchen. I promise you, when you don’t want to sweat your butt off making dinner, that can of chili or chicken noodle soup is going to taste amazing. You can find my make ahead pickle brine and green bean recipes by clicking the links. Those are two very easy ways to get started on your canning journey.

how to start canning

If you like this post, feel free to share it and follow us below on our social media accounts!

  • Facebook
  • Pinterest
  • Instagram
  • YouTube
  • TikTok
  • Spotify
  • Threads

Filed Under: Canning, Canning Recipes, How To's Tagged With: Canning, cooking, Homestead, kitchen, Welcome

JOIN TO OUR MAILING LIST!

Leave us your email to receive new posts and special offers for members only! Don't miss a thing!

Recent Posts

  • Fall Garden Guide
  • Top Mistakes With Goats
  • How To Bond With Your Goats

Make Ahead Pickling Brine

October 15, 2024 by Leigh 8 Comments

Jump to Recipe

If your garden is anything like mine, we’ve got a couple of pickling cucumbers every day, but never enough to can a big batch of dill pickles. Or you’ve got a couple of peppers but can’t do much with them because there’s only five today, 3 tomorrow and 17 on Wednesday. Welcome to the world of gardening, right? If you think there’s nothing you can do about it, think again! I’ve got a solution to your pickle…. see what I did there? Read on for my pickling brine and famous dill pickle recipe.

The Ultimate Homesteader’s Starter Bundle – Only $47!

Get the tools you need to stay organized, track profits, and manage your homestead with ease!

Includes:
✅ Schedule F Tracker – Simplify tax prep
✅ Profit Calculator – Track earnings
✅ Hay Calculator – Plan livestock feed
✅ Garden Journal – Digital & printable
✅ Herd Health Tracker – Monitor animal care
✅ Simple Budget – Manage finances
✅ Backyard Homestead eBook – Essential tips

$99 value – now just $47! Start your homesteading journey today!

Buy Now

What Is Pickling Brine?

Simply put, pickling brine is just the solution that is going help preserve your fruits or veggies. The brine is vinegar, salt, and water. That’s it. Some people add sugar to cut the vinegar and salt down but I don’t. When I want a pickle, I want it to be salty, vinegar-y, and delicious.

pickling brine

What can you use Pickling Brine for?

Anything. Literally. Obviously pickles is the first choice but I have used left over brine for brisket, pulled pork, marinades, and Jared’s Bloody Mary’s. The options are endless. We will also pickle peppers, onions, carrots and okra. You can even use it in some fruits if you want. The best part is that you can make a batch, throw it in the fridge or on the shelf and always have it on hand.

How to make the Brine

The brine is so easy to make, you can’t screw it up. The recipe is 10c of water, 3/4c salt, and 2c vinegar. Don’t worry, I have a recipe card at the bottom for my favorite dill pickles. You can add sugar and the ratio for the recipe above is 1-1.5c sugar.

Also, you do not need fancy pickling/ canning vinegar or salt. Skip the upcharge on those items, they are pretty much the same as regular salt or vinegar. I do use pink Himalayan salt but that’s just because that’s what I always have on hand.

pickling brine
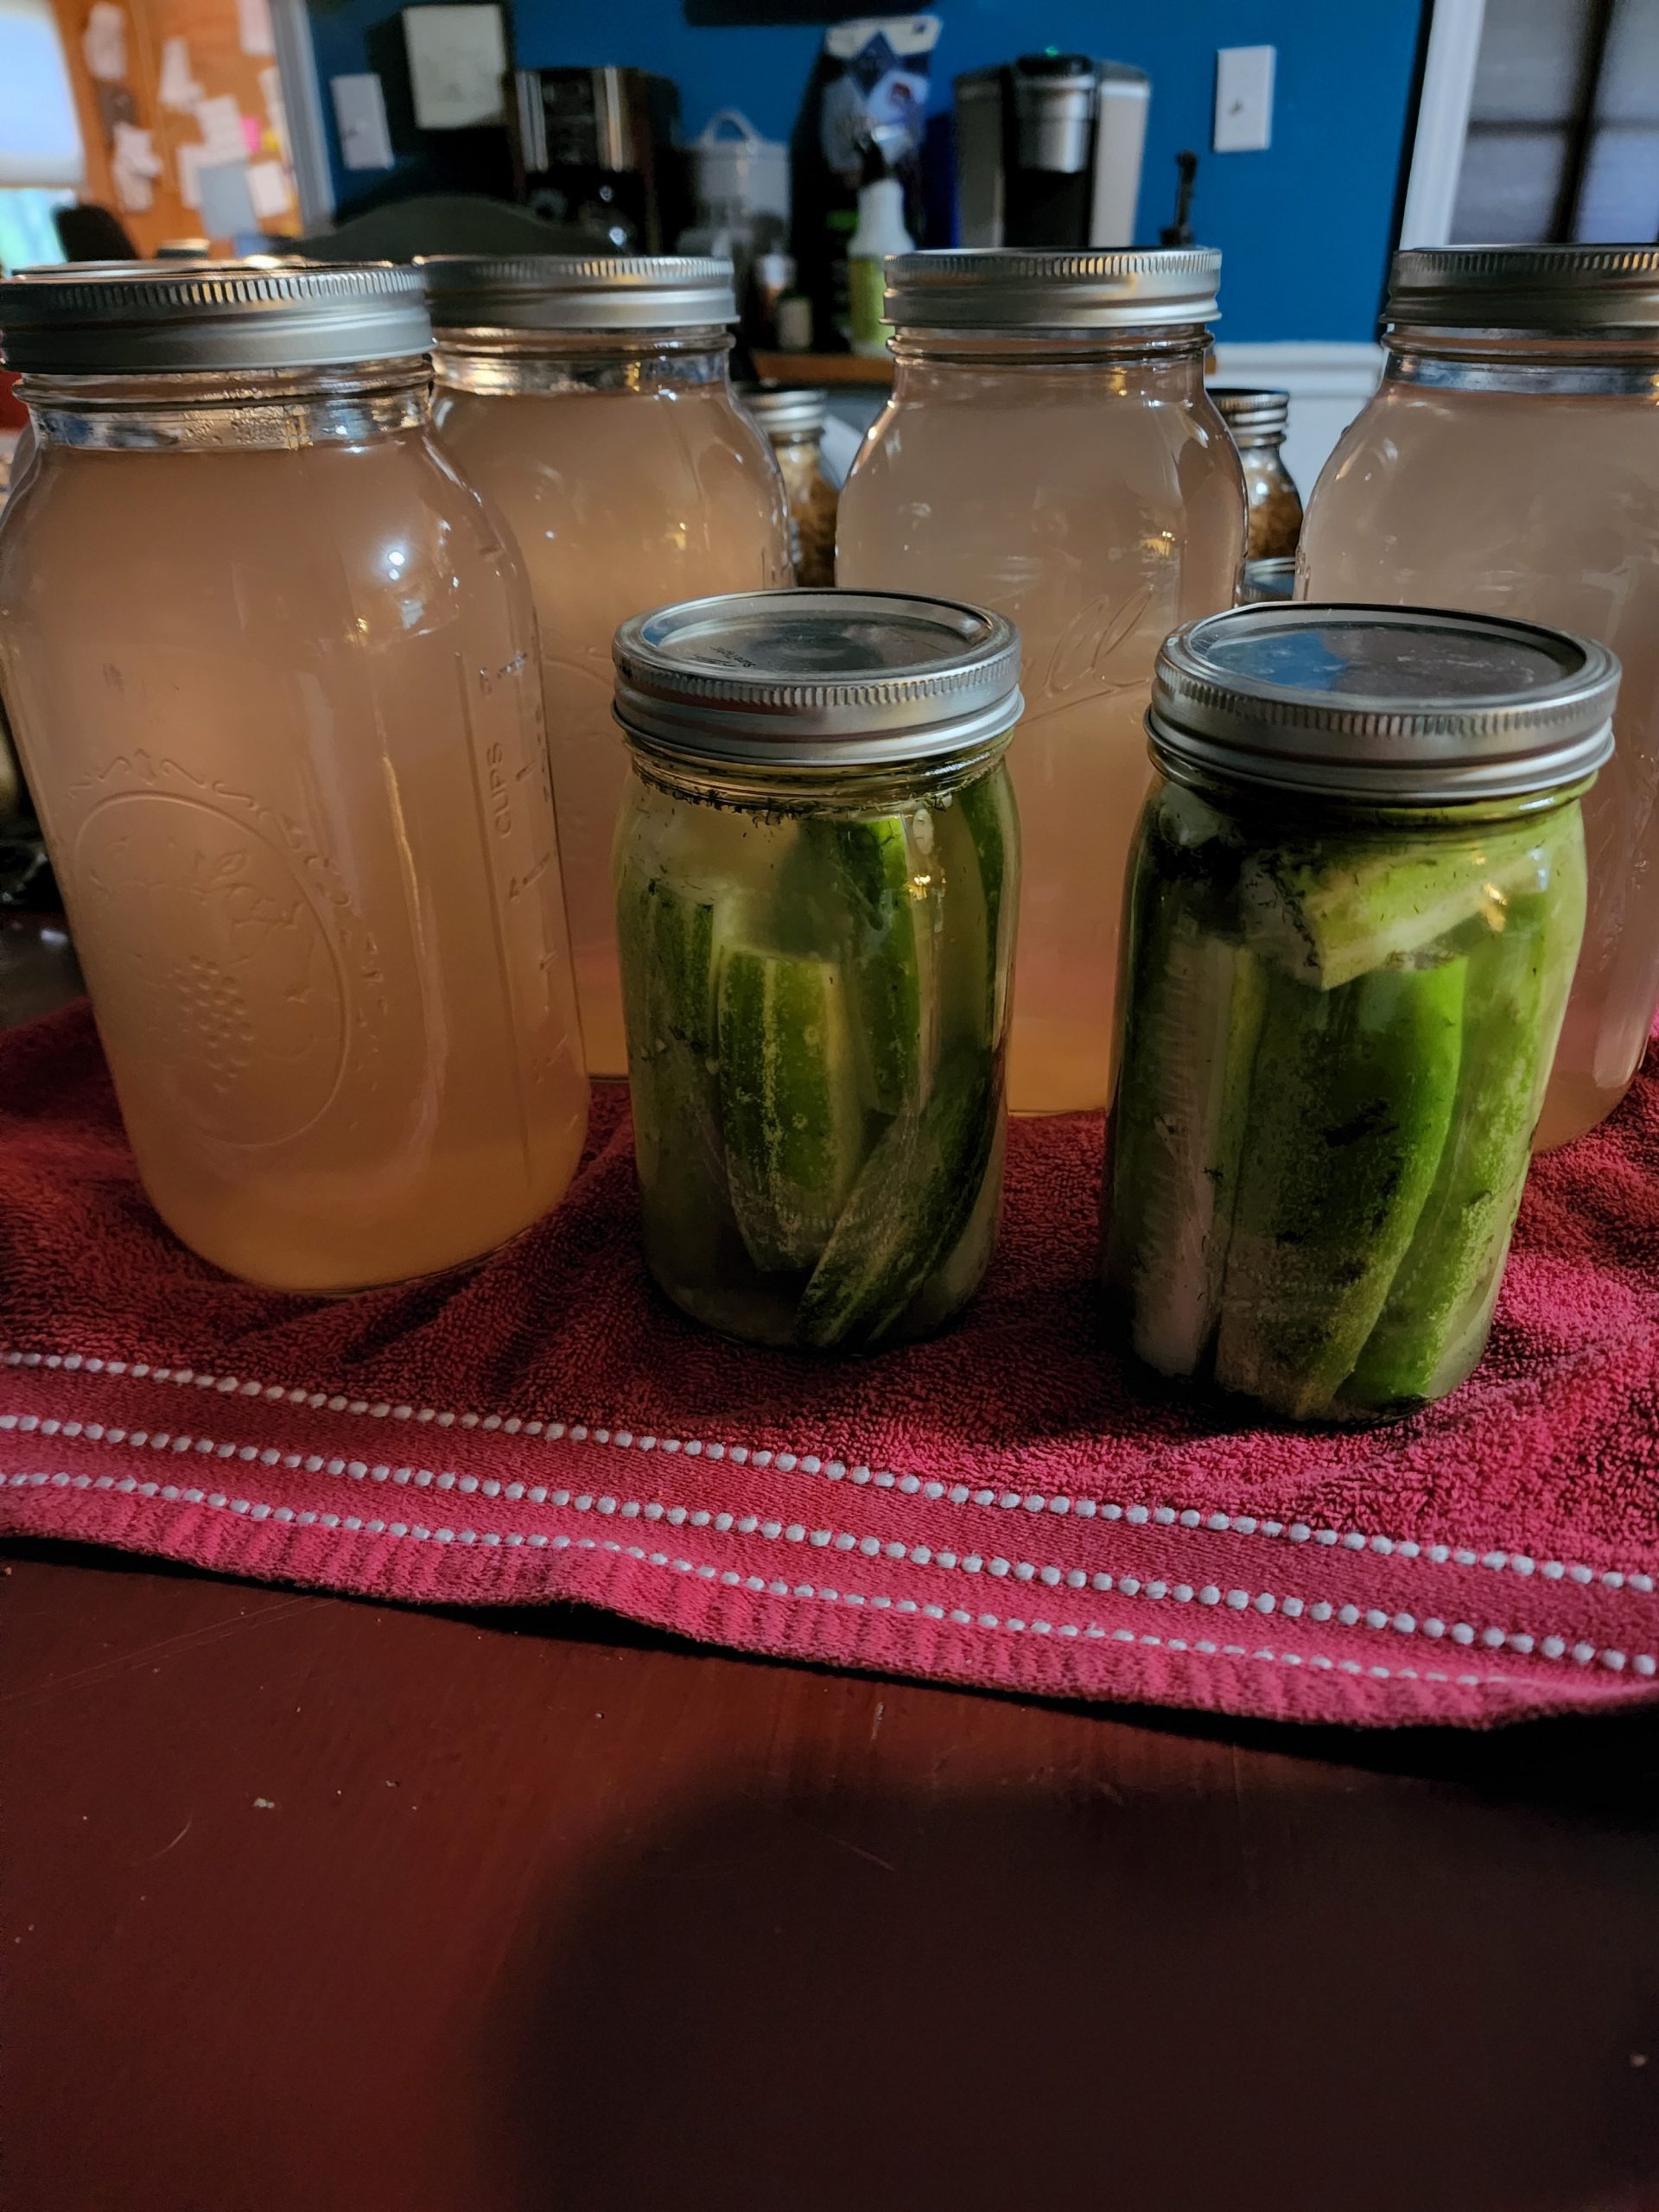
The reddish/brown tinge is due to horrible lighting in my kitchen and the pink salt

I add all of the ingredients above to a big stock pot of water. Also, I use stainless steel pots because it’s not reactive…. and it’s the only thing I have on hand that will handle the quantity I make. Next, use hot water to start dissolving the salt and bring everything to a boil.

Once it’s boiling I will can it into whatever size mason jars I have, wipe the rim, add a ring and lid, then wait for the glorious pings. I do not process them in a canner.

If I don’t get a ping, I just throw that one in the fridge to use first. Why don’t I water bath it? Because the pH of the pickling solution (without sugar) is 3.2. Not many organisms are going to grow in that. And the heat from the boiling brine will create a vacuum seal from the jar. But if you want to water bath can this to make sure that it is shelf stable, you just need to process for 15 minutes for quarts and 25 for half gallon.

All of that being said, I cannot guarantee the safety of your food. If you follow this recipe, you do it at your own risk. I don’t know if you, your kitchen, or cooking utensils are clean/ sterile or how knowledgeable you are on canning. I have to say all of this because… lawyers.

Now, do you want the recipe for crunchy home canned dill pickles? Remember, you do this at your own risk because not only will you eat every single jar in one day, but you will also be *gasp* open kettle canning all of this.

pickling brine
Fresh canned dill pickles

What is open kettling?

Before we get started too far into the recipe, I’ve had a lot of people ask what is open kettle canning. Simply put, it is using HOT food in HOT jars with HOT liquid. For this example, we are using hot jars that have been sterilized and kept hot with hot water. We are using a boiling brine and clean/ fresh cukes. Since the jar is hot and sterile combined with the boiling brine which is highly acidic, you don’t have to process.

As a side note, you can also heat your jars in your oven once sterile. I will put my jars, lids and rings in the oven at about 250*. This reduces your risks of shattering and having to handle jars full of hot water.

The problem with home canned pickles and salsa specifically is that the veggies get turned to mush when they are heated for cooking and then heated again during the water bath. Even the most stout veggies are going to be mushy when you heat them too long. A cuke and tomato? Forget it. They will not stand up and you will end up with mushy pickles and soup for salsa.

The term open kettle was first found in 1914 as a form of home preservation, but stopped in the 1980’s. Many canners still use open kettle to preserve tons of foods. Some of us, myself included, only open kettle HIGHLY acidic foods. So the choice is yours, I choose to do research and figure things out on my own.

Home Canned Dill Pickles

5 from 3 votes
Open Kettled Homemade Dill Pickles
Print Recipe Pin Recipe
Prep Time 2 hours hrs
Cook Time 0 minutes mins
Servings: 7 Quarts
Ingredients Equipment Method

Ingredients
  

  • 10 Cups Water
  • 2 Cups White Vinegar
  • 3/4 Cups Salt
  • 15ish Pickling cucumbers You can use any cukes just make sure that they are approx 6in long and not overripe
  • 7ish Tablespoons Diced Garlic
  • 7ish Bay Leaves
  • 7ish Tablespoons Dill Leaves You can use fresh dill at at least one medium sprig PER jar

Equipment

  • 1 15 qt Stock pot Larger if you are doubling or tripling recipe
  • 1 Ladle
  • 1 Whisk
  • 7 Qt Wide Mouth Mason Jars
  • 1 Debubbler
  • Can Grabber
  • Canning Funnel

Method
 

  1. Making Your Brine
  2. Add Water, vinegar and salt to stock pot and get it to boiling, stirring occasionally to dissolve salt
  3. Start working on Cucumbers
  4. Fill a bowl or sink with ICE COLD water
  5. Cut off both ends of cuke then slice for spears, chips, or whatever pickle you want
  6. Place in cold water as you get your jars ready
  7. Start heating your jars, lids and rings. You can do this by running your jars through a sterilizing cycle in your dishwasher, placing in your oven on 250 or in hot water. It doesn't really matter as long as they are clean and hot.
  8. **Please use a jar grabber, hot pad, or something, these jars are hot and the brine needs to stay boiling**
  9. Once your brine is boiling and ready, Take hot jar and add 1T garlic, 1T Dill (or sprig), 1 Bay leaf to the bottom
  10. Add your cukes, You are going to pack them in there so make sure to be careful
  11. Put your canning funnel on top and then ladle your HOT brine over cukes, leaving 1" head space.
  12. Wipe rim with vinegar towel, add lid and ring then set aside on a towel to start cooling
  13. Repeat until you are out of cukes or brine.
  14. Place a towel over all of the jars and listen for the pings over the next couple hours.
  15. Whatever doesn't ping, place in refrigerator. But give it a couple of days before you eat it so they are actually pickled.
  16. If you have left over brine, go ahead and fill any HOT jars you have. Same as above. Place funnel and ladle in brine
  17. Wipe rim, add lid and ring and set with the others to cool under a towel.

If you like the content I put out, feel free to buy us a coffee! It helps keep this site running, marketing and the goats in grain!

Buy me a coffee
  • Facebook
  • Pinterest
  • Instagram
  • YouTube
  • TikTok
  • Spotify
  • Threads

Filed Under: Canning, Canning Recipes, How To's, Recipes Tagged With: Canning, Pickles, Planning, Projects, Recipes

JOIN TO OUR MAILING LIST!

Leave us your email to receive new posts and special offers for members only! Don't miss a thing!

Recent Posts

  • Fall Garden Guide
  • Top Mistakes With Goats
  • How To Bond With Your Goats

What To Have On Hand During Kidding Season

October 12, 2024 by Leigh Leave a Comment

If you have been on this blog for more than one article, you know how much we love our goats. Seriously, it’s ridiculous. But you may not have heard about the good, bad and ugly that is kidding season. If you have never owned livestock or even had a family pet give birth, you are absolutely not prepared for what is going to happen when your animal gives birth. Even after getting a birth or two under your belt, you’re probably STILL not prepared. And if you’ve got goats? Well, nothing will go as planned during kidding season.

Before we get too far into this, I have a great course on the basics of goat care. I call it Goat Crash Course: Goat 101. In this course, I explain things like types of shelter, types of feeds and hays, basic assessments and so much more! Check it out!

Buy Now

Let’s Start Before Labor

If you know your goat is pregnant, or at least your pretty positive, there are somethings you should do prior to her giving birth. If you don’t have these things on hand, I highly recommend you go and get them quickly. You can buy all of this on amazon, or you can get it at your local feed store or Tractor Supply. All the links here will be for TSC because most everyone has one around somewhere.

  • Selenium– If you live in a selenium depleted area, which is almost the entire US, your brand new goat kid is probably deficient. However, if you have been supplementing with high quality minerals, this shouldn’t be a huge problem. We use these minerals and when kids are born, give them the selenium gel that is linked. The selenium will help boost the development of their muscles, brain and more.
  • Chlorohexidine or Iodine– So there is some debate about dipping umbilical cords. I am not here to set the record straight or to tell you what to do or buy. I am here to tell you what we do and why. Here’s the thing. In 2007 the DEA said no more to 7% iodine. I don’t know why, nor do I care. What I do know is that unless you have a source, you are not getting the 7% which is what is the best for dipping umbilical cords. You can read all about it here or do your own research (which I highly recommend). But the jist is this: trim the cord to about 2-3 inches so that it does not touch the ground and introduce bacteria and other nasties to your goat kid. Then dip the cord in either of the products I listed. Keep an eye on your kid and make sure that they are nursing and definitely got that colostrum.
  • Tums or CMPK– If labor has stalled or if your doe has milk fever, they need calcium. CMPK is what you should have on hand. But good luck finding it. Honestly, we start giving about 3-4 Tums, in the days leading up to labor and then continue to give them for a couple of days after. This to help keeps their calcium up. You do not have to by any means, but it is good to have on hand.
  • Ketone test strips- These can be found at your local pharmacy in the diabetic aisle. These will help you determine if you need to start treating for pregnancy toxemia. In order to keep it from happening in the first place, make sure you are feeding plenty of good quality hay and forage. If your doe is acting lethargic or otherwise off, try giving her a little molasse water and try to test her urine.
  • Lastly- Puppy pads, towels, exam gloves and lube. That’s really it.

I would also recommend watching as many videos on goat labor as possible. You can find Bella’s birth here. Maverick was a big boy and got stuck as he was coming out.

It’s Kidding Season!

Now, I’m pretty bougie with my goats. Unless my girls drop kids without me knowing (here’s looking at you, Bailey and Oakley), it’s a big production on my farm. I have a cheap 5 gallon bucket that has my iodine dip, towels, scissors, puppy pads, selenium and snacks for me. I will also make up some molasses water and bring them grain.

Bailey and Sébastien

At night, our does get put in the smaller area of our barn to make sure that they have privacy from the other goats. We also have an outdoor camera in there to check in on them without disturbing them. During the day, they have free reign over the two pastures.

When it’s time for them to labor, I try to get them into the barn. I won’t force the subject, but I do prefer to have them in a protected area. Also, I will usually just hang back and watch. I get my gloves and lube ready so if I need to go in I’m not fumbling around. Then we wait.

goat kidding

Before we get too far into this, I have a great course on the basics of goat care. I call it Goat Crash Course: Goat 101. In this course, I explain things like types of shelter, types of feeds and hays, basic assessments and so much more! Check it out!

Buy Now

Don’t Panic

The best thing you can do is not panic. I know it’s easier said than done, but seriously, don’t panic. Goats have been having kids for thousands of years. The chances that they or you are going to have a traumatic birth is slim. Unless you have a Bella, then all bets are off.

Subscribe to Craft Beer Club Today!

Once you have decided that you are not panicking, lay your towels down and get ready. Some goats want all of your attention while in labor. Others don’t want you anywhere near them. Both are fine. I have had extremely friendly goats completely freak out on me and I’ve had total terrors turn into lovebugs during labor. The biggest thing is to keep calm and keep them calm. If that means you watch from a distance or stay snuggled in, do it.

Be On Standby

A solid 90% of goats do not require any assistance during labor. That means that you are simply on standby until you are needed. They will start pushing and grunting. If you can, look at their vulva and make sure they are making progress. They should have their kid within about 30 minutes of pushing. If not, start getting prepared to go in. You may have a stuck kid.

Logo 468x60

Stuck Kid

If after 30 minutes of pushing, she has still not produced anything. Glove up and lube up, you’re going in. What you are checking for is that you have two hooves and a nose in the birth canal. If you don’t see or feel that, you need to get in there and find it. Out of the 10% of those times that you will need to assist, it’s usually either a big kid or the head is stuck back. You need to get your hand, and maybe arm in there and pull the head forward.

Remember to stay calm. When Champ went into labor, her first and last kids where stuck. I was able to get the first one out. Then Stella came. But the 3rd one was really stuck. I ended up phoning a friend to just talk to me and keep me calm. Unfortunately, Stella is the only kid that made it. That should not be the case with your stuck kids, but it does happen.

Banner 468x60

You can read about Champ’s labor here and the resulting cuteness that is Stella.

The Kid Is Out, What Now?

The absolute first thing you do is move them out of the way IF mom is still pushing. Be careful of the umbilical cord. It will disconnect on it’s own after a few seconds of pushing. But YOU do not want to rip it.

If the kid is not breathing well, lift the kid up by their back legs and let them dangle. Gently swing them from side to side to help get any fluid that is still in their lungs, mouth and nose out.

Tractor Supply

If mom is a little busy or not immediately cleaning the kid, go ahead and start drying off the baby with a towel. With Champ, she had zero interest in her babies. I think part of it was that once she went into labor, everything was quick but she was also tired and her body condition wasn’t great.

After the kid is cleaned up, check the umbilical cord. If it has broken, make sure it is not profusely bleeding. A drop or two is fine, we are worried about massive bleeding here. Think about it this way. They are tiny, so they don’t have a ton of blood. If that blood is coming out, they don’t have much to circulate through their body. If the cord is still bleeding, pinch the cord with your fingers as hard as you can. We want to try and control the bleeding. Again, this is extremely rare and should not be a problem. Once it has stopped, you can let go and see if it start bleeding again. You can also tie off the cord with dental floss.

Dip the cord with the solution listed in your buy list above.

Bonus Tip: Sometimes, momma will not allow that solution to stay on. That is okay. Don’t panic. Bella will lick and bite off the cord if I do ANYTHING to it. Since she takes such good care of her babies, I’m not worried about it. To be honest, I don’t really dip anymore. I trim the cord to about 1-3inches and make sure they are in a clean and dry area. BUT you need to make that decision for yourself.

Tractor Supply

If mama is still pushing, let her do her thing. You can “bump” her to see if you feel another kid in there. Bumping is putting your arms under her, right in front of her udders, and pulling up sharply. You are checking to see if you feel anything hard. If so, she’s got another baby. If not, she’s passing the placenta next. It’s time to nurse if she only has one. Get her up and see if you can get the baby to nurse.

Nursing

Normally, you don’t need to help. Momma should make this happen on her own. But if you have a first time mom, or maybe a not so great momma, you could need to help the kid out.

To do this, get mama up and place the baby with it’s head towards the udders. This may take a time or two to make sure that it latches but try. If the baby or mama refuses, try again in a few minutes. Rinse and repeat. Kids need that colostrum within the first hour or two.

After the kid has nursed, I will usually get a weight on it. This helps to make sure that they are gaining weight in the coming days. If the kid is not gaining, you may have to pull the kid and start bottle feeding it.

How much weight should the kid gain? Well, that’s a question with no real answer. As long as the kid is gaining weight, is alert and being a kid, it is fine. If for any reason the kid is not gaining weight, alert or being a kid, then I would get involved.

Closing

I hope this has helped you prepare for your goat to go into labor. It can be daunting and scary. But don’t let that stop you. It is awesome to see the birth and the maternal instinct of these creatures. Plus it is heart melting to hear those first cries and mama perk up.

If you like the content I put out, feel free to buy us a coffee! It helps keep this site running, marketing and the goats in grain!

Buy me a coffee
  • Facebook
  • Pinterest
  • Instagram
  • YouTube
  • TikTok
  • Spotify
  • Threads

Filed Under: Animals, Goats, How To's Tagged With: Goats, Homestead, Labor, Welcome

JOIN TO OUR MAILING LIST!

Leave us your email to receive new posts and special offers for members only! Don't miss a thing!

Recent Posts

  • Fall Garden Guide
  • Top Mistakes With Goats
  • How To Bond With Your Goats

Why You Need The Herd Health Sheets

October 8, 2024 by Leigh Leave a Comment

I posted before about how goats are not beginner livestock. I’ve also posted about the basics you need to care for your goats. But how do you keep track of all of the things that you’ve done, need to do, or want to do? I have tried many different ways of trying to keep track of who has gotten what meds, who was breed by who, and who needs vaccines or boosters. But my herd health sheets have been fantastic over the last several years and I wanted to share them with you.

goat kidding

Before we get too far into this, I have a great course on the basics of goat care. I call it Goat Crash Course: Goat 101. In this course, I explain things like types of shelter, types of feeds and hays, basic assessments and so much more! Check it out!

Buy Now

Why You Need Herd Health Sheets

Unlike other livestock, goats can be pretty fragile creatures that require constant care and maintenance. If you don’t know who is who, or maybe forget that you dewormed your milk goat, you can have some pretty serious problems. If you are using your memory to remember who got what and when, you will have problems at some point.

Here Are Some Reasons To Use Herd Health Sheets

If you are breeding your goats for milk, you need to know who bred them around what time. Then you need to know if they have had any issues with milking in the past, how often they have had to be dewormed, how many kids they throw, and if they have any contagious diseases.

Another reason to help keep track is breeding. We decided to keep Champ’s kid Stella. We CAN breed Stella back to her father but that’s not an awesome idea. Also, by knowing that Champ hates being milked, we know that we need to work with Stella a lot on the milking stand.

goat kid in the house with black dog sniffing it

We also had an issue with Orf’s within the first few months of having Bella, Champ, Midas and Texas. So by keeping track of who had it, it helps keep us updated on who is likely to get it.

Obviously, if you only have two goats, you can probably remember these things. But we have more than two and will definitely have even more. Not to mention that we plan on breeding goats for a long time. It would be nice to be able to go back at a glance and see who has been healthy and who hasn’t. I am working towards breeding healthier genetics with less need for worming

Who Needs Herd Sheets

If you have livestock that you need to do treatments to or have on a breeding schedule, I would say that you need these herd sheets. Sure, if you only have one bull, buck, rooster, whatever, you probably don’t need the breeding part for them. But I’ve got two bucks and I do need to be careful about who gets bred to who. Midas can breed everyone but Stella. Spike can breed anyone this year. But I want to wait until the girls are at least eight months old.

While I can go down the rabbit hole of all the technicalities of this, I think it’s safe to say that it’s better to have all this information in one spot. If I’m having to flip pages or do mental gymnastics, someone could get left out and that is dangerous when dealing with creatures that are not so great at keeping themselves alive.

Sheets In Use

The first video is Champ’s sheet and the second is the actual product and how to use it.

Its important to note, on Champ’s sheet, that before I created these sheets, I totally missed documenting fecals and other medications that were given. That can be life threatening when dealing with worms. Here in the south, worms are lethal. Sure, you can have a strong herd that rarely needs deworming. But we aren’t there yet. You can see at the bottom, that the last entry she was dewormed because the strongyles came back with a vengeance. Not to mention that her FAMACHA was a 4.

This sheet also helps keep me aware of weight loss, FAMACHA trends, and so on.

This is a brand new sheet and how to set it up.

Where To Get These Sheets?

You can find them on our store as a digital download. The PDF is for the Google Sheet link and they are super easy to fill out. The best thing to do is to make a copy of the first page, by right clicking and then click duplicate. Then rename the copy to your goat name. After that you can remove the information on there and replace it with your own.

I hope this sheet will help you as they have helped me. I strongly suggest either creating your own or picking up ours.

If you like the content I put out, feel free to buy us a coffee! It helps keep this site running, marketing and the goats in grain!

Buy me a coffee

If you like this post, feel free to share it and follow us below on our social media accounts!

  • Facebook
  • Pinterest
  • Instagram
  • YouTube
  • TikTok
  • Spotify
  • Threads

Filed Under: Animals, Breeding, Goats, How To's Tagged With: Chickens, Goats, Homestead

JOIN TO OUR MAILING LIST!

Leave us your email to receive new posts and special offers for members only! Don't miss a thing!

Recent Posts

  • Fall Garden Guide
  • Top Mistakes With Goats
  • How To Bond With Your Goats

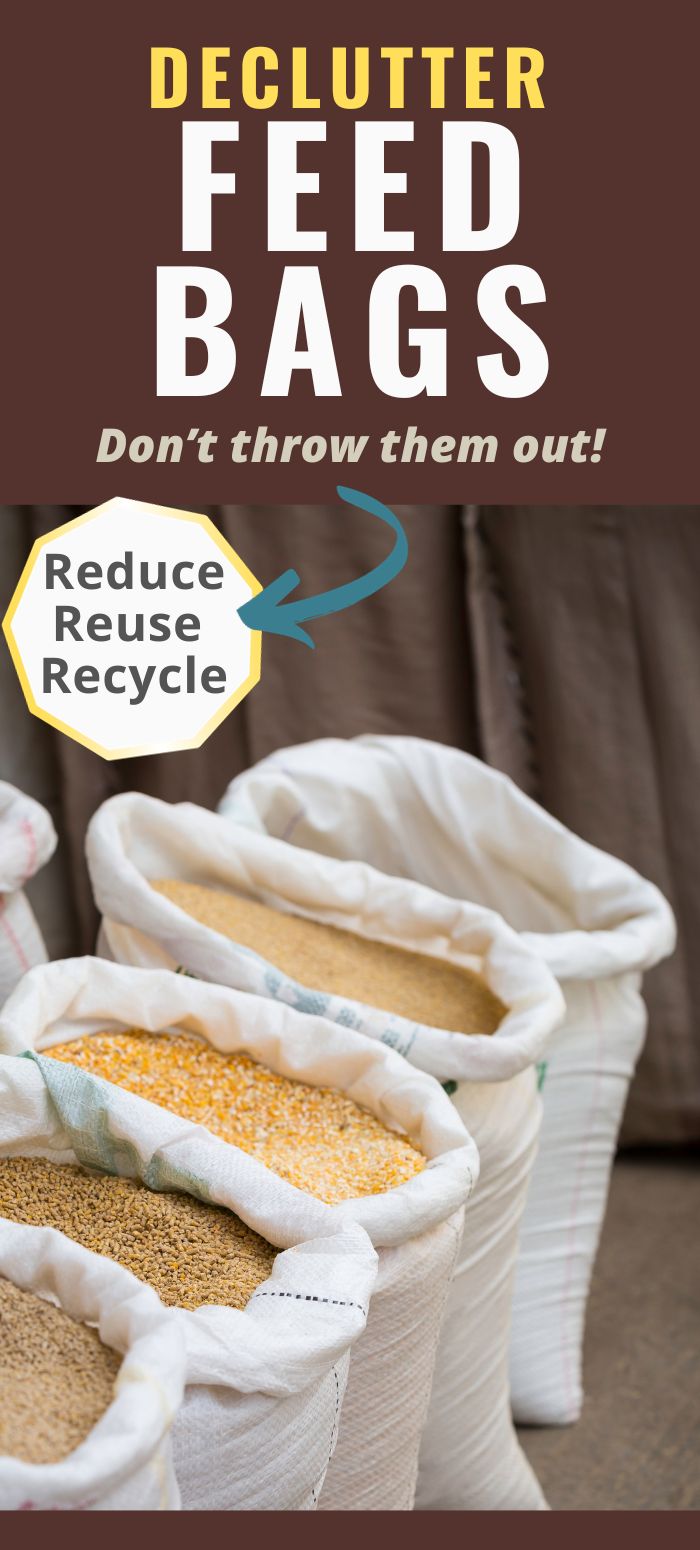
What To Do With Those Feed Bags

October 1, 2024 by Leigh Leave a Comment

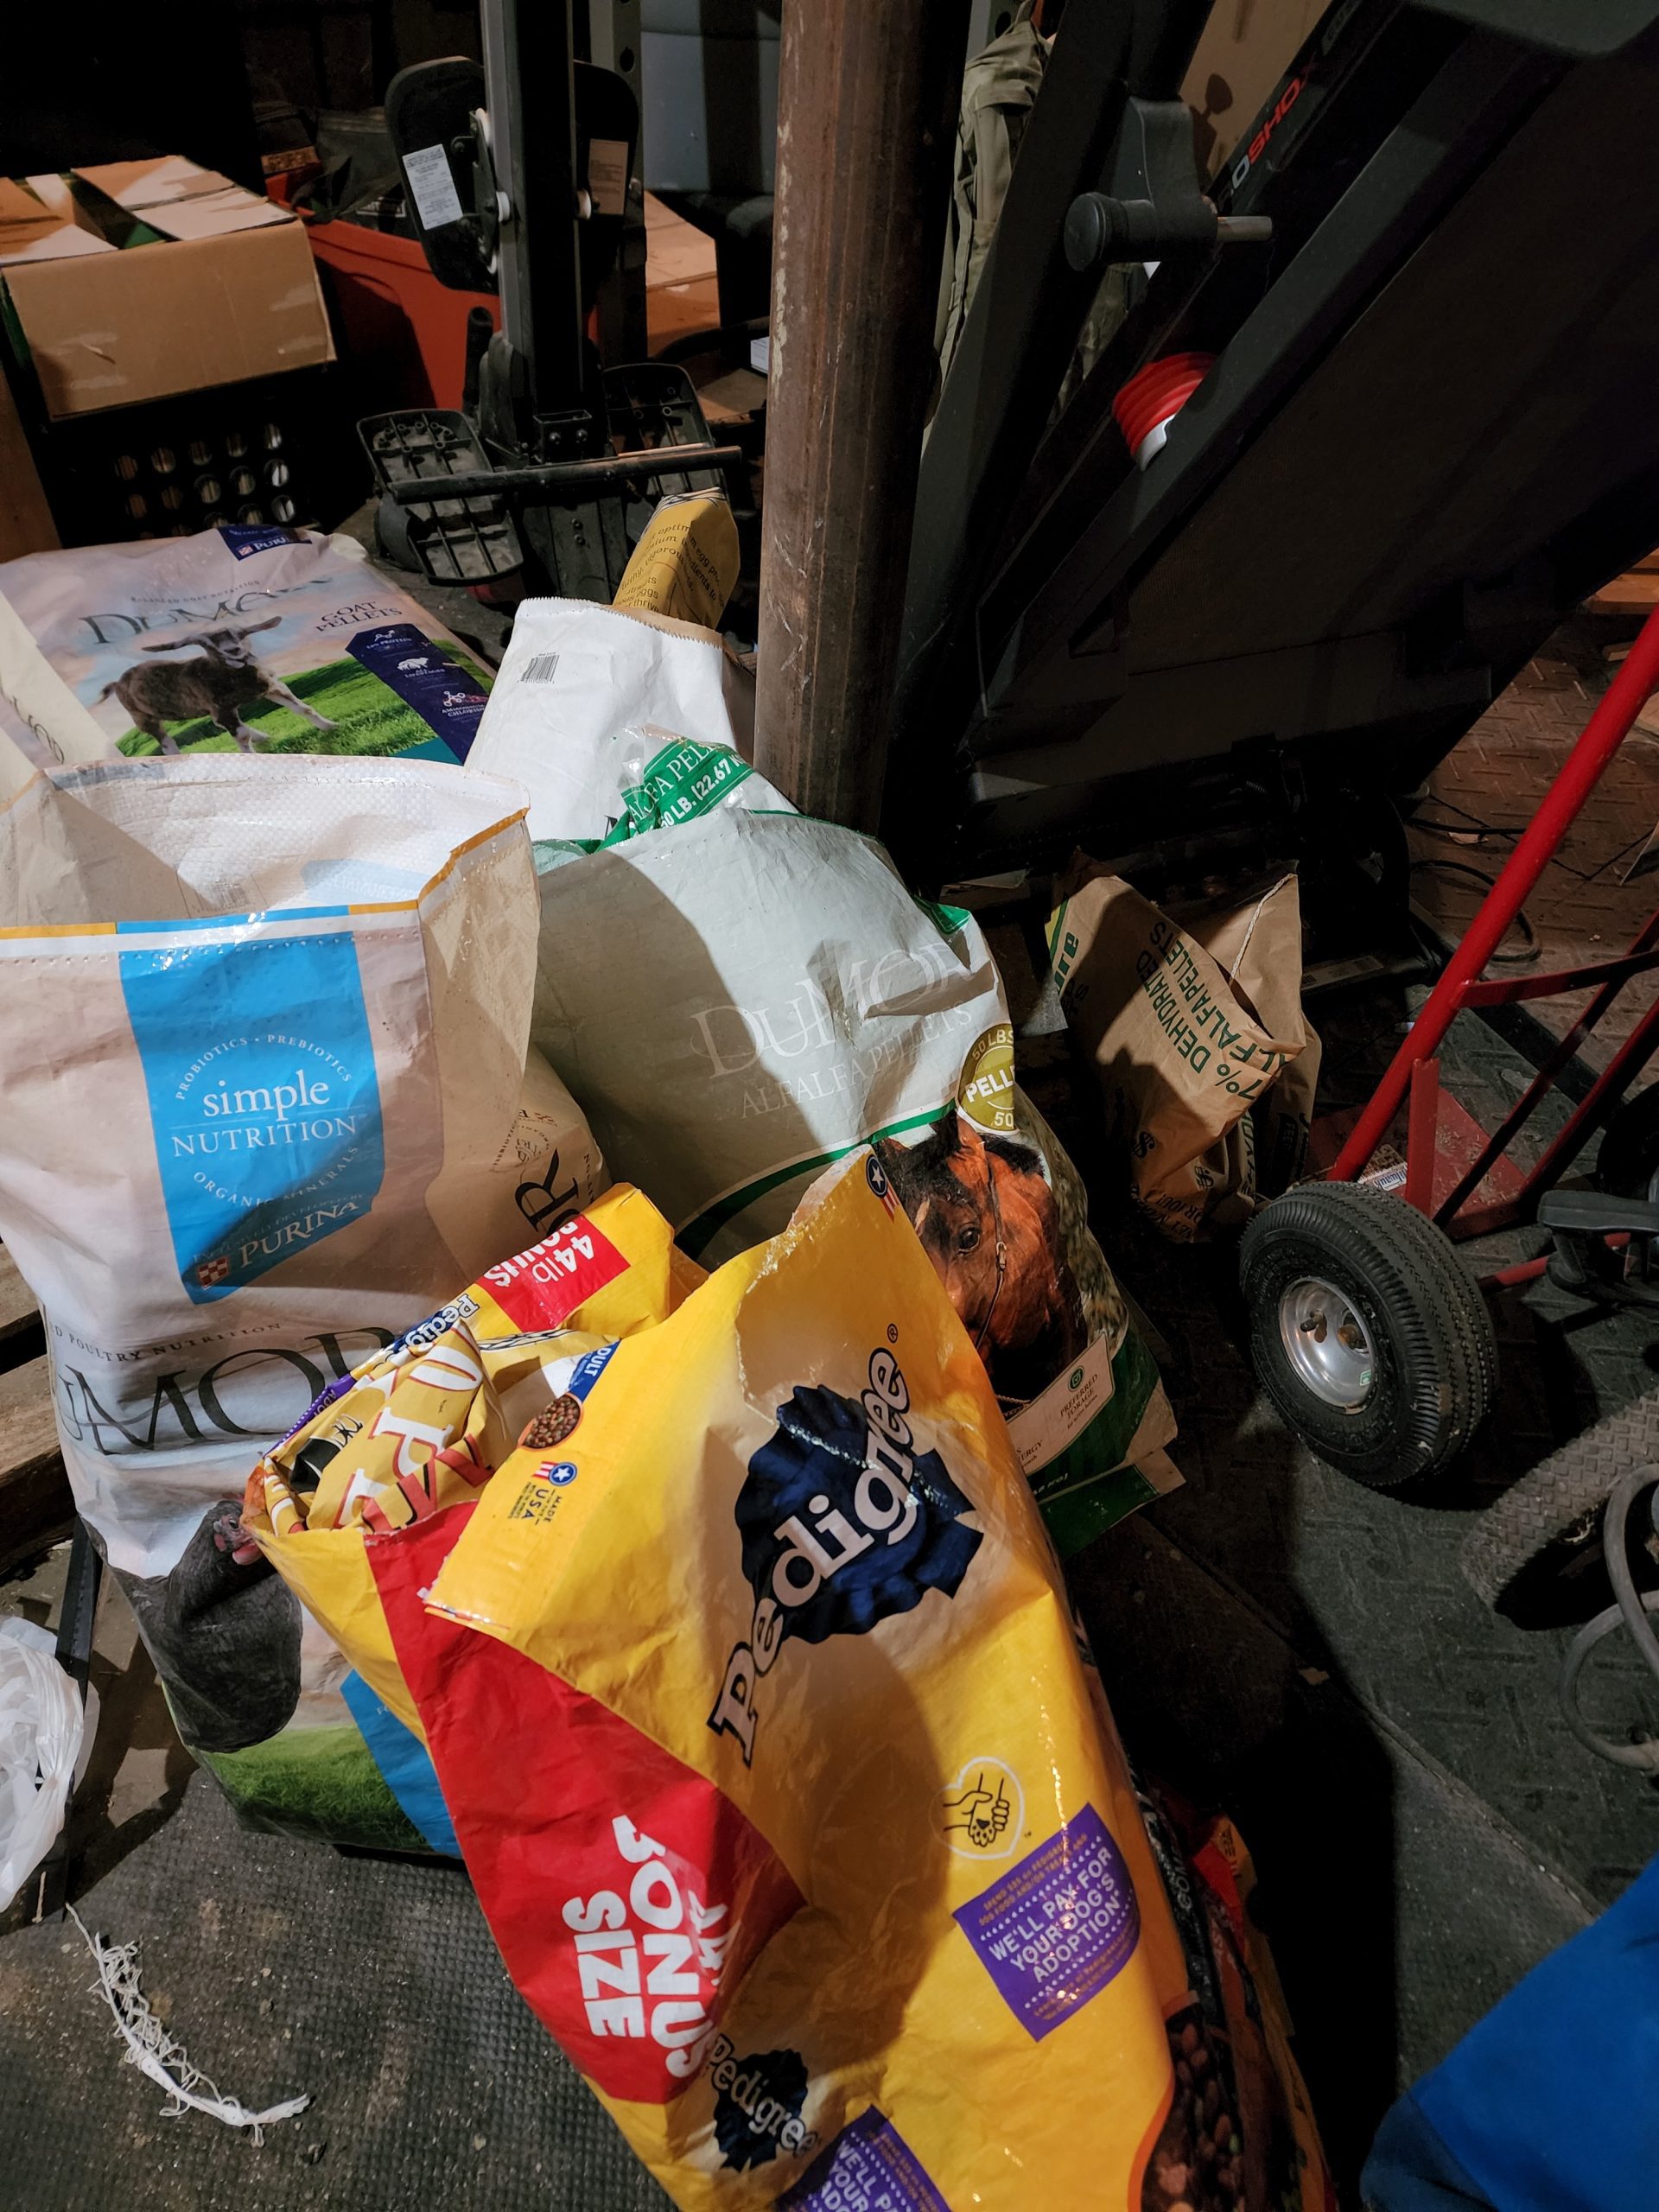
How many feed bags do you have laying around? Do you just throw them away? I’ve always been one to save dog food bags. I don’t know why. Probably the same reason so many people save shopping bags that they never, ever reuse. At least not at the rate they save them. But after cleaning up the basement for the 9 millionth time, and seeing a ton of bags, I decided enough was enough.

goat kidding

Before we get too far into this, I have a great course on the basics of goat care. I call it Goat Crash Course: Goat 101. In this course, I explain things like types of shelter, types of feeds and hays, basic assessments and so much more! Check it out!

Buy Now

What To Do With Those Feed Bags?

But how many bags do you really need? Well, according to my brain, I need all of them. It’s ridiculous. I cannot throw them away. No matter how hard I argue with myself about the fact that I don’t need to save every single one, I end up rolling it up and stowing it in another feed bag. So I started brainstorming, searching and the list below is how we reuse feed bags.

Don’t judge!

Why I save them

I feel like they are really good bags. They are made to hold 50# of food or more! That means they can hold all sorts of things. Plus, let’s be real here, you put anything sharp in a regular trash bag, even the heavy duty ones, and you are blowing a hole in it. Now, all that trash is all over the place. Not cool.

Another reason I am in favor of saving these bags is because I’ve already paid for them. Think about it, I bought the feed but I’m going to throw away a perfectly good bag because it’s empty? Absolutely not. Couple that and the fact that things are getting more and more expensive? I have all the reasons I need to hold on to and reuse feed bags.

Ways To Reuse Feed Bags

Trash Bags– Seriously, these make the most amazing trash bags! I don’t know where you live but trash bags by me are $15 for an 80ct box. When I am going and decluttering, I will reuse feed bags before I even touch my regular trash bags.

Tote Bags- Kathy over at Beyond The Chicken Coop has a great tutorial for making tote bags! These are seriously adorable and I will be making some! I love that I can make different sizes based on what I need. Plus, I know that if I can make the seams strong, they will be strong because again, they hold 50# of feed!

Hay Feeders- Danielle At DIY Danielle, talks about some of the pros and cons of doing it this way. I have found that it works well, until it doesn’t. I love the portability of this style bag, I can nail it to a tree or hang it in the goat barn. But it’s still only going to last so long.

Organizer- Yes, you read that right. We will use these bags to put all of the same type of stuff together. For example: We will store all of our nursery pots in a feed bag. Or if we are going the the back of the property to cut trees, we will put the bar oil, fuel, hatchet, etc in the bag. Now, we take them out immediately after so that we aren’t mixing chemicals if one should mysteriously open. BUT to get all those tools out to the area we are working now only takes one trip.

Logo 468x60

Planters- We have grown some amazing potatoes, carrots, and onions in these bags. But be sure to use the plastic ones for this! Patrick and Jessie at Southern Dreams Homestead has a great and in depth post about growing in containers that will help you here.

Tarps- Yea, I wasn’t sure about this one but the idea is definitely there! Sweet Meadow Sampler has a great tutorial on it. We will be trying it soon though.

https://www.wickedgoodcupcakes.com/shop-online/thinking-of-you-boxes

Flooring– I personally would do this in the winter to make clean out in the spring easier. One of the biggest headaches we have come spring, has nothing to do with the garden. It’s cleaning out the barn and coop. Having these bags would not only insulate them from the ground, it would also help clean up all the pine shavings, poop, urine and more.

Compost- it is feasible that you could compost in these bags. The plastic would trap heat and allow break down faster. The thick paper bags are compositable themselves. In theory (I have not tried this yet) you could fill a bag and empty it in your compost pile. Or you could use the bag AS your compost pile. You can go more in depth about composting with The Homestead RD, Katie has some truly amazing posts about compost. In the post I linked above, she also uses feed bags as planters and can tell you how to do it.

Weed Suppression– We have used the paper feed bags to line the bottoms of our raised beds. It works about the same as using cardboard but it is FAR more readily available for us. I don’t know that I would use the plastic ones through.

Banner 468x60

Wood- We will put our small pieces of scrap wood in these bags to help keep the basement cleaned up. We have a ton of projects around here and I’m not going to throw away or burn a piece of good wood just because it’s a smidge too small. By putting it in the feed bags, we reduce clutter and reuse the bag.

Projects– Sometimes when we have multiple projects going on, it’s hard to keep everything separated. So I will put all the supplies for a project in a feed bag and then write on the front what it’s for. This has helped a ton when it comes to organization.

If you like the content I put out, feel free to buy us a coffee! It helps keep this site running, marketing and the goats in grain!

Buy me a coffee

If you like this post, feel free to share it and follow us below on our social media accounts!

  • Facebook
  • Pinterest
  • Instagram
  • YouTube
  • TikTok
  • Spotify
  • Threads

Filed Under: Animals, Chickens, Goats, How To's, Pigs, Projects Tagged With: Canning, Chickens, Chicks, cooking, Goats, Homestead

JOIN TO OUR MAILING LIST!

Leave us your email to receive new posts and special offers for members only! Don't miss a thing!

Recent Posts

  • Fall Garden Guide
  • Top Mistakes With Goats
  • How To Bond With Your Goats
  • « Go to Previous Page
  • Page 1
  • Page 2
  • Page 3
  • Page 4
  • Page 5
  • Interim pages omitted …
  • Page 7
  • Go to Next Page »
  • Animals
    • Chickens
    • Farm Dogs
    • Goats
  • Garden
    • Compost
    • Garden Projects
    • Seeds and Plants
    • Garden Journal
    • Working With Food
      • Recipes
      • Freezing Foods
      • Dehydrating Foods
      • Canning Tips And Tricks
        • Canning Inventory Sheets
  • Helpful Info
    • Welcome to the Homestead!
    • Emergency Preparedness
    • Frequently Asked Questions
    • Goal Setting
    • Project List
    • Shop Digital Products
      • Hay Calculator
      • Farm Expense And Income Tracker
      • Goat Crash Course: 101
      • Garden Journal Prompts
      • Schedule C Tracker
      • Schedule C Tracker
      • The Homestead Bundle
  • The Truths
  • Episode List
  • Start Here
    • Privacy Policy
    • Affiliate Disclosure
    • Let’s Get in Touch
    • Members Only Library
    • Welcome To Our Homestead

Footer

  • Email
  • Facebook
  • Instagram
  • Pinterest

COME AND GET IT!

Leave us your email to receive new posts and special offers for members only! Don't miss a thing!

· Midnight Theme

Copyright © 2026 · Midnight Theme on Genesis Framework · WordPress · Log in