• Skip to primary navigation
  • Skip to main content
  • Skip to footer

Steel Raven Farms

Where muck boots meet ground.

  • Animals
    • Chickens
    • Farm Dogs
    • Goats
  • Garden
    • Compost
    • Garden Projects
    • Seeds and Plants
    • Garden Journal
    • Working With Food
      • Recipes
      • Freezing Foods
      • Dehydrating Foods
      • Canning Tips And Tricks
        • Canning Inventory Sheets
  • Helpful Info
    • Welcome to the Homestead!
    • Emergency Preparedness
    • Frequently Asked Questions
    • Goal Setting
    • Project List
    • Shop Digital Products
      • Hay Calculator
      • Farm Expense And Income Tracker
      • Goat Crash Course: 101
      • Garden Journal Prompts
      • Schedule C Tracker
      • Schedule C Tracker
      • The Homestead Bundle
  • The Truths
  • Episode List
  • Start Here
    • Privacy Policy
    • Affiliate Disclosure
    • Let’s Get in Touch
    • Members Only Library
    • Welcome To Our Homestead

How To's

How We Organize A Deep Freezer

July 9, 2024 by Leigh Leave a Comment

Seriously, how is it that I can organize our freezer and within a month it’s back to being a disaster. Every time! But I have finally figured it out! I saw this hack on Pinterest and figured what did I have to lose? If it doesn’t work, I can reuse the supplies. But if it works? Well, my sanity may just be returned. Maybe. So how did we organize a deep freezer?
The Ultimate Homesteader’s Starter Bundle – Only $47!

Get the tools you need to stay organized, track profits, and manage your homestead with ease!

Includes:
✅ Schedule F Tracker – Simplify tax prep
✅ Profit Calculator – Track earnings
✅ Hay Calculator – Plan livestock feed
✅ Garden Journal – Digital & printable
✅ Herd Health Tracker – Monitor animal care
✅ Simple Budget – Manage finances
✅ Backyard Homestead eBook – Essential tips

$99 value – now just $47! Start your homesteading journey today!

Buy Now

Organizing A Deep Freezer

The biggest problems with freezers, whether upright or a chest freezer is that things get lost in the shuffle. It doesn’t matter what you do or how well you organize, you are going to lose stuff in those freezers. Not to mention it’s not something that you go into every day. Or maybe you go into it, but only for the 30 seconds it takes to pull out a couple packs of meat.

And if you have kids, they aren’t going to take the time to gently move things around to find what they need. No, my teenagers just throw things around until they find whatever it is they are looking for and them move on with their life…. It’s infuriating.

Before we get too far into this, I have a great course on the basics of goat care. I call it Goat Crash Course: Goat 101. In this course, I explain things like types of shelter, types of feeds and hays, basic assessments and so much more! Check it out!

Buy Now

Starting To Organize A Deep Freezer

When you are sorting your deep freeze to organize it, make sure that you take the time to clean it out too. Over the years, I found that we tend to only clean out our deep freeze when we are getting a whole cow or hog, which is usually once a year per freezer. We usually purchase a whole cow in July and empty out that freezer, defrost it, and then scrub it out. And we do it for the whole hog in February.

This helps to make sure that any freezer burned meat is either used or given to the chickens. I tend to find a bunch of roasts and will can a bunch of soups for us for the winter. If the meat is just too burned, it goes to the dogs or chickens. I hate wasting food.

After it is sorted, make sure to defrost it. This allows you to get all those weird bits of meat, frost, and other random crap that gets lost in the freezer out. If you have had a freezer before, you know what I’m talking about. Especially, the upright freezers. Everything collects at the bottom of the freezer. Hunks of ice, broken caps, a random chicken wing. It ends up at the bottom!

If you are new to heating with firewood and are looking to master the finer points of it. We’ve got a great eBook that goes in depth of what tools you should consider, how and where to stack, how to build a fire and so much more!

Buy Now

Choosing The Right Size Freezer

When we purchase bulk meat like half/whole cows or whole hogs, we needed more freezer space than just one upright freezer. To give you some insight into freezer sizes, a whole cow will barely fit in an 16cu ft freezer. When I say barely, it’s a game of Tetris to get it all in there. Whole chickens take up a ton of space as well. I would say that you could probably fit 100 whole chickens in that same freezer.

I think it’s better to err on the side of caution and always go at least one “size” up from what you think you’ll need. Especially when it comes to getting whole animals. I have found that if you have the square footage to have a bigger freezer, get the bigger freezer. You will end up using the space. Trust me.

Another thing to consider with freezers is that an upright freezer will be easier to find things, but will not hold as much as you think they will. It is incredibly difficult to pack an upright freezer, no matter the size, due to the likelihood of things spilling out. And yes, milk crates will help with this, but just trust me, get a chest freezer if you are getting irregularly shaped things like packs of meat, veggies, etc.

Chest freezers are where it’s at in my opinion. Yes, it will become a holy terror of a disaster, but you get far more bang for your buck with them. Because it doesn’t matter if you organize it or not, you are able to use every square inch of that space.

The Ultimate Homesteader’s Starter Bundle – Only $47!

Get the tools you need to stay organized, track profits, and manage your homestead with ease!

Includes:
✅ Schedule F Tracker – Simplify tax prep
✅ Profit Calculator – Track earnings
✅ Hay Calculator – Plan livestock feed
✅ Garden Journal – Digital & printable
✅ Herd Health Tracker – Monitor animal care
✅ Simple Budget – Manage finances
✅ Backyard Homestead eBook – Essential tips

$99 value – now just $47! Start your homesteading journey today!

Buy Now

Enter Milk Crates To Organize A Deep Freezer

When it comes to organizing a deep freezer, you need to have the ability to sort those various things (packs of meat, froze veggies, etc) into some sort of organized chaos. I love using milk crates. But a word of caution. Don’t buy cheap file crates from Wal-Mart. You want to get something like this. The sturdier the better. We got the cheap ones from Wal-Mart and it’s gone about how you would expect.

Milk crates saved my sanity when Jared brought home the cow. I’m not going to lie, I was nervous that three coolers of meat was going to create more chaos than me. But we worked through it and got everything separated into five milk crates. They are overflowing but still stackable.

The idea with the milk crates is to have the ability to pick up and move them to get to what is below them. So far it has worked beautifully and I will be buying more crates for my upright freezer to handle that disaster.

The problem with the using milk crates in the upright freezer is not having the ability to see through them to what is inside. Yes, we could label them but if my kids won’t put things up where they go, do we really think that putting a label on the crate will help? I guarantee it won’t.

Our herd health bundle helps you keep track of your herd’s health. Includes the goat assessment, herd check sheets AND Herd Health Tracker!

Buy Now

Clearly Label What Is In The Freezer

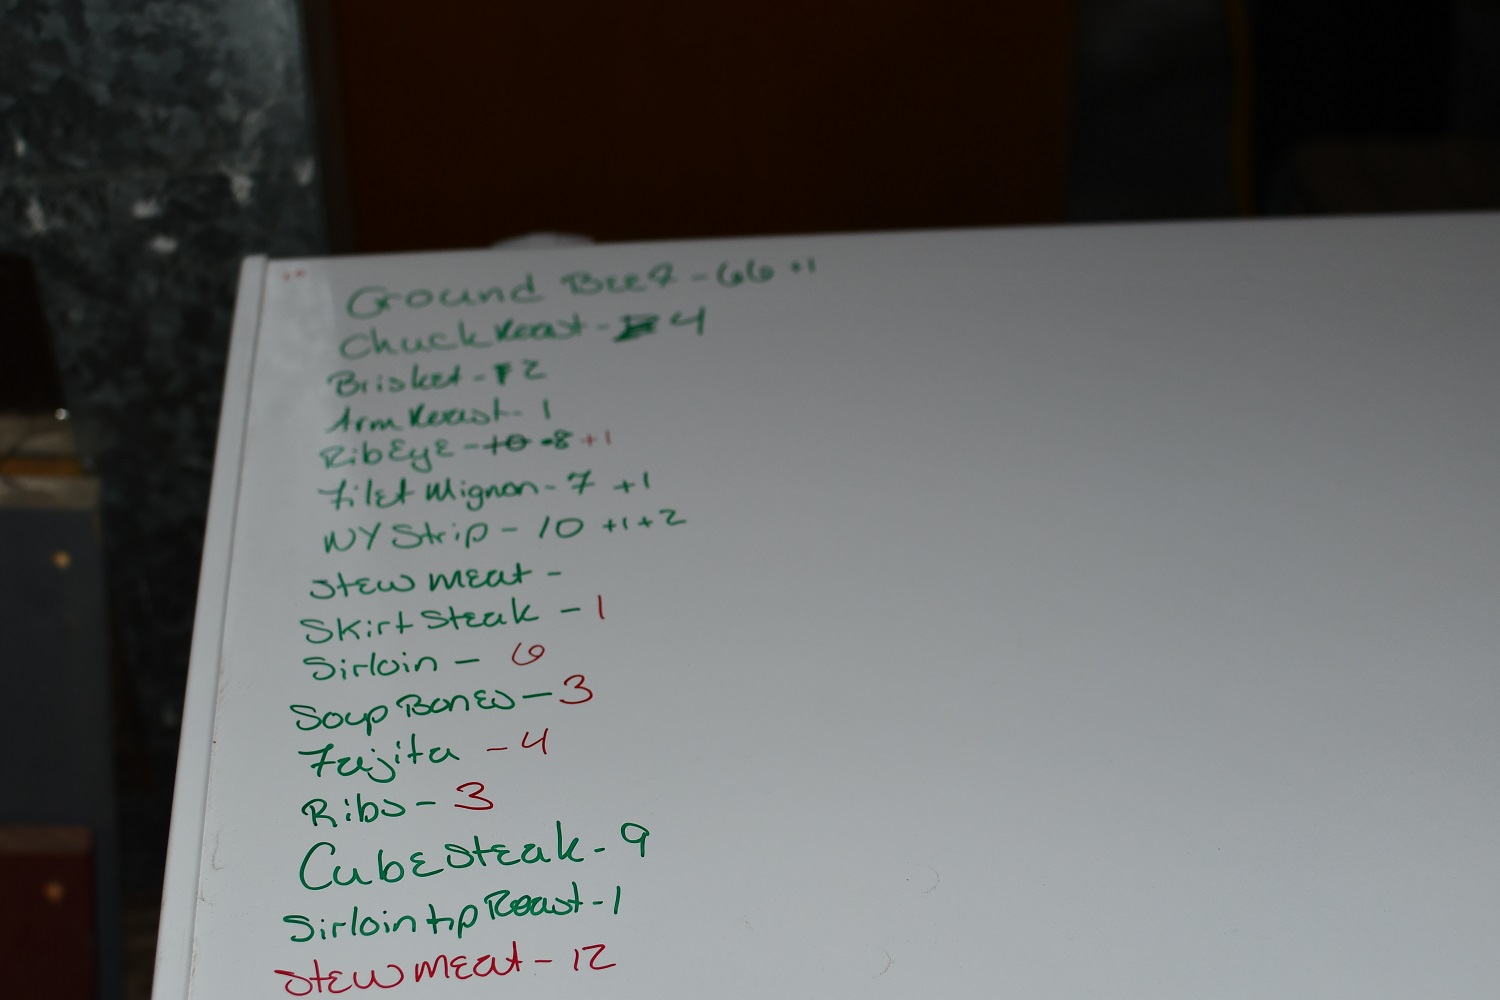
We write on our freezers. This helps keep an eye on inventory levels…. when someone remembers to deduct what they took out…. which no one does. But it’s a good idea. We know that one freezer is full of beef and the other is full of… well other. Unfortunately, what ends up happening, especially with teenage boys, is that they just shove things in the freezer.

That means that you could have cow in one freezer, hog in another and chicken in with the bacon. It’s extremely frustrating. But if you label the outside of the freezer, it could help you a lot more. We have gone so far as to list out how many packs of something is in the freezer. For example, when we load up the freezer with a whole cow, we will put 200 packs of ground beef or 17 sirloin steaks.

This has helped a ton but only if you keep up with it.
If you like the content I put out, feel free to buy us a coffee! It helps keep this site running, marketing and the goats in grain!

Buy me a coffee

If you like this post, feel free to share it and follow us below on our social media accounts!

  • Facebook
  • Pinterest
  • Instagram
  • YouTube
  • TikTok
  • Spotify
  • Threads

Filed Under: How To's, Projects Tagged With: Chickens, cooking, Homestead, kitchen, Organization

JOIN TO OUR MAILING LIST!

Leave us your email to receive new posts and special offers for members only! Don't miss a thing!

Recent Posts

  • Fall Garden Guide
  • Top Mistakes With Goats
  • How To Bond With Your Goats

Training Dogs With Livestock

July 2, 2024 by Leigh Leave a Comment

The entire Farm Dog Series revolves around training “normal” dogs to be farm dogs. It doesn’t talk about training specifically bred dogs to do their tasks. Dogs like cattle dogs or livestock guardian dogs require training that I have not personally worked through. My dogs are pound pups and companion dogs. Their only job is my enjoyment AND raising the alarm. If you are in the same boat, then I am here to talk to you about training dogs with livestock, the pitfalls and triumphs. As well as some general how to’s to get you headed in the right direction.

The Ultimate Homesteader’s Starter Bundle – Only $47!

Get the tools you need to stay organized, track profits, and manage your homestead with ease!

Includes:
✅ Schedule F Tracker – Simplify tax prep
✅ Profit Calculator – Track earnings
✅ Hay Calculator – Plan livestock feed
✅ Garden Journal – Digital & printable
✅ Herd Health Tracker – Monitor animal care
✅ Simple Budget – Manage finances
✅ Backyard Homestead eBook – Essential tips

$99 value – now just $47! Start your homesteading journey today!

Buy Now

Training Dogs With Livestock

Training dogs with livestock isn’t really any different than regular introductions with other animals, except some key points. Most livestock is bigger than the dog and poultry is usually much smaller than the dog. Also, most livestock/ poultry are prey animals and most dogs are predators. Those key differences are pretty big. But the introduction phase is still always the same, regardless of the animals being introduced. The tools for introduction need to be on point because you don’t want your dog getting a cow riled up.

But before we get started into training dogs with livestock, I want to quickly mention a few things. First, your dog should already be decently trained. They should be able to walk on a leash without going crazy or dragging you around. They should have bonded with you before and during training to ensure that they will listen to you. Their recall should be damn near perfect. These things are absolutely essential in introducing your farm dog to livestock.

Before we get too far into this, I have a great course on the basics of goat care. I call it Goat Crash Course: Goat 101. In this course, I explain things like types of shelter, types of feeds and hays, basic assessments and so much more! Check it out!

Buy Now

Start With Introductions

As I stated above, your farm dog should be easily controlled. I NEVER recommend introducing animals to other animals without having some measure in place to maintain safety. In this instance, with dogs, the dog needs to be leashed. Period. I don’t care how well they respond t you, other animals or how well trained.

Due to the nature of dogs and livestock, especially large livestock, you should never put your animals in a position where they can get injured or killed. That means that Fido goes on a leash and the livestock is behind a fence. Initial introductions should always be made through a fence or other barrier. This will allow both animals to feel safer.

Once brought to the fence, you should then, keeping your dog calm and focused on you, allow your livestock to sniff or investigate the dog. If the dog feels threatened, then talk to them and work to calm them. You have to remember that a cow, horse, donkey, or other large animal can be absolutely terrifying to your dog. This thing is huge compared to them. Keeping your dog calm and reassured is key.

If the dog and livestock are both calm and neither are acting riled up. You can get the animals closer, and closer and closer until you are in the pen with the livestock. Sometimes, this never happens. Other times, it’s all within the same day or training session. It really depends on the animals involved.

Introductions for any animals should always be done with at least two CALM people. You don’t want to do this with someone, especially kids, that are going to be distracting or freaking out. Make sure that whoever is helping you is going to either control the dog or be with the livestock.

If you are new to heating with firewood and are looking to master the finer points of it. We’ve got a great eBook that goes in depth of what tools you should consider, how and where to stack, how to build a fire and so much more!

Buy Now

Introductions with smaller livestock

I wanted to talk briefly about introducing dogs to smaller livestock or poultry. When you have medium to extra, extra large dogs, you really want to be careful with introductions to other small animals. The biggest concern when introducing larger animals to smaller animals is the fact that the large animal is well…. large. If you don’t think you can control that animal, you do not need to start making introductions at all.

When you are introducing a 75# pound pup to a baby goat, you need to be ready that the dog is going to at a minimum try to play with the goat, at a maximum, try to kill it. We want to make sure that all animals being introduced are safe. So make sure that no matter what, you are able to control the dog.

You need to understand that small animals and poultry sound a lot like squeaky toys to dogs. And most of us have used squeaky toys to work with our dogs. This has taught them that chewing on these toys creates a squeak…. well guess what that dog is going to do with your baby goat, lamb, chicken, etc. So I recommend not introducing dogs, especially puppies, to small livestock or poultry until you have a Leave It command on point and it’s solid.

Our herd health bundle helps you keep track of your herd’s health. Includes the goat assessment, herd check sheets AND Herd Health Tracker!

Buy Now

Introducing Predator To Prey

One of the things that most people have forgotten is that their dog is a predator. I know, it’s shocking. But your dog is descendant of a wolf. And while we have bred most of those instincts out of them, they are at their core a predator. But as we start letting our dogs be dogs, you are going to find that your normally docile apartment dog is now chasing chickens. This is totally normal. Please don’t get mad at your dog because they are doing exactly what they should be doing. They are dogs and dogs are predators.

But most dogs don’t want to eat chickens, baby goats, and other animals. To be honest, every time Blu would catch a chicken, she would kind of freak out because she didn’t know what to do with it once she caught it! Most dogs are like that. They aren’t trying to hurt the creature, they were trying to play with it. But they do because they don’t know any better.

The best thing that you can do is to make introductions. Then make those introductions as stress free as possible for everyone, yourself included. The best way to do this is to teach your commands and basic obedience with your dog. The next step is make introductions through a barrier and with leashes. After that, start working on getting those two animals close to each other and let your dog know to leave it alone.

The Ultimate Homesteader’s Starter Bundle – Only $47!

Get the tools you need to stay organized, track profits, and manage your homestead with ease!

Includes:
✅ Schedule F Tracker – Simplify tax prep
✅ Profit Calculator – Track earnings
✅ Hay Calculator – Plan livestock feed
✅ Garden Journal – Digital & printable
✅ Herd Health Tracker – Monitor animal care
✅ Simple Budget – Manage finances
✅ Backyard Homestead eBook – Essential tips

$99 value – now just $47! Start your homesteading journey today!

Buy Now

Tools And Training Dogs With Livestock

I talked in depth about the tools to needed to train your dogs here. That list is full of all the things that I use to train my dogs. Since we are talking about potentially dangerous situations, I would hold off on all introductions with livestock until you get to the point that your dog is trained on an ecollar. The reason is that we want to protect our livestock. If for some reason everything goes to hell in a hand basket, that ecollar may be the only thing that keeps your goat or chicken alive.

Personally, I would not let any dog meet any livestock until they are damn near perfect on their recall, leash work, and your bond. Also, I wouldn’t let Fido anywhere near livestock until you have safe, effective fencing or barriers for your livestock/poultry.

In real life, I am a paramedic so that means that I meet a lot of dogs. And the vast majority of the time, every pet owner will say something along the lines of “Oh, he’s friendly. He doesn’t bite.” And my response is always the same…. “Maybe, but today could be the day.” That being said, your dog may be the friendliest dog out there, until there is a baby goat running around screaming and jumping. Even the best trained dog is going to be freaked out until they know what this thing is.

I am going to repeat what I said before. When it comes to training dogs with livestock, you first have to have adequate control and protection over both animals, dog and livestock. Then you start with introductions through the fence. Then you bring them closer and closer and closer until they can safely meet face to face. Provide tons of reassurance and praise when everyone is happy. Don’t be afraid to correct if either of the animals starts showing out.

Finally, patience. This training doesn’t need to happen in a day. If it takes a year to get your dog comfortable with livestock, then it takes a year. Period. Both animal’s safety is more important.

Before we get too far into this, I have a great course on the basics of goat care. I call it Goat Crash Course: Goat 101. In this course, I explain things like types of shelter, types of feeds and hays, basic assessments and so much more! Check it out!

Buy Now

Farm Dog Series

If you liked this post and want to read the rest of our farm dog series you can check those out here.

Other Posts From Training A Farm Dog Series

How I Train My Farm Dogs

How To Train Farm Dogs

Tips, Tools and Hacks For Training Farm Dogs

Best Breeds For Farm Dogs

Commands For Training Farm Dogs

If you like the content I put out, feel free to buy us a coffee! It helps keep this site running, marketing and the goats in grain!

Buy me a coffee

If you like this post, feel free to share it and follow us below on our social media accounts!

  • Facebook
  • Pinterest
  • Instagram
  • YouTube
  • TikTok
  • Spotify
  • Threads

Filed Under: Animals, Farm Dogs, How To's

JOIN TO OUR MAILING LIST!

Leave us your email to receive new posts and special offers for members only! Don't miss a thing!

Recent Posts

  • Fall Garden Guide
  • Top Mistakes With Goats
  • How To Bond With Your Goats

Traveling When You Homestead

June 22, 2024 by Leigh Leave a Comment

As I sit here writing this, I am supposed to be packing, cleaning and getting ready to hit the road in two days. We are going out of town for the Homesteaders Of America Conference in Virginia this weekend. Instead of packing and getting last minute chores done, I sit here thinking about all the things I need to do, but I am obviously not doing… Thanks ADD. But all of this did get me thinking that brand new homesteaders may be struggling with the logistics of traveling when you homestead.

The Ultimate Homesteader’s Starter Bundle – Only $47!

Get the tools you need to stay organized, track profits, and manage your homestead with ease!

Includes:
✅ Schedule F Tracker – Simplify tax prep
✅ Profit Calculator – Track earnings
✅ Hay Calculator – Plan livestock feed
✅ Garden Journal – Digital & printable
✅ Herd Health Tracker – Monitor animal care
✅ Simple Budget – Manage finances
✅ Backyard Homestead eBook – Essential tips

$99 value – now just $47! Start your homesteading journey today!

Buy Now

Traveling When You Homestead

When most people travel, they have to find someone to watch their dogs, cats, maybe a snake or lizard. Usually, it is not a big deal. But when you have gardens that need to be harvested, animals that need to be fed and watered, medications to be given, sometimes finding someone is extremely difficult.

Tractor Supply

I’m not going to lie, traveling when you homestead can be a logistical nightmare. It’s not as easy as it was pre homestead. But your days of traveling aren’t over, they just look a little different now. Some homesteaders rarely leave their property. Others will only travel a certain distance away. Still others will globe trot in the winter. There is no right or wrong answer to traveling and homesteading. It’s all about logistics.

goat kidding

Before we get too far into this, I have a great course on the basics of goat care. I call it Goat Crash Course: Goat 101. In this course, I explain things like types of shelter, types of feeds and hays, basic assessments and so much more! Check it out!

Buy Now

Our Travels

Pre-homestead, we just needed to find someone that could either stay at the house with our four dogs, two cats and three bearded dragons or at least let dogs out to go to the bathroom and feed them. Heading out for a quick overnight or weekend trip was as simple as calling one of Jared’s buddies from the fire department to have them do a drive by the house and let the dogs out. Rarely was it a big deal.

Post- homestead? There’s a lot more.

The first time we went out of town, we went to Yellowstone for a week. One of my friends from work was willing to stay the week and hang out with the animals. She had a crash course in goats and we prefilled their foods, medications and anything else we could to make her life easier. She did fantastic and I am extremely grateful for her.

The second trip is to Virginia for the conference. We were lucky that our neighbor is willing to help us out since he will be home all weekend. But how do you travel when you are knee deep in kidding season, or canning season?

Below is how I get prepared to leave the homestead for a few days.

If you are new to heating with firewood and are looking to master the finer points of it. We’ve got a great eBook that goes in depth of what tools you should consider, how and where to stack, how to build a fire and so much more!

Buy Now

Getting A Farm Sitter

The first thing to do is to line up your farm sitter for your trip. If you’ve got friends or family that is willing to help out, all the better. But if not, check with your local 4-H or FFA. There are a ton of kids that are well versed in farming and would love to make some money. You could also get in touch with your local feed store and see if they know of anyone that would be willing to come out and help.

There are a ton of people out there that are willing to help out if the pay is right. There is no set rate for this, either. Some people who only have a few chickens and need someone to harvest the garden is going to charge less than someone you load chores on.

Logo 468x60

Have your farm sitter come out to the farm to go over everything with you. I leave a typed list of all the things that need to be done in order of animals. So goats have their own list, dogs, chickens, etc.

If you have a friend coming over and they know nothing about feeding animals, go ahead and pre-fill buckets or jars with feed, so all they have to do is dump and go.

Save on Seeds

Clean Up Before You Go

This isn’t just cleaning your house. It’s mucking out the stalls, barns and coops and laying fresh bedding. Move chicken tractors, electric netting, etc. so that they don’t have to mess with it. It’s fresh sheets on the bed if they are spending the night. Make sure that they do not have to do that stuff while your gone.

When we leave, we make sure that the only thing they have to do is feed and water animals, let out dogs, and collect eggs.

Harvesting The Garden

First, let me just say this, planning a vacation in July/ August, is not the best possible scenario. Can it be done? Absolutely. But if there is a choice, maybe not go during peak harvest time.

If you are in mid swing with canning and harvesting the garden, life just got a little harder. But it’s still not impossible. When we went to Yellowstone, we told my friend, you can keep anything the garden produces and any eggs the hens lay. If you don’t want it, throw it to the chickens.

But if it’s the middle of August and you are harvesting the garden every day, that’s a lot of produce to “lose”. Here are some quick tips:

The farm sitter can have anything the garden produces.

Peppers can be frozen, tomatoes too.

Cucumbers and summer squash can go to the goats, chickens and pigs.

Watermelons can stay on the vine for a few days extra.

Look into other ways your produce can be saved until you get back and have your farm sitter do that.

goat kidding

Before we get too far into this, I have a great course on the basics of goat care. I call it Goat Crash Course: Goat 101. In this course, I explain things like types of shelter, types of feeds and hays, basic assessments and so much more! Check it out!

Buy Now

Other Random Chores

Sometimes you have to leave and you have a goat in milk. Or sometimes you had an accidental breeding and now you are going on vacation when your favorite doe is going to kid. You’ve got eggs in the incubator or you’ve got chicks in the brooder. Maybe you have a last minute trip and need to butcher chickens. Or you have a sick animal that needs medications.

All of these things happen. A good farm sitter is invaluable. In theory, you should find someone that is comfortable doing all of those things. The reality is Prior Proper Planning Prevents Piss Poor Performance. That’s not to say that anyone is at fault, quite the opposite. If you can plan around your vacation, and prepare your farm sitter, everything will be fine.

Tractor Supply

In the situation of a goat in milk, see if your farm sitter is comfortable milking. If not, try drying her up before you leave. If that won’t work, think about putting her baby back with her while you’re gone. Another option is to see if you have a goat friend that would be willing to keep her while you’re gone.

Prepare

The best thing you can do when you are preparing for travel is to be as prepared as possible. Our vet has our credit card on file so that if anything happens, we are good to go. We have lists for the farm sitter. Our neighbors are willing to help out and, not only do they have knowledge of animals but have actually met our animals.

Logo 468x60

Having a good infrastructure in place is also key to making sure that you are good to go. Setting up your farm to be automated, like automatic waterers for the garden and animals, helps tremendously.

Enjoy

Lastly, enjoy your trip! Seriously, you have probably earned it. Especially in the fall/ winter when everything is buttoned up for the season and it’s time to relax and plan for spring.

If you like the content I put out, feel free to buy us a coffee! It helps keep this site running, marketing and the goats in grain!

Buy me a coffee

If you like this post, feel free to share it and follow us below on our social media accounts!

  • Facebook
  • Pinterest
  • Instagram
  • YouTube
  • TikTok
  • Spotify
  • Threads

Filed Under: Animals, Chickens, Goats, How To's, Our Homestead, Pigs Tagged With: Eggs, Goats, Homestead, traveling

JOIN TO OUR MAILING LIST!

Leave us your email to receive new posts and special offers for members only! Don't miss a thing!

Recent Posts

  • Fall Garden Guide
  • Top Mistakes With Goats
  • How To Bond With Your Goats

Making Homestead Changes

June 15, 2024 by Leigh Leave a Comment

Sometimes, and I would say with regularly, your life will change. It could be massive changes that totally rip your world apart, taking your sense of stability, safety and self away. Or it could be tiny, miniscule changes that feel good that you realize actually help you. And we all know that change is hard. Sometimes those changes make you feel like a failure, especially when it comes to your hopes and dreams. But I wanted to give you some examples of making homestead changes that we have made over the last year. I want to give you our reasoning, thoughts and how it’s working out. So that maybe, you won’t be so overwhelmed or frustrated with your own changes.

The Ultimate Homesteader’s Starter Bundle – Only $47!

Get the tools you need to stay organized, track profits, and manage your homestead with ease!

Includes:
✅ Schedule F Tracker – Simplify tax prep
✅ Profit Calculator – Track earnings
✅ Hay Calculator – Plan livestock feed
✅ Garden Journal – Digital & printable
✅ Herd Health Tracker – Monitor animal care
✅ Simple Budget – Manage finances
✅ Backyard Homestead eBook – Essential tips

$99 value – now just $47! Start your homesteading journey today!

Buy Now

Making Homestead Changes Is Hard

We have had to step back and really look at not only our homestead goals but also our family and financial goals. We had to really look at what we were spending money on and if those things really served our end financial goal. And we looked at what these things were doing to our family and if that was how we wanted to live.

We had to be really honest with ourselves and our family and make some hard decisions. And I like to think that after making these changes, we will start moving in a better and more peaceful direction.

We sold half our goat herd

This decision was a really hard one. I love my goats, all of them, but we were running into issues with hay and feed. We could afford it, but it was taking money away from other projects and savings. To feed all 15 goats for the month, I was having to spend about $1,000. That is insane.

We had to figure out who to sell and who to keep. It was an easy choice for the babies because only Goose and Maverick were being retained, all other babies were sold. Then we looked at our adults and decided that we couldn’t keep low producing mommas. So that meant that Oakley and Bailey were up. Then we looked at our bucks. Midas has been a proven breeder of healthy kids so we decided to keep him.

The goats went to a wonderful home were they get to jump and play and get all the snuggles. So I’m not terribly upset.

But making this change was important to keeping money on the farm. We are working towards retirement, not spend every penny on animals. Not to mention that it was getting overwhelming with trying to manage 15 goats plus work full time, and and and. We are down to 9 now and it’s much more manageable now.

goat kidding

Before we get too far into this, I have a great course on the basics of goat care. I call it Goat Crash Course: Goat 101. In this course, I explain things like types of shelter, types of feeds and hays, basic assessments and so much more! Check it out!

Buy Now

We decided to hold off on the farmers market this year

We paid to be apart of a locals farmers market this year and I prepped everything to center around it. As we were coming closer and closer to it, I realized that we had nothing to sell. Our chickens still weren’t producing eggs, our garden had just been put in, and I had absolutely NOTHING made to sell.

Not to mention that for us to actually make it to the market, one of us would have to be off work. Because it’s not as easy as just showing up. You’ve got to pick and wash produce, collect, wash and package eggs, load up the truck, unload the truck, and then hope that there are people at the market.

While that’s not really a big deal for most farmers, it is for us. Due to our schedules, we could really only make one market every week if we pushed it. I sat down with planners to try and figure out how we would get there and what we would sell and I just couldn’t figure out how to make it work.

Not to mention we got a late start on the garden, again. So after talking to Jared, we decided that we wouldn’t do the market just yet. We still had too many projects and things on the homestead that needed to get done. Plus, it’s easier for us to pick up shifts than to gamble that the market will pay us what we could have worked in overtime.

The Ultimate Homesteader’s Starter Bundle – Only $47!

Get the tools you need to stay organized, track profits, and manage your homestead with ease!

Includes:
✅ Schedule F Tracker – Simplify tax prep
✅ Profit Calculator – Track earnings
✅ Hay Calculator – Plan livestock feed
✅ Garden Journal – Digital & printable
✅ Herd Health Tracker – Monitor animal care
✅ Simple Budget – Manage finances
✅ Backyard Homestead eBook – Essential tips

$99 value – now just $47! Start your homesteading journey today!

Buy Now

We decided to let ourselves “play”

We all know the saying all work and no play makes Jack a dull boy. Well, one of the things about homesteading is that it tends to take over your entire life. And that’s not necessarily a bad thing. There is an immense amount of joy and pride that comes from planting and harvesting your garden, storing food and raising animals.

But the cool thing about being an adult, is that you get to have several, totally different hobbies. I’m not just a homesteader. I’m an avid reader and love tinkering on projects. I enjoy learning new things. I love to write and LOVE renovating my home. All of these things have gotten pushed to the back burner for the last several years in effort to get the homestead running.

After talking to Jared about these various things, we decided that maybe it wouldn’t be such a bad idea to start leaning into our other hobbies. He loves to work on engines. I love to make things. Why can’t we do those things too? And what does that look like?

Because I’m going to tell you, you will absolutely burnout on homesteading if all you do is eat, breathe and sleep homesteading. You should take a break to enjoy the things that you love that don’t have anything to do with homesteading.

And it’s hard. Because it takes money away from the homestead. But your mental health and wellbeing is WAY more important than making sure that you sink every ounce of energy and dollar into your homestead.

We decided not to do meat chickens this year

Well, that’s not entirely true. We are still going to do meat chickens. But instead of doing a hundred, doing classes, etc. We decided that we were just going to get a couple. We don’t eat that much chicken because we order whole cows and hogs. Plus, we don’t really like chicken.

Our original plan was that we were going to order 150 chicks, raise them and then offer classes every other weekend until they were all butchered. While we may still do that, it will be on a much smaller scale. Because raising, moving, and feeding that many chicks is expensive and hard work.

It puts a lot of strain on Jaxson (our youngest) because he is the keeper of the chickens. We help him out, but ultimately, he is responsible for making sure that they are fed, watered and moved. He asked if we could do less this year and we absolutely agreed.

The Ultimate Homesteader’s Starter Bundle – Only $47!

Get the tools you need to stay organized, track profits, and manage your homestead with ease!

Includes:
✅ Schedule F Tracker – Simplify tax prep
✅ Profit Calculator – Track earnings
✅ Hay Calculator – Plan livestock feed
✅ Garden Journal – Digital & printable
✅ Herd Health Tracker – Monitor animal care
✅ Simple Budget – Manage finances
✅ Backyard Homestead eBook – Essential tips

$99 value – now just $47! Start your homesteading journey today!

Buy Now

Making Your Homestead Changes

I’ve talked a lot about homestead goals, how to deal with overwhelm, how to work full time and homestead, and so much more on this blog. And I’ve always said that if you get overwhelmed take a step back and evaluate what you are doing. If you are burning out, look at what you can change to stop it.

And making those changes looks good on paper. I was so excited about not being so stressed about the goats, only to feel the emotional tug of having them leave the farm. I was so relived that we decided to limit the amount of chickens we raised, only to get gut punched at the financial issues of not putting on those classes. And I am so excited to get my motorcycle and “play time”, but not prepared for the guilt of “taking” my own money.

I can’t help you with making homestead changes. Those are things that you have to really look at and decide if making those changes will satisfy you. You have to look at your goals and your big picture and do a lot of introspection.

But I can tell you this, while the changes are hard, if you have really thought about what you are going to do and why? It’s a lot easier to make a change.

If you like the content I put out, feel free to buy us a coffee! It helps keep this site running, marketing and the goats in grain!

Buy me a coffee

If you like this post, feel free to share it and follow us below on our social media accounts!

  • Facebook
  • Pinterest
  • Instagram
  • YouTube
  • TikTok
  • Spotify
  • Threads

Filed Under: Garden, Homestead Planning, How To's Tagged With: goals, Goats, Homestead, Pigs

JOIN TO OUR MAILING LIST!

Leave us your email to receive new posts and special offers for members only! Don't miss a thing!

Recent Posts

  • Fall Garden Guide
  • Top Mistakes With Goats
  • How To Bond With Your Goats

What I Learned During My First Goat Kidding

June 4, 2024 by Leigh Leave a Comment

******Contains graphic images!!******

Imagine being pregnant with your first child or your partner is. You are worried about the labor and everything is a sign that labor is imminent. That twinge in the back? Must be labor. If you have ever been in labor, and now you are watching for your goat to be in labor, it is completely different. Welcome to the “other side” were you are now a spectator and hopefully not a participant. The unbelievable experience of watching your first goat kidding is amazing, terrifying and one of the coolest experiences.

goat kidding
goat kidding

Before we get too far into this, I have a great course on the basics of goat care. I call it Goat Crash Course: Goat 101. In this course, I explain things like types of shelter, types of feeds and hays, basic assessments and so much more! Check it out!

Buy Now

My First Goat Kidding

We started baby watch with Champ on March 21st. I started my checks earlier because I had no idea what I was doing or looking for. Checking ligaments became a multiple times a day thing. Taking a peak to see if any discharge was showing up. I called the vet who explained all the different things that need to happen in the weeks leading up to birthing, including not eating. Two weeks of stressing about my best girl and she was finally in labor!

She’s in labor!!

I texted our breeder because she’s been waiting just as much as I have and got together all my stuff. Now, I’m pretty extra when it comes to my babies. They get everything I can possibly give them when they are in situations like this. I grabbed molasses water to help with her energy levels. She had fresh grain and alfalfa pellets, and hay. I also had tons of towels, puppy pads and other stuff just in case.

Save on Seeds

The Kidding

The first baby’s front and back leg came out. I had to attempt to reposition and by the time she came out she was stillborn. The second baby was Stella, and she came out perfect. I had to help just a little bit and then dry her off. The third baby was one hoof, then the 2nd but the head was back. I fought for 20 minutes trying to reposition this baby to get her out and just couldn’t.

I tried resuscitating the first and third babies but they were too far gone. It was one of the hardest things I’ve ever done as a homesteader. As much as I wanted those babies to live, it was probably better for Champ that they didn’t. We would have had to pull at least one to raise as a bottle baby and she would never had produced enough milk for them.

Logo 468x60

In the end, we had three gorgeous doelings but Stella was the only one to live. We think that when our other goat Bella, rammed and then rolled Champ it moved the babies and started her labor early. But we will never know.

Stella is great and has been gaining weight like a champ. Champ has also been gaining a ton of weight which is fantastic because we were really worried about her. Her milk has come in and she really is a good momma.

So What Did I Learn About Goat Kidding?

  • More towels are always better. Seriously, I used 10 towels for three babies…..
  • Puppy pads are great if they doe actually stays on them.
  • Get a pull chain. My fingers are too big for both my fingers and the baby’s head to come through the birth canal.
  • Don’t panic. It will ultimately be okay, even if it doesn’t seem like it.
  • Watch ALL the difficult kidding videos. It could save your doe and kids life.
  • Not all labors go the same. The vet said she would stop eating and she ate between pushing.
  • Discharge may not start until just before labor and not 12-24hrs in advanced. Try like two hours.

But I wouldn’t change a bit of it. I love my goats and Champ and Stella are the best girls!

Future Goat Kidding

I could go in depth about the various times that my girls have gone into labor. If you are interested in how to tell if your goat is in labor, I have a post here that could help. I could tell you all the things I think you need when during your goat kidding. But the reality is that it’s not going to help a lot when your in the trenches. The biggest take away is to stay calm and be ready to intervene. That’s how I have gotten through the years of goats being born on the farm.

But I’ve also got some tips to help you BEFORE your doe kids. I call them safe breeding techniques.

Before we get too far into this, I have a great course on the basics of goat care. I call it Goat Crash Course: Goat 101. In this course, I explain things like types of shelter, types of feeds and hays, basic assessments and so much more! Check it out!

Buy Now

Safe Breeding Techniques

One of the things I come back to, year after year, is that livestock (for the most part) don’t need help laboring IF you practice safe breeding techniques. Things like matching your buck to doe and not breeding young does. These are very important and while normally it’s okay, sometimes it’s not.

For example, breeding a full size Nubian buck to a small Nigerian doe is going to cause a problem. This is going to cause the kid/s to be WAY too big for the doe to successfully push out. Can they do it? Sure, it happens. But the risk isn’t worth the reward.

Another example is not breeding too young does. This comes down to a lot of factors and your own philosophies. I do not intentionally breed does that are younger than 1 year old or below 80% of their full weight/size. I say intentionally because fence breeding can and does happen. When it does, you need to either be ready to terminate the pregnancy or prepare for a c section.

We have been very lucky that our bucks are happy to not go after our does even in the height of rut as long as we keep everyone fed and entertained. We’ve had a couple fence breedings though so it’s not foolproof. Thankfully, it was due to a horny nanny goat and not because of a jumped fence.

Our herd health bundle helps you keep track of your herd’s health. Includes the goat assessment, herd check sheets AND Herd Health Tracker!

Buy Now

Practicing Safe Breeding Techniques PRIOR

When you are starting to purchase your herd, make sure that you are paying attention to what you are buying. I’ve said it before, and I will say it again and again, livestock are not pets. While most of us have a soft spot for our animals (no matter if they are hooved, clawed, feathered or furred), when you are purchasing livestock, don’t just purchase to purchase.

This means that if you are breeding for milk, you purchase strong milk lines. If you are breeding for meat, you purchase strong meat lines. Don’t just purchase goats and expect them to be great milkers or for meat.

Purchasing goats from auction can almost guarantee that those goats are, at best not what you are looking for and at worse not healthy (there are exceptions to the rule). Your heart got in the way of your head and now you have a goat that can’t live without constant care. That’s what we had with Champ.

My best piece of advise for new goat owners is to set out your goals for those goats and only get goats that fit within those goals. I’m not saying don’t save that goat, I’m saying if your goal is to have milk, don’t purchase goats that can’t meet your needs.

For example, we are currently working on building our own homesteading lines. The goal is goats that are hardy and can produce milk, meat, and money. That means that we are purchasing does that have the ability to produce a gallon of milk a day. A buck that can produce stout kids that can will get at least 75# of meat at one year.

Our herd health bundle helps you keep track of your herd’s health. Includes the goat assessment, herd check sheets AND Herd Health Tracker!

Buy Now

If you like the content I put out, feel free to buy us a coffee! It helps keep this site running, marketing and the goats in grain!

Buy me a coffee
  • Facebook
  • Pinterest
  • Instagram
  • YouTube
  • TikTok
  • Spotify
  • Threads

Filed Under: Animals, Goats, How To's Tagged With: Goats, Homestead, Welcome

JOIN TO OUR MAILING LIST!

Leave us your email to receive new posts and special offers for members only! Don't miss a thing!

Recent Posts

  • Fall Garden Guide
  • Top Mistakes With Goats
  • How To Bond With Your Goats

How To Set Homestead Goals

May 28, 2024 by Leigh Leave a Comment

We all know the saying “A goal is a dream with a deadline.” — Napoleon Hill. We also know that when you break that goal down into steps it becomes a plan. Then when you take action, you can make those dreams come true. You can think it’s a load of goat shit but it really is true. We had a dream of owning a homestead, we added a deadline, made a plan, and when we followed through. Our dream became reality. If your goal is similar to ours, or if you already have a homestead and you are trying to figure out your next steps, this is how to set homestead goals.

The Ultimate Homesteader’s Starter Bundle – Only $47!

Get the tools you need to stay organized, track profits, and manage your homestead with ease!

Includes:
✅ Schedule F Tracker – Simplify tax prep
✅ Profit Calculator – Track earnings
✅ Hay Calculator – Plan livestock feed
✅ Garden Journal – Digital & printable
✅ Herd Health Tracker – Monitor animal care
✅ Simple Budget – Manage finances
✅ Backyard Homestead eBook – Essential tips

$99 value – now just $47! Start your homesteading journey today!

Buy Now

First Step For How To Set Homestead Goals

The first thing you need to do is dream. If you’re anything like me, that’s absolutely not a problem. I am a daydreamer at heart. But thankfully, I’m also a planner so getting down to the nitty gritty is also easy. But if you struggle with dream, I’ve got an exercise for you.

Daydreaming Exercise

Go out into nature. It can be a park, your yard, whatever. Take your shoes off and put your feet on the ground. This is called grounding. Take a couple of big, deep breaths. Close your eyes (as long as it’s safe!) and allow your mind to wander. Don’t think of all the responsibilities you have, allow yourself to dream.

Flush out that dream in your meditative state. Do you see animals? A huge garden? A greenhouse? What is the finished product of your goal?

Write it down

Our dream is to make the homestead as self sustaining and self funding as possible. We want to be able to pay off our mortgage in 15 years. We want our animals to not only provide food for us, but also an income. Lastly, we want the land to produce enough food and firewood that we decrease our dependency on outside sources by 75% in 5 years.

That’s a large order, right? But it’s really not when you add a deadline like 15 years for the mortgage or 5 years for independence. It is overwhelming when you stop and consider how much work, money, and time it’s going to take. But again, bite size steps or actions can really make a difference.

Logo 468x60

Setting Your Homestead Goals

These are the big goals inside our dream

  • Pay off mortgage in 15 years
  • Self sustaining and self funding
  • Animals provide food and income
  • Land produces enough food, and water and firewood to decrease dependency by 75% in 5 years.

Be sure to list out those big goals from your daydreaming. These high point/ big goals are your starting point.

Logo 468x60

By having clear and measurable goals you can then start brainstorming on what you can do to hit those goals. But the goals listed above are long term goals. And while maintaining a big picture is always a good thing, small steps are what we are after.

My list of 2022 homestead goals are:

  • Garden/ orchard
  • Goat breeding program/ goat dairy
  • Poultry
  • Remodel master bedroom/bathroom/ hall
  • Water Collection system

These small goals will help us reduce dependency, and start making a dent in our budget to allow us to put more money towards the mortgage or back into the farm.

Save on Seeds

Brainstorming or Brain Dumping

I like to list out all the possible things we can do to hit these goals. No matter how big or small, ridiculous, or crazy, I want to know what I can do to make sure we can get achieve our dreams. Get creative here.

  • Pick up extra shifts at work
  • Sell ducklings
  • Sell goat butter
  • Buy/plant fruit trees
  • Pay extra on mortgage
  • Stud out buck
  • Sell Goat Pages
  • Sell cut flowers
  • Sell eggs
  • Sell goat kids
  • Buy/ plant nut trees
  • Sell goat milk
  • Set up roach colony for dragons
  • Farmers Market
  • Stop spending so much money at Lowes
  • Sell chicks
  • Sell goat cheese
  • Plant extra in the gardens
  • Bigger salad bar for dragons
  • Sell the actual kids
  • Sell bearded dragons
  • Goat Ultrasound
goat kidding

Before we get too far into this, I have a great course on the basics of goat care. I call it Goat Crash Course: Goat 101. In this course, I explain things like types of shelter, types of feeds and hays, basic assessments and so much more! Check it out!

Buy Now

Setting The Goals With A Deadline

Setting a deadline puts your brain in motion. Your brain is going to start thinking of ways to hit those goals. And each time you mark off one of those goals, your brain releases a small hit of dopamine and serotonin which are the happy chemicals that will keep you going when you are struggling through that extra shift.

Some examples of goals with a deadline is:

  • I will install our kitchen garden by March of 2023.
  • The greenhouse will be finished by January 2024.
  • We will get and be proficient with an ultrasound machine by 2025.

Keeping goals simple will make them easier to achieve. If you have never run a marathon, it may not be the most attainable to say you are going to run a marathon in three months. Could you do it? Sure, but the chances are that you are not going to be successful without a lot of hard work.

Just because this says for a homestead, doesn’t mean it’s only for a homestead. This same theory can be used for absolutely anything.

Understanding Homestead Flexibility

There is a fine line between homestead flexibility and abandoning your goals because they are too hard or you lose interest.

At the end of the day, you have to remember that all of your goals may be amazing, achievable, S.M.A.R.T, etc. But if you don’t have the flexibility to understand that life is going to pop up and change things? Your homestead could come to a grinding halt. So make sure you are allowing for plenty of time to achieve your goals. I wrote an entire post about homestead flexibility that you can find here.

The flip side is that you have to make sure that you are staying the course. You don’t want to get distracted and end up spending more time and money on projects that aren’t worth your time and money. So make sure that while you’re dreaming, you are also keeping in mind what your definition of success is.

If you like the content I put out, feel free to buy us a coffee! It helps keep this site running, marketing and the goats in grain!

Buy me a coffee

If you like this post, feel free to share it and follow us below on our social media accounts!

  • Facebook
  • Pinterest
  • Instagram
  • YouTube
  • TikTok
  • Spotify
  • Threads

Filed Under: Animals, Canning, Garden, How To's, Our Homestead, Pigs, Projects Tagged With: cast iron, Chickens, Chicks, cooking, Goats, Homestead, kitchen, Welcome

JOIN TO OUR MAILING LIST!

Leave us your email to receive new posts and special offers for members only! Don't miss a thing!

Recent Posts

  • Fall Garden Guide
  • Top Mistakes With Goats
  • How To Bond With Your Goats

Starting Canning Season Right

May 18, 2024 by Leigh Leave a Comment

On our homestead, we can a lot. I’m not talking about making just jams either. Not only do we can individual items like corn, green beans, peaches, etc but we also can meals like chicken noodle soup, beef stew and chilis. But as we go through these jars of delicious foods, we tend to just wash them and stack them up. This creates a problem during canning season.

The Ultimate Homesteader’s Starter Bundle – Only $47!

Get the tools you need to stay organized, track profits, and manage your homestead with ease!

Includes:
✅ Schedule F Tracker – Simplify tax prep
✅ Profit Calculator – Track earnings
✅ Hay Calculator – Plan livestock feed
✅ Garden Journal – Digital & printable
✅ Herd Health Tracker – Monitor animal care
✅ Simple Budget – Manage finances
✅ Backyard Homestead eBook – Essential tips

$99 value – now just $47! Start your homesteading journey today!

Buy Now

Getting Ready For Canning Season

Canning season isn’t just about making sure you have plenty of jars, though that is definitely important. You also need to make sure you have plenty of rings, lids and your tools. You need to make sure you that you have your ingredients like vinegar, lemon juice (or citric acid), and cook or canning books. Another thing I like to make sure is ready are my canners.

Prepping Jars For Canning Season

As I said above, normally we just wash and stack our jars in the basement. Though we are slowly starting to fill jars with water before storing them. Making sure that the jars are clean and ready is key for a successful canning season.

If your jars are not not clean before starting your season, you be trying to wash jars AND can at the same time…. This creates a problem when I’m canning full force and putting up dozens of jars a day. So how do we go about getting all of our jars ready now while we wait for harvest? Every single case of empty jars comes upstairs, including all the lids, rings, and other odds and ends.

I go through each jar and make sure that they all in good condition, no chips, cracks, dips or dings. Then I go through all the rings and sort them. I will keep the rings that have rust but they go into a different bin to use on a different project. I will also take inventory on my jars and see if I need to buy more. Then I start the washing process.

I use vinegar instead of dish tabs because I’m cheap and I think the vinegar does a better job at cleaning them. Once they are clean, they get a fresh lid and ring. Back in the box and stacked up in the dining room. While this will create issues when I’m not canning, it will ultimately make everything easier when it’s time to can.

Getting Your Tools Ready

Finding out in the middle of a canning session is not the time to figure out that your funnels are broken or missing. Do yourself a favor and gather all your canning tools and make sure that you have everything.

Check to make sure that all of your strainers, ladles, and canning funnels are in good shape and you have enough of them. I have four funnels and I’m getting ready to buy a couple more that are much wider. I ordered this one. The reason is because during soup season, when I need to dump the last remaining goodness in that jar? I don’t want to spill it everywhere.

Go ahead and grab one or two more jar grabber thingy’s. Nope, I don’t know what they are actually called but I know when I start looking for mine, it’s usually hidden under all the towels and hot jars.

Also, make sure that you have PLENTY of lids. I usually can about 1,000 jars or more every year. While I do reuse lids, I am not about to learn the hard way that I have run out. Every year I purchase about 1,000 For Jars lids. I don’t always use them all, but a couple years ago, it was damn near impossible to find lids.

Lastly, make sure that all of your rags, hand and bath towels are clean and ready to go. I will blow through all of my rags and hand towels in 1 day if I’m not paying attention. My rags are for cleaning messes, hand towels for hands, and bath towels to help protect counters, tables, and other places I put my hot jars.

Are you getting overwhelmed in the garden? Stressed? Or just not enjoying the garden like you used to? Check out our garden prompts! We send out weekly emails that get you back in the garden and out of your head! Turn the garden back into a place of love and joy instead of frustration and headache!

Subscribe Now!

Start Stocking Up On Ingredients

Get your vinegar, garlic, salt and other herbs and spices for canning season. Remember, every other canner in your area is going to be getting these same items. Especially, if they did not stock up in the spring like you are doing.

We purchase salt by the 50# bag from Azure Standard as well as bulk order herbs that we can’t or didn’t grow from Mountain Rose Herbs.

Another tip is to make sure that you have all your recipes on hand and ready to go. I love this pressure canning cook book. In fact, I have copied several recipes out of it and have laminated them! Actually, to be fair, I laminate all of my favorite recipes so that I don’t ruin them with the mess that is canning season. This is the laminator that I use and love.

Checking Your Canners For Canning Season

Not everything revolves around jars during canning season. Weird, I know. But the jars are just the vessel that you are using to preserve your harvests or good deals. You also need to make sure that your canners, both pressure and water bath are in good condition and ready to go.

Peak canning season (June to September for us) is a terrible time to find out that the gasket on your pressure canner is cracked or the regulator broken. Go ahead and check those things now and order replacements if needed.

You can also take your canner to your local extension office and have them check it for you. I don’t do this, however, I do keep extra gaskets, weights, and timers around to make sure that I don’t lose one mid season… which I inevitably do.

Mentally Preparing For Canning Season

This is my final, and arguably the most important of all the prep work that you are going to do for canning season. Canning is a HUGE under taking. It involves a TON of work. You are going to be hauling potentially hundreds of jars up and down the stairs. You are going to be washing produce until your fingers look like raisins. The amount of cuts, scrapes and bruises will be mind blowing. And the very last thing you will want to do after putting up 200 jars in one day, is cook dinner.

But having the right attitude when you start canning is key to being successful. All of those things I mentioned above, happen to me every year. One year, I damn near cut my finger off. But I finished that round of canning and then went to get stitches.

But when I tell you that the emense pride you will feel when you walk into your basement and your canning shelves are filled to bursting with all that delicious food? It is worth every single ounce of effort.

These are just some of the things that you can do to make sure that you are ready for canning season. If you think of anything I missed, please comment below!

If you like the content I put out, feel free to buy us a coffee! It helps keep this site running, marketing and the goats in grain!

Buy me a coffee

If you like this post, feel free to share it and follow us below on our social media accounts!

  • Facebook
  • Pinterest
  • Instagram
  • YouTube
  • TikTok
  • Spotify
  • Threads

Filed Under: Canning, How To's, Our Homestead Tagged With: Canning, cooking, Homestead

JOIN TO OUR MAILING LIST!

Leave us your email to receive new posts and special offers for members only! Don't miss a thing!

Recent Posts

  • Fall Garden Guide
  • Top Mistakes With Goats
  • How To Bond With Your Goats

How Many Jars Do You Need For Canning?

May 7, 2024 by Leigh Leave a Comment

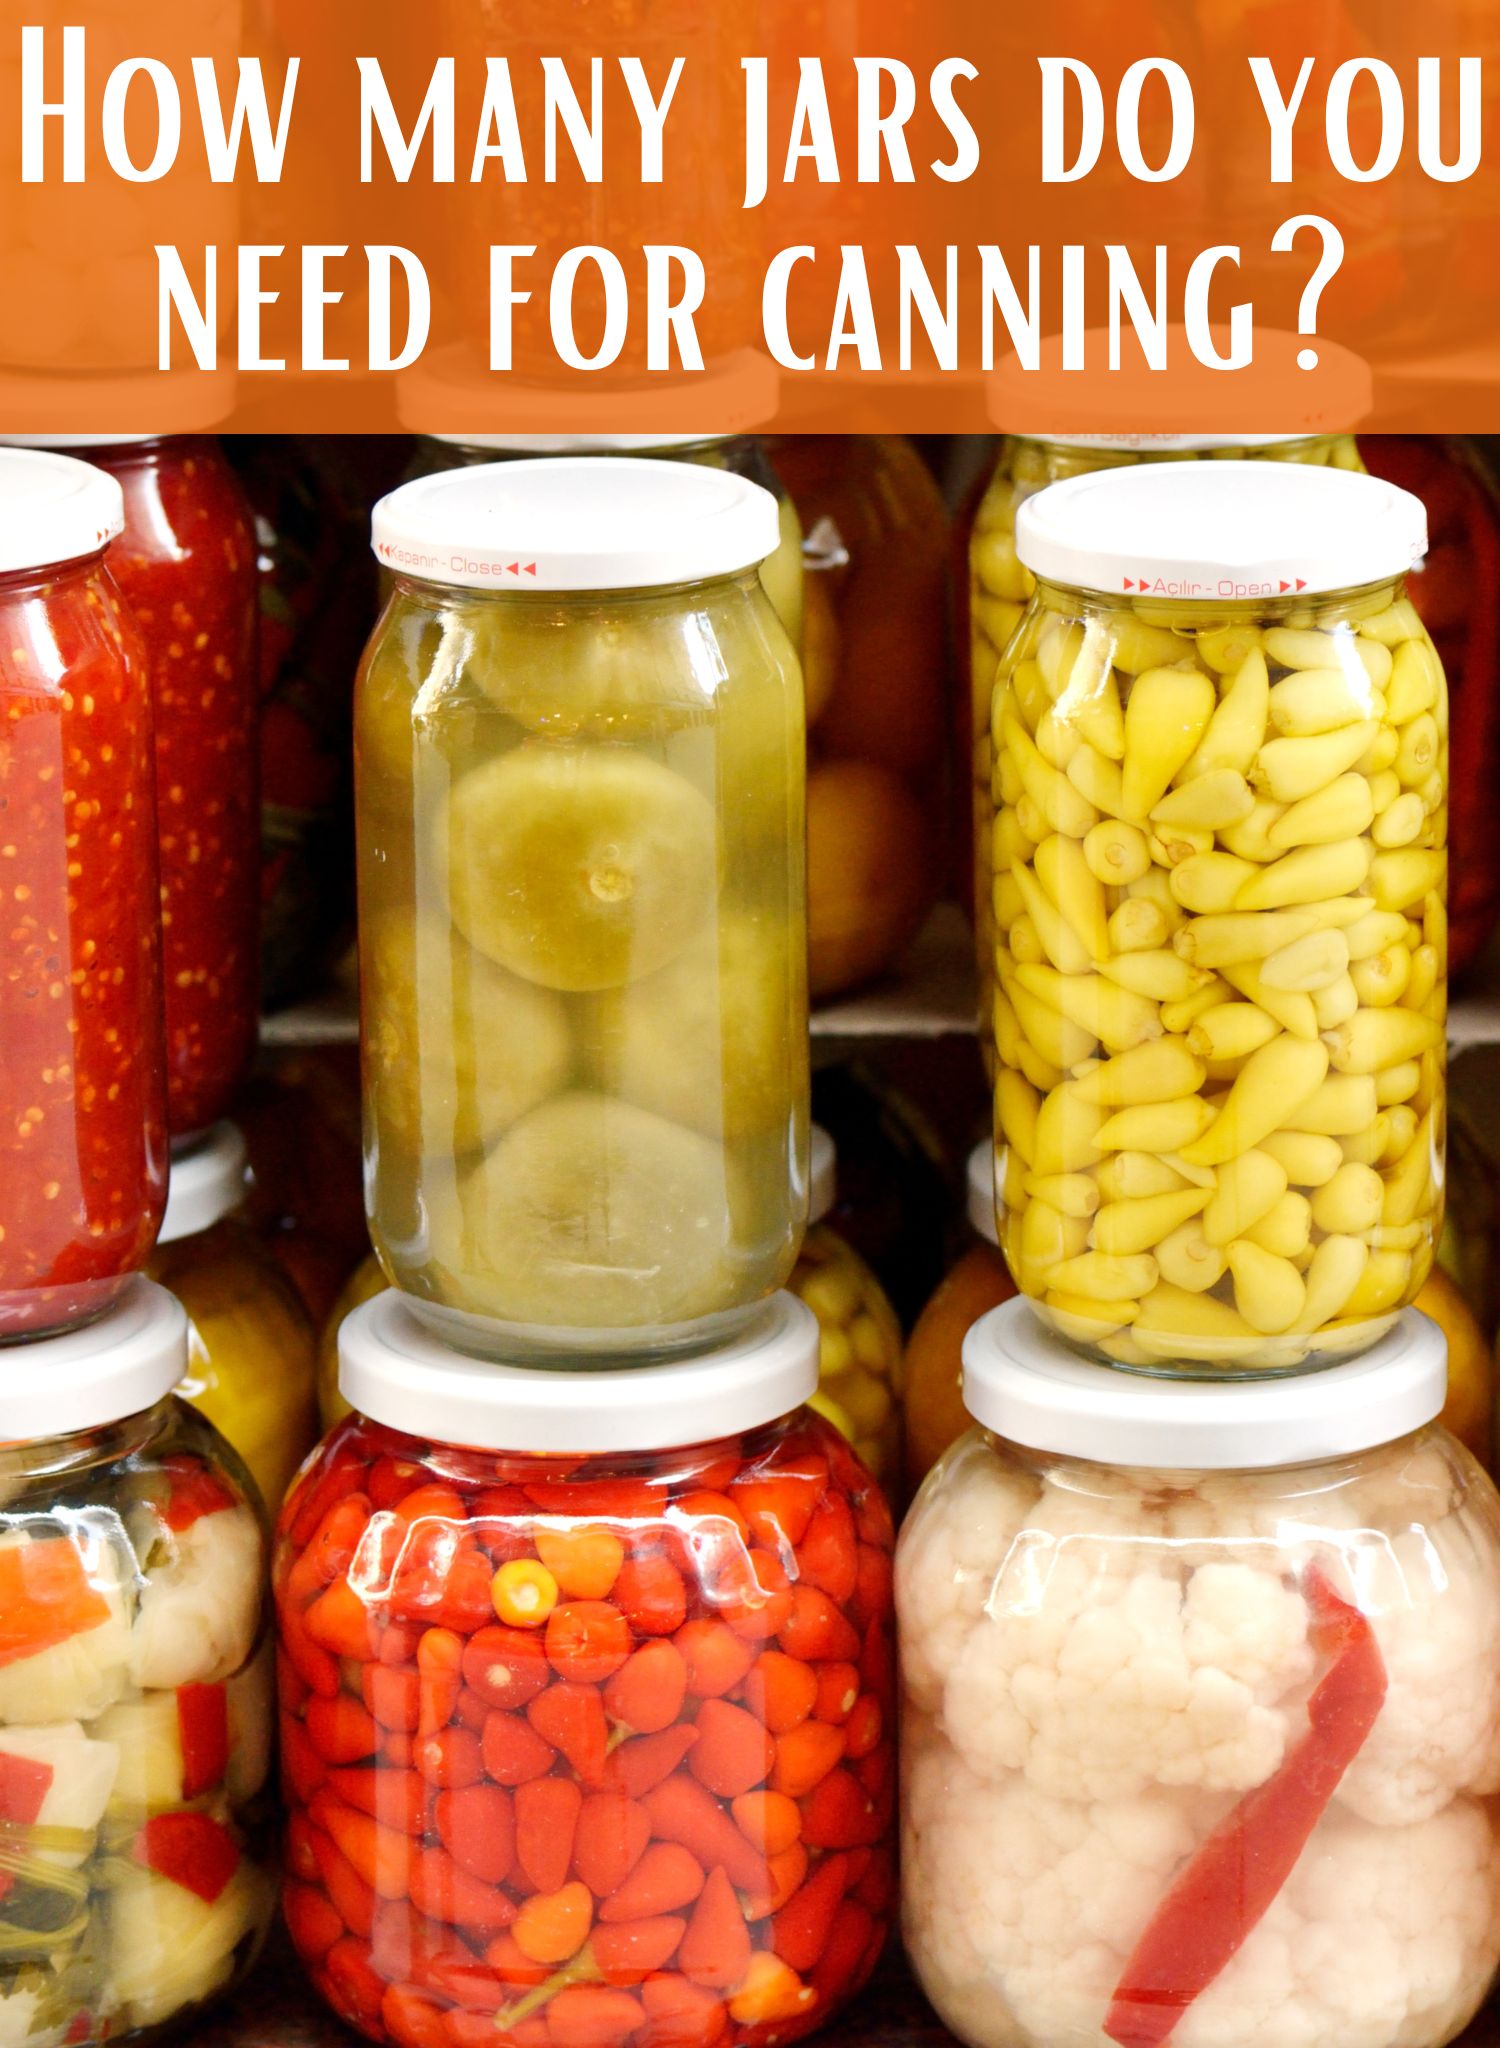
Well, the short answer is all of them. No, I am not exaggerating. When you are gardening to produce food for your family, chances are you would like to preserve some of that harvest for the rest of the year. Or if you are trying to take advantage of a produce sale? Better to have too many jars than not enough. While you can Google recipes all day long, I am more interested in the nitty gritty deals that most people forget to tell you about. Like how many jars do you need for canning? That all depends on your goals.

The Ultimate Homesteader’s Starter Bundle – Only $47!

Get the tools you need to stay organized, track profits, and manage your homestead with ease!

Includes:
✅ Schedule F Tracker – Simplify tax prep
✅ Profit Calculator – Track earnings
✅ Hay Calculator – Plan livestock feed
✅ Garden Journal – Digital & printable
✅ Herd Health Tracker – Monitor animal care
✅ Simple Budget – Manage finances
✅ Backyard Homestead eBook – Essential tips

$99 value – now just $47! Start your homesteading journey today!

Buy Now

Before We Jump In

I’ve written a couple posts on canning, so I don’t feel the need to sound like a broken record. But if you haven’t already, check out my post on gearing up for canning season, my homestead buying guide, and my shelving systems. Trust me, you will be glad you did…. at least for the shelves.

Next, we need to ask some questions before we determine how many jars you need for canning. If you are a beginning homesteader or canner, you will need to answer some questions like the ones below.

Are you looking to supply food for the entire year?

If you are looking to supply your family with an entire year of tomato sauce, you need to look very carefully at how much tomato sauce you currently buy or make. For us, we eat spaghetti about once a week. That means I need at a minimum 52 jars of tomato sauce.

The next question is, is that enough? For us, 52 jars would be gone in about six months. Because we also make chili and other things with tomato sauce. Or we will double or triple recipes because we need left overs for work. It’s the same way with green beans, corn, peas, pickles, etc. If I only can enough for what we use, we will be out in no time. That lesson was learned the hard way.

If you are new to heating with firewood and are looking to master the finer points of it. We’ve got a great eBook that goes in depth of what tools you should consider, how and where to stack, how to build a fire and so much more!

Buy Now

How many people are you feeding?

We are a family of four. But we homeschool and work 24-48 hour shifts. That means that we need left overs. Also we have two growing boys and that means we are also feeding I’m hungry, it’s not mine, and I didn’t do it. So when I am making my projection list for canning, I round WAY up.

What is your skill level with canning?

If you are a novice canner, you need to really consider if you are capable of canning more complex items like soups or stews. It’s not that soups and stews are SO hard to do. It’s actually more of a do you understand the actual process of canning.

For example; if your favorite soup has noodles, do you know that the noodles will turn to mush and become inedible. Same thing with rice, zucchini and other foods that are not as hardy. I’m a advanced but not pro level canner. I still make mistakes. So I know that I need to pay attention or all that hard work will be for not.

Before we get too far into this, I have a great course on the basics of goat care. I call it Goat Crash Course: Goat 101. In this course, I explain things like types of shelter, types of feeds and hays, basic assessments and so much more! Check it out!

Buy Now

Where are you going to put the jars?

I am extremely lucky that I have a full basement. I have sectioned off an entire food storage room. When it’s finished it will have walls, air vents, and a dehumidifier. Jared has also built me these fantastic shelves.

BUT if you don’t have that, you really need to consider how much you can actually can. If you have a tiny pantry, no basement, or other place to put them, you need to get really creative with where stuff will go.

I’ve seen under the bed storage systems for jars that will blow your mind. Keep in mind that your jars should be stored in a cool, dark place. So in a garage that is not temperature controlled probably isn’t the best idea.

Are you buying produce, or are you growing it?

We buy and grow a lot of our produce. Unfortunately, we can’t grow everything we need right now. That’s okay. It’s in the works to grow all the corn we need for a year. But it’s not here yet. If there are financial or garden space constraints, it’s better to identify them now.

Either way, knowing where you are going to source what goes in your jars is another key point in figuring out how many jars you need for canning.

The Ultimate Homesteader’s Starter Bundle – Only $47!

Get the tools you need to stay organized, track profits, and manage your homestead with ease!

Includes:
✅ Schedule F Tracker – Simplify tax prep
✅ Profit Calculator – Track earnings
✅ Hay Calculator – Plan livestock feed
✅ Garden Journal – Digital & printable
✅ Herd Health Tracker – Monitor animal care
✅ Simple Budget – Manage finances
✅ Backyard Homestead eBook – Essential tips

$99 value – now just $47! Start your homesteading journey today!

Buy Now

How far away is your local store?

Our local Wal-Mart is about 25 minutes from us. So if I run out of jars, lids, or anything else, I can get to it pretty quickly. The downside is, when it’s canning season in a farming community, there are no jars. You would be lucky to find anything.

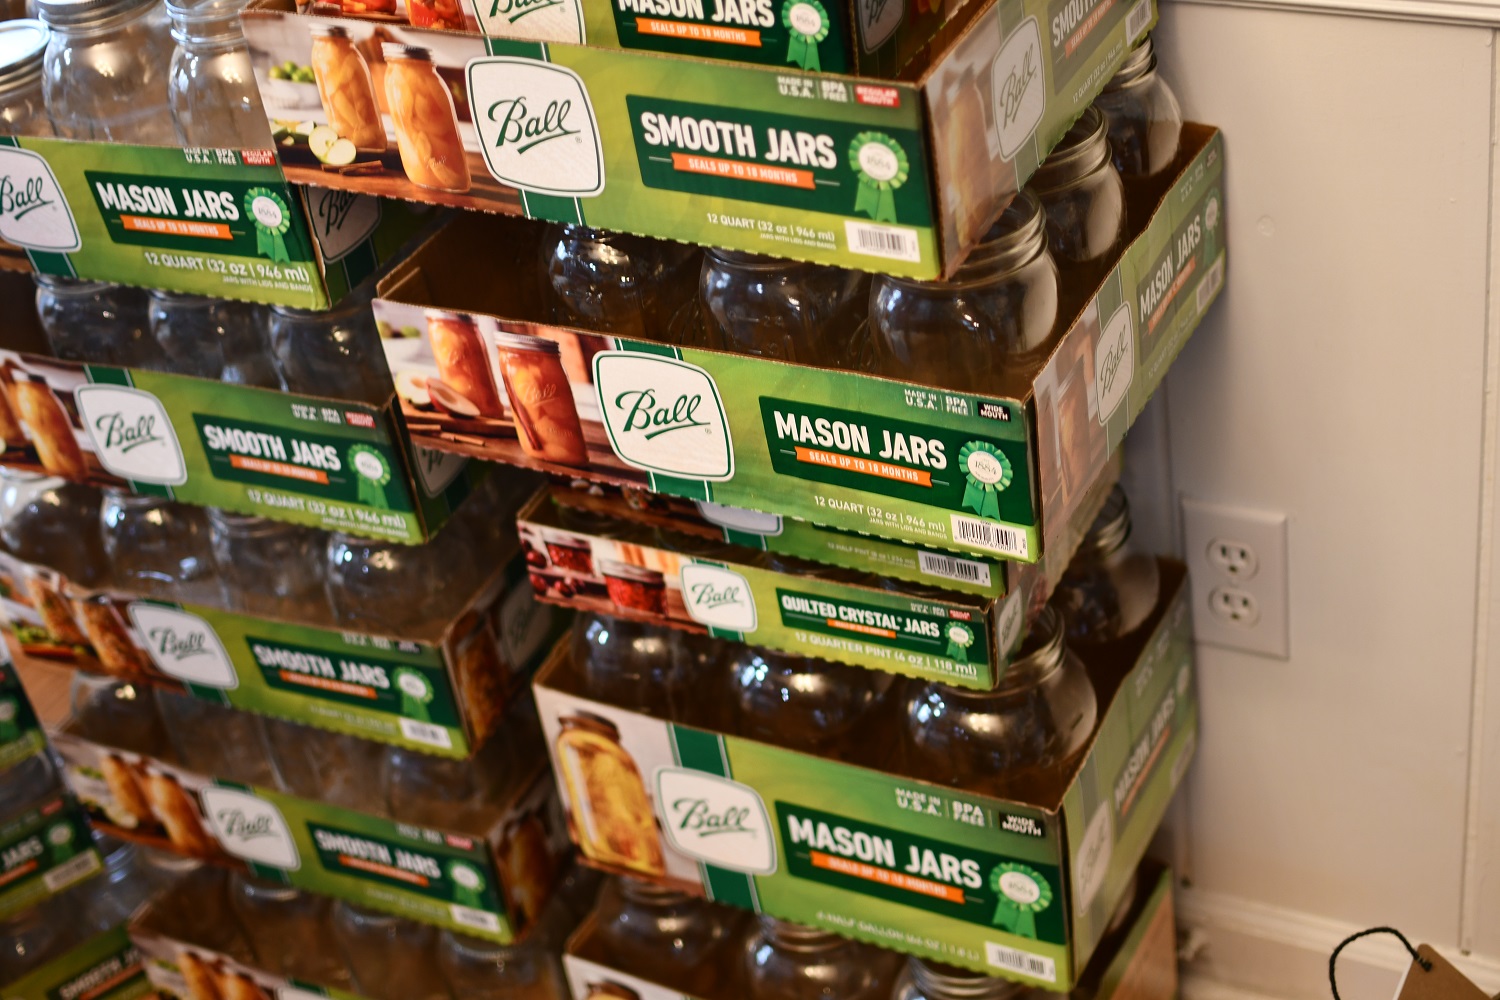
Last year, I bought brand new cases of jars because Wal-Mart had no lids! The only way I could get them was to buy the entire set up. Which is fine! I needed more jars anyways.

If your local store is more than an hour away, I would make sure to always have extra jars on hand. Maybe 1 or 2 cases per type of jar.

So how many jars do you need for canning?

I hate to break it to you, but there is no magic formula here. After you answer the questions above, you can get a much better idea for how many you need. BUT I’m not going to leave you hanging. If you are a beginning homesteader and you are trying to figure out a realistic number, I will tell you what I did.

Our herd health bundle helps you keep track of your herd’s health. Includes the goat assessment, herd check sheets AND Herd Health Tracker!

Buy Now

I buy 2 cases per size, per person, per meal.

And yes, it is a TON of jars. Part of my yearly canning list looks something like this:

52 quarts and pints of corn

52 quarts and pints of green beans

104+ quarts of tomato sauce

50 quarts and 25 pints each of: chicken noodle soup base (no noodles), beef stew, enchilada soup, taco soup, beef roast, potato soup, and chili.

25 pints of salsa

25 quarts of pickles

50 quarts each of pinto, black, kidney beans

100+ jars of potatoes

We are a family of 4 and again, we need to have enough for left overs, lunches, if the boys are home alone for the day, etc. This helps to make sure that even if we don’t eat all that corn, we have some for next year.

Are you getting overwhelmed in the garden? Stressed? Or just not enjoying the garden like you used to? Check out our garden prompts! We send out weekly emails that get you back in the garden and out of your head! Turn the garden back into a place of love and joy instead of frustration and headache!

Subscribe Now!

How many jars do YOU need?

Figuring out how many jars you actually need is going to come down to how much you enjoy canning, your storage, and your finances. Some people can’t afford to drop $12-$20/ person/ meal on jars.

At the end of the day, it’s really about what you can afford. If you can only afford two cases at a time, get them! Trust me, you will use them eventually. As you get more comfortable with canning, or you need to start making your own dog food, thanks Bear, you will appreciate having those extra cans.

Also please for the love of all that is good in this world, pick up lids every single time you see them! Come canning season, they have disappeared! Or you can buy reusable lids like Tattler. PS go to their website, they are a TON cheaper!

If you like the content I put out, feel free to buy us a coffee! It helps keep this site running, marketing and the goats in grain!

Buy me a coffee

If you like this post, feel free to share it and follow us below on our social media accounts!

  • Facebook
  • Pinterest
  • Instagram
  • YouTube
  • TikTok
  • Spotify
  • Threads

Filed Under: Canning, Garden, How To's Tagged With: Canning, cooking, Homestead, kitchen

JOIN TO OUR MAILING LIST!

Leave us your email to receive new posts and special offers for members only! Don't miss a thing!

Recent Posts

  • Fall Garden Guide
  • Top Mistakes With Goats
  • How To Bond With Your Goats

How To Keep Your Livestock Cool In Summer

April 30, 2024 by Leigh 7 Comments

It’s hot, humid and over all icky to be outside in Georgia right now. I’m pretty sure it’s the same everywhere, but I feel like Georgia slowed down to pass the state trooper and decided to “open ‘er up” once it was clear. It went from comfortable mid to upper 70’s to devil’s armpit in less than 24 hours. Not to mention we came back from Yellowstone where it was a balmy 40*! We were a little climate shocked to say the lest. Oh, and our AC doesn’t work, so we are having to use fans and window units. But what do you do with the animals that can’t come inside? How do you keep your livestock cool in summer?

Before we get too far into this, I have a great course on the basics of goat care. I call it Goat Crash Course: Goat 101. In this course, I explain things like types of shelter, types of feeds and hays, basic assessments and so much more! Check it out!

Buy Now

Keeping Your Livestock Cool In Summer

It doesn’t really matter if you have cattle, sheep, goats, chickens or just dogs and cats. There are universal truths about how to keep your livestock cool in summer that can actually keep them alive. Some are basic “Duh’s” but some of these may be new to you.

Clean Water

Every single day, multiple times a day, you need to be out there checking to make sure that they have plenty of cool water. Depending on your watering system this may just be a couple buckets in the shade. Or maybe a water trough that has a frozen gallon milk jug in it.

Regardless, it needs to be clean and fresh every single day. We have these 5 gallon buckets for our goats and we have four of them throughout the pastures and fill them on average 3x a day. On the super hot or humid days we will fill the buckets part of the way with ice to help keep the water cool. We are also planning on getting a 50 gal stock tank once the current kids are a little bigger.

Shade

It is so important for any animal or human to have access to shade when they are outside. Nothing will dehydrate an animal (including humans) quicker than being stuck in the hot sun with no shade. If you don’t have access to shade for your animals, or their shelter is in the sun, you can grab a couple of shade canopies for less than $40 depending on the sizes you choose.

We are lucky enough that all three pastures have a ton of shade so we don’t need the canopy but I would definitely look into it if you don’t.

    Electrolytes

    All animals require electrolytes, but in the summer it is especially important to have more on hand. We buy these, but have also bought Bounce Back, and Electrolytes Plus. Remember that not all electrolytes are equal. I use Bounce Back as my standard and as long as the other brands are close, I’ll buy it in a pinch.

    I will say, right now Bounce Back is expensive on Amazon but pretty affordable at Tractor Supply. Also, as a side note, Electrolyte Plus WILL FIZZ! You have been warned. I still have orange goat-r-aid on my ceiling.

    We usually will put a 5 gallon bucket out of electrolytes and then another with regular water. As we refill buckets throughout the day, we don’t add anymore electrolytes and let it get watered down. The next day we dump and refill

    Keep Their Coats Clean

    Much like with dogs, if their coat is matted, clumped, or dirty, they will have a hard time staying cool. The breeze, if there is one, can not get through to their skin. That will trap heat and cause them to get or stay hot. We brush out their winter coats, if they haven’t already blown them, when the weather maintains 70*. We also give their hooves a good trimming as well. This is also the time that they get any meds, copper bolus’, and vaccines.

    Be careful when using water to cool your animals! I know they seem hot, but when you get their coats wet, it will trap all that body heat to them.

    Also, unless your animals needs to be sheared, do not shave your animal! It doesn’t matter if it is a dog, cat, cattle, etc I have found it does more harm than good. I’ve got dogs with double coats and yes, I see them panting, but I know that the minute they get shaved, they have lost the ability to regulate their temperatures.

      Air Flow

      We all know that when it gets hot, we just want a breeze to blow through to cool us off. If you live in an area that doesn’t get a lot of wind or air movement, consider getting a solar powered fan. You can pick the size that you need but the end result is the same, get the air moving. If you’ve got electricity in your barn, then get a bigger fan. Your goats will thank you.

      Cold Treats!

      We freeze fruit and veggies in muffin tins with water. This gives them a cold treat on hot days. We have also frozen whole watermelons, cantaloupes, etc. We do this mostly for chickens but the goats love them too.

      Make sure whatever you are giving you animal, they are allowed to eat!

        But what if they get too hot?

        Much like dogs, goats will pant when they get too hot. Unlike dogs, however, this is kind of a last ditch effort in cooling themselves down. If they are panting, you need to start working to get them cooled down, right now.

        What are some signs and symptoms of a hot goat? Panting or labored breathing, poor FAMACHA, lethargic, high temperature, etc.

        In the post about what to have on hand for goats, you need to first get a rectal temperature. Their temps should be between 101-102ish. A little higher or lower is not a big deal but more than a degree in either direction needs to be monitored. More than 2 degrees and you need to start warming or cooling.

        Then check their FAMACHA. The card below will show you how to do it and what the color is. The FAMACHA tells you if they are anemic or not. If they are anemic, they do not have the blood volume necessary to handle stress well. If they can’t handle stress, like a heat emergency, they are less likely to bounce back. There is MUCH more to a FAMACHA than this, but for the sake of this post, a score under 3 is going to require a lot more care to get them healthy.

        FAMACHA Card

        Next, get bottoms of their legs in some cool (not cold) water. We don’t want to shock their system but we need to get them cooling down quickly. But do not lay them down in the water. The problem is that their fur will act like a wet blanket and keep all that heat inside. Instead, only put cool water on “bare” skin like the utters, belly, or behind their knees. All areas were their coat should be thinner.

        I bring cold, hot, or otherwise sick goats in the house. My house is relatively comfortable, despite the lack of an HVAC system. This will passively cool them. You can also put them in your bath tub to ensure they are getting cool water in a place that is designed to get wet.

        Tractor Supply

        Also, try to get some cold water into them, if they won’t drink it then you need to drench them. Recheck their temperature every five minutes or so to make sure they are cooling down. We don’t want that temperature to go too low because then we have to start warming them back up.

        Keep at it until their temperature comes down. And it should come down. Hot things will generally cool off when cold things are put on them. The most important thing is to move with a purpose but without shocking the goat.

        If you like the content I put out, feel free to buy us a coffee! It helps keep this site running, marketing and the goats in grain!

        Buy me a coffee

        If you like this post, feel free to share it and follow us below on our social media accounts!

        • Facebook
        • Pinterest
        • Instagram
        • YouTube
        • TikTok
        • Spotify
        • Threads

        Filed Under: Animals, Chickens, Goats, How To's, Pigs Tagged With: Chickens, Goats, Summer

        JOIN TO OUR MAILING LIST!

        Leave us your email to receive new posts and special offers for members only! Don't miss a thing!

        Recent Posts

        • Fall Garden Guide
        • Top Mistakes With Goats
        • How To Bond With Your Goats

        A More Realistic Way To Raise Meat Chickens

        April 27, 2024 by Leigh Leave a Comment

        If you have watched any YouTube-r, TikTok-er, or other social media influencer, you’ve probably seen them butcher and process 50-100 chickens in one shot. Maybe you tried that and it didn’t work. Or maybe you are currently doing that but it’s just not working well for you, your family and your schedule. You are not alone. So how do we raise meat chickens?

        How We Used To Raise Meat Chickens

        Before we bought our property, we researched like crazy. We wanted to be as prepared as possible. Also, we knew that there was going to be a ton of trial and error. That was okay. We were learning as we went and are still learning. But one of the biggest lessons we learned on the homestead was that raising meat chickens 50-100 at a time, simply doesn’t work for us.

        Tractor Supply

        I talked about a lot of the things we did in our post about Raising Meat Chickens Humanely. There were somethings that I didn’t mention in that post though. The first is that butchering out 50 chickens in one shot is freaking hard. We only had 25 that made it out of our first batch, and I’m not going to lie, I won’t do that again.

        Another thing that we learned was that the space that 25, 50 or 100 chickens take up is a lot. If you don’t have that space, then this may not be a good option. And it’s not just freezer space. If you aren’t going to free range them, you have to have a ton of tractors which means moving them a lot. If you do free range them and put them up at night? It’s still a lot of space for you to find.

        Processing them is another issue when it comes to space. You’ve got to have a ton of coolers or other ways to store the meat until it’s ready for the freezer. If you’re going to freeze them whole? That’s another huge space taker. Parting the chicken out is good and will save space, but not a lot.

        How Do We Raise Meat Chickens Now?

        We purchase our chicks from McMurrary Hatchery and we’ve gone with their Big Red Broilers. We still purchase 100 chicks at a time and it can be a ton of work. But we have found that we don’t always get 100 chickens in our freezer. Sometimes that because of predators or sickness. Other times we recruit help or put on a class and give some of those chickens away.

        When it comes to the decision on which chickens to raise for meat, it will always come down to your preference and your farm needs. I’ll dive more into that in a second.

        On our farm, the best part about the Big Red Broilers is that they take longer to get to weight and they don’t all get to weight at the same time. This sounds counter productive, right? YouTube University says that you should get the Cornish Cross so that all the chickens are ready to go at 8 weeks. But this doesn’t work for us.

        Because of our work schedules, we cannot devote an entire weekend to butchering 50-100 chickens. We just can’t. It would involve taking time off work and that’s more counter productive.

        Our Butchering Day

        Our butchering day isn’t an actual day… it’s weeks. Again, this may seem counter productive to some but if we can’t get time off work or if not all of our chickens are ready at the same time, we can’t do them all on one day.

        So what we do is set up our butchering area (which is on our driveway) and leave it set up for a couple of weeks. We will find the chickens that are at butchering weight and we will butcher them that day. This is usually 5-10 depending on what all we have going on that day, how many chickens are ready, etc. We put them in coolers full of salt and ice water. Then we will part them out into thighs, breasts, legs, and wings. After we have gotten what we need, we take the chicken back and put it on the stove for bone broth.

        Everything is cleaned up and “put away” in the butchering area until we have another 5-10 that are ready to go. This will go on until all the chickens are butchered. Usually, it only takes a couple weeks to get every chicken done and in the freezer.

        While this may not seem ideal to many, it works well for us.

        Why Does This Work So Well For Us?

        The reason we love the Big Red Broilers is because the meat is much more tender and tastes better. Another reason is because they have more time to get to weight. Usually, they hit weight around 12-16wks. This gives us a whole month to butcher them.

        Again, for someone (like myself) that will work themselves into the ground to get a job done, this isn’t ideal. But one of the lessons I have learned with homesteading is that you don’t have to do everything in one day, season or year. Working yourself into the ground is not ideal, especially when you are dealing with sharp knives and lives.

        It’s okay for it to take weeks to butcher the chickens.

        Have you ever tried to make 100 chickens worth of bone broth? Have you ever tried to pluck 100 chickens in one day? Do you know what to do with 100 chickens worth of blood? PS, that’s about 5 gallons of blood.

        Because we have tried it, and it just doesn’t work for us.

        Getting Help Or Giving A Class

        Sometimes, you HAVE to butcher 20-50 in one day. There’s no way around it. Everyone is ready and you’ve got to get it done. When this happens, we recruit help or put on a class. Keep in mind the difference between the two things though.

        Putting on a class means that you are teaching people how to butcher a chicken. This means that you have to walk people through the steps one by one. And it takes time! People have questions and they want to make sure they are dispatching animals as humanely as possible. I’m all about it! But when I have to get it done, the last thing I want to do is teach.

        Recruiting help means that the people that are coming know how to butcher chickens and are going to help you do it. I don’t have to make sure they know what their doing.

        Both of these things have their purpose and I love teaching people. But when we have 50 chickens that are ready to go and I need to get them in the freezer, that is not the right time to put on a class.

        So make sure that when you are reaching out for help, you are getting help. And give them a couple chickens for their help!

        Raise Meat Chickens The Way YOU Want To

        Whether you raise a years worth of chickens and butcher them in one shot, or you spread it out like we do, the most important thing is that you do it humanely and in a way this is right for you. The greatest thing about homesteading is that there is no right or wrong way. You can have livestock or not. You could love cattle and not chickens.

        If you dread processing day because it’s a multi day affair? Try doing smaller batches. Or raise two batches of meat chickens a year. Hell, do four batches if it make sense for you!

        Regardless of how you do it, just know that you are feeding your family the best possible chicken you can.

        If you like the content I put out, feel free to buy us a coffee! It helps keep this site running, marketing and the goats in grain!

        Buy me a coffee

        If you like this post, feel free to share it and follow us below on our social media accounts!

        • Facebook
        • Pinterest
        • Instagram
        • YouTube
        • TikTok
        • Spotify
        • Threads

        Filed Under: Animals, Chickens, How To's Tagged With: Chickens, Chicks, meat chickens

        JOIN TO OUR MAILING LIST!

        Leave us your email to receive new posts and special offers for members only! Don't miss a thing!

        Recent Posts

        • Fall Garden Guide
        • Top Mistakes With Goats
        • How To Bond With Your Goats
        • « Go to Previous Page
        • Page 1
        • Interim pages omitted …
        • Page 3
        • Page 4
        • Page 5
        • Page 6
        • Page 7
        • Go to Next Page »
        • Animals
          • Chickens
          • Farm Dogs
          • Goats
        • Garden
          • Compost
          • Garden Projects
          • Seeds and Plants
          • Garden Journal
          • Working With Food
            • Recipes
            • Freezing Foods
            • Dehydrating Foods
            • Canning Tips And Tricks
              • Canning Inventory Sheets
        • Helpful Info
          • Welcome to the Homestead!
          • Emergency Preparedness
          • Frequently Asked Questions
          • Goal Setting
          • Project List
          • Shop Digital Products
            • Hay Calculator
            • Farm Expense And Income Tracker
            • Goat Crash Course: 101
            • Garden Journal Prompts
            • Schedule C Tracker
            • Schedule C Tracker
            • The Homestead Bundle
        • The Truths
        • Episode List
        • Start Here
          • Privacy Policy
          • Affiliate Disclosure
          • Let’s Get in Touch
          • Members Only Library
          • Welcome To Our Homestead

        Footer

        • Email
        • Facebook
        • Instagram
        • Pinterest

        COME AND GET IT!

        Leave us your email to receive new posts and special offers for members only! Don't miss a thing!

        · Midnight Theme

        Copyright © 2026 · Midnight Theme on Genesis Framework · WordPress · Log in