• Skip to primary navigation
  • Skip to main content
  • Skip to primary sidebar
  • Skip to footer

Steel Raven Farms

Where muck boots meet ground.

  • Animals
    • Chickens
    • Farm Dogs
    • Goats
  • Garden
    • Compost
    • Garden Projects
    • Seeds and Plants
    • Garden Journal
    • Working With Food
      • Recipes
      • Freezing Foods
      • Dehydrating Foods
      • Canning Tips And Tricks
        • Canning Inventory Sheets
  • Helpful Info
    • Welcome to the Homestead!
    • Emergency Preparedness
    • Frequently Asked Questions
    • Goal Setting
    • Project List
    • Shop Digital Products
      • Hay Calculator
      • Farm Expense And Income Tracker
      • Goat Crash Course: 101
      • Garden Journal Prompts
      • Schedule C Tracker
      • Schedule C Tracker
      • The Homestead Bundle
  • The Truths
  • Episode List
  • Start Here
    • Privacy Policy
    • Affiliate Disclosure
    • Let’s Get in Touch
    • Members Only Library
    • Welcome To Our Homestead

garden chores

How To Fill A Raised Bed For Cheap

February 10, 2024 by Leigh Leave a Comment

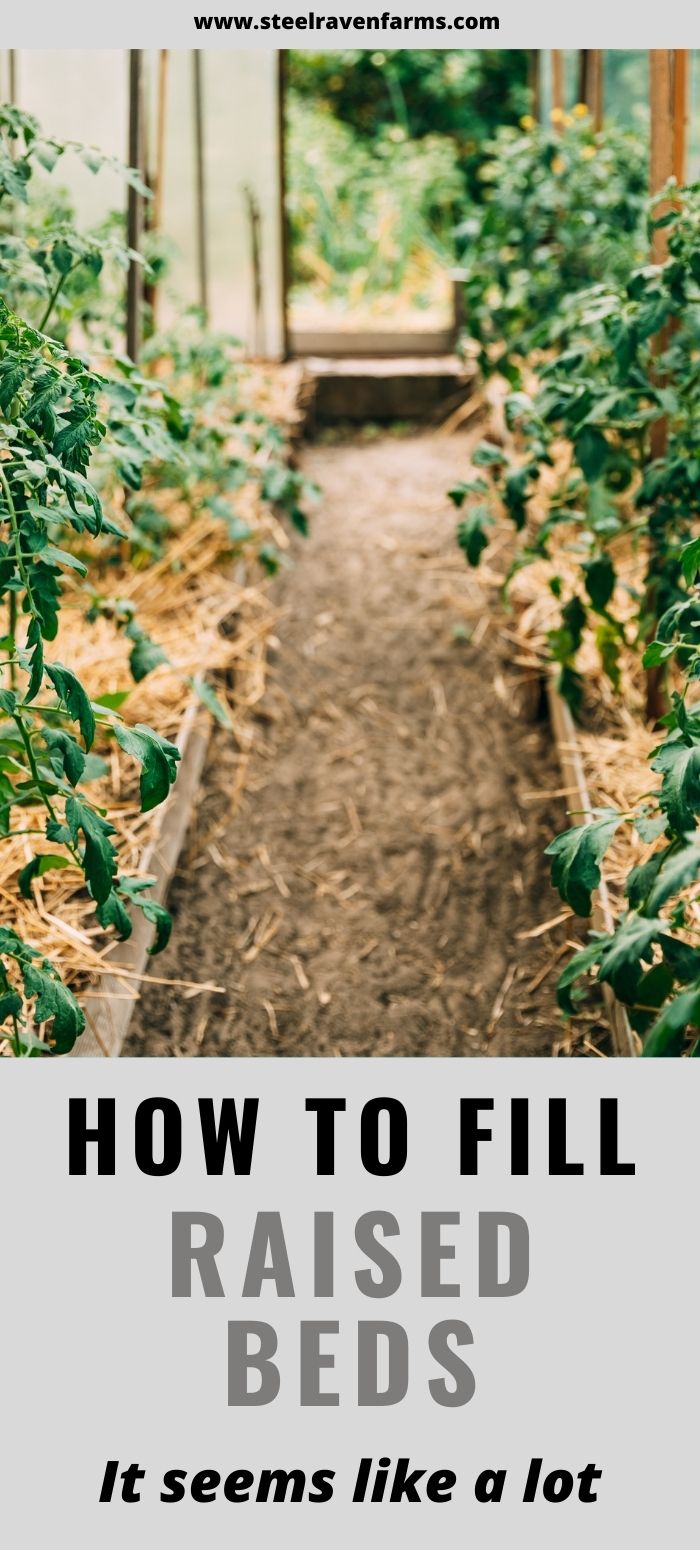
If you are looking to build raised beds, you may be wondering how to fill a raised bed. Or you’ve already done some calculations and wrote off raised beds because they are so expensive. But I’m going to walk you through how we fill our raised beds and how it doesn’t have to be THAT expensive.
Are you getting overwhelmed in the garden? Stressed? Or just not enjoying the garden like you used to? Check out our garden prompts! We send out weekly emails that get you back in the garden and out of your head! Turn the garden back into a place of love and joy instead of frustration and headache!

Subscribe Now!

How To Fill A Raised Bed For Cheap

First, there are a ton of different ways to fill a raised bed. You can go expensive with a ton of soil, or you can fill it with various organic materials. I’m going to walk you through how we fill our 4ft wide x 20ft long x 2ft tall raised beds.

Using Trees To Fill A Raised Bed

Once Jared is done building the bed, I start gathering all the unusable logs on the property. We have had to take down a bunch of pines on the property. Even though we heat our home solely with firewood, we don’t burn pine in the house, but sometimes we will burn pine in the firepit. Instead, we use it in the gardens. We’ve used these pine logs as bed boarders and organic material for inside the beds.

If you are new to heating with firewood and are looking to master the finer points of it. We’ve got a great eBook that goes in depth of what tools you should consider, how and where to stack, how to build a fire and so much more!

Buy Now

These pines and other rotten logs will get put on the bottom of each bed. Usually, this will fill the beds about 50-60% with logs. If the logs aren’t very large or the bed isn’t close to half filled, we will add a second layer of logs. The goal is to completely cover the bottom half (ish) of the bed with these logs. Since trees tend to take FOREVER to breakdown, the idea is that you shouldn’t have to refill the bed that much every year.

The biggest concerns when using trees or logs to help fill your raised bed is going damaging your bed as you fill it, nitrogen depletion, and termites. Out of all of this list, the only thing I am truly worried about is damaging the bed as we fill. We use galvanized steel roofing panels for the walls of the bed and the frame is outside the bed. That means that if we just throw logs into the beds, they could damage the roof panels.

We aren’t going to have issues with termites because we use the steel roofing panels. And I’m not super worried about nitrogen depletion because we use cover crops, manure, etc to keep our soil healthy.

Smaller Branches Next

After we have placed a good layer of logs into the bed, we start filling the next 25% with sticks, branches, etc. The goal is to use as much of the “free” downed trees as possible before using expensive materials like pine shavings, compost and soil.

I don’t usually go crazy breaking these into smaller pieces. But I will jump into the bed and stomp around until they are broken. Again, I’m not going crazy here, but I want to use as much free stuff as possible so I don’t HAVE to purchase more than absolutely necessary.

If you are looking for a great way to keep track of your gardens for years to come, check out our Digital Garden Journal. It’s a digital spreadsheet that helps you manage not only your seedlings but also your seed inventories, soil testing, orchard, harvests and so much more.

Buy Now

Filling With Smaller Stuff

After I’ve gotten all the logs and branches to about 75% of the bed, I start adding the small stuff. I usually fill this to about 85%. This is the stuff that is going to breakdown very quickly. Usually, it breaks down in less than a year. What is the smaller stuff? It’s leaves, wood chips, pine shavings, etc. Again, I want to add as much free stuff as possible before I start adding my compost and soil.

My local power company drops off wood chips for us all the time so we don’t have to pay for those. And our property is mostly wooded, so we have a TON of leaves. We leave a ton of those leaves on the ground for the ecosystem but we do pick up some for the beds. But the pine shavings are my magic bullet.

We use the deep litter method for our livestock and poultry to keep them warm in the winter. So I’ve already paid for the pine shavings once. The pine shavings start to compost throughout the winter and they are “dirty” with animal poop and urine. This is great compost/ filler for my raised beds. Also, because it takes a bit longer for wood to start to fully break down, it adds structure to the soil.

Finally Adding Soil And Compost

One of the reasons that our raised beds don’t cost us a ridiculous amount to fill is because we only add about 4-6″ of soil/ compost. For our 4ftx20ft raised bed, that’s about 40cu ft of soil. Which is still a LOT, but compared to 160cu ft of soil, it’s not too bad.

The reason I don’t add more soil is because I don’t need to. Because of the animal bedding/ pine shavings, there is a ton of nutrients for the roots to grab onto.

Are you getting overwhelmed in the garden? Stressed? Or just not enjoying the garden like you used to? Check out our garden prompts! We send out weekly emails that get you back in the garden and out of your head! Turn the garden back into a place of love and joy instead of frustration and headache!

Subscribe Now!

Lastly!

Worms! I add one or two bait cups of red wiggler or earthworms. Normally, you wouldn’t have to, and you don’t have to. But I like to kick start new garden beds with as much help as I possibly can.

When it comes to adding worms, remember, you don’t have to do this. But I have found that it helps to jump start their work. Also, having them get all that fresh soil, pine shavings, etc composting as soon as possible is amazing.

If you are interested in learning more about my favorite garden planner. I highly recommend Seedtime! This planner has been instrumental in helping me plan out my gardens with WAY more efficiency than I could ever expect! It has also reduced overwhelm, stress, and calmed my ADD/ADHD!

More Info!

Filling A Raised Bed FAQ:

Why Not Fill To The Top?

If you did a quick calculation, you’ll notice that the logs take up 50-60%, the sticks another 25%, and small stuff fills the bed to 85%. Soil only covers another 4-6″ bringing the total volume of the bed to about 90% full.

The reason I don’t fill the bed to the tippy top is for a couple of reasons. One, I don’t want to risk the soil sitting against the wood. Two, I don’t want to risk soil running out of the bed and causing run off. Three, I want to have a good healthy layer of mulch in the bed.

If I fill the bed to the top with soil, the mulch will not stay put and soil will sit on the ledge of the garden bed.

cropped-3.jpg

Are you looking for garden journal prompts, but aren’t interested in a weekly email? Check out our 365 Garden Journal Prompts! This is an amazing, all in one, yearly product that you only pay for once.

Buy Now!

Why Not Fill With Soil?

My beds are 4ftx20ftx2ft. This means that I would have to spend about $400+ per bed on soil. Minimum. Not to mention that if I don’t put organic matter into the soil, the soil will lose nutrients and structure.

Also, having wood in the bottom allows that all important fungi to grow even better. This improves soil quality exponentially.

Why Not Use Hay As Filler?

There are two main problems with using hay as filler. One, hay is usually sprayed with herbicides, pesticides and sometimes fungicides. That means that I am putting those -icides into my raised beds where I am trying to ENCOURAGE that growth. At worse, plants won’t grow and at best they will be stunted.

The second issue with using hay as filler is that purchasing unsprayed hay is already expensive. Using it to fill a bed seems like a waste of money in my book. That’s not to say that I won’t use spent hay that the goats have dropped. But I wouldn’t just take a bale and put it right into my beds.

There is an added inconvenience of having little hay sprouts grow in the beds. In my mind, it’s not that big of a deal, but it may be a thing for some.

Doesn’t The Soil Settle Over Time?

Yes, it does. In fact, the first year, your soil levels could drop by up to half as the soil settles and starts filling those nooks and crannies. But if you fill the bottom of the bed with logs and stack them pretty tight, you won’t lose a ton of soil.

Also, I add pine shavings, grass clippings, etc to my garden throughout the season. So even if the soil levels drop, I’m still getting fresh compost developing. It takes a while for the soil levels to settle so be prepared for the long haul. But I love my raised beds and I really enjoy having them.

If you like the content I put out, feel free to buy us a coffee! It helps keep this site running, marketing and the goats in grain!

Buy me a coffee

If you like this post, feel free to share it and follow us below on our social media accounts!

  • Facebook
  • Pinterest
  • Instagram
  • YouTube
  • TikTok
  • Spotify
  • Threads

Filed Under: Garden, Garden Projects Tagged With: garden chores, garden journal, gardens, Homestead, Raised Beds, soil

JOIN TO OUR MAILING LIST!

Leave us your email to receive new posts and special offers for members only! Don't miss a thing!

Recent Posts

  • Fall Garden Guide
  • Top Mistakes With Goats
  • How To Bond With Your Goats

October Garden Chores

October 5, 2023 by Leigh Leave a Comment

I was going to do a month by month to do list all in one post, but I soon discovered that the post would have been extremely long. So instead we are going to go over what to do in your garden by month. While the posts will generally be shorter, I think it’ll break down easier and be less overwhelming. I’m also going to write this for those in zone 7 since that is where I am and this is what I do. I don’t feel right making a blanket post and you’re in zone 4 and can’t do half of this stuff. You can absolutely adjust this based on your growing seasons, frost dates, etc. So here is my October garden chores.

October Garden Chores

There is a fair amount of things that should be done in the October garden but it is not as exhausting as the spring or summer gardens. October is the month of final summer harvests and starting to harvest the fall garden. We are also prepping gardens for winter. Since, we are always pushing the limits on our fall gardens, we have some prep work that needs to be done before we actually button up for winter.

If you are struggling to stay consistent, focused, and less stressed, sign up to be notified about our garden prompts! It’s a weekly email that helps guide you in the garden! It has greatly reduced my stress and anxiety and gotten me back to loving the garden!

Are you getting overwhelmed in the garden? Stressed? Or just not enjoying the garden like you used to? Check out our garden prompts! We send out weekly emails that get you back in the garden and out of your head! Turn the garden back into a place of love and joy instead of frustration and headache!

Subscribe Now!

Finish Pulling Summer Plants

Usually we are done with this chore in September, but sometimes we’ve let a tomato plant or sweet potatoes go for a little longer, depending on our weather. This means that we can have a ton of things to pull down, even if they are still producing for us.

We do not actually pull plants out of the ground, unless they are weeds. We choose to cut plants at soil level to allow the soil microbes to keep working and feeding. We started doing this after reading Dirt to Soil by Gabe Brown, you can read my review on the book here.

If the bed is “done” for the winter, we will either lay the cut plants on top to act as mulch or we will put a chicken tractor over the cut plants and let the chickens do some work. If we have planted cover crops we will move the cut plants to the side and seed that bed with cover crops. Once the cover crops have sprouted, we will put cut plants back over the sprouts.

Planting Onions and Garlic

We plant all of our onion and garlic for the year in October to harvest in May/June. This means about 400 each of garlic and onion, which is a TON. But we usually eat about an onion per day and can run through some garlic pretty fast. We also try to put some to the side for replanting the following October.

This can be a pinch point in the garden because we have such a long growing season. Because we plant in October and harvest in June, we don’t want want to put it in a bed that we will need for spring or even early summer planting. This is when having a plan for the following year and understanding exactly what you’ve planted, where, etc is so important. It’s also a really good idea to make sure that you’ve got a good garden journal.

Before we get too far into this post, I wanted to give a suggestion about keeping a garden journal. A digital garden journal is a fantastic way to keep track of past, present and future gardens. Our Digital Garden Journal is a great way to keep up with everything without getting too overwhelmed.

Buy Now

Another option to avoid a pinch point in the garden is to use the garlic/onion beds to provide bumper crops of tomatoes, peppers, squash, etc. In our zone (7b), our last frost is anywhere from April 15th to May 1st and our first frost is from October 15th to November 1st, and it is never the same. We plan our summer gardens off where the garlic and onions are and just prepare that bed for a bumper crop.

Barn Clean Out

While this doesn’t seem like a “normal” garden chore. We go through and thoroughly clean out the barn, chicken coops, tractors, etc and make sure that all of the animal bedding is either put into the beds that will be “bare” over winter or put into the compost piles.

Tractor Supply

I wrote a post about using animal bedding as compost here. This allows us to have a fresh space for the animals going into winter and also sets up those beds or compost piles for the following spring. While it’s not as much of a back breaking chore as it is in the spring, it is a really good time to amend beds that may have had heavy feeders in them the previous season.

Animals In The Gardens

This is the time of year that we let the animals eat the gardens. Not the whole garden, but we will put them into the garden areas that we want eaten. This helps us because we don’t have to chop and drop as much and the animals get a “free” meal.

For the chickens, this means putting their tractors over the kitchen garden beds and letting them go to town. They amend the beds, eat left over plants, and eat a bunch of pests that are in the beds. We have had a lot of luck with this but I’ve had a lot of people ask about the high nitrogen in chicken manure.

Save on Seeds

We’ve not had a problem with ANY plants burning because we don’t put the manure directly on the plants. What we do is add hot manure to the compost pile and let it age a bit. Or we will put in a bed that has gotten pretty low, and we add a bunch of soil or other compost over it. That way, it can continue to break down and drop all that nitrogen back in the soil.

Watering!

This is a chore that a lot of people tend to forget about, myself included. It’s just not as hot! So there’s not really a need to get out there and make sure that the garden gets watered. The problem is, where we live, it doesn’t really rain a whole lot in September and October. Sure, we’ll get a shower here and there but it’s not uncommon to go weeks without a real rain.

Make sure you’ve still got your garden on a water timer like this one. We hook a 4 spout splitter above the timer like this one. This ensures that we don’t have to constantly adjust the water timer if we need to use the hoses.

You’ll also notice that you won’t need to water as often or as heavy, provided you’ve been mulching. That’s because the sun isn’t as bright or hot and, of course, the days are shorter.

That’s about it for my October Garden Checklist

I usually try to get out in my gardens at least 3 or 4 times a week at this point because I’m still harvesting green beans, peas, squashes, etc. But for the most part, my gardens are getting buttoned up for winter.

Don’t forget to check out our garden prompts!

Let me now in the comments what you do in October!

If you like this post, feel free to share it and follow us below on our social media accounts!

  • Facebook
  • Pinterest
  • Instagram
  • YouTube
  • TikTok
  • Spotify
  • Threads

Filed Under: Garden Tagged With: chore list, Chores, Garden, garden chores

JOIN TO OUR MAILING LIST!

Leave us your email to receive new posts and special offers for members only! Don't miss a thing!

Recent Posts

  • Fall Garden Guide
  • Top Mistakes With Goats
  • How To Bond With Your Goats

Primary Sidebar

WELCOME

WELCOME

My name is Leigh and I am the lead chaos creator here at Steel Raven Farms. You will see throughout this blog that I am the crazy goat lady.

I am married to my high school sweetheart, Jared and we have two amazing boys.

FOLLOW ME

  • Amazon
  • Facebook
  • Instagram
  • Pinterest
  • TikTok

GET UPDATES!

Leave us your email to receive new posts and special offers for members only! Don't miss a thing!

In all the years that I’ve been growing a garden, the fall garden has steadily remained my favorite. Which is funny because I don’t really like any of the brassicas, which is what most people know the fall garden for. I prefer the root vegetables and cool air. But I have learned over the years…

Read More

  • Animals
    • Chickens
    • Farm Dogs
    • Goats
  • Garden
    • Compost
    • Garden Projects
    • Seeds and Plants
    • Garden Journal
    • Working With Food
      • Recipes
      • Freezing Foods
      • Dehydrating Foods
      • Canning Tips And Tricks
        • Canning Inventory Sheets
  • Helpful Info
    • Welcome to the Homestead!
    • Emergency Preparedness
    • Frequently Asked Questions
    • Goal Setting
    • Project List
    • Shop Digital Products
      • Hay Calculator
      • Farm Expense And Income Tracker
      • Goat Crash Course: 101
      • Garden Journal Prompts
      • Schedule C Tracker
      • Schedule C Tracker
      • The Homestead Bundle
  • The Truths
  • Episode List
  • Start Here
    • Privacy Policy
    • Affiliate Disclosure
    • Let’s Get in Touch
    • Members Only Library
    • Welcome To Our Homestead

Footer

  • Email
  • Facebook
  • Instagram
  • Pinterest

COME AND GET IT!

Leave us your email to receive new posts and special offers for members only! Don't miss a thing!

· Midnight Theme

Copyright © 2026 · Midnight Theme on Genesis Framework · WordPress · Log in