• Skip to primary navigation
  • Skip to main content
  • Skip to primary sidebar
  • Skip to footer

Steel Raven Farms

Where muck boots meet ground.

  • Animals
    • Chickens
    • Farm Dogs
    • Goats
  • Garden
    • Compost
    • Garden Projects
    • Seeds and Plants
    • Garden Journal
    • Working With Food
      • Recipes
      • Freezing Foods
      • Dehydrating Foods
      • Canning Tips And Tricks
        • Canning Inventory Sheets
  • Helpful Info
    • Welcome to the Homestead!
    • Emergency Preparedness
    • Frequently Asked Questions
    • Goal Setting
    • Project List
    • Shop Digital Products
      • Hay Calculator
      • Farm Expense And Income Tracker
      • Goat Crash Course: 101
      • Garden Journal Prompts
      • Schedule C Tracker
      • Schedule C Tracker
      • The Homestead Bundle
  • The Truths
  • Episode List
  • Start Here
    • Privacy Policy
    • Affiliate Disclosure
    • Let’s Get in Touch
    • Members Only Library
    • Welcome To Our Homestead

compost

What Is A Fall Garden

August 10, 2024 by Leigh Leave a Comment

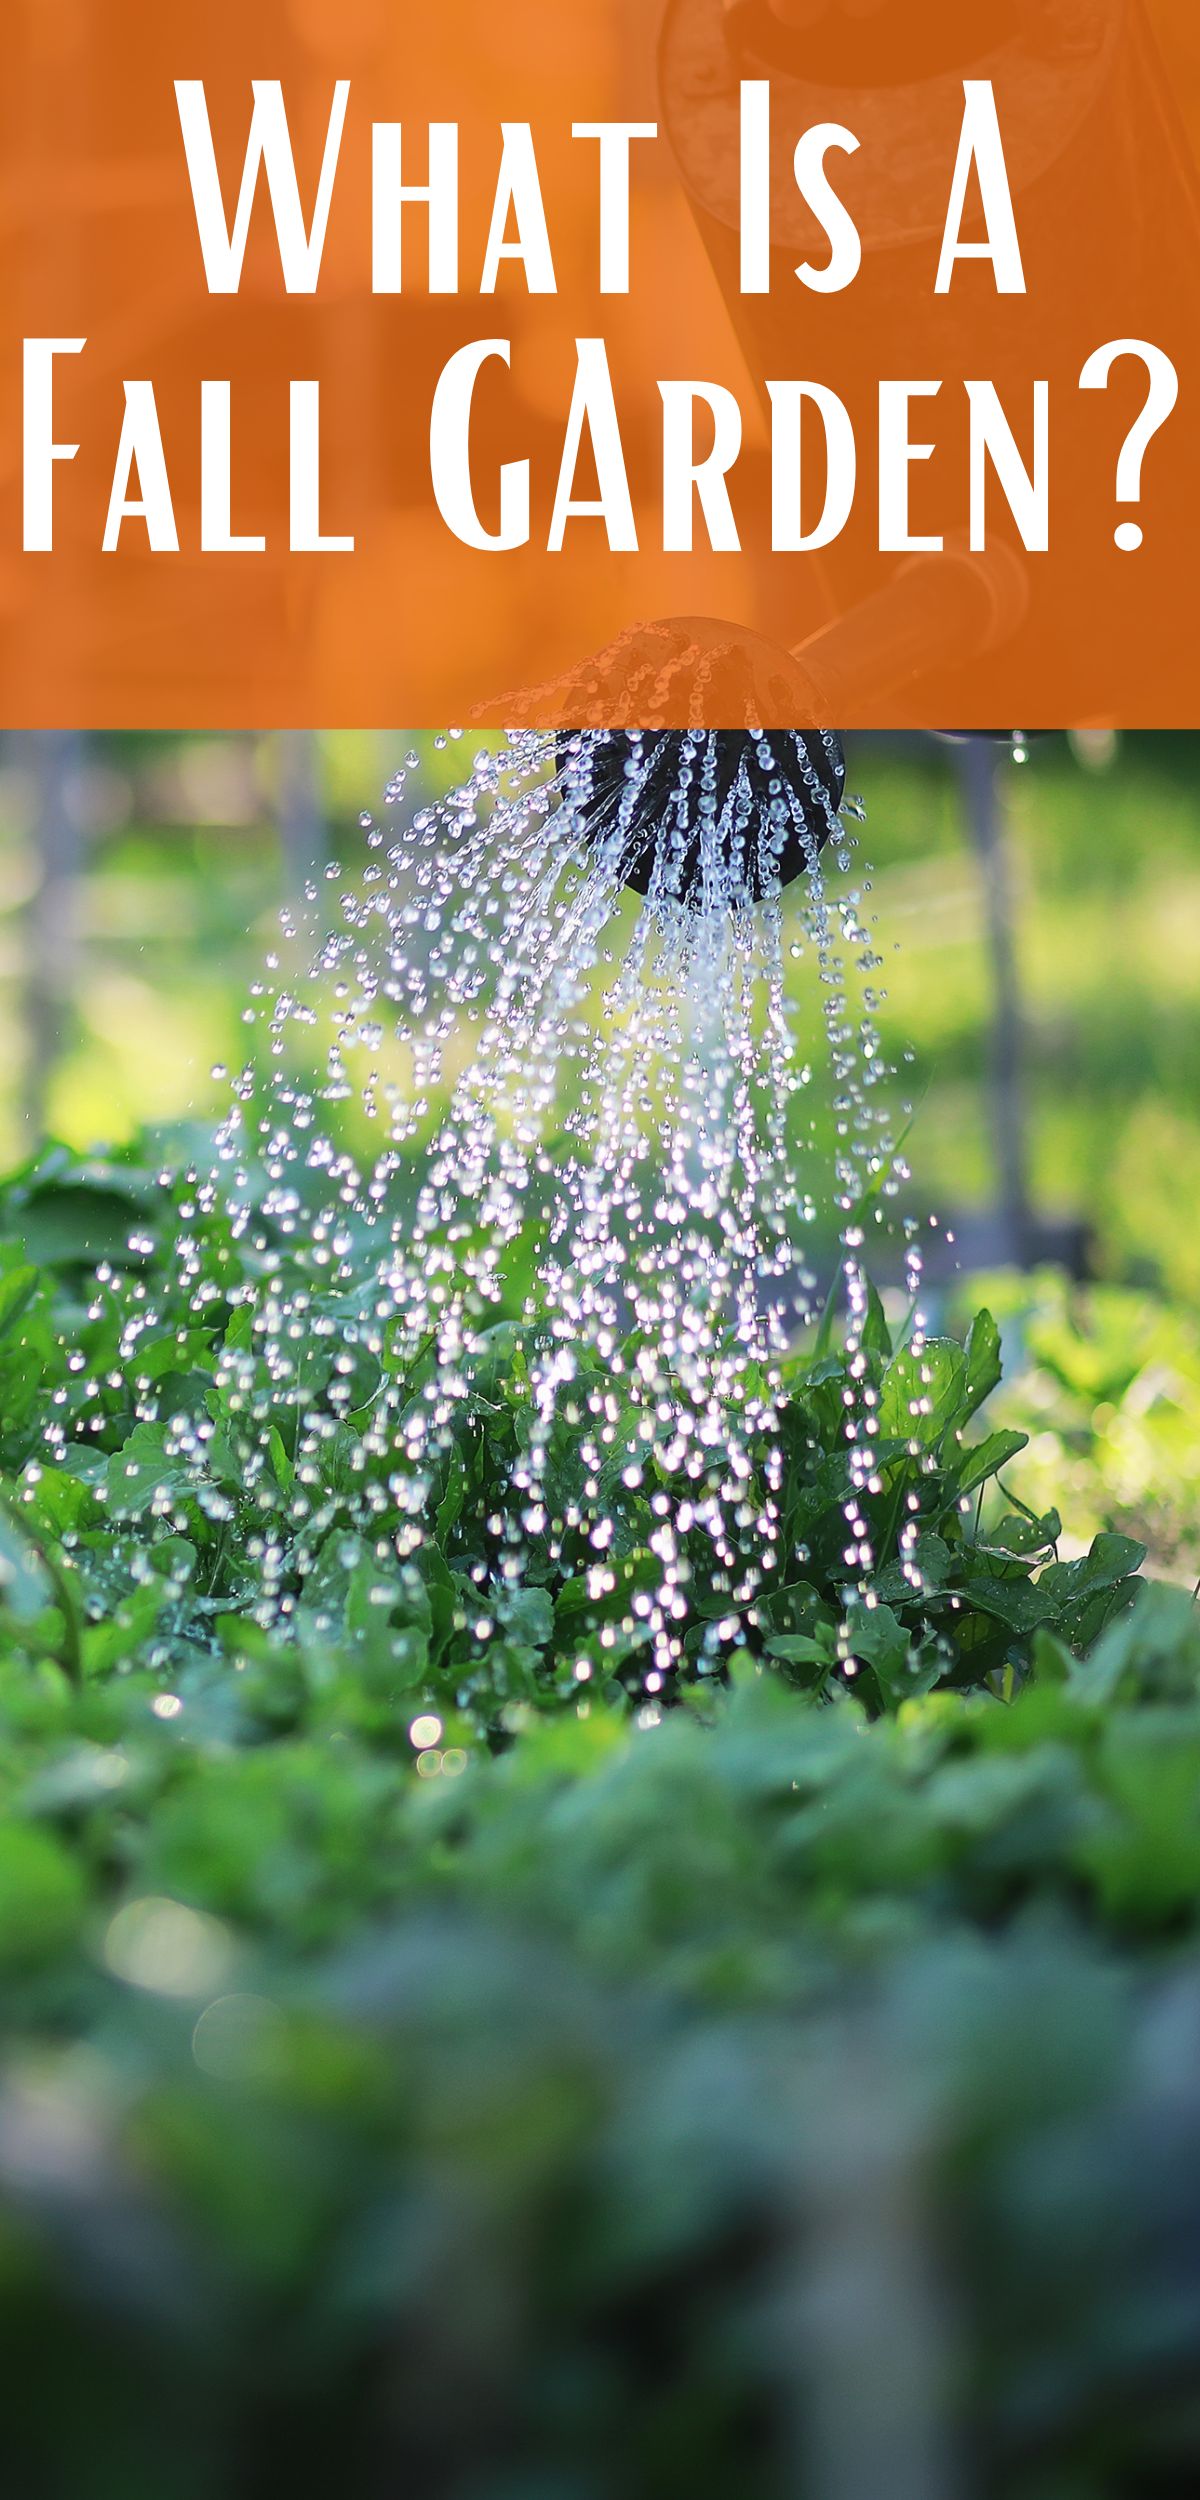
A fall garden is exactly what it sounds like, a garden that you grow in the fall. For those of us with extremely hot summers and no spring to speak of, fall is when we grow our cold/cool weather crops. Our winters aren’t as harsh so we can feasibly grow throughout the winter if we take some extra precautions. If you are looking to grow a fall garden, keep reading!
cropped-3.jpg

Are you looking for garden journal prompts, but aren’t interested in a weekly email? Check out our 365 Garden Journal Prompts! This is an amazing, all in one, yearly product that you only pay for once.

Buy Now!

What Is A Fall Garden?

Here in Georgia, our spring is not really spring. It’s a constant fluctuation between summer and winter… Most likely all four season in one day. From March until about mid May, we are struggling to figure out how to dress. Jeans, sweatshirt and boots in the morning, then tank tops and shorts in the afternoon, and back to winter clothes in evening/ night. It’s ridiculous. But in the fall, it is a mostly gradual decline in temperatures.

That means that we can actually get a cool weather garden in and will continue to produce, even into winter.

What To Plant In A Fall Garden

All cool weather things get planted in a fall garden. Brassicas like cabbage, cauliflower, broccoli, and brussel sprouts are great for fall gardens because you are less likely to have them bolt before they are ready.

Next are your root vegetables. These are things like carrots, radishes, turnips, beets, rutabagas and kohlrabi are fantastic in the fall garden. Not only do they grow well, but they taste better after a few frosty nights. I also like to plant leeks in the fall because they are hardy enough to handle the temps but they also taste a lot better too.

Finally, everything else. This includes greens like lettuce, kale, spinach, etc. Then you’ve got peas and some green bean varieties.

cropped-3.jpg

Are you looking for garden journal prompts, but aren’t interested in a weekly email? Check out our 365 Garden Journal Prompts! This is an amazing, all in one, yearly product that you only pay for once.

Buy Now!

When To Start A Fall Garden

This is really going to depend on your climate and what you are looking to plant. For our first frost dates (Oct 31 to Nov 15), we will plug in “how many days till (date)” into Google to see how many days we have.

For example, if we are wanting to start our seeds on August 15th, I would type into Google “How many days from August 15 2024 to November 15 2024?” Google spits out the answer of 92 days. Then I can start figuring out how many days each vegetable needs to get to harvest size. I put those dates and vegetables in my calendar.

If you don’t want to deal with all that, seedtime.com is a great way to put in what you want to grow, your frost dates and it will give you all the information you need.
If you are interested in learning more about my favorite garden planner. I highly recommend Seedtime! This planner has been instrumental in helping me plan out my gardens with WAY more efficiency than I could ever expect! It has also reduced overwhelm, stress, and calmed my ADD/ADHD!

More Info!

Starting To Rotate Out The Summer Garden

One of the hardest things to figure out is how in the world you are going to start taking down old plants and putting in your fall garden. It’s hard to cut down old plants to put in your winter garden. But it still needs to be done, especially if you have limited space.

I have a few guidelines for taking down plants that may help you. First is figuring out if the plant is healthy. If not, it’s got to go. Second, have I harvested all I need from that plant. When you are drowning in tomatoes, squash, cucumbers and put up all you need for winter, go ahead and pull the plant. Third, is what I am planting going to be “better” than what I’ve already got.

That last one is a little harder to figure out. You’ve got to make the decision on whether or not planting a cabbage plant is worth pulling tomatoes. Well, if you have put up all the tomatoes you need, or are over eating fresh tomatoes, then yea, pulling the tomato plant would be worth it. While tomatoes may be good right now, cabbage will be better in 60-120 days. So you’ve got to weigh what you have now vs what you will need in a few months.

Are you getting overwhelmed in the garden? Stressed? Or just not enjoying the garden like you used to? Check out our garden prompts! We send out weekly emails that get you back in the garden and out of your head! Turn the garden back into a place of love and joy instead of frustration and headache!

Subscribe Now!

When To Start Seeds/ Plants

One of the biggest issues you are going to have as a fall gardener is finding plants. Your best bet is to order seeds now (in July/ August) for fall starts. It is not likely that your local big box store is going to have many, if any, transplants come September.

For my climate and frost dates, I usually start my seeds around August 15th. This gives them plenty of time to get first leaves and grow a bit before I put them in the ground. Usually, mid to end September is fall garden planting for us so that gives those seeds about 6 weeks to really get going.

Also, really think about what you are purchasing if you manage to find a store that is selling plant starts. You can purchase a head of cabbage from the store for around $3. But a plant start is going to be around $5 for the plant. That doesn’t even make financial sense. Especially when you can purchase a pack of cabbage seeds for $3-4 and get about 30 or more plants.

If you are looking for a great way to keep track of your gardens for years to come, check out our Digital Garden Journal. It’s a digital spreadsheet that helps you manage not only your seedlings but also your seed inventories, soil testing, orchard, harvests and so much more.

Buy Now

When To Plant A Fall Garden

Planting a fall garden is going to rely heavily on your climate and garden. For us, seedlings started plants in August is a no no. They will bolt before they ever really get going. Or they will stunt because it’s still so hot. But I can direct seed after August 15th and by the time those plants germinate and start really going, we will cool down.

Just like in the summer garden, we have to watch the weather to make sure that we aren’t jumping the gun. It is a gamble to plant too early and risk everything dying because of the heat. A started plant won’t go in the ground until we are regularly under 80*, preferably under 75*. Shade cloths are a great way to help with this.

For us, this generally looks like starting seeds in August and planting mid to end September.

The Ultimate Homesteader’s Starter Bundle – Only $47!

Get the tools you need to stay organized, track profits, and manage your homestead with ease!

Includes:
✅ Schedule F Tracker – Simplify tax prep
✅ Profit Calculator – Track earnings
✅ Hay Calculator – Plan livestock feed
✅ Garden Journal – Digital & printable
✅ Herd Health Tracker – Monitor animal care
✅ Simple Budget – Manage finances
✅ Backyard Homestead eBook – Essential tips

$99 value – now just $47! Start your homesteading journey today!

Buy Now

Precautions For A Fall Garden

Precautions can look very different for everyone and even different for different parts of your garden. Some of the precautions we take is making sure to start seeds indoors until they have sprouted. Then we put them in a shady, cool area in the greenhouse. This sucks because the whole purpose of the greenhouse is to keep plants safe from Blu and Fenrir. But if it’s too hot, they won’t germinate. So into the house they come until it’s safe to put them outside.

Another precaution we take is watching the weather like a hawk. We look at 10 and 30 day forecasts to help make the best judgements on when to direct sow and when to transplant. Now, we live in Georgia so the weather is unpredictable, till it’s not. We know that summer is hot and winter is cold. But spring and fall are the wild cards. We could have a 90* day in November or a snow storm on March 1st.

If you did mess up your dates, or the weather didn’t cooperate, and you end up with super hot days, or freezing temps, don’t fret. At least not yet. You can mulch to help keep the ground cool and water plentiful. You can also water more often to help keep plants healthy. Another option is putting up shade cloth. This will help make sure that the plants don’t get scorched by the heat.

If it’s supposed to freeze or frost, and you have some plants that are a little too tender for that, you can throw sheets or blankets over the plants to help insulate them. I’ve used gallon jugs filled with water and set them between plants with a blanket over them to help keep them freezing. It works well for nights were we are going to get under freezing. But it’s not foolproof and you may still end up with damage.

I hope this helps!

Fall is the best time to garden because you have the ability to actually enjoy the garden without dying of heatstroke, getting eaten alive by bugs, or worrying about scorching your garden. So don’t forget about the fall garden!

If you like the content I put out, feel free to buy us a coffee! It helps keep this site running, marketing and the goats in grain!

Buy me a coffee

If you like this post, feel free to share it and follow us below on our social media accounts!

  • Facebook
  • Pinterest
  • Instagram
  • YouTube
  • TikTok
  • Spotify
  • Threads

Filed Under: Garden Tagged With: compost, Fall, fall garden, Garden, Homestead

JOIN TO OUR MAILING LIST!

Leave us your email to receive new posts and special offers for members only! Don't miss a thing!

Recent Posts

  • Fall Garden Guide
  • Top Mistakes With Goats
  • How To Bond With Your Goats

March Garden Chores

March 1, 2024 by Leigh Leave a Comment

Y’all!!! Spring is here! Well, that depends on which meteorological or astronomical seasons. But regardless, spring is either here or coming up soon! Can you tell I’m excited? The spring garden doesn’t usually do well for us here in the Southeastern US. But there is still a ton of stuff to do and I’m here to give you my March garden chores so that you can prepare your garden.

Are you getting overwhelmed in the garden? Stressed? Or just not enjoying the garden like you used to? Check out our garden prompts! We send out weekly emails that get you back in the garden and out of your head! Turn the garden back into a place of love and joy instead of frustration and headache!

Subscribe Now!

March Garden Chores

March starts the crazy season for us on the homestead. But the March garden chores can be broken down into 3 main categories: seeding the garden, cultivating the beds, and building the garden. This is also the same time that I am still gathering any tools that I may need that I didn’t get in February. While that may seem kind of lame after I just said it’s a crazy season, but keep reading and I’ll explain.

Seeding The Garden

This is hands down the most time consuming thing when it comes to the garden. Not only does it take a lot of time, it also takes a lot of mental energy. You’ve got to figure out how many seeds you are going to start, how many cups you have, how much space you have, etc.

For me, I use Seedtime to help me figure out exactly how many seeds to plant and when to start them. Seedtime has definitely made my weekly garden task list easier to manage and less of a guessing game. The garden planning feature is great on it’s own, but I tend to throw my plan out the window during the height of planting….. It’s something I’m working on.

If you are interested in learning more about my favorite garden planner. I highly recommend Seedtime! This planner has been instrumental in helping me plan out my gardens with WAY more efficiency than I could ever expect! It has also reduced overwhelm, stress, and calmed my ADD/ADHD!

More Info!

The other big part about seeding the garden is making sure that I actually have plenty of stuff to start seeds. This year, we are selling plant starts, so not only am I starting all of our seeds for our family and farmer’s market produce, but I’m also starting seeds for plant sales.

That means I need to make sure that I have plenty of pots, trays, seeds, soil, and compost. I use these seed trays, these pots, and these carry trays from Bootstrap Farmer for our personal plants and farmer’s market produce. I use these pots from Grower’s Solution for all of our plant starts that we are selling.

Logo 468x60

Cultivating Garden Beds

This is going to look different from year to year depending on your own beds. This year, we completely changed our big garden. We are installing raised beds throughout the garden to help build the soil faster. There were a lot of reasons that went into building raised beds, but at the end of the day, we now have to cultivate them.

What is cultivating? In short, it’s just preparing the beds for planting. That may look like breaking the soil just enough to be able to get your plants in there, pulling weeds, or amending beds.

In the kitchen garden, cultivating looks like taking a couple loads of goat bedding and soil to each bed and filling them up a bit more.

In the big garden, we won’t start cultivating beds until closer to April. This is mostly due to the fact that we haven’t gotten them built yet…. oops.

But the biggest part about cultivating is making sure that all the weeds are out, leaves from fall are moved to the compost pile, and you are ready to plant.

cropped-3.jpg

Are you looking for garden journal prompts, but aren’t interested in a weekly email? Check out our 365 Garden Journal Prompts! This is an amazing, all in one, yearly product that you only pay for once.

Buy Now!

Building The Garden

If you are in March, your garden should already be built. BUT if you’re anything like us, you are probably still building your garden because the timeline got pushed until the breaking point. In our defense, we both work full time jobs, homeschool and February-April is kidding season. So we are slammed trying to get everything done.

We start planting our gardens around April 15th, pending a frost free 10 day forecast, which means every single bed must be built, filled and prepped by April 1st. If we are not building beds, like in our kitchen garden, it looks like repairs, cleaning up, adding compost, soil, or animal bedding.

Building the garden also looks like fencing, gates, seating areas, trellising, and other supports. So even if you aren’t building beds, you may need to be thinking about and sourcing these items. We may not be able to get the gates installed, so we will end up falling back on using pallets. That means that I need to get ahold of pallets and gate hardware. Or figuring out how to get cattle panels to the farm and then up up for trellising.

Our big garden is also getting a gazebo/ pergola this year. In fact, we can’t even finish building the back left side of the garden until the gazebo is built. We are doing this to make sure that we have PLENTY of space between beds and aren’t trying to squeeze things where they don’t fit.

Gathering Tools

Everyone is different when it comes to their planting times. That means that you may not be ready to start seeds yet. But you still need to start gathering up any tools, pots, soil, compost, seeds, etc. If you are a new gardener, you may not know exactly what tools you need. Or maybe you’re not ready to start your own seeds. That’s totally cool.

The main tools that you will need are a good set of pruners (I prefer Fiskars brand). There are a ton of different kinds of pruners, but getting a small and larger set will get you started. I would also suggest getting at least two… you will lose them.

I would also suggest a good set of hand tools. I’m not saying you should get this set, but I would suggest that you get at least the hand trowel, cultivator and large trowel.

March Garden Chores: Planting!

For us, we are usually able to start planting stuff in March. I’ll be planting carrots, broccoli, cabbage and cauliflower around the first of the month. Hopefully, our cool nights will allow us to actually get a harvest….

What are your March garden chores?

If you like the content I put out, feel free to buy us a coffee! It helps keep this site running, marketing and the goats in grain!

Buy me a coffee

If you like this post, feel free to share it and follow us below on our social media accounts!

  • Facebook
  • Pinterest
  • Instagram
  • YouTube
  • TikTok
  • Spotify
  • Threads

Filed Under: Garden Tagged With: Canning, compost, Garden, seeds

JOIN TO OUR MAILING LIST!

Leave us your email to receive new posts and special offers for members only! Don't miss a thing!

Recent Posts

  • Fall Garden Guide
  • Top Mistakes With Goats
  • How To Bond With Your Goats

How To Build Soil The Easy Way

December 9, 2023 by Leigh Leave a Comment

I’ve talked in depth about my winter reading consisting of Grow Your Soil and Dirt to Soil. I also talked about ways to improve your soil here. But today, I wanted to talk about the things we are doing this winter to actively build soil for the spring and summer gardens. There’s some repeating information from the posts I did before but I figured it would help to give a step by step, this is the exact thing we are doing, post to help you build soil. Now, please understand, I am no expert! But I know a thing or two.

Are you getting overwhelmed in the garden? Stressed? Or just not enjoying the garden like you used to? Check out our garden prompts! We send out weekly emails that get you back in the garden and out of your head! Turn the garden back into a place of love and joy instead of frustration and headache!

Subscribe Now!

Building Soil Doesn’t Have To Be Hard

In fact, there are really just three principles to building healthy soil. 1) Organic material 2) No till 3) Cover Crops

Done! Blog post over! But if you’re anything like me, figuring out when to add material, or what exactly no till is, or what in the world are cover crops, you’ve come to the right place. First, I want to give you an overview of how these things help your gardens and how you can use them. If you are looking for what we do in our gardens, jump down to Our Step By Step System.

Logo 468x60

Using Organic Material To Build Soil

The reason organic material is number one is because it’s the most important. We have Georgia red clay on 99% of our land. Sure, we have areas where no one has dug, tilled or scrapped. But the vast majority of our land is clay or rock. So what do you do with that kind of soil? Add more organic material to it!

To limit confusion, let’s talk about what organic material is. Organic material is any material that is natural. Some examples would be plant cuttings, leaves, sticks, mulch (not dyed), pine needles or shavings, and other material that you would find in nature. This can include dirt, rock, etc but because we are talking about building soil, we probably don’t want many, if any rocks.

Save on Seeds

No Till Helps To Build Soil

I think there is a ton of us that were taught that in order to have light, fluffy soil, you had to till it all the time. Or to get rid of weeds, the only thing is to till them under. And both of these things couldn’t be further from the truth.

Soil needs the bacteria, fungi, and other microbes to help build healthy soil. Every time we till, we are ripping the soil apart. We are killing all the good things, including bugs, to help with weeds? And I have yet to see tilled soil that doesn’t turn hard and compacted by middle of the season.

I’m not saying that there is no place for tilling in the garden. Because I think in certain situations it can be hugely beneficial. But I think the vast majority of the time, you shouldn’t need to till at all.

Using Cover Crops To Build Soil

Using cover crops when you are looking to build soil is huge! Mother Nature does not want to be naked and she will cover herself with weeds. But if we plant cover crops, her dirt will be covered. The other really amazing thing about cover crops is the ability to fix the soil. Depending on your soil’s deficiencies, you can plant to help correct them.

Usually, you are going to be deficient in nitrogen in the garden. Especially in the tomato, potato, corn or melon beds. One of the ways you can fix this is by planting clover, field peas, and other legumes.

Cover crops can be difficult to figure out. The most common question is when do you plant them? Too late in the season and they won’t sprout till spring. Too early and they are getting scorched.

cropped-3.jpg

Are you looking for garden journal prompts, but aren’t interested in a weekly email? Check out our 365 Garden Journal Prompts! This is an amazing, all in one, yearly product that you only pay for once.

Buy Now!

How We Build Soil

I don’t really have a great answer for you. But I’ll tell you what I do, and you can figure out if it would work for you.

First, we are in zone 7b/8a. Even with the new updated maps, I am still going to garden like I live in 7b to help minimize heartache. At least for the next couple years. Second, this is what we do and what works for our land. You should experiment and play with your garden to see what really works well for you.

To give you a glimpse into our garden, we have two gardens. The first is my kitchen garden (yes, mine) and it is about 500 sq ft of space. I’ve got 14 4×8 raised beds and then a bunch of planters, in ground plants, etc. Second, is our big garden and it is approximately 1,250 sq ft of garden space. Right now, the garden was a hodge podge of various spaces with trellising.

The plan for next years garden is: 80ftx120ft area with a chicken run, orchard, 16 4x20ft raised beds, 20 2x18ft in ground beds, and then spaces along the fence for plants. I’m going to take you along planning that space in another blog post as well as the podcast to follow.

When it comes to putting the three principles of building soil to use, I am going to give a couple examples at the end of this post. So feel free to skip towards the bottom if that’s all your interested in. I hope it clears up a lot of this information because I know it’s a lot.

Adding Organic Materials To Build Soil

During the winter, we will blow leaves into the gardens and use the leaves as mulch. We will also fill all of our beds with leaves, sticks, mulch, and pine needles. Since our pine shavings are being used as bedding, that part isn’t something we add until spring.

Usually, by end of November, most of our gardens are toast or getting that way. We will have some fall stuff like brussel sprouts, cabbage, etc that will over winter. The beds that are still active with plants is mulched well with leaves and sticks. But the beds that are going to bed will have all of the plants cut at soil level and laid in the bed to act as mulch.

Before we get too far into this post, I wanted to give a suggestion about keeping a garden journal. A digital garden journal is a fantastic way to keep track of past, present and future gardens. Our Digital Garden Journal is a great way to keep up with everything without getting too overwhelmed.

Buy Now

No Tilling In The Gardens

I’m not saying tilling is bad but I am saying we use tilling sparingly. For the most part, we don’t till our gardens at all. The big garden is getting a massive overhaul this winter and I couldn’t be more excited about it. I’ve got a blog post coming about it so stay tuned.

The hardest compacted areas are going to have raised beds placed over it. At this point, it’s going to take years and years to fix that soil. The next best option is to just put raised beds in. The other problem is that in that area, we deal with a lot of soil erosion because it’s on a slope. So raised beds are the best option.

Logo 468x60

One of the big reasons we chose no till is because of what just organic material can do for the soil. To give you an example, in the spring of 2023, we were forced to till just to get our tomatoes planted. The ground was like concrete. After getting the tomatoes and other plants in. We mulched heavily. Now, (winter of 2023) the ground is so soft and fluffy, you almost can’t walk on it because it shifts so easily.

Cover Crops Really Do Build Soil

On the of the biggest issues I see in gardens is bare earth, especially over winter. That soil is so dry and damaged, little is going to grow out of it. But if we throw down some seed, cover it with soil or leaves? We can have green in that area! And the green we want will suppress all the weeds!

Check out our Microgreens at True Leaf Market

We use a couple of different mixes, plus left over seeds to get a cover crop in the ground.

  • Garden Cover Crop- True Leaf Market- I like this blend a lot and have very few issues with it. I love the fact that I can put it in raised beds, the big gardens and even the yard to get some nom noms for the animals.
  • Brassica Cover Crop– True Leaf Market- This is one of my favorite blends for third reasons. First, I don’t have to worry about it “overgrowing” because it usually dies off in winter. Second, some brassicas have long taproots that will help bring nutrients from further down in the soil, up to the plants. Third, there are two root vegetable seed in this mix. That means that I don’t have to worry as much about compaction.
  • Dryland Pasture Cover Crop– True Leaf Market- Every grass in this mix is safe for my goats to eat. Since my goats free range, I like to allow them into the gardens whenever we are done with them. I want to make sure they have good, healthy food to eat. This is also what we plant in our orchard/ chicken so that they have something to eat.

Our Step By Step System For Building Soil

I told you I would give you a step by step guide, so here it is.

Bed is being put to bed

When we have a bed that is being put to bed for the winter, we want to prepare it as much as possible for spring planting.

  1. Cut all of the plants that are still in the bed at soil level and put in a pile outside of the bed.
  2. Broadcast a cover crop mix based on that beds needs and next years plans.
    • Example: In a tomato bed, we would plant a legume heavy mix.
    • We would also make sure that whatever mix we planted would have a winter kill if we plan to use the bed next year.
  3. Water well and, if possible, allow several days for germination.
  4. Once sprouted, or not if seed will go dormant, take all the cut plants and place in beds.
  5. Cover with more leaves or other organic materials as needed throughout winter.
  6. At planting time, cut all plants to soil level, and plant transplants.
    • If planting seed in that bed, you may need to cover with tarps to kill the cover crop first.

Banner 468x60

Bed is in use over fall/ winter

This would be a bed full of brassicas, root vegetables or other cold hardy plants. Obviously, we aren’t going to cut plants to soil level, though we could.

  1. No need for a cover crop in these beds!
  2. Mulch WELL around the plants without damaging them. We don’t want to smother them.
    • I use leaf litter the most in active beds because it helps insulate and breaks down slower.
  3. Once plants die, I cut whatever is left of the plant at soil level and use it as mulch.
  4. Usually, since our winters are so mild, I don’t need to worry about cover crops because my fall crops act as cover crops.
  5. At planting time, I will clear out the beds of anything that hasn’t broken down fully, put it in the compost bin, and then plant.
    • Depending on the soil level of the bed, I will just add more soil or compost on top of the mulch. It really depends on what that bed looks like come planting time.
  6. Once new plants are established, mulch.
Check out our Microgreens at True Leaf Market
cropped-3.jpg

Are you looking for garden journal prompts, but aren’t interested in a weekly email? Check out our 365 Garden Journal Prompts! This is an amazing, all in one, yearly product that you only pay for once.

Buy Now!

How do you build soil in your gardens?

I would love to hear about what you are doing to build soil in your gardens!

If you like the content I put out, feel free to buy us a coffee! It helps keep this site running, marketing and the goats in grain!

Buy me a coffee

If you like this post, feel free to share it and follow us below on our social media accounts!
  • Facebook
  • Pinterest
  • Instagram
  • YouTube
  • TikTok
  • Spotify
  • Threads

Filed Under: Compost, Garden, How To's Tagged With: chicken, compost, Garden, soil

JOIN TO OUR MAILING LIST!

Leave us your email to receive new posts and special offers for members only! Don't miss a thing!

Recent Posts

  • Fall Garden Guide
  • Top Mistakes With Goats
  • How To Bond With Your Goats

Review Of: Grow Your Soil

November 4, 2023 by Leigh Leave a Comment

I’ve told y’all many times that I am a soil nerd. I find it absolutely fascinating that you can go from poor soil to dark, rich soil in a season or two just by caring for the soil! The problem with a lot of books about soil is that they are DRY. If you aren’t interested in or have a decent foundational knowledge of biology and chemistry, you will struggle reading most books about soil. But Diane Miessler NAILED IT in her book Grow Your Soil.

Are you getting overwhelmed in the garden? Stressed? Or just not enjoying the garden like you used to? Check out our garden prompts! We send out weekly emails that get you back in the garden and out of your head! Turn the garden back into a place of love and joy instead of frustration and headache!

Subscribe Now!

My Thoughts On Grow Your Soil

First things first, the way that Diane writes is very similar to how I write, and therefore read. I was able to finish this book in about 2 days of completely uninterrupted reading. Well, except for sleeping. This book was a VERY easy read with a ton of really helpful tips and tricks for you to try in your own garden.

Diane’s Writing Style

The ease of reading makes this book not only an easy read, but allows you fully capture what she’s trying to tell you. As you’re reading, it really feels like you are hanging out talking to her. She has a sense of humor that comes through in her writing.

Also, she doesn’t use big, huge concepts and hard to understand words. While I’m not saying that it’s “simple”, this book is formatted for ANY gardener to enjoy it. I think this is very important when it comes to getting people to understand that building soil isn’t a complicated topic.

The Main Points

I don’t want to ruin the book for anyone, but I feel like hitting the high points would be beneficial if you are looking to purchase the book. Diane’s main points are:

Bring organic matter to the soil

Stop or limit use of inputs like pesticides and fertilizers

Cover crops are our friends

This is something that is echoed through every single book that I have read in regards to bringing your soil back to life. But one of the things that I really liked about Diane’s book, and her message was that it is more geared to the home gardener than Gabe Brown’s book Dirt to Soil, you can read my review on his book here.

While I really enjoyed Gabe’s book, it was harder to figure out how that works on a small scale farm or homestead. While we have acreage here, most of my garden space is in raised beds. I am able to put his teachings to work on my pastures with more success.

In Diane’s book, I feel like the information is actually geared to my garden space and what I am able to accomplish, which was great.

Where To Buy Grow Your Soil

I purchased my copy from Amazon, linked below. I’ve mentioned in the past that we don’t have a fantastic book selection in my town so I get most of my books from Amazon. You can also purchase from Barnes and Noble at $16.95 as of this writing.

I’m sure you could buy this book at a second hand store, but I can’t tell you that for sure.

What are you doing to actively grow your soil?

Let me know below what you have found that works well for building your soil!

If you like this post, feel free to share it and follow us below on our social media accounts!

  • Facebook
  • Pinterest
  • Instagram
  • YouTube
  • TikTok
  • Spotify
  • Threads

Filed Under: Compost, Garden Tagged With: Chickens, compost, Garden, Goats, soil

JOIN TO OUR MAILING LIST!

Leave us your email to receive new posts and special offers for members only! Don't miss a thing!

Recent Posts

  • Fall Garden Guide
  • Top Mistakes With Goats
  • How To Bond With Your Goats

Top 10 Ways To Improve Soil

October 19, 2023 by Leigh Leave a Comment

As we are steadily moving towards cooler months, and for some of you freezing already, now is a great time to start looking into ways to improve soil. You don’t have to do any of it right now, especially if it’s too cold to work the soil or grow a cover crop. But having these ideas in your journal as ways to improve soil will help in the long run.

10 Ways To Improve Your Soil

Mulch

Mulching is usually a forgotten chore in the garden but it is so important. I know what you’re thinking, “I don’t have any plants in the ground, why should I mulch?” Because mulching, no matter the season, keeps weeds at bay, puts organic matter back in the soil and helps retain moisture in the soil.

Save on Seeds

Cover Cropping

This is another huge thing that gets left out for most new gardeners. They think, well I’ve harvested what I need so I’m just going to rip out all of the plants. Then they don’t put any new plants to make sure that the soil stays covered.

I use this mix from True Leaf Markets for the kitchen garden. Depending on what I need in my big garden will depend on what mix (or self mix) I use. I usually try to do a mix that my chickens and ducks can eat on. But regardless of what you buy, something has to be planted in order to keep your ground soft and workable.

Organic Matter

This goes hand in hand with mulching and cover cropping. Soil needs to have organic matter to give it better structure. If you have ever lived in a place with clay soil, you know it is clumpy when wet or blows away if too dry. We want to change the structure of the soil by allowing roots to grow and create channels. The more growth and channels, the more water can be absorbed.

Low or No Till

Tilling isn’t bad per say, but over the last hundred years or so, we have come to realize that tilling may not be the best thing for the soil. When you till, you are ripping the soil apart and that means you are ripping apart the microbiomes that live in the soil. To make this more relatable, it would be like a nuclear bomb going off in your town every couple of months. Everything is destroyed and you have to rebuild season after season.

If you can limit the amount of destruction to the soil, you will have soil with better moisture retention and a lot less run off. Not to mention it’ll have the channels to retrieve nutrients from deeper in the ground.

Logo 468x60

Leaves and limbs

We’ve been taught to think that leaves and debris is something that must be hauled off. But you are getting rid of one of the best (and FREE) resources that our land gives us! Throw those leaves into the compost or straight onto a bed to act as mulch. Trust me, your garden will thank you for it.

There could be issues with the leaves and branches composting and sucking up a ton of nitrogen. But I have not seen that to be an issue. But I also cover crop with nitrogen fixers.

Animal Bedding

I talked in depth about using animal bedding as compost here. It is probably the best and easiest ways to fill up or top dress a garden bed. Especially, when you are looking for free or cheap materials for your garden beds.

You can also use pine shavings as mulch too.

Save on Seeds

Eliminate pesticides and synthetics fertilizers

When I read Gabe Brown’s Dirt to Soil, he mentions that when you use synthetics you are creating “lazy” plants. If the plant doesn’t have to work to get its nutrients because you give it to them, the plant isn’t going to be as hardy or give back to the soil. Same thing with pesticides. Even natural fertilizers and pesticides are creating a situation where the plant doesn’t have to defend or protect itself.

We don’t use any amendments to our beds except compost and animal bedding. That’s it. We learned very quickly that our plants were healthier and are better able to fend off pests if we just left them alone. So that’s what we do.

Animals

Animals are a phenomenal way to improve your soil! To put it very simply, you put an animal in a portable pen, give them some hay and let them be in that pen for 1-4 days depending on the animal size and size of pen. After you move them to a new area, seed where they were. If you can keep this up, they will slowly but surely fix your compacted soil!

Our pigs have been instrumental in bringing our property back! They turned hard, compacted clay, that a tiller couldn’t get into because of the rocks, into the softest black soil within 3 rotations!

Tractor Supply

Crop Rotation

We’ve all heard this one. You’ve got to rotate crops to keep pests, fungi, etc from becoming a problem. But it’s actually more than that. When you rotate your crops from a heavy nitrogen feeder to a nitrogen fixer, you are giving the soil a chance to recover. We want to make sure that we don’t put heavy feeders in the same place for about 3 planting seasons.

For example: You planted Corn in summer 2022, Squash in Fall of 2022, and Tomatoes in summer 2023. Your soil is going to be bone dry when it comes to nutrients. But if you were to plant beans, peas, and garlic in fall of 2022 instead of squash, you have broken the heavy feeder cycle without having to amend the beds with inputs.

Save on Seeds

Plants

Plants probably the most under rated way to improve soil health. I used to pull spent plants from the ground and give them to my chickens, goats, pigs, whatever. But when you rip out plants, you are taking all that carbon out of the soil. You are wrecking all those channels and creating more work for the soil microbiome to fix.

The best thing you can do when you are done with a bed is to just hit it with a weed eater, clippers, etc and just chop and drop it just above soil level. This will leave all that carbon (roots) in the ground to compost and feed the microbiome.

What are your favorite ways to improve soil health?

These are just my favorite ways to improve soil health. In fact, these are the only things I do and we have seen a HUGE improvement in planting. It used to be that we would have to use a drill attachment augur to be able to plant. Now, I can just stick my hand in the dirt and move the soil out of the way. How cool is that!?

If you like this post, feel free to share it and follow us below on our social media accounts!

  • Facebook
  • Pinterest
  • Instagram
  • YouTube
  • TikTok
  • Spotify
  • Threads

Filed Under: Garden Tagged With: compost, cover crop, Fodder, Garden, garden space, soil, vegetables

JOIN TO OUR MAILING LIST!

Leave us your email to receive new posts and special offers for members only! Don't miss a thing!

Recent Posts

  • Fall Garden Guide
  • Top Mistakes With Goats
  • How To Bond With Your Goats

Review Of: Dirt to Soil

September 18, 2023 by Leigh Leave a Comment

As always, when I do a review, I am going to give you my honest opinion of every book, tool, and product that I do. Reviews do no good if they are not real. I recently reached out to a homesteading Facebook group in search of a couple books about building good, healthy soil. Man, did they deliver! The first book is Dirt to Soil by Gabe Brown.

The Ultimate Homesteader’s Starter Bundle – Only $47!

Get the tools you need to stay organized, track profits, and manage your homestead with ease!

Includes:
✅ Schedule F Tracker – Simplify tax prep
✅ Profit Calculator – Track earnings
✅ Hay Calculator – Plan livestock feed
✅ Garden Journal – Digital & printable
✅ Herd Health Tracker – Monitor animal care
✅ Simple Budget – Manage finances
✅ Backyard Homestead eBook – Essential tips

$99 value – now just $47! Start your homesteading journey today!

Buy Now

Why I Read It

I absolutely love all things soil and biology. We are also working with Georgia clay in our gardens which is causing a far amount of issues with it. The soil in our big garden is very compacted in the areas that we haven’t covered it. We’ve had a ton of issues with the soil this summer between soil and water run off, compaction, and stunted plants.

So my goal was to spend this winter learning as much as humanly possible about soil. My first question is why is my soil not great. The second was what can I do to fix it. So off I went in search of a book that could answer those questions but also the more technical questions about the biology of soil.

I already knew we had clay soil, but…

I didn’t realize that I could “fix” it so quickly! I thought it would take years and years to properly build up my soil. I had considered that we were going to have to bring in a lot of inputs to get the soil back to a place where it was healthy.

But after hearing a ton of horror stories about toxic compost, I am really leery of bringing in soil or compost from outside sources.

Save on Seeds

I already knew that we could use the animals to work with us to bring our 8.5 acres back to life. But I wasn’t sure how to do it exactly. I knew that we could rotate the pigs through areas to root the soil and break it up. Doing this would allow organic matter to get into the soil. We could also seed the areas that they had worked and pray that we could keep the chickens and goats out of the seeds.

But nothing we were doing actually worked. We really struggled to hone in on the finer points of building soil.

While the book doesn’t offer clear, concise, step by step instructions on HOW to build soil, Gabe DOES give his 5 soil principles as well as a very thorough recounting of what he did. He even goes in depth about how he has made his farm profitable. Giving a little bit more interest and insight on how to make a homestead or farm profitable.

Logo 468x60

Where To Purchase

I purchased my copy from Amazon because it’s what’s easiest for me. However, I found it at Barnes and Noble for close to the same price. Sadly, we don’t have bookstores that are local to us, so Amazon tends to be where I get the majority of my books.

How The Book Reads

I love the style of the writing in this book. It’s very conversational and Gabe walks through how he got started on his farm. As the book moves through, he not only tells you how he did it, but gives the basic foundation for what you can do.

There is an amazing compilation of science, experience, and options for you to try as well. But the foundation stays the same. Follow these principles, experiment, and watch your soil grow.

One of the things I didn’t like was the constant “you can do it too”. Now, I understand completely that the book is not necessarily meant for the small homesteader. It ABSOLUTELY applies to us, but I am already interested in regenerative farming and hearing again and again that it can work for us was slightly annoying. Not enough to discredit what he was saying but enough for it to be redundant.

My Take Away’s From Dirt to Soil

There are 4 main points that I took away from Dirt to Soil, though they aren’t in any specific order.

Cover Crops

I knew the importance of cover crops, but couldn’t wrap my head around exactly how to do it. Do I plant things I can harvest? What if I still need that space? Which crops do I plant? Isn’t the soil still going to be bare in the winter when the plants die back? Won’t I have to remove the cover crops when I plant for spring/summer? Gabe answered most of these questions in his book.

Tillage Kills

There is a lot of satisfaction when tilling because you can see that beautiful soil (or clay in my case) break up and see the bed take shape. Except, I always struggled because I knew earthworms are GREAT for a garden, but I was rending them into pieces every time I tilled. So how do I create beds that don’t require tilling but keeps the soil healthy and beneficial critters happy? Simple answer? Stop tilling, start using cover crops, limited to no inputs.

Building Soil Is…. Easy?

I figured this out when I started using our animal bedding as compost. Within a few months of using the animal bedding, I noticed that had actual soil in my beds. Now, I had added top soil to my beds when we created the kitchen garden. But I found actual soil when I started planting for fall!

Use The Animals

We have been using the pigs and the chickens to work the soil and it’s been working pretty well. But one of the things we have been “struggling” with is that we let the goats and chickens free range. We had not truly been practicing rotational grazing. Sure, we rotated the chicken tractors through the gardens but we never really did much with them or the goats.

Save on Seeds

My Garden Process After Reading Dirt to Soil

My garden process now is actually quite simple: animal bedding to compost over time, a couple inches of compost or top soil, plants, then mulch. When the bed is done producing, we cut all the plants down and lay them to the side. If we are “done” with that bed for a season, we add a cover crop then put the plants we cut and put them over top as mulch.

Once the cover crop has been established, we let the goats go through and eat down an area. Then we put the pigs through, and finally the chickens. This process has been amazing because the goats cut down and tamp down the crop. The pigs tamp it down more, and eat closer to the ground. Finally, the chickens come through and peck through the poop and spread it. They also eat all the bugs and parasites. This has GREATLY dropped our need for dewormers.

The following season, when we are ready to plant, we chop and drop the cover crop. Usually, we will use the cover crop as mulching until it fully composts down.

This process has been working well for us and I’m excited to see what happens in this summer when we plant the big garden!

If you like this post, feel free to share it and follow us below on our social media accounts!

  • Facebook
  • Pinterest
  • Instagram
  • YouTube
  • TikTok
  • Spotify
  • Threads

Filed Under: Product Reviews Tagged With: Chickens, compost, dirt, Garden, Goats, Pigs

JOIN TO OUR MAILING LIST!

Leave us your email to receive new posts and special offers for members only! Don't miss a thing!

Recent Posts

  • Fall Garden Guide
  • Top Mistakes With Goats
  • How To Bond With Your Goats

4 Ways To Reduce Food Waste

August 24, 2023 by Leigh Leave a Comment

The simple answer is get a couple pigs or chickens. That’s it. End blog post here. But that’s not an ideal answer. If you can’t have pigs or chickens, or you don’t like or want livestock. What are your other options? How can you reduce food waste?

reduce food waste

The Ultimate Homesteader’s Starter Bundle – Only $47!

Get the tools you need to stay organized, track profits, and manage your homestead with ease!

Includes:
✅ Schedule F Tracker – Simplify tax prep
✅ Profit Calculator – Track earnings
✅ Hay Calculator – Plan livestock feed
✅ Garden Journal – Digital & printable
✅ Herd Health Tracker – Monitor animal care
✅ Simple Budget – Manage finances
✅ Backyard Homestead eBook – Essential tips

$99 value – now just $47! Start your homesteading journey today!

Buy Now

Can It!

Sometimes reducing food waste is as simple as making a larger batch and canning it. For example, beef stew is literally the easiest meal on the planet to can. Make a big batch of it and can the left overs. You will need a pressure canner. Though it’s not absolutely required, it is strongly recommended.

If you don’t want to make a large batch but still want to get a couple jars of left overs canned? This little canner is a great option. It’s a little pricey but for the ease of use and not having to lug out one of the big canners? I think it’s definitely worth the investment.

Canning can be pretty nerve-racking to start. Especially, if you are teaching yourself how to start canning. But I promise, the old days of pressure canners exploding are WAY less likely to repeat themselves.

Dehydrating To Reduce Food Waste

I talked here about my new love for dehydrating and I have to say it’s one of my favorite ways to not only reduce food waste, but also to put up food for a rainy day. I love the “set it and forget it” ability with dehydrating food. With a couple hours of prep (for large batches), I can fill up my trays and be done. One of the ways that I work my dehydrator schedule is to cut a large batch of a veggie while prepping/cooking dinner and then fill the trays. Usually, by morning it’s done and ready to be put into jars.

If you are only cutting a cup of carrots but have another pound that will go bad? Just cut all of them and throw what you don’t need in the dehydrator.

When it comes to using a dehydrator to reduce food waste, I mainly use it when I find great deals or sales. Or when my garden is over abundant. I have two dehydrators, one that is a DIY that we picked up from our local Habitat For Humanity and our Excalibur. I have to say the mac daddy one that we picked up? Absolute favorite because it is MASSIVE.

reduce food waste

Can You Feed Food Scrap Your Livestock

Another fantastic way to reduce food waste is to feed it to your animals! This goes for ALL animals on the homestead but is only where applicable. We have a 5gal bucket on our back deck that is strictly for our chickens and pigs. Every evening fill the bucket about half way with feed if it’s not full and throw it on the ground for them.

By feeding kitchen scraps to your livestock, you can effectively reduce not only your food waste but also your feed bill! In fact, we have a whole section of the garden that is for livestock fodder. Another cool hack is to bring a small covered bucket to work and have your co workers fill the bucket with their food scraps! We have been feeding our pigs and chickens for months like this.

A word of caution though, not all animals can eat all food scraps. So be aware and prepared for that. Goats can’t eat meat. It’s taboo for a chicken to eat chicken. Cows shouldn’t have large apples. Etc. So just be cautious when feeding your livestock out of your kitchen scraps.

Meal Prepping To Reduce Food Waste

Lastly, meal prepping will help you reduce a lot of food waste. I talked here about how to stretch your meals out to reduce the stress of cooking after a long day of work. When you have a plan of what you are going to eat for the week, it really helps to reduce food waste and stress!

If you are working towards reducing your need of processed foods, that not only feed your family but the scraps go to your livestock, I talk about cooking from scratch here. Because buying the non-gmo, no corn/soy feed for your meat animals doesn’t make a lick of sense if you turn around and feed them a box of mac and cheese.

Bonus Tip: Compost!

The reason why this wasn’t included in the main group is because composting has some “rules”. The general rule of thumb for compost is to put in organic matter. Things like leaves, grass clippings, garden waste, and most kitchen scraps. BUT!

You really don’t want to put meat scraps in your compost. You can put meat or bones in your compost, but you chance predators or the meat going rancid and causing problems in your compost. Another problem is using things like oil, butter, etc can also go rancid. But if you have left over carrot caps, watermelon rinds, etc? Abosultely put them in the compost.

  • Facebook
  • Pinterest
  • Instagram
  • YouTube
  • TikTok
  • Spotify
  • Threads

Filed Under: Chickens, Garden, Pigs, Projects Tagged With: Canning, Chickens, compost, cooking, Homestead, kitchen, Pigs

JOIN TO OUR MAILING LIST!

Leave us your email to receive new posts and special offers for members only! Don't miss a thing!

Recent Posts

  • Fall Garden Guide
  • Top Mistakes With Goats
  • How To Bond With Your Goats

Primary Sidebar

WELCOME

WELCOME

My name is Leigh and I am the lead chaos creator here at Steel Raven Farms. You will see throughout this blog that I am the crazy goat lady.

I am married to my high school sweetheart, Jared and we have two amazing boys.

FOLLOW ME

  • Amazon
  • Facebook
  • Instagram
  • Pinterest
  • TikTok

GET UPDATES!

Leave us your email to receive new posts and special offers for members only! Don't miss a thing!

In all the years that I’ve been growing a garden, the fall garden has steadily remained my favorite. Which is funny because I don’t really like any of the brassicas, which is what most people know the fall garden for. I prefer the root vegetables and cool air. But I have learned over the years…

Read More

  • Animals
    • Chickens
    • Farm Dogs
    • Goats
  • Garden
    • Compost
    • Garden Projects
    • Seeds and Plants
    • Garden Journal
    • Working With Food
      • Recipes
      • Freezing Foods
      • Dehydrating Foods
      • Canning Tips And Tricks
        • Canning Inventory Sheets
  • Helpful Info
    • Welcome to the Homestead!
    • Emergency Preparedness
    • Frequently Asked Questions
    • Goal Setting
    • Project List
    • Shop Digital Products
      • Hay Calculator
      • Farm Expense And Income Tracker
      • Goat Crash Course: 101
      • Garden Journal Prompts
      • Schedule C Tracker
      • Schedule C Tracker
      • The Homestead Bundle
  • The Truths
  • Episode List
  • Start Here
    • Privacy Policy
    • Affiliate Disclosure
    • Let’s Get in Touch
    • Members Only Library
    • Welcome To Our Homestead

Footer

  • Email
  • Facebook
  • Instagram
  • Pinterest

COME AND GET IT!

Leave us your email to receive new posts and special offers for members only! Don't miss a thing!

· Midnight Theme

Copyright © 2026 · Midnight Theme on Genesis Framework · WordPress · Log in