• Skip to primary navigation
  • Skip to main content
  • Skip to primary sidebar
  • Skip to footer

Steel Raven Farms

Where muck boots meet ground.

  • Animals
    • Chickens
    • Farm Dogs
    • Goats
  • Garden
    • Compost
    • Garden Projects
    • Seeds and Plants
    • Garden Journal
    • Working With Food
      • Recipes
      • Freezing Foods
      • Dehydrating Foods
      • Canning Tips And Tricks
        • Canning Inventory Sheets
  • Helpful Info
    • Welcome to the Homestead!
    • Emergency Preparedness
    • Frequently Asked Questions
    • Goal Setting
    • Project List
    • Shop Digital Products
      • Hay Calculator
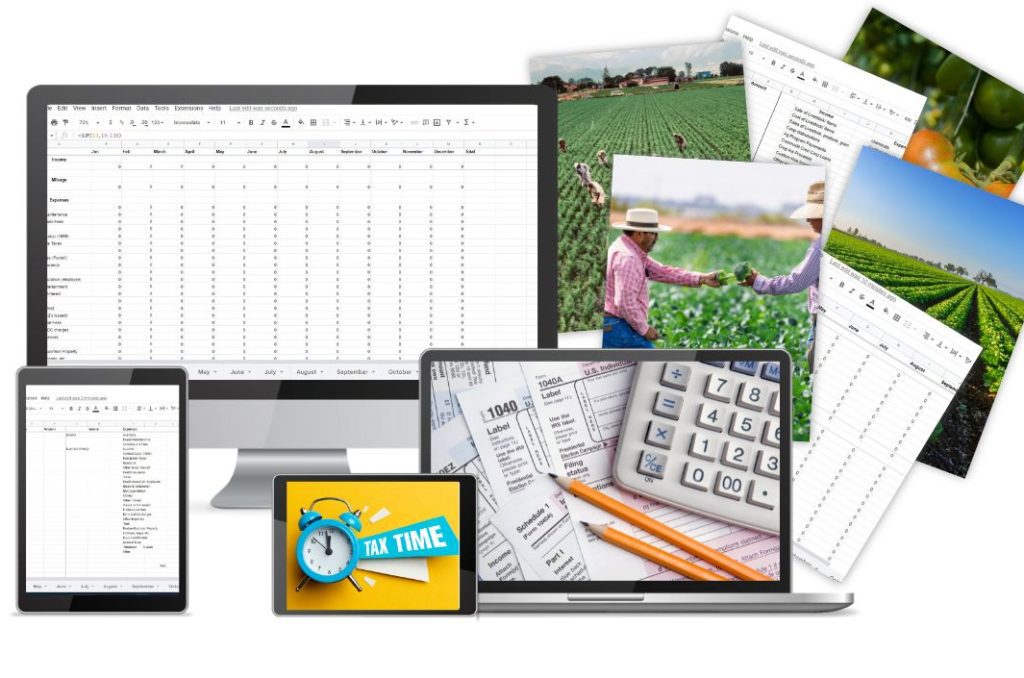
      • Farm Expense And Income Tracker
      • Goat Crash Course: 101
      • Garden Journal Prompts
      • Schedule C Tracker
      • Schedule C Tracker
      • The Homestead Bundle
  • The Truths
  • Episode List
  • Start Here
    • Privacy Policy
    • Affiliate Disclosure
    • Let’s Get in Touch
    • Members Only Library
    • Welcome To Our Homestead

Leigh

How to Use Social Media to Earn an Income on the Homestead

April 29, 2025 by Leigh Leave a Comment

Gone are the days when farming meant staying offline and off the grid. Today, some of the most successful homesteaders are using social media not just to share their lives—but to fund them. If you’re looking to make extra money while raising animals, growing food, or living a simpler life, creating a homestead social media plan could be one of the smartest moves you make.

Whether you want to start a YouTube channel, monetize your Instagram reels, or sell digital products on Pinterest, this guide will walk you through exactly how to turn your homestead content into consistent income.
The Ultimate Homesteader’s Starter Bundle – Only $47!

Get the tools you need to stay organized, track profits, and manage your homestead with ease!

Includes:
✅ Schedule F Tracker – Simplify tax prep
✅ Profit Calculator – Track earnings
✅ Hay Calculator – Plan livestock feed
✅ Garden Journal – Digital & printable
✅ Herd Health Tracker – Monitor animal care
✅ Simple Budget – Manage finances
✅ Backyard Homestead eBook – Essential tips

$99 value – now just $47! Start your homesteading journey today!

Buy Now

Why Social Media Is a Powerful Tool for Homesteaders

As a homesteader, you already have what most content creators spend hours trying to fake—real life, real experience, and real value. People are hungry for authentic content: how to raise chickens, grow tomatoes, can green beans, make herbal salves, or balance motherhood with chores. You’re doing all that and more.

When you start sharing your journey, you:

  • Build community and trust
  • Establish yourself as an expert
  • Drive traffic to your blog, shop, or YouTube
  • Open doors to partnerships, sponsorships, and sales

The best part? You don’t need millions of followers to make money. With a clear homestead social media plan, even a small but loyal audience can create reliable income streams.

Are you getting overwhelmed in the garden? Stressed? Or just not enjoying the garden like you used to? Check out our garden prompts! We send out weekly emails that get you back in the garden and out of your head! Turn the garden back into a place of love and joy instead of frustration and headache!

Subscribe Now!

Step 1: Choose Your Social Media Platforms

You don’t have to be everywhere. The best platform is the one you’ll actually use consistently. Focus on 1–2 platforms that match your content style and target audience.

Here’s a breakdown of the most effective platforms for homesteaders:

Instagram
Great for visuals (gardens, animals, DIYs) and reels. Ideal for building community and growing quickly with daily posts and stories.

TikTok
Short-form video works well for quick tips, farm humor, or before-and-after projects. Viral potential is huge even with a small account.

YouTube
Perfect for long-form tutorials, project breakdowns, and vlogs. A great way to establish yourself as an expert and generate passive ad revenue.

Pinterest
Drives traffic to blogs, Etsy shops, and YouTube videos. Best for evergreen content like recipes, how-tos, and printables.

Facebook
Useful for joining homesteading groups, selling locally, and building a Facebook page or group for your audience.

Step 2: Define Your Niche and Audience

Before posting anything, get crystal clear on who you’re talking to. Not every homesteader has the same goals or challenges. Think about your ideal follower:

  • Are they beginner homesteaders looking to learn?
  • Moms trying to balance family and farm life?
  • Off-grid or self-sufficiency enthusiasts?
  • Gardeners wanting to grow food in small spaces?

Then, ask yourself what problems you can help solve. Your homestead social media plan should revolve around service, not just aesthetics.

Examples of niche focuses:

  • Raising goats for milk or meat
  • Canning and food preservation
  • Frugal and debt-free homesteading
  • Gardening in small spaces
  • Off-grid cooking and DIYs

The more specific you are, the easier it is to grow a loyal, engaged audience.

Step 3: Plan Your Content Strategy

Now it’s time to map out your content. The best strategy combines three types of posts:

1. Educational Content
Teach your audience something useful:

  • How to start seeds indoors
  • 5 mistakes new chicken owners make
  • How to use comfrey salve for wounds

2. Inspirational Content
Share your story, successes, and daily life:

  • A sunrise over your garden
  • A quote about simplicity
  • “Why we started homesteading”

3. Promotional Content
Invite your followers to buy or click:

  • Check out your blog post
  • Buy your ebook or course
  • Visit your Etsy shop

Use a monthly calendar to balance all three types. Pinterest-friendly posts and keyword-rich descriptions can dramatically increase traffic to monetized links.

Step 4: Create and Schedule Content Consistently

You don’t need to post every day, but you do need to be consistent. Pick a posting schedule you can stick to, like:

  • Instagram: 3 reels per week, 2 story days
  • TikTok: 1–2 videos daily
  • YouTube: 1 video every 1–2 weeks
  • Pinterest: 3–5 pins per blog post

Use tools like Later, Tailwind, Metricool, or Canva’s content planner to schedule your posts ahead of time. I use Metricool and have really enjoyed it and the ease of use. Plus, their free option is pretty robust.

Batch your content creation by filming or photographing multiple things at once—like your weekly chores, a harvest day, or a DIY project. Then break that footage into multiple reels, TikToks, or blog tutorials.

Step 5: Monetize Your Content

This is where your homestead social media plan turns into a paycheck. There are several ways homesteaders earn money from their content, even with small audiences.

1. Affiliate Marketing

Share your favorite tools, seeds, gear, or books and earn a commission.
Examples:

  • Amazon Associates
  • Homesteading toolkits or digital bundles
  • Seed companies or gardening supplies

2. Ad Revenue

Once you hit enough views or traffic, platforms pay you to run ads.

  • YouTube Partner Program (1,000 subs + 4,000 watch hours)
  • Pinterest (via blog traffic → Mediavine or Raptive ad networks)
  • TikTok Creator Fund (availability varies)

3. Digital Products

Sell printables, guides, planners, or courses.
Ideas:

  • Garden planning workbook
  • Monthly homestead checklist
  • Goat care guide or feed calculator
  • Online course on canning or microgreens

4. Brand Sponsorships

Once you build trust and engagement, brands may pay you for sponsored posts, product features, or reviews.

Start by tagging brands in your posts and writing honest reviews. As you grow, reach out with a media kit showing your audience size, engagement, and services offered.

5. Physical Products

Promote products you already make:

  • Goat milk soap
  • Farm-fresh eggs
  • Preserved foods or herbal remedies

Use your social media to drive traffic to your Shopify store, Etsy shop, or local pickup days.

Step 6: Build Your Funnel

To create consistent income, you need a funnel—a clear path from your social media post to a purchase.

Here’s an example funnel:

  1. Instagram reel shows you trimming goat hooves
  2. Caption links to your blog post on goat care
  3. Blog post offers a free goat health checklist in exchange for email
  4. Email series pitches your beginner goat-raising ebook

That’s how you turn a 30-second video into a $27 sale (or more).

Create content that leads people to:

  • Join your email list
  • Read your blog
  • Buy your product
  • Watch your YouTube channel

Step 7: Track What’s Working

Every platform gives you analytics—use them. Review each month:

  • Which posts got the most views or saves?
  • What drove the most traffic to your blog?
  • Which links got clicked the most?

Focus on what’s working and do more of it. Your homestead social media plan should evolve as you learn what your audience responds to best.

Tools like Google Analytics, Pinterest Analytics, and social media insights will guide your strategy.

Step 8: Stay Authentic and Serve First

People follow you for you. Don’t try to copy influencers with perfectly polished lives. Show your mud boots, garden fails, and behind-the-scenes struggles. That authenticity is your superpower.

When you focus on serving your audience—educating, inspiring, and connecting—the income naturally follows.

Be honest. Be consistent. Be kind. And the right followers (and opportunities) will come.

Final Thoughts on Creating a Homestead Social Media Plan

If you’re living the homestead life, you already have content worth sharing—and monetizing. Whether you want to supplement your income or create a full-time business, a solid homestead social media plan can turn your skills and stories into a steady source of income.

Start simple. Choose one platform. Create helpful content. Build your audience and serve them well. In time, you’ll grow a digital income stream that supports your homestead dreams.

If you like the content I put out, feel free to buy us a coffee! It helps keep this site running, marketing and the goats in grain!

Buy me a coffee

If you like this post, feel free to share it and follow us below on our social media accounts!
  • Facebook
  • Pinterest
  • Instagram
  • YouTube
  • TikTok
  • Spotify
  • Threads

Filed Under: Frequently Asked Questions, Homestead Planning, How To's, Start Here Tagged With: business, Chickens, Goats, Homestead, income

JOIN TO OUR MAILING LIST!

Leave us your email to receive new posts and special offers for members only! Don't miss a thing!

Recent Posts

  • Fall Garden Guide
  • Top Mistakes With Goats
  • How To Bond With Your Goats

How to Set Realistic Goals for Your Homestead

April 26, 2025 by Leigh Leave a Comment

When you start homesteading, it’s easy to dream big—chickens, goats, gardens, beehives, canning pantries, solar panels, and homemade everything. But without a clear plan, all those dreams can quickly turn into burnout. That’s why mastering homestead goal setting is one of the most valuable skills you can develop. In this guide, we’ll walk you through how to set achievable and realistic goals for your homestead that align with your lifestyle, budget, and time.

Whether you’re homesteading on a quarter-acre suburban lot or a 20-acre rural spread, smart planning is the key to long-term success and joy on the land.

The Ultimate Homesteader’s Starter Bundle – Only $47!

Get the tools you need to stay organized, track profits, and manage your homestead with ease!

Includes:
✅ Schedule F Tracker – Simplify tax prep
✅ Profit Calculator – Track earnings
✅ Hay Calculator – Plan livestock feed
✅ Garden Journal – Digital & printable
✅ Herd Health Tracker – Monitor animal care
✅ Simple Budget – Manage finances
✅ Backyard Homestead eBook – Essential tips

$99 value – now just $47! Start your homesteading journey today!

Buy Now

Why Homestead Goal Setting Matters

Homesteading isn’t just a lifestyle—it’s a deeply personal journey toward self-reliance, sustainability, and fulfillment. But with so many moving pieces, trying to do everything at once is a recipe for chaos. Homestead goal setting allows you to:

  • Stay focused on what matters most
  • Avoid wasting money or energy on the wrong projects
  • Build your skills in a steady, manageable way
  • Prevent overwhelm and burnout
  • Track your progress and celebrate your wins

Instead of spinning your wheels, you’ll move with intention—and that’s where the real magic happens.

If you are interested in learning more about my favorite garden planner. I highly recommend Seedtime! This planner has been instrumental in helping me plan out my gardens with WAY more efficiency than I could ever expect! It has also reduced overwhelm, stress, and calmed my ADD/ADHD!

More Info!

Step 1: Define Your Homestead Vision

Before setting any goals, step back and ask: Why am I homesteading?

Your personal “why” shapes every decision on your land. For example, do you want to:

  • Raise your own food to reduce grocery bills?
  • Teach your kids about nature and responsibility?
  • Create a profitable side hustle?
  • Live more sustainably or off-grid?

Your vision will determine your priorities. If you want to sell produce at the farmers market, a market garden becomes a higher priority than a dairy cow. If your goal is food security, then canning, meat rabbits, or a root cellar might top the list.

Pro tip: Write down your homestead vision and keep it somewhere visible—on your fridge, in your garden journal, or posted in the barn.

Before we get too far into this post, I wanted to give a suggestion about keeping a garden journal. A digital garden journal is a fantastic way to keep track of past, present and future gardens. Our Digital Garden Journal is a great way to keep up with everything without getting too overwhelmed.

Buy Now

Step 2: Assess Your Resources Honestly

Setting realistic homesteading goals starts with understanding what you’re working with. Take stock of your available:

  • Time – Are you working full-time? Homeschooling? Raising toddlers? Be honest.
  • Land – How much usable space do you have? Is it wooded, sloped, wet?
  • Budget – What can you afford to start with? Do you have savings set aside?
  • Skill Level – Are you brand new to gardening, livestock, or building?
  • Support – Are you doing this solo, or do you have help from family, friends, or neighbors?

You don’t need unlimited resources to start homesteading, but understanding your limitations helps you set smart, achievable targets. For instance, if you only have an hour a day, starting a full-scale garden and livestock operation simultaneously might not be feasible—but a small raised bed and a few hens could be perfect.

Our herd health bundle helps you keep track of your herd’s health. Includes the goat assessment, herd check sheets AND Herd Health Tracker!

Buy Now

Step 3: Break It Down by Season or Year

One of the best homestead goal setting strategies is to plan by season or by year. Instead of trying to do everything at once, divide your big picture into quarterly or monthly chunks.

Example Annual Goal: Become 50% food self-sufficient
Seasonal Breakdown:

  • Spring: Build raised beds and plant cool-season crops
  • Summer: Expand garden and preserve harvest
  • Fall: Raise and butcher meat chickens
  • Winter: Learn pressure canning and plan fruit trees

This method keeps you focused and makes your goals feel less overwhelming. It also gives you natural checkpoints to celebrate your wins and adjust plans as needed.

If you are new to heating with firewood and are looking to master the finer points of it. We’ve got a great eBook that goes in depth of what tools you should consider, how and where to stack, how to build a fire and so much more!

Buy Now

Step 4: Use SMART Goals

SMART goals are:

  • Specific – Clear and detailed
  • Measurable – You can track your progress
  • Achievable – It’s realistic with your current resources
  • Relevant – It supports your overall homestead vision
  • Time-bound – There’s a set deadline

Bad goal: “I want to grow more food.”
SMART goal: “Grow 75% of our salad greens from April to September using three 4×8 garden beds.”

SMART goals give you clarity and accountability. They help you stay on track and give you confidence as you move forward.

The Ultimate Homesteader’s Starter Bundle – Only $47!

Get the tools you need to stay organized, track profits, and manage your homestead with ease!

Includes:
✅ Schedule F Tracker – Simplify tax prep
✅ Profit Calculator – Track earnings
✅ Hay Calculator – Plan livestock feed
✅ Garden Journal – Digital & printable
✅ Herd Health Tracker – Monitor animal care
✅ Simple Budget – Manage finances
✅ Backyard Homestead eBook – Essential tips

$99 value – now just $47! Start your homesteading journey today!

Buy Now

Step 5: Prioritize What’s Most Important

You probably have a long list of dreams—fruit trees, bees, goats, solar panels, an orchard, a pond. And they’re all great! But doing everything at once is a fast track to burnout. Pick just 1–3 main goals per season and focus on doing them well.

Ask yourself:

  • What will have the biggest impact on our quality of life?
  • What aligns most with our values or needs right now?
  • What is time-sensitive (like spring planting)?

If your family is struggling with food bills, starting a garden and learning food preservation might be more urgent than building a chicken coop. You can always add more later.

The Hay Calculator:

If you aren’t math-y (don’t worry I’m not either), check out our Hay Calculator. It literally does ALL of the math for you and gives you totals based on what you want your goals.

On the second page, you can track where you’ve bought hay, what you spent and how long it lasted.

Buy the Hay Calculator

Step 6: Track Your Progress

Tracking your progress is not only helpful—it’s encouraging. When you see how far you’ve come, it builds momentum and motivation.

Ideas for tracking:

  • A garden journal or planner
  • A monthly homestead checklist
  • A whiteboard in your kitchen or barn
  • A simple spreadsheet
  • A visual tracker (like coloring in a jar for every quart canned)

You’ll be amazed how satisfying it is to check things off, track harvest totals, or log new skills you’ve learned.

The Ultimate Homesteader’s Starter Bundle – Only $47!

Get the tools you need to stay organized, track profits, and manage your homestead with ease!

Includes:
✅ Schedule F Tracker – Simplify tax prep
✅ Profit Calculator – Track earnings
✅ Hay Calculator – Plan livestock feed
✅ Garden Journal – Digital & printable
✅ Herd Health Tracker – Monitor animal care
✅ Simple Budget – Manage finances
✅ Backyard Homestead eBook – Essential tips

$99 value – now just $47! Start your homesteading journey today!

Buy Now

Step 7: Reassess and Adjust

Life on the homestead is unpredictable. Weather, animal health, family needs, and even burnout can derail the best-laid plans. That’s okay. The key is to expect things to change and stay flexible.

Set regular check-ins—monthly or seasonally—to review your goals:

  • What’s working?
  • What’s not?
  • What needs to be paused or scaled back?
  • What new opportunities have come up?

This reassessment is where real wisdom and growth happen. Flexibility is one of the most powerful homesteading tools you can develop.

Before we get too far into this, I have a great course on the basics of goat care. I call it Goat Crash Course: Goat 101. In this course, I explain things like types of shelter, types of feeds and hays, basic assessments and so much more! Check it out!

Buy Now

Step 8: Celebrate Small Wins

When you set realistic homesteading goals, even small wins matter. Maybe your first garden only yielded a few tomatoes. Maybe you only canned five jars of salsa. That’s still progress!

Celebrate it:

  • Take a picture
  • Post your success on social media
  • Share your homemade meal with friends
  • Mark it in your journal

Each step forward builds your confidence and your skill set. Every win is proof that you’re growing—literally and metaphorically.

The Ultimate Homesteader’s Starter Bundle – Only $47!

Get the tools you need to stay organized, track profits, and manage your homestead with ease!

Includes:
✅ Schedule F Tracker – Simplify tax prep
✅ Profit Calculator – Track earnings
✅ Hay Calculator – Plan livestock feed
✅ Garden Journal – Digital & printable
✅ Herd Health Tracker – Monitor animal care
✅ Simple Budget – Manage finances
✅ Backyard Homestead eBook – Essential tips

$99 value – now just $47! Start your homesteading journey today!

Buy Now

Goal Setting Examples by Homestead Focus

Here are some practical homestead goal setting ideas by category to inspire your plan:

Gardening Goals

  • Build 4 raised beds and plant spring crops
  • Grow and preserve enough tomatoes to make 12 jars of sauce
  • Start composting with kitchen scraps

Livestock Goals

  • Raise 25 meat chickens for freezer meat
  • Build a secure coop and start with 6 laying hens
  • Learn how to trim goat hooves or do a FAMACHA check

Food Preservation Goals

  • Water bath can 40 jars of jam or salsa
  • Learn pressure canning for broth and beans
  • Freeze enough zucchini to use all winter

Income or Business Goals

  • Sell $500 worth of produce at the farmers market
  • Start a blog or YouTube channel about your homestead journey
  • Offer farm tours or goat yoga classes once a month

Sustainability Goals

  • Line dry all laundry in summer
  • Reduce grocery store trips to once per month
  • Start using a solar oven or dehydrator

Family Goals

  • Teach kids how to plant, water, and harvest vegetables
  • Plan weekly outdoor family chores or animal care
  • Involve the whole family in harvesting and preserving food

Before we get too far into this, I have a great course on the basics of goat care. I call it Goat Crash Course: Goat 101. In this course, I explain things like types of shelter, types of feeds and hays, basic assessments and so much more! Check it out!

Buy Now

Final Thoughts on Homestead Goal Setting

The beauty of homesteading is that it’s not about perfection—it’s about progress. By learning how to set realistic goals, you give yourself the freedom to grow, learn, and enjoy your homestead without constant stress or overwhelm.

Whether you’re dreaming of living off-grid or just want to grow a few vegetables and keep chickens, homestead goal setting is your secret weapon. Start with what you have. Do what you can. And watch your homestead—and your confidence—flourish.

If you like the content I put out, feel free to buy us a coffee! It helps keep this site running, marketing and the goats in grain!

Buy me a coffee

If you like this post, feel free to share it and follow us below on our social media accounts!
  • Facebook
  • Pinterest
  • Instagram
  • YouTube
  • TikTok
  • Spotify
  • Threads

Filed Under: Frequently Asked Questions, Homestead Planning, How To's Tagged With: burnout, Chickens, Homestead, mental health, Planning

JOIN TO OUR MAILING LIST!

Leave us your email to receive new posts and special offers for members only! Don't miss a thing!

Recent Posts

  • Fall Garden Guide
  • Top Mistakes With Goats
  • How To Bond With Your Goats

How to Sell Goat Meat: Best Markets and Pricing Strategies

April 22, 2025 by Leigh Leave a Comment

If you’re raising goats and want to turn your herd into a sustainable income stream, learning how to sell goat meat effectively is essential. Whether you raise Boer, Kiko, Spanish, or TexMaster goats, the key to profitability lies in choosing the right markets and setting the right prices. This guide breaks down the most important selling goat meat tips, from market types to pricing strategies that actually work.

Why Goat Meat Is in High Demand

Goat meat—also known as chevon or cabrito—is the most consumed red meat globally. Its lean profile, unique flavor, and adaptability to cultural cuisines make it a top choice for many communities. In the U.S., demand continues to rise due to increased immigrant populations and growing interest in grass-fed, sustainable meat sources. This makes it a prime time to get into the goat meat business—especially if you’re raising goats on pasture with humane practices and clean feed. But to profit, you need to understand where and how to sell.

1. Understand Your Market First

Before diving into pricing, you need to determine who your ideal customer is. Are they local families? Restaurants? Ethnic grocery stores? Butchers? Or are you selling directly off the farm?

Here are a few potential customer segments for goat meat:

  • Ethnic communities (e.g., Hispanic, Middle Eastern, African, Caribbean, Indian)
  • Farm-to-table restaurants
  • Butcher shops and halal meat markets
  • Health-conscious consumers
  • Homesteaders or rural families looking to buy in bulk

Pro tip: Visit local markets, speak with potential buyers, and explore online homesteading and farming groups to discover local demand. Use this research to guide your sales strategy.

2. Choose the Right Selling Channels

Different selling methods work better depending on your location, meat processing setup, and target customers. Below are the top ways to sell goat meat effectively.

A. Direct-to-Consumer Sales

Selling directly from your farm or through a website cuts out the middleman and maximizes profit.

Benefits:

  • Full control of pricing
  • Build customer loyalty
  • Easier to upsell cuts or add-on products

Selling tips:

  • Set up a simple farm stand or pickup point
  • Create a basic website or Shopify store
  • Offer bulk options (whole, half, or quarter goat)

B. Farmers Markets

If you already sell eggs, veggies, or goat milk, adding packaged meat can boost your revenue per customer.

What to know:

  • You’ll need proper licensing, cold storage, and a mobile freezer
  • Offer recipe cards and samples if local laws allow
  • Display USDA or state inspection information clearly

C. Ethnic Grocery Stores and Restaurants

Restaurants and ethnic grocers often buy goat meat in bulk or on a recurring basis. This creates consistent income, but margins are tighter.

Tips for success:

  • Contact chefs or buyers with a clear price list
  • Offer samples or a test order
  • Be flexible with delivery or pickup schedules

D. Livestock Auctions (Live Sales)

Some producers sell goats live at auction instead of processing them. While it’s easier, you lose out on meat markup.

This is not ideal both for the goat’s sake as well as your bottom line. This would be my very last option… I would rather keep the goat for my own freezers.

3. Know Your Processing Options

One of the most important selling goat meat tips is understanding how processing affects your legality, pricing, and market access.

A. USDA-Inspected Facilities

If you want to sell by the cut (e.g., leg, shoulder, ground goat), your meat must be processed at a USDA-inspected facility.

Pros:

  • Can sell meat retail
  • Ideal for stores, restaurants, and direct-to-consumer

Cons:

  • Limited availability in some areas
  • Higher processing costs

B. State-Inspected Facilities (If Your State Allows)

Some states allow in-state meat sales under state inspection. Check your state’s department of agriculture for details.

C. Custom Exempt (For Personal Use or Farm Gate Sales)

If you’re selling whole animals and letting the buyer process it themselves or through a custom-exempt facility, you’re not selling “meat”—you’re selling a live animal. This is legally simpler in many areas.

Popular with:

  • Homesteaders
  • Families who want to fill their freezer

Example Script:
“We sell our goats live, and once purchased, you’re welcome to take them to the custom processor of your choice. We can recommend one nearby.”

Be careful with doing this because there are a lot of people who will try and slaughter the animal on your property before leaving. Be sure to explain clearly, and if necessary in their language, that this is not okay.

4. Set Your Pricing: What to Charge for Goat Meat

Now let’s talk numbers. Pricing your goat meat depends on your costs, your market, and your sales channel. Here are the most effective ways to price it:

A. Price Per Pound Hanging Weight

This is the most common method for bulk goat meat sales.

Example:

  • Goat live weight: 80 lbs
  • Hanging weight (after slaughter): 40 lbs
  • Price per pound: $7
  • Total sale: $280

Key tip: Always clarify if your pricing is based on live weight, hanging weight, or packaged weight. Transparency builds trust.

B. Price Per Cut (Retail)

Retail cuts are the most profitable but require USDA processing and attractive packaging.

Example prices:

  • Ground goat: $10–$14/lb
  • Shoulder roast: $12–$15/lb
  • Rack or chops: $16–$20/lb
  • Organ meats (liver, heart, kidney): $5–$8/lb

Offer bundled boxes like:

  • Griller’s Box (chops, ground, ribs)
  • Family Box (shoulder, ground, stew meat)

C. Whole or Half Goat Sales

This is popular for farm pickup or holiday demand (e.g., Eid, Easter, or family feasts). Set a flat rate or use per-pound pricing.

Example:

  • Whole goat: $250–$400 depending on breed and weight
  • Half goat: $125–$200

5. Seasonal Demand: Timing Your Sales for Max Profit

Certain times of year have much higher demand for goat meat. Here are peak times to plan around:

Holiday/Event – Communities – Goat Type

  • Eid al-Adha – Muslim – Whole bucks
  • Easter – Christian/Greek – Young kids
  • Christmas/New Year – Hispanic/Caribbean – Various
  • Ramadan – Muslim – Cuts or whole

Plan your breeding schedule so kids are at ideal weights around these peak times. For example, Eid demand often focuses on bucks around 6–9 months old and 60–100 lbs.

6. Add Value with Branding and Storytelling

If you want to charge premium prices, build a brand your customers can trust. This works especially well if you’re using regenerative practices, rotating pasture, or raising rare breeds.

Ideas to showcase your value:

  • Create labels with breed info, how they were raised, and your farm name
  • Share behind-the-scenes videos on Instagram and Pinterest
  • Offer cooking guides or storage tips with every order
  • Use the keyword “grass-fed,” “pasture-raised,” and “locally raised” in your marketing copy

Pinterest tip: Post infographics showing “How to Butcher a Goat,” “Goat Meat Nutrition,” or “Cuts of Goat Meat.” These drive traffic and educate your audience. However, this can often insight rude, mean or nasty responses from those that aren’t educated on the practice of raising animals for slaughter.

7. Legal Considerations for Selling Goat Meat

This is one of the most crucial selling goat meat tips—don’t skip the legal stuff.

Check:

  • Your state’s meat sales regulations
  • Licensing required for retail or farmers markets
  • Processing facility inspections and labeling guidelines
  • Zoning laws for farm sales or events

Start by contacting your State Department of Agriculture, USDA Food Safety Inspection Service, and local extension office. Each state varies.

8. Track Your Costs and Profits

Profitable goat meat sales don’t just depend on pricing—they depend on knowing your numbers.

Track:

  • Feed and hay costs per animal
  • Breeding expenses
  • Processing and transport costs
  • Sales income per goat (live vs. processed)

Use a profit-first model to allocate income. An example of profit-first would be like below:

  • 50% profit
  • 30% expenses
  • 10% taxes
  • 10% reinvestment

Knowing your true profit margin helps you scale smart.

Final Thoughts: Sell Smart, Not Just Fast

Selling goat meat is more than just raising animals—it’s about building systems, pricing smart, and understanding your market. Whether you’re just starting with a handful of does or running a full-time meat operation, these selling goat meat tips can help you boost your revenue, build loyal customers, and create a business that supports your homestead goals.

Ready to start selling goat meat?

Here’s a quick checklist:

  • ✅ Define your market
  • ✅ Choose your selling channel
  • ✅ Find a legal processor
  • ✅ Price your products clearly
  • ✅ Build a brand and tell your story
  • ✅ Track costs and profits

You’ve got this. With careful planning and consistent marketing, your goats can feed your community—and your bank account.

If you like the content I put out, feel free to buy us a coffee! It helps keep this site running, marketing and the goats in grain!

Buy me a coffee

If you like this post, feel free to share it and follow us below on our social media accounts!

  • Facebook
  • Pinterest
  • Instagram
  • YouTube
  • TikTok
  • Spotify
  • Threads

Filed Under: Animals, Goats, Homestead Planning Tagged With: business, farming, Goats, Homestead

JOIN TO OUR MAILING LIST!

Leave us your email to receive new posts and special offers for members only! Don't miss a thing!

Recent Posts

  • Fall Garden Guide
  • Top Mistakes With Goats
  • How To Bond With Your Goats

Start A Small Garden For Beginners

April 19, 2025 by Leigh Leave a Comment

Gardening has grown in popularity as more people strive to become self-reliant, eat healthier, and connect with nature. But while the dream of growing your own lush vegetable garden or colorful flower beds can be enticing, many new gardeners fall into the trap of starting too big, too soon. The truth is, gardening isn’t as easy as Pinterest-perfect posts might make it look. It’s a skill, a muscle that needs to be worked slowly but consistently to build knowledge, experience, and confidence. If you’re new to gardening, starting a small garden isn’t just practical—it’s essential for long-term success. Here’s why starting a small garden for beginners is the smartest, most sustainable path and how it sets the foundation for a thriving green future.

cropped-3.jpg

Are you looking for garden journal prompts, but aren’t interested in a weekly email? Check out our 365 Garden Journal Prompts! This is an amazing, all in one, yearly product that you only pay for once.

Buy Now!

Gardening is a Skill, Not an Instant Talent

While not ALL new gardeners think this, many new gardeners assume that planting seeds in the ground will instantly yield fresh produce or blooming flowers. But gardening is more than just digging and watering. It involves learning how to read soil, track sunlight patterns, time your plantings correctly, identify pests, manage watering, and troubleshoot problems like disease or poor germination. These are skills that take time and practice to learn.

Think of gardening like learning to play an instrument or exercising. You wouldn’t expect to run a marathon the first week you take up jogging. Similarly, you shouldn’t expect to manage a half-acre garden on your first try. Gardening is a muscle—one that needs slow and steady workouts to strengthen over time. By starting small, you give yourself space to absorb the lessons, make manageable mistakes, and grow your confidence as well as your crops.

The Ultimate Homesteader’s Starter Bundle – Only $47!

Get the tools you need to stay organized, track profits, and manage your homestead with ease!

Includes:
✅ Schedule F Tracker – Simplify tax prep
✅ Profit Calculator – Track earnings
✅ Hay Calculator – Plan livestock feed
✅ Garden Journal – Digital & printable
✅ Herd Health Tracker – Monitor animal care
✅ Simple Budget – Manage finances
✅ Backyard Homestead eBook – Essential tips

$99 value – now just $47! Start your homesteading journey today!

Buy Now

A Small Garden is Easier to Manage

One of the most overwhelming aspects of gardening for beginners is the maintenance. Watering, weeding, pruning, harvesting—it all adds up, and if your garden is too large, you may quickly find yourself burned out or frustrated. A small garden allows you to keep up with the care your plants need without feeling like the task list is never-ending.

In a small space, you can learn to observe your plants daily, notice small changes in growth, and quickly catch signs of problems like pests or disease. These daily habits create the foundation of good gardening practice, and they’re easier to build when the garden is a manageable size. With fewer plants to worry about, you’ll be more likely to stick with it, especially during tough seasons or busy life moments.

If you are interested in learning more about my favorite garden planner. I highly recommend Seedtime! This planner has been instrumental in helping me plan out my gardens with WAY more efficiency than I could ever expect! It has also reduced overwhelm, stress, and calmed my ADD/ADHD!

More Info!

Gardening Isn’t as Easy as It Looks Online

Social media has a way of making everything look effortless, including gardening. You’ve probably seen dreamy garden beds bursting with tomatoes, giant zucchinis, and flawless flowers. What you don’t see is the composting, soil amending, seed starting failures, pest battles, and years of trial and error that went into creating those lush scenes.

The truth is, gardening comes with setbacks. Seeds don’t always germinate. Weather doesn’t always cooperate. Pests can wipe out an entire crop in a matter of days. These frustrations are part of the journey, and they’re much easier to handle when your garden is small. It’s a lot less heartbreaking to lose three tomato plants than to watch an entire 30-foot row of them die after weeks of care.

Smaller Gardens Are Budget Friendly

Starting a garden can quickly become expensive, especially if you go all-in on raised beds, tools, fertilizers, and an extensive seed list. For beginners, starting small reduces the financial risk. A few containers on a patio, a 4×4 raised bed, or even a small tilled patch of soil in your yard can produce a surprising amount of food without draining your wallet.

Starting small allows you to experiment with different tools, growing methods, and plant varieties without committing to a large investment. You can test out your local climate, soil conditions, and preferences to see what works best for you before expanding.

The Ultimate Homesteader’s Starter Bundle – Only $47!

Get the tools you need to stay organized, track profits, and manage your homestead with ease!

Includes:
✅ Schedule F Tracker – Simplify tax prep
✅ Profit Calculator – Track earnings
✅ Hay Calculator – Plan livestock feed
✅ Garden Journal – Digital & printable
✅ Herd Health Tracker – Monitor animal care
✅ Simple Budget – Manage finances
✅ Backyard Homestead eBook – Essential tips

$99 value – now just $47! Start your homesteading journey today!

Buy Now

Small Gardens Offer Room for Reflection and Learning

When your garden is small, it’s easier to reflect on what’s working and what isn’t. Did that tomato variety struggle with disease? Were those greens too bitter for your taste? Was the spacing too tight? A small-scale garden gives you the ability to evaluate and adapt your practices from season to season without the overwhelming task of managing a massive space.

This kind of seasonal reflection is crucial for developing gardening wisdom. Each season is a chance to improve. Maybe next year you’ll choose disease-resistant varieties, try vertical growing, or add compost earlier. These lessons accumulate slowly, and in a small garden, you’ll have the bandwidth to process and implement them.

Side Note: Get A Garden Journal!

I have said this in every single garden post that I have ever written. GET A GARDEN JOURNAL! This journal will help you as you grow and expand your gardens. You will not remember the varieties that did well or that you didn’t like. You won’t remember exactly what you did to get rid of the Japanese bettles that took out your green beans.

Do yourself a favor and get a garden journal. You can either purchase a digital copy like this or you can get a couple bullet journals and mark your progress every year. No matter what you choose, a garden journal is as important, if not more important, than what raised bed your planted your lettuce in last year.

Before we get too far into this post, I wanted to give a suggestion about keeping a garden journal. A digital garden journal is a fantastic way to keep track of past, present and future gardens. Our Digital Garden Journal is a great way to keep up with everything without getting too overwhelmed.

Buy Now

You’ll Build Better Habits

A small garden helps build consistency—one of the most important elements of gardening success. With a limited number of plants, you’ll naturally build routines around checking in, watering, harvesting, and weeding. These habits form the backbone of every successful garden.

Over time, these small daily actions become second nature. Before you know it, you’ll be checking your soil moisture with your finger, recognizing the early signs of aphids, and knowing just when to harvest your lettuce for the best flavor. This habit-building process is essential for beginners, and it’s much more effective in a small garden.

Success Breeds Confidence

Nothing is more encouraging than harvesting your first ripe tomato or cutting a bouquet of flowers you grew yourself. These small successes give you the confidence to keep going. When you start with a small garden, you’re more likely to succeed—and that early success is crucial for motivation.

On the other hand, taking on too much at once can lead to overwhelm, discouragement, and even the decision to quit gardening altogether. Many would-be gardeners abandon their plots after their first attempt because they feel like they failed. But often, it wasn’t their fault—it was just too much, too soon. Starting small helps you stay positive and inspired to keep learning.

cropped-3.jpg

Are you looking for garden journal prompts, but aren’t interested in a weekly email? Check out our 365 Garden Journal Prompts! This is an amazing, all in one, yearly product that you only pay for once.

Buy Now!

You’ll Make Smarter Expansion Choices

Once you’ve worked your gardening “muscles” in a small space, you’ll know exactly how to expand your garden in a way that makes sense. You’ll know which plants you enjoy growing, which varieties work well in your area, and which gardening tasks you actually enjoy. This information is invaluable when planning a larger garden.

Instead of guessing or copying someone else’s layout, you’ll design your next garden based on real experience. Maybe you’ll build a second raised bed, add a few fruit bushes, or try a new vertical trellis system. No matter how you expand, you’ll do it with intention, not overwhelm.

Small Gardens Can Be Highly Productive

Don’t underestimate what a small garden can produce. With careful planning and succession planting, even a 4×4 garden bed can supply greens, herbs, and seasonal vegetables throughout the growing season. Container gardens can yield fresh herbs, peppers, tomatoes, and even root crops. You don’t need a huge plot to feed yourself and your family.

In fact, starting small often leads to better productivity because you can give each plant the attention it needs. You’re more likely to fertilize correctly, manage pests, and harvest on time when your garden is easy to access and monitor.

Are you getting overwhelmed in the garden? Stressed? Or just not enjoying the garden like you used to? Check out our garden prompts! We send out weekly emails that get you back in the garden and out of your head! Turn the garden back into a place of love and joy instead of frustration and headache!

Subscribe Now!

Pinterest-Worthy Gardens Take Time

If you’re dreaming of a picture-perfect garden, remember: those dreamy Pinterest gardens weren’t built in a season. They’re the result of years of trial, error, and improvement. The good news is that your small garden is the first step toward that vision.

Every gardener starts somewhere. Behind every lush, overflowing bed is a journey of small beginnings. Give yourself the grace to start where you are. There’s beauty in the process, and starting small ensures that you enjoy the journey rather than getting discouraged along the way.

Final Thoughts: Embrace the Small Start

For the new gardener, the most important thing isn’t how much you grow—it’s that you start growing. A small garden gives you the opportunity to develop skills, build habits, learn from mistakes, and experience the joy of homegrown success without the stress and overwhelm of a big plot. Remember, gardening is a muscle. Work it regularly. Tend it patiently. Let it grow strong and steady over time.

By starting small, you’re planting the seeds of a lifelong passion—one that can nourish your body, mind, and soul. So grab a few pots, prepare a little bed, or sow a single row of seeds. That small act of gardening is the foundation of something far greater than you can imagine.

If you like the content I put out, feel free to buy us a coffee! It helps keep this site running, marketing and the goats in grain!

Buy me a coffee

If you like this post, feel free to share it and follow us below on our social media accounts!

  • Facebook
  • Pinterest
  • Instagram
  • YouTube
  • TikTok
  • Spotify
  • Threads

Filed Under: Our Homestead

JOIN TO OUR MAILING LIST!

Leave us your email to receive new posts and special offers for members only! Don't miss a thing!

Recent Posts

  • Fall Garden Guide
  • Top Mistakes With Goats
  • How To Bond With Your Goats

Best Natural Fertilizers for a Productive Garden

April 15, 2025 by Leigh Leave a Comment

If you’re serious about growing a thriving garden that’s not only bountiful but also sustainable, then choosing the best natural fertilizers are essential. Synthetic fertilizers may promise fast results, but they often damage soil health over time. Natural fertilizers, on the other hand, nourish your garden while enriching the soil ecosystem for the long haul.

In this comprehensive guide, we’ll explore the best natural fertilizers to boost plant health, increase yields, and build rich, fertile soil. Whether you’re growing vegetables, herbs, flowers, or fruit, these organic options are ideal for any gardener wanting a more eco-friendly and productive plot.

cropped-3.jpg

Are you looking for garden journal prompts, but aren’t interested in a weekly email? Check out our 365 Garden Journal Prompts! This is an amazing, all in one, yearly product that you only pay for once.

Buy Now!

What Is Organic Garden Fertilizer?

Organic garden fertilizer refers to any plant, mineral, or animal-based material that provides essential nutrients to your garden in a natural form. Unlike chemical fertilizers, organic options support soil microbes, improve structure, and release nutrients slowly—mimicking how nature feeds itself.

Popular examples include compost, worm castings, bone meal, seaweed, and fish emulsion. Each offers a unique nutrient profile and benefit depending on your garden’s needs.

Why Choose Natural Fertilizers?

Before we dive into the list, let’s cover why natural and organic fertilizers are worth the effort:

  • 🌱 Healthier Soil: Organic fertilizers feed soil microbes, fungi, and beneficial bacteria, leading to improved soil fertility and texture.
  • 🥕 Better Food Quality: Gardens nourished with natural fertilizers often yield more nutrient-dense produce.
  • 💧 Water Retention: Healthy soil holds water better, reducing the need for frequent watering.
  • 🐞 Eco-Friendly: Organic fertilizers are renewable and biodegradable, reducing your environmental footprint.
  • 💰 Cost-Effective: Many natural fertilizers can be made at home or sourced affordably from local suppliers.

Before We Get Into The Good Stuff

I just wanted to put out there that before you start spraying stuff all over your plants and soil, you should get a soil test. The reason for this is that you can stunt, burn, or kill your plants if you add too much of the wrong thing. Now that is the extreme, but the reality is that if you are just spraying your plants you could have some issues.

Usually if your plants are putting on a ton of foliage but no fruit or flowers this is a nitrogen problem. If your leaves are turning yellow or brown, you’ve probably got a potassium problem. So make sure that you have an idea of what is going on before you just start spraying with fertilizers, even if they are natural.

1. Compost: The Gold Standard

Best for: All-purpose nutrient boost and soil structure improvement

Compost is the cornerstone of any organic garden. Made from decomposed kitchen scraps, garden waste, and manure, compost provides a balanced mix of nitrogen, phosphorus, and potassium, along with beneficial microbes.

How to use:
Mix compost into the soil before planting or top-dress around established plants. Apply 1–2 inches of compost per growing season for best results.

Pro tip: Homemade compost is best, but high-quality bagged options work too if you’re short on time or materials.

Biggest Con– Compost can get hot. If you don’t let that chicken poop or other manures compost down for long enough (usually 1 year) you risk burning your plants. There has also been a lot of issues lately with bagged soil and compost not being composted for long enough and people are having issues with stunted or burned plants.

The Ultimate Homesteader’s Starter Bundle – Only $47!

Get the tools you need to stay organized, track profits, and manage your homestead with ease!

Includes:
✅ Schedule F Tracker – Simplify tax prep
✅ Profit Calculator – Track earnings
✅ Hay Calculator – Plan livestock feed
✅ Garden Journal – Digital & printable
✅ Herd Health Tracker – Monitor animal care
✅ Simple Budget – Manage finances
✅ Backyard Homestead eBook – Essential tips

$99 value – now just $47! Start your homesteading journey today!

Buy Now

2. Worm Castings: Nature’s Perfect Fertilizer

Best for: Delicate seedlings, potted plants, and vegetables

Worm castings—also called vermicast—are essentially worm poop, but don’t let that fool you. They’re packed with nutrients, beneficial microbes, and plant-growth hormones. I’ve had really good results with Brut’s worm castings.

Benefits:

  • Improves seed germination
  • Enhances disease resistance
  • Contains water-soluble nutrients for immediate uptake

How to use:
Sprinkle around plants or mix into potting soil at a ratio of 1:4 (one part castings to four parts soil).

3. Fish Emulsion: Quick Growth Booster

Best for: Leafy greens and nitrogen-hungry crops

Fish emulsion is a fast-acting, liquid organic garden fertilizer made from decomposed fish. It’s rich in nitrogen and trace minerals, making it perfect for boosting foliage growth. I prefer Fox Farm Wholly Mackerel for fish emulsions… Be aware though, this stuff stinks to high heaven.

How to use:
Dilute with water (usually 1 tablespoon per gallon) and apply as a foliar spray or soil drench every 2–4 weeks.

Tip: Use in the early growing season for best results, but avoid overuse to prevent odor and nutrient imbalance.

Before we get too far into this post, I wanted to give a suggestion about keeping a garden journal. A digital garden journal is a fantastic way to keep track of past, present and future gardens. Our Digital Garden Journal is a great way to keep up with everything without getting too overwhelmed.

Buy Now

4. Bone Meal: Root and Bloom Support

Best for: Flowering plants, bulbs, tomatoes, and root crops

Bone meal is a finely ground powder made from animal bones, rich in phosphorus and calcium. It supports strong root development and flowering.

How to use:
Mix into planting holes or top-dress around the base of plants. Water thoroughly to help nutrients absorb into the soil.

Caution: Bone meal can attract pests if not mixed well into the soil, so always cover after application.

5. Blood Meal: Nitrogen-Packed Power

Best for: Nitrogen-deficient soil and fast-growing greens

Blood meal is made from dried animal blood and contains high levels of nitrogen. It encourages lush, leafy growth and corrects yellowing caused by nitrogen deficiency.

How to use:
Apply sparingly—too much can burn plants. Mix 1–2 tablespoons per square foot of soil and water in.

Note: It’s powerful, so use it only where nitrogen is truly needed.

The Hay Calculator:

If you aren’t math-y (don’t worry I’m not either), check out our Hay Calculator. It literally does ALL of the math for you and gives you totals based on what you want your goals.

On the second page, you can track where you’ve bought hay, what you spent and how long it lasted.

Buy the Hay Calculator

6. Alfalfa Meal: The Balanced Option

Best for: Roses, perennials, and general garden health

Alfalfa meal is a plant-based organic fertilizer that offers a mild, balanced mix of N-P-K (Nitrogen-Phosphorus-Potassium) and natural growth stimulants like triacontanol.

How to use:
Apply 1–2 cups per 10 square feet. Mix into the top layer of soil or compost.

Bonus: It also activates compost piles, making it a dual-purpose garden tool.

7. Kelp Meal and Seaweed Fertilizer: Micronutrient Magic

Best for: Stress resistance, fruiting plants, and micronutrient deficiencies

Kelp meal and seaweed fertilizers are rich in trace minerals, amino acids, and growth hormones like cytokinins and auxins. While they’re not high in N-P-K, they improve plant vigor and root development.

How to use:

  • Kelp Meal: Mix into soil or compost.
  • Liquid Seaweed: Use as a foliar spray or soil soak every 3–4 weeks.

Before we get too far into this, I have a great course on the basics of goat care. I call it Goat Crash Course: Goat 101. In this course, I explain things like types of shelter, types of feeds and hays, basic assessments and so much more! Check it out!

Buy Now

8. Manure: The Classic Garden Fertilizer

Best for: Large garden beds, fruit trees, and deep soil amendment

Aged or composted manure (from cows, chickens, rabbits, or horses) is a traditional favorite. It’s packed with organic matter and essential nutrients, but it must be composted first to avoid burning plants or spreading pathogens.

How to use:
Apply 1–2 inches in fall or early spring and work it into the soil. Avoid using fresh manure during the growing season.

Caution: Always use aged manure to protect your plants and yourself.

9. Green Manure (Cover Crops): Fertilizer You Grow

Best for: Off-season soil fertility and erosion control

Green manure refers to fast-growing cover crops like clover, rye, or buckwheat that are grown and then tilled into the soil to add nitrogen and organic matter.

Benefits:

  • Adds nutrients naturally
  • Improves soil texture
  • Suppresses weeds

How to use:
Plant during the off-season, then till into the soil before planting your main crops.

Our herd health bundle helps you keep track of your herd’s health. Includes the goat assessment, herd check sheets AND Herd Health Tracker!

Buy Now

10. Banana Peels, Coffee Grounds & Eggshells: DIY Fertilizers

Best for: Small gardens, pots, and DIY-minded gardeners

Sometimes the best fertilizer is in your kitchen scraps. Items like banana peels, coffee grounds, and crushed eggshells offer targeted nutrients:

  • 🍌 Banana Peels: Potassium and phosphorus for blooming
  • ☕ Coffee Grounds: Nitrogen boost and mild acidity
  • 🥚 Eggshells: Calcium to prevent blossom end rot

How to use:
Chop or dry and crush before burying directly into the soil or adding to compost.

cropped-3.jpg

Are you looking for garden journal prompts, but aren’t interested in a weekly email? Check out our 365 Garden Journal Prompts! This is an amazing, all in one, yearly product that you only pay for once.

Buy Now!

How to Choose the Right Organic Garden Fertilizer

With so many options, how do you pick the best one for your garden?

Consider These Factors:

  • Soil Test Results: Know what your soil is lacking (N, P, K, or micronutrients).
  • Plant Type: Leafy greens need nitrogen, root crops need phosphorus, and fruiting plants need potassium.
  • Application Method: Some fertilizers are best mixed into soil, while others shine as foliar sprays.
  • Seasonal Timing: Start with compost and worm castings in spring, fish emulsion during growth, and bone meal when flowering.

Tips for Getting the Most Out of Your Fertilizers

  • 🌦️ Apply before rain to help nutrients soak in.
  • 💧 Water after applying dry fertilizers to prevent root burn.
  • 🔁 Rotate fertilizers based on plant stages and needs.
  • 📅 Be consistent—feeding every 3–6 weeks gives steady results.
  • 📈 Track your results in a garden journal to see what works best.

Final Thoughts

Natural fertilizers are the heart of a thriving, eco-conscious garden. When you choose an organic garden fertilizer, you’re not only feeding your plants but building a stronger, more resilient ecosystem from the ground up.

From compost and worm castings to seaweed sprays and bone meal, each fertilizer brings unique benefits that contribute to long-term soil health and garden productivity. Try combining a few of these options and observe how your plants respond—you might be surprised at just how productive your garden can become.

🌿 Save This Post for Later on Pinterest!

📌 Looking for the best organic garden fertilizer options to naturally boost your plants?
Pin this post so you’ll always have the ultimate guide at your fingertips!
#OrganicGardening #NaturalFertilizer #GardenTips #GrowYourOwn #HomesteadGarden #CompostMagic #WormCastings #SustainableLiving

If you like the content I put out, feel free to buy us a coffee! It helps keep this site running, marketing and the goats in grain!

Buy me a coffee

If you like this post, feel free to share it and follow us below on our social media accounts!

  • Facebook
  • Pinterest
  • Instagram
  • YouTube
  • TikTok
  • Spotify
  • Threads

Filed Under: Garden

JOIN TO OUR MAILING LIST!

Leave us your email to receive new posts and special offers for members only! Don't miss a thing!

Recent Posts

  • Fall Garden Guide
  • Top Mistakes With Goats
  • How To Bond With Your Goats

How to Improve Poor Soil Naturally

April 12, 2025 by Leigh Leave a Comment

If you’re struggling to grow a productive garden due to clay, sandy, or rocky soil, you’re not alone. Many homesteaders and gardeners face the challenge of working with less-than-ideal soil. But here’s the good news: you can improve poor soil naturally, with time-tested techniques that don’t require synthetic chemicals or costly equipment.

Whether your garden beds are sticky with clay, quick-draining sand, or riddled with rocks, this guide will show you how to build healthier soil that supports strong plant growth, improves yields, and boosts long-term sustainability.

cropped-3.jpg

Are you looking for garden journal prompts, but aren’t interested in a weekly email? Check out our 365 Garden Journal Prompts! This is an amazing, all in one, yearly product that you only pay for once.

Buy Now!

Why Soil Type Matters in Your Garden

Before we dig into the solutions, it’s important to understand why soil type matters. The texture and composition of your soil affect water retention, nutrient availability, aeration, and root development.

Clay Soil tends to be dense and compacted. It holds water too well and drains poorly, which can suffocate plant roots and lead to root rot.

Sandy Soil is the opposite: it drains too quickly, losing water and nutrients before roots can absorb them.

Rocky Soil is tough to plant in and often lacks organic matter, making it low in nutrients and difficult to work.

Each type has its challenges, but with the right natural amendments and practices, you can improve poor soil and turn your garden into a thriving, productive space.

Identify Your Soil Type

Before you amend anything, know what you’re working with. Here’s how to test your soil type at home:

Squeeze Test
Grab a handful of moist soil and squeeze it into a ball:

  • If it forms a hard lump and doesn’t crumble, it’s clay.
  • If it falls apart immediately, it’s sandy.
  • If it crumbles but holds a shape, you have loam (ideal!).

Jar Test

  • Fill a jar ⅓ with soil, then add water and a few drops of dish soap.
  • Shake vigorously and let it settle for 24 hours.
  • Sand settles first, silt second, and clay last. The layers show your proportions.

If you are interested in learning more about my favorite garden planner. I highly recommend Seedtime! This planner has been instrumental in helping me plan out my gardens with WAY more efficiency than I could ever expect! It has also reduced overwhelm, stress, and calmed my ADD/ADHD!

More Info!

Add Organic Matter – The Universal Fix

No matter your soil type, adding organic matter is the #1 way to improve poor soil naturally. Organic matter boosts microbial life, enhances structure, improves drainage in clay, increases water retention in sand, and adds nutrients to rocky soil.

Great Sources of Organic Matter:

  • Compost – Homemade or purchased, compost is rich in nutrients and microorganisms.
  • Well-rotted Manure – Adds nutrients and improves soil texture.
  • Shredded Leaves – A free and abundant amendment every fall.
  • Grass Clippings – Use only untreated clippings to avoid herbicide contamination.
  • Cover Crops – Plants like clover, rye, or buckwheat break up compacted soil and return nutrients when turned in.
  • Animal Bedding– Every year, we empty out our barn and use that bedding in the gardens. You can read about it here.
  • Spent Hay– Our goats drop a TON of hay and since they don’t usually eat off the ground, that hay is “wasted”. We collect it up and put it in our gardens or in our compost area.

Aim to apply 2–4 inches of organic matter to your beds and gently work it into the top 6–12 inches of soil each season.

The Hay Calculator:

If you aren’t math-y (don’t worry I’m not either), check out our Hay Calculator. It literally does ALL of the math for you and gives you totals based on what you want your goals.

On the second page, you can track where you’ve bought hay, what you spent and how long it lasted.

Buy the Hay Calculator

Fixing Clay Soil Naturally

Clay soil needs aeration and structure to become more plant-friendly.

Natural Amendments for Clay:

  • Compost & Leaf Mold – Add generously to improve drainage and aeration.
  • Mulch & Wood Chips– Like compost it improves drainage and aeration but lasts a lot longer.
  • Gypsum (Calcium Sulfate) – Helps break up clay particles and improves soil texture over time.
  • Coarse Sand – In small amounts and only when mixed thoroughly with organic matter to avoid creating concrete-like soil.
  • Cover Crops with Deep Roots – Daikon radish and alfalfa can break through clay and decompact the soil.

Practices to Avoid:

  • Don’t work clay soil when it’s wet—it compacts further and becomes like brick.
  • Avoid synthetic fertilizers that can alter the pH and kill beneficial microbes.

Before we get too far into this, I have a great course on the basics of goat care. I call it Goat Crash Course: Goat 101. In this course, I explain things like types of shelter, types of feeds and hays, basic assessments and so much more! Check it out!

Buy Now

Fixing Sandy Soil Naturally

Sandy soil needs nutrient retention and moisture-holding capacity.

Natural Amendments for Sandy Soil:

  • Compost – Adds structure and helps sand hold water and nutrients.
  • Coconut Coir or Peat Moss – Excellent for moisture retention (choose peat-free if sustainability is a concern).
  • Biochar – Traps nutrients and water, and supports microbial life.
  • Clay Loam or Silt Loam Soil – If available locally, a small amount can help balance sandy texture.

Long-Term Strategy:

  • Mulch heavily to retain moisture.
  • Use slow-release organic fertilizers like fish emulsion or worm castings.
  • Grow nitrogen-fixing crops like peas or beans.
cropped-3.jpg

Are you looking for garden journal prompts, but aren’t interested in a weekly email? Check out our 365 Garden Journal Prompts! This is an amazing, all in one, yearly product that you only pay for once.

Buy Now!

Fixing Rocky Soil Naturally

Rocky soil is more about removal and rebuilding than just amending.

How to Work with Rocky Soil:

  • Screen Your Soil – Use a soil sifter or screen to remove rocks from planting beds.
  • Raised Beds or Lasagna Gardening – Build on top of rocky soil with layers of compost, manure, cardboard, and mulch.
  • Grow Soil-Breaking Plants – Taproot crops like radish, comfrey, or dandelion can work their way through the rocks and break up hard ground.
  • Add Organic Matter Over Time – Mulch and compost will slowly transform rocky soil into usable garden beds.

While you may not eliminate all the rocks, focusing on building up the topsoil is a smart and natural way to improve poor soil in these conditions.

Before we get too far into this post, I wanted to give a suggestion about keeping a garden journal. A digital garden journal is a fantastic way to keep track of past, present and future gardens. Our Digital Garden Journal is a great way to keep up with everything without getting too overwhelmed.

Buy Now

Use Natural Soil Builders

Soil is a living ecosystem, and building it up requires supporting the life within it.

Helpful Soil-Boosting Techniques:

  • Worm Castings – Rich in beneficial bacteria and nutrients.
  • Mycorrhizal Fungi – These fungi form symbiotic relationships with roots and increase nutrient and water uptake.
  • No-Till Gardening – Reduces disturbance to beneficial organisms and keeps soil structure intact.
  • Mulching – Retains moisture, suppresses weeds, and adds slow-release nutrients as it breaks down.

Test and Monitor Soil Health

Use a soil test kit every season to check:

  • pH levels (aim for 6.0–7.0 for most vegetables)
  • Nutrient levels (especially nitrogen, phosphorus, and potassium)
  • Organic matter percentage
  • Microbial activity (advanced tests available through labs)

Adjust your amendments as needed based on these results. Consistency over time is key.

We have used this test kit for the last 5 years and absolutely love it.

If you are new to heating with firewood and are looking to master the finer points of it. We’ve got a great eBook that goes in depth of what tools you should consider, how and where to stack, how to build a fire and so much more!

Buy Now

Be Patient—Soil Building is a Process

Natural soil improvement doesn’t happen overnight. It can take several seasons of consistent work to improve poor soil significantly—but the results are worth it.

Your rewards will include:

  • More vigorous plant growth
  • Increased yields
  • Better water management
  • Reduced need for fertilizers and irrigation
  • A healthier garden ecosystem

Final Thoughts: You Can Improve Poor Soil—Naturally

Whether you’re battling clay that turns to concrete, sand that drains like a sieve, or rocks that ruin your shovel, you can improve poor soil using natural techniques and organic amendments. Start with compost, support microbial life, and grow with patience.

Every shovelful of compost, every layer of mulch, and every deep-rooted cover crop moves you one step closer to a rich, fertile garden that rewards you for years to come.

If you like the content I put out, feel free to buy us a coffee! It helps keep this site running, marketing and the goats in grain!

Buy me a coffee

If you like this post, feel free to share it and follow us below on our social media accounts!

  • Facebook
  • Pinterest
  • Instagram
  • YouTube
  • TikTok
  • Spotify
  • Threads

Filed Under: Garden

JOIN TO OUR MAILING LIST!

Leave us your email to receive new posts and special offers for members only! Don't miss a thing!

Recent Posts

  • Fall Garden Guide
  • Top Mistakes With Goats
  • How To Bond With Your Goats

Raising Goats for Profit: How to Make Money from Meat and Dairy

April 5, 2025 by Leigh Leave a Comment

Whether you’re a homesteader, hobby farmer, or aspiring agricultural entrepreneur, profitable goat farming is a realistic and achievable goal when approached with the right strategy. In this comprehensive guide, we’ll walk you through everything you need to know about raising goats for profit—focusing on both meat and dairy production. From choosing the right breeds to maximizing your income streams, we’re diving into the details that will help you build a thriving goat business.

Before we get too far into this, I have a great course on the basics of goat care. I call it Goat Crash Course: Goat 101. In this course, I explain things like types of shelter, types of feeds and hays, basic assessments and so much more! Check it out!

Buy Now

Why Goats Are a Smart Investment

Goats are one of the most versatile livestock options for small farms. They require less space and feed than cattle, have strong market demand, and offer multiple income sources—milk, meat, manure, breeding stock, and even agritourism.

Here’s why profitable goat farming is on the rise:

  • Low Startup Costs: Compared to other livestock, goats are relatively inexpensive to purchase and maintain.
  • High Reproduction Rates: Most goat breeds can produce twins or triplets yearly, increasing your herd quickly.
  • Diverse Market Opportunities: You can sell meat, milk, cheese, soap, breeding stock, or even rent goats out for land clearing.

Step 1: Choose Your Focus — Meat or Dairy Goats?

Before you jump into raising goats for profit, it’s essential to decide your primary focus. Yes, you can do both, but if you are just starting out, it would be much easier to figure out where you want to focus your attention.

Meat Goat Farming

Meat goats are hardy, grow quickly, and are in high demand—especially around holidays in ethnic markets. Popular breeds include:

  • Boer: The most common meat goat breed, known for fast growth and muscle mass.
  • Kiko: Hardy and parasite-resistant, great for low-maintenance operations.
  • TexMaster: A crossbreed of Boer and Myotonic, prized for meat quality and ease of management.

Meat goats are typically sold by live weight or hanging weight, with pricing often ranging from $5–$10 per pound depending on your market.

Dairy Goat Farming

If you’re more interested in daily hands-on care and want to create value-added products like cheese and soap, dairy goats are the way to go. Top breeds include:

  • Nubian: High butterfat content, ideal for cheese and rich milk.
  • Saanen: High milk volume, friendly temperament.
  • Alpine: Balanced milk production and strong genetics.

Dairy operations can sell raw milk (check local laws), cheese, yogurt, and even body care products like goat milk soap and lotion.

Before we get too far into this, I have a great course on the basics of goat care. I call it Goat Crash Course: Goat 101. In this course, I explain things like types of shelter, types of feeds and hays, basic assessments and so much more! Check it out!

Buy Now

Step 2: Understand the Costs of Goat Farming

To make your farm truly profitable, you need to track both startup and ongoing costs. Here’s a quick breakdown:

Startup Costs:

  • Goat shelter or barn: $500–$5,000
  • Fencing (goats are escape artists!): $2–$5 per foot. This can increase with the additions of hot wire and additional t-posts to secure your fencing better.
  • Water system and feeders: $200–$800
  • Breeding stock: $150–$500 per goat (more for registered goats)
  • Milking or processing equipment (for dairy): $1,000–$5,000

Ongoing Costs:

  • Feed and hay: $10–$30 per goat per month
  • Veterinary care: $10–$20 per goat monthly
  • Mineral supplements: $20/month for small herds
  • Marketing and packaging (dairy products): Variable

Use a simple spreadsheet, like or Schedule F, or farm management software to track all expenses. Knowing your break-even point is key to profitable goat farming.

Our herd health bundle helps you keep track of your herd’s health. Includes the goat assessment, herd check sheets AND Herd Health Tracker!

Buy Now

Step 3: Build a Solid Infrastructure

Success in goat farming starts with proper infrastructure:

Housing

Goats need shelter from wind, rain, and predators. Simple sheds with good ventilation and dry bedding will do for most climates. Plan for at least 15–20 square feet per goat inside and 200–250 square feet of outdoor space.

Fencing

Invest in strong fencing like woven wire or electric netting. Goats are curious and agile—they will test your boundaries!

Feeding & Watering

A balanced diet includes:

  • Quality hay
  • Grain (in moderation)
  • Minerals (always available)
  • Fresh water

Dairy goats also benefit from high-protein supplements during lactation.

Step 4: Set Up Your Breeding Program

A well-managed breeding program is a core component of profitable goat farming.

  • Breeding Season: Typically fall, with kids born in spring.
  • Gestation Period: About 150 days.
  • Kidding Rate: 2–3 kids per doe is common with good nutrition.

Tips for profitable breeding:

  • Keep detailed records of breeding dates and bloodlines.
  • Cull unproductive or unhealthy animals.

Sell kids at 8–12 weeks for meat or raise doelings as future milkers. Processing the kids is the hardest part of meat goat farming, so be prepared.

If you are a farmer/ homesteader and looking for a way to track your income and expenses, I highly recommend our Schedule F Tracker! We have been using it for years and it is the easiest, fastest and best way that we have found to keep track of the money spent on the homestead.

Buy Now

Step 5: Know Your Market

Understanding your target market is crucial for maximizing profits. Here are key goat product income streams:

Selling Goat Meat

Target:

  • Local ethnic communities
  • Butcher shops
  • Farmers markets
  • Online meat shares

Offer whole goat sales, cut-and-wrapped meat, or CSA-style shares. Use social media and your website to take pre-orders.

Selling Goat Milk & Dairy Products

Raw milk laws vary by state—check your local regulations. You can sell:

  • Bottled milk
  • Cheese (chevre, feta, aged varieties)
  • Yogurt
  • Butter
  • Goat milk soap and lotion

Add value by offering farm tours, classes, or subscription boxes.

Selling Breeding Stock

As your herd improves, you can sell:

  • Registered doelings and bucks
  • Starter herds to new farmers
  • Wethers as pets or brush goats

Document pedigrees, health records, and milk/meat performance to increase value. To give you an idea of how this looks, a starter herd of TexMaster goats (kids and yearlings) will cost you about $2400 depending on your local area. And they are not breed-able for about another year or so. An adult doe will run you about $1,000.

Before we get too far into this, I have a great course on the basics of goat care. I call it Goat Crash Course: Goat 101. In this course, I explain things like types of shelter, types of feeds and hays, basic assessments and so much more! Check it out!

Buy Now

Step 6: Maximize Income Streams

Diversify your farm income to reduce risk and grow your revenue. Here are bonus ways to make money with goats:

  • Goat Yoga Classes
  • Brush Clearing Services
  • Manure for Gardeners
  • Homestead Workshops
  • YouTube Channel or Blog
  • Etsy Shop for Goat-Based Products

The more ways you leverage your goats, the more profitable goat farming becomes.

Step 7: Use Smart Marketing to Stand Out

Marketing is where many farms struggle—but it doesn’t have to be hard.

Build a Farm Website

Include:

  • Your story
  • Products & services
  • Contact info
  • Farm blog (for SEO)
  • Online store or order form

Use Pinterest for SEO & Sales

Pinterest is powerful for promoting:

  • Goat milk soap tutorials
  • Cheese recipes
  • Homesteading tips
  • Farm lifestyle content

Create vertical pins (1000×1500 px), use text overlays, and include keywords like “profitable goat farming,” “goat milk soap,” or “how to start a goat farm.”

If you are a farmer/ homesteader and looking for a way to track your income and expenses, I highly recommend our Schedule F Tracker! We have been using it for years and it is the easiest, fastest and best way that we have found to keep track of the money spent on the homestead.

Buy Now

Grow Your Social Media

Post consistently on:

  • Instagram (behind-the-scenes + stories)
  • Facebook (farm updates + customer interaction)
  • YouTube or TikTok (goat care, kidding season, milking tutorials)

Engage your audience and build community. People love following real farmers.

Step 8: Stay Compliant and Legal

To run a legitimate and profitable operation, get familiar with local regulations. Below are just a few licensing and regulations to consider. I would also look into getting insurance if you are going to have farm tours, sell food products, etc. It’s better to be safe than sorry.

  • Business License
  • Raw Milk Sales Permits
  • Animal Welfare Standards
  • Meat Processing Laws
  • Zoning & Land Use

It’s worth consulting your county extension office or a farm attorney for guidance. Don’t skip this step—it protects your farm and future.

Step 9: Track, Measure & Improve

The best farmers treat their operation like a business. Monitor these metrics:

  • Feed-to-meat/milk conversion ratios
  • Breeding success rates
  • Average sale price per product
  • Customer acquisition cost
  • Monthly profit/loss

Review your numbers monthly and look for ways to improve efficiency. That’s how you turn a hobby into profitable goat farming.

Our herd health bundle helps you keep track of your herd’s health. Includes the goat assessment, herd check sheets AND Herd Health Tracker!

Buy Now

Final Thoughts: Is Goat Farming Really Profitable?

Absolutely—if you plan well, start small, and grow intentionally.

Profitable goat farming isn’t a get-rich-quick scheme, but with hard work and smart decisions, you can turn your goats into a dependable income source that fits your lifestyle and values.

Whether you’re raising meat goats for local markets or crafting artisan cheese from your backyard herd, there’s never been a better time to start.

If you like the content I put out, feel free to buy us a coffee! It helps keep this site running, marketing and the goats in grain!

Buy me a coffee

If you like this post, feel free to share it and follow us below on our social media accounts!

  • Facebook
  • Pinterest
  • Instagram
  • YouTube
  • TikTok
  • Spotify
  • Threads

Filed Under: Animals, Goal Setting, Goats

JOIN TO OUR MAILING LIST!

Leave us your email to receive new posts and special offers for members only! Don't miss a thing!

Recent Posts

  • Fall Garden Guide
  • Top Mistakes With Goats
  • How To Bond With Your Goats

How To Choose The Best Goat Breeds For Homesteading

April 1, 2025 by Leigh Leave a Comment

So, you’re thinking about adding goats to your homestead? These little (or not-so-little) creatures can bring a ton of benefits, whether you’re looking for fresh milk every morning or a steady supply of high-quality meat. But with so many breeds out there, how do you pick the right one? Let’s break it down in a way that actually makes sense, so you can make the best choice for your farm.

Before we get too far into this, I have a great course on the basics of goat care. I call it Goat Crash Course: Goat 101. In this course, I explain things like types of shelter, types of feeds and hays, basic assessments and so much more! Check it out!

Buy Now

Choosing The Best Goat Breeds For Homesteading

If you’ve ever wanted livestock that doesn’t take up as much space as a cow but still brings a lot to the table (literally), goats are the way to go. They’re low-maintenance, great at clearing brush, and give you either delicious milk or top-notch meat—or both! Plus, they have a lot of personality, which makes them fun to have around.

I want to point out before we get too far into this post that you don’t have to run separate herds. If you want meat and milk, you can always have dairy does (girls) and meat bucks (boys). That way you have milk from mommas and the kids can be for meat. At the end of the day, you have to make the right decision for YOUR farm.

The big question is: do you want goats for milk, meat, or both? The answer will determine which breed is right for you.

Our herd health bundle helps you keep track of your herd’s health. Includes the goat assessment, herd check sheets AND Herd Health Tracker!

Buy Now

Dairy vs. Meat Goats: What’s the Difference?

Before we dive into specific breeds, let’s cover the basics.

  • Dairy goats are all about milk. They produce a lot of it, and some breeds have milk that’s perfect for cheese, butter, or just drinking straight from the jar.
  • Meat goats are built for, well, meat. They grow fast, have a good amount of muscle, and give you a solid return on your investment.
  • Fiber goats are great for fiber… duh. But you have to be very careful with your climate and if you can shear them. There is a lot of money in goat fiber, but it can be a pain to get that fiber.

Because we live in the south, we don’t, and probably never will, have fiber goats. It is simply too hot and humid for me to feel comfortable putting an animal through that level of discomfort.

Alright, let’s get into the good stuff—our top picks for each category!

Before we get too far into this, I have a great course on the basics of goat care. I call it Goat Crash Course: Goat 101. In this course, I explain things like types of shelter, types of feeds and hays, basic assessments and so much more! Check it out!

Buy Now

Best Meat Goat for Homesteaders: TexMaster

If your goal is to raise goats for meat, TexMaster goats should be at the top of your list. These guys are a mix of Tennessee Meat Goats™ and Boer goats, meaning they’ve got the best of both worlds—fast growth and hardy genetics.

Why We Chose TexMaster Goats

  1. They grow fast. TexMasters put on weight quickly, which means you don’t have to wait forever before they’re ready for processing. Usually you can get a kid to market weight in 5-8 months depending on how big you want that kid.
  2. Less hassle. They’re super hardy and don’t require a ton of maintenance, which is great if you don’t want to spend all your time babying your herd. This comes in really handy when you live in a parasite heavy area… like the south.
  3. Great feed efficiency. These goats don’t need fancy grain-heavy diets. They thrive on pasture and forage, saving you money.
  4. Easygoing temperament. Some goats are escape artists or just plain annoying. TexMasters are known for being pretty chill and easy to handle. Which is great because these goats can reach 300+ pounds when fully mature.

Raising TexMasters: A Few Quick Tips

  • Give them plenty of space to graze—happy goats mean better meat!
  • Keep an eye on parasites, but overall, they’re a pretty low-maintenance breed.
  • Make sure your fencing is solid because goats love to test boundaries.

If meat production is your goal, TexMasters are hands-down one of the best breeds to have on your farm.

If you are a farmer/ homesteader and looking for a way to track your income and expenses, I highly recommend our Schedule F Tracker! We have been using it for years and it is the easiest, fastest and best way that we have found to keep track of the money spent on the homestead.

Buy Now

Best Dairy Goat for Homesteaders: Full-Size Nubians

If you’re more interested in fresh, creamy milk, then Nubians are your best bet. With their long floppy ears and social personalities, they’re pretty hard not to love. Plus, their milk is packed with butterfat, making it ideal for homemade cheese, butter, and yogurt.

Why Nubian Goats Are the Best for Dairy

  1. Creamy, high-fat milk. If you want milk that’s rich and perfect for making dairy products, Nubians are your goats.
  2. Good milk production. They aren’t the absolute top producers, but they still give you a solid 1-2 gallons per day.
  3. They handle heat well. If you live somewhere warm, Nubians will do just fine, unlike some other dairy breeds that struggle in the heat.
  4. They’re super friendly. Nubians are basically the golden retrievers of the goat world—social, affectionate, and a little noisy (okay, sometimes a lot noisy).

Taking Care of Nubians: What You Need to Know

  • Make sure they have a cozy shelter to keep them safe from extreme weather.
  • Milking is a commitment—once you start, you have to keep up with it! I have a blog post here about my thoughts on the milking machines.
  • Feed them well! Good hay, grains, and minerals make a huge difference in milk quality.
  • They do best in pairs or small herds—lonely goats are unhappy goats.
  • Nubians can struggle with parasites, so make sure that you are checking them regularly.

If you love the idea of fresh milk every day, Nubians are the way to go.

Before we get too far into this, I have a great course on the basics of goat care. I call it Goat Crash Course: Goat 101. In this course, I explain things like types of shelter, types of feeds and hays, basic assessments and so much more! Check it out!

Buy Now

Other Things to Think About Before You Get Goats

Now that you’ve got an idea of which breeds are best, here are a few other things to consider before you dive in.

1. Do You Have the Right Setup?

Goats can be escape artists, so good fencing is non-negotiable. Also, make sure you have enough space for them to roam and forage.

2. What’s Your Climate Like?

Nubians handle heat well, while TexMasters are hardy in a variety of conditions. Make sure the breed you choose can thrive where you live.

3. How Much Time Can You Commit?

Meat goats require less daily attention than dairy goats since milking is an everyday job. Be realistic about what fits your lifestyle.

4. Is There a Market for Goat Products in Your Area?

If you’re thinking about selling milk or meat, check out the demand in your local area first. Nubian milk is amazing for cheesemaking, while TexMaster meat is known for its quality.

The Final Verdict: Which Goat Breed is Right for You?

At the end of the day, it all comes down to what you want from your goats.

  • If you’re all about easy-to-raise, fast-growing meat goats, TexMasters are the perfect fit.
  • If fresh, creamy milk is more your style, full-size Nubians will be your best friends.

Both breeds bring a ton of value to a homestead, and honestly, you can’t go wrong with either. Some homesteaders even keep both to have the best of both worlds!

Are you thinking about getting goats? Already have some? Drop a comment below and let’s chat about it!

Happy homesteading!

If you like the content I put out, feel free to buy us a coffee! It helps keep this site running, marketing and the goats in grain!

Buy me a coffee

If you like this post, feel free to share it and follow us below on our social media accounts!

  • Facebook
  • Pinterest
  • Instagram
  • YouTube
  • TikTok
  • Spotify
  • Threads

Filed Under: Goats Tagged With: dairy goat, goat breed, goat meat, Goat Milk, Goats, Homestead, meat goats, milk goat, Planning

JOIN TO OUR MAILING LIST!

Leave us your email to receive new posts and special offers for members only! Don't miss a thing!

Recent Posts

  • Fall Garden Guide
  • Top Mistakes With Goats
  • How To Bond With Your Goats

Homestead Flexibility: The Key to Success When Plans Go Awry

March 29, 2025 by Leigh Leave a Comment

When it comes to homesteading, there are countless essential skills to master—gardening, animal care, food preservation, and efficient time management, to name a few. However, the most valuable skill of all might be homestead flexibility: the ability to adapt, adjust, and pivot when things don’t go as planned.

The Ultimate Homesteader’s Starter Bundle – Only $47!

Get the tools you need to stay organized, track profits, and manage your homestead with ease!

Includes:
✅ Schedule F Tracker – Simplify tax prep
✅ Profit Calculator – Track earnings
✅ Hay Calculator – Plan livestock feed
✅ Garden Journal – Digital & printable
✅ Herd Health Tracker – Monitor animal care
✅ Simple Budget – Manage finances
✅ Backyard Homestead eBook – Essential tips

$99 value – now just $47! Start your homesteading journey today!

Buy Now

What Is Homestead Flexibility?

Homestead flexibility is the art of adjusting to unexpected changes while maintaining progress toward your goals. My husband, Jared, used to say that the Army’s real motto should be Semper Gumby—“Always Flexible.” This phrase became even more relevant when I worked in EMS, where situations could change in an instant. But nowhere has Semper Gumby been more applicable than on our homestead.

Homestead Flexibility in Action

A perfect example happened just yesterday. I was deep into meal prep, making breakfast tacos in bulk for Jared. While handling pounds of meat, eggs, and potatoes, a nagging thought told me to check on Jade, one of our goats. She wasn’t due for another few days, but something felt off.

I planned to check on her after hanging laundry, but before I could finish, I heard a scream—one unlike her usual noisy calls. Rushing to the pasture, we found Jade mid-labor. Within moments, we were in full-on kidding mode. My carefully planned day was out the window, but instead of stressing, we adapted. By the end of it, we welcomed two new kids: Onyx and Amethyst.

This is homestead flexibility at work—knowing that sometimes, your schedule will take a backseat to what truly matters in the moment.

The Reality of Homestead Challenges

Many homesteaders start with an ideal vision of self-sufficiency, but reality often paints a different picture. Equipment breaks down, livestock gets sick, and the weather doesn’t always cooperate. Learning to work with what you have rather than becoming frustrated with what you can’t control is a crucial part of long-term success.

Take, for example, the unpredictability of animal births. Even with calculated due dates, animals often surprise you. The key is having supplies ready and being mentally prepared to pivot at a moment’s notice. The same goes for your garden—some crops may fail due to unexpected frosts or pests, and you’ll need to replant or find alternative solutions. The more you can embrace the unexpected, the more sustainable your homesteading journey will be.

Structuring Your Goals While Staying Flexible

We started the year with clear homesteading goals: fencing the garden, building chicken tractors, and clearing the basement. But then came the rain. In our part of Georgia, February was the rainiest I’ve ever seen. Mud pits replaced pastures, barns flooded, and outdoor projects became impossible.

Had we been rigid in our plans, we would have felt defeated. Instead, we shifted gears. Jared focused on splitting firewood, something that needed doing anyway. Rather than forcing progress on the flooded garden, we redirected our efforts to indoor tasks. Flexibility saved our momentum.

The Ultimate Homesteader’s Starter Bundle – Only $47!

Get the tools you need to stay organized, track profits, and manage your homestead with ease!

Includes:
✅ Schedule F Tracker – Simplify tax prep
✅ Profit Calculator – Track earnings
✅ Hay Calculator – Plan livestock feed
✅ Garden Journal – Digital & printable
✅ Herd Health Tracker – Monitor animal care
✅ Simple Budget – Manage finances
✅ Backyard Homestead eBook – Essential tips

$99 value – now just $47! Start your homesteading journey today!

Buy Now

How to Build Flexibility Into Your Homestead Plans

  1. Give Yourself Time
    Unexpected events will arise—ill animals, bad weather, or surprise births. When setting goals, allow extra time so that delays don’t completely derail your progress.
  2. Accept That Not Everything Will Happen on Time
    Some projects will need to be pushed back. If rain ruins your February planting plans, move them to March. If the basement isn’t cleared, reevaluate your approach. Adaptation is key.
  3. Prioritize Your Goals
    Not all tasks are equally urgent. Structure your to-do list based on necessity. For example, as we plan for the next quarter, our priorities are:
    • Seed and plant the garden (critical for food supply)
    • Improve our butchering space
    • Stack and split firewood
    • Clear the basement (helps with storage and future projects)
    • Build the firepit (a lower-priority, nice-to-have project)
    • Work on the greenhouse (can be gathered gradually)
  4. Have Backup Plans
    Flexibility isn’t just about shifting schedules—it’s about having alternatives. This year, we opted for a slower-growing meat bird breed to allow for unexpected butchering delays without compromising meat quality. This kind of foresight makes all the difference.
  5. Give Yourself and Your Family Grace
    Homesteading is demanding, and sometimes, despite your best efforts, things won’t go as planned. That’s okay. Giving yourself and your family grace means understanding that delays, setbacks, and mistakes are part of the process. Instead of frustration, practice patience. Celebrate progress, no matter how small, and remember that each challenge is a learning opportunity.
  6. Stay Organized and Track Your Progress
    One of the best ways to maintain flexibility while staying productive is by keeping detailed records of your projects, goals, and setbacks. A homestead journal can help you track planting schedules, livestock health, weather patterns, and completed projects. By reviewing past records, you can make better decisions moving forward and quickly adapt when unexpected challenges arise.
  7. Lean on Your Community
    Homesteading isn’t just about self-sufficiency—it’s also about community. Whether it’s neighbors, fellow homesteaders, or online support groups, having a network to rely on can make a huge difference. Sharing advice, bartering resources, and lending a hand during tough times can ease some of the burdens and help you stay adaptable.

The Power of Switching Gears

On any given day, weather, emergencies, or surprise animal births can throw a wrench into our plans. But instead of losing an entire day to frustration, we ask: What can we do instead?

Today, for instance, it’s raining again. That means no gardening, no firewood stacking, and no firepit building. But it’s the perfect day to clean out the basement—a task we can tackle indoors.

Beyond switching gears for productivity, it’s also important to recognize when you need rest. Homesteading can be physically and mentally exhausting. Building flexibility into your routine also means knowing when to take a step back, recharge, and return with fresh energy.

The Ultimate Homesteader’s Starter Bundle – Only $47!

Get the tools you need to stay organized, track profits, and manage your homestead with ease!

Includes:
✅ Schedule F Tracker – Simplify tax prep
✅ Profit Calculator – Track earnings
✅ Hay Calculator – Plan livestock feed
✅ Garden Journal – Digital & printable
✅ Herd Health Tracker – Monitor animal care
✅ Simple Budget – Manage finances
✅ Backyard Homestead eBook – Essential tips

$99 value – now just $47! Start your homesteading journey today!

Buy Now

The Bottom Line: Flexibility Fuels Success

A successful homestead is built on vision, adaptability, and hard work. Without a clear vision, you’ll struggle to stay on course. Without flexibility, unexpected challenges will leave you feeling overwhelmed. But when you combine vision, flexibility, and a willingness to pivot when needed, your homestead will thrive—rain or shine.

If you like the content I put out, feel free to buy us a coffee! It helps keep this site running, marketing and the goats in grain!

Buy me a coffee

If you like this post, feel free to share it and follow us below on our social media accounts!

  • Facebook
  • Pinterest
  • Instagram
  • YouTube
  • TikTok
  • Spotify
  • Threads

Filed Under: Our Homestead Tagged With: Canning, Chickens, Chicks, cooking, Eggs, Goats, Homestead, kitchen, Welcome

JOIN TO OUR MAILING LIST!

Leave us your email to receive new posts and special offers for members only! Don't miss a thing!

Recent Posts

  • Fall Garden Guide
  • Top Mistakes With Goats
  • How To Bond With Your Goats

How to Make a Goat Gain Weight Fast

March 25, 2025 by Leigh Leave a Comment

If you’re raising goats for meat, dairy, or show purposes, you may find yourself needing to put weight on your goats quickly. Whether you want to fatten up a market goat, improve body condition for breeding, or ensure your show goat looks its best, proper nutrition and management are key. In this guide, we’ll cover the most effective ways to make a goat gain weight fast. From diet optimization to supplements and care strategies, you’ll learn exactly what it takes to achieve healthy weight gain in goats.

Before we get too far into this, I have a great course on the basics of goat care. I call it Goat Crash Course: Goat 101. In this course, I explain things like types of shelter, types of feeds and hays, basic assessments and so much more! Check it out!

Buy Now

Why Weight Gain Matters in Goats

Weight gain is essential for several reasons:

  • Meat Production: Heavier goats yield more meat, increasing profitability.
  • Dairy Goats: Healthy body weight is crucial for optimal milk production.
  • Breeding: Underweight goats may struggle with fertility and pregnancy.
  • Show Goats: Proper weight and muscle development are crucial for competition.

Now, let’s dive into the best strategies for rapid and healthy weight gain in goats.

The Ultimate Homesteader’s Starter Bundle – Only $47!

Get the tools you need to stay organized, track profits, and manage your homestead with ease!

Includes:
✅ Schedule F Tracker – Simplify tax prep
✅ Profit Calculator – Track earnings
✅ Hay Calculator – Plan livestock feed
✅ Garden Journal – Digital & printable
✅ Herd Health Tracker – Monitor animal care
✅ Simple Budget – Manage finances
✅ Backyard Homestead eBook – Essential tips

$99 value – now just $47! Start your homesteading journey today!

Buy Now

1. Provide a High-Calorie, High-Protein Diet

Prioritize High-Quality Hay

Hay should be the foundation of your goat’s diet. The best hay for weight gain includes:

  • Alfalfa Hay – High in protein and calcium.
  • Clover Hay – Nutrient-dense and highly digestible.
  • Timothy Hay – A good supplement but lower in protein than alfalfa.

Make sure hay is fresh, mold-free, and always available. Providing high-quality hay is more important than grain, as it supports overall gut health and digestion, leading to better nutrient absorption and steady weight gain.

Choose the Right Grain Feed

While high-quality hay is the primary focus, grains can provide additional calories and protein to speed up weight gain. Look for feeds that contain:

  • Corn – High in calories and energy.
  • Oats – Easily digestible and packed with nutrients.
  • Barley – Great for adding bulk and weight.
  • Soybean Meal – High in protein for muscle growth.

A high-quality goat feed blend with 14-18% protein is ideal for supplementing hay and promoting weight gain.

Increase Fat Intake

Healthy fats provide a dense source of calories. Add these to your goat’s diet:

  • Black Oil Sunflower Seeds (BOSS) – High in fat and omega-3s.
  • Rice Bran – Provides energy and promotes coat health.
  • Flaxseed Meal – Great for digestion and overall health.

Introduce these fat sources gradually to prevent digestive upset.

2. Use Weight Gain Supplements

Commercial Goat Weight Gain Supplements

There are many formulated supplements that can help goats gain weight, including:

  • Goat Power Boost – Provides extra calories and nutrients.
  • Show Goat Supplements – Designed for fast weight gain and muscle tone.

Molasses for Energy

Molasses is a great way to add extra calories and improve feed palatability. Mix molasses into feed or offer it as a treat.

Probiotics and Digestive Enzymes

A healthy digestive system allows goats to absorb more nutrients. Consider adding probiotics or yeast supplements to improve gut health.

3. Increase Feeding Frequency

Instead of feeding goats once or twice a day, increase feed frequency:

  • Feed 3-4 times per day to ensure steady nutrient absorption.
  • Offer free-choice hay so goats always have something to graze on.
  • Provide a balanced mineral supplement to avoid nutritional deficiencies.

4. Ensure Proper Health and Parasite Control

Check for Diseases

Illnesses such as Johne’s disease, pneumonia, or chronic infections can cause weight loss. Parasites are the most common reason for weight loss. Get a fecal (or take one to your vet) and make sure the parasites aren’t stealing groceries from your goat. If a goat isn’t gaining weight despite good nutrition and good health, consult a vet for an examination.

5. Reduce Stress for Maximum Growth

Provide a Comfortable Living Environment

  • Ensure adequate shelter from extreme weather.
  • Keep bedding clean to reduce disease risk.
  • Provide adequate space to prevent overcrowding and competition for food.

Minimize Competition

  • Feed weaker goats separately to ensure they get enough nutrients.
  • Use multiple feeding stations to reduce aggressive behavior.
  • Avoid sudden changes in diet to prevent stress-related weight loss.

Before we get too far into this, I have a great course on the basics of goat care. I call it Goat Crash Course: Goat 101. In this course, I explain things like types of shelter, types of feeds and hays, basic assessments and so much more! Check it out!

Buy Now

6. Exercise for Healthy Weight Gain

While it may seem counterintuitive, moderate exercise helps with muscle development and healthy weight gain. Encourage movement by providing space to roam and interact with their environment.

7. Monitor Progress and Adjust as Needed

Track Weight Regularly

Use a livestock scale or weight tape to monitor progress. Adjust diet and supplements based on weight gain trends.

Look for Signs of Healthy Weight Gain

A well-fed goat should have:

  • A rounded belly but not excessive fat.
  • Good muscle tone, especially in the back and shoulders.
  • A healthy, shiny coat.
  • Active and alert behavior.

Before we get too far into this post, I wanted to give a suggestion about keeping a garden journal. A digital garden journal is a fantastic way to keep track of past, present and future gardens. Our Digital Garden Journal is a great way to keep up with everything without getting too overwhelmed.

Buy Now

Conclusion

Fattening up a goat quickly requires a combination of high-quality feed, weight gain supplements, proper health care, and stress management. By following these strategies, you can help your goat achieve healthy weight gain efficiently.

Key Takeaways:

✔ Prioritize high-quality hay as the main source of nutrition.
✔ Supplement with grains, fats, weight gain products, and probiotics.
✔ Monitor health closely and ensure a balanced diet.
✔ Reduce stress and ensure comfortable living conditions.
✔ Track weight and adjust feeding strategies accordingly.

By implementing these best practices, you can ensure your goats gain weight quickly and healthily, maximizing their growth potential for meat production, breeding, or show purposes.

For more expert goat care tips, be sure to subscribe to our newsletter and follow us on social media!

If you like the content I put out, feel free to buy us a coffee! It helps keep this site running, marketing and the goats in grain!

Buy me a coffee

If you like this post, feel free to share it and follow us below on our social media accounts!

  • Facebook
  • Pinterest
  • Instagram
  • YouTube
  • TikTok
  • Spotify
  • Threads

Filed Under: Our Homestead

JOIN TO OUR MAILING LIST!

Leave us your email to receive new posts and special offers for members only! Don't miss a thing!

Recent Posts

  • Fall Garden Guide
  • Top Mistakes With Goats
  • How To Bond With Your Goats
  • « Go to Previous Page
  • Page 1
  • Page 2
  • Page 3
  • Page 4
  • Interim pages omitted …
  • Page 23
  • Go to Next Page »

Primary Sidebar

WELCOME

WELCOME

My name is Leigh and I am the lead chaos creator here at Steel Raven Farms. You will see throughout this blog that I am the crazy goat lady.

I am married to my high school sweetheart, Jared and we have two amazing boys.

FOLLOW ME

  • Amazon
  • Facebook
  • Instagram
  • Pinterest
  • TikTok

GET UPDATES!

Leave us your email to receive new posts and special offers for members only! Don't miss a thing!

In all the years that I’ve been growing a garden, the fall garden has steadily remained my favorite. Which is funny because I don’t really like any of the brassicas, which is what most people know the fall garden for. I prefer the root vegetables and cool air. But I have learned over the years…

Read More

  • Animals
    • Chickens
    • Farm Dogs
    • Goats
  • Garden
    • Compost
    • Garden Projects
    • Seeds and Plants
    • Garden Journal
    • Working With Food
      • Recipes
      • Freezing Foods
      • Dehydrating Foods
      • Canning Tips And Tricks
        • Canning Inventory Sheets
  • Helpful Info
    • Welcome to the Homestead!
    • Emergency Preparedness
    • Frequently Asked Questions
    • Goal Setting
    • Project List
    • Shop Digital Products
      • Hay Calculator
      • Farm Expense And Income Tracker
      • Goat Crash Course: 101
      • Garden Journal Prompts
      • Schedule C Tracker
      • Schedule C Tracker
      • The Homestead Bundle
  • The Truths
  • Episode List
  • Start Here
    • Privacy Policy
    • Affiliate Disclosure
    • Let’s Get in Touch
    • Members Only Library
    • Welcome To Our Homestead

Footer

  • Email
  • Facebook
  • Instagram
  • Pinterest

COME AND GET IT!

Leave us your email to receive new posts and special offers for members only! Don't miss a thing!

· Midnight Theme

Copyright © 2026 · Midnight Theme on Genesis Framework · WordPress · Log in