• Skip to primary navigation
  • Skip to main content
  • Skip to primary sidebar
  • Skip to footer

Steel Raven Farms

Where muck boots meet ground.

  • Animals
    • Chickens
    • Farm Dogs
    • Goats
  • Garden
    • Compost
    • Garden Projects
    • Seeds and Plants
    • Garden Journal
    • Working With Food
      • Recipes
      • Freezing Foods
      • Dehydrating Foods
      • Canning Tips And Tricks
        • Canning Inventory Sheets
  • Helpful Info
    • Welcome to the Homestead!
    • Emergency Preparedness
    • Frequently Asked Questions
    • Goal Setting
    • Project List
    • Shop Digital Products
      • Hay Calculator
      • Farm Expense And Income Tracker
      • Goat Crash Course: 101
      • Garden Journal Prompts
      • Schedule C Tracker
      • Schedule C Tracker
      • The Homestead Bundle
  • The Truths
  • Episode List
  • Start Here
    • Privacy Policy
    • Affiliate Disclosure
    • Let’s Get in Touch
    • Members Only Library
    • Welcome To Our Homestead

Homestead

Quieting The Pantry

February 20, 2024 by Leigh Leave a Comment

I talked about starting a stricter diet at the end of last year (December 2023) and there are some truly amazing things that have happened as a result. I’ve lost some weight, which is always nice but never my goal. I noticed a significant improvement in my stomach pains, bloat, etc. But the coolest part about this stricter diet is the quieting the pantry.

Quieting In The Pantry

The Ultimate Homesteader’s Starter Bundle – Only $47!

Get the tools you need to stay organized, track profits, and manage your homestead with ease!

Includes:
✅ Schedule F Tracker – Simplify tax prep
✅ Profit Calculator – Track earnings
✅ Hay Calculator – Plan livestock feed
✅ Garden Journal – Digital & printable
✅ Herd Health Tracker – Monitor animal care
✅ Simple Budget – Manage finances
✅ Backyard Homestead eBook – Essential tips

$99 value – now just $47! Start your homesteading journey today!

Buy Now

Quieting The Pantry

In October 2023, I got really sick. Like, overnight stay in the hospital sick because I couldn’t stop vomiting. They had me so doped up on anti-psych meds (because you can’t puke if you’re unconscious) and I was still vomiting through them. Finally, we were able to get it somewhat under control and they started me on some pretty stout meds to take home for “correcting” the stomach acid, easing the vomiting, etc. But I knew that if I wanted to get better, I needed to change my diet.

Diets Vs Lifestyle Changes

Now, I’ve said it before that we eat “healthy” about 85% of the time. Sometimes, we just can’t because of our jobs. Other times, because of stress. But for the most part, we don’t consume a lot of junk food. Things like soda, candy, and other overly processed foods are a treat if they ever happen at all.

I started looking into various “elimination diets” as a way to heal my gut. But all of the diets seemed to be a band aid. Think about it, you diet to lose weight. Or maybe you diet so that you can figure out what is causing an issue (me). But at the end of the day, a diet means that you plan on going back to the way you were eating after the thing is corrected, with maybe a couple of adjustments. But that’s not what I wanted.

I wanted to completely, maybe even radically, change the way we were eating. Even if it was only one step at a time. I wanted to move my family away from the loud pantry.

What Is A Quiet Pantry?

Well, to be honest, I didn’t know what a quiet pantry was until I had one. Jill Winger over at The Prairie Homestead nailed the one feeling that I have been coming back to over the last several months. But I just couldn’t put my finger on why I felt so much better opening my cabinets. My pantry, now full of jars of rice, soups, dehydrated veggies, and many more simple ingredients, had become quiet.
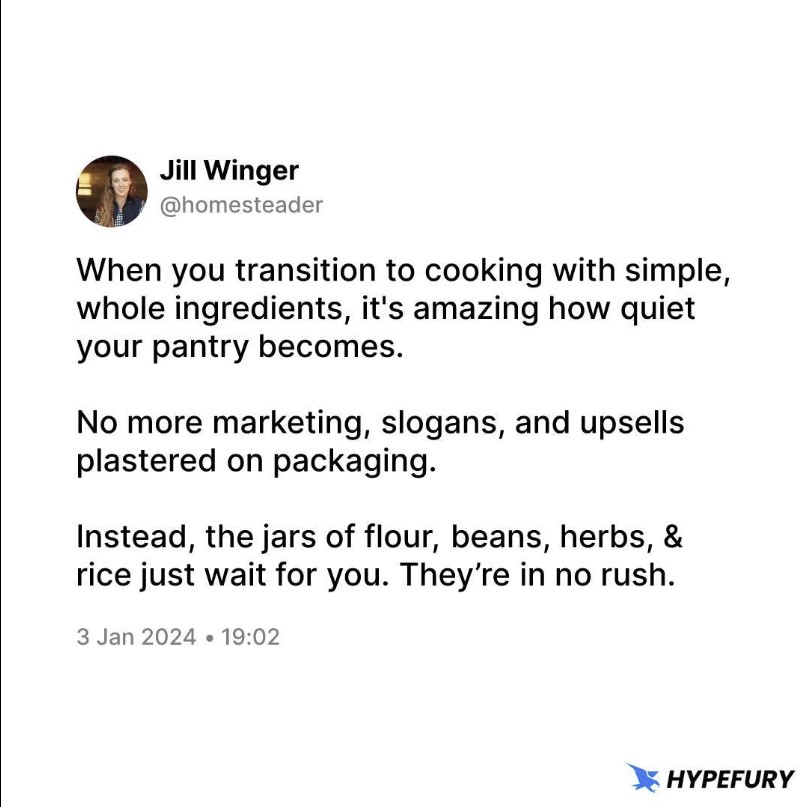
As I look at my pantry, I don’t see the hydrogenated oils masquerading as cheese. Or quick boxes of pasta that somehow only needed a few ingredients from me to turn into a “delicious” meal. I no longer see “quick”, “easy”, or “ready to serve” keywords jumping out at me. The bright packaging has been replaced by clear jars. Where you can clearly see what you are getting. And as odd as it is, the stress of figuring out what’s for dinner has just about vanished.

Now, I am not the type of person to throw out food. I will continue to use it until it’s gone or I will give it to the chickens. But over the last several months, there are less of those keywords in my pantry. It’s so cool, opening my cupboards and seeing jars and jars of dried beans, flour, rice, and other simple ingredients. And the fact that I know how to cook with them!

If you are new to heating with firewood and are looking to master the finer points of it. We’ve got a great eBook that goes in depth of what tools you should consider, how and where to stack, how to build a fire and so much more!

Buy Now

When I tell you that figuring out what to do for dinner has gotten easier, it really has. But not in the way you’re probably thinking. When you get stuck in the drag of “quick”, “easy”, or “ready to eat” your creative energy gets stuck in neutral. I’ll go over more of that below.

Quieting The Pantry Has Extended To The Fridge

I am a coffee junkie. Actually, to be fair, I am a creamer junkie. I absolutely love flavored creamers. My favorite was Cinnamon Toast Crunch from Coffee Mate. But in 2021-2022 it was difficult to find, then as time went on, it was harder and harder to find other creamers that I liked. I will make my own creamers from goat milk, but if I don’t have goat milk, I don’t have creamer. When I got sick in October, I knew that the first thing to go needed to be the creamer.

goat kidding

Before we get too far into this, I have a great course on the basics of goat care. I call it Goat Crash Course: Goat 101. In this course, I explain things like types of shelter, types of feeds and hays, basic assessments and so much more! Check it out!

Buy Now

Why? Well, most commercial, flavored creamers are not actually diary. Those creamers are mostly oil and most oils are made from either soy or corn…. Do I need to go on?

After cutting the creamer, I started really looking at the rest of the stuff in the fridge. Y’all, I didn’t realize how much junk was in my fridge. Looking past the creamer, we also had a ton of sauces, marinades, and other processed stuff. It really opened my eyes to just how much junk we were still consuming. But it also clued me in to how much we were still relying on the store for things that I can make.

And The Freezer!

I don’t know how your freezer looks. But in our freezers, it looks like about 90% meat. But there are still a fair amount of packing. Not as much as it could be, and it’s definitely a lot better than what I was expecting. But realizing just how much of the non-meat products in there were probably not good for us either. I love frozen corn, but the vast majority of corn bought from a store is going to be GMO. I don’t think I need to go in depth about why that isn’t ideal….

The Ultimate Homesteader’s Starter Bundle – Only $47!

Get the tools you need to stay organized, track profits, and manage your homestead with ease!

Includes:
✅ Schedule F Tracker – Simplify tax prep
✅ Profit Calculator – Track earnings
✅ Hay Calculator – Plan livestock feed
✅ Garden Journal – Digital & printable
✅ Herd Health Tracker – Monitor animal care
✅ Simple Budget – Manage finances
✅ Backyard Homestead eBook – Essential tips

$99 value – now just $47! Start your homesteading journey today!

Buy Now

Freeing Your Creative Energy

When you allow the quieting of the pantry to actually take affect, it forces you to become more creative with dinner. And as weird as it sounds, it makes figuring out what’s for dinner a lot easier. For example, you can transform basic rice into chicken flavored rice with chicken bullion or stocks. Add in some peppers, beans and corn (non-gmo of course) and you’ve got dirty rice. Throw in some shredded chicken or andouille sausage and you’ve got a meal.

By giving yourself the creativity to make dinner fun, you end up with some really fun recipes that are quick, easy, and HEALTHY!

Last night, we had chicken tacos. They were absolutely delicious and not one thing came out of a box, can or packaging. No taco seasoning packets, plastic wrapped tortillas, or box and packet of flavoring for the rice.

The other really cool thing about having these very basic staples in your pantry is that when you know you’ve got something getting ready to go bad, you can plan a meal around it. Or you just need to use up the very last of this item, you can just throw it in the pot. To give you an example, every week I make a Brunswick stew style dinner. This is literally any fresh produce that is about to turn, or the very last bit of dehydrated leeks that need a home.

cropped-3.jpg

Are you looking for garden journal prompts, but aren’t interested in a weekly email? Check out our 365 Garden Journal Prompts! This is an amazing, all in one, yearly product that you only pay for once.

Buy Now!

Grocery Shopping Is Cheaper!

For years, we have been conditioned to think that eating from scratch or “healthy” is too expensive. And yes, it can be. When you are talking about getting two weeks worth of groceries and half of your meals are “quick”, “easy”, or “ready to eat”, yea it’s going to be more expensive. Or when $75 of your food budget goes to creamer **raises hand** yes, it’s going to get expensive.

Since the quieting in the pantry, I have cut our grocery budget in half. Now, some of that is because we have bulk purchased rice, beans, sugar, etc. But the other part of that is because I am more deliberate in what I am buying. I am not buying prepackaged meals, or cans of soup. We are also using more meat instead of filling the plate with over processed junk.

Quieting The Pantry Takes Time

You can absolutely go nuts and clean out the pantry, fridge and freezer. Or you could slowly use everything up. I’m not going to tell you how to cook your dinners. But I will say that if you are not a strong cook, it can be VERY difficult to move away from packaged foods and dinners.

To be honest, I’m kind of in between a strong cook and great cook. There are a lot of meals that I do really well… Tacos for example. But there are still others that I am learning. When you walk into ANYTHING that you are learning, please give yourself grace. Your dinner may not look just like the recipe. That’s okay! Just don’t give up!

If you like the content I put out, feel free to buy us a coffee! It helps keep this site running, marketing and the goats in grain!

Buy me a coffee

If you like this post, feel free to share it and follow us below on our social media accounts!

  • Facebook
  • Pinterest
  • Instagram
  • YouTube
  • TikTok
  • Spotify
  • Threads

Filed Under: Working With Food Tagged With: cooking, Eggs, Goats, Homestead

JOIN TO OUR MAILING LIST!

Leave us your email to receive new posts and special offers for members only! Don't miss a thing!

Recent Posts

  • Fall Garden Guide
  • Top Mistakes With Goats
  • How To Bond With Your Goats

Our Best Dual Purpose Chickens

February 17, 2024 by Leigh Leave a Comment

When we first brought chickens to the homestead, we started with 25 chicks. As we became victims of chicken math, we have grown our flock to about 50-75…. They are really hard to count. While I don’t LOVE the thought of dual purpose chickens, there is a need to have a good solid laying hen, that can produce good meat animals. So, these are our best dual purpose chicken breeds.

The Ultimate Homesteader’s Starter Bundle – Only $47!

Get the tools you need to stay organized, track profits, and manage your homestead with ease!

Includes:
✅ Schedule F Tracker – Simplify tax prep
✅ Profit Calculator – Track earnings
✅ Hay Calculator – Plan livestock feed
✅ Garden Journal – Digital & printable
✅ Herd Health Tracker – Monitor animal care
✅ Simple Budget – Manage finances
✅ Backyard Homestead eBook – Essential tips

$99 value – now just $47! Start your homesteading journey today!

Buy Now

Why More Chickens?

Bringing more chickens home is a multi-layered answer. First, we sell eggs. That means that we need more eggs than our current eight hens can keep up with. Seriously, I’ve got a wait list going on. Second, we want to be able to hatch chicks and sell those babies to others. Third, and most sensitive to people, we want meat. Having the additional 24 laying hens will up our production in all of those areas. Since the third reason is so controversial I want to briefly touch on it.

We eat meat, as I am sure many of us do. But with the rising prices of everything, the cost of meat is skyrocketing. I don’t know about you but I can’t afford to keep having to fork out hundreds of dollars a month on meat. And going vegetarian is not a viable option either. Let’s not mention the living conditions of some of these chicken houses. You can read more about my choice to raise our own meat chickens here.

But to expand a little more, when you raise meat chickens you normally hear about the Cornish X. These birds are not genetically modified but they have been bred from several other breeds of chickens to get big as fast as possible. That’s fine with me. We raised fifty of them over winter. But I’m not going to lie, they don’t taste good.

I’m not sure if it’s because they were allowed to free range, we waited to butcher a little too long or what, but I’m not a fan of the meat. But to keep with the point, my issue with the Cornish X is: what happens when I can’t order them? I want to close the holes in our food security as much as possible. So having to order them from a hatchery doesn’t make a lot of sense.

Banner 468x60

So we made sure to order chicks that are all dual purpose breeds. We have Dark Brahmas, Sussex, Ancona, Dorking, Black Cochins, and New Hampshire’s. They are also pretty good egg producers with a mix of cream, white, and brown eggs. Lastly, we made sure to get a couple of breeds that are good mothers. We wanted to have the ability to leave the eggs and let them hatch them out.

cropped-3.jpg

Are you looking for garden journal prompts, but aren’t interested in a weekly email? Check out our 365 Garden Journal Prompts! This is an amazing, all in one, yearly product that you only pay for once.

Buy Now!

Our thinking was, if the power goes out for several days (which we are prone to here), we don’t want to rely completely on an incubator. I’ll keep you up to date on how they are doing but for now, they are warm, happy, and loving their box.

Our Best Dual Purpose Chickens

Speckled Sussex- Our Sussex’s have been absolute rockstars when it comes to doing chicken things. They have been fantastic in the garden and have single “winged” taken out about half of our Japanese Beatle population. They are also fantastic mothers. Sussex are a fairly fast growing chicken with good meat to bone ratio. But be forewarned, it takes them about 6-8 months to get to a decent size.

Black Australorp- I have to say, I don’t really care for the Australorp. They are not very friendly and tend to be pretty flighty. But they produce great eggs and hit a good butcher weight faster than the Sussex. Honestly, I would love to get more of these guys, but having them panic and run away from us is a big sticking point for me.

Barred Rock- This is my second favorite dual purpose chicken. The biggest down side is that they really are a laying chicken more than a meat chicken. They take forever to get to a decent butcher weight. But they will absolutely rock it with eggs. Plus they are a classic sight on the farm.

At the end of the day, any animal is a meat animal. The question becomes is it worth it to butcher them? Because if they are laying a ton of eggs but they are tiny? Keep letting them lay eggs. You could get more meals out of the eggs than the meat. But if they are eating a ton of food and only producing a couple eggs a week? It’s to the freezer.

You have to make that distinction.

The Next Generation

Since the original publication of this blog post, all of the girls are doing fantastic. We’ve had a few issues with predators, but nothing since losing our favorite fluffy foot (black cochin). We are starting to get some eggs from them as well.

We’ve also had a lot of success with our incubator and it has yielded us several roosters which will be butchered with the meat ducks… If I can get Jared to do it. If he can’t, I’m not really sure what we are going to do. I guess in the end we will have 10 jumbo pekins that we have to keep a close eye on for health issues.

The best part about this next generation is the peace of mind. I knew what I was trying to do when I ordered them. I wanted to create a system that reduced our dependence not only on the grocery store, but also hatcheries. To see that actually happening is pretty awesome.

The Ultimate Homesteader’s Starter Bundle – Only $47!

Get the tools you need to stay organized, track profits, and manage your homestead with ease!

Includes:
✅ Schedule F Tracker – Simplify tax prep
✅ Profit Calculator – Track earnings
✅ Hay Calculator – Plan livestock feed
✅ Garden Journal – Digital & printable
✅ Herd Health Tracker – Monitor animal care
✅ Simple Budget – Manage finances
✅ Backyard Homestead eBook – Essential tips

$99 value – now just $47! Start your homesteading journey today!

Buy Now

If you have any questions feel free to ask and I’ll get back to you. If you like this post feel free to share it on all your social media.

If you like the content I put out, feel free to buy us a coffee! It helps keep this site running, marketing and the goats in grain!

Buy me a coffee

If you like this post, feel free to share it and follow us below on our social media accounts!

  • Facebook
  • Pinterest
  • Instagram
  • YouTube
  • TikTok
  • Spotify
  • Threads

Filed Under: Animals, Chickens Tagged With: Chickens, Chicks, Eggs, Homestead, kitchen

JOIN TO OUR MAILING LIST!

Leave us your email to receive new posts and special offers for members only! Don't miss a thing!

Recent Posts

  • Fall Garden Guide
  • Top Mistakes With Goats
  • How To Bond With Your Goats

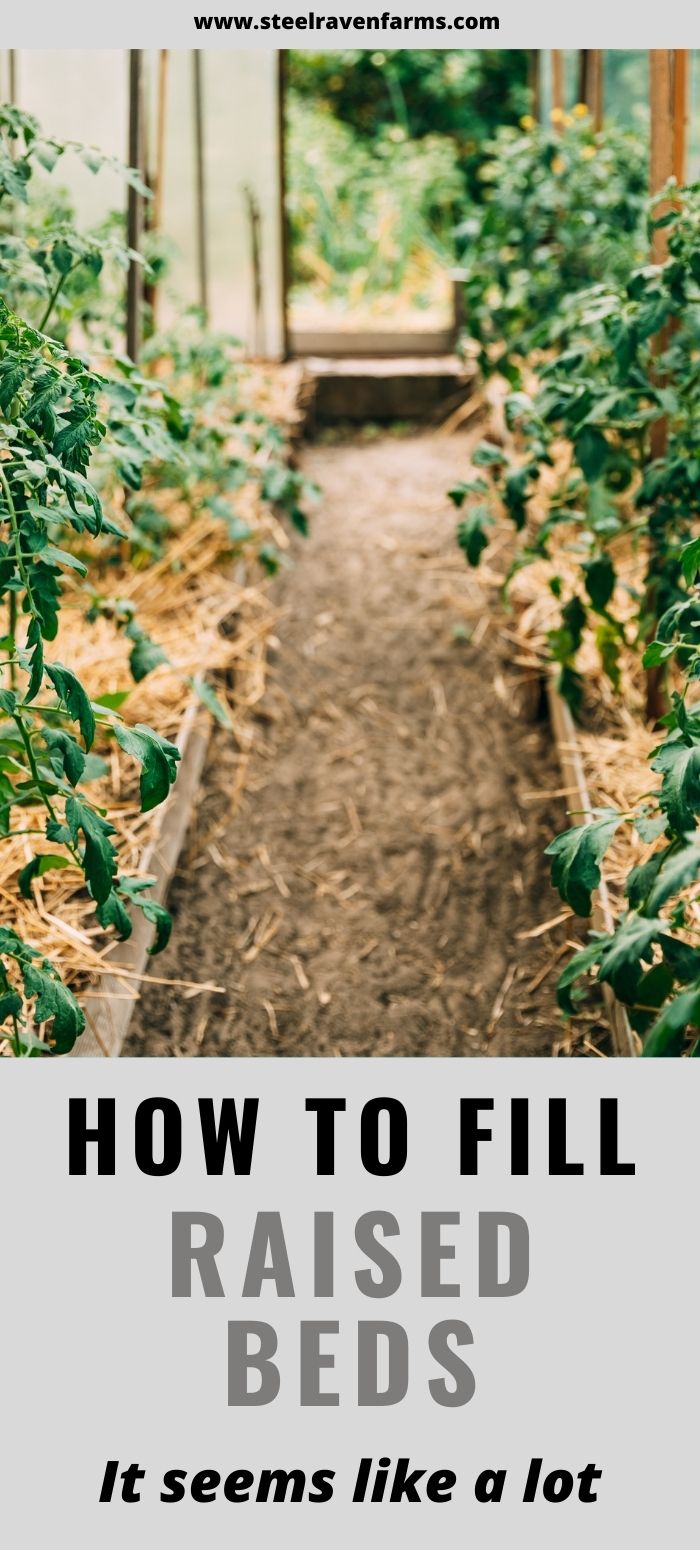
How To Fill A Raised Bed For Cheap

February 10, 2024 by Leigh Leave a Comment

If you are looking to build raised beds, you may be wondering how to fill a raised bed. Or you’ve already done some calculations and wrote off raised beds because they are so expensive. But I’m going to walk you through how we fill our raised beds and how it doesn’t have to be THAT expensive.

Are you getting overwhelmed in the garden? Stressed? Or just not enjoying the garden like you used to? Check out our garden prompts! We send out weekly emails that get you back in the garden and out of your head! Turn the garden back into a place of love and joy instead of frustration and headache!

Subscribe Now!

How To Fill A Raised Bed For Cheap

First, there are a ton of different ways to fill a raised bed. You can go expensive with a ton of soil, or you can fill it with various organic materials. I’m going to walk you through how we fill our 4ft wide x 20ft long x 2ft tall raised beds.

Using Trees To Fill A Raised Bed

Once Jared is done building the bed, I start gathering all the unusable logs on the property. We have had to take down a bunch of pines on the property. Even though we heat our home solely with firewood, we don’t burn pine in the house, but sometimes we will burn pine in the firepit. Instead, we use it in the gardens. We’ve used these pine logs as bed boarders and organic material for inside the beds.

If you are new to heating with firewood and are looking to master the finer points of it. We’ve got a great eBook that goes in depth of what tools you should consider, how and where to stack, how to build a fire and so much more!

Buy Now

These pines and other rotten logs will get put on the bottom of each bed. Usually, this will fill the beds about 50-60% with logs. If the logs aren’t very large or the bed isn’t close to half filled, we will add a second layer of logs. The goal is to completely cover the bottom half (ish) of the bed with these logs. Since trees tend to take FOREVER to breakdown, the idea is that you shouldn’t have to refill the bed that much every year.

The biggest concerns when using trees or logs to help fill your raised bed is going damaging your bed as you fill it, nitrogen depletion, and termites. Out of all of this list, the only thing I am truly worried about is damaging the bed as we fill. We use galvanized steel roofing panels for the walls of the bed and the frame is outside the bed. That means that if we just throw logs into the beds, they could damage the roof panels.

We aren’t going to have issues with termites because we use the steel roofing panels. And I’m not super worried about nitrogen depletion because we use cover crops, manure, etc to keep our soil healthy.

Smaller Branches Next

After we have placed a good layer of logs into the bed, we start filling the next 25% with sticks, branches, etc. The goal is to use as much of the “free” downed trees as possible before using expensive materials like pine shavings, compost and soil.

I don’t usually go crazy breaking these into smaller pieces. But I will jump into the bed and stomp around until they are broken. Again, I’m not going crazy here, but I want to use as much free stuff as possible so I don’t HAVE to purchase more than absolutely necessary.

If you are looking for a great way to keep track of your gardens for years to come, check out our Digital Garden Journal. It’s a digital spreadsheet that helps you manage not only your seedlings but also your seed inventories, soil testing, orchard, harvests and so much more.

Buy Now

Filling With Smaller Stuff

After I’ve gotten all the logs and branches to about 75% of the bed, I start adding the small stuff. I usually fill this to about 85%. This is the stuff that is going to breakdown very quickly. Usually, it breaks down in less than a year. What is the smaller stuff? It’s leaves, wood chips, pine shavings, etc. Again, I want to add as much free stuff as possible before I start adding my compost and soil.

My local power company drops off wood chips for us all the time so we don’t have to pay for those. And our property is mostly wooded, so we have a TON of leaves. We leave a ton of those leaves on the ground for the ecosystem but we do pick up some for the beds. But the pine shavings are my magic bullet.

We use the deep litter method for our livestock and poultry to keep them warm in the winter. So I’ve already paid for the pine shavings once. The pine shavings start to compost throughout the winter and they are “dirty” with animal poop and urine. This is great compost/ filler for my raised beds. Also, because it takes a bit longer for wood to start to fully break down, it adds structure to the soil.

Finally Adding Soil And Compost

One of the reasons that our raised beds don’t cost us a ridiculous amount to fill is because we only add about 4-6″ of soil/ compost. For our 4ftx20ft raised bed, that’s about 40cu ft of soil. Which is still a LOT, but compared to 160cu ft of soil, it’s not too bad.

The reason I don’t add more soil is because I don’t need to. Because of the animal bedding/ pine shavings, there is a ton of nutrients for the roots to grab onto.

Are you getting overwhelmed in the garden? Stressed? Or just not enjoying the garden like you used to? Check out our garden prompts! We send out weekly emails that get you back in the garden and out of your head! Turn the garden back into a place of love and joy instead of frustration and headache!

Subscribe Now!

Lastly!

Worms! I add one or two bait cups of red wiggler or earthworms. Normally, you wouldn’t have to, and you don’t have to. But I like to kick start new garden beds with as much help as I possibly can.

When it comes to adding worms, remember, you don’t have to do this. But I have found that it helps to jump start their work. Also, having them get all that fresh soil, pine shavings, etc composting as soon as possible is amazing.

If you are interested in learning more about my favorite garden planner. I highly recommend Seedtime! This planner has been instrumental in helping me plan out my gardens with WAY more efficiency than I could ever expect! It has also reduced overwhelm, stress, and calmed my ADD/ADHD!

More Info!

Filling A Raised Bed FAQ:

Why Not Fill To The Top?

If you did a quick calculation, you’ll notice that the logs take up 50-60%, the sticks another 25%, and small stuff fills the bed to 85%. Soil only covers another 4-6″ bringing the total volume of the bed to about 90% full.

The reason I don’t fill the bed to the tippy top is for a couple of reasons. One, I don’t want to risk the soil sitting against the wood. Two, I don’t want to risk soil running out of the bed and causing run off. Three, I want to have a good healthy layer of mulch in the bed.

If I fill the bed to the top with soil, the mulch will not stay put and soil will sit on the ledge of the garden bed.

cropped-3.jpg

Are you looking for garden journal prompts, but aren’t interested in a weekly email? Check out our 365 Garden Journal Prompts! This is an amazing, all in one, yearly product that you only pay for once.

Buy Now!

Why Not Fill With Soil?

My beds are 4ftx20ftx2ft. This means that I would have to spend about $400+ per bed on soil. Minimum. Not to mention that if I don’t put organic matter into the soil, the soil will lose nutrients and structure.

Also, having wood in the bottom allows that all important fungi to grow even better. This improves soil quality exponentially.

Why Not Use Hay As Filler?

There are two main problems with using hay as filler. One, hay is usually sprayed with herbicides, pesticides and sometimes fungicides. That means that I am putting those -icides into my raised beds where I am trying to ENCOURAGE that growth. At worse, plants won’t grow and at best they will be stunted.

The second issue with using hay as filler is that purchasing unsprayed hay is already expensive. Using it to fill a bed seems like a waste of money in my book. That’s not to say that I won’t use spent hay that the goats have dropped. But I wouldn’t just take a bale and put it right into my beds.

There is an added inconvenience of having little hay sprouts grow in the beds. In my mind, it’s not that big of a deal, but it may be a thing for some.

Doesn’t The Soil Settle Over Time?

Yes, it does. In fact, the first year, your soil levels could drop by up to half as the soil settles and starts filling those nooks and crannies. But if you fill the bottom of the bed with logs and stack them pretty tight, you won’t lose a ton of soil.

Also, I add pine shavings, grass clippings, etc to my garden throughout the season. So even if the soil levels drop, I’m still getting fresh compost developing. It takes a while for the soil levels to settle so be prepared for the long haul. But I love my raised beds and I really enjoy having them.

If you like the content I put out, feel free to buy us a coffee! It helps keep this site running, marketing and the goats in grain!

Buy me a coffee

If you like this post, feel free to share it and follow us below on our social media accounts!

  • Facebook
  • Pinterest
  • Instagram
  • YouTube
  • TikTok
  • Spotify
  • Threads

Filed Under: Garden, Garden Projects Tagged With: garden chores, garden journal, gardens, Homestead, Raised Beds, soil

JOIN TO OUR MAILING LIST!

Leave us your email to receive new posts and special offers for members only! Don't miss a thing!

Recent Posts

  • Fall Garden Guide
  • Top Mistakes With Goats
  • How To Bond With Your Goats

Dealing With Death On The Homestead

February 9, 2024 by Leigh 4 Comments

I really struggled with writing this post. I am the person that takes an animal death way harder than a human one. I don’t know why, maybe it’s my job or that I have attachment issues. But when an animal dies, I am a sobbing mess. It hurts in ways that I can’t describe. If you are reading this post, you probably feel similar. While death is a normal part of life, there is no easy way to handle it. Dealing with death on the homestead for those of us that feel it deeper, it’s a lot harder.

The Ultimate Homesteader’s Starter Bundle – Only $47!

Get the tools you need to stay organized, track profits, and manage your homestead with ease!

Includes:
✅ Schedule F Tracker – Simplify tax prep
✅ Profit Calculator – Track earnings
✅ Hay Calculator – Plan livestock feed
✅ Garden Journal – Digital & printable
✅ Herd Health Tracker – Monitor animal care
✅ Simple Budget – Manage finances
✅ Backyard Homestead eBook – Essential tips

$99 value – now just $47! Start your homesteading journey today!

Buy Now

Dealing With Death On The Homestead

We have lost more than our share of animals on the homestead and it never gets easier. We have lost goats, chickens, our dogs, and today a duckling. To be honest, the duckling was up there with the goats. I have always wanted a duck and now that I finally have 20, it tears my heart to know that she died. But knowing why they died and how to prevent it really helps me heal from it.

Dealing with death on the homestead is understanding that livestock are not pets. But it’s also understanding that animals will die. While that doesn’t absolve the guilt or heartache, understanding that when you farm you are going to do everything you can, and animals will die anyways. But at the same time, knowing that you are going to do everything in your power to help anyways.

goat kidding

Before we get too far into this, I have a great course on the basics of goat care. I call it Goat Crash Course: Goat 101. In this course, I explain things like types of shelter, types of feeds and hays, basic assessments and so much more! Check it out!

Buy Now

Understanding The Role Of Your Animal

While this may seem odd, when you understand the role of your animal, it really helps you plan their existence. For example, when we purchase meat birds, we know that their role is to end up in the freezer. That means that we will do everything in our power to make sure that every single day of their lives are as happy and humane as possible. But we are not going to take a meat animal to the vet and waste resources.

However, our milk goats have a role too. Their role is to provide milk and future meat animals. That means that when they are no longer filling their role, we have to make the decision to sell or butcher. During their time on the homestead, we will take them to the vet as needed and care for them to make sure they are happy, healthy and raised humanely.

Because you understand the role of your animal, it allows you to make decisions based on the role vs your need to care for animals as pets or companion animals. It sounds heartless, but you have to decide if you are a homestead or animal rescue.

Why the Why is so important

When you know why an animal died, not only does it help you from a practical stand point, it also helps you heal. I think that it’s because it can be a learning opportunity or simply because it absolves guilt. Either way I think it helps us heal while dealing with the death of our favorite animals.

Texas was my favorite goat. He was unbelievably vocal and would sing to me every time I came home from literally anywhere. Whether I was gone for a 24hr shift or a ride to the grocery store, it was always the same. He would bleat at me until I came to love on him. That was the best part of coming home.

He died because of polio. Goat polio is different from human polio but basically it is caused by thiamine deficiency or sulfur toxicity. My lack of knowledge and lack of medicines on hand did not help him and killed him. As unfortunate as it was, and as much as I beat myself up about it, there is a bright spot. No other goats will die because I didn’t know what I was doing.

Voldemort was our first goat that died. His was due to an extremely high parasite load. He had an unbelievable amount of barber pole worm, strongyle worms, and coccidia. It took us several days to realize that he was as sick as he was. When we got him to the vet, she told us that he was probably going to die. The worm load was just too high. If he didn’t die from the worm load, the internal bleeding of the worms suddenly being gone would kill him. We did everything we could but he still died.

With both goats, I poured over hundreds of articles, consulted with our vets and came up with a plan for future treatment. It will never bring back our babies, but at least now we know what to do, what to look for, and what to do to keep it from happening.

Learning From Mistakes

We have lost several chickens for several reasons; overcrowding, mareks, and predators. But we are learning how to raise our chickens in the best environment for them. They have plenty of access to open pasture. They are vaccinated from the hatchery for mareks. We keep an eye on their general condition to make sure that we catch potential injury or illness before it becomes a problem.

But today, we lost a duckling. It broke my heart. I tried everything I could think of but it was simply too late. Unfortunately, we don’t know why or how. We’ve got another one that is going down the same path but we are trying everything we can.

This is life though. Even more to the point, this is homestead life. Animals will die. Whether it’s because they are meat or because they are sick, hard labors, failed hatches, and more. It happens and it hurts.

My Advice For Dealing With Death On The Homestead

The best advice I can give you is don’t give up. Yes, it is hard and some days it doesn’t seem worth it. But I promise you it is. It’s worth the heartache for the good days. I would not give up a single second of owning goats because we lost Texas and Voldemort. I will always own dogs, despite having lost so many. The good out weighs the bad, every single time.

My second piece of advise is to honor their life. It doesn’t matter if they are meat animals or a beloved pet. It doesn’t matter if they’ve been with you for twenty years or twenty minutes, that life needs to be honored. If you can, have a cemetery for them. We have an old corral that we will never use and it is perfect. Baby bearded dragons, chicks, goats, and even toads that the dogs have killed go in there and get a flower seed planted with them. That is how I honor them.

goat kidding

Before we get too far into this, I have a great course on the basics of goat care. I call it Goat Crash Course: Goat 101. In this course, I explain things like types of shelter, types of feeds and hays, basic assessments and so much more! Check it out!

Buy Now

If you like the content I put out, feel free to buy us a coffee! It helps keep this site running, marketing and the goats in grain!

Buy me a coffee

If you like this post, feel free to share it and follow us below on our social media accounts!
  • Facebook
  • Pinterest
  • Instagram
  • YouTube
  • TikTok
  • Spotify
  • Threads

Filed Under: Animals Tagged With: Chickens, Chicks, duckling, Goats, Homestead

JOIN TO OUR MAILING LIST!

Leave us your email to receive new posts and special offers for members only! Don't miss a thing!

Recent Posts

  • Fall Garden Guide
  • Top Mistakes With Goats
  • How To Bond With Your Goats

Pre-Planting Checklist For The Garden

February 6, 2024 by Leigh Leave a Comment

If you are a gardener, you are chomping at the bit for spring. Trust me, you are absolutely not alone. I am impatiently waiting for the day that I can put my seeds in the ground…. plus I am taking off a whole month between mid April to mid May from my “real” job. But until then I’ve got my pre-planting checklist for the garden ready to go. And I’m going to share it with you.

cropped-3.jpg

Are you looking for garden journal prompts, but aren’t interested in a weekly email? Check out our 365 Garden Journal Prompts! This is an amazing, all in one, yearly product that you only pay for once.

Buy Now!

Pre-Planting Checklist For The Garden

For every gardener, the finer details of this list is could look different. But I feel like despite your growing zone, frost dates, etc. The list is still the same. I’m going to go more in depth below, but to get the check list out of the way now. You’ll need amendments, soil tester, irrigation, quality soil or compost, tools, journal, plants/ seeds and their needs, and chairs.

Checklist For Amendments

Now, every gardener has a different philosophy and definition when it comes to amendments. To me, an amendment is something that added to the soil or seedling to encourage growth, improve soil structure, and water holding capacity. That being said, once my plants are in the ground, the only amendments I add to the soil is animal bedding and mulch. Because of that, I make sure that my soil is as top notch.

Some amendments I like to have on hand are:

Pine shavings or perlite: I personally prefer pine shavings as it will break down over time and feed the soil and soil biome as it does. Perlite doesn’t break down at all. While that isn’t necessarily a bad thing, it’s not what I’m looking for in my soil.

Peat Moss: I love peat moss! When I can get my hands on good quality, organic peat moss, I have noticed a HUGE improvement in water retention.

The Ultimate Homesteader’s Starter Bundle – Only $47!

Get the tools you need to stay organized, track profits, and manage your homestead with ease!

Includes:
✅ Schedule F Tracker – Simplify tax prep
✅ Profit Calculator – Track earnings
✅ Hay Calculator – Plan livestock feed
✅ Garden Journal – Digital & printable
✅ Herd Health Tracker – Monitor animal care
✅ Simple Budget – Manage finances
✅ Backyard Homestead eBook – Essential tips

$99 value – now just $47! Start your homesteading journey today!

Buy Now

Worms: When I am building a raised bed, I will add worms to to the bed. It seems odd, but I don’t want to wait for them to come on their own. I will usually add one bait cup to each bed to encourage them to start working.

Fertilizers: Now, I’m not big on adding fertilizer to my plants after they are in the ground. BUT sometimes it’s necessary. Usually, I will use fertilizers on seedlings and then once or twice after transplanting. I only use OMRI grade, natural fertilizers like Fox Farm Big Bloom, Grow Big and Tiger Bloom. The goal is for my soil to be so great that I don’t need any fertilizers.

Checklist For Soil Tests

If you already have beds or rows done, getting a soil test will help you figure out exactly what kind of amendments you need. I would not go adding a ton of amendments to your soil without a test. You don’t want to end up adding a bunch of nitrogen and end up with a huge plant that isn’t producing fruits. This is the testing kit we use.

Are you getting overwhelmed in the garden? Stressed? Or just not enjoying the garden like you used to? Check out our garden prompts! We send out weekly emails that get you back in the garden and out of your head! Turn the garden back into a place of love and joy instead of frustration and headache!

Subscribe Now!

That being said, I don’t do soil tests every year. And I don’t do tests on brand new beds. Usually, because we are pushing right into planting time and I just don’t have the time to send off and wait for results. But on my established beds, I will do a soil test every other year or so. Unless my harvest for the year was terrible.

Another soil tester that I like to have on hand is this guy. This soil tester is amazing because I can test pH and moisture easily. I can then make minute adjustments based on what I’m seeing right then. But again, this isn’t something I use regularly because I can see my plants and soil to make a lot of those decisions.

If you are interested in learning more about my favorite garden planner. I highly recommend Seedtime! This planner has been instrumental in helping me plan out my gardens with WAY more efficiency than I could ever expect! It has also reduced overwhelm, stress, and calmed my ADD/ADHD!

More Info!

Irrigation Checklist

Making sure that you have water to your garden may sound like a “Duh”. But you would be surprised how many people, myself included, forget about how we are going to water our gardens! Or wait until plants are in the ground before we remember we don’t have enough drip tape, sprinklers, or hose to reach those beds….

So make sure that you have your irrigation figured out. That may look like planning out your drip irrigation or making sure that you have enough connectors. In our case, we have to make sure we have enough hose to reach the big garden, then make sure we have enough pressure and sprinklers to reach the far back of the garden. There are plans to get a yard hydrant out to the garden but until that happens, I’m stuck hauling hoses.

I highly, HIGHLY recommend having your irrigation on a timer. I am notorious for forgetting to water the garden…. or starting to water and then forgetting to turn it off. Having a timer really helps to make sure that even if I forget, it still gets done.

Checklist For Soil And Compost

I use Fox Farm Potting Soil for seed starts. This stuff is amazing! There is a ton of nutrients to help those seeds grow big and strong. I would highly recommend using caution when using a seed starting mix like this. The main reason is because it’s sterile. That means it has no nutrients in it. You will have to add SOMETHING to it to make sure your plants can grow.

cropped-3.jpg

Are you looking for garden journal prompts, but aren’t interested in a weekly email? Check out our 365 Garden Journal Prompts! This is an amazing, all in one, yearly product that you only pay for once.

Buy Now!

Sourcing compost is going to be the next part of your checklist. Now, you HAVE to be careful when sourcing animal manure compost. A lot of the times, animals are eating hay that has been sprayed with herbicides or pesticides. The animals that eat that hay are not going to be able to absorb those chemicals so it will be pushed out in their feces. That means that you will end up with those herbicides and pesticides in your garden. So source your compost carefully.

The other way around that is to make your own. I use my kitchen scraps, animal bedding, leaf litter and sticks to start making compost. This isn’t ideal if you are starting a garden from scratch because you could need a TON of compost and soil. But starting your own compost area isn’t that hard.

Great Tools For The Garden

Shears/ Pruners: I recommend a couple sets of really good pruners. I say a couple because you will lose them and then find them, only to lose them again. I really like the Fiskars brand.

Hand Tools: I love having hand tools in the garden. I normally grab tools form my local Habitat For Humanity or thrift store because I know I am going to lose these tools. But I recommend getting something similar to these.

Bigger Tools: These are your typical tools like shovels, hoes, rakes, etc. I don’t use these much in the garden after planting. Well, I spread mulch with a shovel and by hand but for the most part, once my plants are in the ground, I’m on to hand tools.

Make Sure To Grab A Journal

I’ve talked repeatedly about the need for a garden journal. It’s not just for mental health and, in this case, hugely important for tracking your gardens progress throughout the year. This is my favorite journal but really anything that will get you writing your garden’s progress is key. I also have a digital garden journal that I update a couple times a year. The digital journal is more utilitarian and not for the beauty of the garden.

If you are looking for a great way to keep track of your gardens for years to come, check out our Digital Garden Journal. It’s a digital spreadsheet that helps you manage not only your seedlings but also your seed inventories, soil testing, orchard, harvests and so much more.

Buy Now

I also recommend a check registry… I know it’s weird but hear me out. Using a registry is a great way to list out what seeds you have on hand before ordering new ones! I’ve got a digital inventory that I also use, but I have found that using the registry helps me keep track better.

Seeds Or Plants Checklist

What is a garden without plants to go in it! This is going to be completely dependent on you, your growing season and your garden size. But, again, you can’t have a garden without plants. I talked here about the benefits of seed starting but if the only thing you have access to is a nursery or big box store, do you what you’ve got to do.

If you are looking to start your own seeds I recommend buying your seeds from True Leaf Market, Eden Brothers, and Territorial Seed Company. That doesn’t mean that you can’t purchase seeds elsewhere, I just really like their seeds. I’ve had really good luck with them and the price is great.

Save on Seeds

Logo 468x60

Another thing to consider when you are starting your own seeds is what pots to use. I love Bootstrap Farmer! I use these pots and these trays. They have really held up over time and I am not gentle on them. The trays are stout and can be carried, fully loaded, with one hand and not break.

A Place To Sit

One of my favorite YouTuber’s, Jessica Sowards, says it the best, “The best medicine for the garden, is the gardener.” That means having a place to sit when you’re tired, either from the garden or life. It’s pretty amazing to be able to just sit and relax in the garden.

Each of my gardens, the kitchen and big gardens, have a ton of chairs. We move them around so we can sit in the shade or in the sun. I’ve picked them up from thrift stores, Habitat For Humanity and various yard sales. I paint them, replace cushions and put them outside. It’s been the best medicine for this gardener.

Other Possible Needs

Shade cloth: You may or may not need shade cloth. But if you live where it is incredibly hot, giving your plants some shade from the sun is a must. We have lost more than our far share of plants that require full sun….to the sun.

Plant Tape: I have used various ways to secure plants to trellis, fencing, etc and sometimes it works great, others not so much. I recently found this plant tape and I really like it. It doesn’t hurt the plants and is completely reusable.

Sprayer: I only use these sprayers when the seeds are watering or fertilizer. If I need to spray fertilizer on the garden, I use one like this that attaches to the hose.

What other items are on your checkist?

If you like the content I put out, feel free to buy us a coffee! It helps keep this site running, marketing and the goats in grain!

Buy me a coffee

If you like this post, feel free to share it and follow us below on our social media accounts!
  • Facebook
  • Pinterest
  • Instagram
  • YouTube
  • TikTok
  • Spotify
  • Threads

Filed Under: Garden Tagged With: checklists, Garden, garden start, Homestead, seed

JOIN TO OUR MAILING LIST!

Leave us your email to receive new posts and special offers for members only! Don't miss a thing!

Recent Posts

  • Fall Garden Guide
  • Top Mistakes With Goats
  • How To Bond With Your Goats

How to Brood Chicks Inside

February 5, 2024 by Leigh Leave a Comment

Jump to Recipe

You went to tractor supply to get dog food and they had baby chicks. Of course, you had your kids with you and some how you managed to get talked into a couple of chicks. How does this happen?! The good news is, it’s not rocket science to brood chickens. But for someone who has never raised day old chicks? It sure seems like it. In this post I’m going to go over the basics of how to brood chicks inside, what we use, and other tips and tricks I’ve learned. If you want to skip most of this click the “jump to recipe” at the top of the post for my lists.

The Ultimate Homesteader’s Starter Bundle – Only $47!

Get the tools you need to stay organized, track profits, and manage your homestead with ease!

Includes:
✅ Schedule F Tracker – Simplify tax prep
✅ Profit Calculator – Track earnings
✅ Hay Calculator – Plan livestock feed
✅ Garden Journal – Digital & printable
✅ Herd Health Tracker – Monitor animal care
✅ Simple Budget – Manage finances
✅ Backyard Homestead eBook – Essential tips

$99 value – now just $47! Start your homesteading journey today!

Buy Now

What Do You Need?

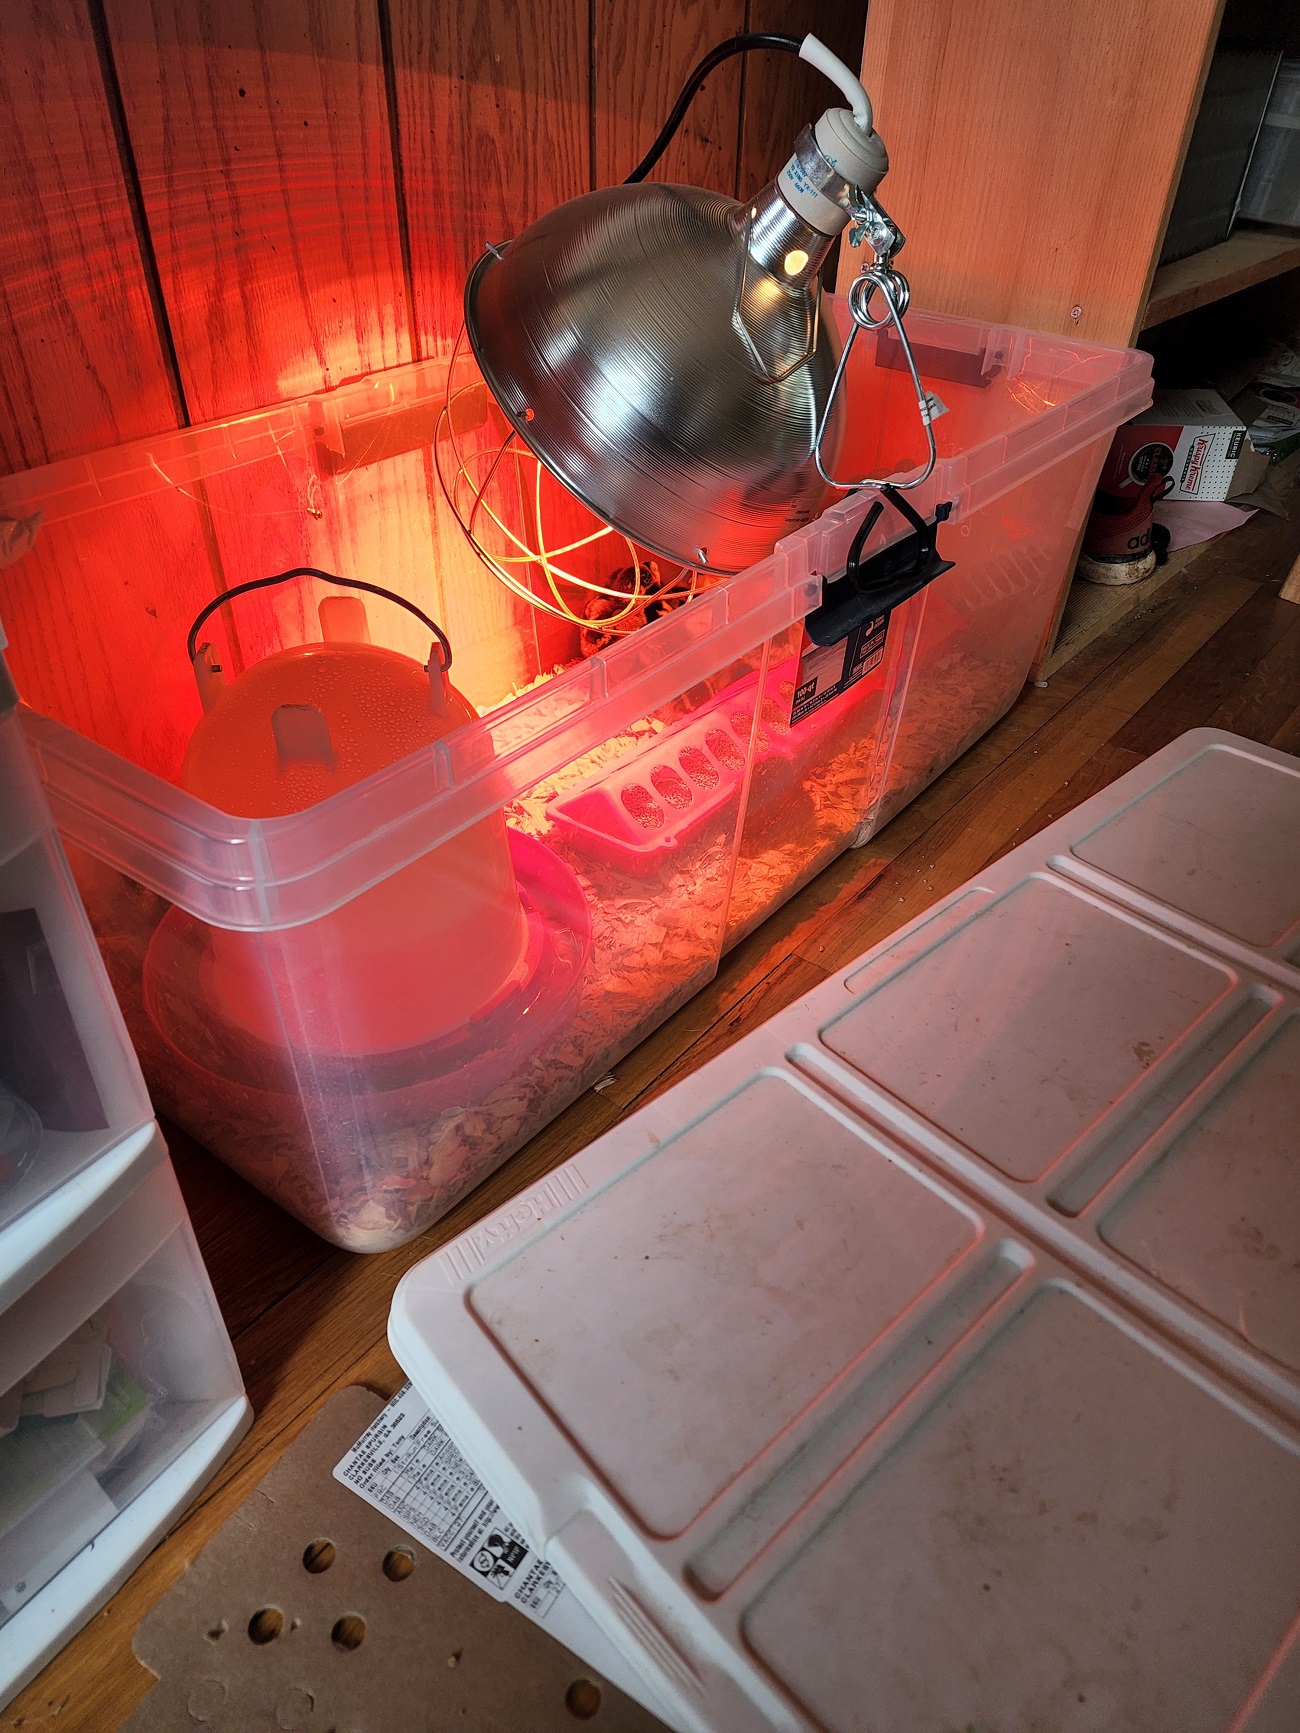
This is going to depend on how many babies you get. But you need a place to put them, a waterer, feeder, medicated chick feed, a heat lamp with red light and bedding. That’s really it. You don’t HAVE to use medicated chick starter but I do recommend it for baby chicks. It helps prevent coccidia in your flock and that my friends is huge. Coccidia and other parasites are the number one killer of all baby animals on all homesteads, except maybe predator’s.

Tractor Supply

When it comes to a place to put them, it really doesn’t have to be fancy. We use a plastic tote when we have to brood a smaller batch of chickens. There are 25 in here and this will only last about a week, maybe two. Once they have out grown this, *fingers crossed* they will go into the new chicken coop. You can read about our experiment with a metal chicken coop here . But they will stay here until it’s a “problem” and then they will be moved elsewhere. Usually if you are only brooding a couple up to maybe 6, this tote should be fine.

Approx 100Qt Plastic tote

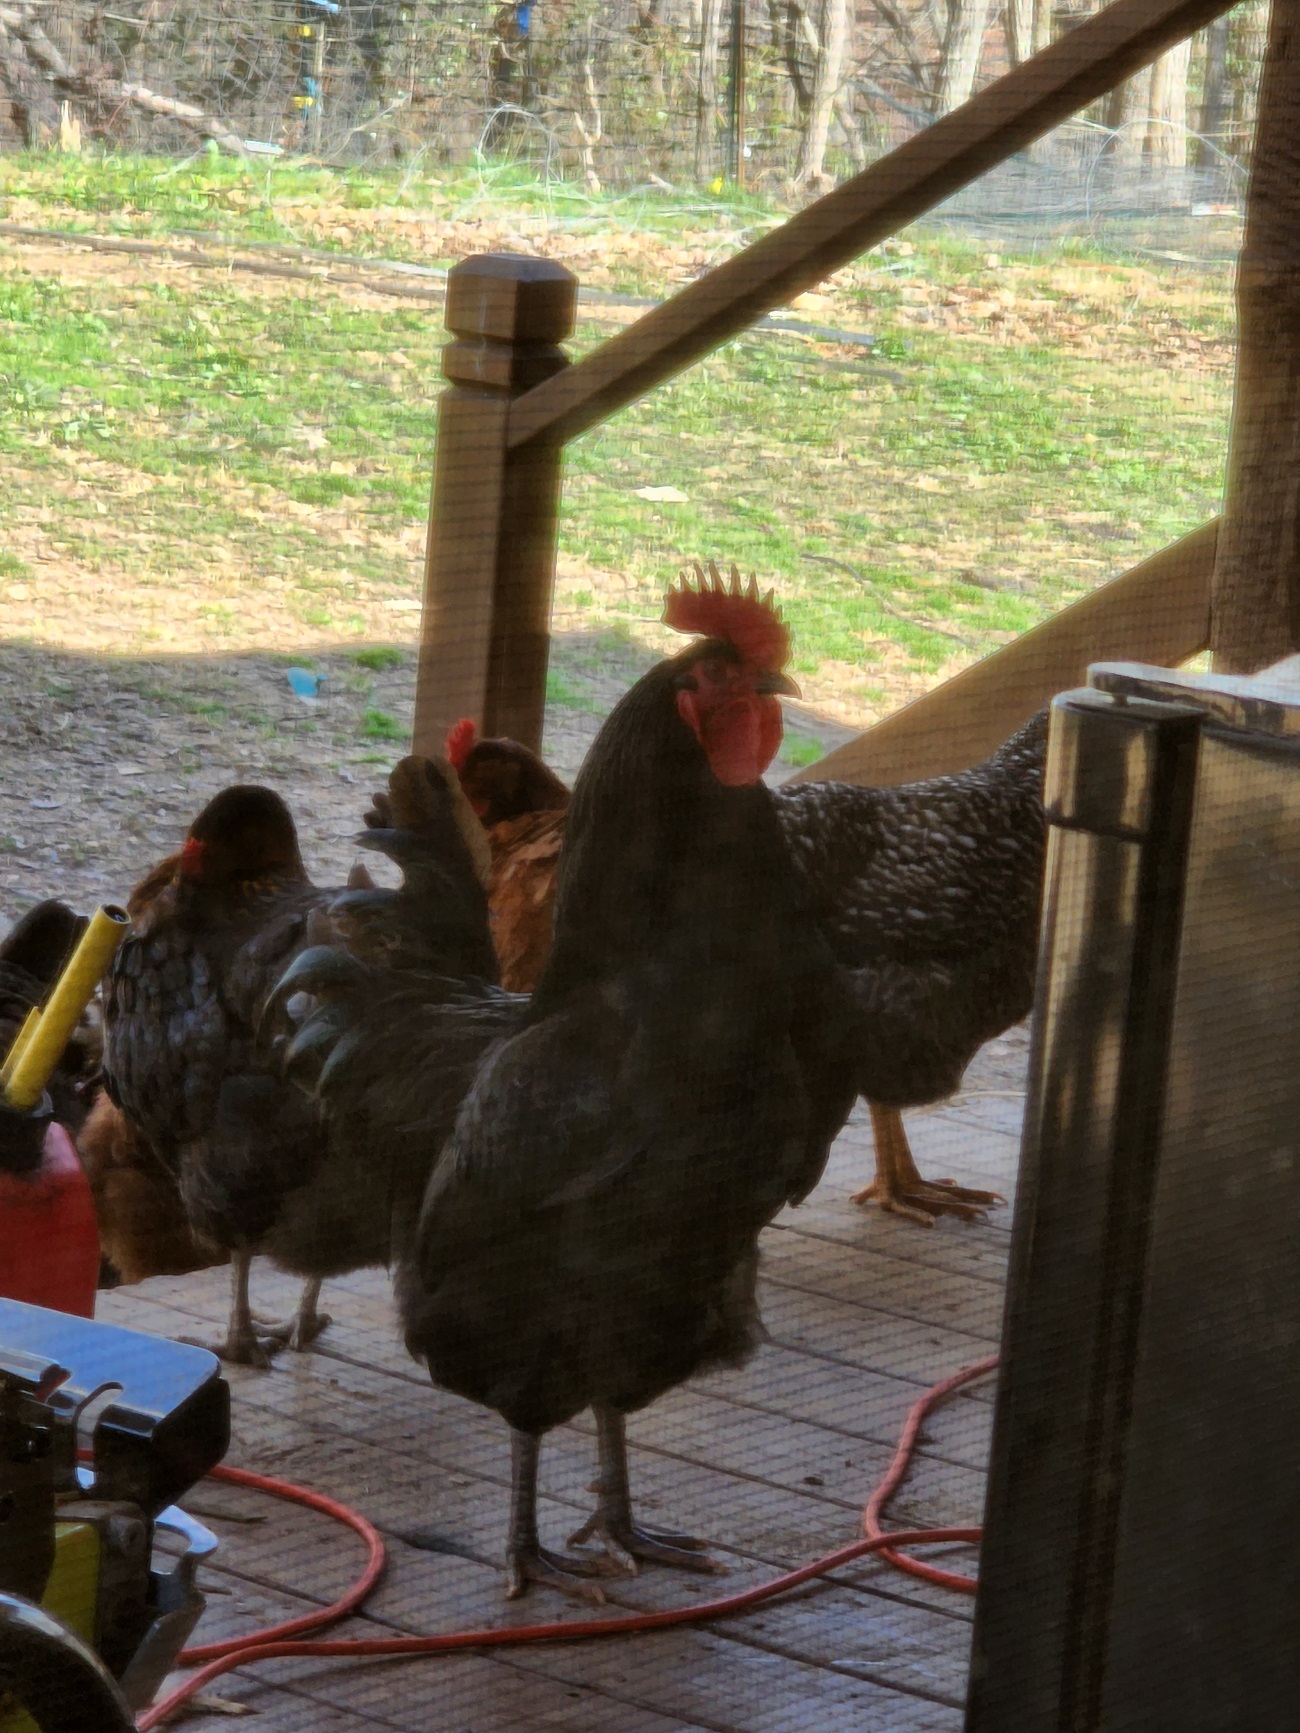
We put this tote in our living room for a couple of different reasons. Our other chickens like to come up onto the deck. Since having the chicks, the other chickens have been jumping up on the mini fridge out front to look through the window. This is going to help when the time comes to integrate everyone into the new coop. The other chickens know that we are brooding chickens in here. George and one of black stars have taken to keeping an eye on them.

George and his ladies trying to find the chicks

While you are brooding chickens, you want to try and maintain their temperatures around 90-95*. At this age, they are simply too little to regulate their own temperatures well. Every week you decrease their temps by moving the light higher and higher. If you notice your chicks staying away from the heat lamp or panting, move the heat lamp up because it’s probably too warm for them. Another thing you can buy to help gauge the heat is a Temp gun. These things are amazing for so many things beyond a chicken brooder.

If you are new to heating with firewood and are looking to master the finer points of it. We’ve got a great eBook that goes in depth of what tools you should consider, how and where to stack, how to build a fire and so much more!

Buy Now

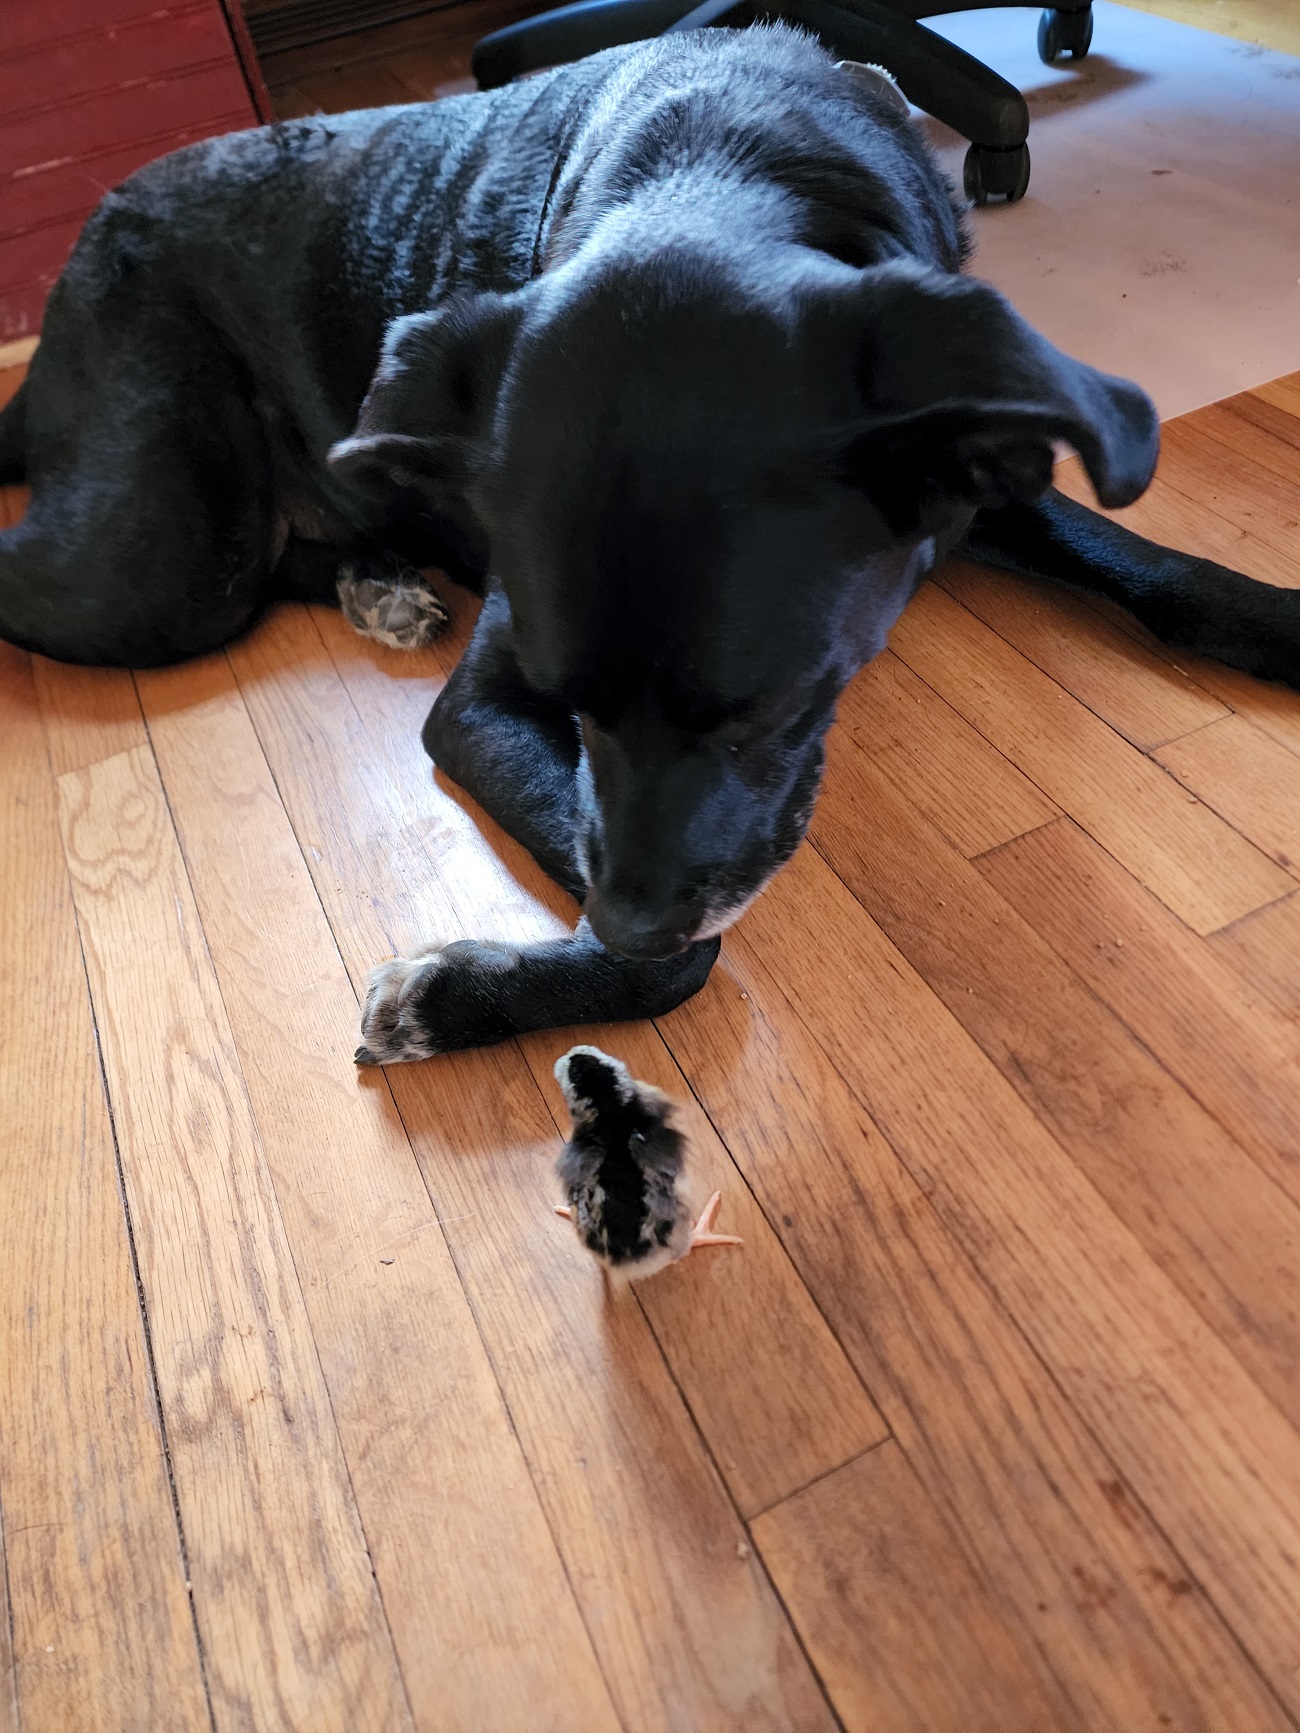
The other reason we brood chickens in the living room is so they get used to us and our noise. We are hoping that being around us will socialize them better and we will be able to handle them more. There is also the added bonus of photo ops like this one.

Bear says “what is this thing”

This is the first time for us using a red light for heat. Since we have reptiles, we have an abundance of CHE (ceramic heat emitters) and we used those for our first two batches. Unfortunately, we had a couple issues with our meat chicks pecking each other. After doing some research I found out that chickens are attracted to red things and they are cannibals. They will peck each other and then once they see the blood, they will kill that chick. So we got this red light and we already had the lamp with caging. But the new one is so far so good. We got ours from Tractor Supply and love it.

Tractor Supply

When it comes to feeders and waterers, it comes down to size. When they are little, you don’t need a ton of feed and water but you do want to make sure that they don’t run out. You can find the feeder shown in the picture here. However, when that one breaks we will be switching to this one because the one we have takes up a lot of space and can really only be used for chicks. I like our waterer and we will continue to use it for chicks. When the ducks come, they will need a different waterer because they like to play in it.

Logo 468x60

Tips and Tricks

Socializing

So you’ve got your set up, got all the things. Now what? Love on those babies! Seriously. If you want happy chicks that will run up to you, love on them. Let your kids play with them. Socialize them to the point where they are excited to see you. We didn’t do that with our first batch and it’s hard to get them to come to us. Our meat chicks however, loved us. They would come running when you came outside and they would follow you around because they associated us with food.

If you have older children, around five or so, make this their chore. Giving kids an animal helps teach them responsibility, empathy, and kindness in a way that human to human interaction just doesn’t do.

Pasty Butt

Chicks will get what is called pasty butt. It’s a thing. The best thing you can do to combat this is apple cider vinegar in their drinking water. I do about a tablespoon in each time we fill up our 5 Qt waterer. You can absolutely do more but I wouldn’t do much less. If your chick does end up with pasty butt simply take a warm wet rag and GENTLY wipe it off. If you are too rough you can damage their vent and that is fatal.

The Ultimate Homesteader’s Starter Bundle – Only $47!

Get the tools you need to stay organized, track profits, and manage your homestead with ease!

Includes:
✅ Schedule F Tracker – Simplify tax prep
✅ Profit Calculator – Track earnings
✅ Hay Calculator – Plan livestock feed
✅ Garden Journal – Digital & printable
✅ Herd Health Tracker – Monitor animal care
✅ Simple Budget – Manage finances
✅ Backyard Homestead eBook – Essential tips

$99 value – now just $47! Start your homesteading journey today!

Buy Now

Feeding Your Chicks

Chicks only need the medicated feed for the first bag. Again this depends on how many chicks you have and what size bag. We buy a 50lb bag for 50 chicks. If you only have 5? Get the 5lb bag. Just use common sense on how much your chicks need. Feeding them more isn’t going to hurt them but not enough could.

Logo 468 x 60

What do you feed them after that first bag? Just regular chick feed. You do want about 20-24% protein until they are mostly grown, about 4wks-2months. Also make sure that it is crumbles for a while and once they get most of their feathers, you can switch to a pellet. After that we switch our laying hens to a layer feed. This keeps them from growing too fast but also have different nutrients for healthy chickens and eggs.

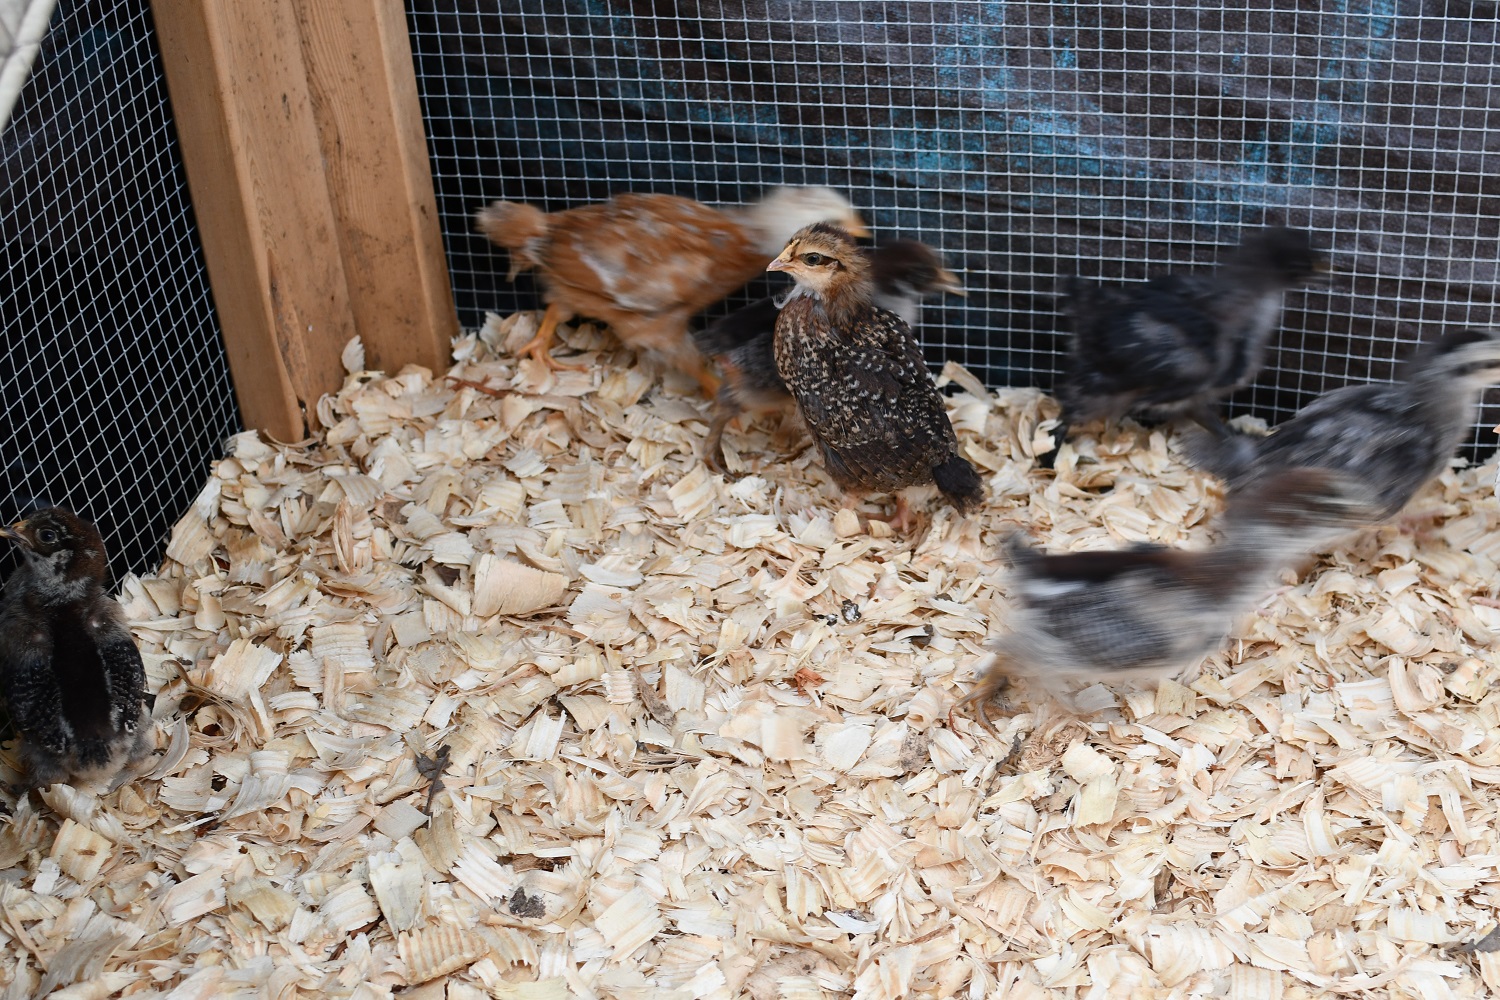
You can see that they have most of their feathers and now they are outside

How long do you brood chickens? About 3 weeks or once they are fully feathered, they can go outside into their coop or to free range. If it’s cold out, make sure to bring the heat lamp with them for nights. If it’s warm, make sure they have plenty of water.

Buying List For Brooding Chicks

Print Recipe
Equipment

Equipment

  • 1 Brooder Box
  • 1 Clamp Lamp
  • 1 Red light
  • 1 bag Pine shavings
  • 1 bag Medicated chick feed
  • 1 waterer
  • 1 feeder

That’s about it! If you have any questions about how to brood chickens feel free to comment below. Feel free to share this on your social media and like us as well!

If you like the content I put out, feel free to buy us a coffee! It helps keep this site running, marketing and the goats in grain!

Buy me a coffee

If you like this post, feel free to share it and follow us below on our social media accounts!

  • Facebook
  • Pinterest
  • Instagram
  • YouTube
  • TikTok
  • Spotify
  • Threads

Filed Under: Animals, Chickens Tagged With: Brooding, Chickens, Chicks, Eggs, Homestead

JOIN TO OUR MAILING LIST!

Leave us your email to receive new posts and special offers for members only! Don't miss a thing!

Recent Posts

  • Fall Garden Guide
  • Top Mistakes With Goats
  • How To Bond With Your Goats

Raised Bed Vs Row Gardens

February 3, 2024 by Leigh Leave a Comment

I see this question a lot when I am browsing social media and forums, “which is better, raised bed vs row gardens?” And every time, I answer, “whichever one gets you in the garden is the best.” Seriously, I don’t care what type of garden you have, if you are gardening, that’s a win in my book. But if you clicked on this blog, or read any of my posts, you know I’m not going to stop there. I am going to give you MY reasons for why a raised bed garden is better than a row garden. But I still maintain, that any garden is better than no garden!

Raised beds vs row gardens with a picture of a garden

Are you getting overwhelmed in the garden? Stressed? Or just not enjoying the garden like you used to? Check out our garden prompts! We send out weekly emails that get you back in the garden and out of your head! Turn the garden back into a place of love and joy instead of frustration and headache!

Subscribe Now!

Why Is The Question Raised Bed Vs Row Gardens?

I think the main reason for the question of which one is better is because people want a hard fast, concrete, right or wrong answer before they “waste” their time or money. But I am not one of those people. I want to have a whole conversation about WHY which one is better than the others. Plus, I figure it’s all about perspective anyways.

Benefits Of A Row Garden

Row gardens are exactly what they sound like, rows and rows of plants. Sometimes, there is trellising and stakes and sometimes not. Usually, though not always, there is a lot of tilling involved. This type of garden doesn’t require a ton of soil to be trucked in or building materials to be used. All you really need is a way to get your plants in the ground.

Row gardens can be very cheap to install and maintain because you don’t have to build anything. It’s as simple as digging up the ground enough to get your plants in the ground. It is suggested that you till just enough to get any rocks, weeds, etc out of the garden.

Another great pro to a row garden is that you don’t have to bring a ton of soil into the mix. Now, this assumes that you will be adding compost or organic matter to the bed or that you will be using cover cropping.

cropped-3.jpg

Are you looking for garden journal prompts, but aren’t interested in a weekly email? Check out our 365 Garden Journal Prompts! This is an amazing, all in one, yearly product that you only pay for once.

Buy Now!

Cons Of A Row Garden

There are a few cons to a row garden and number one is weeding! You will be on your hands and knees pulling weeds or using harsh chemicals to kill the weeds before they stunt your plant. Another option is laying a TON of mulch. But honestly, you should be mulching your garden anyways.

Another con to a row garden is going to be pests. Now, there are absolutely pests in raised beds, but they don’t seem to be as bad. Ant hills, spiders, scorpions, etc are all more likely to be found in a row garden than a raised bed. I have noticed that the only critters that are in my raised beds are tiny wolf spiders and Japanese beetles. The row garden? GIANT spiders, scorpions, grasshoppers, a million army worms and two million horn worms.

I don’t know why they don’t touch the raised beds, I just know that they don’t…. at least my beds.

If you are interested in learning more about my favorite garden planner. I highly recommend Seedtime! This planner has been instrumental in helping me plan out my gardens with WAY more efficiency than I could ever expect! It has also reduced overwhelm, stress, and calmed my ADD/ADHD!

More Info!

Benefits Of A Raised Bed Garden

There are a lot of benefits of a raised bed garden and the first is that it can be a back saver! Seriously, not having to kneel down, bend over and reach has been a life saver for my back. It’s has been amazing.

Then there is the fact that I have complete control of the soil? Yea, that’s another win in my book. We have extremely rocky, clay soil that is prone to erosion. Not only that, we live on a mountain so there are a ton of flat spots, steep inclines, etc so it is hard to get a garden to stay put. Every year, I add leaves, sticks, compost and animal bedding to my raised beds and the plants flourish.

Before we get too far into this post, I wanted to give a suggestion about keeping a garden journal. A digital garden journal is a fantastic way to keep track of past, present and future gardens. Our Digital Garden Journal is a great way to keep up with everything without getting too overwhelmed.

Buy Now

Lastly, harvesting has been a snap. While I still lose produce, it’s not nearly as bad as a row garden. Because most everything is at least a mid thigh height for me, I can actually see what needs to be harvested.

Cons of A Raised Bed Garden

Well, the first, and biggest, con to a raised bed garden is the cost. Depending on the size of the bed, materials, prefab-ed, etc, each bed can set you back several hundred dollars. That’s just the materials to build the bed. Then you have to fill the bed with materials and soil. This can ramp up the cost of a raised bed.

Which brings us to our next point. The amount of work to build and maintain raised beds can get both expensive AND labor intensive. The cost may not be a problem for you, but when it comes time to start filling those beds? You are in for a ton of work.

Depending on the size of your bed, you are going to be loading a ton of logs, sticks, leaves, soil, and compost until it’s mostly full. Then you are going to repeat this for several years as that material breaks down and settles.

The Ultimate Homesteader’s Starter Bundle – Only $47!

Get the tools you need to stay organized, track profits, and manage your homestead with ease!

Includes:
✅ Schedule F Tracker – Simplify tax prep
✅ Profit Calculator – Track earnings
✅ Hay Calculator – Plan livestock feed
✅ Garden Journal – Digital & printable
✅ Herd Health Tracker – Monitor animal care
✅ Simple Budget – Manage finances
✅ Backyard Homestead eBook – Essential tips

$99 value – now just $47! Start your homesteading journey today!

Buy Now

Why I Like Raised Beds Over Row Gardens

My personal preference is raised bed gardens. I love the way raised beds look. They are clean cut and help keep the lines of the garden pretty. It also helps with weeding because there just isn’t as many weeds to contend with.

Wear And Tear On My Body

I also really like the fact that I don’t have to kneel down and get on my hands and knees to plant, weed, mulch, etc. I can do it from standing or bending over or I can also sit on the edge of the bed and work. Also, I don’t have to worry as much about pest problems because they just don’t crawl up the beds like the do in the row garden.

When it comes time to harvest, I’m not having to get down on my hands and knees to find produce before it’s overripe. I can also see what is going to be ready for harvest a lot easier and there is a lot less wasted harvest.

Are you getting overwhelmed in the garden? Stressed? Or just not enjoying the garden like you used to? Check out our garden prompts! We send out weekly emails that get you back in the garden and out of your head! Turn the garden back into a place of love and joy instead of frustration and headache!

Subscribe Now!

But Raised Beds Are Expensive

However, there are some pretty major cons. Depending on the size of the bed, each bed costs about $150-$300 to build. Then to fill the bed takes a TON of labor. Now, I’m lucky enough that my boys are always looking for ways to earn extra money. So they are more than happy to do that manual labor for me. But if you don’t have that option, it can be very labor intensive or expensive.

Then there’s the soil cost.

Now, we mostly use logs, sticks and leaves as the foundation to our raised beds and that helps a ton. We usually fill the beds about 3/4 of the way full with woody products. Then we fill the rest with wood shavings or wood chips. After that, we add animal bedding, starting with the chicken bedding and then adding the goats. Then we fill with spent hay. After all that, we add soil.

Usually, our yearly soil cost is about $400-500 for the kitchen garden and another $800 for the big garden. We get our soil from a couple different places. We’ve been lucky that we have a neighbor that has a horse farm. She turns the manure regularly until it’s composted down into black gold. But sometimes, we still have to purchase soil. And it’s expensive.

So Which Is Better? Raised Bed Vs Row Gardens?

For me, a raised bed is better than a row garden. But that doesn’t mean that row gardens don’t have their place. In fact, I would say that if you don’t have a lot of money, row gardens are better. Or if you can’t do a lot of manual labor to set up raised beds, row gardens are better. But if you have access to the money, time and labor to set up a raised bed garden? I think raised beds are better.

cropped-3.jpg

Are you looking for garden journal prompts, but aren’t interested in a weekly email? Check out our 365 Garden Journal Prompts! This is an amazing, all in one, yearly product that you only pay for once.

Buy Now!

But remember, a garden is better than no garden. It doesn’t matter if it is a container garden on your apartment patio, an acre row garden, or 50 60ft long raised beds. A garden that produces food for you is the best garden.

If you like the content I put out, feel free to buy us a coffee! It helps keep this site running, marketing and the goats in grain!

Buy me a coffee

If you like this post, feel free to share it and follow us below on our social media accounts!

  • Facebook
  • Pinterest
  • Instagram
  • YouTube
  • TikTok
  • Spotify
  • Threads

Filed Under: Garden, Garden Projects Tagged With: Garden, Homestead, vegetable, vegetable garden

JOIN TO OUR MAILING LIST!

Leave us your email to receive new posts and special offers for members only! Don't miss a thing!

Recent Posts

  • Fall Garden Guide
  • Top Mistakes With Goats
  • How To Bond With Your Goats

What Do I Do With Bucks?

January 30, 2024 by Leigh Leave a Comment

Depending on how you run your homestead, you may start to realize that your male livestock and poultry don’t have a long life span. Or, maybe you aren’t used to the livestock way of life and are really struggling with the idea of butchering the males. Either way, you are probably asking yourself, “What do I do with bucks?” And the real answer is one that you may not like or it may not fit with your ideals. But I’m going to tell you what I do with my bucks.

What do I do with Bucks

Two goat kids in a field
goat kidding

Before we get too far into this, I have a great course on the basics of goat care. I call it Goat Crash Course: Goat 101. In this course, I explain things like types of shelter, types of feeds and hays, basic assessments and so much more! Check it out!

Buy Now

What Do I Do With Bucks?

Well, this entirely depends on your homestead goals, philosophies and needs. And that is something that you need figure out BEFORE you start breeding. Seriously, don’t get livestock or poultry and then not know what you are going to do with the animals. You will end up in a world of hurt. Ask me how I know.

Some of the ways that we handle the bucks on our farm is selling, castrating, and butchering.

Selling Bucks

We always try to sell any bucks that we don’t need for next seasons breeding cycles. But there are two very important criteria that have to be met before selling an uncastrated buckling. One, he has to come from good, hardy, proven lines. Two, he has to have good conformation, size, and disposition. If he doesn’t meet those criteria, he is castrated.

We do everything in our power to only sell uncastrated males that hit those criteria. The reason why those criteria are so important to us is the heavy losses we have sustained on our farm due to unhealthy kids and weak genetics. We don’t want to spread that to other farms. It has taken years for us to finally get our herd genetics figured out and sending out weak goats isn’t something I’m interested in.

If for some reason, we cannot sell a solid and healthy buckling by ten weeks, he is castrated.

goat kidding

Before we get too far into this, I have a great course on the basics of goat care. I call it Goat Crash Course: Goat 101. In this course, I explain things like types of shelter, types of feeds and hays, basic assessments and so much more! Check it out!

Buy Now

Castrating Bucks

If we cannot use a buck on our farm, we cannot sell him, or he doesn’t meet our criteria, he is castrated. We do this by banding around ten to twelve weeks and putting him in the buck pen. If he met our criteria but we couldn’t sell him, then we attempt to sell him as a wether or pet. Unfortunately, bucks and wethers are not as sought after as does. So this happens a lot.

I don’t want to sell any inferior goats. Goats have become increasingly fragile for a lot of reasons like; overbreeding, poor genetics, breeders just trying to make a dollar, and overuse of medical interventions. Because of all these things, it’s really hard to guarantee the health of a goat. Weak goats don’t make it through winter and you are stuck digging a hole in the frozen ground.

So to keep from spreading weak genetics, we are very strict when it comes to who is leaving our farm.

Butchering Bucks

Unfortunately, we cannot afford to feed a bunch of goats that don’t have a purpose. It’s the reality of farm life. And it HURTS! I didn’t grow up like this and I still struggle with the idea of culling members of the herd. But it’s part of responsible breeding and, PLEASE, breed responsibly. Goats are so fragile to start with and irresponsible breeders are out there just selling kids to make a dollar. That’s not doing anything to improve the situation.

When it comes to deciding who gets butchered and who stays, we have made it easy on ourselves. Well, as easy as this decision can be. If the buck doesn’t meet our criteria, he is castrated and will be butchered. If we are not using him for breeding, he gets sold. If we can’t sell him by ten to twelve weeks, he is castrated. If we cannot sell him as a wether, he is butchered.

Unfortunately, this is the life we lead.

The Ultimate Homesteader’s Starter Bundle – Only $47!

Get the tools you need to stay organized, track profits, and manage your homestead with ease!

Includes:
✅ Schedule F Tracker – Simplify tax prep
✅ Profit Calculator – Track earnings
✅ Hay Calculator – Plan livestock feed
✅ Garden Journal – Digital & printable
✅ Herd Health Tracker – Monitor animal care
✅ Simple Budget – Manage finances
✅ Backyard Homestead eBook – Essential tips

$99 value – now just $47! Start your homesteading journey today!

Buy Now

Our Does Get The Same Treatment

And just so everyone is clear, this is the same criteria we use for our does. Just without the castration part. If a doe requires deworming, we don’t breed her and she will go to the butcher. If she is sickly, she gets butchered. We don’t try to sell our does as a rule. The main reason is we want the milk.

If she doesn’t fit our requirements, there’s a really good chance she isn’t a solid goat and we don’t want to put out inferior goats. Maybe in a few years, when we have our established lines and have enough milk goats, we will think about selling our does. But for right now, we are standing by our standards.

Dealing With The Emotions Of These Decisions

I will say it again, we didn’t grow up like this. We were taught from a young age that you care for animals. You don’t kill them because they don’t “meet your criteria“. You get your meat from the grocery store like everyone else. I talked extensively about livestock are not pets in this blog post, and it’s very hard to stand by these criteria and make these decisions.

This whole situation and subsequent conversations, can create a very difficult and emotional rollercoaster ride. But I have found that when you pick a goal, set perimeters for that goal, and measure EVERYTHING against that goal? It makes these decisions a LOT easier.

But don’t get it twisted, it’s still hard.

If you are new to heating with firewood and are looking to master the finer points of it. We’ve got a great eBook that goes in depth of what tools you should consider, how and where to stack, how to build a fire and so much more!

Buy Now

Since getting into goats, we lost at least two goats a year until we implemented this criteria. We lost beloved pets because we didn’t want to make the hard decisions. We bred for milk, not for healthy kids. We thought overusing medical interventions was normal.

We did it wrong

Since making the decision that we were going to breed for hardiness first, then milk, then meat, we have had a lot less death on the homestead. We have placed beloved goats on the cull list, and it’s a hard decision to make. It feels terrible to take them to the slaughter house, but I will NOT sell inferior goats. Because I will not be part of the problem.

What’s more heartbreaking? Losing a goat to the cold because she wasn’t strong enough to survive it or butchering a goat that was raised in a healthy, happy, loving environment?

Is it better to perpetuate a vicious cycle of over deworming or only breed hardy, parasite resistant goats?

Is it better to make a dollar on any kid, or only produce top notch animals that don’t require medical intervention?

These are all decisions that you will HAVE to make if you are getting into livestock that will have a purpose. I’m not going to say that either side is right or wrong. I AM going to say that when we are making decisions on our farm, these are some of the questions we ask ourselves.

Because we are tired of sickly goats that don’t survive winter. We are tired of digging new holes in the pet cemetery.

If you like the content I put out, feel free to buy us a coffee! It helps keep this site running, marketing and the goats in grain!

Buy me a coffee

If you like this post, feel free to share it and follow us below on our social media accounts!

  • Facebook
  • Pinterest
  • Instagram
  • YouTube
  • TikTok
  • Spotify
  • Threads

Filed Under: Animals, Goats, Homestead Planning Tagged With: Butchering, Freezer, Goats, Homestead, meat goat

JOIN TO OUR MAILING LIST!

Leave us your email to receive new posts and special offers for members only! Don't miss a thing!

Recent Posts

  • Fall Garden Guide
  • Top Mistakes With Goats
  • How To Bond With Your Goats

February Garden Chores

January 23, 2024 by Leigh Leave a Comment

This is an exciting time for those of us that are getting ready to start seeds. Steel Raven Farms is located in Northeast Georgia, in the foothills of the Appalachian Mountains. We are in zone 7b, even though I don’t really keep track of that. But this time of year is really when I start working on February garden chores and really start on getting my garden stuff going.

cropped-3.jpg

Are you looking for garden journal prompts, but aren’t interested in a weekly email? Check out our 365 Garden Journal Prompts! This is an amazing, all in one, yearly product that you only pay for once.

Buy Now!

February Garden Chores

First and foremost, there is a never ending list of homestead chores that need to be done. But February is a weird month for us. We’ve got goat kids being born, projects getting finished up and prepping for spring planting. And it’s COLD! The very last thing most people are thinking about is a garden. But I know that in just a few short weeks, the weather will turn and we will start warming up.

As far as February garden chores, we are looking at finalizing garden plans, checking seed inventory, checking our garden stuff, and starting seeds. Some of these things will take place towards the start of the month and others will depend on the weather but for the most part, these are the things we are doing in February.

Finalizing Garden Plans

As we are moving out of January, we are still finalizing garden plans. This looks a little different for everyone depending on how you are planning your garden. But for us, we are still in the process of giving our big garden a facelift. So I don’t want to put a ton of effort into planning a space when I don’t know EXACTLY how much space I’m going to have.

But garden plans are not just the physical structures of the garden, though that is a huge part of garden plans. In this case, I’m talking about what I can put IN those structures. This is the time were I am making sure that I have plenty of space for all of the things I want to plant.

Now, I know that regardless of whether my beds are build or not, there will still be plenty of room to plant all the tomatoes, peppers, squash, and all the other delicious veggies. But I do want to ensure that I have plenty of space, seeds, pots, and other things make this years garden a success.

Checking Seed Inventory

I’ve got a whole blog post/ page on creating a seed inventory. This can look like a notebook or a spreadsheet but it is surprisingly important to have some sort of system that tells you exactly what seeds you have on hand. I’ve created a digital seed inventory that you can purchase here, or you can make your own. But now is not the time to buy seeds!

If you are just starting your gardens, then yes, buy the seeds. But if you have a ton of seeds and you don’t NEED to purchase seeds for this years garden, wait till summer! Most seed companies will start putting their seeds on sale in the middle of summer and that is the time to stock up. Plus, come summer, you will have a better idea of what plants are doing well for you and which aren’t.

All that being said, start looking at what seeds you have on hand and match that up to your garden plans. Do you have enough tomato seeds? Which squash was resistant to bores? Which sweet pepper did you love? All of this information should be either in your seed inventory or your garden journals.

Are you getting overwhelmed in the garden? Stressed? Or just not enjoying the garden like you used to? Check out our garden prompts! We send out weekly emails that get you back in the garden and out of your head! Turn the garden back into a place of love and joy instead of frustration and headache!

Subscribe Now!

Prepping Your Garden Stuff

Again, this looks different for everyone, but February garden chores wouldn’t be complete without checking your supplies. Do you have enough compost, soil or amendments? Do you have a fresh garden journal? Are your tools clean and sharp? Do you have enough pots to start your plants?

You would be surprised to find that you need to start sourcing some of these materials NOW before you get too far into the season.

For me, I am making sure that I have plenty of soil and compost, my pots are clean and sanitized, my greenhouse is ready, and I’m good to go! Jared will usually go through and start sharpening tools, finish any big projects that need to be done in the garden and help me with seeds.

Starting Seeds!

This is it, ya’ll! Every single gardener is chomping at the bit to get their gardens started and I am no different. My last frost is supposed to be around April 15th. But I can go ahead and start a fair amount of cool weather, frost hardy things now! Things like cabbage, broccoli, cauliflower, kohlrabi, etc can all be started in my greenhouse without risk of damage.

But there are some summer things we can start now too! I wait till I’m closer to March before starting too many tomatoes and peppers but I will start a tray and put them in the greenhouse around mid February. This is an experiment more than anything, because I want to see just how well my greenhouse stays warm.

But don’t go too crazy with starting your seeds. If your last frost is around the same time as mine, it’s easy to get caught up in the hype of starting seeds early. But remember, the more you start at once, the less bumper crop you will have later.

Pro Amateur Tips For February Garden Chores

Start A Garden Journal

If you haven’t already, start setting up your garden journal! I’ve talked about the importance of journaling here, but garden journals are a must if you are going to “take your garden seriously”. By that I mean, if you want to learn from your garden and grow your gardening skills, then you should make sure that you are writing down what is happening in your garden.

If you’re not sure what to write about, I’ve got my 365 Day Garden Journal Prompt that you can purchase below!

cropped-3.jpg

Are you looking for garden journal prompts, but aren’t interested in a weekly email? Check out our 365 Garden Journal Prompts! This is an amazing, all in one, yearly product that you only pay for once.

Buy Now!

This is also a great place to write down all the seed varieties you grew for the year and how they did for you. This will keep you from purchasing seeds that don’t work for you or remind you of what did well.

Seed Inventory

I have two different ways I track my seed inventory. One is my digital seed inventory and the other is an account ledger book. The reason is twofold. One, I love redundancy. Two, I love having paper copies. There is something about handwriting something that sticks in my brain better.

But having that digital copy of my seed inventory tells me where I bought the seed and has links which is amazing! So no matter if you are super techy or ole school, (or in my case both), make sure that you’ve got something to help you track your seeds!

Don’t Start A TON Of Summer Seeds Yet

I know it’s tempting to start a ton of seeds because you’ve got your hands in the dirt and it’s exciting! But please! Don’t start all of your peppers, tomatoes, cucumbers, etc all at once!

Space out your plantings by about two weeks. This ensures a longer and more spread out harvest, but also won’t wipe out your seed stash if you get a freak storm.

As always, don’t be afraid to try new varieties and have fun! It’s great being a student of the garden!

If you like the content I put out, feel free to buy us a coffee! It helps keep this site running, marketing and the goats in grain!

Buy me a coffee

If you like this post, feel free to share it and follow us below on our social media accounts!

  • Facebook
  • Pinterest
  • Instagram
  • YouTube
  • TikTok
  • Spotify
  • Threads

Filed Under: Garden, Seeds and Plants Tagged With: by month, Chores, Garden, Homestead, kitchen

JOIN TO OUR MAILING LIST!

Leave us your email to receive new posts and special offers for members only! Don't miss a thing!

Recent Posts

  • Fall Garden Guide
  • Top Mistakes With Goats
  • How To Bond With Your Goats

Livestock Are Not Pets

January 20, 2024 by Leigh Leave a Comment

If you did not grow up on a farm or with livestock animals, it may be a foreign concept of raising animals for meat. It could bother you that people, like myself, butcher animals for meat. It’s difficult for a lot of people to wrap their mind around the fact that I can genuinely love my animals, yet I’m still able to put them in the freezer. But that’s because I have realized that livestock and poultry are not pets and that helps a lot. Before you click off this blog post, stick with me and I will explain more about how people can raise an animal and then butcher it. Maybe then, you can understand why people like me choose to raise our meat.

goat kidding

Before we get too far into this, I have a great course on the basics of goat care. I call it Goat Crash Course: Goat 101. In this course, I explain things like types of shelter, types of feeds and hays, basic assessments and so much more! Check it out!

Buy Now

Livestock Aren’t Pets

Now, you can absolutely have livestock animals that you bought with the sole purpose of it being a pet. But before we get too far down this rabbit hole, we need to discuss some things first. Like, the definition of livestock and poultry, what is a companion animal, why people choose to raise their own meat, and why we need to respect those decisions.

Remember, stick with me! Don’t get upset and storm off because you don’t like what I have to say. I mean, obviously you can, but if you truly want the answer to “how can you slaughter something you raised” stick around and find out.

What Is Livestock And Poultry

The Oxford Dictionary defines livestock as “Domestic animals kept on a farm for use or profit; esp. cattle, sheep, and pigs.” And poultry as “Domestic fowl collectively; birds which are commonly reared for their flesh, eggs, or feathers, as chickens, ducks, geese, turkeys, etc.“

The reason this is important is that a lot of people confuse ALL animals with pets or companion animals. They think that all animals that are kept by people should be raised but not butchered. Because that is the lens in which they see animals. They’ve never been on a farm or raised an animal knowing that it’s entire purpose is to end up in the freezer.

Which makes me wonder who they think raises the meat they get at the grocery store?

What Is A Companion Animal

I’m not going to pull out the dictionary for this one but I define a companion animal as a pet. This could be a dog, cat, gerbil, or even a pig or goat. And we have PLENTY of these on the homestead. These animals don’t really have a job, they aren’t an asset or really have a use other than companionship.

Champ is a goat and companion animal. She will live out the rest of her days here on the farm with no use. When she dies, she will be cremated. BUT she started out as livestock. Her original purpose was to give us milk and babies and she did that. Now that she is older, she has earned her retirement.

But what a lot of people don’t seem to understand is that my herd, and most peoples herd, of goats are not companion animals. They have a purpose: Milk, Money or Meat. While I don’t WANT to butcher any of my goats, I know that it is a reality that I will have to deal with. Especially because I want milk.

BeBe and Rory are not companion animals, they are livestock. They will be butchered as soon as they hit 75# or we head into winter, whichever comes first.

Answering Questions With Questions

To answer the question of why we raise our own meat, the answer is another question, actually a couple. Have you ever seen where livestock is raised? I’m not talking about the fields dotted with cattle and chicken or woods with pigs. I’m talking the pig houses, chicken houses or CAFOs. Have you seen what those animals are fed? Do you know where that feed comes from? Do you have any knowledge of ruminant biology?

I don’t ask these questions to be rude or nasty. I ask them because if you have never seen any of those things, I can understand why you would be confused. I can understand why you ask “why raise your own meat?”

Why We Raise Our Own Meat

Now, to be completely transparent, we don’t raise cow or pig on the homestead. We tried to raise pigs and it was a colossal failure meat-wise. We will try again when we are in a better position…maybe. But we do raise our own chicken and goat. That may not seem like a lot, but we just don’t have the infrastructure to raise cows yet. Building pasture for cattle and goats is a big goal for 2024.

In the mean time, we source our beef from a local farm that raises grass fed beef. We source our pigs from someone who raises pasture pork. We purchase meat in bulk instead of relying on the grocery store.

The reason is because we want the animals that are being raised for meat, to be animals. Pigs root and wallow. Cattle should walk around and eat grass. Chickens should scratch and peck. Goats should scream and eat grass. That is what they are SUPPOSED to do.

Industrial Agriculture

Industrial agriculture has created these confinement systems to hold huge groups of animals together, feed them low grade antibiotics and grains, pack them onto trailers and send them to the processor.

The amount of stress those animals endures is not okay. In fact, it’s inhumane. Animal welfare is not at the top of industrial agriculture’s list of priorities.

Like most homesteaders, I choose to source or raise the meat my family is going to consume as humanely as possible. I want animals that are raised as natural a diet as possible. I want animals that have only one bad day.

Respecting Decisions

I’m not sure when we became a country that isn’t allowed to have differences of opinions. But what I will say is that no matter where you fall on the meat eating/ raising spectrum you fall on, respecting other’s decisions is a key part of being an adult. If a person chooses to only source their meat from local farms, great. If a person decides to go to the grocery store, great…. I don’t have to like it.

I can desperately want to take them to the different chicken farms around here and show them how these animals are raised, shoved into cramped boxes, transported in the rain, heat, etc. I want show them where these animals are unloaded and butchered.

But I can’t do that. I have to respect their decision.

But the beautiful thing about a blog?

I can also show you my operation. I can show you transparency.

I can talk about all of the crazy things my chickens and goats do.

In doing those things, my hope is that you make the decision to source your food locally. From farmers who really do love their animals, instead of industrial ag….

If you like the content I put out, feel free to buy us a coffee! It helps keep this site running, marketing and the goats in grain!

Buy me a coffee

If you like this post, feel free to share it and follow us below on our social media accounts!

  • Facebook
  • Pinterest
  • Instagram
  • YouTube
  • TikTok
  • Spotify
  • Threads

Filed Under: Animals Tagged With: Ducks, ethical meat, Goats, Homestead, livestock

JOIN TO OUR MAILING LIST!

Leave us your email to receive new posts and special offers for members only! Don't miss a thing!

Recent Posts

  • Fall Garden Guide
  • Top Mistakes With Goats
  • How To Bond With Your Goats
  • « Go to Previous Page
  • Page 1
  • Interim pages omitted …
  • Page 7
  • Page 8
  • Page 9
  • Page 10
  • Page 11
  • Interim pages omitted …
  • Page 13
  • Go to Next Page »

Primary Sidebar

WELCOME

WELCOME

My name is Leigh and I am the lead chaos creator here at Steel Raven Farms. You will see throughout this blog that I am the crazy goat lady.

I am married to my high school sweetheart, Jared and we have two amazing boys.

FOLLOW ME

  • Amazon
  • Facebook
  • Instagram
  • Pinterest
  • TikTok

GET UPDATES!

Leave us your email to receive new posts and special offers for members only! Don't miss a thing!

In all the years that I’ve been growing a garden, the fall garden has steadily remained my favorite. Which is funny because I don’t really like any of the brassicas, which is what most people know the fall garden for. I prefer the root vegetables and cool air. But I have learned over the years…

Read More

  • Animals
    • Chickens
    • Farm Dogs
    • Goats
  • Garden
    • Compost
    • Garden Projects
    • Seeds and Plants
    • Garden Journal
    • Working With Food
      • Recipes
      • Freezing Foods
      • Dehydrating Foods
      • Canning Tips And Tricks
        • Canning Inventory Sheets
  • Helpful Info
    • Welcome to the Homestead!
    • Emergency Preparedness
    • Frequently Asked Questions
    • Goal Setting
    • Project List
    • Shop Digital Products
      • Hay Calculator
      • Farm Expense And Income Tracker
      • Goat Crash Course: 101
      • Garden Journal Prompts
      • Schedule C Tracker
      • Schedule C Tracker
      • The Homestead Bundle
  • The Truths
  • Episode List
  • Start Here
    • Privacy Policy
    • Affiliate Disclosure
    • Let’s Get in Touch
    • Members Only Library
    • Welcome To Our Homestead

Footer

  • Email
  • Facebook
  • Instagram
  • Pinterest

COME AND GET IT!

Leave us your email to receive new posts and special offers for members only! Don't miss a thing!

· Midnight Theme

Copyright © 2026 · Midnight Theme on Genesis Framework · WordPress · Log in