• Skip to primary navigation
  • Skip to main content
  • Skip to primary sidebar
  • Skip to footer

Steel Raven Farms

Where muck boots meet ground.

  • Animals
    • Chickens
    • Farm Dogs
    • Goats
  • Garden
    • Compost
    • Garden Projects
    • Seeds and Plants
    • Garden Journal
    • Working With Food
      • Recipes
      • Freezing Foods
      • Dehydrating Foods
      • Canning Tips And Tricks
        • Canning Inventory Sheets
  • Helpful Info
    • Welcome to the Homestead!
    • Emergency Preparedness
    • Frequently Asked Questions
    • Goal Setting
    • Project List
    • Shop Digital Products
      • Hay Calculator
      • Farm Expense And Income Tracker
      • Goat Crash Course: 101
      • Garden Journal Prompts
      • Schedule C Tracker
      • Schedule C Tracker
      • The Homestead Bundle
  • The Truths
  • Episode List
  • Start Here
    • Privacy Policy
    • Affiliate Disclosure
    • Let’s Get in Touch
    • Members Only Library
    • Welcome To Our Homestead

cooking

What Does Food Security Look Like?

December 10, 2024 by Leigh Leave a Comment

If you live in America or really any industrialized country, there is a good chance you have a ton of holes in your food chain. The vast majority of Americans don’t even know what food security is, it’s just not something they think about. As long as they can get to the store and buy their food, they are happy. Unfortunately, when the pandemic hit, it was eye opening for a lot of people. They learned that having an emergency food supply isn’t just about a zombie apocalypse. This series is here to help you identify and start to fill the holes in your food security.
The Ultimate Homesteader’s Starter Bundle – Only $47!

Get the tools you need to stay organized, track profits, and manage your homestead with ease!

Includes:
✅ Schedule F Tracker – Simplify tax prep
✅ Profit Calculator – Track earnings
✅ Hay Calculator – Plan livestock feed
✅ Garden Journal – Digital & printable
✅ Herd Health Tracker – Monitor animal care
✅ Simple Budget – Manage finances
✅ Backyard Homestead eBook – Essential tips

$99 value – now just $47! Start your homesteading journey today!

Buy Now

Why Food Security Is Important

I don’t understand why so many people don’t think about where their next meal is coming from. It’s mind boggling to me how many people just go about their life with no thoughts to the future. Most people don’t have a plan if their house catches on fire, let alone what they are going to do if they lose their job. Preppers have caught a bad name due to being hyper prepared but also due to propaganda. But those of us that have lost jobs, homes, or other life altering events know how important it is to have a back up plan.
Not all emergencies look the same, nor are they all on the same scale. For example, losing a job could be catastrophic for one family, but not a big deal for another. A week without power could cripple a family that relies on freezers to feed their family. A cancer diagnosis could financially ruin a family. But all of these are emergencies. But by having food security, it reduces one part of their emergency. Even if it’s small.

What Is Food Security

To start, we need to figure out what food security means to you and your family. To me, food security means having the ability to source and acquire the food, water, and other necessities my family and animals need to survive, at a minimum. If you don’t know what that looks like, you came to the right place.

Save on Seeds

In order to start filling food security holes, you need to first identify them. Then you can start figuring out how to close those holes. Remember, we are trying to source these items. Are you on a special diet? What do you know how to cook? What do you like to eat? What kind of storage do you have? What do your animals need to eat? These are all very important questions in closing food security holes.

The Ultimate Homesteader’s Starter Bundle – Only $47!

Get the tools you need to stay organized, track profits, and manage your homestead with ease!

Includes:
✅ Schedule F Tracker – Simplify tax prep
✅ Profit Calculator – Track earnings
✅ Hay Calculator – Plan livestock feed
✅ Garden Journal – Digital & printable
✅ Herd Health Tracker – Monitor animal care
✅ Simple Budget – Manage finances
✅ Backyard Homestead eBook – Essential tips

$99 value – now just $47! Start your homesteading journey today!

Buy Now

Let’s start answering some of those questions

If you are on a special diet like a cardiac, diabetic, or even lactose intolerant, getting emergency supplies is going to be harder to do. There is a ton of carbs and sodium in long term, commercial foods. Preserving your own foods is ideal, but it’s not necessarily long term.

Can you cook? If not, having pre-made, commercial meals may be the way to go. Especially if your culinary skills are limited. However, I would highly suggest you learn to cook more and also learn about the fundamentals of cooking.

Are you a picky eater? Or have someone in your home that is picky? Then you need to make sure that you’ve got foods that they like or can tolerate. It’s cruel to tell someone, “sucks to be you” in an emergency situation. So make sure you’ve got foods that they like. A side note to this, if you buy a pre packed survival meal kit like this, please make sure that you like EVERYTHING in it. It may save you some money now, but if you don’t like beef stroganoff, don’t waste your money on it.

What kind of storage do you have? We are blessed to have a basement/garage combo that we were able to retrofit with shelves and turn a 12×12 area into our food storage room. We’ve got tons of shelves and supplies to help us out. Everything from canned goods to extra jars as well as commercial, long term storage items. If you aren’t that lucky, where can you store your emergency supplies? A linen closet? Under the beds?

Lastly, what do your animals need to survive? It seems that most people forget to make sure they’re animals will be okay in an emergency situation. That means making sure that you’ve got medications, food, and water.

Tractor Supply

Why is this so important to me?

Well, recently we had to replace our well pump. I know you’re thinking, “Leigh, a well pump isn’t about food and food security.” But it is. Without water, all things will die.

When we moved on to our homestead, we were told that the well pump was pretty new but to have a couple of pump switches on stand by because the power would surge and cause the switch to fail. The first night we were here, the water cut off in the middle of my shower. I had to use bottled water to finish washing my hair. I called my step dad and the old owner trying to figure out what happened. The switch failed.

If you are new to heating with firewood and are looking to master the finer points of it. We’ve got a great eBook that goes in depth of what tools you should consider, how and where to stack, how to build a fire and so much more!

Buy Now

For the next several months we dealt with the water randomly cutting off or the water stopping if we ran the back spigot. Multiple plumbers came out and no one knew how to fix it. Then one morning, the water cut off completely.

Logo 468x60

This is a big problem, without water you cannot drink, shower, water crops or animals. Since the other plumbers couldn’t figure out the problem, I decided to call a well plumber. We were showering at the stations because we had no water at home and we were giving our animals bottled water. There was also a winter storm bearing down on us that was supposed to hit that weekend. The stores were running out of water. In short, we were screwed if we couldn’t get access water.

The well plumbers came out and said it was the well pump. When we explained it was a brand new pump, they said that everything we were describing; running out of water, low pressure, etc were all because of the pump. Once it was replaced, we never had another problem.

PS: Shortly after the well pump was fixed, that winter storm hit and we lost power for three days.

Subscribe to Craft Beer Club Today!

So how does this relate to food security?

Simple: if you do not have water, you cannot cook, clean, drink, or survive. Without that well pump, our animals would die of thirst. 

Some of the steps we took after this incident was to make sure that we always have 5 gallon jugs filled. We also have a pump to get water out of them. Then we have several IBC and 55 gallon totes around the property that we fill for animal water.
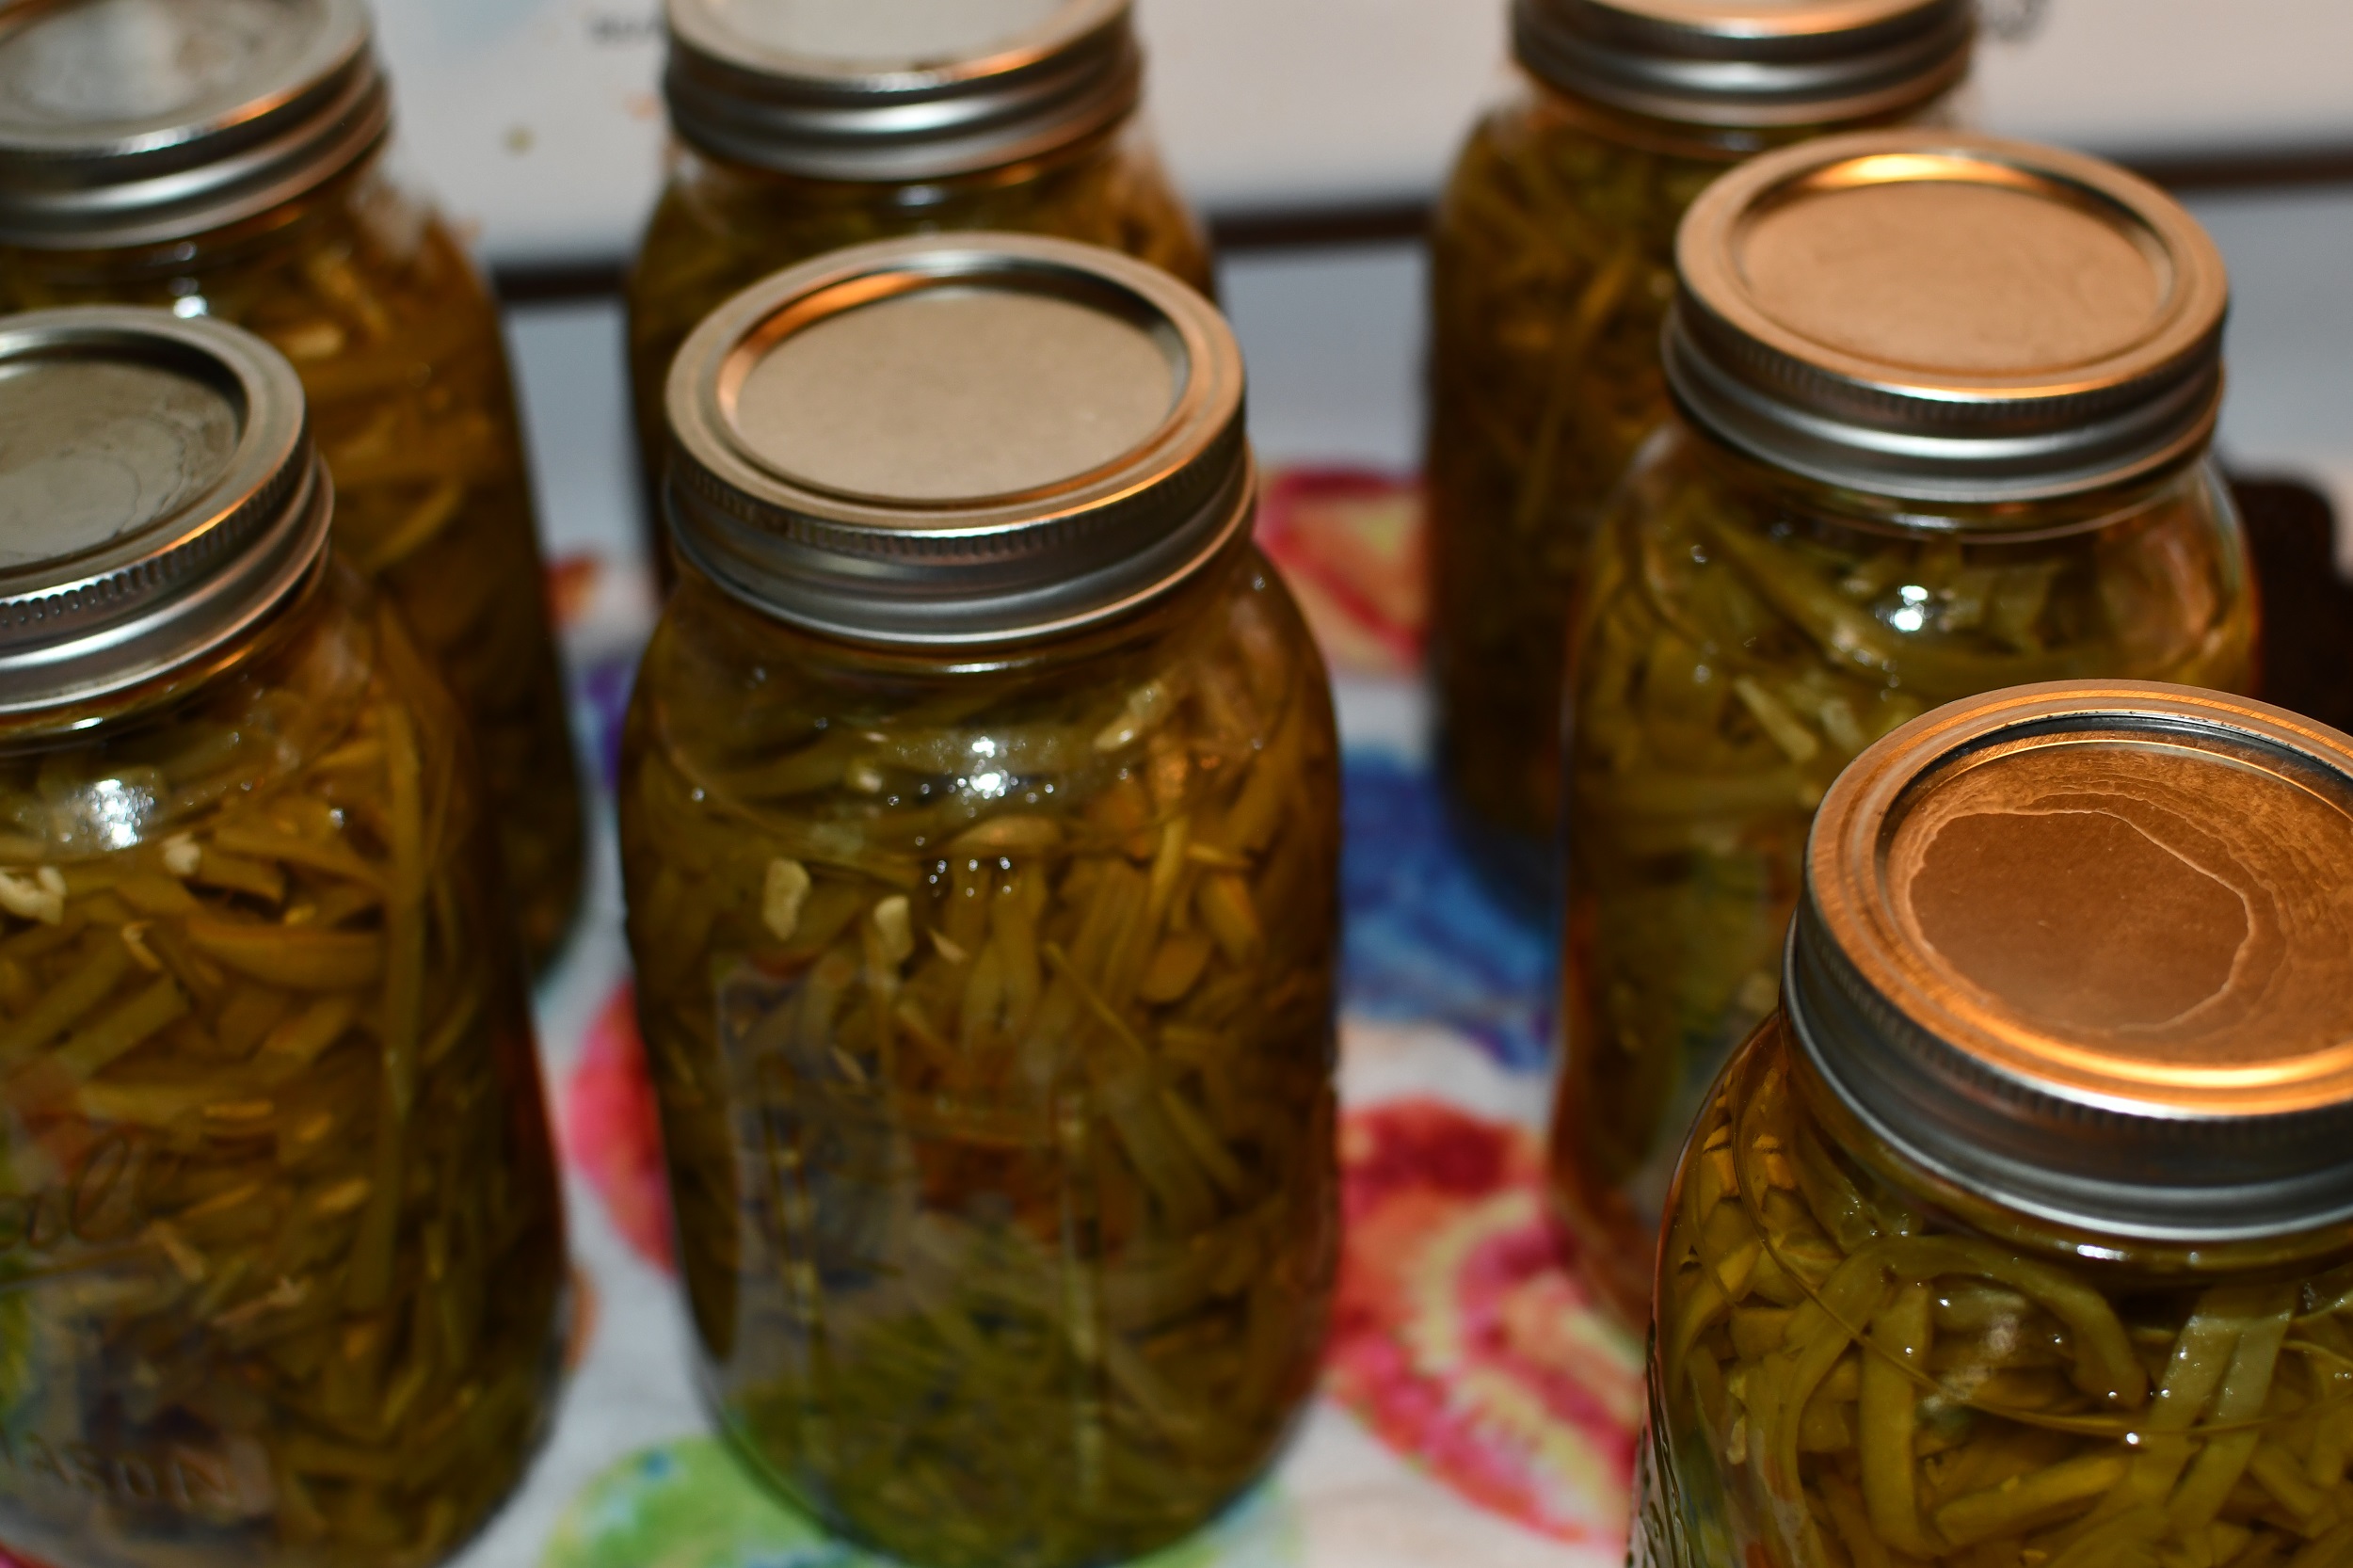
Our garden produces a lot of our veggies, if not all of them. This helps make sure that we have fresh veggies for today, but also canned veggies for later.

Then we have our animals, all of the animals on our homestead can survive off of what the homestead produces during the warm months. The chickens and ducks give us a ton of eggs and we’ve only selected dual purpose breeds so that we can butcher when we need to.

Our goats provide us with milk and we make our own cheeses, creamers, and even butter. We are also going to be purchasing Boer goats and breed them so that we can have meat from them as well.

Don’t live on a farm?

Don’t panic! Just because you don’t have a garden or animals, doesn’t mean that you can’t start preparing for an emergency! You can go on Amazon or Walmart.com and start looking at various long term, emergency food. We like Augason and Ready Wise, but do your research.

Also make sure you have manual can openers or keys like these. Oh and coffee!!!! Make sure you’ve got some form of caffeine because when the power goes out, nothing is better than hot coffee!

Food security includes water, food, and basic necessities like soap, medications, first aid, and clothes just to name a few things. So what can you do to start identifying holes in your food security and fixing them?

If you like the content I put out, feel free to buy us a coffee! It helps keep this site running, marketing and the goats in grain!

Buy me a coffee

If you like this post, feel free to share it and follow us below on our social media accounts!

  • Facebook
  • Pinterest
  • Instagram
  • YouTube
  • TikTok
  • Spotify
  • Threads

Filed Under: Emergency Preparation, Homestead Planning Tagged With: cast iron, Chicks, cooking, Eggs, food security, Goats, Homestead, kitchen, Welcome

JOIN TO OUR MAILING LIST!

Leave us your email to receive new posts and special offers for members only! Don't miss a thing!

Recent Posts

  • Fall Garden Guide
  • Top Mistakes With Goats
  • How To Bond With Your Goats

Our Homestead Buying Guide

October 26, 2024 by Leigh Leave a Comment

I’ve been getting asked a lot, “Where do you buy x?” So I figured I would take the time to list out where we buy the stuff for our goats, chickens, canning, seeds, garden stuff, and other odds and ends that we have used and really like. This is a VERY link heavy post, so here is our affiliate disclosure again. It doesn’t cost you a penny, but it does help us here on the homestead. The other thing is that I am not going to push you to buy anything that we have not already bought, tested and liked/loved. You don’t need that and to be honest, that’s not who I am. Here is the Homestead Buying Guide.

The Ultimate Homesteader’s Starter Bundle – Only $47!

Get the tools you need to stay organized, track profits, and manage your homestead with ease!

Includes:
✅ Schedule F Tracker – Simplify tax prep
✅ Profit Calculator – Track earnings
✅ Hay Calculator – Plan livestock feed
✅ Garden Journal – Digital & printable
✅ Herd Health Tracker – Monitor animal care
✅ Simple Budget – Manage finances
✅ Backyard Homestead eBook – Essential tips

$99 value – now just $47! Start your homesteading journey today!

Buy Now

PS: if you don’t have a Honey account and you shop online a ton, I highly suggest you download it. You can use my code here. They are great because it can automatically search for coupon codes and you earn cash back on purchases. I’ve earned $300 in the last year. It’s worth the minimal effort AND you can add items to your honey list which will tell you when prices have dropped or if it’s at the lowest price.

Livestock

Goats

You can read any of my posts involving my goats here.

goat kidding

Before we get too far into this, I have a great course on the basics of goat care. I call it Goat Crash Course: Goat 101. In this course, I explain things like types of shelter, types of feeds and hays, basic assessments and so much more! Check it out!

Buy Now

We get most of our goat gear from Tractor Supply. Their prices can be higher than a local feed store on some things but cheaper on others. For example; my local feed store has alfalfa pellets for $17.99/ 50# bag. Tractor supply has theirs for $19.99 as of this writing.

Buckets– We get these for feed, water, and so many other things. They are really useful.

Troughs- We use two different kinds. This one is the one we hang on the fence at different points to give them feed, alfalfa, or whatever else. We use this one for portability or if we are hanging a temporary feeder in a kidding pen for them.

Balling Gun– This helps us get pills down into the goats without having to worry about getting bitten. Yes, that happens a lot.

Tractor Supply

Hoof Trimmers- We’ve bought two of these, and I’m a fan of this one. It just seems sturdier and I like it better. BUT this one from TSC is fine too. It’s not that I don’t like it per se, I just prefer the orange one. If you’ve got some money to spend, I would HIGHLY suggest the Hoof Boss. I’ve seen it used and it does a fantastic job. It is on our wish list of things to buy.

Meds- Now, I’m going to say this. We treat a lot of aliments on our homestead. But we also have an amazing vet that we can call any time… almost. But having a few meds on hand is going to save you a ton of heartache. Meds to get from a vet: Thiamine, Banamine and a good antibiotic. Things to have on hand that you can get from a feed store: Red Cell, Probiotics, Safeguard or Cydectin (or your choice of dewormer), electrolytes, Iron, B-complex, and Copper Wire Bolus. On the copper wire, make sure you get kids or adults based on what you have.

Chickens

You can read about how we brood chickens here. The list below are links to the items we have bought.

Incubator- We use this one and have had great success with it. The only thing I don’t like is the size. I wish it were bigger but beggar and choosers.

Brooder lights- We have used CHE’s like this one, but it can cause the chickens to attack other chickens. So a red light and housing is what you really need. We also use pine shavings for bedding for both the goats and the chickens.

Tractor Supply

Feed- When we have chicks, we start them on a medicated feed. This helps with cocci and other harmful organisms. Remember, you really only need a week or two worth of this feed. What we do is feed approximately 1#/ chick. If you have two chicks, you would need 2#, if you have 50 you need 50#. This is not perfect, it’s really a guess. When we do our meat chickens, we buy one bag of medicated chick start and than it’s regular chick feed after that.

Feeders/waterers- We use this feeder when they are little, and this one when they are bigger. However! If you’ve got some money to spend or you are only interested in buying one thing, this is the feeder you need. I love it! AND we can hang it, which really does decrease the mess. It also works fantastic with the ducklings.

When chicks are little, they need a ton of water, but they are also extremely messy. So finding one that isn’t going to make a mess but also be easy to fill has been difficult. This waterer is good, not great, but it will get the job done when they are little. As they get bigger, we use this one. We found that the metal ones did not hold up well at all. If you have a waterer you love, let me know in the comments.

House Supplies

Canning

Alright! I’ve been waiting to do this one!

Canners- This is my water bath canner and this is my pressure canner. I’ve got two of the presto pressure canners and I love them. One of these days, I am going to get this mack daddy. I can process 19 quarts a time. Which replaces BOTH of my other canners. The price tag is steep at around $500 but it’s got a life time warranty and it’s worth every penny.

Logo 468x60

Jars- All I’m going to say is this: when you think you have enough, double it. Then double it again. Here’s why. I have over a thousand jars. When I can, I can for an entire year. So when I am figuring out how many jars of tomato sauce I need for the year, it’s not a couple dozen. I can 104+ quart jars. When I can green beans, it’s not a couple pints. It’s 146+ quarts and 146+ pints. Same with corn. Soups and stews is another big ticket item in my house. We are talking 200 quarts and 200 pints-ish. Sometimes it’s more. That’s already 600 quart jars that I need. So while you may not need that many, be prepared that you will need more than you think.

Funnels- Yall, you will never, and I mean never have enough funnels. I love the metal funnels and I have at least 6 of them. Make sure to get wide mouth and regular!

Jar grabby things- Get a bunch of these too. You will lose them or the handles will break while you are mid canning.

https://www.wickedgoodcupcakes.com/shop-online/thinking-of-you-boxes

Books- Canning cookbooks are some of the best investments that you can make. This book is hands down the best period. Buy it. She’s got a ton of amazing soups in there and they are divine. This is another really good one with some great recipes. If you are new to canning, I will recommend getting a Ball Book. There is a ton of great information in them. BUT after you get some experience, or after doing your own research, take it with a grain of salt. Some of the recipes are extremely convoluted and contradictory. Lastly, I’m not a Prepper, per se. BUT I do put up my own food because after the pandemic, I realized that relying on the grocery store isn’t a super smart idea. That being said, this book has some great recipes, ideas, and more for being self reliant.

Check back for more items as we find them and add them to the list!

If you like this post, feel free to share it and follow us below on our social media accounts!

  • Facebook
  • Pinterest
  • Instagram
  • YouTube
  • TikTok
  • Spotify
  • Threads

Filed Under: Animals, Canning, Chickens, Goats, How To's, Our Homestead, Pigs, Projects Tagged With: Canning, cast iron, Chickens, Chicks, cooking, Eggs, Goats, Homestead, kitchen

JOIN TO OUR MAILING LIST!

Leave us your email to receive new posts and special offers for members only! Don't miss a thing!

Recent Posts

  • Fall Garden Guide
  • Top Mistakes With Goats
  • How To Bond With Your Goats

How To Start Canning

October 22, 2024 by Leigh 1 Comment

Y’all! It’s canning season! I am beyond excited! Over the next few months I will be sharing with you ALL (okay, most) of the canning recipes that I have accumulated over the years. From things like salsa and broths to more complex stews and soups. I’ll also show you how we can basics like corn, green beans, and beans. But today? Today I want to talk to you about how to start canning.

How To Start Canning

I have always been fascinated by the idea that I didn’t have to go to the grocery store to buy food. You mean I could have a garden and animals that provided food for me? And I could put in a little work and have healthy food throughout the year. I also didn’t need a million freezers to store food and have to worry about a power failure? So I started researching, because that’s what I do when I don’t understand something.

I found out that canning is actually pretty simple. Put the food in a jar, tighten, and put it into a waterbath canner or pressure canner, and set the timer. The hard part comes in knowing which way to process the foods and for how long. If you don’t allow the “pearl clutchers” to get in the way, you can have shelves and shelves full of healthy food that will last for a couple years.

With this knowledge in hand, I went to work. I started with canning apple sauce and over the years, I have canned hundreds, if not thousands of jars of food.

how to start canning

Take the fear out of canning

What do I mean by pearl clutchers? Well, these are the people that whole heartedly agree that what the USDA, FDA and Ball say, you must do. There is a ton of fear about canning that is perpetuated by these organizations. They make it feel like the only thing you can can are jelly, jams, and a couple of soups. To give you an example: The Ball Book Of Canning says you cannot can chili with beans but on the next page, you can can ham and bean soup. That doesn’t make any sense.

Tractor Supply

So my take on it is this: if the store can put it in a can, or Grandma didn’t kill her entire family, then it’s probably okay to eat. If I follow basic kitchen cleanliness while I cook, follow proper canning times? It’s probably okay. When I take the jar off the shelf to make it, and it looks good, smells good and I boil it for 10 minutes? It’s probably okay to eat.

how to start canning

Random tangent

The latest update from the CDC says that in 2018 there were 242 cases of botulism in the US. Of that, only 18 were foodborne. Only 3 of those cases were linked to home canned food. You can read the full article here. Does it happen? Absolutely. But there are 329.5 million people in the US as of 2020. That means that your chance of consuming botulism is pretty close to zero.

Logo 468x60

Do your research, find solid recipes, and get to canning. It will be okay.

Let’s Get Started

So you have decided to take the plunge and start canning. But what do you need to get started? My friends over at Southern Dream Homestead has a great blog post on canning and I highly suggest it. But the short version is this:

You will need a huge pot that can handle a fair amount of jars. Most home canners use something similar to this one. I like it simply because I can use the pot for various other things. When I am pressure canning, I use huge pots for soups and stews making 36 Quarts at a time. This can also be used as an old fashion stock pot and as a water bath canner. The utility is great!

A good pressure canner will go a long way. I have two of them that I run at the same time during canning season. This one from Amazon is about $130 as of this writing. Shop it around and look at Walmart, Target or other stores. They may have it cheaper. Edit to add: Here is a link for a pressure canner from Walmart.

Arguably, the most important thing when it comes to canning is great recipes. This is the cookbook that I refer back to every year and I love it. I have made several of soups/ stews in this cook book and they are absolutely divine. The chicken chowder and enchilada soup are family favorites. Do yourself a favor and get either the hardback or spiral version. Paperback cookbooks do not last long in the kitchen.

Some other cookbooks I like are: Ball’s Cook Book, The Homestead Canning Cookbook, and Meals In A Jar.

I also have a quick reference guide that you can download get in my members only section. Sign up below and you will be emailed the password.

Lastly, you need tools. This one is a bit more expensive, but the tools feel a little more quality than some of the others. Regardless, you should probably get a couple sets of jar grabbers, funnels, ladles, etc. This is a good kit, but always get extra jar grabbers and funnels. You will always need more than you have.

You may have noticed that I left out jars. Get Ball Mason Jars, period. Yes, you may have some success with other jars. You may even find some obscure brand that holds up amazing. However, Ball is tried and true for a reason, their jars will literally stand the test of time. But PLEASE don’t buy them from amazon. You are going to pay through the nose for them.

The best place I have found for mason jars is Wal-Mart. Depending on where you live, your prices will vary, but I can get a case of quart mason jars for around $16 and a case of pint for $12. Half gallons come in a 6pk for $12. Amazon wants to double or triple that price. So shop around. Oh, and stock up on lids whenever you can find them.

Save on Seeds

Finally, get yourself some good sturdy shelves. You do not want to spend an entire summer canning your heart out, getting burns, and sore muscles to have your plastic shelves fail. I’ve got a great tutorial on how we built our canning shelves and after several years, we still love them.

So get your supplies and get started in the kitchen. I promise you, when you don’t want to sweat your butt off making dinner, that can of chili or chicken noodle soup is going to taste amazing. You can find my make ahead pickle brine and green bean recipes by clicking the links. Those are two very easy ways to get started on your canning journey.

how to start canning

If you like this post, feel free to share it and follow us below on our social media accounts!

  • Facebook
  • Pinterest
  • Instagram
  • YouTube
  • TikTok
  • Spotify
  • Threads

Filed Under: Canning, Canning Recipes, How To's Tagged With: Canning, cooking, Homestead, kitchen, Welcome

JOIN TO OUR MAILING LIST!

Leave us your email to receive new posts and special offers for members only! Don't miss a thing!

Recent Posts

  • Fall Garden Guide
  • Top Mistakes With Goats
  • How To Bond With Your Goats

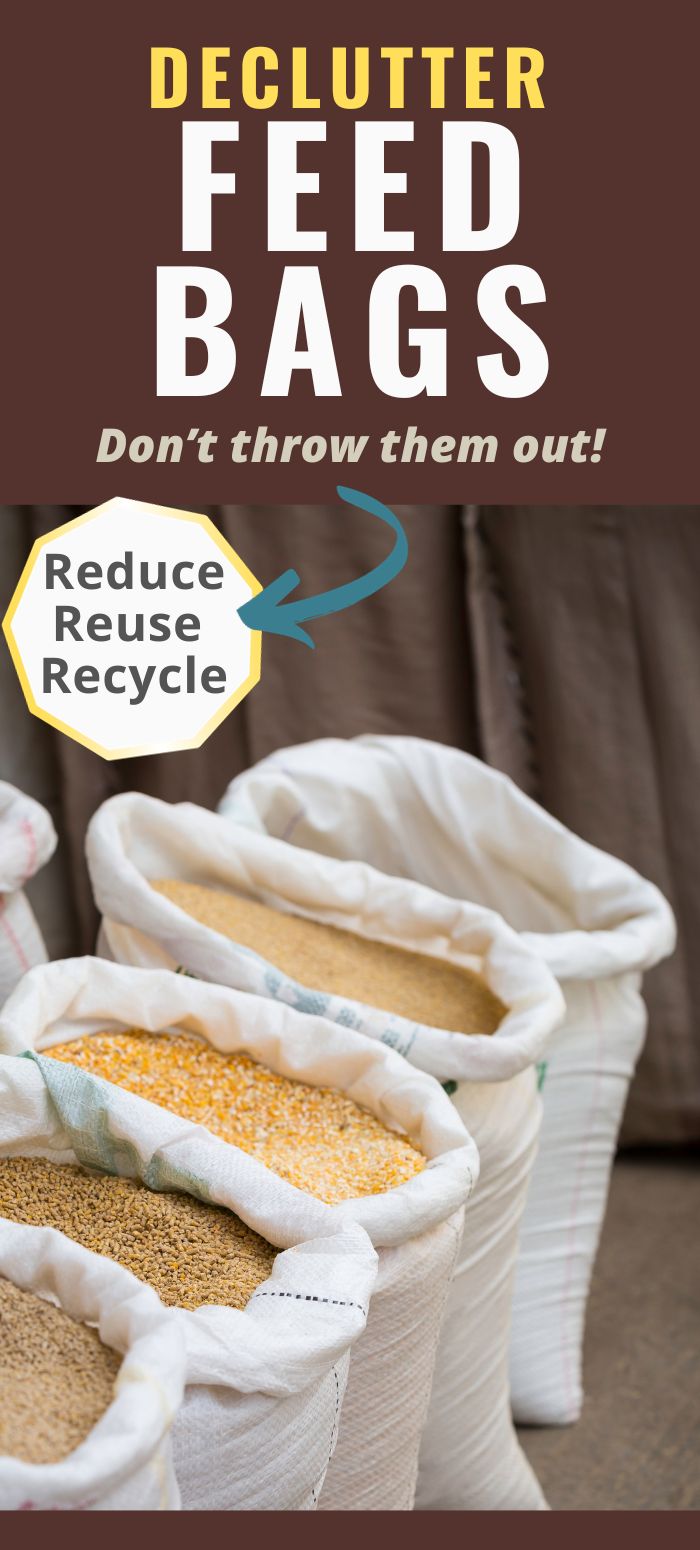
What To Do With Those Feed Bags

October 1, 2024 by Leigh Leave a Comment

How many feed bags do you have laying around? Do you just throw them away? I’ve always been one to save dog food bags. I don’t know why. Probably the same reason so many people save shopping bags that they never, ever reuse. At least not at the rate they save them. But after cleaning up the basement for the 9 millionth time, and seeing a ton of bags, I decided enough was enough.

goat kidding

Before we get too far into this, I have a great course on the basics of goat care. I call it Goat Crash Course: Goat 101. In this course, I explain things like types of shelter, types of feeds and hays, basic assessments and so much more! Check it out!

Buy Now

What To Do With Those Feed Bags?

But how many bags do you really need? Well, according to my brain, I need all of them. It’s ridiculous. I cannot throw them away. No matter how hard I argue with myself about the fact that I don’t need to save every single one, I end up rolling it up and stowing it in another feed bag. So I started brainstorming, searching and the list below is how we reuse feed bags.

Don’t judge!

Why I save them

I feel like they are really good bags. They are made to hold 50# of food or more! That means they can hold all sorts of things. Plus, let’s be real here, you put anything sharp in a regular trash bag, even the heavy duty ones, and you are blowing a hole in it. Now, all that trash is all over the place. Not cool.

Another reason I am in favor of saving these bags is because I’ve already paid for them. Think about it, I bought the feed but I’m going to throw away a perfectly good bag because it’s empty? Absolutely not. Couple that and the fact that things are getting more and more expensive? I have all the reasons I need to hold on to and reuse feed bags.

Ways To Reuse Feed Bags

Trash Bags– Seriously, these make the most amazing trash bags! I don’t know where you live but trash bags by me are $15 for an 80ct box. When I am going and decluttering, I will reuse feed bags before I even touch my regular trash bags.

Tote Bags- Kathy over at Beyond The Chicken Coop has a great tutorial for making tote bags! These are seriously adorable and I will be making some! I love that I can make different sizes based on what I need. Plus, I know that if I can make the seams strong, they will be strong because again, they hold 50# of feed!

Hay Feeders- Danielle At DIY Danielle, talks about some of the pros and cons of doing it this way. I have found that it works well, until it doesn’t. I love the portability of this style bag, I can nail it to a tree or hang it in the goat barn. But it’s still only going to last so long.

Organizer- Yes, you read that right. We will use these bags to put all of the same type of stuff together. For example: We will store all of our nursery pots in a feed bag. Or if we are going the the back of the property to cut trees, we will put the bar oil, fuel, hatchet, etc in the bag. Now, we take them out immediately after so that we aren’t mixing chemicals if one should mysteriously open. BUT to get all those tools out to the area we are working now only takes one trip.

Logo 468x60

Planters- We have grown some amazing potatoes, carrots, and onions in these bags. But be sure to use the plastic ones for this! Patrick and Jessie at Southern Dreams Homestead has a great and in depth post about growing in containers that will help you here.

Tarps- Yea, I wasn’t sure about this one but the idea is definitely there! Sweet Meadow Sampler has a great tutorial on it. We will be trying it soon though.

https://www.wickedgoodcupcakes.com/shop-online/thinking-of-you-boxes

Flooring– I personally would do this in the winter to make clean out in the spring easier. One of the biggest headaches we have come spring, has nothing to do with the garden. It’s cleaning out the barn and coop. Having these bags would not only insulate them from the ground, it would also help clean up all the pine shavings, poop, urine and more.

Compost- it is feasible that you could compost in these bags. The plastic would trap heat and allow break down faster. The thick paper bags are compositable themselves. In theory (I have not tried this yet) you could fill a bag and empty it in your compost pile. Or you could use the bag AS your compost pile. You can go more in depth about composting with The Homestead RD, Katie has some truly amazing posts about compost. In the post I linked above, she also uses feed bags as planters and can tell you how to do it.

Weed Suppression– We have used the paper feed bags to line the bottoms of our raised beds. It works about the same as using cardboard but it is FAR more readily available for us. I don’t know that I would use the plastic ones through.

Banner 468x60

Wood- We will put our small pieces of scrap wood in these bags to help keep the basement cleaned up. We have a ton of projects around here and I’m not going to throw away or burn a piece of good wood just because it’s a smidge too small. By putting it in the feed bags, we reduce clutter and reuse the bag.

Projects– Sometimes when we have multiple projects going on, it’s hard to keep everything separated. So I will put all the supplies for a project in a feed bag and then write on the front what it’s for. This has helped a ton when it comes to organization.

If you like the content I put out, feel free to buy us a coffee! It helps keep this site running, marketing and the goats in grain!

Buy me a coffee

If you like this post, feel free to share it and follow us below on our social media accounts!

  • Facebook
  • Pinterest
  • Instagram
  • YouTube
  • TikTok
  • Spotify
  • Threads

Filed Under: Animals, Chickens, Goats, How To's, Pigs, Projects Tagged With: Canning, Chickens, Chicks, cooking, Goats, Homestead

JOIN TO OUR MAILING LIST!

Leave us your email to receive new posts and special offers for members only! Don't miss a thing!

Recent Posts

  • Fall Garden Guide
  • Top Mistakes With Goats
  • How To Bond With Your Goats

7 Most Common Mistakes For New Homesteaders

September 21, 2024 by Leigh 4 Comments

So you’ve bought your property. Congratulations! You have been dreaming, scheming, planning, watching YouTube, and reading blogs like this one to try and figure out all the things you want to do on your homestead. Once you’ve moved in and the dust has settled, you look around and ask, “What now?” If you’re anything like the the rest of us mere mortals, you’re going to jump in with both feet. Now, you are overwhelmed, underprepared and stressed to the max. It’s like I know, right? Welcome to my life for the last year. So here is my list of 7 most common mistakes for new homesteaders, and how to avoid them.

The Ultimate Homesteader’s Starter Bundle – Only $47!

Get the tools you need to stay organized, track profits, and manage your homestead with ease!

Includes:
✅ Schedule F Tracker – Simplify tax prep
✅ Profit Calculator – Track earnings
✅ Hay Calculator – Plan livestock feed
✅ Garden Journal – Digital & printable
✅ Herd Health Tracker – Monitor animal care
✅ Simple Budget – Manage finances
✅ Backyard Homestead eBook – Essential tips

$99 value – now just $47! Start your homesteading journey today!

Buy Now

Mistakes For New Homesteaders and Quick Fixes

Starting Too Big

We all want to hit the ground running when we start our homesteads. Before you know it, you’ve got chickens, ducks, turkey, rabbits, cows, and goats. Your garden is huge but not producing. The goats are sick all the time. You have no time to enjoy the life you are trying so hard to build.

Downsize– Seriously, I know you wanted all the critters when you moved in and the thought of selling or butchering them is abhorrent, but you need to think about where you are and what you are doing. If you are struggling with caring for them, you aren’t giving them their best life. So downsize the herd and move on.

cucumber seedling

Get Help– If you are able to, enlist the help of kids, family or neighbors. Worse case? Hire someone until you get it figured out. This can get expensive, but if you don’t want to downsize, there are plenty of 4H and FFA kids that are looking for farm work.

Pay someone– I know that this seems counterproductive to the whole homesteading thing, but consider it. Jared and I work full time, plus have part time jobs and homeschooling that take up a lot of time. The exterior of our house desperately needs a coat of paint, but we just don’t have the time to do it. So we are hiring it out. It’ll be the same when we put in our property fencing and expand the goat pens. We could absolutely do it, but paying someone else to do it frees up our time to do something else.

Logo 468x60

Not starting at all

Paralysis by analysis is a thing. You want to do all of these things but you get so overwhelmed with choices, decisions and options, that you do nothing. You’ve got a list that is three miles long but you’re not really sure which thing is the best to start with.

Pick one thing– When we first moved in, our list of the things we wanted to do was incredibly long. I had 3 legal pad filled with notes, lists, and more. What made it easy to start was that we prioritized a few things off that list. We got a chicken coop and chicks. We started clearing land and debris. Then we got goats. THEN we got overwhelmed.

two goats

Infrastructure– A lot of people don’t think about infrastructure when they are setting up their homesteads. They have this idea in their head about what they want but no idea how to execute. My suggestion is to come up with your Homestead Infrastructure and then start making plans based on that.

Not having a plan

You jumped in with both feet and no plan. You are stressed, overwhelmed and ready to throw in the towel. You ordered the chicks but don’t have a coop. The seedlings that you planted in January have no home because there is no garden. You lost your plan, your goals, and your mind

Write it down!- I talked about goal setting here. But while goals are great, if you don’t have a plan, they’re not really a goal. It’s a dream. So come up with a big picture goal/ dream and start laying out how to achieve it.

Save on Seeds

Create A Budget– Look into how much those goals, dreams, and plans are going to cost. Then start working it into your budget. This life is expensive, but no one wants to be shocked when they go to start building a barn and end up thousands of dollars in the hole.

Lack of Organization

I have lost two bags of chicken shrink bags. I’ve misplaced my goals list and plan. Don’t even get me started about the basement. If I don’t have a list, things don’t get done. Or I my ADD kicks in and I have cleaned the whole house, but it doesn’t look like it.

Declutter– Yes, I know. You know how to declutter but you just don’t have the time. Well, let me ask you this? How much time have you wasted looking for things? How much money have you wasted reordering things because you can’t find them? Go ahead and declutter.

Make lists– Make the lists, check it twice and then put it on your fridge!

The Ultimate Homesteader’s Starter Bundle – Only $47!

Get the tools you need to stay organized, track profits, and manage your homestead with ease!

Includes:
✅ Schedule F Tracker – Simplify tax prep
✅ Profit Calculator – Track earnings
✅ Hay Calculator – Plan livestock feed
✅ Garden Journal – Digital & printable
✅ Herd Health Tracker – Monitor animal care
✅ Simple Budget – Manage finances
✅ Backyard Homestead eBook – Essential tips

$99 value – now just $47! Start your homesteading journey today!

Buy Now

No Accountability

Let’s be real for a second. We think we want accountability, but we really don’t. But we REALLY do. Most of us are self starters and are excited to work on new projects. But when we get bored, disinterested or defeated, it’s easy to just walk away from it. If we don’t have someone to say no, do not get that herd of twenty goats, you’ll never get ahead.

brooder full of baby ducks and some chicks

Respect the no– When I brought up getting pigs to Jared, he flat out told me no. Not because he doesn’t want them. He does. He said no because we don’t have fencing, a dedicated spot, or anything else. We’ve got two pregnant goats as well as all the chickens. So I respected the no.

Learn to self motivate– While I struggle with wanting everything right now and ADD. Jared struggles with motivation. He has been working on self motivation for a while and is doing better. There are days when he’s just not feeling it. That makes it hard on all of us because he is the main builder and heavy lifter on the farm. Figure out what you can do to motivate yourself and do it, all the time.

Banner 468x60

Education

We all know that education is key to everything. If you don’t know how to do something, life is going to get hard if you’re not willing to learn.

Pick a subject– and become an expert on it. Or at least as much as an expert as you can. If you pick goats, good luck. You will never be an expert. Find someone who is an expert and learn as much as you can from them. Our neighbors have been farmers their entire lives, who better to teach us how to be farmers?

Subscribe to Craft Beer Club Today!

Don’t be afraid to learn as you go– Get a solid base knowledge of your topic and then put it to work. Jared was not a carpenter before this homestead, now? He has built chicken tractors, barns, and so much more. He built my beautiful greenhouse. Don’t be afraid to learn.

Not knowing and using your resources

I am guilty of this one. Our neighbor has goats. Have I ever asked him for help? Nope. Our other neighbor raised meat chickens for years. Did I ask him for help? Nope. It’s a flaw that I’m still working on.

jars of green beans getting ready for the canner

Social media and YouTube are all great resources, but nothing is better than having someone walk you through the process. I can watch something one time and tell you how to do it. But I don’t actually know how to do it, until I’ve done it.

Don’t Get Discouraged

There is a reason you wanted to homestead. Remember that reason at every turn. When things get hard, remember why you chose this life. When the chicken knocks over a $80 bottle of goat antibiotics because your child forgot to shut the garage door? Remember you wanted the chickens…. and the child. As you progress with your homestead and get discouraged about all the things you need to do, look back and see all of the things that you’ve already done. Even if that’s only managing to keep the children alive.

If you like the content I put out, feel free to buy us a coffee! It helps keep this site running, marketing and the goats in grain!

Buy me a coffee

If you like this post, feel free to share it and follow us below on our social media accounts!
  • Facebook
  • Pinterest
  • Instagram
  • YouTube
  • TikTok
  • Spotify
  • Threads

Filed Under: Animals, How To's, Our Homestead, Projects Tagged With: Chicks, cooking, Goats, kitchen, Welcome

JOIN TO OUR MAILING LIST!

Leave us your email to receive new posts and special offers for members only! Don't miss a thing!

Recent Posts

  • Fall Garden Guide
  • Top Mistakes With Goats
  • How To Bond With Your Goats

Homestead Daily Schedule

August 13, 2024 by Leigh Leave a Comment

On our homestead, this looks a little different than most. Due to our work schedules, one of us is gone 48 of 72 hours. Sometimes more. However, the goats still need to be milked, fed and let out. Chickens and ducks still need feed, water, and be let out. Dogs are also hungry and need to go to the bathroom. And all the other chores need to be done. So regardless of who is home, the daily schedule looks pretty much the same.

The Ultimate Homesteader’s Starter Bundle – Only $47!

Get the tools you need to stay organized, track profits, and manage your homestead with ease!

Includes:
✅ Schedule F Tracker – Simplify tax prep
✅ Profit Calculator – Track earnings
✅ Hay Calculator – Plan livestock feed
✅ Garden Journal – Digital & printable
✅ Herd Health Tracker – Monitor animal care
✅ Simple Budget – Manage finances
✅ Backyard Homestead eBook – Essential tips

$99 value – now just $47! Start your homesteading journey today!

Buy Now

What Is Our Homestead Daily Schedule?

As I mentioned above, our days are set up on a 3 day rotation. On the first day, I go to work and Jared is the responsible party until he goes to work the next day. Day 2 is when I come home and handle my portion of the homestead chores. On day 3 we are both home and try to squeak out as much time together as possible.

Day 1 Daily Schedule

This is my work day, so Jared is home with the boys. He usually gets up with me and we drink coffee and hang out for a few minutes before I head to work. Sometimes, he will tell me about what he has planned for the day. But more often then not, I don’t really care per say. The way I see it, he is a grown ass man and knows what he needs to do for the day. Unless there is something pressing, I don’t worry too much about what he’s doing.

That being said, most of the time he is working on whatever project we are doing. In the summer, it’s usually firewood. In the winter, it’s usually household projects. Spring is reserved for garden projects and fall is for yard clean up.

He also makes sure that the boys are doing their school work and the house doesn’t burn down.

Day 2 Daily Schedule

This is the day that he goes to work and I am coming home. Normally, I get home a little later in the morning. After getting myself cleaned up and my stuff put away, I get the boys started on their school work and I start working on whatever inside projects need to be handled. Sometimes this is blog or household work. Other times this could be getting seeds together and planted. It really depends on what the season is.

But I can tell you that the day after a 24 hour shift is left really loose. I have run calls all night and come home with a pile of chores that HAVE to get done and it’s awful. Instead, we give ourselves and each other grace when it comes to the day after shift. We just don’t put a lot of stuff on ourselves.

That being said, the goats still need to be checked and fed. Chickens and ducks still need to be fed and let out. The garden still needs to be harvested, planted or maintained. But we don’t stress about getting the to do list done.

Day 3 Daily Schedule

For me, the day starts around 8am. Blu gets her morning meds and mom needs coffee. The first set of dogs are let out and showers start. I will usually start a load of laundry and work on it throughout the day.

If I have goats in milk, my day starts a little earlier so that I can get them milked before they are screaming for their food and to be let out. I also do a quick glance at the herd to make sure everyone is healthy and happy.

After I get the goats done, I am in the garden first thing to beat the heat. I try to get things harvested before the heat of the day really hits. I will also try to get the first batches of preservation going. Whether it’s dehydrating tomatoes or squash or getting a canner filled. Depending on the season, I may be planting more in the garden.

I will also start the boys on their homeschool stuff for the day. As the day heats up, I scramble into the house to keep from overheating (y’all the Georgia heat is no joke!). I will work on the blog or general household tasks until it cools down enough to be able to go back outside.

Then it’s dinner time. After dinner, the boys take care of their chores. I finish up laundry and head to bed, where I read for about 4 hours.

Homesteading Daily Schedule With Kids

One of the biggest issues that I see new homesteaders, and hell even parents, making is that they don’t give their kids chores. You will overwhelm yourself and your partner if you do not let those kids earn their keep. We have a pay to play rule which means that if you want to play video games, watch TV or do what YOU want to do, you have to “pay” for that by doing your chores, school work, etc. So make sure that your kiddos are helping.

After everyone is done and animals are fed, we start working on school work, this is usually around 930-10. Jared and I have different views on this. Usually I let them unschool and Jared is more structured. Unschooling is when the child directs what they would like to learn about. I feel like this gives them the opportunity to learn about the things that interest them and helps them learn better. Jared prefers to help them with “normal” school work.

Neither way is wrong and the boys seem to enjoy having the flexibility. Win Win.

We get them involved with various aspects of homesteading to not only teach them how to do things that are necessary for survival if the SHTF but also because this is invaluable information. And this still counts as their schooling since they are learning things like how to follow the instructions on how to put together a metal shed. Or how much firewood makes a cord and then measuring the stack that they’ve made. They also get crash courses in animal husbandry if an animal gets sick and needs medications. They’ve also been a huge help in the garden and ask a ton of great questions. Most that I don’t have an answer to, so we ask google a lot of questions.

Don’t Beat Yourself Up

One of the things that I see a lot of new homesteaders do, especially those of us that work off farm, is that they feel like they have to do ALL the things, RIGHT NOW! That can’t be further from the truth. In fact, the opposite is more true; you have time. I talk about homesteading goals and preparation here, but the short version is figure out where you want to be, and take small actionable steps to get there.

Homesteading, while hard work, should NOT be so stressful that you don’t want or can’t do it. You don’t have to get everything done right now! Take a breath and give yourself kindness and grace to make at a reasonable pace. You don’t need to burn yourself out within the first year.

If you like the content I put out, feel free to buy us a coffee! It helps keep this site running, marketing and the goats in grain!

Buy me a coffee

If you like this post, feel free to share it and follow us below on our social media accounts!

  • Facebook
  • Pinterest
  • Instagram
  • YouTube
  • TikTok
  • Spotify
  • Threads

Filed Under: Animals, Canning, Chickens, Garden, Goats, Homeschool, How To's, Our Homestead, Pigs, Projects Tagged With: Canning, cast iron, Chickens, Chicks, cooking, Eggs, Goats, Homestead, kitchen, Welcome

JOIN TO OUR MAILING LIST!

Leave us your email to receive new posts and special offers for members only! Don't miss a thing!

Recent Posts

  • Fall Garden Guide
  • Top Mistakes With Goats
  • How To Bond With Your Goats

Can Homesteading Save Money

August 6, 2024 by Leigh 2 Comments

We can answer this right now, no. Homesteading will not save you money. In fact, homesteading will cost you money. A lot of money. In the first year we were on our homestead we exhausted our emergency fund four separate times. Can homesteading save money? No. Not at first. But in the long run, it will absolutely save you money. Just maybe not in the ways your expecting. Be sure to read to the end for the “pay offs” I’m talking about.

The Ultimate Homesteader’s Starter Bundle – Only $47!

Get the tools you need to stay organized, track profits, and manage your homestead with ease!

Includes:
✅ Schedule F Tracker – Simplify tax prep
✅ Profit Calculator – Track earnings
✅ Hay Calculator – Plan livestock feed
✅ Garden Journal – Digital & printable
✅ Herd Health Tracker – Monitor animal care
✅ Simple Budget – Manage finances
✅ Backyard Homestead eBook – Essential tips

$99 value – now just $47! Start your homesteading journey today!

Buy Now

Why Should You Homestead Then?

Homesteading is not necessarily about saving money. Sure, there are somethings that we have saved a ton of money on like eggs, milk, and chicken.

We no longer buy eggs because our chickens have solved that problem. We don’t have to buy chicken at the grocery store because we butcher our own. We don’t buy milk from the store unless we run out. But when you look at the $100/month we have saved by how much we have spent? We are solidly in the red.

Spend More To Make More?

Because the farm is an LLC, which I highly recommend you do, we are able to write off a lot for taxes. That being said, our first year’s return was eye opening. We spent over $3,000 in vet bills and another $5,000 on feed. That was only in six months. The following year we doubled that. That doesn’t include the well pump that went out, or the water heater. Or all the fencing and structures for the goats and chickens.

But homesteading is not about saving money. It’s about living off the land, having livestock, learning new skills, and being self sufficient. Of course homesteading means different things for different people.

The Ultimate Homesteader’s Starter Bundle – Only $47!

Get the tools you need to stay organized, track profits, and manage your homestead with ease!

Includes:
✅ Schedule F Tracker – Simplify tax prep
✅ Profit Calculator – Track earnings
✅ Hay Calculator – Plan livestock feed
✅ Garden Journal – Digital & printable
✅ Herd Health Tracker – Monitor animal care
✅ Simple Budget – Manage finances
✅ Backyard Homestead eBook – Essential tips

$99 value – now just $47! Start your homesteading journey today!

Buy Now

Homesteading Is A Long Game When It Comes To Saving Money

What I have found is that homesteading is a long term goal and commitment. You are probably not going to save money your first or your second year. If you are starting your homestead from the ground up, you will probably not see a positive until year five. But it really depends on your goals. If you want your homestead completely self sufficient but you are starting from scratch, it will take time. If you came into a property that has fencing, a barn, and garden. You are probably already ahead of the game.

Why Homesteading Doesn’t Save Money?

The reality is that you are going to spend money at first. Rarely, though it does happen, are you going to stumble onto a property that is absolutely perfect for you. You are going to have to spend money to make that property the way you want it.

I preach the importance of setting goals and figuring out your WHY. But probably the most important thing is to define what your vision of a successful homestead is. This is no different. When you are trying to set up your homestead, you want to make sure that you aren’t wasting money on things that don’t matter in the long run.

While you may not see a big financial gain, you will see the “pay off” in other areas.

When Does Homesteading “Pay Off”?

For us, homesteading started to pay off within the first year. But it’s probably not the way you’re thinking. When we bought our property, we defined, very quickly, what a successful homestead meant, and then wrote down our year one, five and ten year goals. That’s when we started to see the “pay off.”

Chickens Doing Double Duty

The pay off was a significant decrease in fleas and ticks. This was because the chickens free ranged and took care of those bugs. That meant that Jared and Jaxson weren’t being eaten alive. This made them happier and more likely to be outside.

The chickens also helped break up the compacted soil in the garden spaces. They ate the grubs and bugs that could destroy the next years crops. They’re manure became compost for the next years garden.

Their eggs are SO much better than anything you can get from the store. Bright orange yolks mean very healthy and happy chickens. But it also means that egg is packed with nutrients.

Another great thing about chickens is that we can incubate the eggs because we have a rooster. That means that technically, we never have to buy another batch of chickens. Which of course means that we will buy more chickens because… chicken math is a thing.

cropped-3.jpg

Are you looking for garden journal prompts, but aren’t interested in a weekly email? Check out our 365 Garden Journal Prompts! This is an amazing, all in one, yearly product that you only pay for once.

Buy Now!

Goats Earning Their Keep

Initially, we bought the goats to be long term lawn mowers. But after falling in love with these creatures, we started breeding and milking them. Their pay off has been a little slower because they are expensive creatures to maintain. But I realized very quickly that I could tolerate their milk.

Their pay off is in my health. For the first time in years, I am able to consume milk with pain. While I am not lactose intolerant, I do have issues with gut health. Their milk has helped ease that pain and has increased the good bacteria in my gut. Not to mention, I know exactly what is in their feed, hay, treats, etc.

Before we get too far into this, I have a great course on the basics of goat care. I call it Goat Crash Course: Goat 101. In this course, I explain things like types of shelter, types of feeds and hays, basic assessments and so much more! Check it out!

Buy Now

The Garden Producing

Gardening is probably the biggest way that we save money on the homestead. But again, not at first and not in the way you are probably thinking. Our big garden is getting a face lift in 2024 and that means a TON of money is getting dumped into it.

Like the budget for it is about $10,000 and includes the orchard, chicken runs, fencing, the gazebo and more. That’s okay, though. Because the amount of money it saves us isn’t about the weekly or monthly dollars saved at the grocery store.

It’s about the health benefits of the garden.

We do not spray our gardens with ANYTHING. There are no pesticides, herbicides or fertilizers used…. at all. It’s grown in soil that comes from our neighbors horse manure and our own animals bedding. Neither one of us deworm or use chemicals our animals unless absolutely necessary.

That means that our food from the garden is literally the healthiest thing we can consume on the planet. This pays off HUGE because we are filling our plates with food that is so nutrient dense, that it helps ward off sickness, disease and other issues that are common for people who eat the standard American diet.

goat kidding

Before we get too far into this, I have a great course on the basics of goat care. I call it Goat Crash Course: Goat 101. In this course, I explain things like types of shelter, types of feeds and hays, basic assessments and so much more! Check it out!

Buy Now

No, homesteading probably won’t save you money

But what homesteading will do is shorten your supply train. Homesteading will reduce your need on the grocery store. It will make you healthier, even if it’s only because you are more active. There are so many other pay offs when it comes to homesteading that it’s okay that it doesn’t save you a ton of money at first.

It will pay off in the end.

If you like the content I put out, feel free to buy us a coffee! It helps keep this site running, marketing and the goats in grain!

Buy me a coffee

If you like this post, feel free to share it and follow us below on our social media accounts!

  • Facebook
  • Pinterest
  • Instagram
  • YouTube
  • TikTok
  • Spotify
  • Threads

Filed Under: Animals, Canning, Chickens, Goats, How To's, Our Homestead, Pigs, Projects Tagged With: Canning, cast iron, Chickens, Chicks, cooking, Eggs, Goats, Homestead, kitchen, Welcome

JOIN TO OUR MAILING LIST!

Leave us your email to receive new posts and special offers for members only! Don't miss a thing!

Recent Posts

  • Fall Garden Guide
  • Top Mistakes With Goats
  • How To Bond With Your Goats

What to Plant in Your Vegetable Garden

July 30, 2024 by Leigh Leave a Comment

If you are new to gardening or homesteading, and you’ve been breaking your brain trying to figure out what to plant in your vegetable garden, allow me to help you! The main things I look at when planning a garden is what do I want to eat, how much space do I have, and leave room for experimenting.

cropped-3.jpg

Are you looking for garden journal prompts, but aren’t interested in a weekly email? Check out our 365 Garden Journal Prompts! This is an amazing, all in one, yearly product that you only pay for once.

Buy Now!

What To Plant In Your Gardens

Through the years, various gardens and designs, I have figured out a few things about gardening. The first is to always give more space to fruits and vegetables that you know you like. Next, is to figure out how much space I am willing to give to the stuff I like, but also the things I want to try. Finally, what do I want to try and grow.

I found Southern Dreams Homestead to have a great article for beginners and their gardens. They have a ton of great information and it’s really helpful if you don’t know what you’re doing. Learning and Yearning also has a great article about getting started with organic gardening.

cropped-3.jpg

Are you looking for garden journal prompts, but aren’t interested in a weekly email? Check out our 365 Garden Journal Prompts! This is an amazing, all in one, yearly product that you only pay for once.

Buy Now!

What fruits and vegetables do you like?

This is a very serious question that people usually get tripped up on. I despise raw tomatoes. I do not want it anywhere near my hamburger or salad. BUT I absolutely love salsa, ketchup, BBQ sauce, and more. That means I should probably not plant a ton of slicing tomatoes and plant more sauce or paste tomatoes. While, yes, Jared loves to eat raw tomatoes, he is the only one. So it doesn’t make a lot of sense to plant an entire row of slicers just for him. 

To figure out what to plant in your garden, I would sit down and really think about all the fruits and vegetables you like to eat. Then, I would think about all the cooked versions of those foods you like. Do you like pasta sauce? That’s tomatoes, peppers, onion, garlic, basil, oregano, etc. If you have the space in your garden to grow those things. Then do it!

Another thing to consider is your animals. If you have chickens or goats, you can absolutely grow extra squash for them. As you are figuring out what to plant, also think about all the things you can grow to help off set your feed bills.

Before we get too far into this, I have a great course on the basics of goat care. I call it Goat Crash Course: Goat 101. In this course, I explain things like types of shelter, types of feeds and hays, basic assessments and so much more! Check it out!

Buy Now

How Much to Plant?

Again this one is pretty simple, it comes down to space and what you like. Going back to my tomato example, out of the four of us, Jared is the only one that likes raw tomatoes. I’m not going to take up an entire row of space for slicers. But what I will do is plant a couple slicers and grape tomatoes so that he has something to snack on. The majority of my tomato space will be taken up with beefsteak or slicers.

But how much to plant? This is a varying formula that takes time to dial in. The best way to do this is to figure out how much each plant should produce and then figure out how much you need. As you grow, you will adjust how much you eat/ use but to start figure out how much you think you’ll eat and how much each plant should grow. Below is a how to become a victim of tomato math.

cropped-3.jpg

Are you looking for garden journal prompts, but aren’t interested in a weekly email? Check out our 365 Garden Journal Prompts! This is an amazing, all in one, yearly product that you only pay for once.

Buy Now!

What is tomato math?

Well, it’s the same as chicken and goat math. If I need two eggs a day for breakfast, I need at least ten chickens. That is chicken math. No, it doesn’t make any sense which is the point. Goat math is a little different because you start with two and then end up with nine and I’m still not really sure how that happened.

Tomato math is simply thinking that 25 plants is not nearly enough to sustain my family’s tomato needs and you end up with 150 plants and a ton of tomatoes. Not to mention trying to figure out what your going to do with 1,2000+ pounds of tomatoes.

The best way to figure out how much you need to plant is simple.

Figure out what the average yield for the type of plant: tomatoes are 8-10# per plant, peas are about 30 plants per person, potatoes are 5-10# per plant and so on. Then figure out how many pounds you need. I know we will go through about 100# per person for potatoes per year for cubed, shredded, whole, and fries. So I need 400#.

Then divide the number of pounds the plant yields to the number pounds you need;

Potatoes- 400/5=80 potato plants.

If you don’t know how many pounds you need, estimate and write down what you planted. When you harvest, write down the weight. Keep an eye on how much you are using and when it’s gone, figure up how many days until your next harvest. This is where garden journals are absolutely necessary!

Our herd health bundle helps you keep track of your herd’s health. Includes the goat assessment, herd check sheets AND Herd Health Tracker!

Buy Now

Experimenting With Your Garden

A lot of times, people only grow what they will eat. And that’s great if you are limited on space. But you are missing out on whole other varieties! I did a podcast about trying different varieties here. We didn’t know that we liked cabbage until we had it, same with broccoli, winter squash, radishes, etc.

Don’t be afraid to give some space to other plants in your garden. If you don’t like them, I’m sure your chickens will love them.

Are you getting overwhelmed in the garden? Stressed? Or just not enjoying the garden like you used to? Check out our garden prompts! We send out weekly emails that get you back in the garden and out of your head! Turn the garden back into a place of love and joy instead of frustration and headache!

Subscribe Now!

Try not to get overwhelmed

I know that is way easier said than done. At the end of the day, even planting one tomato plant is better than doing nothing at all. So don’t sweat it, just get out there and start digging in the dirt and enjoy the wonder of growing your own food.

If you decide to start seeds instead of buying plants, which I highly recommend, The Homesteading RD has a great guide for starting pepper plants. Since my own pepper starts didn’t do so well, I will be using some of these tips next year.

You can start big or small, it’s totally up to you. What you need to remember is that just by planting something you are doing something to decrease your dependency on the grocery store. It doesn’t matter that you didn’t harvest thousands of pounds of food. The reality is that you tried.

If your garden doesn’t produce a ton like you wanted it to, try again. I found these articles helpful for fall planting or just helping your soil through fall. Though Georgia doesn’t have much of a fall, more of a HOT, not so hot, freezing, hot…. you get the picture.

The Ultimate Homesteader’s Starter Bundle – Only $47!

Get the tools you need to stay organized, track profits, and manage your homestead with ease!

Includes:
✅ Schedule F Tracker – Simplify tax prep
✅ Profit Calculator – Track earnings
✅ Hay Calculator – Plan livestock feed
✅ Garden Journal – Digital & printable
✅ Herd Health Tracker – Monitor animal care
✅ Simple Budget – Manage finances
✅ Backyard Homestead eBook – Essential tips

$99 value – now just $47! Start your homesteading journey today!

Buy Now

Other Helpful Tips and Tricks

Over at Vintage Homestead, you can figure out how to take a soil samples. This is great for figuring out if you need extra nitrogen, fertilizer, or other materials added to your garden. Once you’ve taken your samples and have your results you can head over to Learning and Yearning to figure out how to add materials to your soil naturally.

If you’re anything like me and you want to know which plants like rhubarb and help them, head over to The Homesteading RD to take a look at what they have to say.

I am guilty of wanting to mulch everything in the garden and Learning and Yearning has a great article on how to avoid those pitfalls that comes with it.

If you like the content I put out, feel free to buy us a coffee! It helps keep this site running, marketing and the goats in grain!

Buy me a coffee

If you like this post, feel free to share it and follow us below on our social media accounts!
  • Facebook
  • Pinterest
  • Instagram
  • YouTube
  • TikTok
  • Spotify
  • Threads

Filed Under: Animals, Canning, Chickens, Garden, Goats, How To's, Pigs, Projects Tagged With: cooking, Homestead, Organic, Plants

JOIN TO OUR MAILING LIST!

Leave us your email to receive new posts and special offers for members only! Don't miss a thing!

Recent Posts

  • Fall Garden Guide
  • Top Mistakes With Goats
  • How To Bond With Your Goats

How To Pressure Can Green Beans

July 20, 2024 by Leigh 2 Comments

Jump to Recipe

I am extremely picky when it comes to green beans. I cannot stand mushy green beans. The thought of the skin of the green bean scraping against my teeth is enough to make me want to vomit. So the only way I will buy, can or otherwise consume green beans is frenched green beans. Today, I went to my local farmers market for strawberries. Yes, they are worth the two hour round trip drive and I saw they had bushels of green beans! Score! So today I’m going pressure can green beans.

The Ultimate Homesteader’s Starter Bundle – Only $47!

Get the tools you need to stay organized, track profits, and manage your homestead with ease!

Includes:
✅ Schedule F Tracker – Simplify tax prep
✅ Profit Calculator – Track earnings
✅ Hay Calculator – Plan livestock feed
✅ Garden Journal – Digital & printable
✅ Herd Health Tracker – Monitor animal care
✅ Simple Budget – Manage finances
✅ Backyard Homestead eBook – Essential tips

$99 value – now just $47! Start your homesteading journey today!

Buy Now

Pressure Canning Green Beans

The first thing you need is fresh green beans. Straight from the garden is the best but today we are working with what we’ve got. I got a bushel which is about 30# of green beans and will yield about 25 quart jars of beans. This is not precise. Sometimes a bushel is only 25# and only 18# of usable green beans. So be prepared for less or more.

You’ll need a couple bowls, cold water for soaking, jars, pressure canner and the assorted tools that go with pressure canning.

Let’s Get Snapping

You’ll need a couple bowls so you can snap to your hearts content. This is seriously my favorite part. No one wants to help because it’s pretty mindless which is why it’s my favorite part. Last year I snapped two bushels of green beans in six hours. I took my time and got to watch my farm. I watched the goats play, the chickens scratch, and my boys help Jared build. All while I took a load off.

If you don’t know how to snap beans, it’s very simple. Snap off the ends at about 1/2 inch, roughly. Throw the ends in a bowl. Then snap the bean in half or thirds depending on how big you want your pieces. Just work through your bushel/ bag.

If you have goats or chickens, they will love you for giving them the ends. All of the animals fight over the beans, tops and bottoms and of course anything that gets dropped on the floor.

Soak Your Beans

Next clean your sink or a cooler and let them sit in cool water for about 30 minutes. You don’t have to do this step but I feel like it gets all the dirt and grime off your beans. You can do this before you start snapping, go for it, it’s totally up to you.

Also, I will “agitate” the water with my hands to help scrub off any dirt or debris that is on the beans.

I like using a cooler because I can just dump the processed beans straight into a cooler of cool water on the porch and I don’t have to move. Which is ideal considering I usually process 40-50 quarts of green beans at a time.

French Cut Green Beans

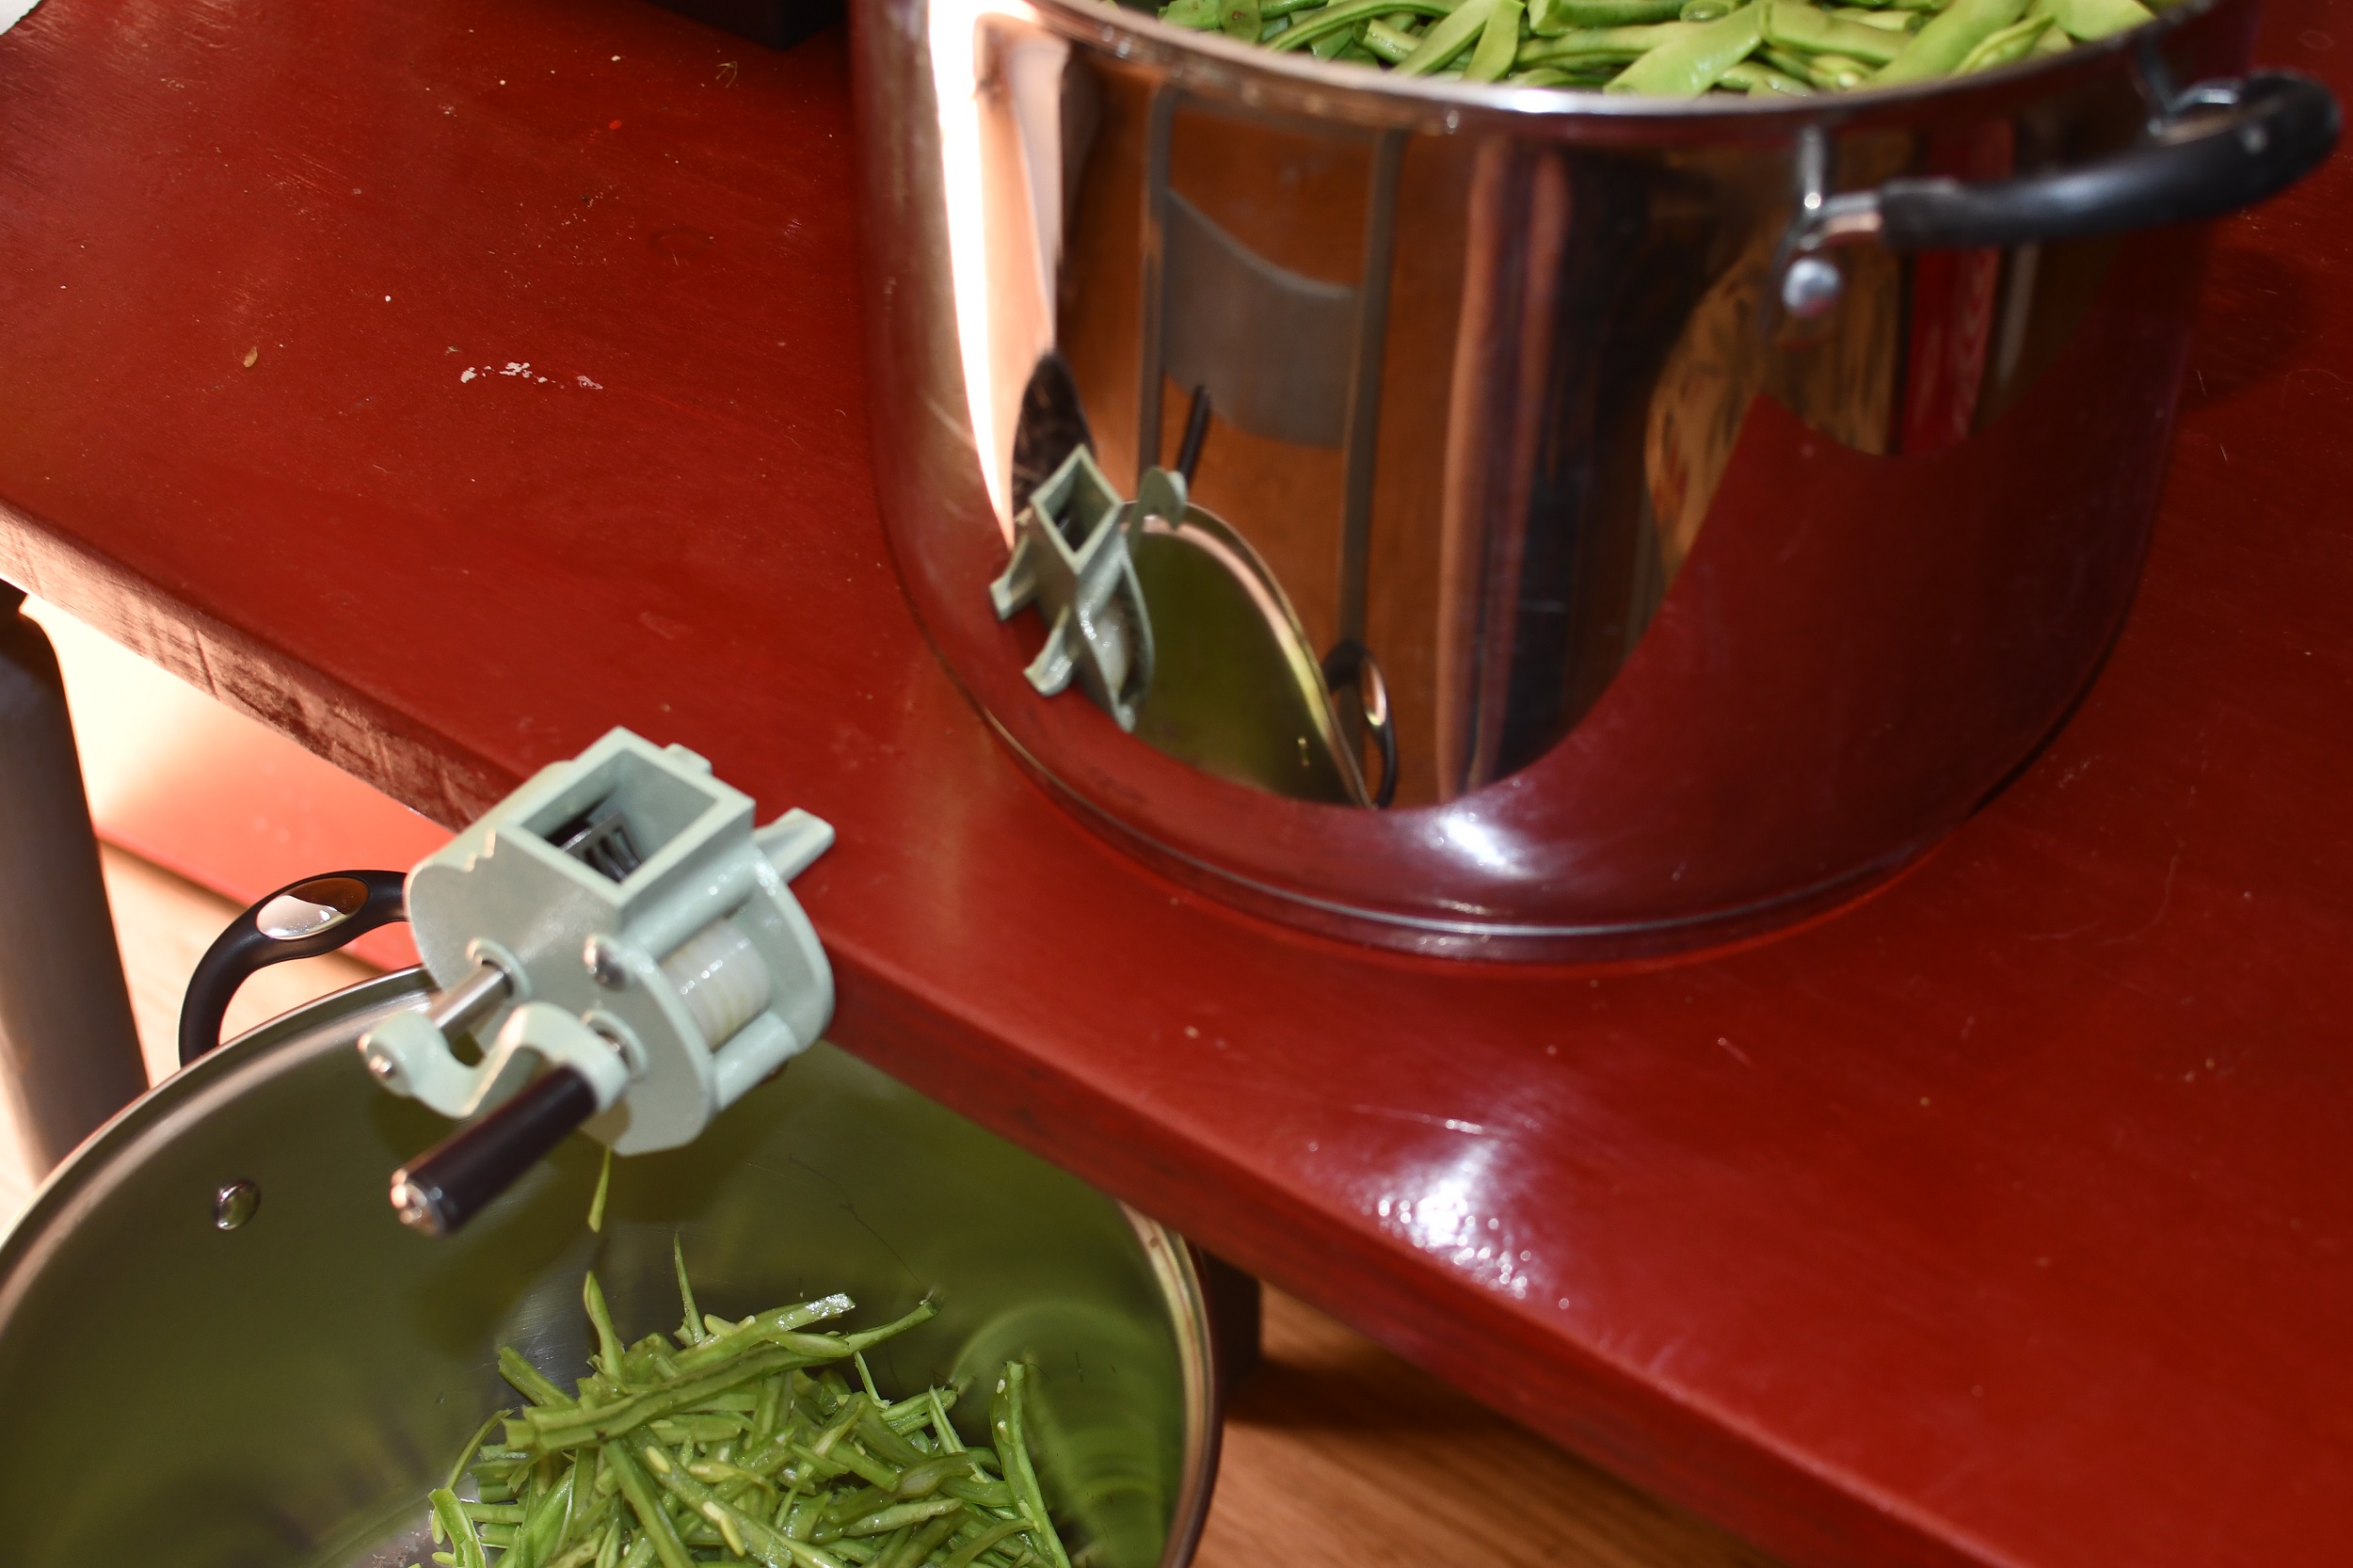
Once they are clean, I run them through the frencher. If you don’t have a frencher or don’t want french cut beans just skip this step. But make sure that you snap your beans a little smaller about an inch long.

If I am canning green beans, which is the entire point of this post, I only can French cut green beans. So you’ll need a frencher like this one and while I love it, it does get stuck if the bean is too big or too hard. It also requires you to attach it to a counter, table, etc and sometimes it just doesn’t work that well. But it’s the best crank version and I don’t like the manual ones.

Get Your Canner Ready

Next, get your canners ready. You need a pressure canner. I have two similar to this one but mine don’t have the gauge. You don’t HAVE to have the gauge. If you head to your local Wal-Mart they should have one that doesn’t have a gauge. While you’re at Wal-Mart go ahead and get at least two cases of quart mason jars. Ball is the most common, but Azure Standard has some really great jars as well. Also pick up the tool pack that has a canning funnel, canning tongs, and the de-bubbler. It should look like this.

Your specific canner should tell you how much water to put into it. My canner says three quarts. It will not fill the canner, and you don’t want it to. Go ahead and fill it to your manufactures instructions and get the water boiling.

Pack Your Green Beans Into Jars

While waiting on your water to boil, you’re going to start packing your jars. Using your funnel and clean hands start packing your green beans into your jars. I usually pack till the green beans are about an inch and a half from the top. I usually push down to get as many beans in as possible but you also don’t want to pack it so full. Set it off to the side until you have a canner full. This is usually seven-ten quart jars depending on the size of your canner.

Once you have a full canner ready (not in the canner yet), go ahead and fill each jar with room temperature water till you have 1″ head space. Head space refers to the space from the top of the food/water to the top of the jar. Next, you’re going to use the de-bubbler to get all the air bubbles out.

I’m not going to lie to you, I gently tap the jar on the counter until all the bubbles are at the top. It’s worked well for me, usually because I can’t find the de-bubbler thing. Add more water to the jar to maintain the 1″ head space.

Then wipe the rim of the jar with a paper towel or rag dipped in vinegar. Put the lid and then ring on to finger tip tight and you are ready to put them in the canner. I usually place them in the canner all at once so that nothing starts cooking before I’m ready.

Loading Your Pressure Canner

By the time you are ready to start adding your jars, your water should be boiling or close. Go ahead and place your jars in the canner and place the lid per your canners instructions. The normal process for most canners is to let the canner vent for ten minutes before placing your weight on the vent. But again, follow your canners instructions.

My canners have a pressure lock that will pop up once it has come to pressure and shortly after that the rocker will rock. Your canner may be different.

Once the weight starts to rock, or you are up to your PSI on your gauge, you start your time. I will also usually drop the temp on the burner at this point too. I have it on high to get everything up to pressure but will usually drop it to medium to medium high once the weight is rocking. You only want the weight to rock about once every few seconds. Usually mine just gently jiggles.

Green beans need to be processed for 25 minutes. Depending on your altitude will depend on your actual times. I process mine at 25 minutes at 15 PSI for quarts because I am over 1000 feet above sea level.

PS Loading a canner is pretty universal. That process is pretty much the same for everything you are going to pressure can except headspace, time and pressure (Your PSI will never change unless you love altitude).

After Processing Your Pressure Canned Green Beans

When time is up, simply turn off the heat and wait about ten minutes. After that you can move your canner off the burner. Some people move it before, some never touch it. It’s up to you. If I’ve got multiple canners going, I will pull mine off the burner.

You MUST let your canner depressurize naturally! This is none negotiable. At best, you will ruin your food. At worst you can warp your canner or blow up your kitchen. Let’s not do that.

Once the pressure lock drops you can remove ONLY the weight. Once the pressure lock drops and you have removed the weight, give it about ten minutes or so and then you should be able to crack the canner open.

There will be steam that comes out so please be careful. Leave the lid on for another ten minutes or so. The other way you can do it is just put your canner off to the side and let it set for about an hour to hour and a half. This should give it plenty of time to depressurize naturally. When in doubt, leave it alone.

Unloading Your Canner

You can then take the lid off and carefully lift out the jars using the jar tongs. Again, be very careful. The contents of the canner and jars are still extremely hot. I put the jars on a folded towel to start to cool. Within 24hrs you will hear the sweet pinging of success! You can test your seal after 24hrs by pressing down on the lid. If there is give, it’s not sealed. If it sealed, you won’t feel or hear anything when you press it.

Anything that is not sealed needs to go into the fridge or be eaten within a couple of days.

Also, please, please, please remove your rings from the jars before storage. Normally, I am very much your kitchen, your rules. But on this one, I’m going to be a little more vocal…. The reason we remove rings from jars is because if that jar becomes unsealed for any reason, you will never know it if the ring is still on. As temperatures change in your storage area, seals can break. As bacterial get in and start growing, it could re-seal itself.

I’ve had a few jars that we forgot to take the ring off of and pulled months later? There was no way to tell that the lid resealed and the food inside looked perfectly fine. But there was a film on the top of the food. So be careful. Was the food safe, maybe? I wasn’t willing to risk it. So do yourself a favor and remove the rings.

But that’s it! You will love your green beans!

If you like the content I put out, feel free to buy us a coffee! It helps keep this site running, marketing and the goats in grain!

Buy me a coffee
Print Recipe
Print

Pressure Canned French Cut Green Beans

The best green beans that you can make and can yourself.
Prep Time6 hours hrs
Active Time2 hours hrs
Total Time8 hours hrs

Equipment

  • 1 Pressure Canner
  • 1 Canning Kit Funnels, Canning Tongs, and Debubbler
  • 1 Green Bean Frencher
  • 2 Cases of Quart Jars You can use pints but get double the amount
  • All Bowls and Stock pots You will probably need every last one by the time this is all said and done

Materials

  • 1 bushel Green Beans

Instructions

  • Snap your green beans by snapping off the top and bottom. Then snap them into desired lengths. I tend to snap mine in 2in sections but it's not a big deal if they are longer or shorter
  • Rinse beans well. I usually have a big stock pot full of water and I just throw the beans into that as I snap
  • Once you are either done snapping or you have filled your first pot, drain the water. Now you will start frenching. If you are using the crank tool then make sure you've got a pot under it. Start feeding your green beans through it.
  • When you arms feel like jello from cranking, take a break and fill up your pressure canner with water to per manufacture instructions. Mine says 3qts.
    Get it on the stove to start boiling.
  • Next start filling your jars with green beans. I tend to pack my jars pretty full. Fill with room temperature water, wipe the rim with a vinegar rag and place a lid and ring on it. Tighten ring to finger tight.
    Set it off to the side
  • Once you have a full canner of jars, gently set the jars into the canner. If the water is already boiling you can secure your canning lid. Follow manufacture instructions on using your canner. Every single one is different.
  • Process for 20 minutes for pints and 25 for quarts at 10# of pressure. Adjust for altitude.
  • When processing is over allow canner to depressurize naturally. This could take a couple hours depending on your model so be prepared.
  • Once canner is cool and safe to open, bring your jars out and allow them to cool. Listen for the ping and check your seals the next morning. Anything that doesn't seal, put in the fridge and eat within a couple of days.

If you like this post, feel free to share it and follow us below on our social media accounts!
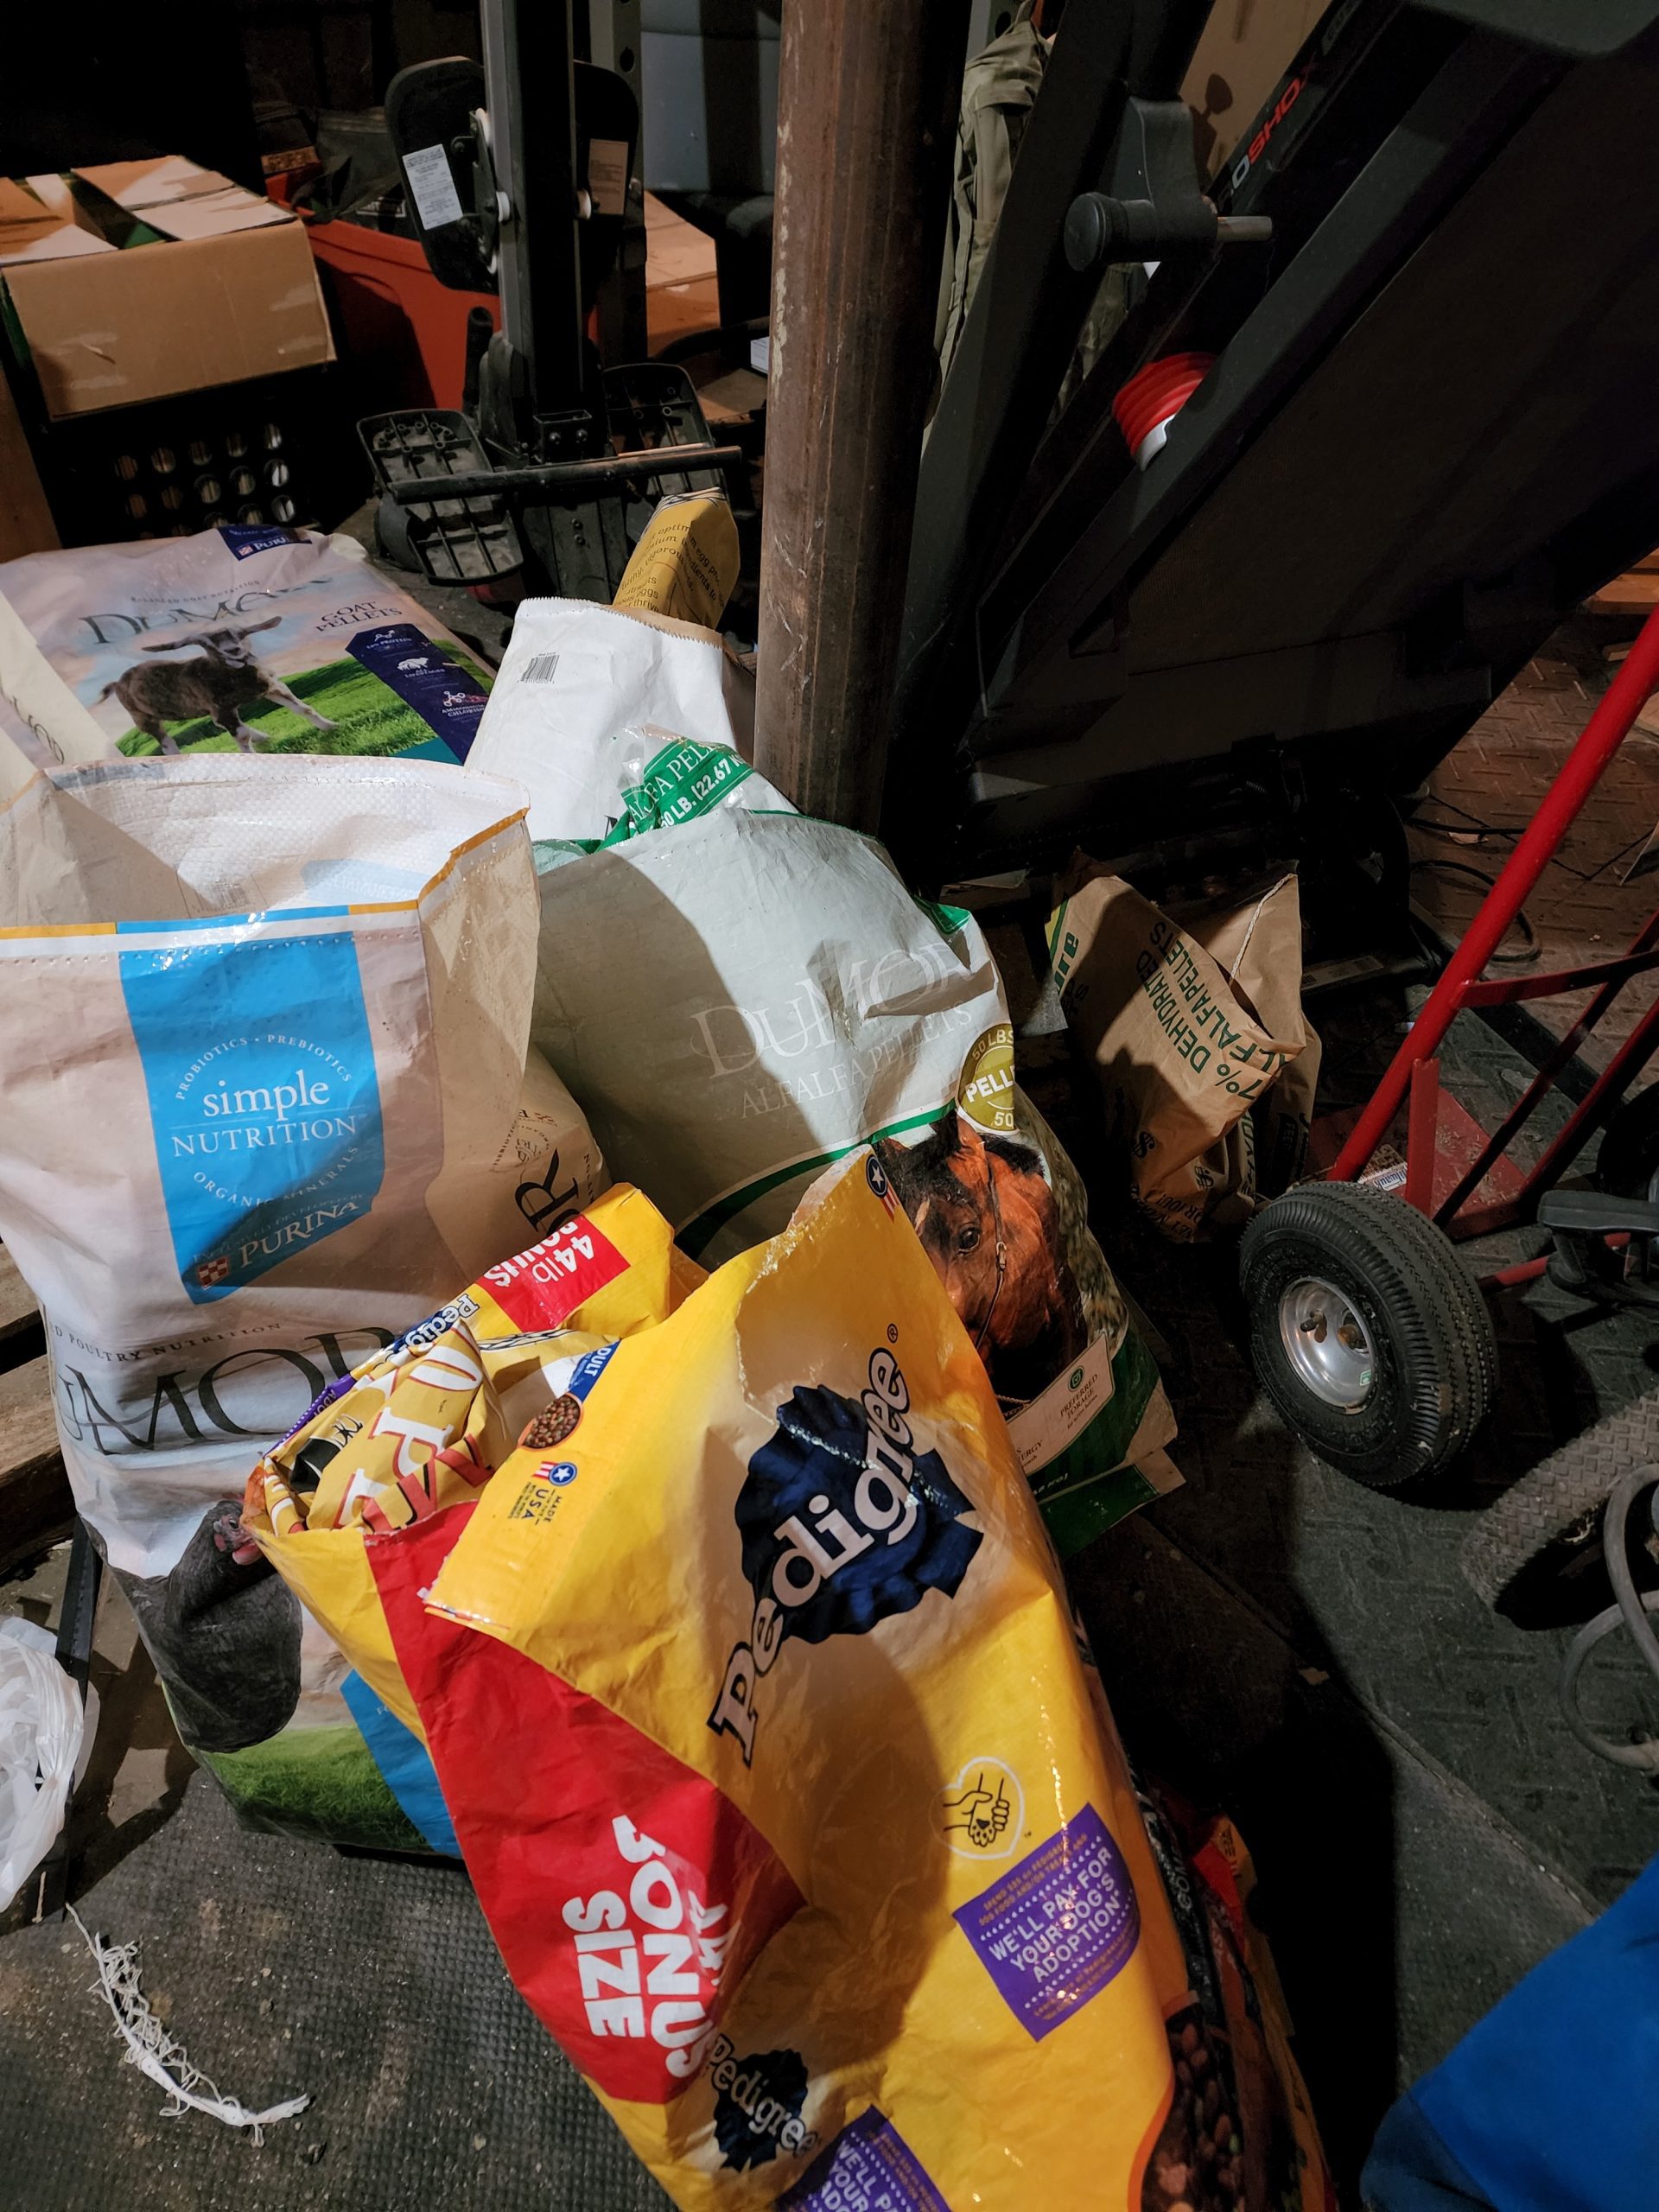
  • Facebook
  • Pinterest
  • Instagram
  • YouTube
  • TikTok
  • Spotify
  • Threads

Filed Under: Canning, Canning Recipes, How To's Tagged With: Canning, cooking, green beans, Homestead, kitchen, pressure canning, Recipes

JOIN TO OUR MAILING LIST!

Leave us your email to receive new posts and special offers for members only! Don't miss a thing!

Recent Posts

  • Fall Garden Guide
  • Top Mistakes With Goats
  • How To Bond With Your Goats

How We Organize A Deep Freezer

July 9, 2024 by Leigh Leave a Comment

Seriously, how is it that I can organize our freezer and within a month it’s back to being a disaster. Every time! But I have finally figured it out! I saw this hack on Pinterest and figured what did I have to lose? If it doesn’t work, I can reuse the supplies. But if it works? Well, my sanity may just be returned. Maybe. So how did we organize a deep freezer?

The Ultimate Homesteader’s Starter Bundle – Only $47!

Get the tools you need to stay organized, track profits, and manage your homestead with ease!

Includes:
✅ Schedule F Tracker – Simplify tax prep
✅ Profit Calculator – Track earnings
✅ Hay Calculator – Plan livestock feed
✅ Garden Journal – Digital & printable
✅ Herd Health Tracker – Monitor animal care
✅ Simple Budget – Manage finances
✅ Backyard Homestead eBook – Essential tips

$99 value – now just $47! Start your homesteading journey today!

Buy Now

Organizing A Deep Freezer

The biggest problems with freezers, whether upright or a chest freezer is that things get lost in the shuffle. It doesn’t matter what you do or how well you organize, you are going to lose stuff in those freezers. Not to mention it’s not something that you go into every day. Or maybe you go into it, but only for the 30 seconds it takes to pull out a couple packs of meat.

And if you have kids, they aren’t going to take the time to gently move things around to find what they need. No, my teenagers just throw things around until they find whatever it is they are looking for and them move on with their life…. It’s infuriating.

Before we get too far into this, I have a great course on the basics of goat care. I call it Goat Crash Course: Goat 101. In this course, I explain things like types of shelter, types of feeds and hays, basic assessments and so much more! Check it out!

Buy Now

Starting To Organize A Deep Freezer

When you are sorting your deep freeze to organize it, make sure that you take the time to clean it out too. Over the years, I found that we tend to only clean out our deep freeze when we are getting a whole cow or hog, which is usually once a year per freezer. We usually purchase a whole cow in July and empty out that freezer, defrost it, and then scrub it out. And we do it for the whole hog in February.

This helps to make sure that any freezer burned meat is either used or given to the chickens. I tend to find a bunch of roasts and will can a bunch of soups for us for the winter. If the meat is just too burned, it goes to the dogs or chickens. I hate wasting food.

After it is sorted, make sure to defrost it. This allows you to get all those weird bits of meat, frost, and other random crap that gets lost in the freezer out. If you have had a freezer before, you know what I’m talking about. Especially, the upright freezers. Everything collects at the bottom of the freezer. Hunks of ice, broken caps, a random chicken wing. It ends up at the bottom!

If you are new to heating with firewood and are looking to master the finer points of it. We’ve got a great eBook that goes in depth of what tools you should consider, how and where to stack, how to build a fire and so much more!

Buy Now

Choosing The Right Size Freezer

When we purchase bulk meat like half/whole cows or whole hogs, we needed more freezer space than just one upright freezer. To give you some insight into freezer sizes, a whole cow will barely fit in an 16cu ft freezer. When I say barely, it’s a game of Tetris to get it all in there. Whole chickens take up a ton of space as well. I would say that you could probably fit 100 whole chickens in that same freezer.

I think it’s better to err on the side of caution and always go at least one “size” up from what you think you’ll need. Especially when it comes to getting whole animals. I have found that if you have the square footage to have a bigger freezer, get the bigger freezer. You will end up using the space. Trust me.

Another thing to consider with freezers is that an upright freezer will be easier to find things, but will not hold as much as you think they will. It is incredibly difficult to pack an upright freezer, no matter the size, due to the likelihood of things spilling out. And yes, milk crates will help with this, but just trust me, get a chest freezer if you are getting irregularly shaped things like packs of meat, veggies, etc.

Chest freezers are where it’s at in my opinion. Yes, it will become a holy terror of a disaster, but you get far more bang for your buck with them. Because it doesn’t matter if you organize it or not, you are able to use every square inch of that space.

The Ultimate Homesteader’s Starter Bundle – Only $47!

Get the tools you need to stay organized, track profits, and manage your homestead with ease!

Includes:
✅ Schedule F Tracker – Simplify tax prep
✅ Profit Calculator – Track earnings
✅ Hay Calculator – Plan livestock feed
✅ Garden Journal – Digital & printable
✅ Herd Health Tracker – Monitor animal care
✅ Simple Budget – Manage finances
✅ Backyard Homestead eBook – Essential tips

$99 value – now just $47! Start your homesteading journey today!

Buy Now

Enter Milk Crates To Organize A Deep Freezer

When it comes to organizing a deep freezer, you need to have the ability to sort those various things (packs of meat, froze veggies, etc) into some sort of organized chaos. I love using milk crates. But a word of caution. Don’t buy cheap file crates from Wal-Mart. You want to get something like this. The sturdier the better. We got the cheap ones from Wal-Mart and it’s gone about how you would expect.

Milk crates saved my sanity when Jared brought home the cow. I’m not going to lie, I was nervous that three coolers of meat was going to create more chaos than me. But we worked through it and got everything separated into five milk crates. They are overflowing but still stackable.

The idea with the milk crates is to have the ability to pick up and move them to get to what is below them. So far it has worked beautifully and I will be buying more crates for my upright freezer to handle that disaster.

The problem with the using milk crates in the upright freezer is not having the ability to see through them to what is inside. Yes, we could label them but if my kids won’t put things up where they go, do we really think that putting a label on the crate will help? I guarantee it won’t.

Our herd health bundle helps you keep track of your herd’s health. Includes the goat assessment, herd check sheets AND Herd Health Tracker!

Buy Now

Clearly Label What Is In The Freezer

We write on our freezers. This helps keep an eye on inventory levels…. when someone remembers to deduct what they took out…. which no one does. But it’s a good idea. We know that one freezer is full of beef and the other is full of… well other. Unfortunately, what ends up happening, especially with teenage boys, is that they just shove things in the freezer.

That means that you could have cow in one freezer, hog in another and chicken in with the bacon. It’s extremely frustrating. But if you label the outside of the freezer, it could help you a lot more. We have gone so far as to list out how many packs of something is in the freezer. For example, when we load up the freezer with a whole cow, we will put 200 packs of ground beef or 17 sirloin steaks.

This has helped a ton but only if you keep up with it.

If you like the content I put out, feel free to buy us a coffee! It helps keep this site running, marketing and the goats in grain!

Buy me a coffee

If you like this post, feel free to share it and follow us below on our social media accounts!

  • Facebook
  • Pinterest
  • Instagram
  • YouTube
  • TikTok
  • Spotify
  • Threads

Filed Under: How To's, Projects Tagged With: Chickens, cooking, Homestead, kitchen, Organization

JOIN TO OUR MAILING LIST!

Leave us your email to receive new posts and special offers for members only! Don't miss a thing!

Recent Posts

  • Fall Garden Guide
  • Top Mistakes With Goats
  • How To Bond With Your Goats
  • « Go to Previous Page
  • Page 1
  • Page 2
  • Page 3
  • Page 4
  • Page 5
  • Go to Next Page »

Primary Sidebar

WELCOME

WELCOME

My name is Leigh and I am the lead chaos creator here at Steel Raven Farms. You will see throughout this blog that I am the crazy goat lady.

I am married to my high school sweetheart, Jared and we have two amazing boys.

FOLLOW ME

  • Amazon
  • Facebook
  • Instagram
  • Pinterest
  • TikTok

GET UPDATES!

Leave us your email to receive new posts and special offers for members only! Don't miss a thing!

In all the years that I’ve been growing a garden, the fall garden has steadily remained my favorite. Which is funny because I don’t really like any of the brassicas, which is what most people know the fall garden for. I prefer the root vegetables and cool air. But I have learned over the years…

Read More

  • Animals
    • Chickens
    • Farm Dogs
    • Goats
  • Garden
    • Compost
    • Garden Projects
    • Seeds and Plants
    • Garden Journal
    • Working With Food
      • Recipes
      • Freezing Foods
      • Dehydrating Foods
      • Canning Tips And Tricks
        • Canning Inventory Sheets
  • Helpful Info
    • Welcome to the Homestead!
    • Emergency Preparedness
    • Frequently Asked Questions
    • Goal Setting
    • Project List
    • Shop Digital Products
      • Hay Calculator
      • Farm Expense And Income Tracker
      • Goat Crash Course: 101
      • Garden Journal Prompts
      • Schedule C Tracker
      • Schedule C Tracker
      • The Homestead Bundle
  • The Truths
  • Episode List
  • Start Here
    • Privacy Policy
    • Affiliate Disclosure
    • Let’s Get in Touch
    • Members Only Library
    • Welcome To Our Homestead

Footer

  • Email
  • Facebook
  • Instagram
  • Pinterest

COME AND GET IT!

Leave us your email to receive new posts and special offers for members only! Don't miss a thing!

· Midnight Theme

Copyright © 2026 · Midnight Theme on Genesis Framework · WordPress · Log in