• Skip to primary navigation
  • Skip to main content
  • Skip to primary sidebar
  • Skip to footer

Steel Raven Farms

Where muck boots meet ground.

  • Animals
    • Chickens
    • Farm Dogs
    • Goats
  • Garden
    • Compost
    • Garden Projects
    • Seeds and Plants
    • Garden Journal
    • Working With Food
      • Recipes
      • Freezing Foods
      • Dehydrating Foods
      • Canning Tips And Tricks
        • Canning Inventory Sheets
  • Helpful Info
    • Welcome to the Homestead!
    • Emergency Preparedness
    • Frequently Asked Questions
    • Goal Setting
    • Project List
    • Shop Digital Products
      • Hay Calculator
      • Farm Expense And Income Tracker
      • Goat Crash Course: 101
      • Garden Journal Prompts
      • Schedule C Tracker
      • Schedule C Tracker
      • The Homestead Bundle
  • The Truths
  • Episode List
  • Start Here
    • Privacy Policy
    • Affiliate Disclosure
    • Let’s Get in Touch
    • Members Only Library
    • Welcome To Our Homestead

Working With Food

Make Ahead Pickling Brine

October 15, 2024 by Leigh 8 Comments

Jump to Recipe

If your garden is anything like mine, we’ve got a couple of pickling cucumbers every day, but never enough to can a big batch of dill pickles. Or you’ve got a couple of peppers but can’t do much with them because there’s only five today, 3 tomorrow and 17 on Wednesday. Welcome to the world of gardening, right? If you think there’s nothing you can do about it, think again! I’ve got a solution to your pickle…. see what I did there? Read on for my pickling brine and famous dill pickle recipe.
The Ultimate Homesteader’s Starter Bundle – Only $47!

Get the tools you need to stay organized, track profits, and manage your homestead with ease!

Includes:
✅ Schedule F Tracker – Simplify tax prep
✅ Profit Calculator – Track earnings
✅ Hay Calculator – Plan livestock feed
✅ Garden Journal – Digital & printable
✅ Herd Health Tracker – Monitor animal care
✅ Simple Budget – Manage finances
✅ Backyard Homestead eBook – Essential tips

$99 value – now just $47! Start your homesteading journey today!

Buy Now

What Is Pickling Brine?

Simply put, pickling brine is just the solution that is going help preserve your fruits or veggies. The brine is vinegar, salt, and water. That’s it. Some people add sugar to cut the vinegar and salt down but I don’t. When I want a pickle, I want it to be salty, vinegar-y, and delicious.

pickling brine

What can you use Pickling Brine for?

Anything. Literally. Obviously pickles is the first choice but I have used left over brine for brisket, pulled pork, marinades, and Jared’s Bloody Mary’s. The options are endless. We will also pickle peppers, onions, carrots and okra. You can even use it in some fruits if you want. The best part is that you can make a batch, throw it in the fridge or on the shelf and always have it on hand.

How to make the Brine

The brine is so easy to make, you can’t screw it up. The recipe is 10c of water, 3/4c salt, and 2c vinegar. Don’t worry, I have a recipe card at the bottom for my favorite dill pickles. You can add sugar and the ratio for the recipe above is 1-1.5c sugar.

Also, you do not need fancy pickling/ canning vinegar or salt. Skip the upcharge on those items, they are pretty much the same as regular salt or vinegar. I do use pink Himalayan salt but that’s just because that’s what I always have on hand.

pickling brine
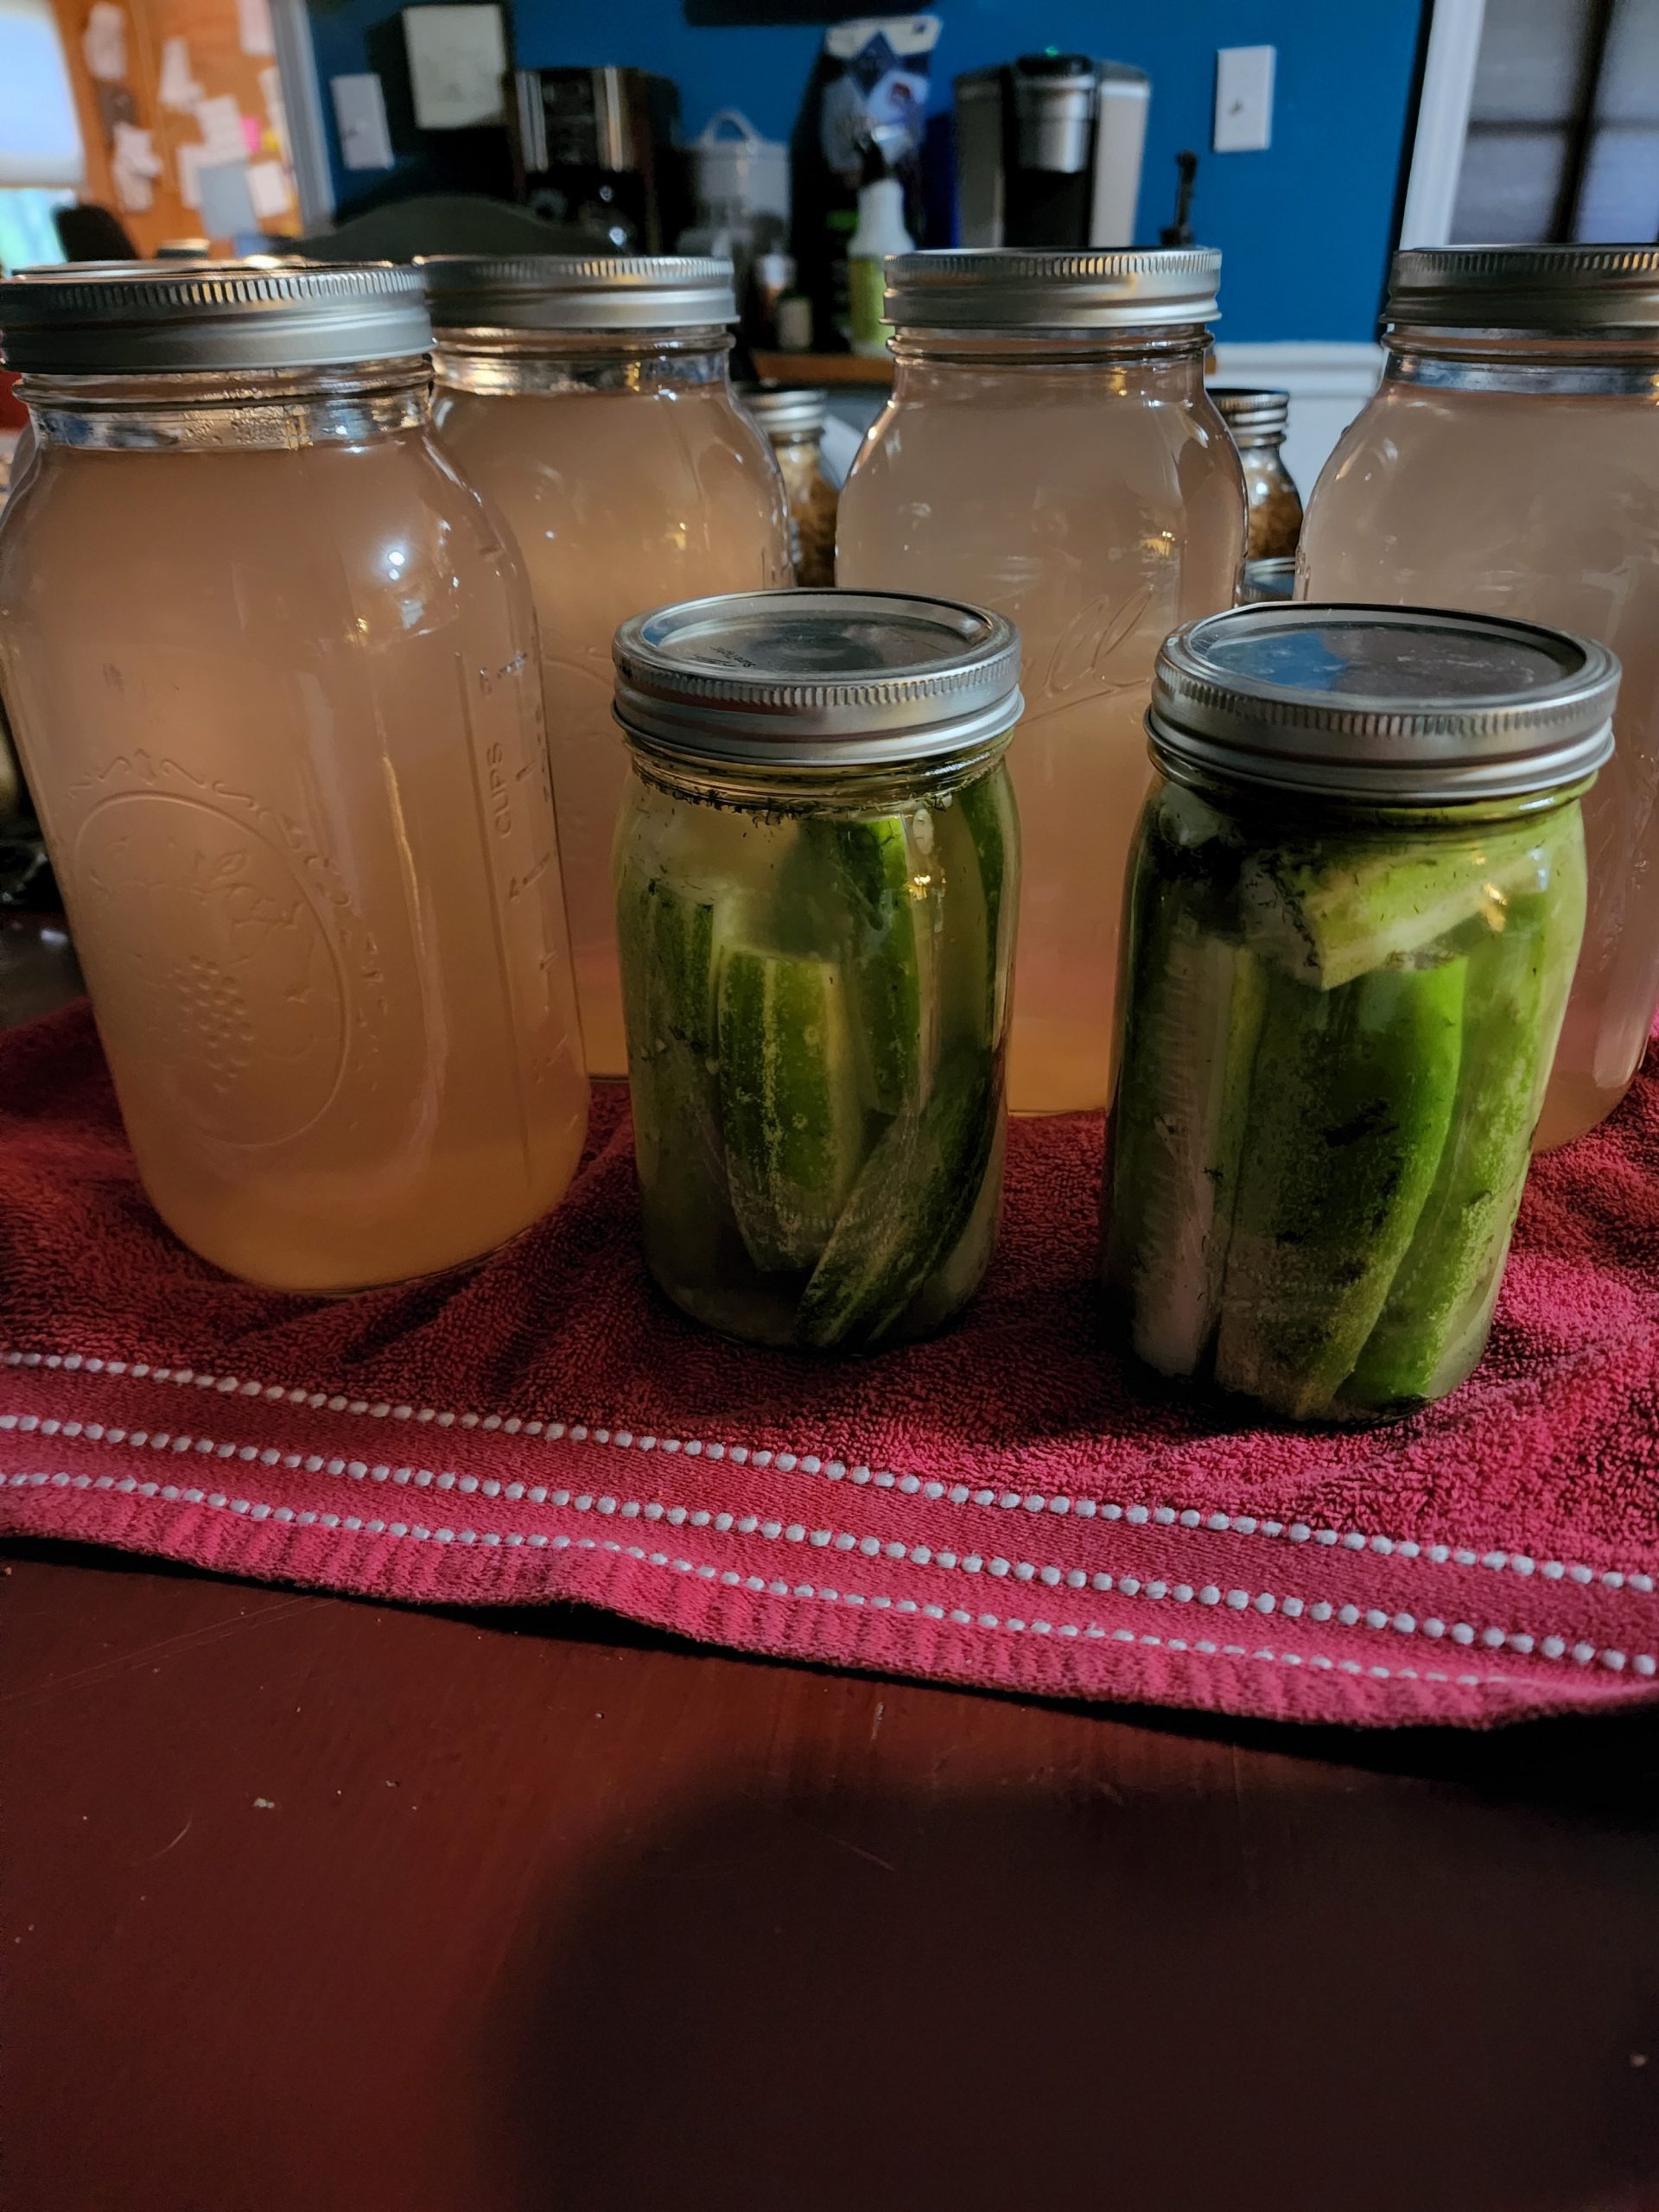
The reddish/brown tinge is due to horrible lighting in my kitchen and the pink salt

I add all of the ingredients above to a big stock pot of water. Also, I use stainless steel pots because it’s not reactive…. and it’s the only thing I have on hand that will handle the quantity I make. Next, use hot water to start dissolving the salt and bring everything to a boil.

Once it’s boiling I will can it into whatever size mason jars I have, wipe the rim, add a ring and lid, then wait for the glorious pings. I do not process them in a canner.

If I don’t get a ping, I just throw that one in the fridge to use first. Why don’t I water bath it? Because the pH of the pickling solution (without sugar) is 3.2. Not many organisms are going to grow in that. And the heat from the boiling brine will create a vacuum seal from the jar. But if you want to water bath can this to make sure that it is shelf stable, you just need to process for 15 minutes for quarts and 25 for half gallon.

All of that being said, I cannot guarantee the safety of your food. If you follow this recipe, you do it at your own risk. I don’t know if you, your kitchen, or cooking utensils are clean/ sterile or how knowledgeable you are on canning. I have to say all of this because… lawyers.

Now, do you want the recipe for crunchy home canned dill pickles? Remember, you do this at your own risk because not only will you eat every single jar in one day, but you will also be *gasp* open kettle canning all of this.

pickling brine
Fresh canned dill pickles

What is open kettling?

Before we get started too far into the recipe, I’ve had a lot of people ask what is open kettle canning. Simply put, it is using HOT food in HOT jars with HOT liquid. For this example, we are using hot jars that have been sterilized and kept hot with hot water. We are using a boiling brine and clean/ fresh cukes. Since the jar is hot and sterile combined with the boiling brine which is highly acidic, you don’t have to process.

As a side note, you can also heat your jars in your oven once sterile. I will put my jars, lids and rings in the oven at about 250*. This reduces your risks of shattering and having to handle jars full of hot water.

The problem with home canned pickles and salsa specifically is that the veggies get turned to mush when they are heated for cooking and then heated again during the water bath. Even the most stout veggies are going to be mushy when you heat them too long. A cuke and tomato? Forget it. They will not stand up and you will end up with mushy pickles and soup for salsa.

The term open kettle was first found in 1914 as a form of home preservation, but stopped in the 1980’s. Many canners still use open kettle to preserve tons of foods. Some of us, myself included, only open kettle HIGHLY acidic foods. So the choice is yours, I choose to do research and figure things out on my own.
Home Canned Dill Pickles

5 from 3 votes
Open Kettled Homemade Dill Pickles
Print Recipe Pin Recipe
Prep Time 2 hours hrs
Cook Time 0 minutes mins
Servings: 7 Quarts
Ingredients Equipment Method

Ingredients
  

  • 10 Cups Water
  • 2 Cups White Vinegar
  • 3/4 Cups Salt
  • 15ish Pickling cucumbers You can use any cukes just make sure that they are approx 6in long and not overripe
  • 7ish Tablespoons Diced Garlic
  • 7ish Bay Leaves
  • 7ish Tablespoons Dill Leaves You can use fresh dill at at least one medium sprig PER jar

Equipment

  • 1 15 qt Stock pot Larger if you are doubling or tripling recipe
  • 1 Ladle
  • 1 Whisk
  • 7 Qt Wide Mouth Mason Jars
  • 1 Debubbler
  • Can Grabber
  • Canning Funnel

Method
 

  1. Making Your Brine
  2. Add Water, vinegar and salt to stock pot and get it to boiling, stirring occasionally to dissolve salt
  3. Start working on Cucumbers
  4. Fill a bowl or sink with ICE COLD water
  5. Cut off both ends of cuke then slice for spears, chips, or whatever pickle you want
  6. Place in cold water as you get your jars ready
  7. Start heating your jars, lids and rings. You can do this by running your jars through a sterilizing cycle in your dishwasher, placing in your oven on 250 or in hot water. It doesn't really matter as long as they are clean and hot.
  8. **Please use a jar grabber, hot pad, or something, these jars are hot and the brine needs to stay boiling**
  9. Once your brine is boiling and ready, Take hot jar and add 1T garlic, 1T Dill (or sprig), 1 Bay leaf to the bottom
  10. Add your cukes, You are going to pack them in there so make sure to be careful
  11. Put your canning funnel on top and then ladle your HOT brine over cukes, leaving 1" head space.
  12. Wipe rim with vinegar towel, add lid and ring then set aside on a towel to start cooling
  13. Repeat until you are out of cukes or brine.
  14. Place a towel over all of the jars and listen for the pings over the next couple hours.
  15. Whatever doesn't ping, place in refrigerator. But give it a couple of days before you eat it so they are actually pickled.
  16. If you have left over brine, go ahead and fill any HOT jars you have. Same as above. Place funnel and ladle in brine
  17. Wipe rim, add lid and ring and set with the others to cool under a towel.

If you like the content I put out, feel free to buy us a coffee! It helps keep this site running, marketing and the goats in grain!

Buy me a coffee
  • Facebook
  • Pinterest
  • Instagram
  • YouTube
  • TikTok
  • Spotify
  • Threads

Filed Under: Canning, Canning Recipes, How To's, Recipes Tagged With: Canning, Pickles, Planning, Projects, Recipes

JOIN TO OUR MAILING LIST!

Leave us your email to receive new posts and special offers for members only! Don't miss a thing!

Recent Posts

  • Fall Garden Guide
  • Top Mistakes With Goats
  • How To Bond With Your Goats

Homestead Lessons: We Learn The Hard Way

August 24, 2024 by Leigh 7 Comments

Originally, this post was about the all the homestead lessons we learned the first year. But you never stop learning, especially when you homestead. So I wanted to go over all the homestead lessons we have picked up along the way. And the list keeps growing and growing.

The Ultimate Homesteader’s Starter Bundle – Only $47!

Get the tools you need to stay organized, track profits, and manage your homestead with ease!

Includes:
✅ Schedule F Tracker – Simplify tax prep
✅ Profit Calculator – Track earnings
✅ Hay Calculator – Plan livestock feed
✅ Garden Journal – Digital & printable
✅ Herd Health Tracker – Monitor animal care
✅ Simple Budget – Manage finances
✅ Backyard Homestead eBook – Essential tips

$99 value – now just $47! Start your homesteading journey today!

Buy Now

Homestead Lessons:

The Animals

Goats are not entry level animals. Seriously, wait until you have good fencing, a good vet, and patience!

Goats eat WAY more than you think they do.

Goat math is a thing. I’m still confused how our numbers jumped from 2 to 7….. Now, we are hovering around 15.

Chickens are cool, roosters are not. I threaten George with the stock pot daily.

Learn how to butcher and process your own animals. But also give yourself grace because you don’t know how.

If you don’t have a solid plan for pigs, don’t even bother. They will destroy your gardens, pens, and sanity. Sure, sometimes they’re fine. But these are also not beginner animals.

Be prepared for a ton of clean up after processing those animals.

Chicken poop is slippery on concrete. Be careful when you start chasing chickens through your basement.

Animals will die. Yes, it’s hard. No, it doesn’t get any easier.

Building

Build it right the first time. I cannot tell you the amount of times we have had to rebuild fences.

But also understand that you will rebuild things. It’s inevitable.

Don’t let the husband borrow your tools. Ever. Seriously, don’t do it. This man has broken more tape measures….

You are way more capable than you think you are. So is your spouse.

Regardless if it’s going to take longer, get your kids involved with projects. They need to learn how to do this stuff too.

Budget for a project, and then double it. If you think it’s going to cost $400 to build a fence, make sure you’ve got at least $800 set aside.

Garden

Find a local farm stand. Even if you have a garden. It’s better to know where to get fresh produce if the garden fails…. or the chickens, goats or pigs wreck it.

Canning is addictive. Get more jars than you think you will ever need, then double it.

Enjoy the abundance, even when you are drowning in cucumbers.

Learn to start your own plants. It’s WAY cheaper.

Give your garden and yourself grace! You can’t know everything about every plant!

Keep a garden journal!

Buy the seeds…. yes, all of them.

Try new varieties. Even if you have ones you love, try different ones.

Plant the flowers. Yes, all of them.

Plant ALL the plants. Even if you think it’s too many. You would be surprised what can happen in a season…. Plus that’s extra for the animals.

Also, plant for your animals too. You may not have enough to sustain them, but any discount on my feed bill makes me happy.

Planning

Have a plan A, B, C, D and E. Maybe go ahead and plan for F, G and H too. Just to be safe.

Estimate how much firewood you will use, and then double it. Maybe triple if you live in a crazy weather state like Georgia.

Go ahead and stock up on the things you think you need. Not only is it cheaper in the long run, if you need to pull off your supply in an emergency, you will be glad you have it.

Patience is the biggest lesson you will learn.

An emergency fund is going to be your saving grace when you buy a house. But when you buy a homestead? You should probably triple the amount you think you’ll need.

You are going to blow through that emergency fund when your goats get sick, dog needs surgery, well pump goes out and water heater explodes all in one month.

Understand things are going to happen that are beyond your control. Roll with it. A good attitude will get you through it.

Start a blog to detail the antics and chaos of your life. In a year, you will look back and laugh.

Learn to say no. Especially to your husband when he says goats would be a great idea 2 months into owning your homestead.

You are living the life you always wanted in a way you never dreamed. You are blessed beyond measure.

A homestead is what you make it. It starts with HOME for a reason. Enjoy it.

Bear the freeloader

Since buying our homestead, I have learned so much. These are just a few of the homestead lessons we have picked up along the way. I could write 100 more and still not be at the end of my list. But it has been worth every single penny, sleepless night, and fight. I would not trade my life for the world and all the money. Here’s to the next year on the homestead. May it be as entertaining and interesting as the last.

If you like the content I put out, feel free to buy us a coffee! It helps keep this site running, marketing and the goats in grain!

Buy me a coffee

If you like this post, feel free to share it and follow us below on our social media accounts!

  • Facebook
  • Pinterest
  • Instagram
  • YouTube
  • TikTok
  • Spotify
  • Threads

Filed Under: Animals, Canning, Chickens, Goats, How To's, Our Homestead, Pigs, Projects Tagged With: Chickens, Goats, Homestead, Projects, Welcome

JOIN TO OUR MAILING LIST!

Leave us your email to receive new posts and special offers for members only! Don't miss a thing!

Recent Posts

  • Fall Garden Guide
  • Top Mistakes With Goats
  • How To Bond With Your Goats

Homestead Daily Schedule

August 13, 2024 by Leigh Leave a Comment

On our homestead, this looks a little different than most. Due to our work schedules, one of us is gone 48 of 72 hours. Sometimes more. However, the goats still need to be milked, fed and let out. Chickens and ducks still need feed, water, and be let out. Dogs are also hungry and need to go to the bathroom. And all the other chores need to be done. So regardless of who is home, the daily schedule looks pretty much the same.

The Ultimate Homesteader’s Starter Bundle – Only $47!

Get the tools you need to stay organized, track profits, and manage your homestead with ease!

Includes:
✅ Schedule F Tracker – Simplify tax prep
✅ Profit Calculator – Track earnings
✅ Hay Calculator – Plan livestock feed
✅ Garden Journal – Digital & printable
✅ Herd Health Tracker – Monitor animal care
✅ Simple Budget – Manage finances
✅ Backyard Homestead eBook – Essential tips

$99 value – now just $47! Start your homesteading journey today!

Buy Now

What Is Our Homestead Daily Schedule?

As I mentioned above, our days are set up on a 3 day rotation. On the first day, I go to work and Jared is the responsible party until he goes to work the next day. Day 2 is when I come home and handle my portion of the homestead chores. On day 3 we are both home and try to squeak out as much time together as possible.

Day 1 Daily Schedule

This is my work day, so Jared is home with the boys. He usually gets up with me and we drink coffee and hang out for a few minutes before I head to work. Sometimes, he will tell me about what he has planned for the day. But more often then not, I don’t really care per say. The way I see it, he is a grown ass man and knows what he needs to do for the day. Unless there is something pressing, I don’t worry too much about what he’s doing.

That being said, most of the time he is working on whatever project we are doing. In the summer, it’s usually firewood. In the winter, it’s usually household projects. Spring is reserved for garden projects and fall is for yard clean up.

He also makes sure that the boys are doing their school work and the house doesn’t burn down.

Day 2 Daily Schedule

This is the day that he goes to work and I am coming home. Normally, I get home a little later in the morning. After getting myself cleaned up and my stuff put away, I get the boys started on their school work and I start working on whatever inside projects need to be handled. Sometimes this is blog or household work. Other times this could be getting seeds together and planted. It really depends on what the season is.

But I can tell you that the day after a 24 hour shift is left really loose. I have run calls all night and come home with a pile of chores that HAVE to get done and it’s awful. Instead, we give ourselves and each other grace when it comes to the day after shift. We just don’t put a lot of stuff on ourselves.

That being said, the goats still need to be checked and fed. Chickens and ducks still need to be fed and let out. The garden still needs to be harvested, planted or maintained. But we don’t stress about getting the to do list done.

Day 3 Daily Schedule

For me, the day starts around 8am. Blu gets her morning meds and mom needs coffee. The first set of dogs are let out and showers start. I will usually start a load of laundry and work on it throughout the day.

If I have goats in milk, my day starts a little earlier so that I can get them milked before they are screaming for their food and to be let out. I also do a quick glance at the herd to make sure everyone is healthy and happy.

After I get the goats done, I am in the garden first thing to beat the heat. I try to get things harvested before the heat of the day really hits. I will also try to get the first batches of preservation going. Whether it’s dehydrating tomatoes or squash or getting a canner filled. Depending on the season, I may be planting more in the garden.

I will also start the boys on their homeschool stuff for the day. As the day heats up, I scramble into the house to keep from overheating (y’all the Georgia heat is no joke!). I will work on the blog or general household tasks until it cools down enough to be able to go back outside.

Then it’s dinner time. After dinner, the boys take care of their chores. I finish up laundry and head to bed, where I read for about 4 hours.

Homesteading Daily Schedule With Kids

One of the biggest issues that I see new homesteaders, and hell even parents, making is that they don’t give their kids chores. You will overwhelm yourself and your partner if you do not let those kids earn their keep. We have a pay to play rule which means that if you want to play video games, watch TV or do what YOU want to do, you have to “pay” for that by doing your chores, school work, etc. So make sure that your kiddos are helping.

After everyone is done and animals are fed, we start working on school work, this is usually around 930-10. Jared and I have different views on this. Usually I let them unschool and Jared is more structured. Unschooling is when the child directs what they would like to learn about. I feel like this gives them the opportunity to learn about the things that interest them and helps them learn better. Jared prefers to help them with “normal” school work.

Neither way is wrong and the boys seem to enjoy having the flexibility. Win Win.

We get them involved with various aspects of homesteading to not only teach them how to do things that are necessary for survival if the SHTF but also because this is invaluable information. And this still counts as their schooling since they are learning things like how to follow the instructions on how to put together a metal shed. Or how much firewood makes a cord and then measuring the stack that they’ve made. They also get crash courses in animal husbandry if an animal gets sick and needs medications. They’ve also been a huge help in the garden and ask a ton of great questions. Most that I don’t have an answer to, so we ask google a lot of questions.

Don’t Beat Yourself Up

One of the things that I see a lot of new homesteaders do, especially those of us that work off farm, is that they feel like they have to do ALL the things, RIGHT NOW! That can’t be further from the truth. In fact, the opposite is more true; you have time. I talk about homesteading goals and preparation here, but the short version is figure out where you want to be, and take small actionable steps to get there.

Homesteading, while hard work, should NOT be so stressful that you don’t want or can’t do it. You don’t have to get everything done right now! Take a breath and give yourself kindness and grace to make at a reasonable pace. You don’t need to burn yourself out within the first year.

If you like the content I put out, feel free to buy us a coffee! It helps keep this site running, marketing and the goats in grain!

Buy me a coffee

If you like this post, feel free to share it and follow us below on our social media accounts!

  • Facebook
  • Pinterest
  • Instagram
  • YouTube
  • TikTok
  • Spotify
  • Threads

Filed Under: Animals, Canning, Chickens, Garden, Goats, Homeschool, How To's, Our Homestead, Pigs, Projects Tagged With: Canning, cast iron, Chickens, Chicks, cooking, Eggs, Goats, Homestead, kitchen, Welcome

JOIN TO OUR MAILING LIST!

Leave us your email to receive new posts and special offers for members only! Don't miss a thing!

Recent Posts

  • Fall Garden Guide
  • Top Mistakes With Goats
  • How To Bond With Your Goats

Can Homesteading Save Money

August 6, 2024 by Leigh 2 Comments

We can answer this right now, no. Homesteading will not save you money. In fact, homesteading will cost you money. A lot of money. In the first year we were on our homestead we exhausted our emergency fund four separate times. Can homesteading save money? No. Not at first. But in the long run, it will absolutely save you money. Just maybe not in the ways your expecting. Be sure to read to the end for the “pay offs” I’m talking about.

The Ultimate Homesteader’s Starter Bundle – Only $47!

Get the tools you need to stay organized, track profits, and manage your homestead with ease!

Includes:
✅ Schedule F Tracker – Simplify tax prep
✅ Profit Calculator – Track earnings
✅ Hay Calculator – Plan livestock feed
✅ Garden Journal – Digital & printable
✅ Herd Health Tracker – Monitor animal care
✅ Simple Budget – Manage finances
✅ Backyard Homestead eBook – Essential tips

$99 value – now just $47! Start your homesteading journey today!

Buy Now

Why Should You Homestead Then?

Homesteading is not necessarily about saving money. Sure, there are somethings that we have saved a ton of money on like eggs, milk, and chicken.

We no longer buy eggs because our chickens have solved that problem. We don’t have to buy chicken at the grocery store because we butcher our own. We don’t buy milk from the store unless we run out. But when you look at the $100/month we have saved by how much we have spent? We are solidly in the red.

Spend More To Make More?

Because the farm is an LLC, which I highly recommend you do, we are able to write off a lot for taxes. That being said, our first year’s return was eye opening. We spent over $3,000 in vet bills and another $5,000 on feed. That was only in six months. The following year we doubled that. That doesn’t include the well pump that went out, or the water heater. Or all the fencing and structures for the goats and chickens.

But homesteading is not about saving money. It’s about living off the land, having livestock, learning new skills, and being self sufficient. Of course homesteading means different things for different people.

The Ultimate Homesteader’s Starter Bundle – Only $47!

Get the tools you need to stay organized, track profits, and manage your homestead with ease!

Includes:
✅ Schedule F Tracker – Simplify tax prep
✅ Profit Calculator – Track earnings
✅ Hay Calculator – Plan livestock feed
✅ Garden Journal – Digital & printable
✅ Herd Health Tracker – Monitor animal care
✅ Simple Budget – Manage finances
✅ Backyard Homestead eBook – Essential tips

$99 value – now just $47! Start your homesteading journey today!

Buy Now

Homesteading Is A Long Game When It Comes To Saving Money

What I have found is that homesteading is a long term goal and commitment. You are probably not going to save money your first or your second year. If you are starting your homestead from the ground up, you will probably not see a positive until year five. But it really depends on your goals. If you want your homestead completely self sufficient but you are starting from scratch, it will take time. If you came into a property that has fencing, a barn, and garden. You are probably already ahead of the game.

Why Homesteading Doesn’t Save Money?

The reality is that you are going to spend money at first. Rarely, though it does happen, are you going to stumble onto a property that is absolutely perfect for you. You are going to have to spend money to make that property the way you want it.

I preach the importance of setting goals and figuring out your WHY. But probably the most important thing is to define what your vision of a successful homestead is. This is no different. When you are trying to set up your homestead, you want to make sure that you aren’t wasting money on things that don’t matter in the long run.

While you may not see a big financial gain, you will see the “pay off” in other areas.

When Does Homesteading “Pay Off”?

For us, homesteading started to pay off within the first year. But it’s probably not the way you’re thinking. When we bought our property, we defined, very quickly, what a successful homestead meant, and then wrote down our year one, five and ten year goals. That’s when we started to see the “pay off.”

Chickens Doing Double Duty

The pay off was a significant decrease in fleas and ticks. This was because the chickens free ranged and took care of those bugs. That meant that Jared and Jaxson weren’t being eaten alive. This made them happier and more likely to be outside.

The chickens also helped break up the compacted soil in the garden spaces. They ate the grubs and bugs that could destroy the next years crops. They’re manure became compost for the next years garden.

Their eggs are SO much better than anything you can get from the store. Bright orange yolks mean very healthy and happy chickens. But it also means that egg is packed with nutrients.

Another great thing about chickens is that we can incubate the eggs because we have a rooster. That means that technically, we never have to buy another batch of chickens. Which of course means that we will buy more chickens because… chicken math is a thing.

cropped-3.jpg

Are you looking for garden journal prompts, but aren’t interested in a weekly email? Check out our 365 Garden Journal Prompts! This is an amazing, all in one, yearly product that you only pay for once.

Buy Now!

Goats Earning Their Keep

Initially, we bought the goats to be long term lawn mowers. But after falling in love with these creatures, we started breeding and milking them. Their pay off has been a little slower because they are expensive creatures to maintain. But I realized very quickly that I could tolerate their milk.

Their pay off is in my health. For the first time in years, I am able to consume milk with pain. While I am not lactose intolerant, I do have issues with gut health. Their milk has helped ease that pain and has increased the good bacteria in my gut. Not to mention, I know exactly what is in their feed, hay, treats, etc.

Before we get too far into this, I have a great course on the basics of goat care. I call it Goat Crash Course: Goat 101. In this course, I explain things like types of shelter, types of feeds and hays, basic assessments and so much more! Check it out!

Buy Now

The Garden Producing

Gardening is probably the biggest way that we save money on the homestead. But again, not at first and not in the way you are probably thinking. Our big garden is getting a face lift in 2024 and that means a TON of money is getting dumped into it.

Like the budget for it is about $10,000 and includes the orchard, chicken runs, fencing, the gazebo and more. That’s okay, though. Because the amount of money it saves us isn’t about the weekly or monthly dollars saved at the grocery store.

It’s about the health benefits of the garden.

We do not spray our gardens with ANYTHING. There are no pesticides, herbicides or fertilizers used…. at all. It’s grown in soil that comes from our neighbors horse manure and our own animals bedding. Neither one of us deworm or use chemicals our animals unless absolutely necessary.

That means that our food from the garden is literally the healthiest thing we can consume on the planet. This pays off HUGE because we are filling our plates with food that is so nutrient dense, that it helps ward off sickness, disease and other issues that are common for people who eat the standard American diet.

goat kidding

Before we get too far into this, I have a great course on the basics of goat care. I call it Goat Crash Course: Goat 101. In this course, I explain things like types of shelter, types of feeds and hays, basic assessments and so much more! Check it out!

Buy Now

No, homesteading probably won’t save you money

But what homesteading will do is shorten your supply train. Homesteading will reduce your need on the grocery store. It will make you healthier, even if it’s only because you are more active. There are so many other pay offs when it comes to homesteading that it’s okay that it doesn’t save you a ton of money at first.

It will pay off in the end.

If you like the content I put out, feel free to buy us a coffee! It helps keep this site running, marketing and the goats in grain!

Buy me a coffee

If you like this post, feel free to share it and follow us below on our social media accounts!

  • Facebook
  • Pinterest
  • Instagram
  • YouTube
  • TikTok
  • Spotify
  • Threads

Filed Under: Animals, Canning, Chickens, Goats, How To's, Our Homestead, Pigs, Projects Tagged With: Canning, cast iron, Chickens, Chicks, cooking, Eggs, Goats, Homestead, kitchen, Welcome

JOIN TO OUR MAILING LIST!

Leave us your email to receive new posts and special offers for members only! Don't miss a thing!

Recent Posts

  • Fall Garden Guide
  • Top Mistakes With Goats
  • How To Bond With Your Goats

What to Plant in Your Vegetable Garden

July 30, 2024 by Leigh Leave a Comment

If you are new to gardening or homesteading, and you’ve been breaking your brain trying to figure out what to plant in your vegetable garden, allow me to help you! The main things I look at when planning a garden is what do I want to eat, how much space do I have, and leave room for experimenting.

cropped-3.jpg

Are you looking for garden journal prompts, but aren’t interested in a weekly email? Check out our 365 Garden Journal Prompts! This is an amazing, all in one, yearly product that you only pay for once.

Buy Now!

What To Plant In Your Gardens

Through the years, various gardens and designs, I have figured out a few things about gardening. The first is to always give more space to fruits and vegetables that you know you like. Next, is to figure out how much space I am willing to give to the stuff I like, but also the things I want to try. Finally, what do I want to try and grow.

I found Southern Dreams Homestead to have a great article for beginners and their gardens. They have a ton of great information and it’s really helpful if you don’t know what you’re doing. Learning and Yearning also has a great article about getting started with organic gardening.

cropped-3.jpg

Are you looking for garden journal prompts, but aren’t interested in a weekly email? Check out our 365 Garden Journal Prompts! This is an amazing, all in one, yearly product that you only pay for once.

Buy Now!

What fruits and vegetables do you like?

This is a very serious question that people usually get tripped up on. I despise raw tomatoes. I do not want it anywhere near my hamburger or salad. BUT I absolutely love salsa, ketchup, BBQ sauce, and more. That means I should probably not plant a ton of slicing tomatoes and plant more sauce or paste tomatoes. While, yes, Jared loves to eat raw tomatoes, he is the only one. So it doesn’t make a lot of sense to plant an entire row of slicers just for him. 

To figure out what to plant in your garden, I would sit down and really think about all the fruits and vegetables you like to eat. Then, I would think about all the cooked versions of those foods you like. Do you like pasta sauce? That’s tomatoes, peppers, onion, garlic, basil, oregano, etc. If you have the space in your garden to grow those things. Then do it!

Another thing to consider is your animals. If you have chickens or goats, you can absolutely grow extra squash for them. As you are figuring out what to plant, also think about all the things you can grow to help off set your feed bills.

Before we get too far into this, I have a great course on the basics of goat care. I call it Goat Crash Course: Goat 101. In this course, I explain things like types of shelter, types of feeds and hays, basic assessments and so much more! Check it out!

Buy Now

How Much to Plant?

Again this one is pretty simple, it comes down to space and what you like. Going back to my tomato example, out of the four of us, Jared is the only one that likes raw tomatoes. I’m not going to take up an entire row of space for slicers. But what I will do is plant a couple slicers and grape tomatoes so that he has something to snack on. The majority of my tomato space will be taken up with beefsteak or slicers.

But how much to plant? This is a varying formula that takes time to dial in. The best way to do this is to figure out how much each plant should produce and then figure out how much you need. As you grow, you will adjust how much you eat/ use but to start figure out how much you think you’ll eat and how much each plant should grow. Below is a how to become a victim of tomato math.

cropped-3.jpg

Are you looking for garden journal prompts, but aren’t interested in a weekly email? Check out our 365 Garden Journal Prompts! This is an amazing, all in one, yearly product that you only pay for once.

Buy Now!

What is tomato math?

Well, it’s the same as chicken and goat math. If I need two eggs a day for breakfast, I need at least ten chickens. That is chicken math. No, it doesn’t make any sense which is the point. Goat math is a little different because you start with two and then end up with nine and I’m still not really sure how that happened.

Tomato math is simply thinking that 25 plants is not nearly enough to sustain my family’s tomato needs and you end up with 150 plants and a ton of tomatoes. Not to mention trying to figure out what your going to do with 1,2000+ pounds of tomatoes.

The best way to figure out how much you need to plant is simple.

Figure out what the average yield for the type of plant: tomatoes are 8-10# per plant, peas are about 30 plants per person, potatoes are 5-10# per plant and so on. Then figure out how many pounds you need. I know we will go through about 100# per person for potatoes per year for cubed, shredded, whole, and fries. So I need 400#.

Then divide the number of pounds the plant yields to the number pounds you need;

Potatoes- 400/5=80 potato plants.

If you don’t know how many pounds you need, estimate and write down what you planted. When you harvest, write down the weight. Keep an eye on how much you are using and when it’s gone, figure up how many days until your next harvest. This is where garden journals are absolutely necessary!

Our herd health bundle helps you keep track of your herd’s health. Includes the goat assessment, herd check sheets AND Herd Health Tracker!

Buy Now

Experimenting With Your Garden

A lot of times, people only grow what they will eat. And that’s great if you are limited on space. But you are missing out on whole other varieties! I did a podcast about trying different varieties here. We didn’t know that we liked cabbage until we had it, same with broccoli, winter squash, radishes, etc.

Don’t be afraid to give some space to other plants in your garden. If you don’t like them, I’m sure your chickens will love them.

Are you getting overwhelmed in the garden? Stressed? Or just not enjoying the garden like you used to? Check out our garden prompts! We send out weekly emails that get you back in the garden and out of your head! Turn the garden back into a place of love and joy instead of frustration and headache!

Subscribe Now!

Try not to get overwhelmed

I know that is way easier said than done. At the end of the day, even planting one tomato plant is better than doing nothing at all. So don’t sweat it, just get out there and start digging in the dirt and enjoy the wonder of growing your own food.

If you decide to start seeds instead of buying plants, which I highly recommend, The Homesteading RD has a great guide for starting pepper plants. Since my own pepper starts didn’t do so well, I will be using some of these tips next year.

You can start big or small, it’s totally up to you. What you need to remember is that just by planting something you are doing something to decrease your dependency on the grocery store. It doesn’t matter that you didn’t harvest thousands of pounds of food. The reality is that you tried.

If your garden doesn’t produce a ton like you wanted it to, try again. I found these articles helpful for fall planting or just helping your soil through fall. Though Georgia doesn’t have much of a fall, more of a HOT, not so hot, freezing, hot…. you get the picture.

The Ultimate Homesteader’s Starter Bundle – Only $47!

Get the tools you need to stay organized, track profits, and manage your homestead with ease!

Includes:
✅ Schedule F Tracker – Simplify tax prep
✅ Profit Calculator – Track earnings
✅ Hay Calculator – Plan livestock feed
✅ Garden Journal – Digital & printable
✅ Herd Health Tracker – Monitor animal care
✅ Simple Budget – Manage finances
✅ Backyard Homestead eBook – Essential tips

$99 value – now just $47! Start your homesteading journey today!

Buy Now

Other Helpful Tips and Tricks

Over at Vintage Homestead, you can figure out how to take a soil samples. This is great for figuring out if you need extra nitrogen, fertilizer, or other materials added to your garden. Once you’ve taken your samples and have your results you can head over to Learning and Yearning to figure out how to add materials to your soil naturally.

If you’re anything like me and you want to know which plants like rhubarb and help them, head over to The Homesteading RD to take a look at what they have to say.

I am guilty of wanting to mulch everything in the garden and Learning and Yearning has a great article on how to avoid those pitfalls that comes with it.

If you like the content I put out, feel free to buy us a coffee! It helps keep this site running, marketing and the goats in grain!

Buy me a coffee

If you like this post, feel free to share it and follow us below on our social media accounts!

  • Facebook
  • Pinterest
  • Instagram
  • YouTube
  • TikTok
  • Spotify
  • Threads

Filed Under: Animals, Canning, Chickens, Garden, Goats, How To's, Pigs, Projects Tagged With: cooking, Homestead, Organic, Plants

JOIN TO OUR MAILING LIST!

Leave us your email to receive new posts and special offers for members only! Don't miss a thing!

Recent Posts

  • Fall Garden Guide
  • Top Mistakes With Goats
  • How To Bond With Your Goats

How To Pressure Can Green Beans

July 20, 2024 by Leigh 2 Comments

Jump to Recipe

I am extremely picky when it comes to green beans. I cannot stand mushy green beans. The thought of the skin of the green bean scraping against my teeth is enough to make me want to vomit. So the only way I will buy, can or otherwise consume green beans is frenched green beans. Today, I went to my local farmers market for strawberries. Yes, they are worth the two hour round trip drive and I saw they had bushels of green beans! Score! So today I’m going pressure can green beans.

The Ultimate Homesteader’s Starter Bundle – Only $47!

Get the tools you need to stay organized, track profits, and manage your homestead with ease!

Includes:
✅ Schedule F Tracker – Simplify tax prep
✅ Profit Calculator – Track earnings
✅ Hay Calculator – Plan livestock feed
✅ Garden Journal – Digital & printable
✅ Herd Health Tracker – Monitor animal care
✅ Simple Budget – Manage finances
✅ Backyard Homestead eBook – Essential tips

$99 value – now just $47! Start your homesteading journey today!

Buy Now

Pressure Canning Green Beans

The first thing you need is fresh green beans. Straight from the garden is the best but today we are working with what we’ve got. I got a bushel which is about 30# of green beans and will yield about 25 quart jars of beans. This is not precise. Sometimes a bushel is only 25# and only 18# of usable green beans. So be prepared for less or more.

You’ll need a couple bowls, cold water for soaking, jars, pressure canner and the assorted tools that go with pressure canning.

Let’s Get Snapping

You’ll need a couple bowls so you can snap to your hearts content. This is seriously my favorite part. No one wants to help because it’s pretty mindless which is why it’s my favorite part. Last year I snapped two bushels of green beans in six hours. I took my time and got to watch my farm. I watched the goats play, the chickens scratch, and my boys help Jared build. All while I took a load off.

If you don’t know how to snap beans, it’s very simple. Snap off the ends at about 1/2 inch, roughly. Throw the ends in a bowl. Then snap the bean in half or thirds depending on how big you want your pieces. Just work through your bushel/ bag.

If you have goats or chickens, they will love you for giving them the ends. All of the animals fight over the beans, tops and bottoms and of course anything that gets dropped on the floor.

Soak Your Beans

Next clean your sink or a cooler and let them sit in cool water for about 30 minutes. You don’t have to do this step but I feel like it gets all the dirt and grime off your beans. You can do this before you start snapping, go for it, it’s totally up to you.

Also, I will “agitate” the water with my hands to help scrub off any dirt or debris that is on the beans.

I like using a cooler because I can just dump the processed beans straight into a cooler of cool water on the porch and I don’t have to move. Which is ideal considering I usually process 40-50 quarts of green beans at a time.

French Cut Green Beans

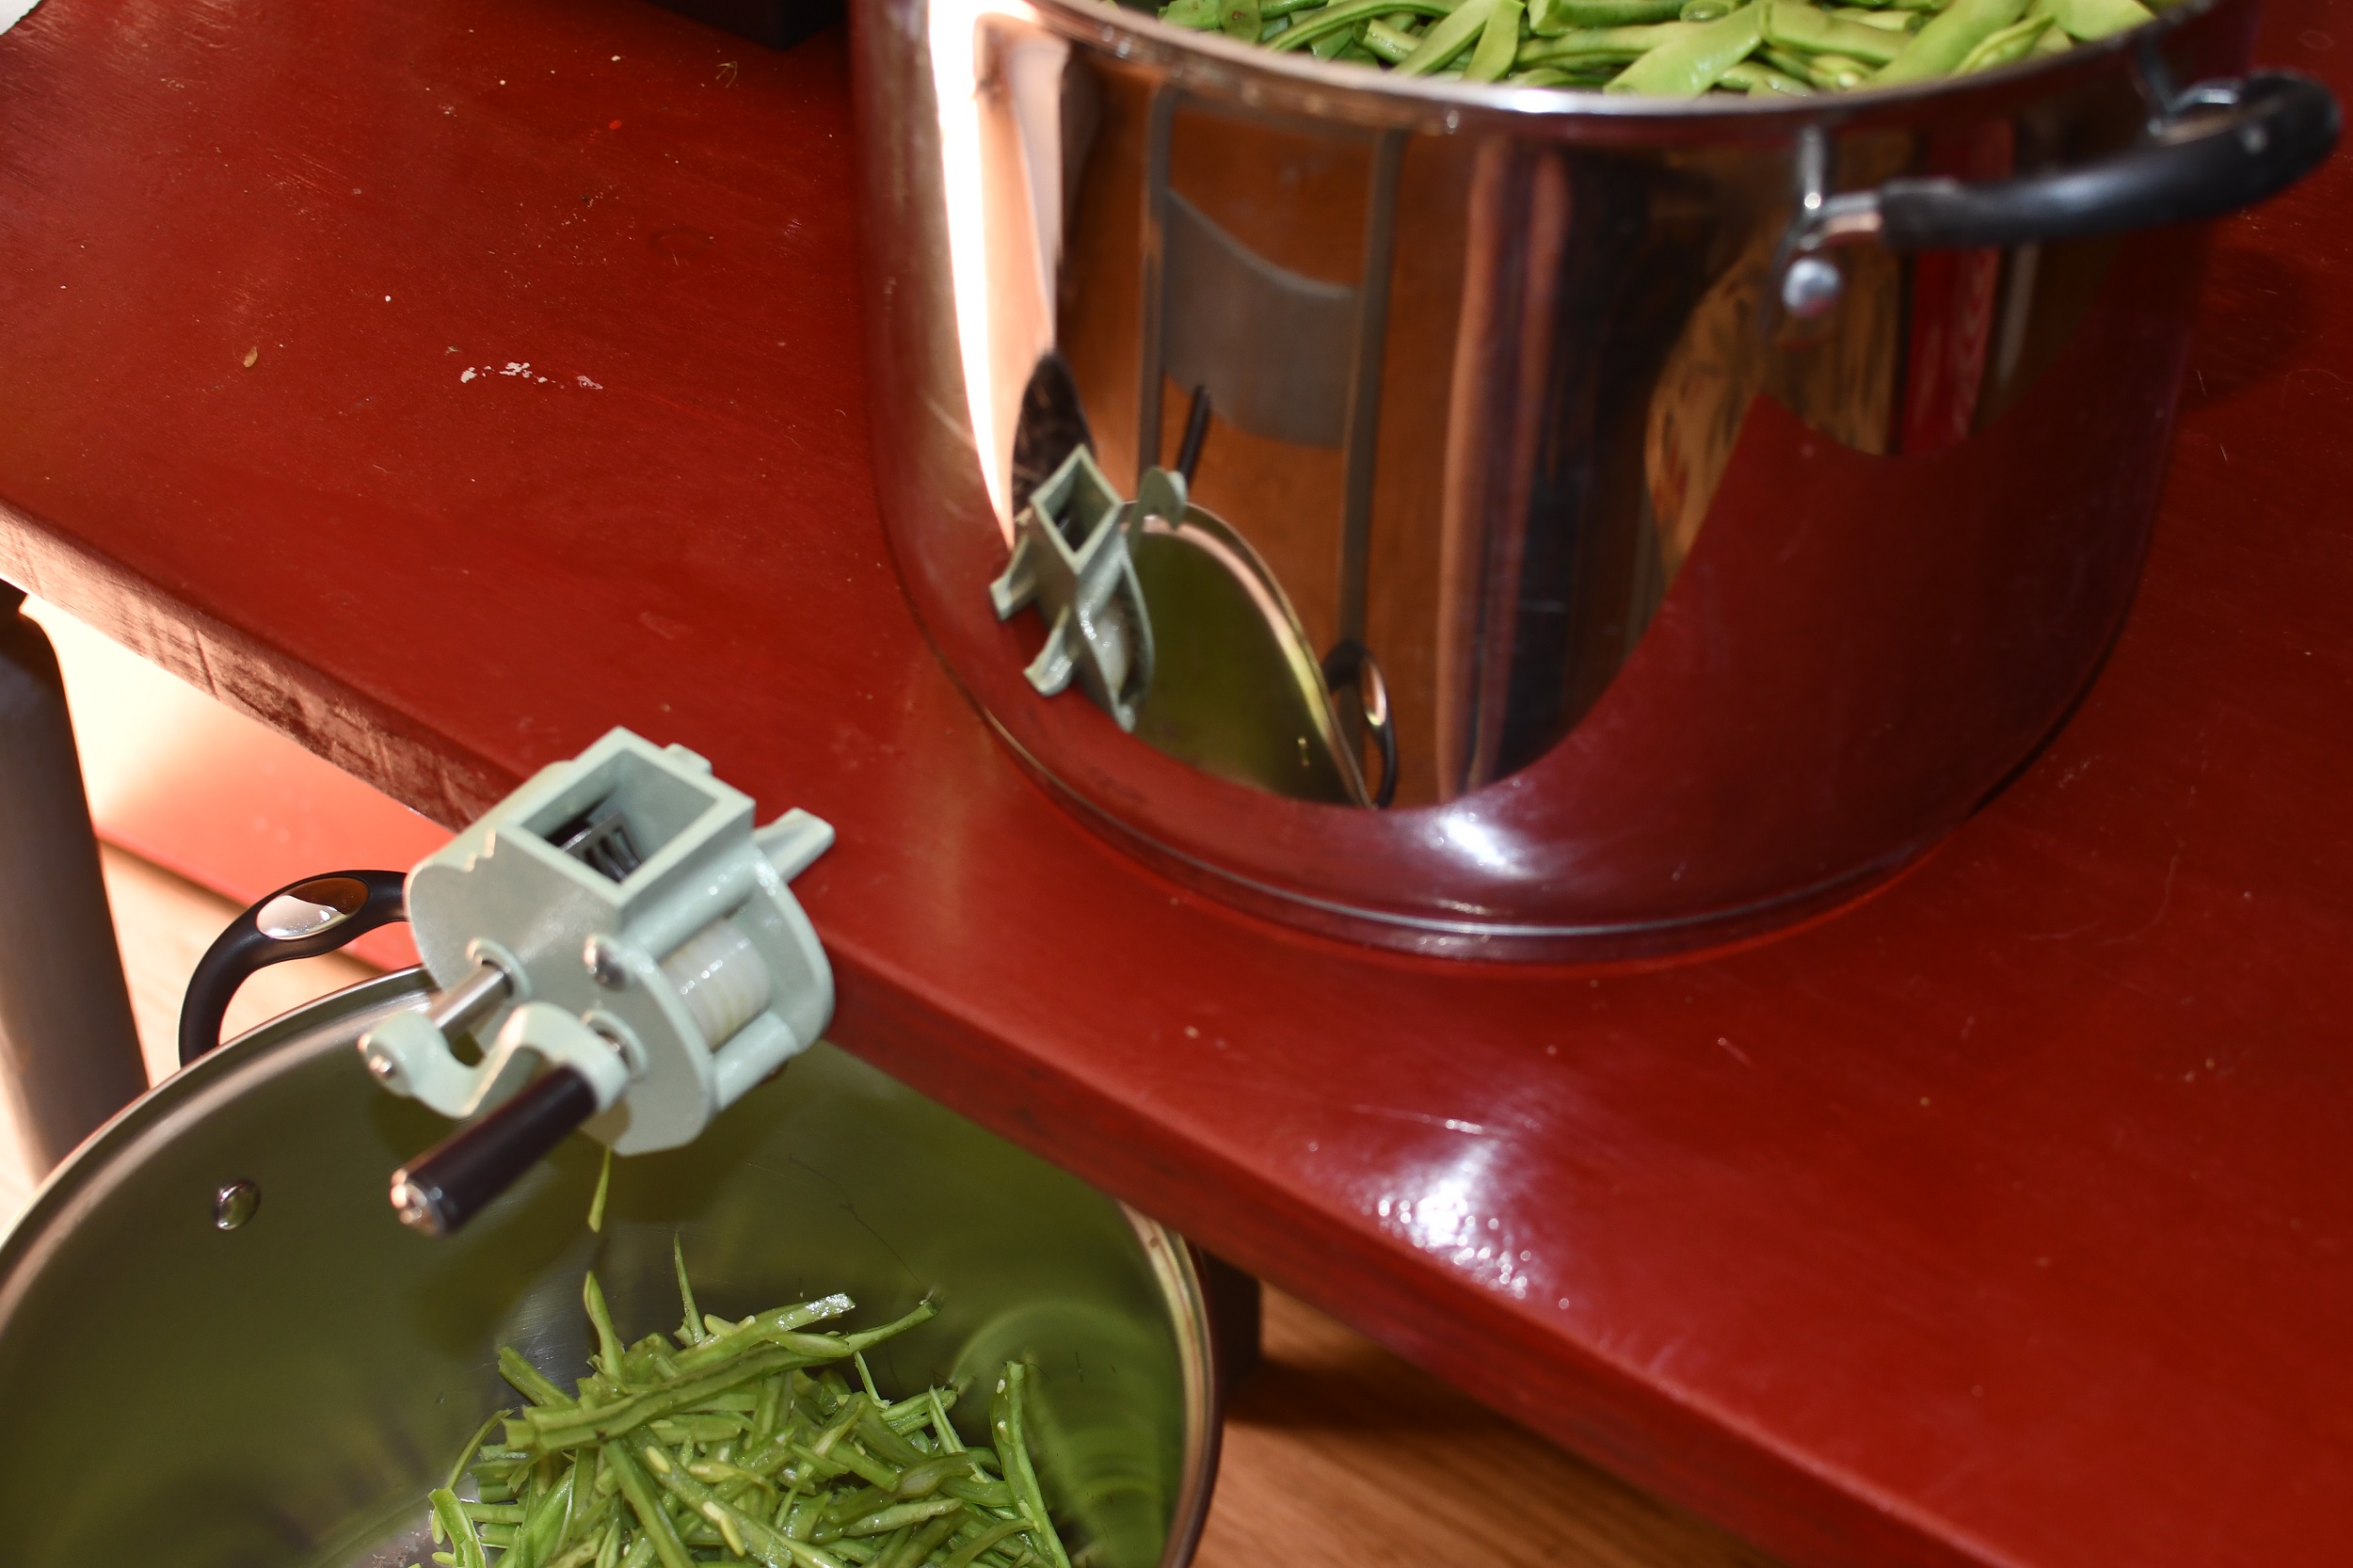
Once they are clean, I run them through the frencher. If you don’t have a frencher or don’t want french cut beans just skip this step. But make sure that you snap your beans a little smaller about an inch long.

If I am canning green beans, which is the entire point of this post, I only can French cut green beans. So you’ll need a frencher like this one and while I love it, it does get stuck if the bean is too big or too hard. It also requires you to attach it to a counter, table, etc and sometimes it just doesn’t work that well. But it’s the best crank version and I don’t like the manual ones.

Get Your Canner Ready

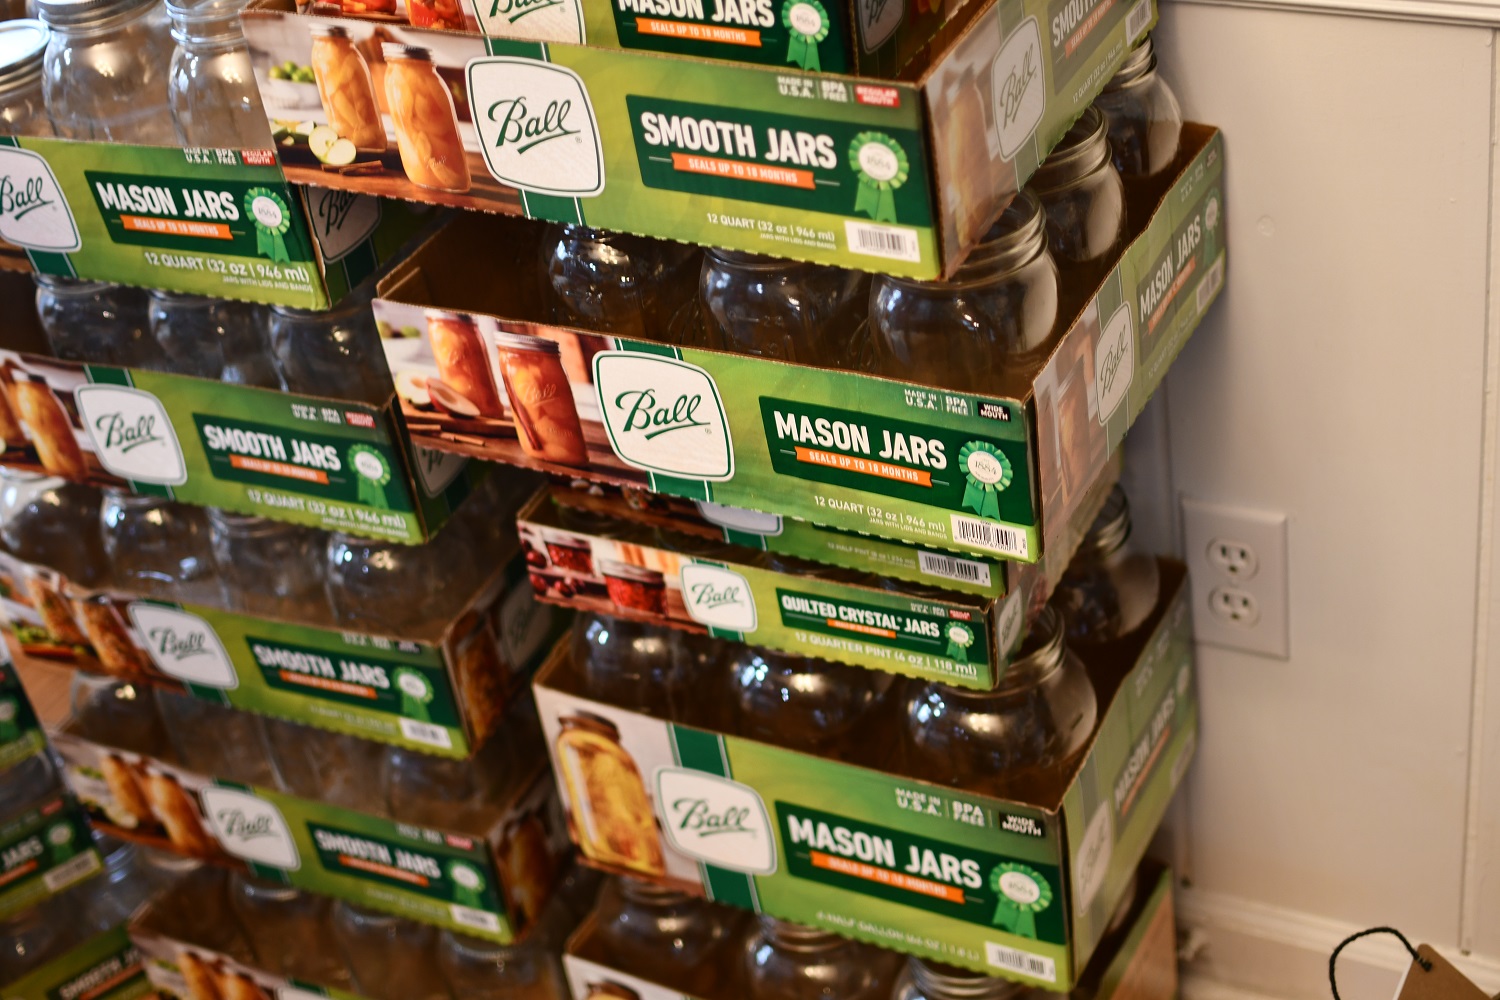
Next, get your canners ready. You need a pressure canner. I have two similar to this one but mine don’t have the gauge. You don’t HAVE to have the gauge. If you head to your local Wal-Mart they should have one that doesn’t have a gauge. While you’re at Wal-Mart go ahead and get at least two cases of quart mason jars. Ball is the most common, but Azure Standard has some really great jars as well. Also pick up the tool pack that has a canning funnel, canning tongs, and the de-bubbler. It should look like this.

Your specific canner should tell you how much water to put into it. My canner says three quarts. It will not fill the canner, and you don’t want it to. Go ahead and fill it to your manufactures instructions and get the water boiling.

Pack Your Green Beans Into Jars

While waiting on your water to boil, you’re going to start packing your jars. Using your funnel and clean hands start packing your green beans into your jars. I usually pack till the green beans are about an inch and a half from the top. I usually push down to get as many beans in as possible but you also don’t want to pack it so full. Set it off to the side until you have a canner full. This is usually seven-ten quart jars depending on the size of your canner.

Once you have a full canner ready (not in the canner yet), go ahead and fill each jar with room temperature water till you have 1″ head space. Head space refers to the space from the top of the food/water to the top of the jar. Next, you’re going to use the de-bubbler to get all the air bubbles out.

I’m not going to lie to you, I gently tap the jar on the counter until all the bubbles are at the top. It’s worked well for me, usually because I can’t find the de-bubbler thing. Add more water to the jar to maintain the 1″ head space.

Then wipe the rim of the jar with a paper towel or rag dipped in vinegar. Put the lid and then ring on to finger tip tight and you are ready to put them in the canner. I usually place them in the canner all at once so that nothing starts cooking before I’m ready.

Loading Your Pressure Canner

By the time you are ready to start adding your jars, your water should be boiling or close. Go ahead and place your jars in the canner and place the lid per your canners instructions. The normal process for most canners is to let the canner vent for ten minutes before placing your weight on the vent. But again, follow your canners instructions.

My canners have a pressure lock that will pop up once it has come to pressure and shortly after that the rocker will rock. Your canner may be different.

Once the weight starts to rock, or you are up to your PSI on your gauge, you start your time. I will also usually drop the temp on the burner at this point too. I have it on high to get everything up to pressure but will usually drop it to medium to medium high once the weight is rocking. You only want the weight to rock about once every few seconds. Usually mine just gently jiggles.

Green beans need to be processed for 25 minutes. Depending on your altitude will depend on your actual times. I process mine at 25 minutes at 15 PSI for quarts because I am over 1000 feet above sea level.

PS Loading a canner is pretty universal. That process is pretty much the same for everything you are going to pressure can except headspace, time and pressure (Your PSI will never change unless you love altitude).

After Processing Your Pressure Canned Green Beans

When time is up, simply turn off the heat and wait about ten minutes. After that you can move your canner off the burner. Some people move it before, some never touch it. It’s up to you. If I’ve got multiple canners going, I will pull mine off the burner.

You MUST let your canner depressurize naturally! This is none negotiable. At best, you will ruin your food. At worst you can warp your canner or blow up your kitchen. Let’s not do that.

Once the pressure lock drops you can remove ONLY the weight. Once the pressure lock drops and you have removed the weight, give it about ten minutes or so and then you should be able to crack the canner open.

There will be steam that comes out so please be careful. Leave the lid on for another ten minutes or so. The other way you can do it is just put your canner off to the side and let it set for about an hour to hour and a half. This should give it plenty of time to depressurize naturally. When in doubt, leave it alone.

Unloading Your Canner

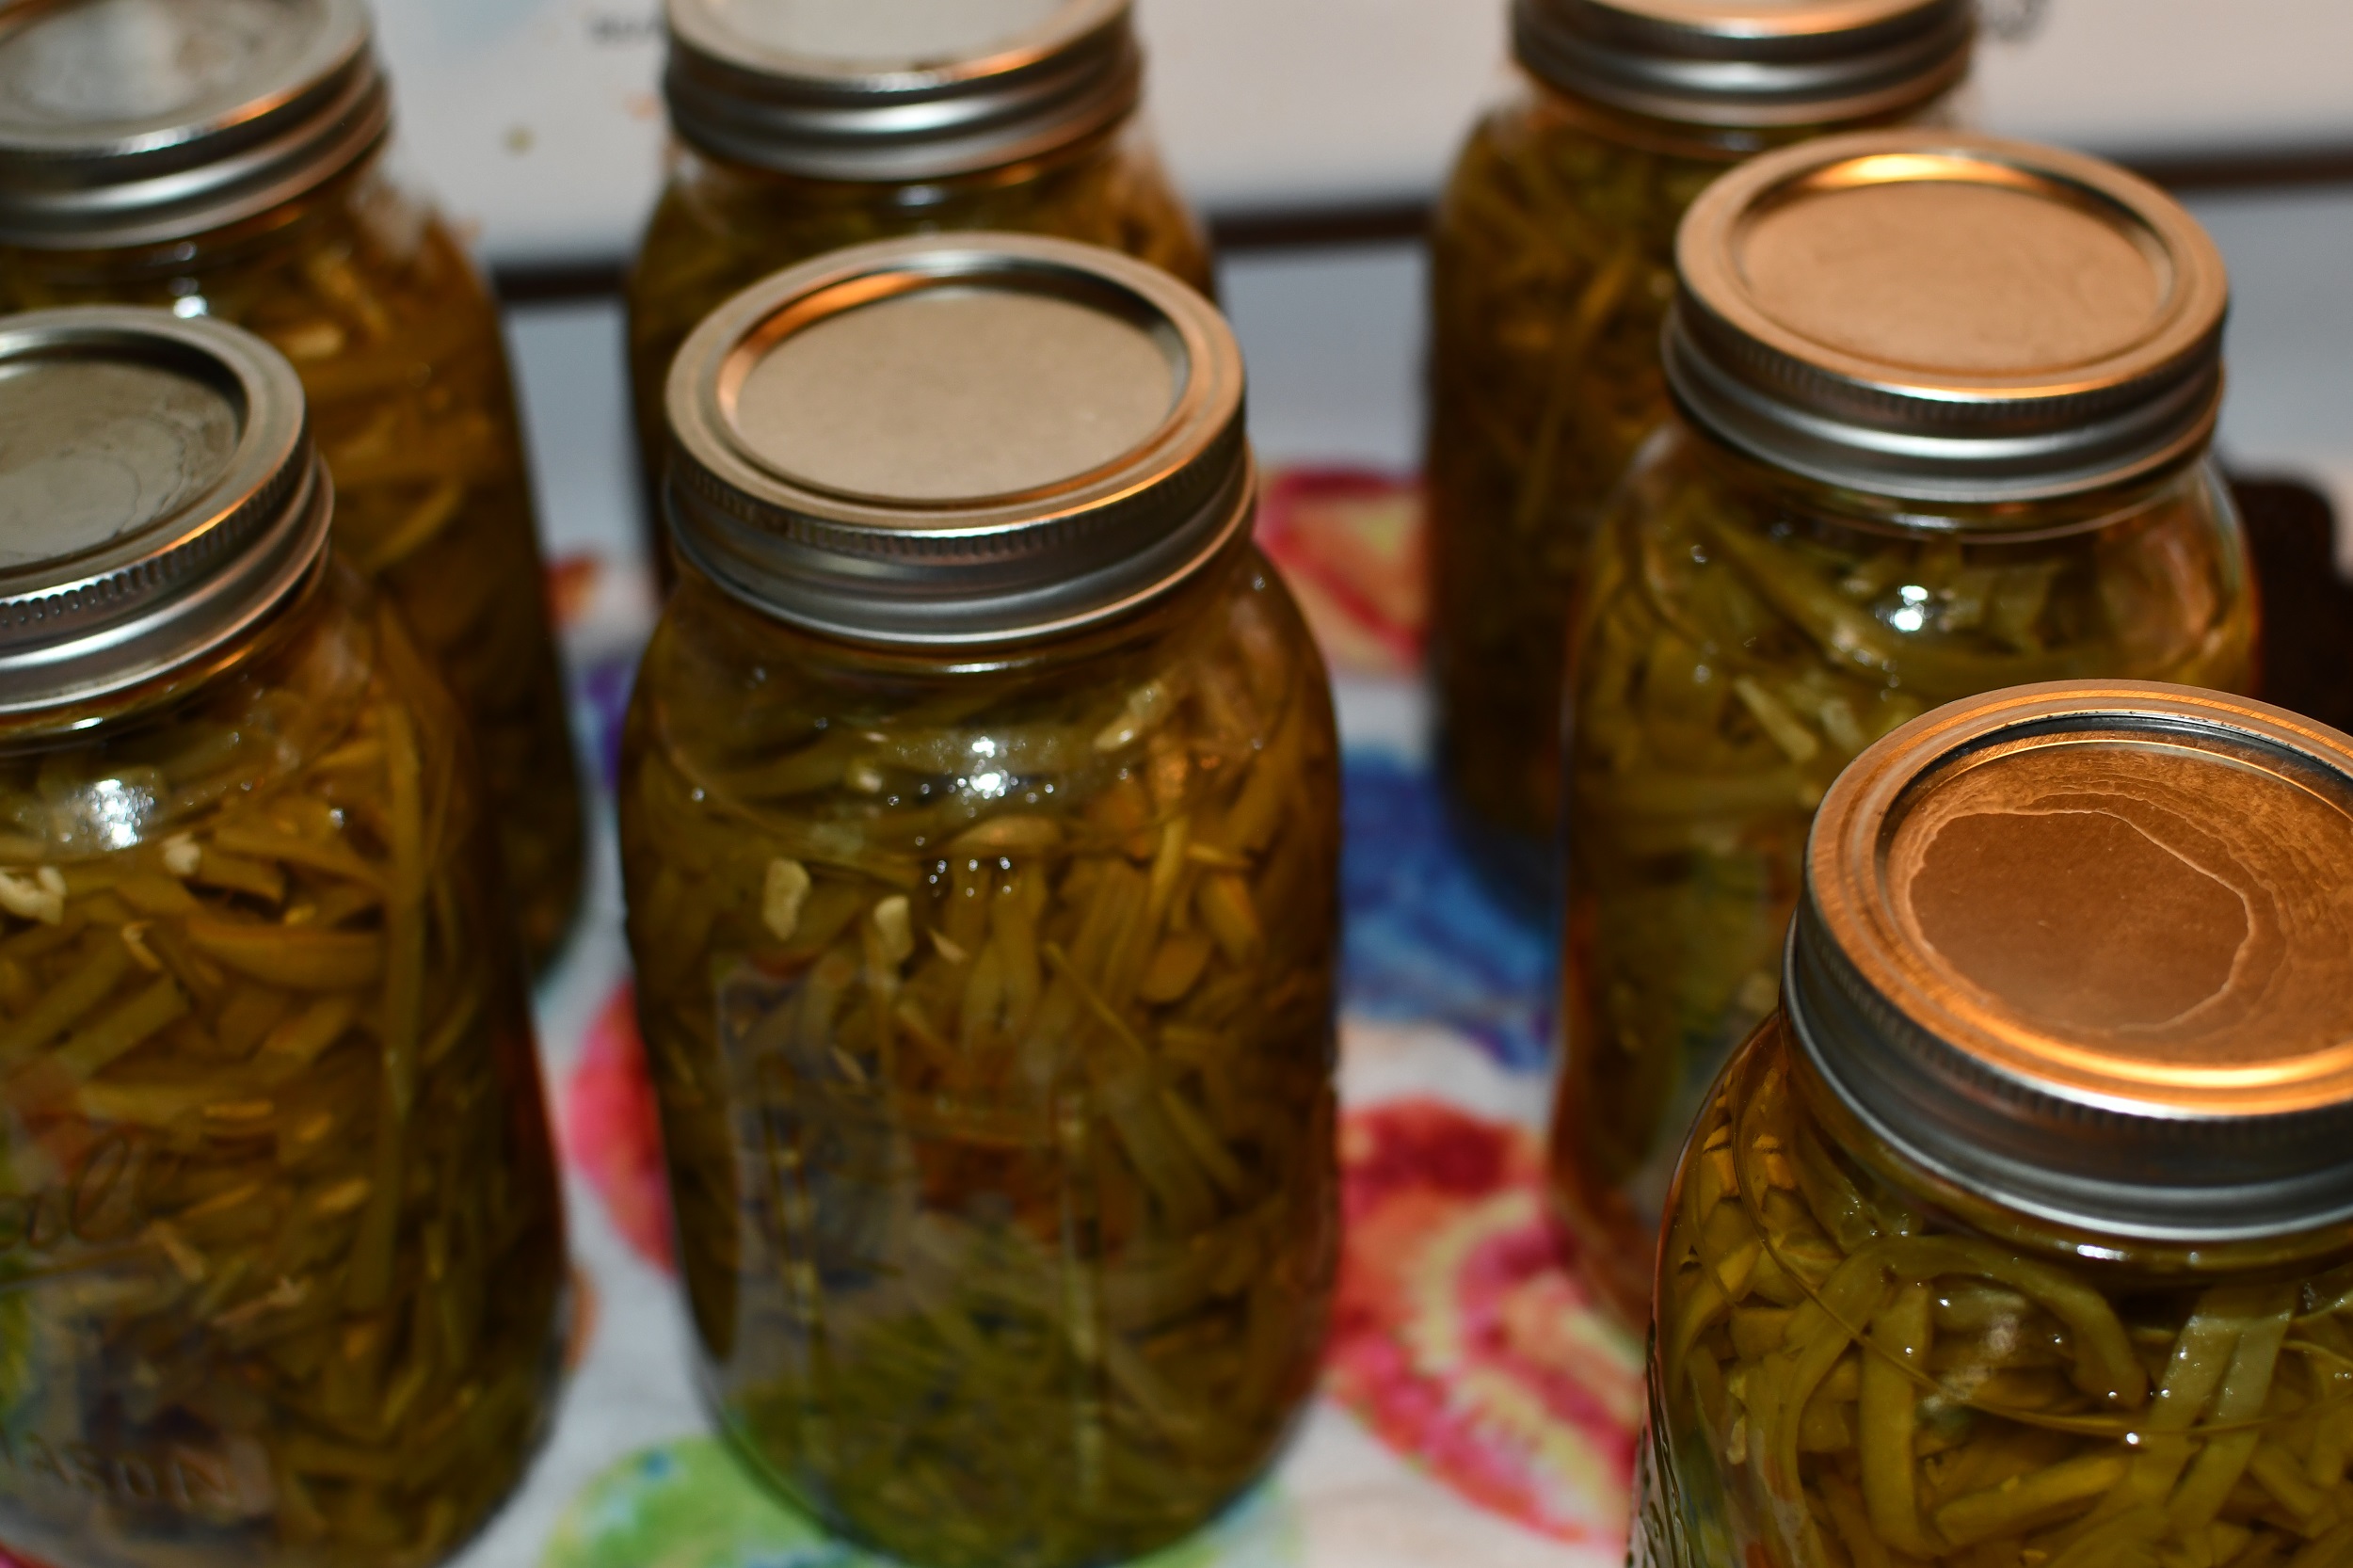
You can then take the lid off and carefully lift out the jars using the jar tongs. Again, be very careful. The contents of the canner and jars are still extremely hot. I put the jars on a folded towel to start to cool. Within 24hrs you will hear the sweet pinging of success! You can test your seal after 24hrs by pressing down on the lid. If there is give, it’s not sealed. If it sealed, you won’t feel or hear anything when you press it.

Anything that is not sealed needs to go into the fridge or be eaten within a couple of days.

Also, please, please, please remove your rings from the jars before storage. Normally, I am very much your kitchen, your rules. But on this one, I’m going to be a little more vocal…. The reason we remove rings from jars is because if that jar becomes unsealed for any reason, you will never know it if the ring is still on. As temperatures change in your storage area, seals can break. As bacterial get in and start growing, it could re-seal itself.

I’ve had a few jars that we forgot to take the ring off of and pulled months later? There was no way to tell that the lid resealed and the food inside looked perfectly fine. But there was a film on the top of the food. So be careful. Was the food safe, maybe? I wasn’t willing to risk it. So do yourself a favor and remove the rings.

But that’s it! You will love your green beans!

If you like the content I put out, feel free to buy us a coffee! It helps keep this site running, marketing and the goats in grain!

Buy me a coffee
Print Recipe
Print

Pressure Canned French Cut Green Beans

The best green beans that you can make and can yourself.
Prep Time6 hours hrs
Active Time2 hours hrs
Total Time8 hours hrs

Equipment

  • 1 Pressure Canner
  • 1 Canning Kit Funnels, Canning Tongs, and Debubbler
  • 1 Green Bean Frencher
  • 2 Cases of Quart Jars You can use pints but get double the amount
  • All Bowls and Stock pots You will probably need every last one by the time this is all said and done

Materials

  • 1 bushel Green Beans

Instructions

  • Snap your green beans by snapping off the top and bottom. Then snap them into desired lengths. I tend to snap mine in 2in sections but it's not a big deal if they are longer or shorter
  • Rinse beans well. I usually have a big stock pot full of water and I just throw the beans into that as I snap
  • Once you are either done snapping or you have filled your first pot, drain the water. Now you will start frenching. If you are using the crank tool then make sure you've got a pot under it. Start feeding your green beans through it.
  • When you arms feel like jello from cranking, take a break and fill up your pressure canner with water to per manufacture instructions. Mine says 3qts.
    Get it on the stove to start boiling.
  • Next start filling your jars with green beans. I tend to pack my jars pretty full. Fill with room temperature water, wipe the rim with a vinegar rag and place a lid and ring on it. Tighten ring to finger tight.
    Set it off to the side
  • Once you have a full canner of jars, gently set the jars into the canner. If the water is already boiling you can secure your canning lid. Follow manufacture instructions on using your canner. Every single one is different.
  • Process for 20 minutes for pints and 25 for quarts at 10# of pressure. Adjust for altitude.
  • When processing is over allow canner to depressurize naturally. This could take a couple hours depending on your model so be prepared.
  • Once canner is cool and safe to open, bring your jars out and allow them to cool. Listen for the ping and check your seals the next morning. Anything that doesn't seal, put in the fridge and eat within a couple of days.

If you like this post, feel free to share it and follow us below on our social media accounts!

  • Facebook
  • Pinterest
  • Instagram
  • YouTube
  • TikTok
  • Spotify
  • Threads

Filed Under: Canning, Canning Recipes, How To's Tagged With: Canning, cooking, green beans, Homestead, kitchen, pressure canning, Recipes

JOIN TO OUR MAILING LIST!

Leave us your email to receive new posts and special offers for members only! Don't miss a thing!

Recent Posts

  • Fall Garden Guide
  • Top Mistakes With Goats
  • How To Bond With Your Goats

What To Do With Squash

June 25, 2024 by Leigh Leave a Comment

Squash is a very prolific plant for us. We don’t have a ton of pressure from squash bugs, though we do have them. But it doesn’t take long before we are drowning in squash. If you have squash coming out of your ears, you have probably asked the magical Google what to do with squash. I’ve compiled a list of the various things we do with squash that not only feed us but our animals. Plus a bonus on what we do with winter squash.

The Ultimate Homesteader’s Starter Bundle – Only $47!

Get the tools you need to stay organized, track profits, and manage your homestead with ease!

Includes:
✅ Schedule F Tracker – Simplify tax prep
✅ Profit Calculator – Track earnings
✅ Hay Calculator – Plan livestock feed
✅ Garden Journal – Digital & printable
✅ Herd Health Tracker – Monitor animal care
✅ Simple Budget – Manage finances
✅ Backyard Homestead eBook – Essential tips

$99 value – now just $47! Start your homesteading journey today!

Buy Now

What To Do With Squash

Squash is one of the most versatile veggies in the garden. Probably second only to tomatoes and potatoes. It’s a fast growing and productive plant, that if you can keep healthy, will out produce EVERY plant in the garden. But when even you are rebelling against eating one more sauteed squash for dinner, it can be overwhelming.

There are two types of squash; summer and winter. Depending on where you live, you may be able to keep your winter squash without having to do anything with it. I’ll go over more on how to keep winter squash at the bottom of this post. But unless otherwise stated, this post is focused more on summer squash.

But I wanted to go over some of the ways that we use our squash so that we aren’t just throwing out moldy squash. There are three big things that we do with squash, besides fresh eating; freeze it, dehydrate it or give it to our animals.

Before we get too far into this, I have a great course on the basics of goat care. I call it Goat Crash Course: Goat 101. In this course, I explain things like types of shelter, types of feeds and hays, basic assessments and so much more! Check it out!

Buy Now

Freezing Squash

Freezing squash is a great way to extend the shelf life of this beloved veggie. Though there are some considerations. First is that very few things have the best texture when coming out of the freezer. So if that is going to be a problem, then don’t put your entire harvest in the freezer. Also make sure that you are washing your produce before you put it in the freezer!

When we put squash in the freezer, we usually slice it into half inch medallions and lay them on a tray with either parchment paper or silicone mats. This allows the squash to freeze separately before going in a bag. You don’t have to, but it makes thawing a lot easier. We will also cube it or grate it and store depending on what we need it for.

Squash will hold it’s shape well when thawing but it is usually going to taste better in soups, stews, or mashed up. We will use it in stir fry’s and have enjoyed it, but again, remember texture will be a thing.

Lastly, be aware that the more stuff you put in your freezer, the harder it will be to find it later. No matter how well you keep your freezers organized, it’s only a matter of time before you find a 6 year old bag of squash at the bottom of your freezer.

If you are new to heating with firewood and are looking to master the finer points of it. We’ve got a great eBook that goes in depth of what tools you should consider, how and where to stack, how to build a fire and so much more!

Buy Now

Dehydrating It

This is hands down my favorite way to store squash. It takes up less space and uses zero electricity to store. I also love the fact that I can set it and forget it, in the dehydrator. It’s not like it’s going to spoil sitting in a running dehydrator. I use this dehydrator and absolutely love it! Also, I go more in depth about dehydrating foods here.

I will chunk up several trays worth of various squash to put in the dehydrator. Then I turn it on to veggie and let it run until I remember it’s been going for 3 days…oops. Once it’s done, or I remember it exists, I will pump them into half gallon mason jars like this and store.

Now, you can and probably should put oxygen absorbers in there, but usually I don’t. I haven’t found any issues with not doing it. You can also use mylar bags, but I have found that keeping everything in jars is better for my set up. The reason I don’t bother with oxygen absorbers and bags is because I’m not usually storing for more than a year.

Are you getting overwhelmed in the garden? Stressed? Or just not enjoying the garden like you used to? Check out our garden prompts! We send out weekly emails that get you back in the garden and out of your head! Turn the garden back into a place of love and joy instead of frustration and headache!

Subscribe Now!

When it comes to using dehydrated squash, I usually throw it in soups and stews for extra veggies. It also helps absorb any extra water and flavoring.

To reconstitute dehydrated squash, I will fill the bottom of a bowl with however much I needed, then add boiling hot water over the top, covering the squash with several inches of water. If I need more water, I’ll add more as the squash absorbs it. But again, usually my dehydrated squash is going into soup.

Give Squash To Your Animals

Most animals can eat most squashes without worry. Yes, there will be outliers that can’t handle squash, but for the most part, squash is perfectly safe for animals to eat. But if you have questions, reach out to a vet. That being said, we will gladly give our animals excess squash.

Our chicken’s run is right next to the garden so when I fill my basket with squash, I will chuck whatever is ready but I can’t use over the fence to them. They love it! Plus this helps reduce our feed bill which is always a win win.

Also, the seeds from squash can act as a natural dewormer for your animals, so win, win, win.

When we feed squash to the goats, we do it in moderation AND we cut it into smaller pieces. Their mouths are not very big and we don’t want to cause them to choke.

goat kidding

Before we get too far into this, I have a great course on the basics of goat care. I call it Goat Crash Course: Goat 101. In this course, I explain things like types of shelter, types of feeds and hays, basic assessments and so much more! Check it out!

Buy Now

Storing Winter Squash

Finally, when it comes to winter squash, there are a few more things to consider. First and foremost, winter squash is grown for storage. The skin of it is thicker and able to withstand storage. Usually, you can store winter squash for about 3 months in ideal situations. This means a cool, dark place with good air flow.

The problem with that is I don’t really have an ideal place to store winter squash, whole. Come end of harvest season, my canning shelves are crammed with jars of food, storage items, potatoes, and other random bits. So my favorite way to store winter squash is to either can it or freeze it.

Usually, I will peel the squash, scoop the seeds and cube it. I will either flash freeze it (freezing on silicone mats or parchment paper) and put it into bags. Or I will go ahead and can it. I don’t usually dehydrate winter squash because it takes so long, but I’m not opposed to it either. It really depends on my mood and what I have going on at the time.

cropped-3.jpg

Are you looking for garden journal prompts, but aren’t interested in a weekly email? Check out our 365 Garden Journal Prompts! This is an amazing, all in one, yearly product that you only pay for once.

Buy Now!

I hope this helps you figure out what all you can do with your squash!

If you like the content I put out, feel free to buy us a coffee! It helps keep this site running, marketing and the goats in grain!

Buy me a coffee

If you like this post, feel free to share it and follow us below on our social media accounts!

  • Facebook
  • Pinterest
  • Instagram
  • YouTube
  • TikTok
  • Spotify
  • Threads

Filed Under: Dehydrating Food, Freezing, Garden, Working With Food Tagged With: Chickens, dehydrating, Eggs, food, freezing, Garden, Goats

JOIN TO OUR MAILING LIST!

Leave us your email to receive new posts and special offers for members only! Don't miss a thing!

Recent Posts

  • Fall Garden Guide
  • Top Mistakes With Goats
  • How To Bond With Your Goats

Best Food Preservation Methods

June 8, 2024 by Leigh Leave a Comment

As we start working our way through spring and into summer, we need to start thinking about the best food preservation methods. There are many different ways to preserve your harvest and they are all great. If you follow the FDA and USDA guides, you’ll find that preserving your harvest may not be possible and freezing is your best bet. If you are a rebel, like myself, you may find that pressure canning is the saving grace to all that hard work. Regardless the question will eventually arise “what is the best way to preserve this?” While the answer is totally up to you, I will give you my reasons why I choose to can the majority of my garden harvest.

The Ultimate Homesteader’s Starter Bundle – Only $47!

Get the tools you need to stay organized, track profits, and manage your homestead with ease!

Includes:
✅ Schedule F Tracker – Simplify tax prep
✅ Profit Calculator – Track earnings
✅ Hay Calculator – Plan livestock feed
✅ Garden Journal – Digital & printable
✅ Herd Health Tracker – Monitor animal care
✅ Simple Budget – Manage finances
✅ Backyard Homestead eBook – Essential tips

$99 value – now just $47! Start your homesteading journey today!

Buy Now

Best Food Preservation Methods

There are 3 main types of preservation and obviously many sub categories. The 3 big ones are freezing, canning, or dehydrating. Each one of these methods have pros and cons. Each food that you are looking to preserve will have better results depending on your methods. While I am very much a rebel when it comes to how I preserve my foods, it all comes down to two main considerations, texture and safety.

Freezing

I have two huge chest freezers and one upright freezer, which sounds like a lot. But it’s not when you purchase whole hogs and cows and butcher 100+ meat chickens every year. A whole cow will overflow an entire 18cu ft chest freezer. And even breaking down chickens still takes up a ton of space. Despite great organization, those freezers are crammed to the max with various meats.

But there are certain things that we are just going to freeze instead of canning. Things like green beans, corn on the cob, shredded potatoes, and the over abundance of tomatoes.

We are at the point were we are going to have to get a third chest freezer to handle all of the produce and meat we consume every year.

The biggest downsides to freezing is space, texture and power outages.

The Ultimate Homesteader’s Starter Bundle – Only $47!

Get the tools you need to stay organized, track profits, and manage your homestead with ease!

Includes:
✅ Schedule F Tracker – Simplify tax prep
✅ Profit Calculator – Track earnings
✅ Hay Calculator – Plan livestock feed
✅ Garden Journal – Digital & printable
✅ Herd Health Tracker – Monitor animal care
✅ Simple Budget – Manage finances
✅ Backyard Homestead eBook – Essential tips

$99 value – now just $47! Start your homesteading journey today!

Buy Now

Canning

I am a rebel so I will can pretty much anything. There are certain things that I will absolutely pressure can vs waterbath. There are also things that I will freeze over can. The big one is meat. Canned meat just doesn’t suit our tastebuds. I have some and let’s just say, it’s not pretty. The ground beef taste like cat food looks. The chicken looks nasty and to be honest, I don’t know if I can bring myself to try it.

But there are many, many things that I choose to can for the ease and space saving. Things like corn, green beans, soups, potatoes, beans, and the like.

But I don’t can things like squash, green beans, peas, and meats. I can’t stand the texture of these foods canned. Though I will can French cut green beans occasionally.

I have found that canning is a huge space saver when it comes to freezer space but it has it’s own draw backs. Storage becomes a hassle if you don’t have the ability to dedicate a space to storing jars, canners, lids, etc.

Another big draw bag is the time it takes to prep for canning. While I don’t babysit my canners when they are working, I do stick close because I don’t want to risk the canner stopping or running out of propane.

goat kidding

Before we get too far into this, I have a great course on the basics of goat care. I call it Goat Crash Course: Goat 101. In this course, I explain things like types of shelter, types of feeds and hays, basic assessments and so much more! Check it out!

Buy Now

Dehydrating

This is probably my favorite way to preserve foods. It is very hands off and I don’t need to worry as much about setting timers, checking propane or making sure I have enough space in the freezers. I just fill my trays, pop them in the dehydrator and hope I remember them in a day or two.

I love to puree tomatoes and then dehydrate the crap out of them. Skin and all. When it’s finally dry, usually two days, I throw it in my blender and now I have tomato flakes. I can reconstitute it for paste, sauce, or added flavor in soups.

I’ve also done the same thing with left over mashed potatoes. Throw it in a silicone liner, pop it in the dehydrator and then blend. Now, I’ve got instant potato flakes that I can just add warm milk or water to.

I love the minimal waste of a dehydrator too. If I don’t need a whole onion, I can chop up the rest of it and put it in the dehydrator and now I’ve got a shelve stable product that will take years to go bad.

Dehydrating is the most versatile of all the options. But it can take forever.

I have this dehydrator as well as a DIY one that we found at Habitat For Humanity. I would recommend going as big as you can afford and store if you have a good size garden. You would be surprised at how much you can fit in a dehydrator but it also really isn’t that much either. So make sure that you go bigger than you need.

cropped-3.jpg

Are you looking for garden journal prompts, but aren’t interested in a weekly email? Check out our 365 Garden Journal Prompts! This is an amazing, all in one, yearly product that you only pay for once.

Buy Now!

But What’s The Best Food Preservation Method?

That is really going to depend on you, what you are preserving and what you have at your disposal. If you don’t have a ton of space for extra freezers, then freezing isn’t going to be a good option. Or if you don’t have a basement that you can put in shelves, canning may not be a good option either. Finally, if you are looking for good emergency preparedness options, adding foods that need water to reconstitute isn’t a great option either.

For me and my family, I choose to do a mix of all three methods. I enjoy having my meats and some veggies in the freezer. I prefer to have soups canned and ready to go to take to work or on nights that I just don’t feel like cooking. I love the versatility of dehydrated veggies in soups to help soak up the water and add some heartiness.

The best food preservation method is the one that works for you, your family and your situation. If you can’t stand the texture of frozen strawberries, then dehydrate them. If you don’t have the space for hundreds of jars of food, look into freezing.

Are you getting overwhelmed in the garden? Stressed? Or just not enjoying the garden like you used to? Check out our garden prompts! We send out weekly emails that get you back in the garden and out of your head! Turn the garden back into a place of love and joy instead of frustration and headache!

Subscribe Now!

Try Different Methods

I love a good experiment and luckily, if we don’t like something, we can feed it to the chickens. I froze a bunch of strawberries I had gotten at half price and when I went to use them, I couldn’t stand the texture. So they got put in to mix drinks, got used as ice, or just got thrown to the chickens. But I also dehydrated a bunch and they were a decent snack.

I canned a bunch of dried beans because I never remember to soak or have time to make them on the go. The beans were okay and I’d do it again, but I wouldn’t go out of my way to make cases and cases like I did. If my instapot broke, I would definitely do it again though.

Don’t be afraid of trying a few of these methods and figure out what you like. I didn’t know that I loved green beans until I had them fresh from the garden. Go figure.

If you like this post feel free to share it on your social media and follow us on the social medial links below!

If you like the content I put out, feel free to buy us a coffee! It helps keep this site running, marketing and the goats in grain!

Buy me a coffee

If you like this post, feel free to share it and follow us below on our social media accounts!

  • Facebook
  • Pinterest
  • Instagram
  • YouTube
  • TikTok
  • Spotify
  • Threads

Filed Under: Canning, Freezing, Working With Food Tagged With: Canning, dehydrating, freezing, Garden, Homestead

JOIN TO OUR MAILING LIST!

Leave us your email to receive new posts and special offers for members only! Don't miss a thing!

Recent Posts

  • Fall Garden Guide
  • Top Mistakes With Goats
  • How To Bond With Your Goats

How To Set Homestead Goals

May 28, 2024 by Leigh Leave a Comment

We all know the saying “A goal is a dream with a deadline.” — Napoleon Hill. We also know that when you break that goal down into steps it becomes a plan. Then when you take action, you can make those dreams come true. You can think it’s a load of goat shit but it really is true. We had a dream of owning a homestead, we added a deadline, made a plan, and when we followed through. Our dream became reality. If your goal is similar to ours, or if you already have a homestead and you are trying to figure out your next steps, this is how to set homestead goals.

The Ultimate Homesteader’s Starter Bundle – Only $47!

Get the tools you need to stay organized, track profits, and manage your homestead with ease!

Includes:
✅ Schedule F Tracker – Simplify tax prep
✅ Profit Calculator – Track earnings
✅ Hay Calculator – Plan livestock feed
✅ Garden Journal – Digital & printable
✅ Herd Health Tracker – Monitor animal care
✅ Simple Budget – Manage finances
✅ Backyard Homestead eBook – Essential tips

$99 value – now just $47! Start your homesteading journey today!

Buy Now

First Step For How To Set Homestead Goals

The first thing you need to do is dream. If you’re anything like me, that’s absolutely not a problem. I am a daydreamer at heart. But thankfully, I’m also a planner so getting down to the nitty gritty is also easy. But if you struggle with dream, I’ve got an exercise for you.

Daydreaming Exercise

Go out into nature. It can be a park, your yard, whatever. Take your shoes off and put your feet on the ground. This is called grounding. Take a couple of big, deep breaths. Close your eyes (as long as it’s safe!) and allow your mind to wander. Don’t think of all the responsibilities you have, allow yourself to dream.

Flush out that dream in your meditative state. Do you see animals? A huge garden? A greenhouse? What is the finished product of your goal?

Write it down

Our dream is to make the homestead as self sustaining and self funding as possible. We want to be able to pay off our mortgage in 15 years. We want our animals to not only provide food for us, but also an income. Lastly, we want the land to produce enough food and firewood that we decrease our dependency on outside sources by 75% in 5 years.

That’s a large order, right? But it’s really not when you add a deadline like 15 years for the mortgage or 5 years for independence. It is overwhelming when you stop and consider how much work, money, and time it’s going to take. But again, bite size steps or actions can really make a difference.

Logo 468x60

Setting Your Homestead Goals

These are the big goals inside our dream

  • Pay off mortgage in 15 years
  • Self sustaining and self funding
  • Animals provide food and income
  • Land produces enough food, and water and firewood to decrease dependency by 75% in 5 years.

Be sure to list out those big goals from your daydreaming. These high point/ big goals are your starting point.

Logo 468x60

By having clear and measurable goals you can then start brainstorming on what you can do to hit those goals. But the goals listed above are long term goals. And while maintaining a big picture is always a good thing, small steps are what we are after.

My list of 2022 homestead goals are:

  • Garden/ orchard
  • Goat breeding program/ goat dairy
  • Poultry
  • Remodel master bedroom/bathroom/ hall
  • Water Collection system

These small goals will help us reduce dependency, and start making a dent in our budget to allow us to put more money towards the mortgage or back into the farm.

Save on Seeds

Brainstorming or Brain Dumping

I like to list out all the possible things we can do to hit these goals. No matter how big or small, ridiculous, or crazy, I want to know what I can do to make sure we can get achieve our dreams. Get creative here.

  • Pick up extra shifts at work
  • Sell ducklings
  • Sell goat butter
  • Buy/plant fruit trees
  • Pay extra on mortgage
  • Stud out buck
  • Sell Goat Pages
  • Sell cut flowers
  • Sell eggs
  • Sell goat kids
  • Buy/ plant nut trees
  • Sell goat milk
  • Set up roach colony for dragons
  • Farmers Market
  • Stop spending so much money at Lowes
  • Sell chicks
  • Sell goat cheese
  • Plant extra in the gardens
  • Bigger salad bar for dragons
  • Sell the actual kids
  • Sell bearded dragons
  • Goat Ultrasound
goat kidding

Before we get too far into this, I have a great course on the basics of goat care. I call it Goat Crash Course: Goat 101. In this course, I explain things like types of shelter, types of feeds and hays, basic assessments and so much more! Check it out!

Buy Now

Setting The Goals With A Deadline

Setting a deadline puts your brain in motion. Your brain is going to start thinking of ways to hit those goals. And each time you mark off one of those goals, your brain releases a small hit of dopamine and serotonin which are the happy chemicals that will keep you going when you are struggling through that extra shift.

Some examples of goals with a deadline is:

  • I will install our kitchen garden by March of 2023.
  • The greenhouse will be finished by January 2024.
  • We will get and be proficient with an ultrasound machine by 2025.

Keeping goals simple will make them easier to achieve. If you have never run a marathon, it may not be the most attainable to say you are going to run a marathon in three months. Could you do it? Sure, but the chances are that you are not going to be successful without a lot of hard work.

Just because this says for a homestead, doesn’t mean it’s only for a homestead. This same theory can be used for absolutely anything.

Understanding Homestead Flexibility

There is a fine line between homestead flexibility and abandoning your goals because they are too hard or you lose interest.

At the end of the day, you have to remember that all of your goals may be amazing, achievable, S.M.A.R.T, etc. But if you don’t have the flexibility to understand that life is going to pop up and change things? Your homestead could come to a grinding halt. So make sure you are allowing for plenty of time to achieve your goals. I wrote an entire post about homestead flexibility that you can find here.

The flip side is that you have to make sure that you are staying the course. You don’t want to get distracted and end up spending more time and money on projects that aren’t worth your time and money. So make sure that while you’re dreaming, you are also keeping in mind what your definition of success is.

If you like the content I put out, feel free to buy us a coffee! It helps keep this site running, marketing and the goats in grain!

Buy me a coffee

If you like this post, feel free to share it and follow us below on our social media accounts!

  • Facebook
  • Pinterest
  • Instagram
  • YouTube
  • TikTok
  • Spotify
  • Threads

Filed Under: Animals, Canning, Garden, How To's, Our Homestead, Pigs, Projects Tagged With: cast iron, Chickens, Chicks, cooking, Goats, Homestead, kitchen, Welcome

JOIN TO OUR MAILING LIST!

Leave us your email to receive new posts and special offers for members only! Don't miss a thing!

Recent Posts

  • Fall Garden Guide
  • Top Mistakes With Goats
  • How To Bond With Your Goats

Starting Canning Season Right

May 18, 2024 by Leigh Leave a Comment

On our homestead, we can a lot. I’m not talking about making just jams either. Not only do we can individual items like corn, green beans, peaches, etc but we also can meals like chicken noodle soup, beef stew and chilis. But as we go through these jars of delicious foods, we tend to just wash them and stack them up. This creates a problem during canning season.

The Ultimate Homesteader’s Starter Bundle – Only $47!

Get the tools you need to stay organized, track profits, and manage your homestead with ease!

Includes:
✅ Schedule F Tracker – Simplify tax prep
✅ Profit Calculator – Track earnings
✅ Hay Calculator – Plan livestock feed
✅ Garden Journal – Digital & printable
✅ Herd Health Tracker – Monitor animal care
✅ Simple Budget – Manage finances
✅ Backyard Homestead eBook – Essential tips

$99 value – now just $47! Start your homesteading journey today!

Buy Now

Getting Ready For Canning Season

Canning season isn’t just about making sure you have plenty of jars, though that is definitely important. You also need to make sure you have plenty of rings, lids and your tools. You need to make sure you that you have your ingredients like vinegar, lemon juice (or citric acid), and cook or canning books. Another thing I like to make sure is ready are my canners.

Prepping Jars For Canning Season

As I said above, normally we just wash and stack our jars in the basement. Though we are slowly starting to fill jars with water before storing them. Making sure that the jars are clean and ready is key for a successful canning season.

If your jars are not not clean before starting your season, you be trying to wash jars AND can at the same time…. This creates a problem when I’m canning full force and putting up dozens of jars a day. So how do we go about getting all of our jars ready now while we wait for harvest? Every single case of empty jars comes upstairs, including all the lids, rings, and other odds and ends.

I go through each jar and make sure that they all in good condition, no chips, cracks, dips or dings. Then I go through all the rings and sort them. I will keep the rings that have rust but they go into a different bin to use on a different project. I will also take inventory on my jars and see if I need to buy more. Then I start the washing process.

I use vinegar instead of dish tabs because I’m cheap and I think the vinegar does a better job at cleaning them. Once they are clean, they get a fresh lid and ring. Back in the box and stacked up in the dining room. While this will create issues when I’m not canning, it will ultimately make everything easier when it’s time to can.

Getting Your Tools Ready

Finding out in the middle of a canning session is not the time to figure out that your funnels are broken or missing. Do yourself a favor and gather all your canning tools and make sure that you have everything.

Check to make sure that all of your strainers, ladles, and canning funnels are in good shape and you have enough of them. I have four funnels and I’m getting ready to buy a couple more that are much wider. I ordered this one. The reason is because during soup season, when I need to dump the last remaining goodness in that jar? I don’t want to spill it everywhere.

Go ahead and grab one or two more jar grabber thingy’s. Nope, I don’t know what they are actually called but I know when I start looking for mine, it’s usually hidden under all the towels and hot jars.

Also, make sure that you have PLENTY of lids. I usually can about 1,000 jars or more every year. While I do reuse lids, I am not about to learn the hard way that I have run out. Every year I purchase about 1,000 For Jars lids. I don’t always use them all, but a couple years ago, it was damn near impossible to find lids.

Lastly, make sure that all of your rags, hand and bath towels are clean and ready to go. I will blow through all of my rags and hand towels in 1 day if I’m not paying attention. My rags are for cleaning messes, hand towels for hands, and bath towels to help protect counters, tables, and other places I put my hot jars.

Are you getting overwhelmed in the garden? Stressed? Or just not enjoying the garden like you used to? Check out our garden prompts! We send out weekly emails that get you back in the garden and out of your head! Turn the garden back into a place of love and joy instead of frustration and headache!

Subscribe Now!

Start Stocking Up On Ingredients

Get your vinegar, garlic, salt and other herbs and spices for canning season. Remember, every other canner in your area is going to be getting these same items. Especially, if they did not stock up in the spring like you are doing.

We purchase salt by the 50# bag from Azure Standard as well as bulk order herbs that we can’t or didn’t grow from Mountain Rose Herbs.

Another tip is to make sure that you have all your recipes on hand and ready to go. I love this pressure canning cook book. In fact, I have copied several recipes out of it and have laminated them! Actually, to be fair, I laminate all of my favorite recipes so that I don’t ruin them with the mess that is canning season. This is the laminator that I use and love.

Checking Your Canners For Canning Season

Not everything revolves around jars during canning season. Weird, I know. But the jars are just the vessel that you are using to preserve your harvests or good deals. You also need to make sure that your canners, both pressure and water bath are in good condition and ready to go.

Peak canning season (June to September for us) is a terrible time to find out that the gasket on your pressure canner is cracked or the regulator broken. Go ahead and check those things now and order replacements if needed.

You can also take your canner to your local extension office and have them check it for you. I don’t do this, however, I do keep extra gaskets, weights, and timers around to make sure that I don’t lose one mid season… which I inevitably do.

Mentally Preparing For Canning Season

This is my final, and arguably the most important of all the prep work that you are going to do for canning season. Canning is a HUGE under taking. It involves a TON of work. You are going to be hauling potentially hundreds of jars up and down the stairs. You are going to be washing produce until your fingers look like raisins. The amount of cuts, scrapes and bruises will be mind blowing. And the very last thing you will want to do after putting up 200 jars in one day, is cook dinner.

But having the right attitude when you start canning is key to being successful. All of those things I mentioned above, happen to me every year. One year, I damn near cut my finger off. But I finished that round of canning and then went to get stitches.

But when I tell you that the emense pride you will feel when you walk into your basement and your canning shelves are filled to bursting with all that delicious food? It is worth every single ounce of effort.

These are just some of the things that you can do to make sure that you are ready for canning season. If you think of anything I missed, please comment below!

If you like the content I put out, feel free to buy us a coffee! It helps keep this site running, marketing and the goats in grain!

Buy me a coffee

If you like this post, feel free to share it and follow us below on our social media accounts!

  • Facebook
  • Pinterest
  • Instagram
  • YouTube
  • TikTok
  • Spotify
  • Threads

Filed Under: Canning, How To's, Our Homestead Tagged With: Canning, cooking, Homestead

JOIN TO OUR MAILING LIST!

Leave us your email to receive new posts and special offers for members only! Don't miss a thing!

Recent Posts

  • Fall Garden Guide
  • Top Mistakes With Goats
  • How To Bond With Your Goats
  • « Go to Previous Page
  • Page 1
  • Page 2
  • Page 3
  • Page 4
  • Go to Next Page »

Primary Sidebar

WELCOME

WELCOME

My name is Leigh and I am the lead chaos creator here at Steel Raven Farms. You will see throughout this blog that I am the crazy goat lady.

I am married to my high school sweetheart, Jared and we have two amazing boys.

FOLLOW ME

  • Amazon
  • Facebook
  • Instagram
  • Pinterest
  • TikTok

GET UPDATES!

Leave us your email to receive new posts and special offers for members only! Don't miss a thing!

In all the years that I’ve been growing a garden, the fall garden has steadily remained my favorite. Which is funny because I don’t really like any of the brassicas, which is what most people know the fall garden for. I prefer the root vegetables and cool air. But I have learned over the years…

Read More

  • Animals
    • Chickens
    • Farm Dogs
    • Goats
  • Garden
    • Compost
    • Garden Projects
    • Seeds and Plants
    • Garden Journal
    • Working With Food
      • Recipes
      • Freezing Foods
      • Dehydrating Foods
      • Canning Tips And Tricks
        • Canning Inventory Sheets
  • Helpful Info
    • Welcome to the Homestead!
    • Emergency Preparedness
    • Frequently Asked Questions
    • Goal Setting
    • Project List
    • Shop Digital Products
      • Hay Calculator
      • Farm Expense And Income Tracker
      • Goat Crash Course: 101
      • Garden Journal Prompts
      • Schedule C Tracker
      • Schedule C Tracker
      • The Homestead Bundle
  • The Truths
  • Episode List
  • Start Here
    • Privacy Policy
    • Affiliate Disclosure
    • Let’s Get in Touch
    • Members Only Library
    • Welcome To Our Homestead

Footer

  • Email
  • Facebook
  • Instagram
  • Pinterest

COME AND GET IT!

Leave us your email to receive new posts and special offers for members only! Don't miss a thing!

· Midnight Theme

Copyright © 2026 · Midnight Theme on Genesis Framework · WordPress · Log in