• Skip to primary navigation
  • Skip to main content
  • Skip to footer

Steel Raven Farms

Where muck boots meet ground.

  • Animals
    • Chickens
    • Farm Dogs
    • Goats
  • Garden
    • Compost
    • Garden Projects
    • Seeds and Plants
    • Garden Journal
    • Working With Food
      • Recipes
      • Freezing Foods
      • Dehydrating Foods
      • Canning Tips And Tricks
        • Canning Inventory Sheets
  • Helpful Info
    • Welcome to the Homestead!
    • Emergency Preparedness
    • Frequently Asked Questions
    • Goal Setting
    • Project List
    • Shop Digital Products
      • Hay Calculator
      • Farm Expense And Income Tracker
      • Goat Crash Course: 101
      • Garden Journal Prompts
      • Schedule C Tracker
      • Schedule C Tracker
      • The Homestead Bundle
  • The Truths
  • Episode List
  • Start Here
    • Privacy Policy
    • Affiliate Disclosure
    • Let’s Get in Touch
    • Members Only Library
    • Welcome To Our Homestead

Projects

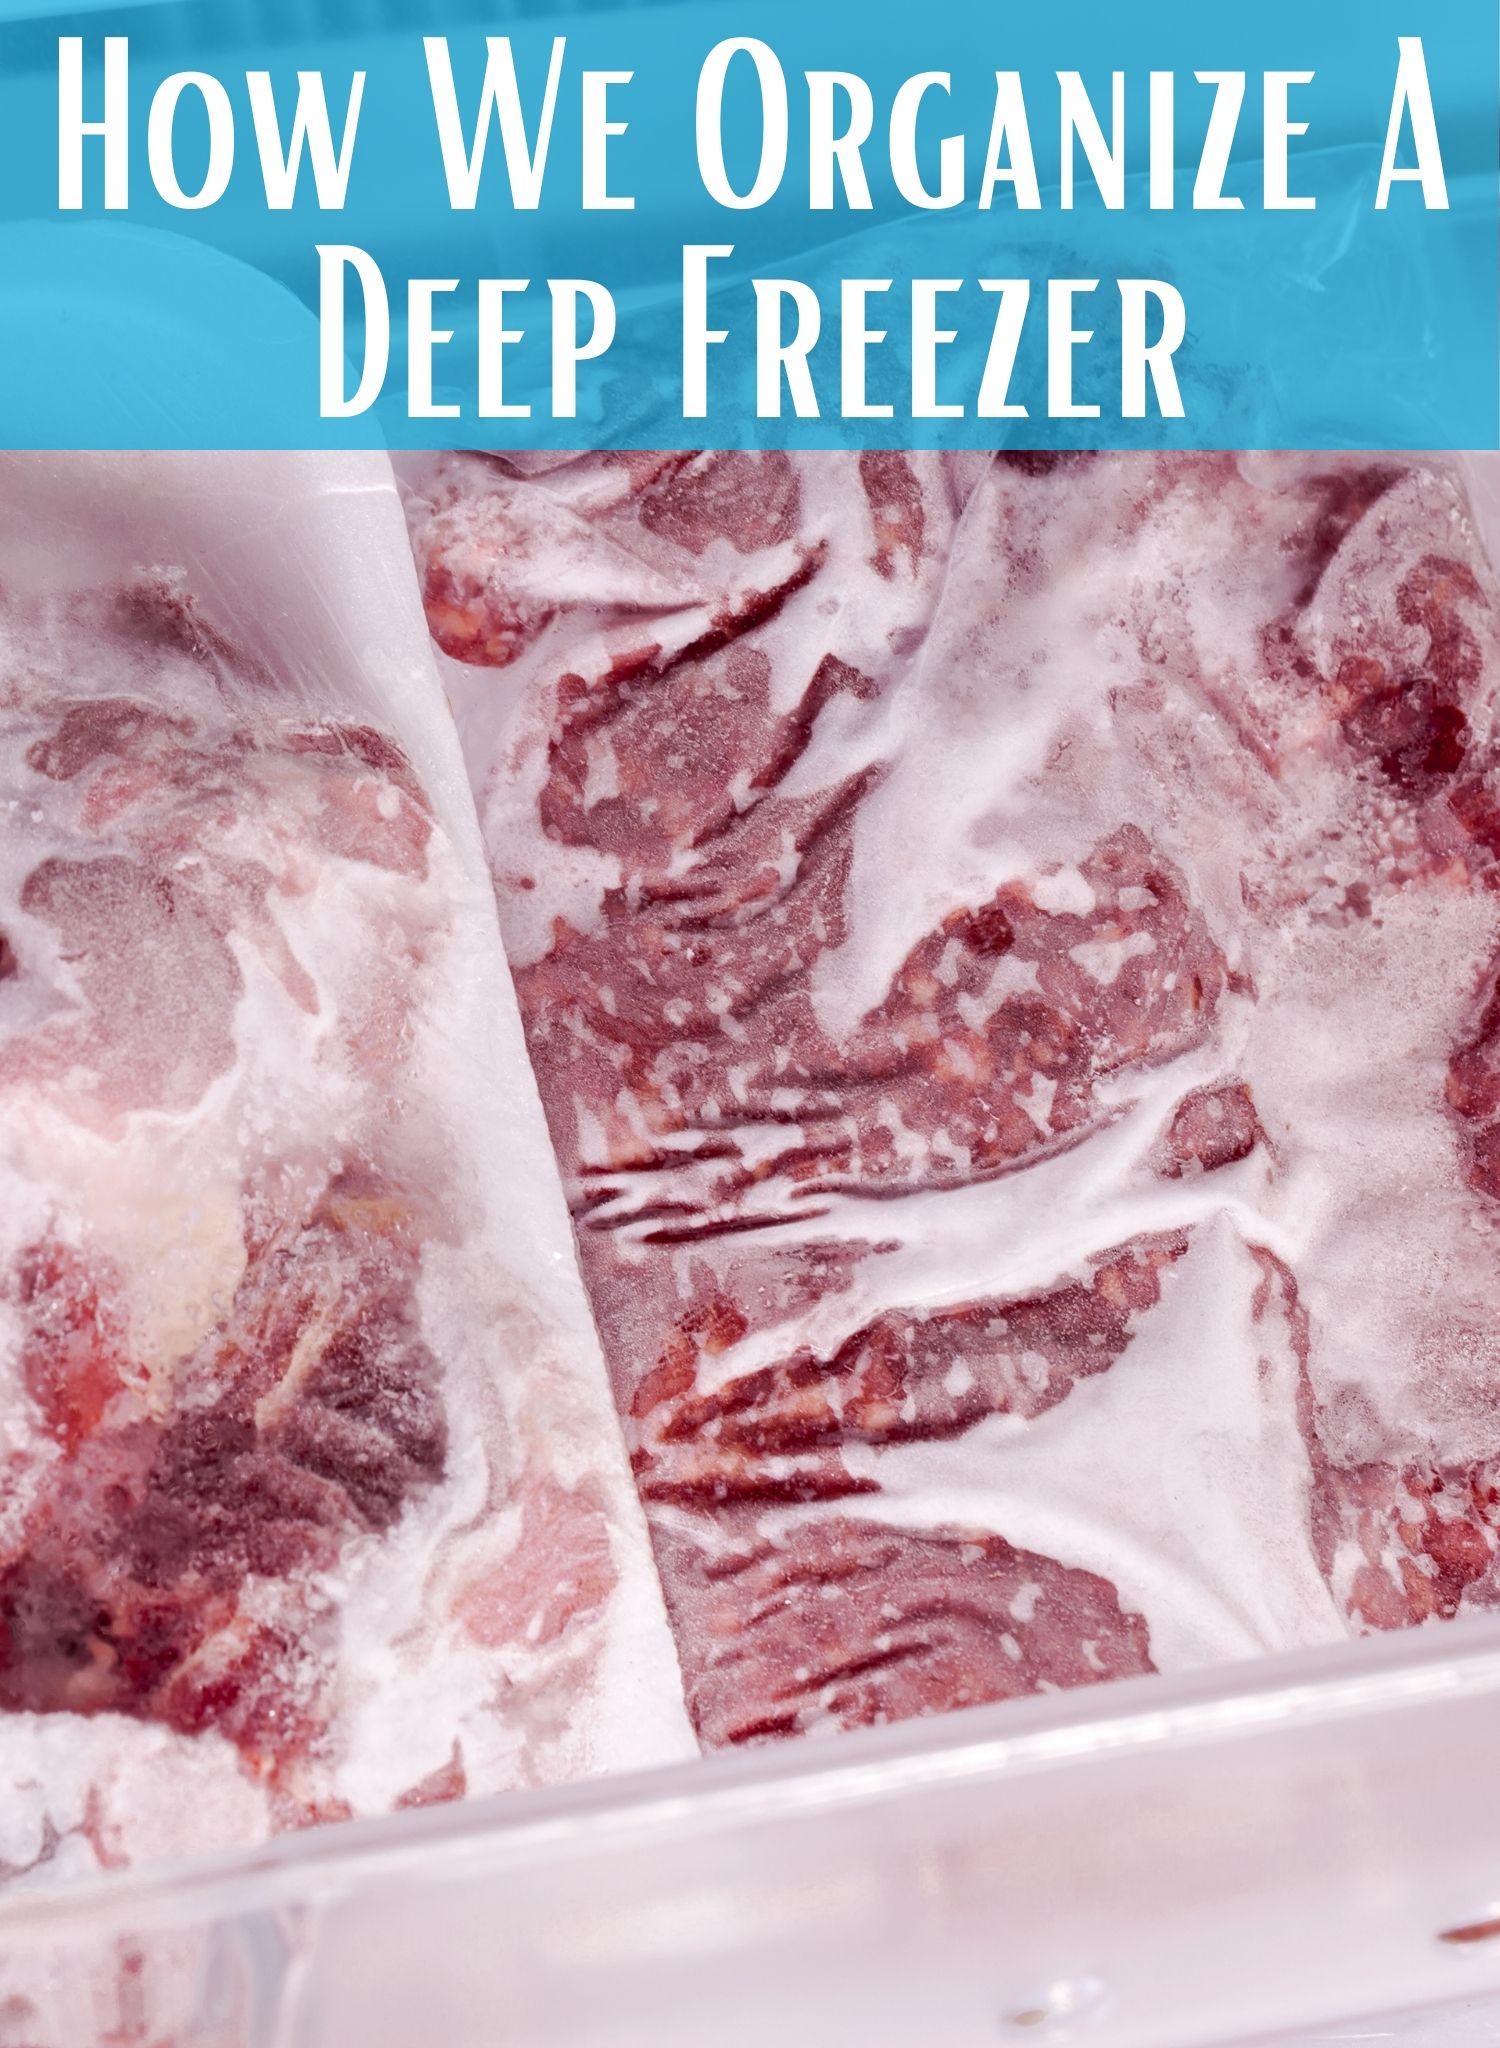
How We Organize A Deep Freezer

July 9, 2024 by Leigh Leave a Comment

Seriously, how is it that I can organize our freezer and within a month it’s back to being a disaster. Every time! But I have finally figured it out! I saw this hack on Pinterest and figured what did I have to lose? If it doesn’t work, I can reuse the supplies. But if it works? Well, my sanity may just be returned. Maybe. So how did we organize a deep freezer?
The Ultimate Homesteader’s Starter Bundle – Only $47!

Get the tools you need to stay organized, track profits, and manage your homestead with ease!

Includes:
✅ Schedule F Tracker – Simplify tax prep
✅ Profit Calculator – Track earnings
✅ Hay Calculator – Plan livestock feed
✅ Garden Journal – Digital & printable
✅ Herd Health Tracker – Monitor animal care
✅ Simple Budget – Manage finances
✅ Backyard Homestead eBook – Essential tips

$99 value – now just $47! Start your homesteading journey today!

Buy Now

Organizing A Deep Freezer

The biggest problems with freezers, whether upright or a chest freezer is that things get lost in the shuffle. It doesn’t matter what you do or how well you organize, you are going to lose stuff in those freezers. Not to mention it’s not something that you go into every day. Or maybe you go into it, but only for the 30 seconds it takes to pull out a couple packs of meat.

And if you have kids, they aren’t going to take the time to gently move things around to find what they need. No, my teenagers just throw things around until they find whatever it is they are looking for and them move on with their life…. It’s infuriating.

Before we get too far into this, I have a great course on the basics of goat care. I call it Goat Crash Course: Goat 101. In this course, I explain things like types of shelter, types of feeds and hays, basic assessments and so much more! Check it out!

Buy Now

Starting To Organize A Deep Freezer

When you are sorting your deep freeze to organize it, make sure that you take the time to clean it out too. Over the years, I found that we tend to only clean out our deep freeze when we are getting a whole cow or hog, which is usually once a year per freezer. We usually purchase a whole cow in July and empty out that freezer, defrost it, and then scrub it out. And we do it for the whole hog in February.

This helps to make sure that any freezer burned meat is either used or given to the chickens. I tend to find a bunch of roasts and will can a bunch of soups for us for the winter. If the meat is just too burned, it goes to the dogs or chickens. I hate wasting food.

After it is sorted, make sure to defrost it. This allows you to get all those weird bits of meat, frost, and other random crap that gets lost in the freezer out. If you have had a freezer before, you know what I’m talking about. Especially, the upright freezers. Everything collects at the bottom of the freezer. Hunks of ice, broken caps, a random chicken wing. It ends up at the bottom!

If you are new to heating with firewood and are looking to master the finer points of it. We’ve got a great eBook that goes in depth of what tools you should consider, how and where to stack, how to build a fire and so much more!

Buy Now

Choosing The Right Size Freezer

When we purchase bulk meat like half/whole cows or whole hogs, we needed more freezer space than just one upright freezer. To give you some insight into freezer sizes, a whole cow will barely fit in an 16cu ft freezer. When I say barely, it’s a game of Tetris to get it all in there. Whole chickens take up a ton of space as well. I would say that you could probably fit 100 whole chickens in that same freezer.

I think it’s better to err on the side of caution and always go at least one “size” up from what you think you’ll need. Especially when it comes to getting whole animals. I have found that if you have the square footage to have a bigger freezer, get the bigger freezer. You will end up using the space. Trust me.

Another thing to consider with freezers is that an upright freezer will be easier to find things, but will not hold as much as you think they will. It is incredibly difficult to pack an upright freezer, no matter the size, due to the likelihood of things spilling out. And yes, milk crates will help with this, but just trust me, get a chest freezer if you are getting irregularly shaped things like packs of meat, veggies, etc.

Chest freezers are where it’s at in my opinion. Yes, it will become a holy terror of a disaster, but you get far more bang for your buck with them. Because it doesn’t matter if you organize it or not, you are able to use every square inch of that space.

The Ultimate Homesteader’s Starter Bundle – Only $47!

Get the tools you need to stay organized, track profits, and manage your homestead with ease!

Includes:
✅ Schedule F Tracker – Simplify tax prep
✅ Profit Calculator – Track earnings
✅ Hay Calculator – Plan livestock feed
✅ Garden Journal – Digital & printable
✅ Herd Health Tracker – Monitor animal care
✅ Simple Budget – Manage finances
✅ Backyard Homestead eBook – Essential tips

$99 value – now just $47! Start your homesteading journey today!

Buy Now

Enter Milk Crates To Organize A Deep Freezer

When it comes to organizing a deep freezer, you need to have the ability to sort those various things (packs of meat, froze veggies, etc) into some sort of organized chaos. I love using milk crates. But a word of caution. Don’t buy cheap file crates from Wal-Mart. You want to get something like this. The sturdier the better. We got the cheap ones from Wal-Mart and it’s gone about how you would expect.

Milk crates saved my sanity when Jared brought home the cow. I’m not going to lie, I was nervous that three coolers of meat was going to create more chaos than me. But we worked through it and got everything separated into five milk crates. They are overflowing but still stackable.

The idea with the milk crates is to have the ability to pick up and move them to get to what is below them. So far it has worked beautifully and I will be buying more crates for my upright freezer to handle that disaster.

The problem with the using milk crates in the upright freezer is not having the ability to see through them to what is inside. Yes, we could label them but if my kids won’t put things up where they go, do we really think that putting a label on the crate will help? I guarantee it won’t.

Our herd health bundle helps you keep track of your herd’s health. Includes the goat assessment, herd check sheets AND Herd Health Tracker!

Buy Now

Clearly Label What Is In The Freezer

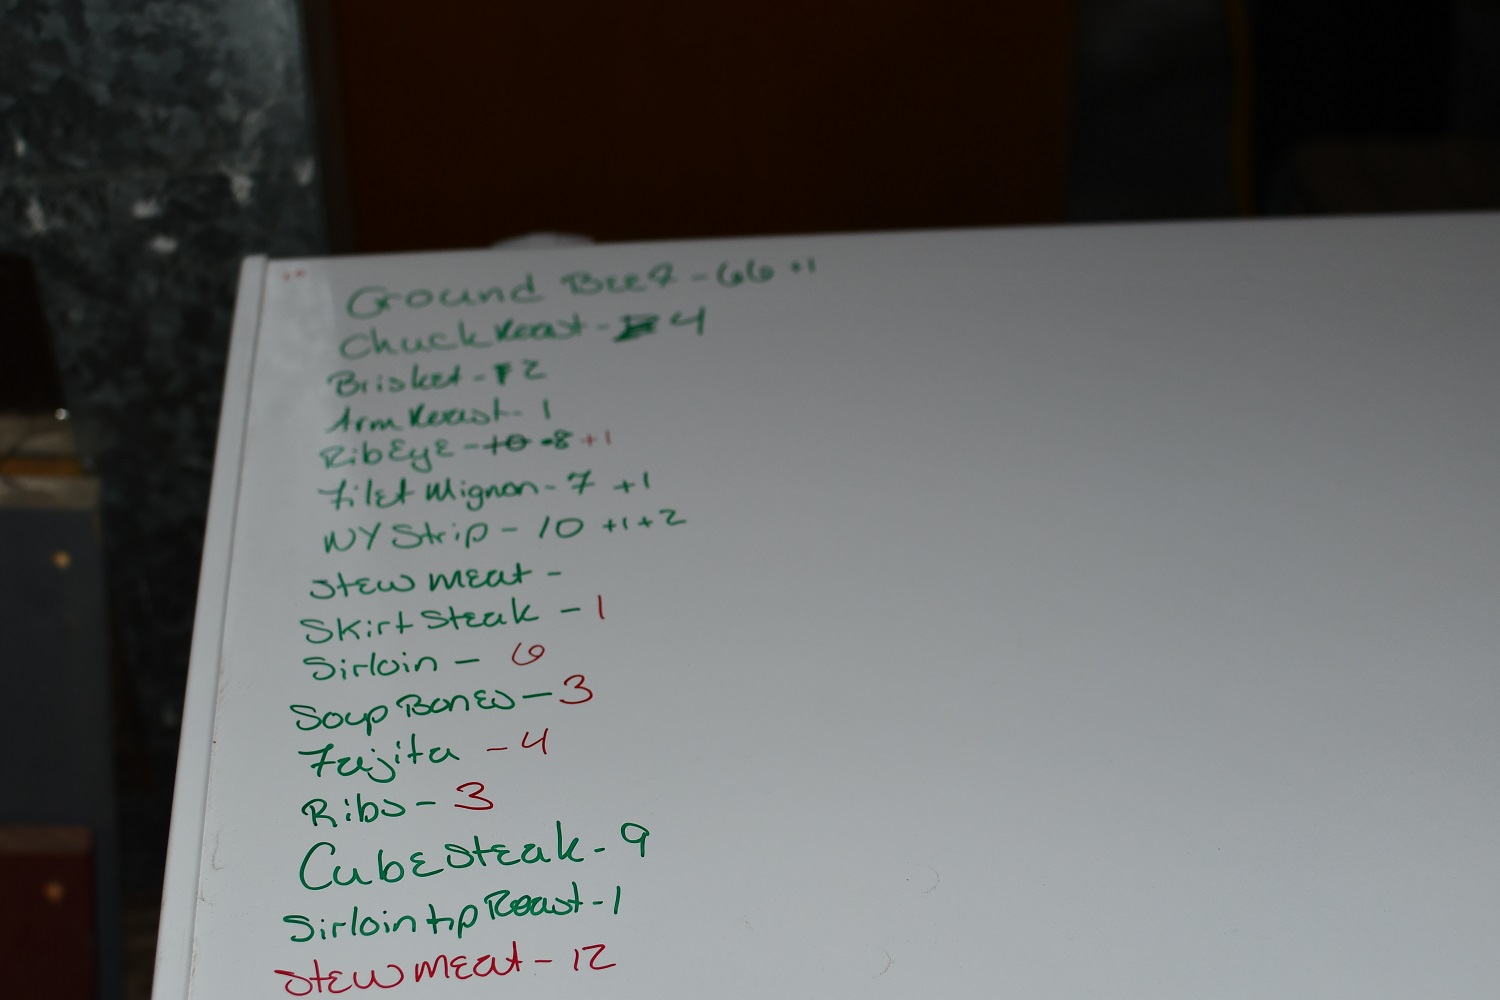
We write on our freezers. This helps keep an eye on inventory levels…. when someone remembers to deduct what they took out…. which no one does. But it’s a good idea. We know that one freezer is full of beef and the other is full of… well other. Unfortunately, what ends up happening, especially with teenage boys, is that they just shove things in the freezer.

That means that you could have cow in one freezer, hog in another and chicken in with the bacon. It’s extremely frustrating. But if you label the outside of the freezer, it could help you a lot more. We have gone so far as to list out how many packs of something is in the freezer. For example, when we load up the freezer with a whole cow, we will put 200 packs of ground beef or 17 sirloin steaks.

This has helped a ton but only if you keep up with it.
If you like the content I put out, feel free to buy us a coffee! It helps keep this site running, marketing and the goats in grain!

Buy me a coffee

If you like this post, feel free to share it and follow us below on our social media accounts!

  • Facebook
  • Pinterest
  • Instagram
  • YouTube
  • TikTok
  • Spotify
  • Threads

Filed Under: How To's, Projects Tagged With: Chickens, cooking, Homestead, kitchen, Organization

JOIN TO OUR MAILING LIST!

Leave us your email to receive new posts and special offers for members only! Don't miss a thing!

Recent Posts

  • Fall Garden Guide
  • Top Mistakes With Goats
  • How To Bond With Your Goats

How To Set Homestead Goals

May 28, 2024 by Leigh Leave a Comment

We all know the saying “A goal is a dream with a deadline.” — Napoleon Hill. We also know that when you break that goal down into steps it becomes a plan. Then when you take action, you can make those dreams come true. You can think it’s a load of goat shit but it really is true. We had a dream of owning a homestead, we added a deadline, made a plan, and when we followed through. Our dream became reality. If your goal is similar to ours, or if you already have a homestead and you are trying to figure out your next steps, this is how to set homestead goals.

The Ultimate Homesteader’s Starter Bundle – Only $47!

Get the tools you need to stay organized, track profits, and manage your homestead with ease!

Includes:
✅ Schedule F Tracker – Simplify tax prep
✅ Profit Calculator – Track earnings
✅ Hay Calculator – Plan livestock feed
✅ Garden Journal – Digital & printable
✅ Herd Health Tracker – Monitor animal care
✅ Simple Budget – Manage finances
✅ Backyard Homestead eBook – Essential tips

$99 value – now just $47! Start your homesteading journey today!

Buy Now

First Step For How To Set Homestead Goals

The first thing you need to do is dream. If you’re anything like me, that’s absolutely not a problem. I am a daydreamer at heart. But thankfully, I’m also a planner so getting down to the nitty gritty is also easy. But if you struggle with dream, I’ve got an exercise for you.

Daydreaming Exercise

Go out into nature. It can be a park, your yard, whatever. Take your shoes off and put your feet on the ground. This is called grounding. Take a couple of big, deep breaths. Close your eyes (as long as it’s safe!) and allow your mind to wander. Don’t think of all the responsibilities you have, allow yourself to dream.

Flush out that dream in your meditative state. Do you see animals? A huge garden? A greenhouse? What is the finished product of your goal?

Write it down

Our dream is to make the homestead as self sustaining and self funding as possible. We want to be able to pay off our mortgage in 15 years. We want our animals to not only provide food for us, but also an income. Lastly, we want the land to produce enough food and firewood that we decrease our dependency on outside sources by 75% in 5 years.

That’s a large order, right? But it’s really not when you add a deadline like 15 years for the mortgage or 5 years for independence. It is overwhelming when you stop and consider how much work, money, and time it’s going to take. But again, bite size steps or actions can really make a difference.

Logo 468x60

Setting Your Homestead Goals

These are the big goals inside our dream

  • Pay off mortgage in 15 years
  • Self sustaining and self funding
  • Animals provide food and income
  • Land produces enough food, and water and firewood to decrease dependency by 75% in 5 years.

Be sure to list out those big goals from your daydreaming. These high point/ big goals are your starting point.

Logo 468x60

By having clear and measurable goals you can then start brainstorming on what you can do to hit those goals. But the goals listed above are long term goals. And while maintaining a big picture is always a good thing, small steps are what we are after.

My list of 2022 homestead goals are:

  • Garden/ orchard
  • Goat breeding program/ goat dairy
  • Poultry
  • Remodel master bedroom/bathroom/ hall
  • Water Collection system

These small goals will help us reduce dependency, and start making a dent in our budget to allow us to put more money towards the mortgage or back into the farm.

Save on Seeds

Brainstorming or Brain Dumping

I like to list out all the possible things we can do to hit these goals. No matter how big or small, ridiculous, or crazy, I want to know what I can do to make sure we can get achieve our dreams. Get creative here.

  • Pick up extra shifts at work
  • Sell ducklings
  • Sell goat butter
  • Buy/plant fruit trees
  • Pay extra on mortgage
  • Stud out buck
  • Sell Goat Pages
  • Sell cut flowers
  • Sell eggs
  • Sell goat kids
  • Buy/ plant nut trees
  • Sell goat milk
  • Set up roach colony for dragons
  • Farmers Market
  • Stop spending so much money at Lowes
  • Sell chicks
  • Sell goat cheese
  • Plant extra in the gardens
  • Bigger salad bar for dragons
  • Sell the actual kids
  • Sell bearded dragons
  • Goat Ultrasound
goat kidding

Before we get too far into this, I have a great course on the basics of goat care. I call it Goat Crash Course: Goat 101. In this course, I explain things like types of shelter, types of feeds and hays, basic assessments and so much more! Check it out!

Buy Now

Setting The Goals With A Deadline

Setting a deadline puts your brain in motion. Your brain is going to start thinking of ways to hit those goals. And each time you mark off one of those goals, your brain releases a small hit of dopamine and serotonin which are the happy chemicals that will keep you going when you are struggling through that extra shift.

Some examples of goals with a deadline is:

  • I will install our kitchen garden by March of 2023.
  • The greenhouse will be finished by January 2024.
  • We will get and be proficient with an ultrasound machine by 2025.

Keeping goals simple will make them easier to achieve. If you have never run a marathon, it may not be the most attainable to say you are going to run a marathon in three months. Could you do it? Sure, but the chances are that you are not going to be successful without a lot of hard work.

Just because this says for a homestead, doesn’t mean it’s only for a homestead. This same theory can be used for absolutely anything.

Understanding Homestead Flexibility

There is a fine line between homestead flexibility and abandoning your goals because they are too hard or you lose interest.

At the end of the day, you have to remember that all of your goals may be amazing, achievable, S.M.A.R.T, etc. But if you don’t have the flexibility to understand that life is going to pop up and change things? Your homestead could come to a grinding halt. So make sure you are allowing for plenty of time to achieve your goals. I wrote an entire post about homestead flexibility that you can find here.

The flip side is that you have to make sure that you are staying the course. You don’t want to get distracted and end up spending more time and money on projects that aren’t worth your time and money. So make sure that while you’re dreaming, you are also keeping in mind what your definition of success is.

If you like the content I put out, feel free to buy us a coffee! It helps keep this site running, marketing and the goats in grain!

Buy me a coffee

If you like this post, feel free to share it and follow us below on our social media accounts!

  • Facebook
  • Pinterest
  • Instagram
  • YouTube
  • TikTok
  • Spotify
  • Threads

Filed Under: Animals, Canning, Garden, How To's, Our Homestead, Pigs, Projects Tagged With: cast iron, Chickens, Chicks, cooking, Goats, Homestead, kitchen, Welcome

JOIN TO OUR MAILING LIST!

Leave us your email to receive new posts and special offers for members only! Don't miss a thing!

Recent Posts

  • Fall Garden Guide
  • Top Mistakes With Goats
  • How To Bond With Your Goats

Using A Metal Shed For A Chicken Coop

April 16, 2024 by Leigh

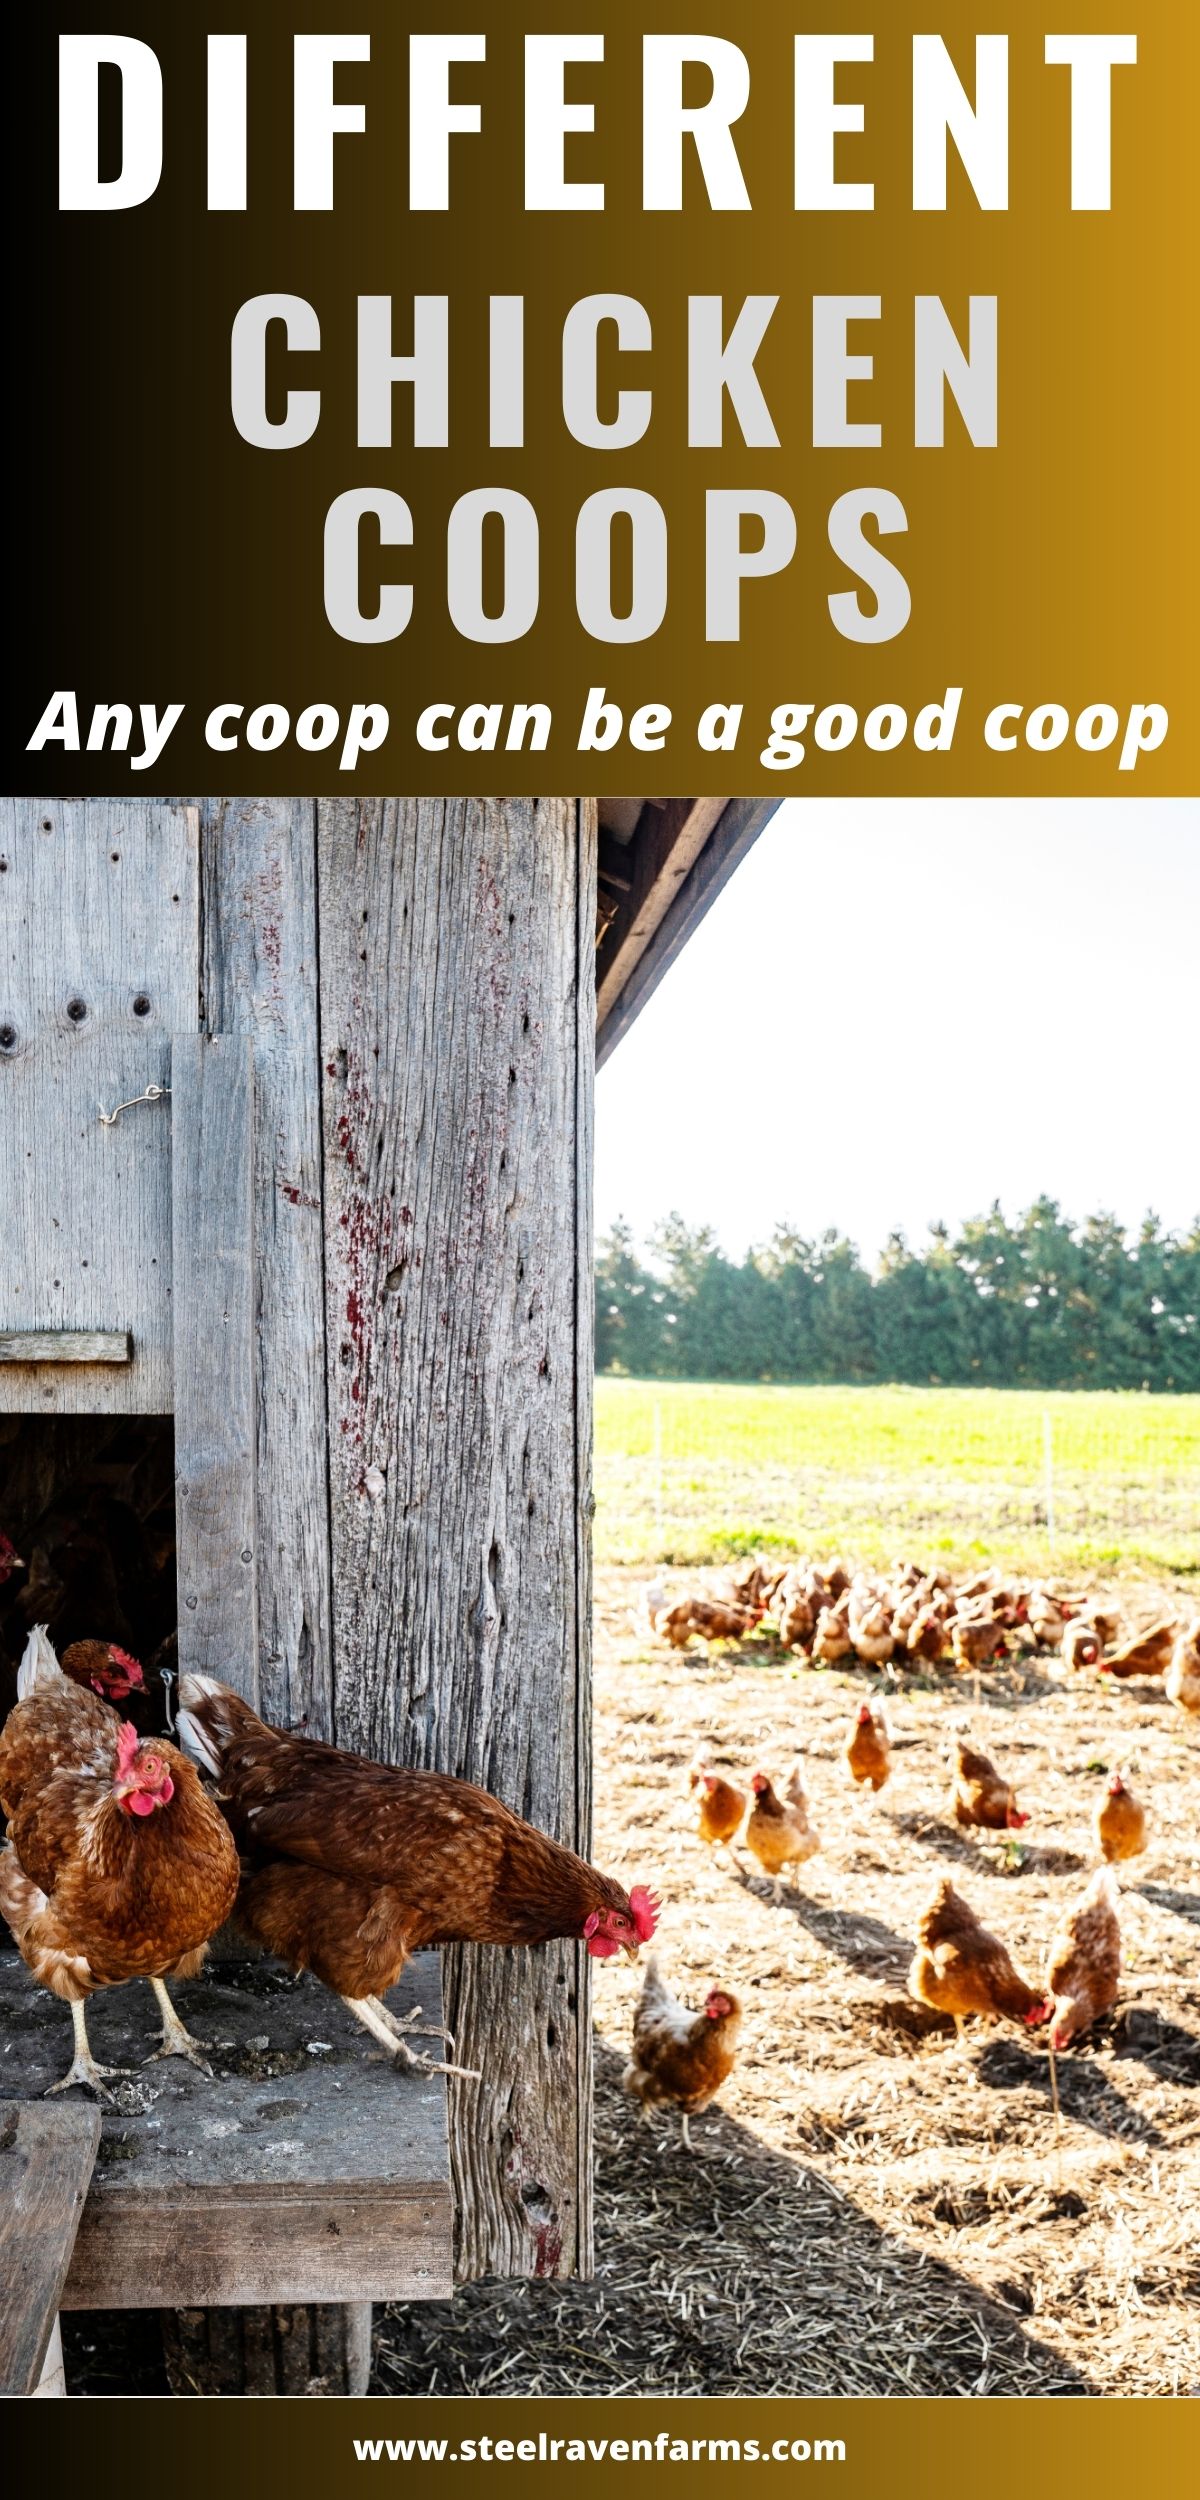
I have been browsing the internet for weeks trying to figure out something for a new coop. We’ve got more chicks and ducks coming and nowhere to put them. So I started researching the different types of chicken coops and I couldn’t find anything I really liked. And to be honest, the wood coop that we have now, is starting to really stink, even after we clean it really well. I think using a metal shed for a chicken coop may work. Maybe.

Why We Chose A Metal Shed For A Chicken Coop

***Make sure to read the updates at the bottom to see how it’s actually working***

We have seriously out grown our old coop. When we bought it, we weren’t really planning on having a ton of chickens. Our thought was, chickens are pretty easy so let’s get a couple. By a couple I mean 15 but only 9 survived. After offering our extra eggs for sale and current state of the supply chain, we have decided to grow our flock. We are hoping that this will allow us to make a little bit of money but also sustain us food wise. You can read about our new flock here. 

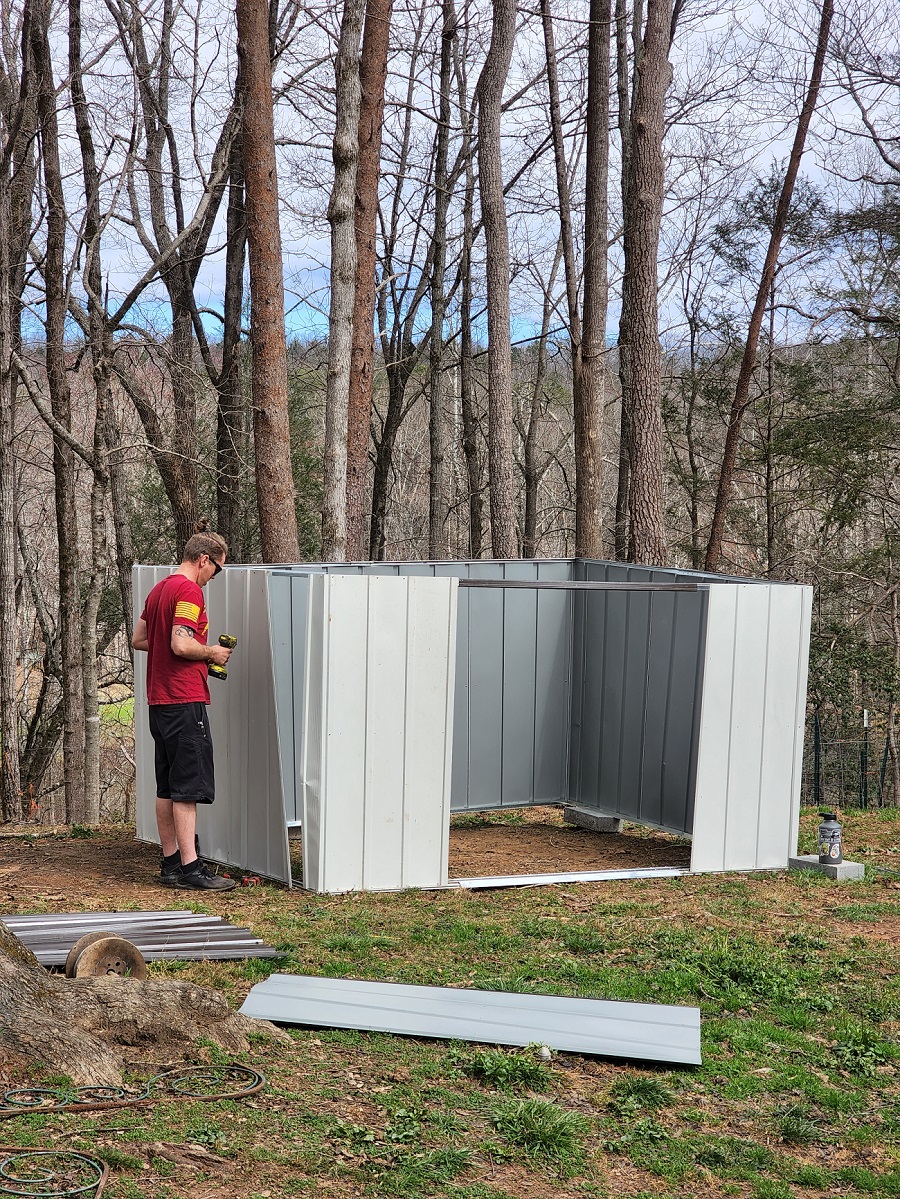
Since, we will also be getting 20 ducks around the end of March AND the 36 chickens, we want to make sure there is plenty of room for all of them. I think this 8×10 metal shed will work great. It’s got plenty of space and if we can hang the new laying boxes and roosting bars, there will be plenty of room for the ducks to nest.

Also since we allow them to free range throughout the day, there shouldn’t be any problems with space during the day.

Now before anyone gets all up in arms about it, we know some of the problems with a shed like this as well as ducks and chickens in the same coop. First, we will be installing gables and vents to make sure that the heat can escape in the summer. They will also have frozen bottles on the ground to keep cool. Not to mention we made sure that the coop is in a shady area.

Save on Seeds

We will also be adding boards and hardware cloth to the bottoms to ensure it as predator proof as possible. The ducks and chickens can cohabitate in the same coop as long as they have their own spaces. The ducks will be on one side and the chickens on the other. I’m sure we will find more problems as we go but we will see.

Jared working on the new Coop

We will always be as transparent with our readers. In that vein, we want to make sure that you don’t make the same mistakes we have. Or if you decide to make the mistake, at least do it differently.

You can also check out this from Redfin article as well! “Whether you’re planning to raise chickens at home in Asheville, NC, Eugene, OR, or Burlington, VT, check out this Redfin article we were featured in on 5 Chicken Coop Ideas For A Thriving Flock“

Summer Update

So this coop was built in the spring before it got really hot. What we have found is that the coop does not get super hot at night like we thought. Since we allow them to free range throughout the day and only put them inside the coop at night when the sun has gone down. We have not noticed a HUGE temperature increase.

Don’t get me wrong, it’s still hot at night and it’s warm in the coop, but I was thinking like fatally hot and it’s not. We have been averaging 80* nights and the coop is 90* but also has fans blowing the hot air out.

One of the things we have noticed is that NONE of the animals want to go in their respective houses at night. That includes the goats. I think a lot of it is that it’s just too hot. When they are outside they can move around and find cool ground.

The chickens and ducks seem to prefer being outside during the summer and that’s fine. We have predator lights up around the property and so far we haven’t seen any signs of them being taken in the night.

I’ll update back after winter and let you know how that goes. But for right now the coop is working.

Winter Update

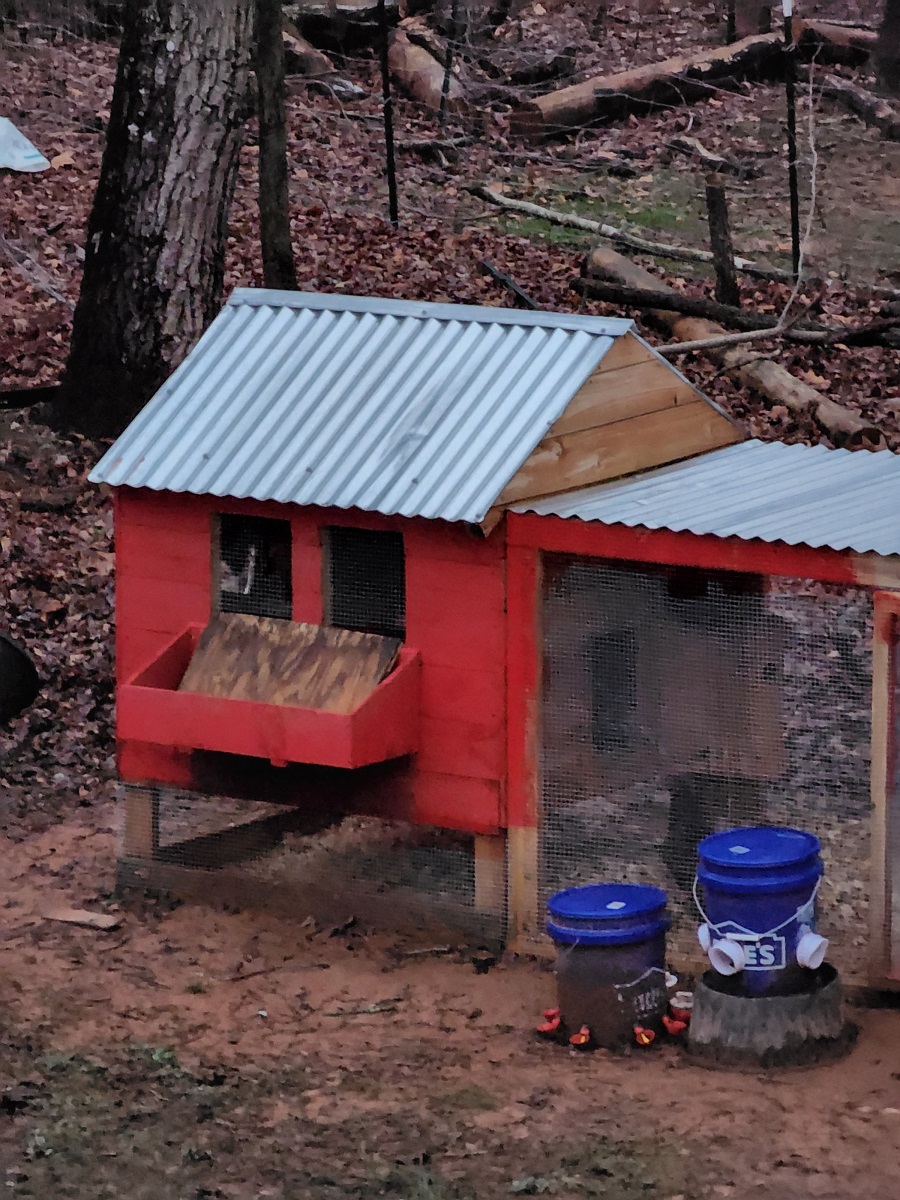
We have moved the chickens and ducks back into the red coop. The metal shed has turned into a flop…. Well, not completely. The shed rusted from the ground up. No matter how much pine shavings we added, the odor was completely foul. The chickens also didn’t seem as healthy either. It seemed to take them longer to get through molt and they stopped laying eggs way sooner than they should have.

When we moved them back to the red coop, their feathers seemed to get brighter and they seemed happier. Now, this is all speculation and we don’t have scientific proof, but I feel like the shed was not a good option for long term keeping.

We plan to convert the shed back into a shed and just put our various building materials in it. I would suggest looking into different types of chicken coops and leave the metal shed alone.

Using A Metal Shed For A Chicken Coop…. The Final Update

As of this writing (2024), we have turned this shed into a home for broody hens and a brood coop for new chicks. For this purpose, the metal shed has turned out to be excellent. We went through and painted all the rust, patched holes, and general upkeep of the shed. We noticed that the broody hens and new chicks all thrived.

I think the main problem with using a metal coop as a permanent coop is the severe lack of air flow, extremely low light, and everything tends to stay damp without a good heat source. Since we fixed everything and have made it a temporary home for these chicks/ hens, it has turned out VERY well and is something we will continue to do.

If you like this post, feel free to share it and follow us below on our social media accounts!

  • Facebook
  • Pinterest
  • Instagram
  • YouTube
  • TikTok
  • Spotify
  • Threads

Filed Under: Animals, Chickens, How To's, Projects Tagged With: chicken coop, Chickens, Chicks, Ducks, Eggs, Homestead, metal coop

JOIN TO OUR MAILING LIST!

Leave us your email to receive new posts and special offers for members only! Don't miss a thing!

Recent Posts

  • Fall Garden Guide
  • Top Mistakes With Goats
  • How To Bond With Your Goats

5 Things I Learned Heating With Firewood

March 19, 2024 by Leigh Leave a Comment

What sounds more homestead-y than a wood burning stove? Not much… Well, I would say gathering eggs too. But there are a lot of things to consider when it comes to heating with firewood, before you jump in with both feet. Things like, how much do you need? How are you going to stack it? How do you start a fire in an insert or wood stove? These are all questions I didn’t know I had, till I had them.

If you are new to heating with firewood and are looking to master the finer points of it. We’ve got a great eBook that goes in depth of what tools you should consider, how and where to stack, how to build a fire and so much more!

Buy Now

I Learned A Lot Our First Year Heating With Firewood

Our fireplace insert is pretty old but still works very well. Unfortunately, it is not very energy efficient. We also learned that when we lose power, we loose the ability to heat our home well. We also have a wood burning furnace in the basement. While it was cool but not cold, we decided to start the furnace to see if it even worked. Boy did it! The boys rooms were 95* before we were able to get the fire out. After some trail and error, we figured out the basics of heating with firewood.

We’ve been heating our home solely with firewood for several years now so this list has changed a bit LOT!

We have since removed the old furnace in the basement since it produced WAY too much heat and ate WAY too much wood. Our wood burning insert in the living room suits us just fine.

Save on Seeds

1. Cut or buy more wood than you think you’ll need

If it’s your first year, cut double what you think you’ll need. We only cut two cords that first year. By the time the season was over, we had bought two more cords. Thankfully, we had a ton of downed trees on the property that were pretty dry. That allowed us to cut as we needed but having to buy firewood wasn’t on my to do list….until it was.

The Ultimate Homesteader’s Starter Bundle – Only $47!

Get the tools you need to stay organized, track profits, and manage your homestead with ease!

Includes:
✅ Schedule F Tracker – Simplify tax prep
✅ Profit Calculator – Track earnings
✅ Hay Calculator – Plan livestock feed
✅ Garden Journal – Digital & printable
✅ Herd Health Tracker – Monitor animal care
✅ Simple Budget – Manage finances
✅ Backyard Homestead eBook – Essential tips

$99 value – now just $47! Start your homesteading journey today!

Buy Now

We still ended up running low and almost out on two separate occasions and of course one of those we had a winter storm baring down on us. Figures.

In the subsequent years, we have learned that having 6 cords of wood on standby is ideal. Do we use 6 cords of wood? Rarely. But having it on standby is a great way to always have a head start on next year’s wood pile.

2. Get a good wood splitter

I love splitting firewood. Whether with an axe or with the splitter, it is incredibly satisfying to see your wood pile grow. Part of it is because you can see the progress of your work. The other part is you know you will be warm that winter.

But you do need a solid wood splitter to get the job done faster. Trust me, after an hour of swinging that axe you will be tired and looking to trade out with someone. There are several kinds out there, but we have an electric splitter. I would prefer gas but with it being 3x to 5x the price? Electric it is.

Logo 468 x 60

Our log splitter is smaller and we have to bend over to use it. Jared is tasked with building a table for it because after a while my back and hip start to hurt and I have to walk it off. Still, it beats having to use an axe 100% of the time.

We are also very lucky that our neighbors have a log splitter that they are totally cool with us borrowing. I would recommend saving to purchase your own and we are but thankfully that purchase is lower on the list.

3. Learn how to start a fire

You think I’m joking but you need to learn how to properly start a fire. There is no one right way to do it but you still need to know how to do it. You also need to learn how to operate your insert, stove, or fireplace. The basic jist is open your flue and add some sort of starter like paper, leaves, or similar. Light the starter and quickly add small sticks or kindling to it. Then add larger pieces of kindling until you can add a log without putting out the fire.

If you are new to heating with firewood and are looking to master the finer points of it. We’ve got a great eBook that goes in depth of what tools you should consider, how and where to stack, how to build a fire and so much more!

Buy Now

How I do it, put cardboard on the log holders and a couple small logs that are “scraggly” they are super dry and have little pieces of wood sticking off them. This acts as my kindling. Then I light with our propane torch. Easy peasy. Jared has this whole process of building and building and BUILDING. I’ve go other stuff to do so I choose the easy way.

PS: Our propane torch is this attachment to the camp stove propane bottles. We then refill the camp stove bottles off a big propane tank at the beginning of every fall/winter.

4. Get a pot of water for your stove

A pot of water on the stove allows for you to create humidity. Without it, you will dry out not only your sinuses but it can also damage your home. If you have hard wood floors, or wood paneling like we do, it will cause it to dry, crack, and split.

Thankfully, when we had a cord of wood delivered, I started asking the guy questions because he had heated with wood his entire life. He walked in the house and asked where our water pot was. Before he left, we fixed the problem.

I had no idea that was a thing until I ended up getting really sick. I had a patient that had bronchitis and she coughed on me. Because my sinuses were so dry, there was no mucus. No mucus= no protection from germs.

We have since upgraded to a “fancy” pot so I could have my cooking pots back. We also have a magnetic fan and thermometer. While this may not seem important, and isn’t really necessary, it has helped a lot with monitoring the insert’s temperature AND moving air even if the power is out. I highly recommend both of these things.

If you are new to heating with firewood and are looking to master the finer points of it. We’ve got a great eBook that goes in depth of what tools you should consider, how and where to stack, how to build a fire and so much more!

Buy Now

5. Storing Your Firewood

Next to cutting or ordering enough, storing your firewood is the most important lesson we learned. I knew that we needed to stack firewood off the ground. Also, I knew that we needed to keep it mostly dry. You should also probably not bring a ton of firewood on your deck or into your house because of bugs.

What I didn’t know was the mess dry wood creates in a house. I didn’t know that you should store your kindling separate. Finally, I didn’t realize that tarping your wood will actually cause to stay wet.

Banner 468x60

To fix some of these problems I made a wood storage box. It’s not pretty, but it does a fantastic job of making sure that the mess stays in the box. I also have a small ledge behind the lid that we have another box that holds small pieces of kindling. This box has been a lifesaver.

We pulled off the tarp and almost immediately wood that was previously damp, started to dry. We only pulled the tarp over our stack if it was supposed to rain. This helped a ton.

Subscribe to Craft Beer Club Today!

Bonus tip!

Leave a layer of ash in the bottom of your insert! I swear, this was the key to starting fires quickly and keeping those embers warm. It acts as insulation and really helps keep your fireplace at the correct temperatures. I usually keep an inch or two in the bottom when I clean it out between fires. When I need to remove ash, I place it in this bucket until it’s most full and then it goes into the compost pile.

If you like the content I put out, feel free to buy us a coffee! It helps keep this site running, marketing and the goats in grain!

Buy me a coffee

If you like this post, feel free to share it and follow us below on our social media accounts!
  • Facebook
  • Pinterest
  • Instagram
  • YouTube
  • TikTok
  • Spotify
  • Threads

Filed Under: Our Homestead, Projects Tagged With: firewood, heating, Homestead, things I've learned, tips, wood burning

JOIN TO OUR MAILING LIST!

Leave us your email to receive new posts and special offers for members only! Don't miss a thing!

Recent Posts

  • Fall Garden Guide
  • Top Mistakes With Goats
  • How To Bond With Your Goats

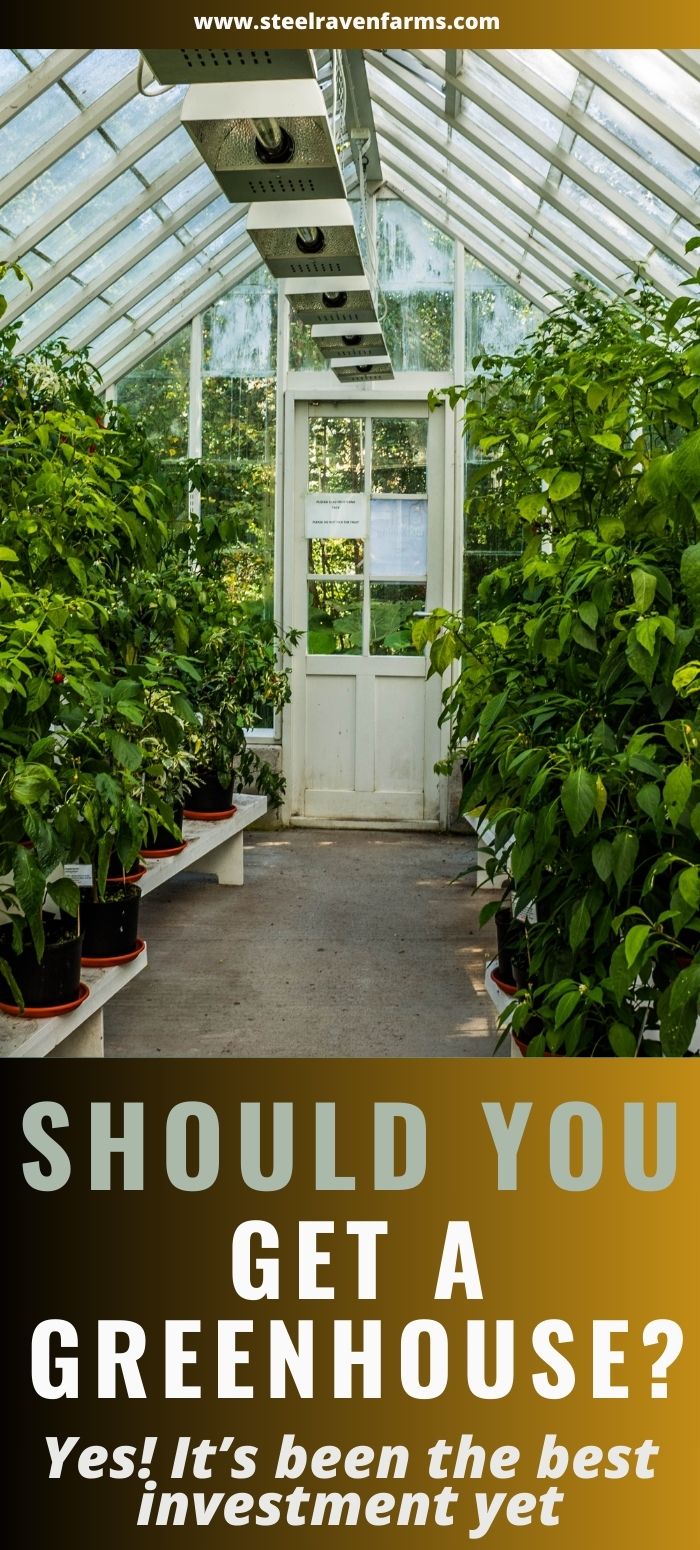
Should You Get A Greenhouse

January 13, 2024 by Leigh Leave a Comment

Normally, I would give you a straight answer here so you didn’t have to read through roughly 1200 words unless you wanted to. But on this one, the answer of should you get a greenhouse is it depends. There are a lot of factors that come into deciding to get a greenhouse. Then you have narrow down how you are going to use it, the types of plants and finally the type of greenhouse. So instead of giving you a straight answer, I’m going to help you make a decision.

The Ultimate Homesteader’s Starter Bundle – Only $47!

Get the tools you need to stay organized, track profits, and manage your homestead with ease!

Includes:
✅ Schedule F Tracker – Simplify tax prep
✅ Profit Calculator – Track earnings
✅ Hay Calculator – Plan livestock feed
✅ Garden Journal – Digital & printable
✅ Herd Health Tracker – Monitor animal care
✅ Simple Budget – Manage finances
✅ Backyard Homestead eBook – Essential tips

$99 value – now just $47! Start your homesteading journey today!

Buy Now

Before You Get A Greenhouse, Ask Yourself…

I am all about treating yourself and getting things you want. Even if there is absolutely no purpose for the thing. But before you drop a couple thousand, or more, on a greenhouse, really ask yourself why you want a greenhouse.

Why Do You Want A Greenhouse?

Everyone will have different answers for this and it is solely based on your needs. We built our greenhouse because of our dog Blu. That’s not fair, we built the greenhouse for a lot of reasons but her longevity was high on the list.

Logo 468x60

Blu is a German Shepherd/ Great Pyrenees cross and she is massive. She is notorious for smashing her face into windows to raise hell at whatever has dared come into her yard. It doesn’t matter what or who is in the window when she goes nuts, but I can guarantee you, if it is fragile it’s probably ruined.

In 2023, she knocked over 100+ tomato starts, about 50 pepper starts and another batch of melon, eggplant, and cuke starts. We learned our lesson the hard way that a greenhouse is safer for our plant starts.

But if you don’t have a Blu, you may not need a greenhouse.

Save on Seeds

Another reason to consider getting a greenhouse would be to lengthen your growing season. Now, this would be more for a high tunnel like this but you may find that a traditional greenhouse would work well for you too.

cropped-3.jpg

Are you looking for garden journal prompts, but aren’t interested in a weekly email? Check out our 365 Garden Journal Prompts! This is an amazing, all in one, yearly product that you only pay for once.

Buy Now!

What Type Of Plants Are You Putting In A Greenhouse

For us, the greenhouse was for plant starts and some tropical stuff like citrus, coffee, and ginger plants. But mostly, the greenhouse is for our plant starts. So before you start sinking hundreds and thousands of dollars into a greenhouse, really think about the things that you are going to put into the greenhouse.

If you are only putting plant starts in your greenhouse, something small like this would probably be a good choice. Especially if you are starting smaller batches of starts.

But the more plants you are trying to house, the larger the greenhouse needs to be. Let’s not mention there are about a billion different styles of greenhouses.

Different Kinds Of Greenhouses

There are traditional glass greenhouses, plastic hoop house greenhouses, small transplant greenhouses, and even cold frames. But at the end of the day, a greenhouse is a glass or plastic structure that will grow plants. So don’t get hung up on which one is better than another. It really depends on what you are going to use it for.

If you are only starting plant starts in it, then something small and plastic that can sit on the sunny part of a deck would work beautifully. If you are looking to grow food in it, then a plastic high tunnel may be better suited. Or if you are looking to extend your growing season, I would also consider a high tunnel.

The glass window greenhouses are pretty out of date when you are looking at a production greenhouse. The simple reality is that there are so many other options when it comes to greenhouses. And you can usually built them MUCH cheaper than a glass one. My friend over at The Homesteading RD had a great post about what kind of plastics to use.

Are you getting overwhelmed in the garden? Stressed? Or just not enjoying the garden like you used to? Check out our garden prompts! We send out weekly emails that get you back in the garden and out of your head! Turn the garden back into a place of love and joy instead of frustration and headache!

Subscribe Now!

Making The Decision To Get A Greenhouse

Jared wanted a greenhouse from the get go. He wanted to be able to grow year round and while I didn’t disagree with him, I didn’t want to spend that kind of money on a greenhouse when we already have a 200+ day growing season.

But as we really got into homesteading and farming, I realized that having a greenhouse really would help us.

Getting Our Greenhouse

Since our living room is so small, and it’s the only room that gets a good amount of light and heat, we really struggled with getting our plant starts started. Then we had to deal with Blu, kids, cats, and other issues with having 300+ starts in the house.

Check out our Microgreens at True Leaf Market

So I asked Jared to build me a greenhouse. I told him that I wanted a window plane greenhouse that was huge. I didn’t want to build something small and then outgrow it. The poor man is a military guy, who wants everything dress right dress. Then there’s me, the girl who loves crazy colors, abstract, and nothing that actually matches.

But Jared indulged me, and I love my greenhouse.

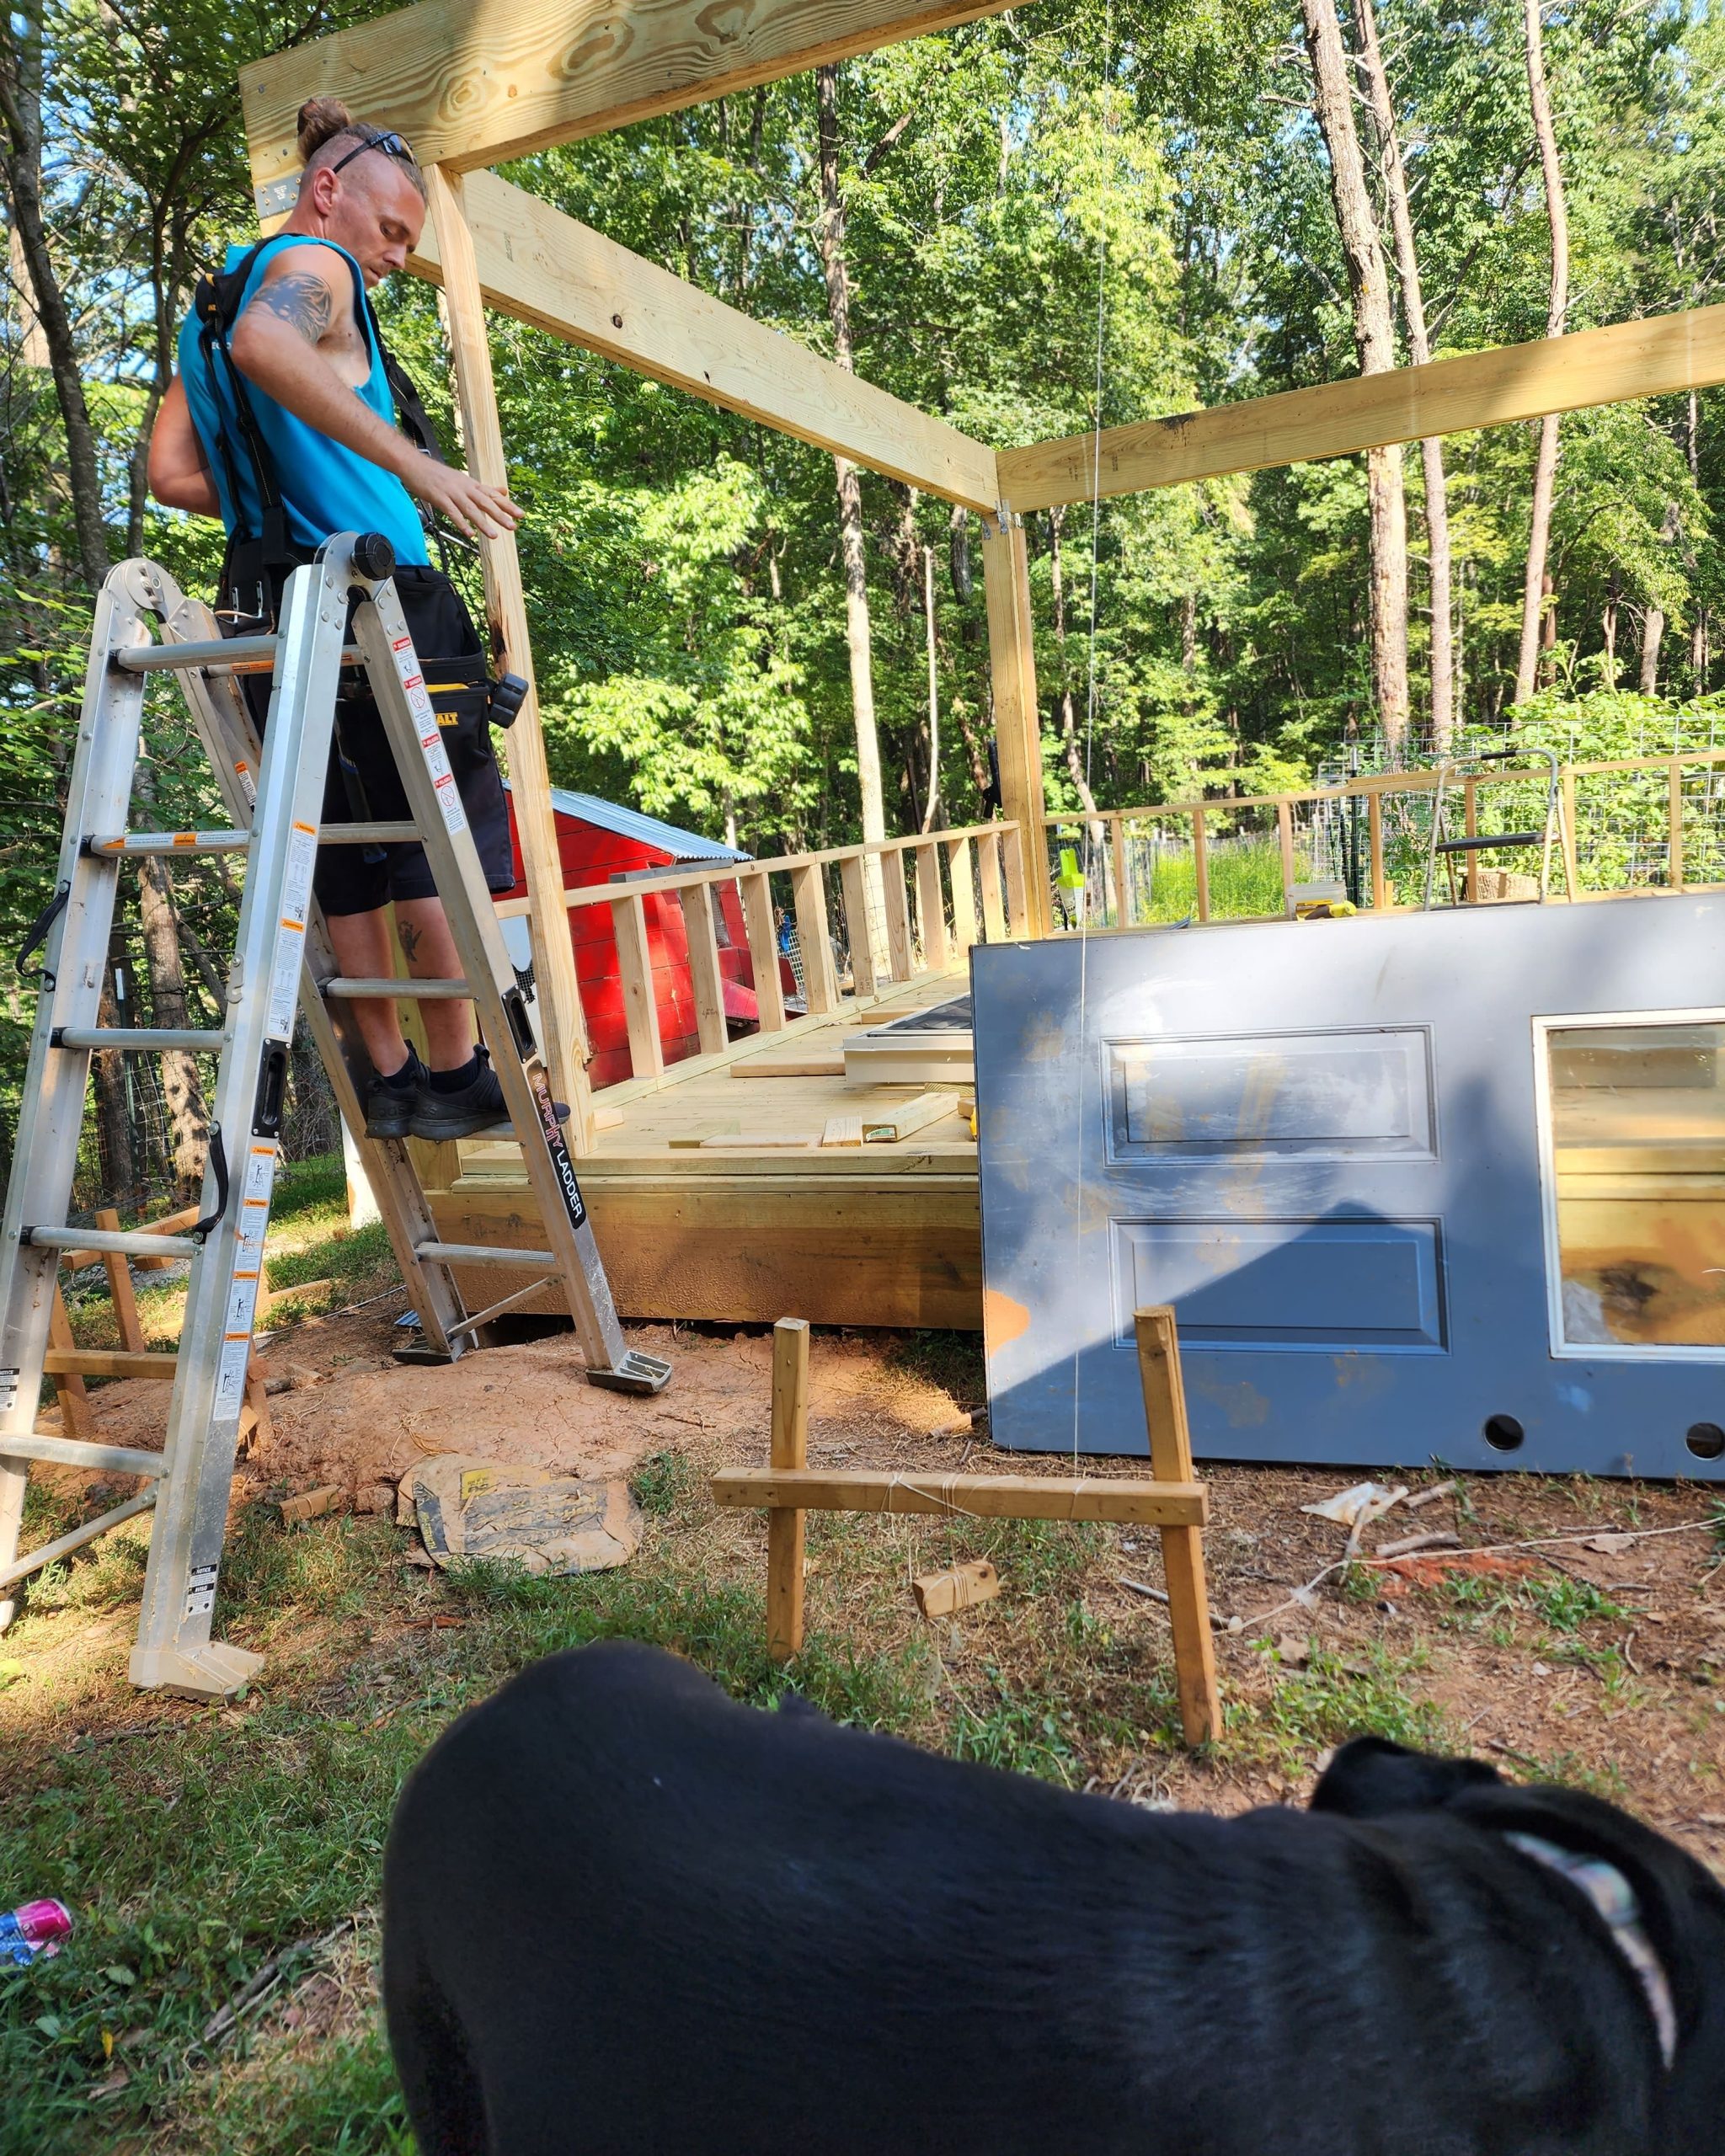
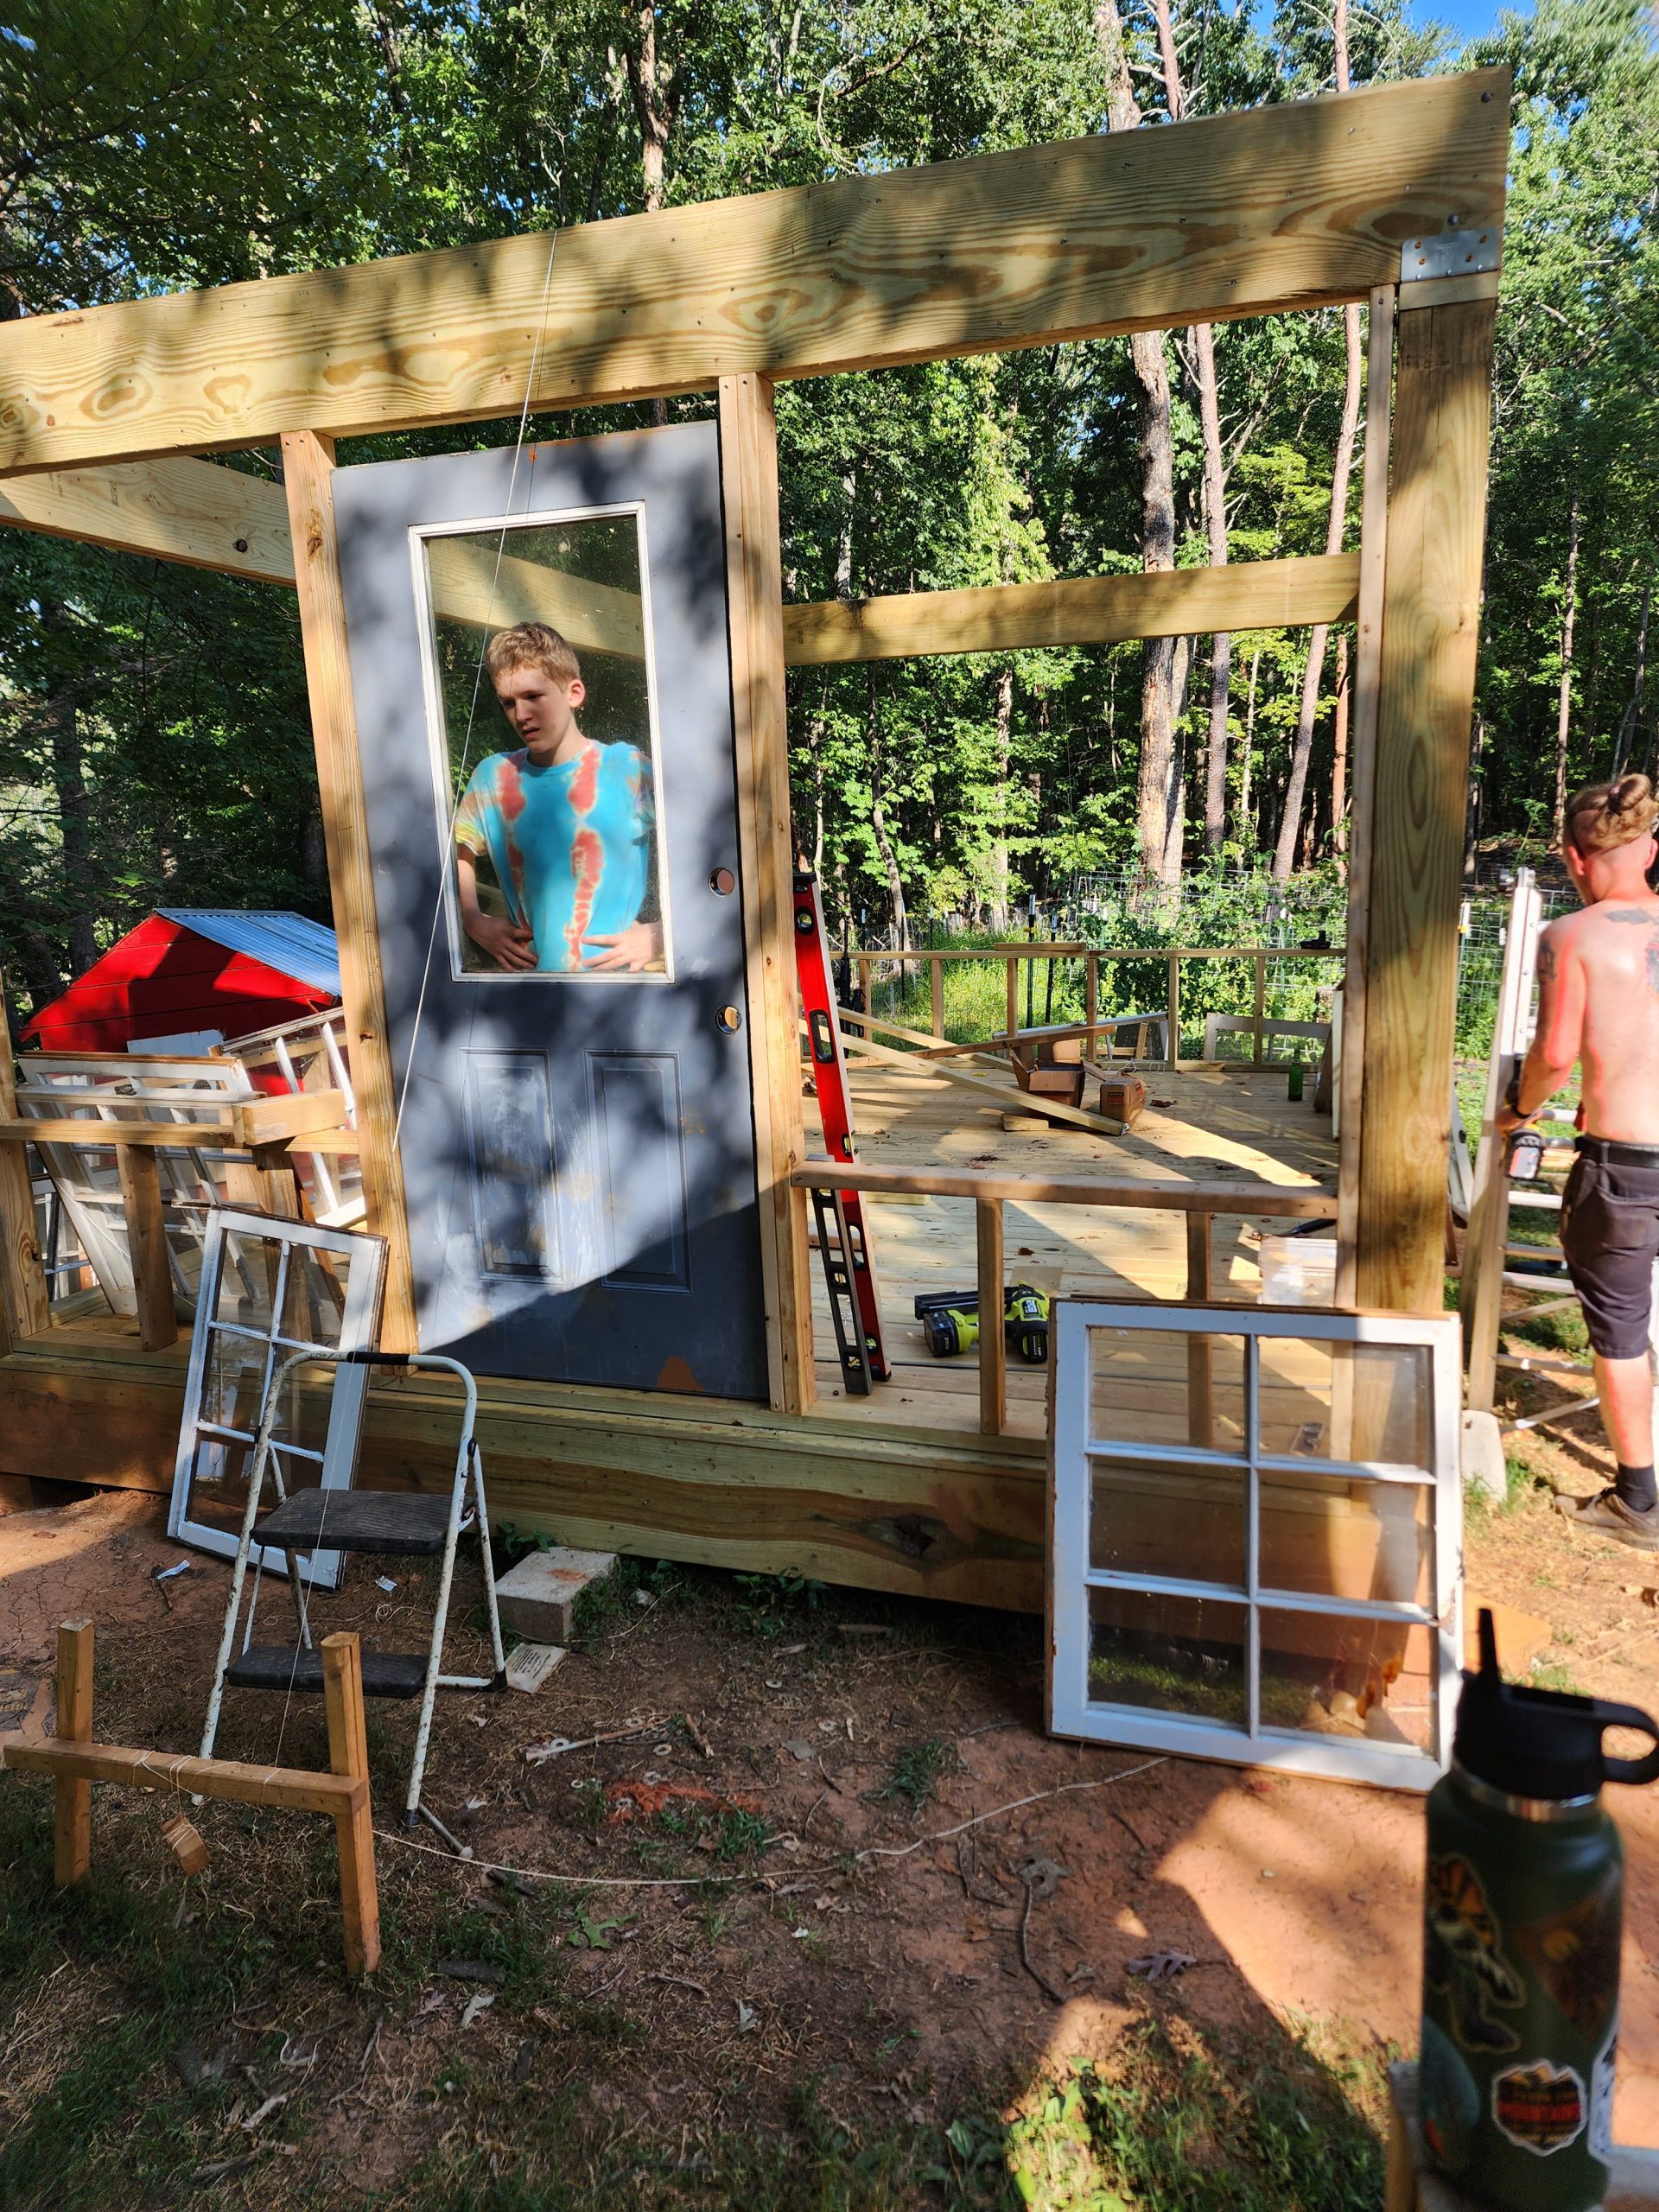
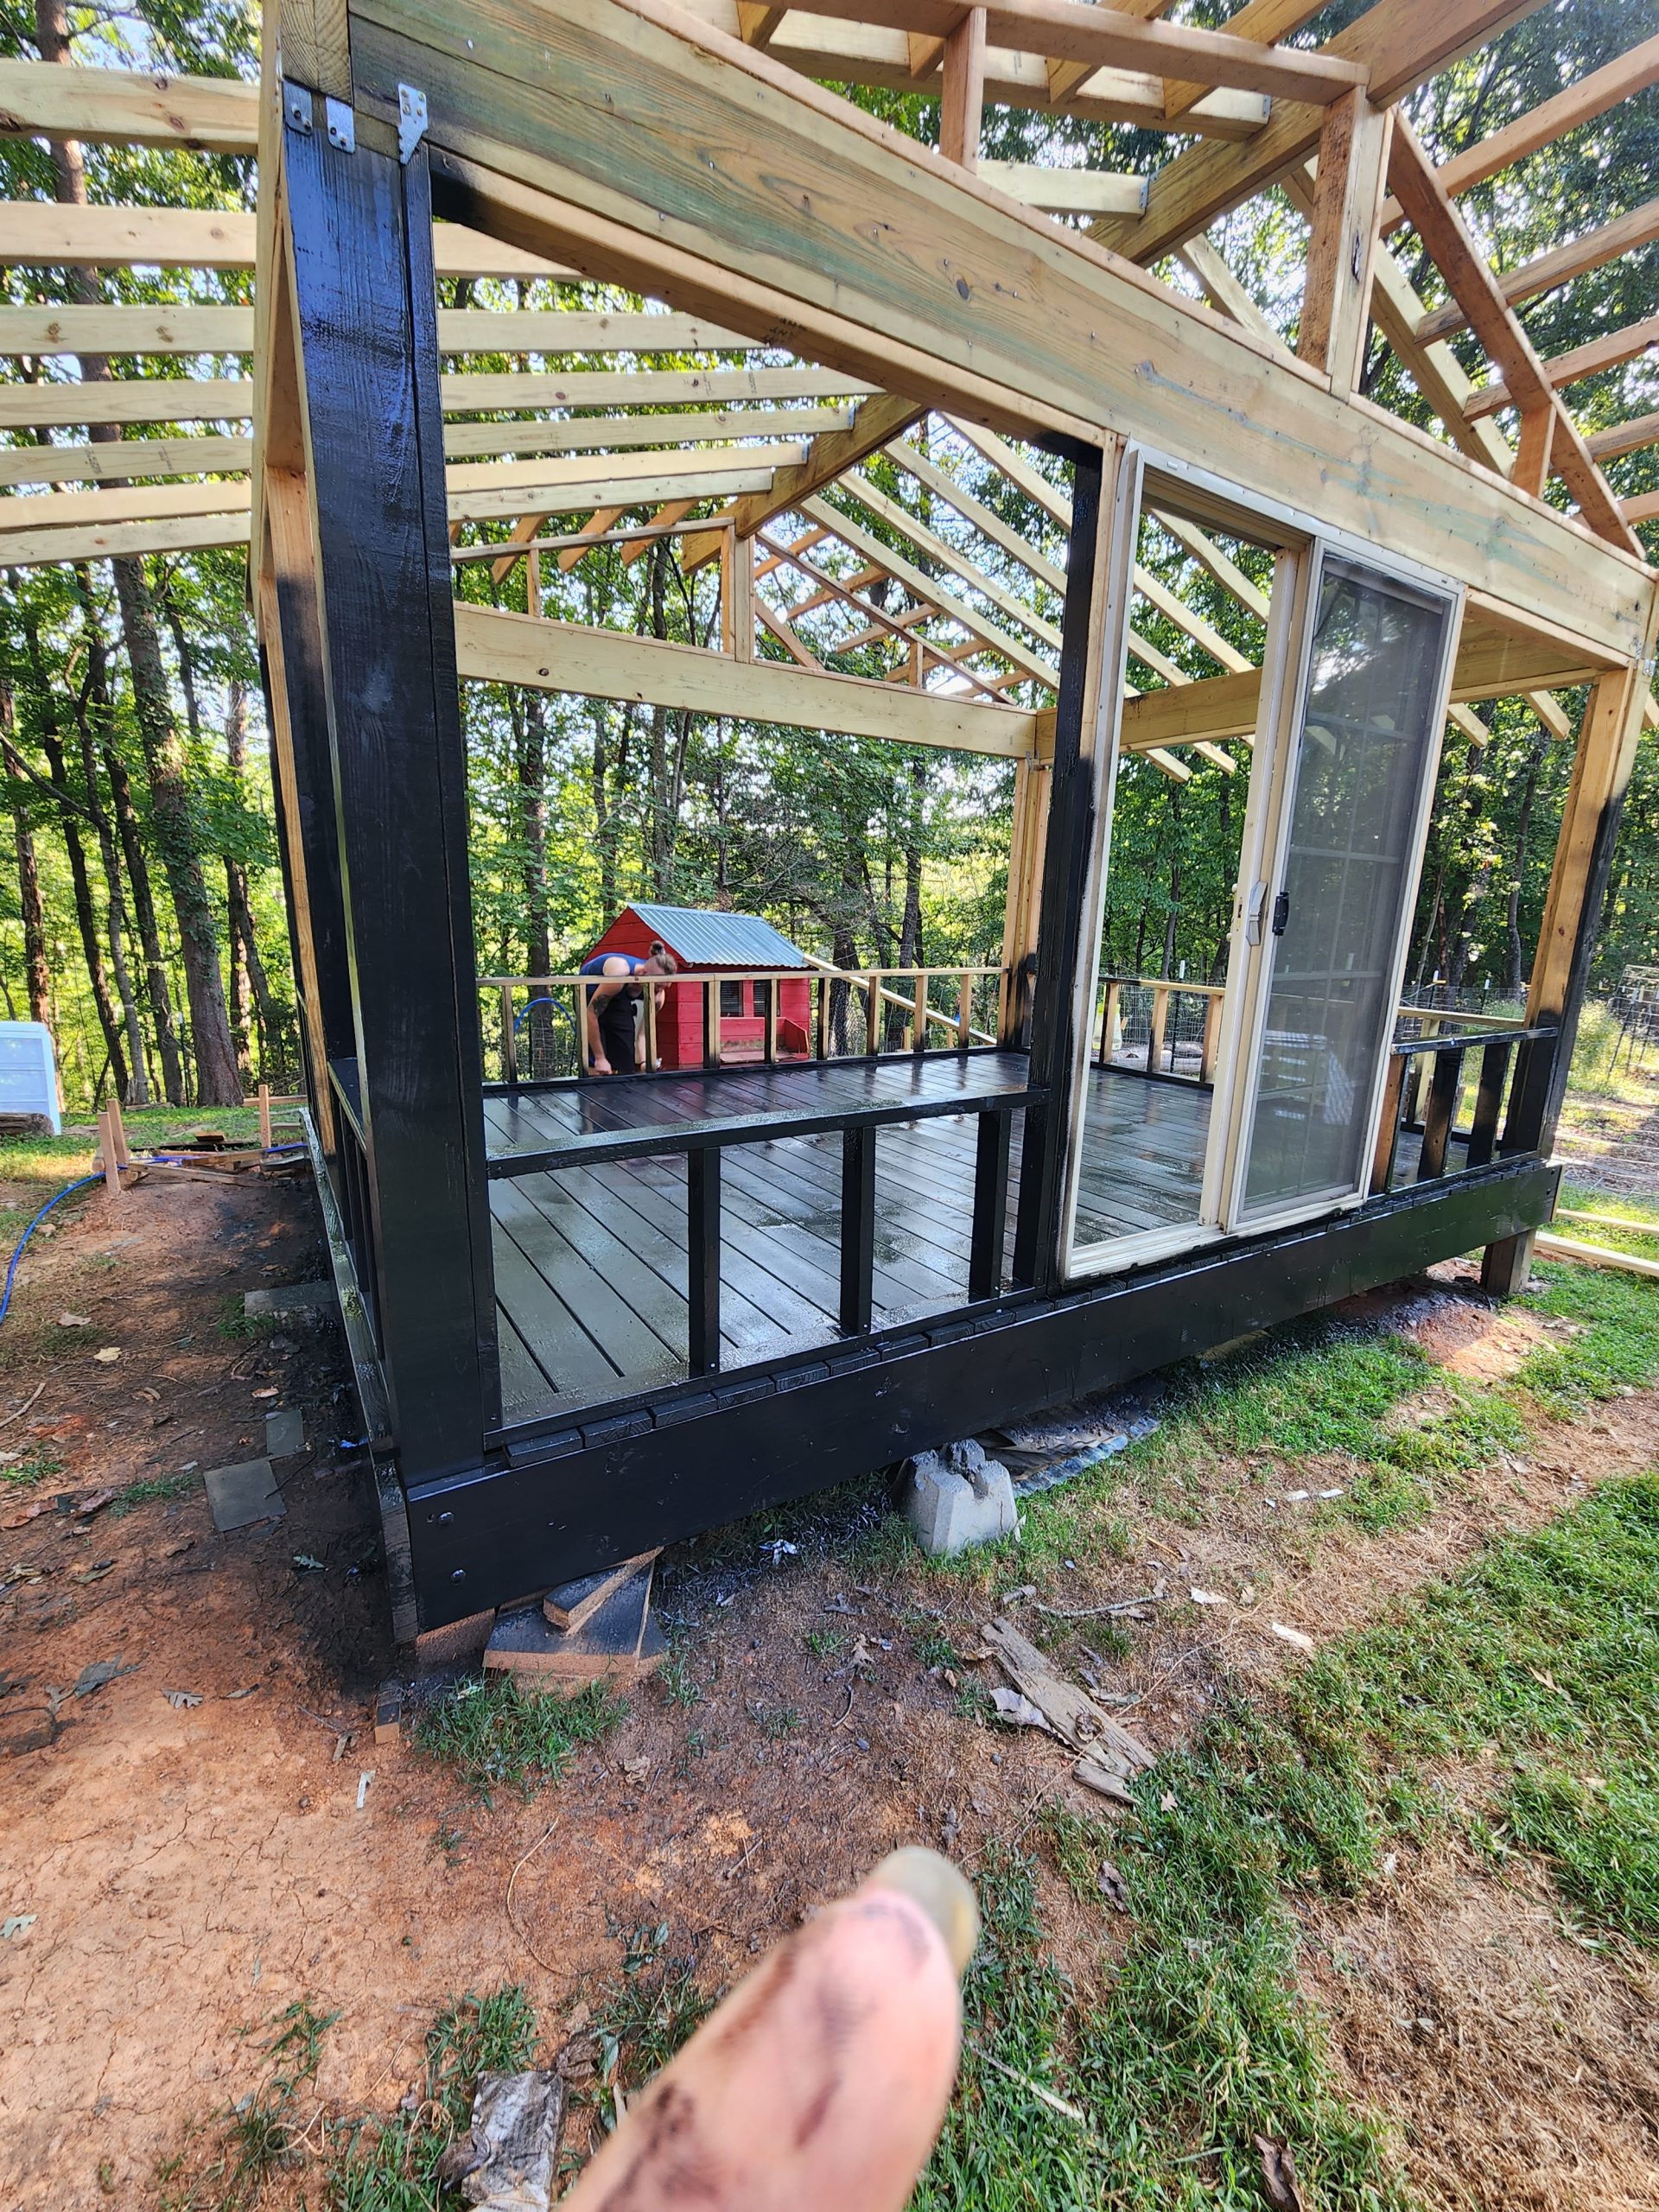
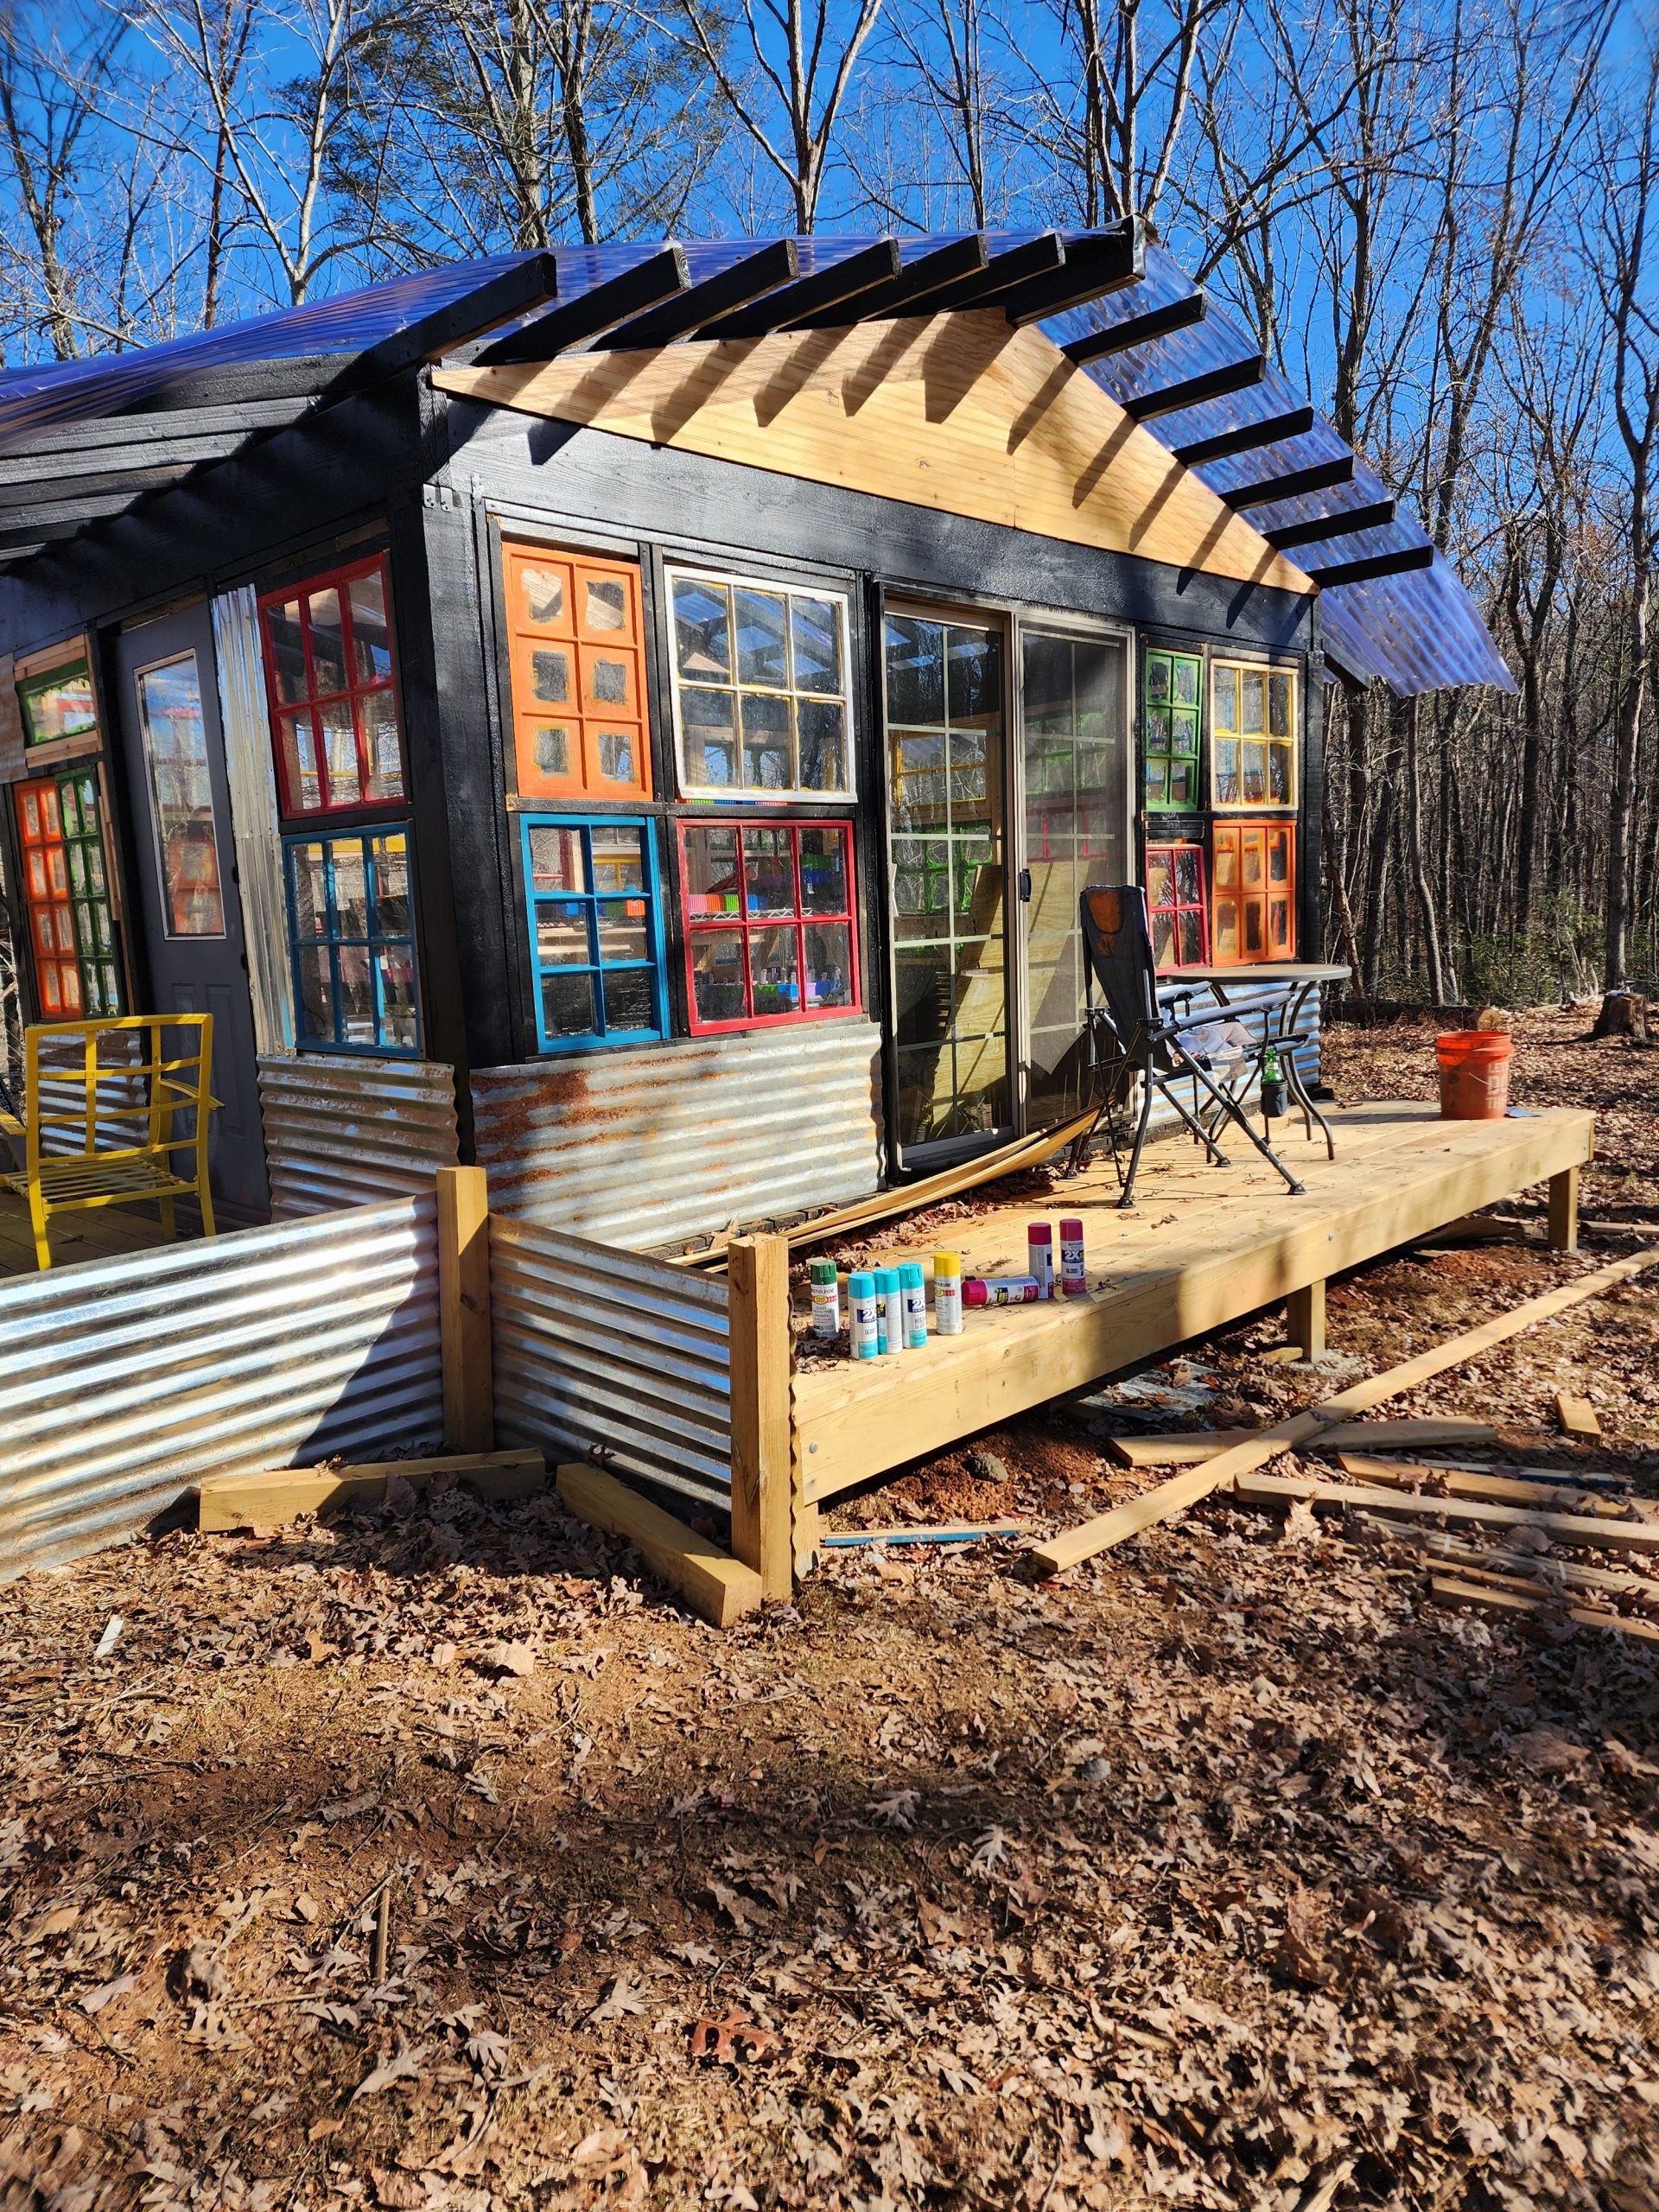
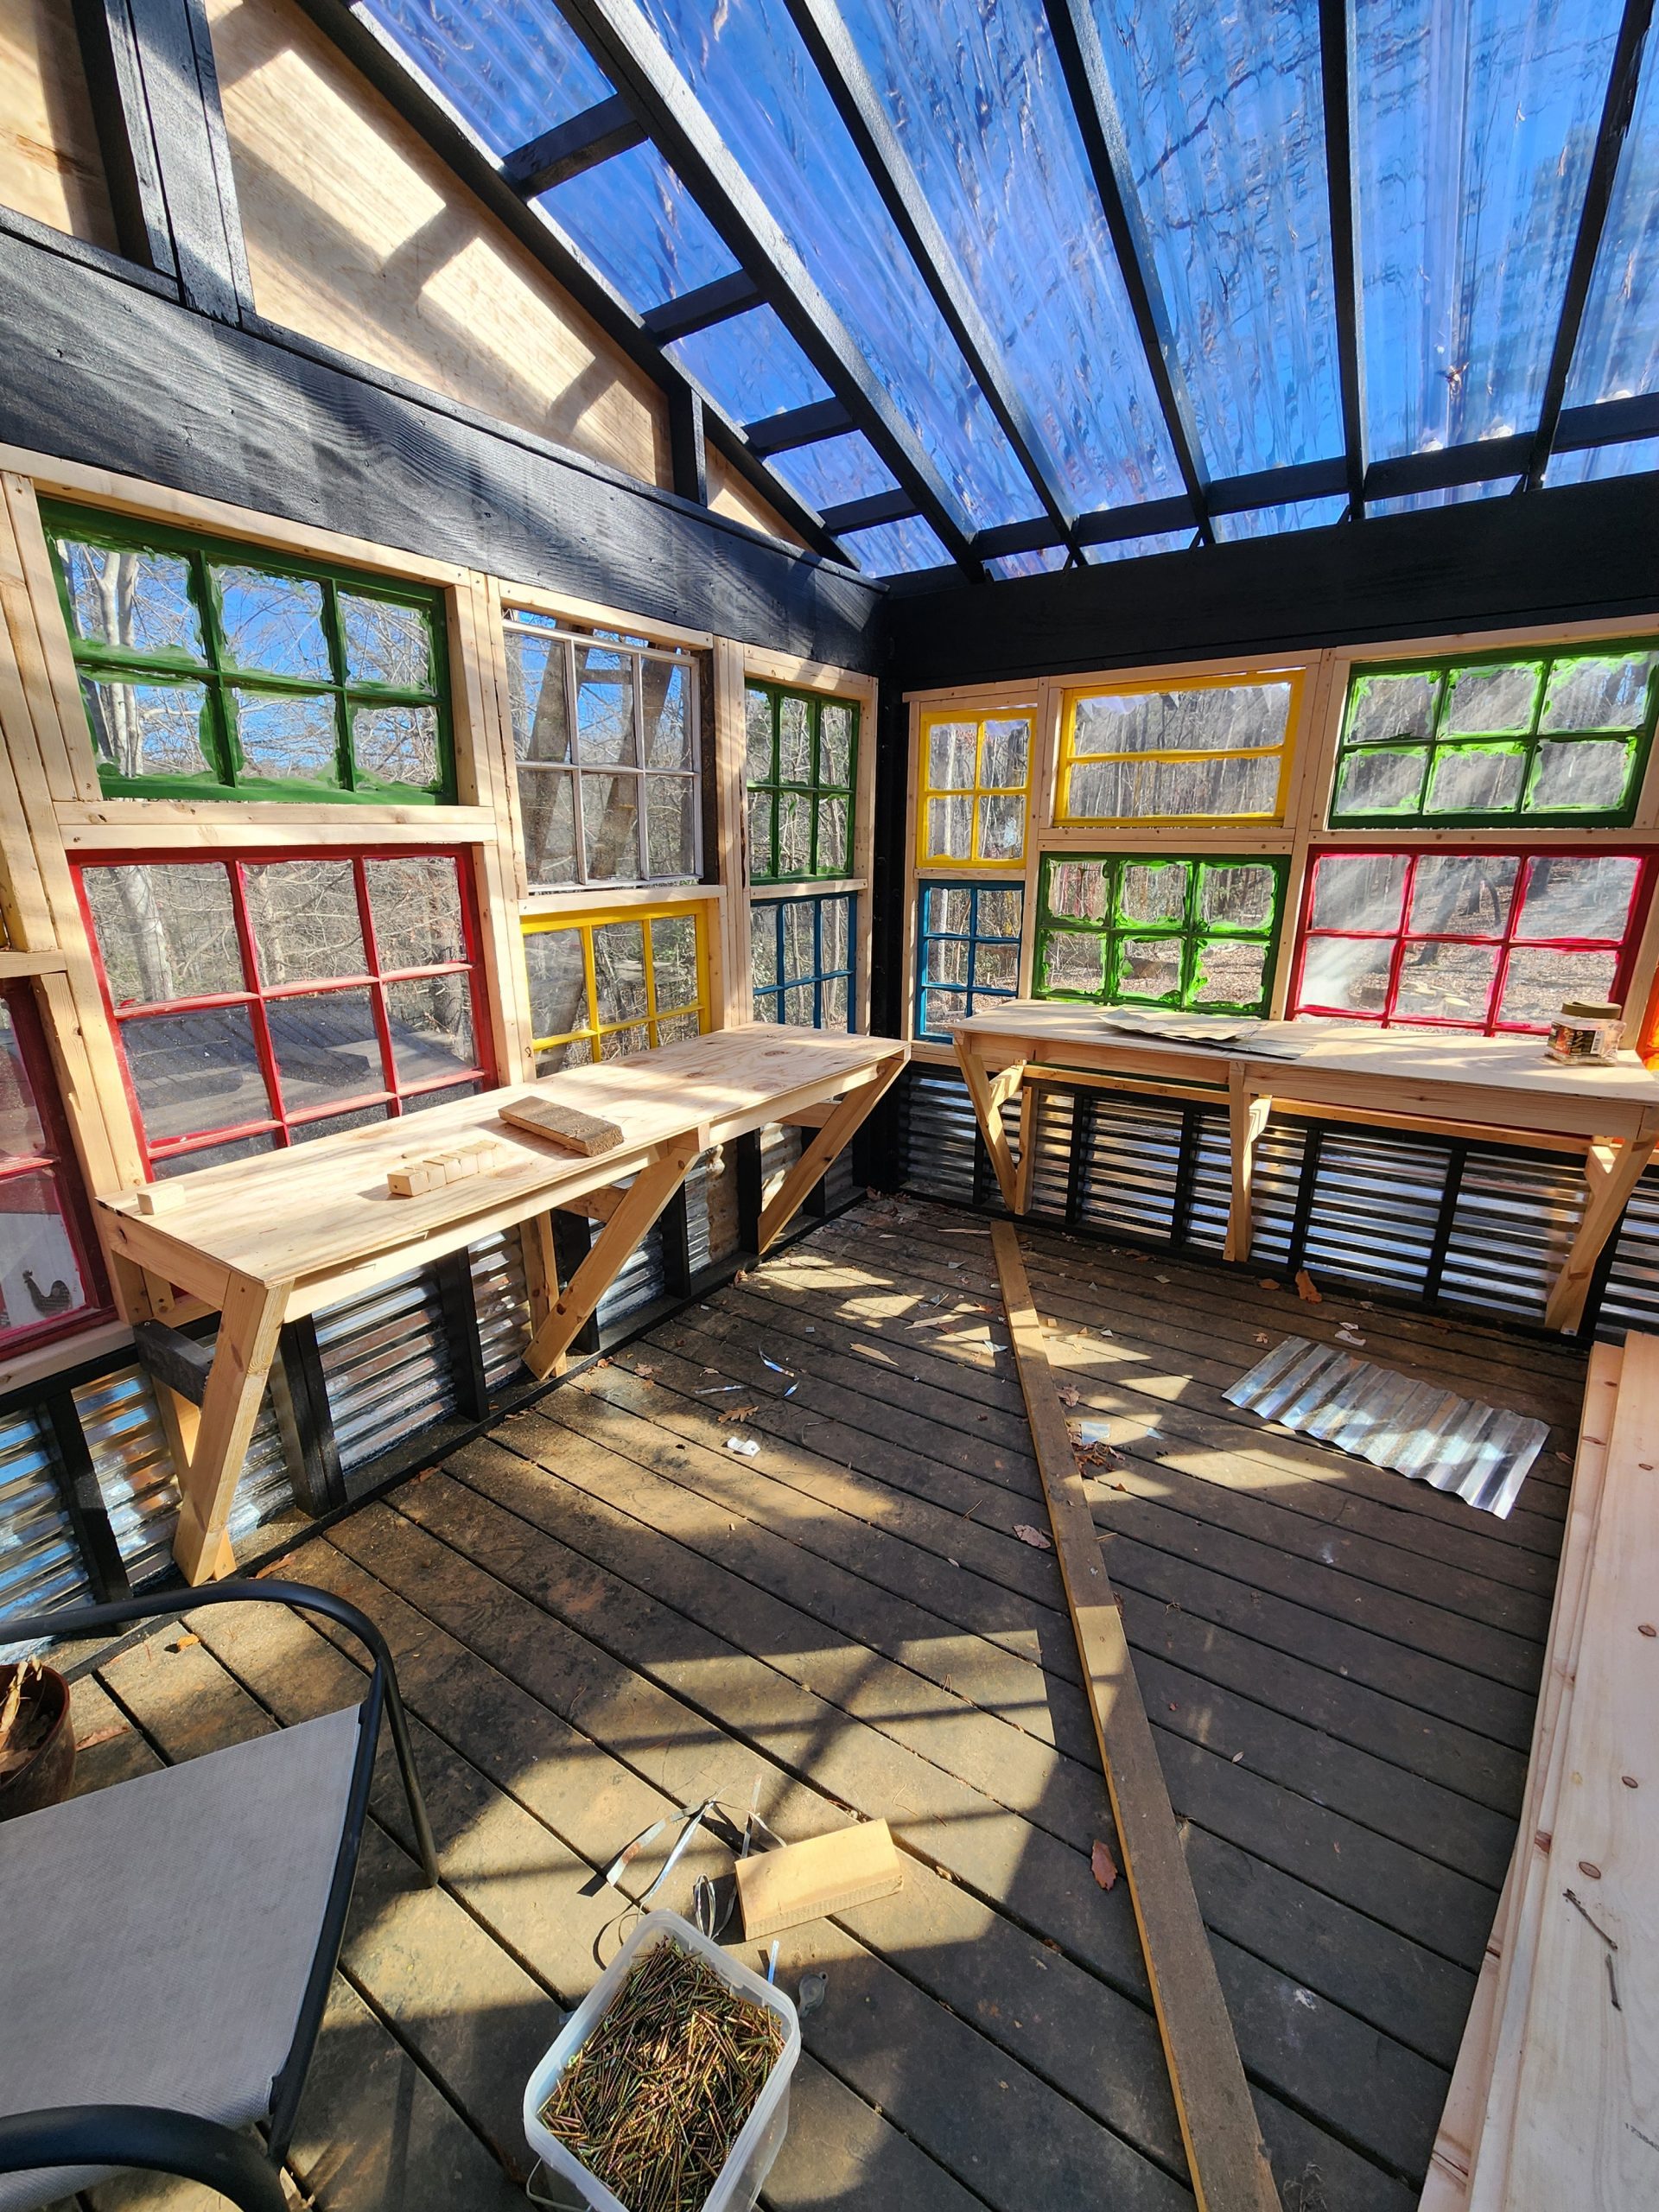
Our greenhouse is 12ft x16ft with 2 decks on the front. It’s got a sliding glass door on one side and a regular door on the other. The main structure is painted black and there are 5 different paint colors for the windows. We used tin on the “holes” and bottom to help keep it insulated but also rustic.

In between the decks, I have a small 4ftx4ft raised bed that will house Felix Felicis, our christmas tree. It will also have a couple other plants that will hopefully vine out from the greenhouse.

Save on Seeds

Inside, there is plenty of room for racks and racks of plant starts, storage for pots, tools, and more. It is probably my most favorite place on the homestead, except my gardens.

I even have my hammock set up in the corner (not pictured) so that I can hang out in the greenhouse.

Finishing The Greenhouse

There is still a ton of work left to do on the greenhouse. Things like painting, running power, putting in fans, and, of course, more plants. But those things can take time. The structure is up and able to receive plants.

Getting Your Greenhouse

Our greenhouse has cost us about $8,000 in material and probably another $4,000 in labor. But man, she is a gorgeous building and I couldn’t be happier with her.

But when you are looking at getting your own greenhouse, really make sure that it is something that you will like and use. If not, you will probably not be as happy with your greenhouse. As frilly and weird as my greenhouse is, if it wasn’t? I probably wouldn’t use it.

When you are looking at your greenhouse options, make sure that you are getting the greenhouse that you want, will work for you and is within your budget. Don’t be afraid to go all out to make it something beautiful that you will want to spend time in.

If you are a farmer/ homesteader and looking for a way to track your income and expenses, I highly recommend our Schedule F Tracker! We have been using it for years and it is the easiest, fastest and best way that we have found to keep track of the money spent on the homestead.

Buy Now

If you like the content I put out, feel free to buy us a coffee! It helps keep this site running, marketing and the goats in grain!

Buy me a coffee

If you like this post, feel free to share it and follow us below on our social media accounts!
  • Facebook
  • Pinterest
  • Instagram
  • YouTube
  • TikTok
  • Spotify
  • Threads

Filed Under: Garden Projects, Homestead Planning, Projects Tagged With: gardens, greenhouse, Homestead, Projects

JOIN TO OUR MAILING LIST!

Leave us your email to receive new posts and special offers for members only! Don't miss a thing!

Recent Posts

  • Fall Garden Guide
  • Top Mistakes With Goats
  • How To Bond With Your Goats

4 Ways To Reduce Food Waste

August 24, 2023 by Leigh Leave a Comment

The simple answer is get a couple pigs or chickens. That’s it. End blog post here. But that’s not an ideal answer. If you can’t have pigs or chickens, or you don’t like or want livestock. What are your other options? How can you reduce food waste?

reduce food waste

The Ultimate Homesteader’s Starter Bundle – Only $47!

Get the tools you need to stay organized, track profits, and manage your homestead with ease!

Includes:
✅ Schedule F Tracker – Simplify tax prep
✅ Profit Calculator – Track earnings
✅ Hay Calculator – Plan livestock feed
✅ Garden Journal – Digital & printable
✅ Herd Health Tracker – Monitor animal care
✅ Simple Budget – Manage finances
✅ Backyard Homestead eBook – Essential tips

$99 value – now just $47! Start your homesteading journey today!

Buy Now

Can It!

Sometimes reducing food waste is as simple as making a larger batch and canning it. For example, beef stew is literally the easiest meal on the planet to can. Make a big batch of it and can the left overs. You will need a pressure canner. Though it’s not absolutely required, it is strongly recommended.

If you don’t want to make a large batch but still want to get a couple jars of left overs canned? This little canner is a great option. It’s a little pricey but for the ease of use and not having to lug out one of the big canners? I think it’s definitely worth the investment.

Canning can be pretty nerve-racking to start. Especially, if you are teaching yourself how to start canning. But I promise, the old days of pressure canners exploding are WAY less likely to repeat themselves.

Dehydrating To Reduce Food Waste

I talked here about my new love for dehydrating and I have to say it’s one of my favorite ways to not only reduce food waste, but also to put up food for a rainy day. I love the “set it and forget it” ability with dehydrating food. With a couple hours of prep (for large batches), I can fill up my trays and be done. One of the ways that I work my dehydrator schedule is to cut a large batch of a veggie while prepping/cooking dinner and then fill the trays. Usually, by morning it’s done and ready to be put into jars.

If you are only cutting a cup of carrots but have another pound that will go bad? Just cut all of them and throw what you don’t need in the dehydrator.

When it comes to using a dehydrator to reduce food waste, I mainly use it when I find great deals or sales. Or when my garden is over abundant. I have two dehydrators, one that is a DIY that we picked up from our local Habitat For Humanity and our Excalibur. I have to say the mac daddy one that we picked up? Absolute favorite because it is MASSIVE.

reduce food waste

Can You Feed Food Scrap Your Livestock

Another fantastic way to reduce food waste is to feed it to your animals! This goes for ALL animals on the homestead but is only where applicable. We have a 5gal bucket on our back deck that is strictly for our chickens and pigs. Every evening fill the bucket about half way with feed if it’s not full and throw it on the ground for them.

By feeding kitchen scraps to your livestock, you can effectively reduce not only your food waste but also your feed bill! In fact, we have a whole section of the garden that is for livestock fodder. Another cool hack is to bring a small covered bucket to work and have your co workers fill the bucket with their food scraps! We have been feeding our pigs and chickens for months like this.

A word of caution though, not all animals can eat all food scraps. So be aware and prepared for that. Goats can’t eat meat. It’s taboo for a chicken to eat chicken. Cows shouldn’t have large apples. Etc. So just be cautious when feeding your livestock out of your kitchen scraps.

Meal Prepping To Reduce Food Waste

Lastly, meal prepping will help you reduce a lot of food waste. I talked here about how to stretch your meals out to reduce the stress of cooking after a long day of work. When you have a plan of what you are going to eat for the week, it really helps to reduce food waste and stress!

If you are working towards reducing your need of processed foods, that not only feed your family but the scraps go to your livestock, I talk about cooking from scratch here. Because buying the non-gmo, no corn/soy feed for your meat animals doesn’t make a lick of sense if you turn around and feed them a box of mac and cheese.

Bonus Tip: Compost!

The reason why this wasn’t included in the main group is because composting has some “rules”. The general rule of thumb for compost is to put in organic matter. Things like leaves, grass clippings, garden waste, and most kitchen scraps. BUT!

You really don’t want to put meat scraps in your compost. You can put meat or bones in your compost, but you chance predators or the meat going rancid and causing problems in your compost. Another problem is using things like oil, butter, etc can also go rancid. But if you have left over carrot caps, watermelon rinds, etc? Abosultely put them in the compost.

  • Facebook
  • Pinterest
  • Instagram
  • YouTube
  • TikTok
  • Spotify
  • Threads

Filed Under: Chickens, Garden, Pigs, Projects Tagged With: Canning, Chickens, compost, cooking, Homestead, kitchen, Pigs

JOIN TO OUR MAILING LIST!

Leave us your email to receive new posts and special offers for members only! Don't miss a thing!

Recent Posts

  • Fall Garden Guide
  • Top Mistakes With Goats
  • How To Bond With Your Goats

The Homestead Holiday Gift Guide

October 2, 2022 by Leigh Leave a Comment

The holidays are coming and with that comes the desire to get those that matter to us gifts that are meaningful and useful. If you are living on a homestead, or have relatives that do, this list is packed full of great ideas to help you get the most bang for your buck. While also get something that they will love. Some of the things on this list are things that are on our own holiday wish list. Others are things that we have already bought and absolutely love. This homestead holiday gift guide is sure to have something for your homesteader.

If you are a homesteader, and your family doesn’t know what to get you for the holidays? Share this with them. Or, if you are going to a holiday party and need a hostess gift? Check out the $0-$50 section below. It’s got a ton of great ideas.

Homestead Holiday Gift Guide

I have broken this guide up into price points because that’s important. No one wants to find the perfect gift and realize it’s outside of their price range. Also this entire post is filled with affiliate links. Buying from these links doesn’t charge you any extra but it does allow us to make some extra money for the farm. You can read more about our affiliate disclosure by clicking the link.

But First Some Housekeeping

The holiday season is a time for giving. As the giver, you are giving someone a gift that you thought they would like or that made you think of them. And friends? That is amazing. As the recipient, it is an awesome feeling when someone hands you a gift and says, “This made me think of you.” But also as a recipient, I don’t want you to waste your money on me. I would rather you donate that money to a good cause like animal rescue, save the bees, or really anything where the money actually goes to the cause.

Sometimes though, the gift giver simply wants to give you a gift. And if you are getting a gift for a homesteader, you may be a little lost on what to get them. You know they don’t want anything, but you are bound and determined to get them something. Most homesteaders would love to receive a gift that works on the farm. So let’s talk about homestead holiday gifts.

$0-$100 Gifts

First and foremost, GIFT CARDS. I can not stress this enough. I know, it seems like such an impersonal gift. But it is seriously the BEST gift I could receive and I know a lot of other people feel the same. I hate wasting money and when people buy things that I can’t use, it bothers me. Not because I’m spoiled, although that is true too. It’s because that person spent their hard earned money on things that won’t get used, can’t be returned, etc. So seriously consider gift cards to places like Home Depot, Tractor Supply and Amazon.

Tractor Supply

Digital Prints, Digital Art Work, or Printables– I have several different digital photography prints in my Etsy store and they are a huge hit. Unlike regular artwork, these are digital and can be printed at any size you want. These make fantastic hostess gifts, too. You will usually find prints for less than $10 and it doesn’t cost more than a few more dollars to have them printed at Walmart, Target, Sams, etc.

Ask About Their Amazon Wish List– Almost anyone that regularly shops on Amazon has at least one wish list. I have 10. But ask them for a link to their wish list so you can be sure to get something that they will love.

Donations– Every year there is that one person that you have absolutely no idea what to get them. I’ve got a family full of them. Instead of getting them a present that is going to hang out in the garage for the next 5 years, you know who you are, make a donation to their favorite charity. Get them a card, explain what you did, and put the receipt in the card.

Books– If your homesteader is a bookworm then I’ve got the list for you!

Homesteading

  • Back To The Basics
  • The Homesteader’s Herbal Companion
  • The Encyclopedia of Country Living
  • The First-Time Homesteader

Cookbooks

  • The Homestead Canning Cookbook
  • The Complete Guide To Pressure Canning
  • Preserving Everything
  • The Prepper’s Pantry

Animals

  • The Backyard Homestead Guide To Raising Animals
  • Butchering
  • The Ultimate Guide To Raising Farm Animals

Gear- Whether it’s stuff for butchering, milking, or building having extra gear is amazing. Gift cards would be amazing for this stuff as well because you may not know the difference between hoof trimmers to get, or which power tools they need batteries for. But I will tell you this, getting me gear so I can do my chores better? Score.

Sharp Things

  • Cold Steel Machete
  • Mtech Axe
  • Throwing Axes

Tools

  • Drill Bits, Saw Blades, and more
  • Hand tools: extra screw drivers, wrenches, socket sets, pliers and more.

Miscellaneous

  • Cast Iron, the good kind from antique stores.
  • Boots are always a plus
  • Coveralls! Seriously.

Seeds!!!!!!!! This would probably be better as a gift card, but I don’t know many homesteaders that will turn down packets of seeds. Tomatoes are usually pretty safe. Cucumbers are too if they have livestock. But check and see what they grow, and then check out Territorial Seed Company or Eden Brothers.

Logo 468x60

Plants- Territorial Seed has some great plants including coffee plants! Etsy is also another great place to get edible plants so consider berry bushes, grape vines, etc.

$100-$250 Gifts

You had better be pretty good to get something off this list. While I know I haven’t been super good, if my family is reading this? I would like this milker please!

Greenhouse– There are some greenhouses that will come in under $250 that are great for seed starts or house plants that are too big to come inside. If you know they are short on space, a greenhouse may be a great option.

Pressure Canners– I will never say no to an additional canner. I’ve been saving up for this canner, but just having another one is a time saver for me. The All American 931 can hold 19 quart jars and is a double stack. When I’m hip deep in canning season, this helps a lot. The Presto is a great canner and you can usually only get 7 quart jars in there.

Camp stove- Along the same lines as a pressure canner, having additional burners would be amazing. Not to mention not heating up the house. This camp stove has been on my list for a while and I’m hoping to get one before next canning season.

Bench Grinder– You have no idea how quickly sharp things get dull on the homestead. Having a good bench grinder is a great gift to give. Jared is able to sharpen all the knives, scissors, shovels, axes, and more with ours.

$250+ Gifts

If you’ve got a from scratch chef that has made you some amazing meals, check out this Kitchen Aid Mixer. Yes, it’s pricey but well worth the money spent, especially if that means you are going to get some awesome home cooking from it. This one is on my wish list as well

Got a homesteader that has goats? Or other hooved creatures? Hoof Boss is definitely a time and back saver. When we have to trim hooves, it takes hours. It’s hard on the back and trying to wrangle all the goats? Well, they’re lucky they’re cute.

Chainsaws– Now, this one will need a little bit of research, but an extra chainsaw is always great to have around. Not to mention the chains, sharpening equipment, etc.

At The End Of The Day

Your homesteader will love whatever gift you give them, we are grateful like that. But if you want to give them something that they will use, or need, check out some of the offerings on the homestead holiday gift guide. Or better yet, ask them what they want or need. I’m sure they would be ecstatic to receive something they need.

If you like this post, feel free to share it and follow us below on our social media accounts!
  • Facebook
  • Pinterest
  • Instagram
  • YouTube
  • TikTok
  • Spotify
  • Threads

Filed Under: Animals, Canning, Chickens, Garden, Goats, How To's, Our Homestead, Pigs, Projects Tagged With: Canning, cast iron, Chickens, Chicks, cooking, Eggs, Goats, Homestead, kitchen, Welcome

JOIN TO OUR MAILING LIST!

Leave us your email to receive new posts and special offers for members only! Don't miss a thing!

Recent Posts

  • Fall Garden Guide
  • Top Mistakes With Goats
  • How To Bond With Your Goats

The Laundry Room Remodel

August 18, 2022 by Leigh Leave a Comment

Hold on to your butts, this is a long posts.

Not everything on the homestead is about livestock, gardens and canning. Sometimes it’s about what is inside your home too. When we bought the house, we really didn’t care that the walls were wood paneled. Nor did we care that we would have to replace the floors. Those different upgrades that we were going to have to do, just was not a problem. We bought it for the land. Unfortunately, the house still does need to be updated and brought into this century, let alone this decade. So I decided to do a laundry room remodel and to make it more of a challenge for less than $700.

  • Why The Laundry Room?
    • The Things We Hated:
    • Where To Start: Paneling
    • Next: Ceiling and Electrical
    • Painting Over Wood Paneling
    • Storage
  • Final Takeaways For A Laundry Room Remodel

Why The Laundry Room?

Well, simply put it’s the most hated room in our house, bar none. No one likes doing laundry. But since I hate it the least, it’s “my” chore. Which is fine because that means that the dishes go to someone else. Score.

But it was hard to find the urge to get in there and do the laundry, or even clean the space. It was drab and was just not nice to look at. The worst part was, no matter how many times I cleaned it, it always stunk.

I could have started anywhere in the house, but this seemed to be the most manageable. Plus, if we screwed something up, it was a small space. It had the least amount of the things we hated the most (paneling) and seemed like a quick remodel would be, well, quick. There was no way to know how wrong I was.

Before the laundry remodel could start, I had to at least think about that I wanted it to look like. The first thing I did, was figure out all the things we hated about the room.

The Things We Hated:

  1. Paneling
  2. Lack of storage
  3. Open shelves
  4. Chewed and clawed up door jam
  5. Popcorn ceilings
  6. Lighting
  7. No place to fold or store laundry while finishing the other laundry.

Then I figured out what I wanted it to look like. There were two things that needed to happen in that room, the paneling gone and more storage. Anything past that was fair game. So I started working on designing what I wanted.

Our house is not very big and that is just fine with us. But the downside is that we have to get very creative with storage options. I have found that putting in cabinets has helped a ton. Almost every single remodel or design idea has tons of shelves, cabinets and other storage ideas.

Where To Start: Paneling

Before we jump into the rest of this post, let me tell you something about paneling and trying to cover it. This is not for the feint of heart. Nor is it for someone not willing to work. Like most construction projects, it’s dirty, dusty, and there is a ton of heavy lifting. Don’t let any of the videos or other posts lie to you and tell you, “I just covered the crack in the paneling and painted”. That’s not what they did, trust me.

Back to the laundry room.

Once we got the majority of everything out of the laundry room, I decided to start with the wood paneling. While others may love shiplap, I hate it. So I started looking into how to cover up the cracks in the paneling and found that caulk is a good choice. Let me tell you, it’s not.

Boys helping cover wood paneling

After twelve bottles of caulking, we weren’t even half way done. It also didn’t fill the cracks well. Once it dried, there would be an indent in the middle of the crack. So that failed.

When talking to a couple of friends who do construction, they suggested using drywall putty or mud. That worked a lot better, and was a ton cheaper so we went with that. But the problem we were still having was that, once dried, the crack was still noticeable.

The indent that doesn’t want to be covered

After three to four coats with the drywall mud, the crack was barely noticeable and ready to sand.

Let me tell you this, before you start sanding, make sure that you have a respirator like this one and great airflow in the room you’ll be working in. I used sheets and blankets to block off the doorway so that we could keep the dust to a minimum and it definitely helped. But the clean up was enormous.

Next: Ceiling and Electrical

Next we started working on removing the popcorn ceiling. For this job, it may have been better just to leave it. But popcorn ceilings are a close second in my hatred book. To remove popcorn ceiling you need two things, a spray bottle with water and a drywall knife similar to this, and the size doesn’t matter. You can buy a popcorn scraper but we found that it gouged the ceiling more and was harder to work with. Because all the “droppings” fell into the bag, it’s definitely worth a shot.

Logo 468x60

Then you are going to soak the ceiling with water using some sort of sprayer, we used this one. Once it’s saturated, and yes you need to soak it, you can start working to scrape the ceiling. I will tell you it is extremely satisfying to do it. I don’t know why. Once you’re done, you can sand any rough spots.

Another option for the ceiling is to just sand it if you have an electric sander. After doing the scraper, I liked this method the most because it is a one and done. I also didn’t have to worry as much about gouging the ceiling when I sanded. Plus, I was already sanding the walls so two birds, one stone.

After the ceiling was done, dry and painted, it was time to tackle the nipple lights. I don’t know what they’re actually called but they look like nipples, sorry. It was also time to start pulling the black outlets and switches and replacing them with white ones.

Cue problem #93480382 of this remodel. The electrical was done to 1980s code, so it was pretty much a fire hazard. And since our house is all wood, it would have gone up like a matchbox. After cleaning out forty years of dust, bugs and debris out of the switch boxes, we were able to replace the switches. Only to find out, everything was backwards. Since Jared is amazing, he was able to get in there and help me get everything switched out. I love that man.

Once we got the new light fixture installed, we were ready to tackle the paint.

Painting Over Wood Paneling

Now, before we jump into painting, you need to know something about wood paneling. Much like painting previously painted wood, you need to sand your paneling. If you don’t, the paint won’t stick. We took our sander around the room and hit every single wall. Then we washed the walls with warm soapy water. We wanted to make sure that we weren’t going to have another problem, which of course we did.

I used Kilz Primer, because the previous owners had cats and I’m pretty sure the litter box was in the laundry room. So it stunk. After I hit the walls, ceiling, baseboards and door jams, you could still see the wood paneling AND the cracks.

We did four coats of primer and you could still see the orange through the paint. I was not happy. Mind you at this point, I still hadn’t picked a color for the walls. But after seeing that we would need a darker color to help hide the wood? Gray it is.

Storage

I’m not a decorator, but seeing everything start to come together is my favorite part. There were a lot of phone calls and text messages sent to my family and friends because I am absolutely clueless when it comes to this stuff. The two things I knew that I wanted was it to feel clean, even if it wasn’t, and to have a ton of storage.

Previously, when it was time to do laundry, we had a storage rack like this. It worked okay, but it was temporary because we lived in a rental. When we moved into this house, we couldn’t really use it. It blocked access to the attic and didn’t fit between the basement door and the dryer. So anytime we had to go into the attic, we had to unload this thing and move it out of the way.

Logo 468x60

So I started measuring. I figured that I could put cabinets and shelves over the washer and dryer. I decided that I wanted to use cabinets and industrial pipe rod to fold our clothes. Here come the kitchen cabinets. The unfinished cabinets are much cheaper and are usually in stock at the stores.

I also grabbed a couple of decking boards to use as the tops and used a propane torch to burn them. To attach the boards to the cabinets, I used 1in corner brackets. Then, I found my stash of cabinet pulls and finished it off.

When we were placing the wall cabinets, we decided to use a French cleat system and it worked pretty well except, you could see where the top cleats where too low and too wide. This resulted in having to get a word art sign that could hide it.

Then came the shelves. We bought 1x10x10 boards and these shelf brackets. I really love these brackets! I’m not a fan of the normal shelf brackets because they look cheap to me. While these brackets were more expensive, I think it looks more finished.

The final touch of this remodel, was adding different storage containers for laundry detergent, bleach, etc. I didn’t want to just leave them in their packaging because, well it’s not nice to look at. While that may not bother some, I do want my home to look a little more put together.

Today, my laundry room looks like this and I couldn’t be happier with it.

Final Takeaways For A Laundry Room Remodel

–Drywall Tape -Next time we will be using drywall tape to help cover the cracks in the paneling better.

-Lighting- bright white light bulbs will help keep the room looking bigger instead of the more orange-y/ yellow-y bulbs.

– Use drop cloths to protect your floors if you will not be replacing them

– Give yourself at least an inch when measuring for cabinets. We ended up having to cram that smaller cabinet between the washer and dryer. The good news is that now my washer can’t walk out when it’s unbalanced.

-You don’t have to buy every decoration when you hit the final stage. You can, but I liked being able to find things as I liked them instead of switching things out and wasting money.

I know this was a long post. If you’ve made it this far, thanks for sticking around. While this laundry room remodel took a couple of months and is still not quite done, it has been great. We have lived in rentals our entire marriage and it’s nice to be able to work together and make this home ours.

  • Facebook
  • Pinterest
  • Instagram
  • YouTube
  • TikTok
  • Spotify
  • Threads
  • Facebook
  • Pinterest
  • Instagram
  • YouTube
  • TikTok
  • Spotify
  • Threads

Filed Under: How To's, Projects Tagged With: Homestead, kitchen, Laundry Remodel, Welcome

JOIN TO OUR MAILING LIST!

Leave us your email to receive new posts and special offers for members only! Don't miss a thing!

Recent Posts

  • Fall Garden Guide
  • Top Mistakes With Goats
  • How To Bond With Your Goats
  • « Go to Previous Page
  • Page 1
  • Page 2
  • Animals
    • Chickens
    • Farm Dogs
    • Goats
  • Garden
    • Compost
    • Garden Projects
    • Seeds and Plants
    • Garden Journal
    • Working With Food
      • Recipes
      • Freezing Foods
      • Dehydrating Foods
      • Canning Tips And Tricks
        • Canning Inventory Sheets
  • Helpful Info
    • Welcome to the Homestead!
    • Emergency Preparedness
    • Frequently Asked Questions
    • Goal Setting
    • Project List
    • Shop Digital Products
      • Hay Calculator
      • Farm Expense And Income Tracker
      • Goat Crash Course: 101
      • Garden Journal Prompts
      • Schedule C Tracker
      • Schedule C Tracker
      • The Homestead Bundle
  • The Truths
  • Episode List
  • Start Here
    • Privacy Policy
    • Affiliate Disclosure
    • Let’s Get in Touch
    • Members Only Library
    • Welcome To Our Homestead

Footer

  • Email
  • Facebook
  • Instagram
  • Pinterest

COME AND GET IT!

Leave us your email to receive new posts and special offers for members only! Don't miss a thing!

· Midnight Theme

Copyright © 2026 · Midnight Theme on Genesis Framework · WordPress · Log in