• Skip to primary navigation
  • Skip to main content
  • Skip to primary sidebar
  • Skip to secondary sidebar
  • Skip to footer

Steel Raven Farms

Where muck boots meet ground.

  • Animals
    • Chickens
    • Farm Dogs
    • Goats
  • Garden
    • Compost
    • Garden Projects
    • Seeds and Plants
    • Garden Journal
    • Working With Food
      • Recipes
      • Freezing Foods
      • Dehydrating Foods
      • Canning Tips And Tricks
        • Canning Inventory Sheets
  • Helpful Info
    • Welcome to the Homestead!
    • Emergency Preparedness
    • Frequently Asked Questions
    • Goal Setting
    • Project List
    • Shop Digital Products
      • Hay Calculator
      • Farm Expense And Income Tracker
      • Goat Crash Course: 101
      • Garden Journal Prompts
      • Schedule C Tracker
      • Schedule C Tracker
      • The Homestead Bundle
  • The Truths
  • Episode List
  • Start Here
    • Privacy Policy
    • Affiliate Disclosure
    • Let’s Get in Touch
    • Members Only Library
    • Welcome To Our Homestead

Our Homestead

How To Build Raised Garden Beds

December 28, 2024 by Leigh Leave a Comment

While it’s definitely easier to just buy a raised garden bed, kits or other premade/ prefabricated beds, I do think that building them from scratch is a great way to go. I’ll explain why in a minute. The idea of using raised beds was, at first, a ridiculous idea to me. I’ve got great soil, why do I need a bed? But after our first garden flopped, maybe learning how to build raised garden beds is a better idea.

cropped-3.jpg

Are you looking for garden journal prompts, but aren’t interested in a weekly email? Check out our 365 Garden Journal Prompts! This is an amazing, all in one, yearly product that you only pay for once.

Buy Now!

What are raised garden beds?

Simply put, it is a structure that sits on the ground that you add soil, compost and other organic material to grow things. That’s it. But it is definitely more than that. You see, our soil in Georgia is usually red clay. But there’s a reason why Georgia is a huge agricultural state, we can grow just about anything in this soil. That also means that our weeds are super plants, too.

A raised bed is a great way to keep weeds from growing and stealing water and other nutrients from your plants.

Raised beds also help those with ailments or disabilities that can’t be on their knees in a garden.

Also raised beds help create a designated spot for fruits or vegetables that you want to save seeds from.

And they look prettier.

Susan over at Learning and Yearning as a great guide to raised beds. I took a lot of inspiration from her and Kathi over at Oakhill Homestead when I was brainstorming, designing and building our raised garden beds.

Are you getting overwhelmed in the garden? Stressed? Or just not enjoying the garden like you used to? Check out our garden prompts! We send out weekly emails that get you back in the garden and out of your head! Turn the garden back into a place of love and joy instead of frustration and headache!

Subscribe Now!

To Buy Or Build A Raised Bed

Well, that’s the question, isn’t it? There are somethings you need to consider when it comes to building a raised bed. Things like your skill level, cost of materials, and customization. If you are not handy with tools or don’t have any skill, building a raised bed may not be a good option. The cost of lumber is extremely high in some parts of the country and that makes building one out of reach for some people. If you are looking for certain dimensions, building one may be a better option.

When we were looking at raised beds, I wanted to conceal the area in front of our front porch. The gutters get overrun when it rains and creates a lot of issues with run off.

Our dogs like to dig and wreak havoc in the front yard. The goats like to hide under the porch and the chickens like to lay their eggs under there too.

So I wanted to help hide some of this as well as keep creatures out. In front of the front porch is a 12ft section on each side of the stairs. And one side has a walk way to the porch, and the other side is wide open. The raised beds/ planters had to be tall enough to keep goats from walking right up to it. Trying to find something that was prefabricated was going to either be insanely expensive or not the right size.

The Ultimate Homesteader’s Starter Bundle – Only $47!

Get the tools you need to stay organized, track profits, and manage your homestead with ease!

Includes:
✅ Schedule F Tracker – Simplify tax prep
✅ Profit Calculator – Track earnings
✅ Hay Calculator – Plan livestock feed
✅ Garden Journal – Digital & printable
✅ Herd Health Tracker – Monitor animal care
✅ Simple Budget – Manage finances
✅ Backyard Homestead eBook – Essential tips

$99 value – now just $47! Start your homesteading journey today!

Buy Now

It Was Better For Us To Build Raised Garden Beds

We found a couple of prefab’d raised beds like this one, and this one. But those are really expensive and still not the right fit for what we needed. So Jared and I brainstormed what we could do. I told him what I wanted: 2.5-3 feet wide, 12 feet long, and about 24 inches tall. He got to work designing and sketching and handed me a material list.

I went to Home Depot and got 45 dog ear pickets and 6 3x4x 8ft posts and he went to work. We also got some lattice to discourage the critters from going under the deck on the sides that would be open until we could build more beds.

cropped-3.jpg

Are you looking for garden journal prompts, but aren’t interested in a weekly email? Check out our 365 Garden Journal Prompts! This is an amazing, all in one, yearly product that you only pay for once.

Buy Now!

How To Build Raised Garden Beds

It was pretty easy for Jared to build the beds and he got them both done in a day.

He stared with cutting all of the lumber to size.

Cut List

Pickets- cut off the dog ear. Then find your half way point (should be 5′ 5″) and cut there. If you are doing a custom size, cut to that number

3×4- Cut in half

Take your extra pickets (we bought 5 extra) and cut those to 18 inches

Instructions

On a flat and level surface (unless you want your beds to follow the contour of the ground), screw each picket onto a 3×4 timber.

Do this with the front and back of your bed.

Line them up so that you can attach your side picket. Do the same for the other side. You should have a rectangle.

Then start attaching pickets all the way up until you have your desired height. Ours was four pickets high.

Then go in and screw those 18in pickets half way between the 3x4s to help stabilize the pickets to help keep them from bowing when the bed is filled with soil.

Prepping Your Garden Beds

To start, I highly recommend using a liner. Katie over at The Homesteading RD has a great article all about different liners and why you should use them. Now, we didn’t use the cedar like she suggested for two reasons; one, cedar is still pretty expensive and two, because I didn’t to go BACK out to the store. Instead, I used our woven ground cloth.

If you are going to use any kind of plastic or cloth for your beds, I suggest stapling it to the sides of your pickets. But make sure you use plenty of slack in your liner, the weight of the soil, compost and other filler will tear it.

If you are interested in learning more about my favorite garden planner. I highly recommend Seedtime! This planner has been instrumental in helping me plan out my gardens with WAY more efficiency than I could ever expect! It has also reduced overwhelm, stress, and calmed my ADD/ADHD!

More Info!

Filler

Since our beds were 12 feet long, 2.5 feet wide and 2 feet tall, we needed a TON of filler. Now, we could have gone and gotten a bunch of soil, but that’s expensive AND the soil will get compacted over time. That’s not what we want.

About 2 months ago, Jared went through the property and cut down a bunch of mountain laurel. If you don’t know, mountain laurel is extremely toxic to pretty much everything. But our goats didn’t get that memo and without fail someone always eats it and gets sick.

So I had this giant pile of laurel that needed to go. After a ton of research, including calling the Arbor Foundation, I found out that laurel doesn’t leach toxins as it decomposes. Score.

I filled the beds with as much laurel as possible. We cut down big branches and stuffed them in the bed, being careful not to puncture the liner. It took about half the pile but my beds were about 80% full.

I talk here about ways to fill your garden beds for cheap.

Compost

Next, Chase filled the beds with compost. He’s in that wonderful teenage stage where he likes to pick things up and put them down. Repeatedly. But hey, it works for me. He did a fantastic job and the beds were about 90% full….. Or so I thought.

I ordered my soil, peat moss and the rest of the things I needed for finishing off the rest of the area. Including Halloween Decorations.

I wish I would have realized before buying all of this that it was heavy. I knew it was heavy, but I guess I didn’t realize HOW heavy it would be.

Driving home, on curvy mountain roads was a test of not only my driving skills but also my patience. But we all made it home in one piece and nothing fell off the back of the truck. Score.

cropped-3.jpg

Are you looking for garden journal prompts, but aren’t interested in a weekly email? Check out our 365 Garden Journal Prompts! This is an amazing, all in one, yearly product that you only pay for once.

Buy Now!

Soil

What you fill your beds with is totally up to you. As I said above, I would highly recommend using some sort of filler that is decomposable and a liner. When it comes to soil, we used regular top soil since we were adding peat moss and already had compost and the laurel in the beds. Also, since we aren’t 100% sure what we will be planting in these beds long term, I didn’t want to put in something that was going to be highly acidic or alkalotic.

Plants

What does well in raised beds? Literally everything. I want these beds to house our garlic, onion, and carrots. I may even put our regular potatoes and sweet potatoes in there. Again, I’m not entirely sure. But for now, I threw in some great fall plants and we’ll see what they can do.

Our Take Away

We figured out that raised beds are a great way to go to help conceal the disaster of the front porch.

It takes a TON of soil and other filler to fill these beds so take that into consideration when building these things. Not just height but width and length too.

Logo 468x60

Run hardware cloth around the top if you want to keep chickens and goats out.

Do not compact the soil in these beds! As you add soil, spread it around so it can fill holes in your filler but don’t cram it in there.

The beds themselves only cost about $60 each to build but ended up running us about $100 each to fill. Keep that in mind when you start this project.

If you like the content I put out, feel free to buy us a coffee! It helps keep this site running, marketing and the goats in grain!

Buy me a coffee

If you like this post, feel free to share it and follow us below on our social media accounts!

  • Facebook
  • Pinterest
  • Instagram
  • YouTube
  • TikTok
  • Spotify
  • Threads

Filed Under: Garden, How To's, Projects Tagged With: Garden, Goats, Homestead

JOIN TO OUR MAILING LIST!

Leave us your email to receive new posts and special offers for members only! Don't miss a thing!

Recent Posts

  • Fall Garden Guide
  • Top Mistakes With Goats
  • How To Bond With Your Goats

What Causes Bloat In Goats?

November 26, 2024 by Leigh Leave a Comment

If you have been around goats for more than a minute, you have probably heard someone mention bloat. But what is it and what causes bloat in goats? There are a far amount of reasons that a goat can bloat and we are going to talk about them here.

goat kidding

Before we get too far into this, I have a great course on the basics of goat care. I call it Goat Crash Course: Goat 101. In this course, I explain things like types of shelter, types of feeds and hays, basic assessments and so much more! Check it out!

Buy Now

What Causes Bloat In Goat?

There are three main things that causes bloat in goats; obstruction, too lush of grass and upset rumen. There could be other factors, but usually bloat falls into one of these three categories. I am going to go into these three categories in depth and then talk about the various treatment options and methods for dealing with bloat.

I also want to give you guys a science lesson and some other things to keep in mind before I give you treatment protocols. If you want to skip ahead because you know you have a goat in bloat, head to the bottom, but make sure to read through the rest of this after the emergency has past.

Our herd health bundle helps you keep track of your herd’s health. Includes the goat assessment, herd check sheets AND Herd Health Tracker!

Buy Now

How Does A Goat’s Stomach Work?

Before we get into what is bloat, I wanted to bring up something that maybe you didn’t know. If you did, you can skip down to the next section. A goat’s stomach has four different sections; the rumen, reticulum, omasum, and abomasum. The main culprit for bloat is going to be the rumen because it acts as the fermentation tank for what the goat eats.

If you don’t know how fermentation works, you have probably dealt with it when you open a juice that has been left to sit out with the lid on. It’s basically the breakdown of sugars and turns them into alcohols. This is how wine, bread, beer, etc are able to create bubbles.

As the goat eats, the rumen (with all it’s bacteria, parasites, etc) starts to break down the food that the goats eat. It then creates the bubbles that causes your goat to either burp or bloat.

Before we get too far into this, I have a great course on the basics of goat care. I call it Goat Crash Course: Goat 101. In this course, I explain things like types of shelter, types of feeds and hays, basic assessments and so much more! Check it out!

Buy Now

What Is Bloat?

Bloat is when a goat is unable to release the gasses that are in their stomach. This release is usually them burping…. and if you have not had the absolute horror of a having a goat burp in your face…. It’s gag worthy.

But when a goat can’t burp, due to obstruction or too much gas building up, the left side of their stomach will start to swell with that gas. This makes them incredibly uncomfortable. Usually, you can see bloat a mile away, but if you aren’t quite sure if what you are seeing is bloat, one way to figure it out is to see if the animal is burping. You can also put your hand on the stomach and see if it moves, think gas bubbles. The belly will also be hard and sound like a basketball if you flick it with your finger.

These are usually early-ish signs of bloat. Later, and more dangerous, signs of bloat are pacing, panting, crying, and labored breathing (worse than panting, it will look like they are gasping). You need to start treatment ASAP and potentially get a vet involved.

cropped-3.jpg

Are you looking for garden journal prompts, but aren’t interested in a weekly email? Check out our 365 Garden Journal Prompts! This is an amazing, all in one, yearly product that you only pay for once.

Buy Now!

Dealing With Obstruction

This is not a super common issue if you do not give your goats treats. If you do give your goats treats, this can cause an obstruction because goats are hungry little beggars that don’t like to chew…..

One of the most common treats that people give their goats are pieces of apple, carrots, squash, and other semi or hard items. Most people think that their animals will chew up their food like a normal creature… They do not. They will damn near swallow a carrot whole. So do yourself, and them a favor and cut up large pieces of fruits and veggies. Or give them very large pieces that require them to take bites instead of swallowing it in one go.

We learned this lesson the hard way, not because of bloat but because of choking.

The Hay Calculator:

If you aren’t math-y (don’t worry I’m not either), check out our Hay Calculator. It literally does ALL of the math for you and gives you totals based on what you want your goals.

On the second page, you can track where you’ve bought hay, what you spent and how long it lasted.

Buy the Hay Calculator

Too Lush Grass?

This one can go hand in hand with an upset rumen, but it is a separate category. Plus, it needed it’s own very space because there is a lot of factors that go into why too lush of grass is actually a bad thing. When an animal is used to eating hay, and then they are suddenly turned out to fresh grass, you will notice that, at least initially, they are thrilled! Until you notice that the left side of their stomach is massive and you’re not sure why.

The main difference between hay and fresh grass comes down to water content. Which sounds obvious, but most people don’t think about the fact that wet grass becomes sludge in a rumen. If that rumen gets packed with sludge, it can disrupt the ability for the rumen to ferment and produce gas for them to burp.

There are two main ways that this tends to happen; early spring and after rain. Most people are so excited to turn their animals out to pasture, especially after a long winter. But do yourself and your animals a favor and don’t let them stay out on fresh pasture for too long. Let them get use to the change in their diet.

This also goes for wet grass after a rain.

Before we get too far into this, I have a great course on the basics of goat care. I call it Goat Crash Course: Goat 101. In this course, I explain things like types of shelter, types of feeds and hays, basic assessments and so much more! Check it out!

Buy Now

An Upset Rumen

In the science section, we talked about what a rumen does and how it works; fermentation. If the rumen cannot function, then you risk a goat bloating. But how does a rumen get upset? Usually it’s an issue with deworming or antibiotics. Though that is not always the case.

A rumen works on bacteria and parasites to function. If you have recently given dewormers, there are little to no parasites. If you have recently given antibiotics, there is little to no bacteria to breakdown food. This causes the rumen to get very upset and not work.

Usually, you will be told to give probiotics, prebiotics after any treatments. An upset rumen is the reason why.

Our herd health bundle helps you keep track of your herd’s health. Includes the goat assessment, herd check sheets AND Herd Health Tracker!

Buy Now

Treatment Protocols For Bloat In Goats

Now, I will say this until I am blue in the face; ALWAYS contact a veterinarian if you have an animal in distress. Period.

However, I also fully understand that you may not have a vet that can help you. Sometimes, you can’t afford it. Other times, there is no vet to care for your goat. In those cases, you have no way to contact a vet for help. So here are the ways that I treat for bloat on my farm.

But please understand something, your animal can die from bloat. This is not something to play with. IF you choose to do nothing (either getting to a vet or doing something yourself) that animal will die a painful death. I’m not saying this to be fear mongering or mean. I am simply stating a fact. If that is not something that you can stomach, maybe reconsider getting livestock.

Before we get too far into this, I have a great course on the basics of goat care. I call it Goat Crash Course: Goat 101. In this course, I explain things like types of shelter, types of feeds and hays, basic assessments and so much more! Check it out!

Buy Now

Clearing An Obstruction

If you have a goat with an obstruction, you have to clear that obstruction, and it will not be easy. Goats will fight you tooth and nail…. and if they aren’t fighting you, you have a whole different problem. The best way to remove an obstruction is with your hand/ arm or a semi rigid tube. This is the one that I have on hand and it has saved a couple of overly enthusiastic goats.

Also make sure to have some sort of hard thing in their mouth (bite block) to keep them from chewing on the tube and potentially making things worse. You are going to feed the tube through the middle of the bite block (I have used small rolls of duck tape) and gently cram it down their throat. You will be fighting them, it will suck, but you need to be gentle but firm in the pressure needed to get the tube down the throat. You will probably meet resistance of the thing they didn’t chew.

You will need to gently but firmly push past it to try and clear the esophagus. The reason we are being gentle but firm is because we don’t want to damage structures or make things worse. However, if you have a goat that is bloating because they can’t burp, you are stuck between a rock and a hard place. You will know if you are in the trachea (not likely) because you will hear them breathing through the tube. You will need to back up the tube and try again. You will know if you are in the esophagus if hear a hissing sound and smell the absolutely foul smell of fermenting grass.

I said above that you will either use your hand/ arm or tube. I highly recommend the tube, but I have also pushed my arm down their throat. You will get cut on their teeth. They will bite. But if it comes between my arm getting a few scratches or bites and my goat dying? I’ll take the wounds with pride…. just make sure to clean those wounds up because infections are not fun.

The Hay Calculator:

If you aren’t math-y (don’t worry I’m not either), check out our Hay Calculator. It literally does ALL of the math for you and gives you totals based on what you want your goals.

On the second page, you can track where you’ve bought hay, what you spent and how long it lasted.

Buy the Hay Calculator

Normal Bloat

The first and easiest methods for fixing bloat is to get the goat moving. Think about when you are gassy. Sitting in one spot is not going to get that gas bubble to move. But if you get up and start moving or stretching, it can help get that gas bubble to move around. It’s the same way with goats.

However, that only works if you catch it early. One of the best ways I have found to treat bloat is a mixture of baking soda and olive oil. I make a drench of it, usually 2 tablespoons of baking soda in about half a cup of olive oil. It should be thick, but not thick like batter, more like a syrup. They will not like it, they will fight you, but make sure to get as much of it down them as possible.

Keep an eye on them and repeat if necessary in about an hour.

The Ultimate Homesteader’s Starter Bundle – Only $47!

Get the tools you need to stay organized, track profits, and manage your homestead with ease!

Includes:
✅ Schedule F Tracker – Simplify tax prep
✅ Profit Calculator – Track earnings
✅ Hay Calculator – Plan livestock feed
✅ Garden Journal – Digital & printable
✅ Herd Health Tracker – Monitor animal care
✅ Simple Budget – Manage finances
✅ Backyard Homestead eBook – Essential tips

$99 value – now just $47! Start your homesteading journey today!

Buy Now

Fixing An Upset Rumen

There are two ways to fix an upset rumen and both of them work well. First and foremost, you should be giving pre or probiotics after ALL treatments that will disrupt their rumen (dewormer or antibiotics). I even go so far as to give them probiotics after any big changes in their diet (remember switching from grass to hay or hay to grass). I also give them probiotics after kidding to make sure that they are supported. Unfortunately, this takes longer to work. If you are needing a quick answer, the second option is the best.

Another way to fix an upset rumen is to give them some sort of dark beer. We regularly drink with our goats so any beer will work, but a good, room temperature dark beer like Guinness is great. Now, if you are on a sobriety journey, this may not be a good option for you. Instead, getting a good natural kombucha like GT’s or fermented pickle juice would be fine too.

The reason that we give beer (or kombucha) is because it has carbonation to help with the burping and because it has yeast or other bacteria to help give the rumen something to jump start it.

Before we get too far into this, I have a great course on the basics of goat care. I call it Goat Crash Course: Goat 101. In this course, I explain things like types of shelter, types of feeds and hays, basic assessments and so much more! Check it out!

Buy Now

I hope this helps

Bloat is a killer for any ruminant and it’s a painful way to die. These are some of the tips and tricks I have picked up in the years that I’ve owned goats and I hope they help you.

If you like the content I put out, feel free to buy us a coffee! It helps keep this site running, marketing and the goats in grain!

Buy me a coffee

If you like this post, feel free to share it and follow us below on our social media accounts!

  • Facebook
  • Pinterest
  • Instagram
  • YouTube
  • TikTok
  • Spotify
  • Threads

Filed Under: Our Homestead

JOIN TO OUR MAILING LIST!

Leave us your email to receive new posts and special offers for members only! Don't miss a thing!

Recent Posts

  • Fall Garden Guide
  • Top Mistakes With Goats
  • How To Bond With Your Goats

Cooking During Power Outages

November 19, 2024 by Leigh Leave a Comment

I am a firm believer that learning how to do something on the fly is a great way to learn. However, there are certain things that you should put a little preparation into prior to needing the skill. Learning the art of cooking during power outages is not the time to figure out that you don’t know how to cook over open flames.

The Ultimate Homesteader’s Starter Bundle – Only $47!

Get the tools you need to stay organized, track profits, and manage your homestead with ease!

Includes:
✅ Schedule F Tracker – Simplify tax prep
✅ Profit Calculator – Track earnings
✅ Hay Calculator – Plan livestock feed
✅ Garden Journal – Digital & printable
✅ Herd Health Tracker – Monitor animal care
✅ Simple Budget – Manage finances
✅ Backyard Homestead eBook – Essential tips

$99 value – now just $47! Start your homesteading journey today!

Buy Now

Cooking During Power Outages

There is very little more frightening than not being able to feed yourself and family. But it is inevitably worse when you can’t feed your family during an incredibly stressful time, like when you don’t have power. In this blog post, I am going to give you all my tips, tricks, and hacks for how we weather storms and cook for our family. My hope is that you will take this knowledge and run with it.

I do want to be very clear with this post. I am not trying to insight panic or fear. In fact, quite the opposite. There is a certain comfort in knowing that if the power goes out for whatever reason, you can feed your family. Plus, it can be really fun. Learning how to use a grill is a very handy way to not heat up the house in the summer. Cooking over a campfire is a great way to have family time. Again, it can be really fun to learn this skill and it’s a skill that will feed you.

If you are new to heating with firewood and are looking to master the finer points of it. We’ve got a great eBook that goes in depth of what tools you should consider, how and where to stack, how to build a fire and so much more!

Buy Now

Why do you need to learn?

If you have never had to struggle with paying your light bill, I am beyond proud of you. As a child of a single mother, there were times that the power or water got shut off. Granted, and thankfully, never for very long, but it did happen. As an adult looking back at my childhood, I can honestly say that my mother made the best of a bad situation and it was never a big deal. She would pull out the camping equipment and we would camp in the living room. No big deal.

As an adult, having no power isn’t a big deal for me. We’ve lost power several times over the years and you just make do. There’s very little point in freaking out and panicking because there isn’t power.

All that being said, I learned a long time ago how to cook over an open flame (camp fire) and how to cook on grills, smokers, etc. And it’s a skill that has served me well as I’ve gotten older.

If you are interested in learning more about my favorite garden planner. I highly recommend Seedtime! This planner has been instrumental in helping me plan out my gardens with WAY more efficiency than I could ever expect! It has also reduced overwhelm, stress, and calmed my ADD/ADHD!

More Info!

Tools For Cooking During Power Outages

If your stove is electric and you lose power, you don’t have a stove. My suggestion is to have some form of fire to cook with. But my second suggestion is to have multiple ways to cook with fire. That being said, there are several things that will absolutely make your life easier when cooking over fire and I’m going to list those out below. Remember, it is better to work on this skill now, when you have power to read this blog post, than to try to figure out how to open a can with an electric can opener.

This post is very affiliate link heavy. Our site gets a small commission off these links but it doesn’t cost you a thing. If you would like to learn more about our affiliate program, you can click here.

Camp Stove– First and foremost, get yourself a camp stove with a flat top attachment. Yes, it runs off propane but in the 6+ years that we have had ours, I have found that it doesn’t use a ton of propane. I use our camp stove for canning, burgers, soups, and so much more. If I am doing a canning marathon, I can usually run one propane tank for about 6 hours before I start running low. These things are sturdy and I love them.

Fun fact, I desperately wanted a Black Stone but I just couldn’t see spending a ton of money on one. This little flat top is fantastic and so much cheaper.

Before we get too far into this, I have a great course on the basics of goat care. I call it Goat Crash Course: Goat 101. In this course, I explain things like types of shelter, types of feeds and hays, basic assessments and so much more! Check it out!

Buy Now

Cooking Tripod– Now, this particular link is for a bunch of different kinds because I don’t know what your set up is or could be. I have this one from Camp Chef and love it. I cook almost exclusively with cast iron or stainless steel and while heavy, this tripod has held up for us.

Cast Iron– I have an entire post about cast iron here, and like I said above, we only cook with it or stainless steel. That being said, I would not put any other type of pot/pan over flame. You will probably melt handles, or overheat the pan. I just wouldn’t risk it. Specifically, I would get two different cast iron pans for cooking over open flames. A Dutch oven like this and a 12″ pan like this.

Utensils– I’m not going to link any specific utensils here. My suggestion is that you get utensils that are rated for high heat. Things like wooden spoons, metal spatulas, etc.

The Ultimate Homesteader’s Starter Bundle – Only $47!

Get the tools you need to stay organized, track profits, and manage your homestead with ease!

Includes:
✅ Schedule F Tracker – Simplify tax prep
✅ Profit Calculator – Track earnings
✅ Hay Calculator – Plan livestock feed
✅ Garden Journal – Digital & printable
✅ Herd Health Tracker – Monitor animal care
✅ Simple Budget – Manage finances
✅ Backyard Homestead eBook – Essential tips

$99 value – now just $47! Start your homesteading journey today!

Buy Now

Tips For Cooking Over Open Flame

If you are use to cooking on a gas stove, understand that cooking over propane or an open flame is totally different. If you aren’t practiced at it, you will scorch your food. Plus, you can’t walk away from the food.

Tip #1- Use cast iron. No exceptions. Cast iron is made to be used on open flame. The way that the pan heats, cooks and cools is all centered around being used over open flame. This is the reason why it was created and part of the reason it will last forever.

Tip #2- Always make sure that your pan is hot before you start cooking. This is especially important for cast iron and an open flame.

Tip #3- Use a quality fat for your cast iron before you start cooking. This may sound like a “duh” thing, but you don’t want to use crappy oil in an already stressful situation.

Tip #4- Be prepared to move your pan around the fire. This is obviously more geared towards a cooking over a camp fire but regardless, don’t be afraid to move that pan around to find hotter or cooler spots. If you have a tripod, even better. You can lift your pan higher to keep you food from burning.

Tip#5- Start with easy things like broth based soups (chicken noodle, beef stew, etc) before you start learning how to cook meat in your Dutch oven.

Tip #6- Always, always have a way to wash your utensils, pots, pans and hands. Don’t get yourself sick because you don’t have some way to wash your stuff. I use a bleach solution that I can just rinse off after dunking. This is not ideal. But neither is cooking over a fire because my power is out. I do recommend getting large tub that you can wash your dishes in.

cropped-3.jpg

Are you looking for garden journal prompts, but aren’t interested in a weekly email? Check out our 365 Garden Journal Prompts! This is an amazing, all in one, yearly product that you only pay for once.

Buy Now!

Easy Beef Stew Over A Camp Fire

I didn’t want to leave you without an easy meal to cook over the campfire. This is one of my favorite ways to have a hot, filling meal.

Tools: Cast iron Dutch oven, spoon to stir, ladle, some way to cook over a flame (tripod, grate, firepit, etc)

Ingredients: 1# of stew meat, 1.5# of potatoes, .5# carrots, 1 onion, about 3T of minced garlic, 1 bunch of celery and about 24-32oz of beef broth.

Seasons to taste: salt, pepper, garlic salt, Cajun seasoning, oil/ fat, flour, bay leaves, oregano

Directions: start your fire and let it get going. Once it’s caught, put your Dutch oven on to heat up. Again use something that keeps it off the fire but still allows it to heat up. Also, be freaking careful! You are cooking over an open flame. This is not the time to make a trip to the ED.

As you are waiting for your pan to heat, toss your meat in just enough flour to coat it.

Once your pan is hot, add your oil. I coat the bottom of the Dutch oven. Once the oil shimmers (moves freely and quickly) and add your onion and garlic. Once fragrant, add your meat. Cook for about 2 minutes on each side. We aren’t trying to over cook the meat here, we just want to sear it. Take it out and put on a plate.

Add about a cup or so of your beef broth and scrape the bottom of the Dutch oven. We want all those brown bits off the bottom of the pan.

Once that’s done, add your veggies, the rest of your broth and bring to a boil. Add your seasonings. I can’t tell you how much to add because I use a ton of seasoning and you may not like how much I add. A good rule of thumb is 1 teaspoon of salt and pepper and then 1 tablespoon of each and then taste after about 5 minutes.

Once everything is boiling, move your pot away from the heat (this is where you have to babysit your food) and put it where it will simmer. We don’t want a hard boil here, we just want little bubbles to help cook the potatoes and carrots. Once you’ve got the temperature right, and it’s actually simmering, add your beef back into the pot.

Let it simmer for about 30 minutes or so. Checking and stirring regularly. If you find your running out of broth, add some more or add water. Now, if it is done cooking before you are ready to eat, you can take it off the fire and the cast iron will retain a ton of heat.

Usually what I do, is check a potato. If it is JUST cooked, I will pull the Dutch oven off the fire and set it on the ground next to the fire (covered!). It will continue to cook and stay warm without over cooking.

90% of the time, this recipe turns out pretty good. Of course, it’s hard to screw up beef stew. Usually, if you do screw it up, it’s still edible and pretty damn good.

I hope you enjoy this and try it out! Preferably before you lose power!

If you like the content I put out, feel free to buy us a coffee! It helps keep this site running, marketing and the goats in grain!

Buy me a coffee

If you like this post, feel free to share it and follow us below on our social media accounts!

  • Facebook
  • Pinterest
  • Instagram
  • YouTube
  • TikTok
  • Spotify
  • Threads

Filed Under: Our Homestead

JOIN TO OUR MAILING LIST!

Leave us your email to receive new posts and special offers for members only! Don't miss a thing!

Recent Posts

  • Fall Garden Guide
  • Top Mistakes With Goats
  • How To Bond With Your Goats

Canning Food Is Safe

November 12, 2024 by Leigh Leave a Comment

I would say, as a whole, canning food is totally safe. But that being said, there are a lot of variables that can make canning food unsafe. In this blog post, I will go over all the reasons that you should consider canning and all the reasons why canning food is safe, practical and the things that can go wrong. But the end of this blog post, you will be able to make the decision of if canning food is safe for you and your family.

The Ultimate Homesteader’s Starter Bundle – Only $47!

Get the tools you need to stay organized, track profits, and manage your homestead with ease!

Includes:
✅ Schedule F Tracker – Simplify tax prep
✅ Profit Calculator – Track earnings
✅ Hay Calculator – Plan livestock feed
✅ Garden Journal – Digital & printable
✅ Herd Health Tracker – Monitor animal care
✅ Simple Budget – Manage finances
✅ Backyard Homestead eBook – Essential tips

$99 value – now just $47! Start your homesteading journey today!

Buy Now

Canning Food Is Safe

There are many reasons that canning food could become unsafe, but as a whole, canning is totally safe. In this blog post, I am going to talk about everything that I’ve heard about unsafe and safe canning practices. I’m also going to talk about things to keep in mind as you start your canning journey and how to minimize your risk of consuming unsafe foods. But most importantly, I am going to give you as much information as I can about Botulism, which is everyone’s biggest fear when it comes to canning.

What Is Canning?

Canning is a preservation method that allows food to be shelf stable for a longer period of time. There is some debate about the longevity of canned foods. I’ll discuss more about this below but the average shelf life for home canned foods is about 18 months.

There are two main types of canning here in the US; pressure canning and waterbath canning. Pressure canning is used for low acidity foods and waterbath canning is for high acidity foods. But understand something here, the US is one of the very, VERY few countries that use pressure canning as a food preservation method.

The jist of canning is this; put food in a jar, wipe the rim, put in a pot and heat it for a certain amount of time. There is a lot more to it, but for the point of figuring out if canning food is safe, that’s really it.

Are you getting overwhelmed in the garden? Stressed? Or just not enjoying the garden like you used to? Check out our garden prompts! We send out weekly emails that get you back in the garden and out of your head! Turn the garden back into a place of love and joy instead of frustration and headache!

Subscribe Now!

The Dreaded Botulism

Canning food is a personal choice that you REALLY have to think about. For me, it was a no brainer. But I also understand that some people may not feel comfortable risking their family like this. So I wanted to drop some information for you to digest as we move through the rest of this post.

Botulism is an anaerobic bacteria which means that it lives and thrives in an environment with no oxygen. This means that canning is the perfect breeding ground for botulism because the whole purpose of heating the food and sealing it, is to get most the air out of the jar.

But to give you some stats, in 2022, there were 19 cases of foodborne Botulism. You can go here to play with the CDC’s BEAM Dashboard and see where I am getting these numbers. You want to make sure that you are putting “Clostridium” in the etiology filter, and specifically, we are looking for foodborne cases.

To give you a little more information about what would be considered a foodborne Botulism case, it could have been home canned food OR honey, baked potatoes and minced garlic in oil.

But before you start freaking out, keep reading.

Botulism spores cannot live in acidic environments with a pH less than 4.6. Nor is Botulism found in canned food where the internal temperatures have reached, at least, 240*.

The Ultimate Homesteader’s Starter Bundle – Only $47!

Get the tools you need to stay organized, track profits, and manage your homestead with ease!

Includes:
✅ Schedule F Tracker – Simplify tax prep
✅ Profit Calculator – Track earnings
✅ Hay Calculator – Plan livestock feed
✅ Garden Journal – Digital & printable
✅ Herd Health Tracker – Monitor animal care
✅ Simple Budget – Manage finances
✅ Backyard Homestead eBook – Essential tips

$99 value – now just $47! Start your homesteading journey today!

Buy Now

Safe Vs Unsafe Canning Practices

This is really where you are going to protect yourself and your family against most issues when it comes to canning. What is considered a safe or unsafe canning practice? Well, I’m going to tell you.

Not washing vegetables prior to canning is unsafe. Even if you peel the skin, you should still wash both the skin before peeling and the vegetable AFTER peeling. This decreases risk of contamination.

Raising the pH of your foods that are going to be waterbath canned is always safe. Though sometimes unnecessary, it is always good practice.

Boiling food for at least 10 minutes prior to eating is safe practice. This will kill any possible toxins that have grown and to be fair, most of the time you need to heat the food anyways.

Using unsterilized jars is an unsafe practice. Your jars should be clean before you put anything in it. Personally, I do not sterilize my jars prior to canning. But I do make sure that if I’m water bath canning, I dip those babies in boiling water, this will “sterilize” them as best as I can get. My dishwasher is a 13 or 16 year old boy. I’m just working with what I’ve got.

Not reusing lids is another safe canning practice, that I don’t always do. It really depends if the lid is in good shape but normally, I do use new lids. But I can’t say that I ALWAYS do.

Before we get too far into this, I have a great course on the basics of goat care. I call it Goat Crash Course: Goat 101. In this course, I explain things like types of shelter, types of feeds and hays, basic assessments and so much more! Check it out!

Buy Now

The Pressure Canning Debate

The debate is this: People have used waterbath, open kettle, dry canning, and other forms of canning, instead of pressure canning, for hundreds of years and the vast majority of them didn’t die from Botulism.

And that argument is correct for the most part. With a decade worth of recent reporting, there have been less than 1,000 cases of home canned Botulism cases. The risk of death or injury from other canning methods is extremely low, but never zero.

One of the things that I really want to bring up here is a two fold thing that you should decide for yourself. Again, I am NEVER going to tell you what to do. I’m going to give you information and tell you what I do. After that, you make your own decision. I follow the “Your kitchen, homestead, home, kids, your rules” philosophy, so you do you boo boo.

That being said, there is a lot of debate about pressure canning in other countries vs the US. Above, I told you that the US is one of the only states in the world that has and uses pressure canners to can food. But the US is NOT the only country that cans food. That being said, other countries have more cases of Botulism than we do, mind you it’s still really low at 82 in 2021. But these are SEVERAL countries in Europe.

All of that to say, your risk of getting Botulism or other injury, illness or death from home canned food is extremely low, but never zero.

cropped-3.jpg

Are you looking for garden journal prompts, but aren’t interested in a weekly email? Check out our 365 Garden Journal Prompts! This is an amazing, all in one, yearly product that you only pay for once.

Buy Now!

How Long Does Canned Food Stay Safe

12-18 months is the generally accepted timeframe for shelf stable home canned food, depending on food type, recipe, and canning method. I have found that most of the time, the food itself is still good long after 12-18 months, but the texture, nutrition, etc are all poor.

In my home, most food doesn’t last past the 18 month mark for two reasons. One, we’ve already eaten it and two, I need the jars. But there are a few cans of food that I wouldn’t touch after 18 months; beans and pickles are the two that come to mind immediately. But anything that sits in water for a long period isn’t going to taste very good after 18 months.

But there are two ways that I ALWAYS use to check if the food is still good. I ALWAYS look at the food before I open the jar. If it doesn’t look good, it’s probably not. If there’s mold, obviously toss it. Second, I smell it. If it doesn’t smell, we are probably good to go. If it does smell, does it smell like the cooked version of that food. For example, cooked carrots have a very distinct smell. Does the jar of canned carrots smell like cooked carrots? Yes, we are good to go. No, toss it.

The Ultimate Homesteader’s Starter Bundle – Only $47!

Get the tools you need to stay organized, track profits, and manage your homestead with ease!

Includes:
✅ Schedule F Tracker – Simplify tax prep
✅ Profit Calculator – Track earnings
✅ Hay Calculator – Plan livestock feed
✅ Garden Journal – Digital & printable
✅ Herd Health Tracker – Monitor animal care
✅ Simple Budget – Manage finances
✅ Backyard Homestead eBook – Essential tips

$99 value – now just $47! Start your homesteading journey today!

Buy Now

Starting Your Canning Journey

My suggestion for any new canner is to start small and easy. Don’t try to run a pressure canner without any canning experience. Don’t try and make a super difficult recipe when you don’t have a clue what you are doing. Start easy with jams, syrups, and salsa.

Once you’ve got that under your belt, start working with things like chow chow, relish, etc. Then get a pressure canner and start working on single vegetable jars like canning corn, green beans, etc.

After you’ve gotten a feel for how to use your canner, start working on harder things like beef stew, chicken noodle, etc and move on from there.

The biggest thing that I will recommend is always starting with tried, true, and tested recipes. Personally, I use recipes from all over the web. But I’ve been canning for over 15 years. I don’t always know what I’m doing, but I do know when things go sideways and something isn’t right.

But all that knowledge didn’t help me when I warped my pressure canner this year. I wasn’t paying attention and didn’t add enough water to the canner. That was an expensive mistake. But it happens.

Before we get too far into this, I have a great course on the basics of goat care. I call it Goat Crash Course: Goat 101. In this course, I explain things like types of shelter, types of feeds and hays, basic assessments and so much more! Check it out!

Buy Now

Canning Food Is Safe

At the end of the day, canning food is safe. It’s far safer than texting and driving (400 deaths/year on average). It’s safer running a marathon. And while that sounds funny, it really is the reality.

Canned food is safe as long as you follow safe practices and don’t try to out can your abilities. Learn, grow, and enjoy the fruits of your labor!

If you like this post, feel free to share it and follow us below on our social media accounts!

  • Facebook
  • Pinterest
  • Instagram
  • YouTube
  • TikTok
  • Spotify
  • Threads

Filed Under: Canning, Emergency Preparation, Frequently Asked Questions Tagged With: Canning, emergency, emergency food, Garden, pressure canning

JOIN TO OUR MAILING LIST!

Leave us your email to receive new posts and special offers for members only! Don't miss a thing!

Recent Posts

  • Fall Garden Guide
  • Top Mistakes With Goats
  • How To Bond With Your Goats

Homestead Infrastructure

November 2, 2024 by Leigh Leave a Comment

Over the last several weeks, Jared and I have been going through our budget and project list for 2023. We decided that this year, we were really going to focus on the infrastructure of the homestead. I knew we couldn’t be the only one, so I wanted to put together a post on homestead infrastructure and what it means.

The Ultimate Homesteader’s Starter Bundle – Only $47!

Get the tools you need to stay organized, track profits, and manage your homestead with ease!

Includes:
✅ Schedule F Tracker – Simplify tax prep
✅ Profit Calculator – Track earnings
✅ Hay Calculator – Plan livestock feed
✅ Garden Journal – Digital & printable
✅ Herd Health Tracker – Monitor animal care
✅ Simple Budget – Manage finances
✅ Backyard Homestead eBook – Essential tips

$99 value – now just $47! Start your homesteading journey today!

Buy Now

Every homestead is different, so every infrastructure plan is going to be different. But I wanted to go through our list of homestead infrastructure with you so that you can get some ideas on what you want to do with your own homestead infrastructure and why. If you have your own ideas, please list them in the comments below!

What Is Homestead Infrastructure

The first thing we need to do is define infrastructure: “the basic physical and organizational structures and facilities (e.g. buildings, roads, power supplies) needed for the operation of a society or enterprise.”(Dictonary.com).

But what does that mean for a homestead? We aren’t necessarily operating as a society, community or enterprise. We are also not necessarily building roads, grids, or buildings on a large scale. But that doesn’t mean that the same idea doesn’t work.

When I talk about homestead infrastructure, I’m talking about barns, sheds, and other outbuildings. I’m also talking about fencing, pastures and gardens. It comes inside the house in the form of canning, storage, freezers, and energy efficiency. As your coming up with ideas on what your infrastructure will be, think about all the things in your local community.

Grocery stores= garden, fruit trees, canning

Milk, cheese, butter, eggs and meat= cows, pigs, goats, chickens

Roads= Trails or walk ways to barns, livestock pens, gardens, etc

Grids like water, electric, gas= wells, solar, firewood

Schools, community center, grocery store= home

By setting up your own infrastructure, you are going to prepare yourself, family and homestead for future success. Also remember, if you can’t do something like build a barn or put in an acre garden, that’s okay too. Just work on the things you can do.

Logo 468x60

Why Infrastructure Is Important

When you are setting up your homestead, it is incredibly easy to get overwhelmed with the things you want to do or think you should do. I wrote a couple blog posts about setting goals, mistakes we’ve made, and things we have learned, but the biggest take away is that you need to know what you want, and how to get there.

Infrastructure on your homestead is so easily overlooked because you think you’re doing it with every project you do. But if you really stop and think about it, are you actually setting up something that is going to last for years to come, or are you simply reacting to the things you think you should be doing?

For example:

We bought goats on an impulse. Then as we bought more goats and as winter was barreling down on us, we decided to build a goat barn. They say hindsight is 20/20, and they are right. That first barn kind of works but is also kind of a disaster. Does it keep them dry? Sorta. Does it keep them warm? Yes. Will it keep predators out? Uh, maybe?

The barn is built right in a rain run off area. When we built it, we had no idea. But now it’s becoming an issue with all the summer rains we have gotten. The entire thing has about 2 inches of muck building up the sides, there are leaks in the roof and the “ventilation” we thought was a great idea? Not so much.

That being said, the infrastructure we put in? Isn’t working. That’s okay-ish. It’s a learning experience. But it’s also expensive.

Had we planned our infrastructure better it would save us money, time and a ton of frustration. That’s why it’s so important. But the learning part? That’s important, too.

Setting Up Your Homestead Infrastructure

For the planners, this is the best step. If you’re a do-er, find yourself a planner. I say that because I am a planner and I have about a million lists floating around for different projects and plans. In fact, I have a “hard copy” of my Pinterest in a 3″ binder. Jared is a do-er. He has zero desire to plan and that is just fine.

Our list of infrastructure is five pages typed and while yours doesn’t have to be that long, it does need to be that thorough. What does it need to have on it? Check out the example below:

Project: Goat Barn

Dimensions or Specs: Current: 8×13, Increase to 12×16. Current “milking area” will turn into a weaning pen and new milk parlor and kidding space created. Door from inner barn to milking area to avoid having to haul goats outside to be milked. Inner barn area will be increase to 8×10 minimum. Storage area in kidding/milking area for milking supplies. Bedding racks to get them off the ground. Gutters to IBC’s to help with water.

Resources On Hand: current barn will be torn apart, bleached/cleaned and painted. Materials that are reusable will be reused.

Resources Needed: t1-11, studs, paint, new hardware, more roofing, plywood or similar for bedding racks, screws, concrete pavers to get wood off the ground and possibly gravel in barn and in dry lot that will be created around the barn

Plan of Action: Jared and I will build a couple new goat shacks so the girls can have a place to go for the days that their barn will be moved. Barn will be torn down, cleaned and painted. New area for barn will be cleared and leveled. Water run off trenches will be “installed” to divert water from barn. Pavers placed and walls built. Interior built and painted. Pavers for milking area. Gravel, if decided, will go into inner barn, weaning area and dry lot.

Estimated cost: $1000

Homestead Infrastructure Ideas

Below are just a few of the things on our infrastructure list and each one has it’s own Project Planning Worksheet in my binder

  • IBC’s for firewood and water
  • Fencing for new livestock
  • Meat animals
  • Fence in Upper Garden
  • Goat Barn
  • Firewood/wood lot
  • Energy Efficiency
  • Yard hydrants
  • Solar panels
  • Generator
  • Hay Barn
  • Outdoor kitchen/ butchering area
  • Erosion control
  • Food Storage Room
  • Well Bladder
  • Attic Gables

Before you get overwhelmed, remember, this is MY entire 2023 focus. Paralysis by analysis is a thing and you don’t need to get overwhelmed. Make a list and see what you can do. See what it’s going to take for you to do those things. Then get to work.

If you like the content I put out, feel free to buy us a coffee! It helps keep this site running, marketing and the goats in grain!

Buy me a coffee

If you like this post, feel free to share it and follow us below on our social media accounts!

  • Facebook
  • Pinterest
  • Instagram
  • YouTube
  • TikTok
  • Spotify
  • Threads

Filed Under: Animals, Canning, Chickens, Garden, Goats, How To's, Our Homestead, Pigs

JOIN TO OUR MAILING LIST!

Leave us your email to receive new posts and special offers for members only! Don't miss a thing!

Recent Posts

  • Fall Garden Guide
  • Top Mistakes With Goats
  • How To Bond With Your Goats

Prepping Firewood For Winter

October 29, 2024 by Leigh Leave a Comment

If you heat with firewood, you know the drill because every year it’s the same. But for those that are new to heating with firewood, I wanted to get you ahead of the game. It’s not as easy as lighting a fire and going about your business. There is a lot of time, energy and muscle that goes into heating with firewood. I spoke about it a lot in this post. It’s also not a winter only thing. But by prepping firewood for winter now, or even earlier, you will be warm and cozy.

If you are new to heating with firewood and are looking to master the finer points of it. We’ve got a great eBook that goes in depth of what tools you should consider, how and where to stack, how to build a fire and so much more!

Buy Now

How to start prepping firewood for winter

Every year is the same for us, we pick out trees in the spring/ early summer that need to come down because they are dead or dying. Then Jared takes them down and turns them into rounds. We haul the rounds to our woodlot at the back of the property to be split. Then they season until they are ready or needed. But there are a couple things that you should take into account when prepping firewood for winter. Things like location, stacking, tools and types of wood.

Location

The first step is to locate an outside space that is about 20-30 feet from your home, with good drainage, sunlight, and airflow.

You don’t want your firewood pile to be too close to the house because of bugs. But you also don’t want it too far away because a hike through the woods in a blizzard is no fun. I have found that the sweet spot is usually about 20-30 feet. If you have the ability to put it next to concrete, like a driveway? That helps too because there is now a physical barrier between your wood pile and home.

Drainage is another thing to consider when looking for a spot for your wood pile. You want to make sure that you have adequate drainage so that your wood pile isn’t sitting in a puddle of water after a hard rain. Our farm is mostly hills so finding a spot that will drain water away from the pile but was still close was a chore. Also we have our wood pile up on pallets and this helps keep it off the ground but cinderblocks work just as well.

Lastly, you want to consider the amount of sunlight that will reach your wood pile. Ideally, you will have your pile in a sunny location that is semi protected from the rain and with good airflow. Without airflow and sun, your wood pile will take forever to dry. This late in the game (September) you need all the help you can get.

PS don’t tarp your wood pile! I KNOW it’s tempting. But if you tarp it there will not be enough airflow to dry out the wood. Condensation will build under the tarp and keep things damp. If you will remember to take it off after a storm? Sure, you can tarp it. But don’t leave it on there.

Stacking Firewood

If you ask my boys how to stack firewood, they’ll tell you, “In a pile?”

Save on Seeds

But there is more to it than that, and they know it, too. The biggest thing to remember when stacking firewood is to get it up off the ground and to stack bark side up. I’m sure we know why stacking on the ground is bad but indulge me as I explain it to those who may not know.

When you stack firewood straight on the ground you are going to introduce a ton of moisture to the wood. Not only from the ground, but also when it rains the water will hit the ground and splash up. Or if that bottom row stays damp, that moisture will travel through that wood, if only because it can’t dry, and not allow the next row to dry. That goes directly against what we are trying to do, right? We want the wood to be dry and free of rot before we put it in our fireplace, insert or stove.

By keeping firewood off the ground, we are also increasing airflow. If air can move under the wood, it will dry faster. But the most important? All that hard work of cutting, chopping, stacking, etc will be for not, if it rots.

The other part of stacking is keeping the bark side up. Obviously, sometimes you can’t and that’s okay. But keeping the bark side up will allow water to roll off and not absorb into the wood. A moisture meter will be your best friend when it comes to checking if your wood is dry enough to burn. Usually you want about 20% moisture or less.

Lastly, stacking in a # way is unnecessary unless you are trying to dry wood faster. Those stacks are easily knocked over and having to restack firewood is not on my list of good times.

Tools for prepping firewood for winter

Table Grinder– Sharpening your axe or other tools is a great way to extend their life.

Axe- A good axe will get you far with chopping firewood. We use a log splitter for the most part but we will also use an axe.

Hatchet– We use ours to help chop kindling and other smaller pieces that the axe is simply too big for.

Gas powered log splitter- We will be getting this log splitter here in a few months. The electric one works, but a gas one is a lot stronger.

Tractor Supply

Electric log splitter– This guy is a work horse. I really like using him but the downside is that we can only go so far with an extension cord. It also doesn’t have a ton of muscle to drive through some of the larger or wetter pieces of wood. BUT I would absolutely buy this one again. It has been worth every single penny.

If you are new to heating with firewood and are looking to master the finer points of it. We’ve got a great eBook that goes in depth of what tools you should consider, how and where to stack, how to build a fire and so much more!

Buy Now

Moisture Meter– As I said above, you will want to check the moisture of your wood to make sure it is drying. We’ve got this one and another brand and it has done well for us.

Types Of Wood

First and foremost, any wood is good wood when you are cold. BUT, there are dangers to using certain woods or green wood. Creosote is a thing and it’s pretty dangerous. So let’s talk about types of woods to use.

Hard woods like maple, ash, birch, oak and walnut are great for burning hotter longer. They also don’t produce a ton of smoke.

Tractor Supply

Soft woods like pine, fir, and cedar are okay and can be used but they don’t burn as hot and will usually be gone quickly.

Green woods are what are really bad for your stove, fireplace or chimney. Green wood produces a ton of creosote and smoke.

If you would like a copy of my firewood eBook, you can order it here!

If you like the content I put out, feel free to buy us a coffee! It helps keep this site running, marketing and the goats in grain!

Buy me a coffee

If you like this post, feel free to share it and follow us below on our social media accounts!

  • Facebook
  • Pinterest
  • Instagram
  • YouTube
  • TikTok
  • Spotify
  • Threads

Filed Under: How To's, Our Homestead

JOIN TO OUR MAILING LIST!

Leave us your email to receive new posts and special offers for members only! Don't miss a thing!

Recent Posts

  • Fall Garden Guide
  • Top Mistakes With Goats
  • How To Bond With Your Goats

Our Homestead Buying Guide

October 26, 2024 by Leigh Leave a Comment

I’ve been getting asked a lot, “Where do you buy x?” So I figured I would take the time to list out where we buy the stuff for our goats, chickens, canning, seeds, garden stuff, and other odds and ends that we have used and really like. This is a VERY link heavy post, so here is our affiliate disclosure again. It doesn’t cost you a penny, but it does help us here on the homestead. The other thing is that I am not going to push you to buy anything that we have not already bought, tested and liked/loved. You don’t need that and to be honest, that’s not who I am. Here is the Homestead Buying Guide.

The Ultimate Homesteader’s Starter Bundle – Only $47!

Get the tools you need to stay organized, track profits, and manage your homestead with ease!

Includes:
✅ Schedule F Tracker – Simplify tax prep
✅ Profit Calculator – Track earnings
✅ Hay Calculator – Plan livestock feed
✅ Garden Journal – Digital & printable
✅ Herd Health Tracker – Monitor animal care
✅ Simple Budget – Manage finances
✅ Backyard Homestead eBook – Essential tips

$99 value – now just $47! Start your homesteading journey today!

Buy Now

PS: if you don’t have a Honey account and you shop online a ton, I highly suggest you download it. You can use my code here. They are great because it can automatically search for coupon codes and you earn cash back on purchases. I’ve earned $300 in the last year. It’s worth the minimal effort AND you can add items to your honey list which will tell you when prices have dropped or if it’s at the lowest price.

Livestock

Goats

You can read any of my posts involving my goats here.

goat kidding

Before we get too far into this, I have a great course on the basics of goat care. I call it Goat Crash Course: Goat 101. In this course, I explain things like types of shelter, types of feeds and hays, basic assessments and so much more! Check it out!

Buy Now

We get most of our goat gear from Tractor Supply. Their prices can be higher than a local feed store on some things but cheaper on others. For example; my local feed store has alfalfa pellets for $17.99/ 50# bag. Tractor supply has theirs for $19.99 as of this writing.

Buckets– We get these for feed, water, and so many other things. They are really useful.

Troughs- We use two different kinds. This one is the one we hang on the fence at different points to give them feed, alfalfa, or whatever else. We use this one for portability or if we are hanging a temporary feeder in a kidding pen for them.

Balling Gun– This helps us get pills down into the goats without having to worry about getting bitten. Yes, that happens a lot.

Tractor Supply

Hoof Trimmers- We’ve bought two of these, and I’m a fan of this one. It just seems sturdier and I like it better. BUT this one from TSC is fine too. It’s not that I don’t like it per se, I just prefer the orange one. If you’ve got some money to spend, I would HIGHLY suggest the Hoof Boss. I’ve seen it used and it does a fantastic job. It is on our wish list of things to buy.

Meds- Now, I’m going to say this. We treat a lot of aliments on our homestead. But we also have an amazing vet that we can call any time… almost. But having a few meds on hand is going to save you a ton of heartache. Meds to get from a vet: Thiamine, Banamine and a good antibiotic. Things to have on hand that you can get from a feed store: Red Cell, Probiotics, Safeguard or Cydectin (or your choice of dewormer), electrolytes, Iron, B-complex, and Copper Wire Bolus. On the copper wire, make sure you get kids or adults based on what you have.

Chickens

You can read about how we brood chickens here. The list below are links to the items we have bought.

Incubator- We use this one and have had great success with it. The only thing I don’t like is the size. I wish it were bigger but beggar and choosers.

Brooder lights- We have used CHE’s like this one, but it can cause the chickens to attack other chickens. So a red light and housing is what you really need. We also use pine shavings for bedding for both the goats and the chickens.

Tractor Supply

Feed- When we have chicks, we start them on a medicated feed. This helps with cocci and other harmful organisms. Remember, you really only need a week or two worth of this feed. What we do is feed approximately 1#/ chick. If you have two chicks, you would need 2#, if you have 50 you need 50#. This is not perfect, it’s really a guess. When we do our meat chickens, we buy one bag of medicated chick start and than it’s regular chick feed after that.

Feeders/waterers- We use this feeder when they are little, and this one when they are bigger. However! If you’ve got some money to spend or you are only interested in buying one thing, this is the feeder you need. I love it! AND we can hang it, which really does decrease the mess. It also works fantastic with the ducklings.

When chicks are little, they need a ton of water, but they are also extremely messy. So finding one that isn’t going to make a mess but also be easy to fill has been difficult. This waterer is good, not great, but it will get the job done when they are little. As they get bigger, we use this one. We found that the metal ones did not hold up well at all. If you have a waterer you love, let me know in the comments.

House Supplies

Canning

Alright! I’ve been waiting to do this one!

Canners- This is my water bath canner and this is my pressure canner. I’ve got two of the presto pressure canners and I love them. One of these days, I am going to get this mack daddy. I can process 19 quarts a time. Which replaces BOTH of my other canners. The price tag is steep at around $500 but it’s got a life time warranty and it’s worth every penny.

Logo 468x60

Jars- All I’m going to say is this: when you think you have enough, double it. Then double it again. Here’s why. I have over a thousand jars. When I can, I can for an entire year. So when I am figuring out how many jars of tomato sauce I need for the year, it’s not a couple dozen. I can 104+ quart jars. When I can green beans, it’s not a couple pints. It’s 146+ quarts and 146+ pints. Same with corn. Soups and stews is another big ticket item in my house. We are talking 200 quarts and 200 pints-ish. Sometimes it’s more. That’s already 600 quart jars that I need. So while you may not need that many, be prepared that you will need more than you think.

Funnels- Yall, you will never, and I mean never have enough funnels. I love the metal funnels and I have at least 6 of them. Make sure to get wide mouth and regular!

Jar grabby things- Get a bunch of these too. You will lose them or the handles will break while you are mid canning.

https://www.wickedgoodcupcakes.com/shop-online/thinking-of-you-boxes

Books- Canning cookbooks are some of the best investments that you can make. This book is hands down the best period. Buy it. She’s got a ton of amazing soups in there and they are divine. This is another really good one with some great recipes. If you are new to canning, I will recommend getting a Ball Book. There is a ton of great information in them. BUT after you get some experience, or after doing your own research, take it with a grain of salt. Some of the recipes are extremely convoluted and contradictory. Lastly, I’m not a Prepper, per se. BUT I do put up my own food because after the pandemic, I realized that relying on the grocery store isn’t a super smart idea. That being said, this book has some great recipes, ideas, and more for being self reliant.

Check back for more items as we find them and add them to the list!

If you like this post, feel free to share it and follow us below on our social media accounts!

  • Facebook
  • Pinterest
  • Instagram
  • YouTube
  • TikTok
  • Spotify
  • Threads

Filed Under: Animals, Canning, Chickens, Goats, How To's, Our Homestead, Pigs, Projects Tagged With: Canning, cast iron, Chickens, Chicks, cooking, Eggs, Goats, Homestead, kitchen

JOIN TO OUR MAILING LIST!

Leave us your email to receive new posts and special offers for members only! Don't miss a thing!

Recent Posts

  • Fall Garden Guide
  • Top Mistakes With Goats
  • How To Bond With Your Goats

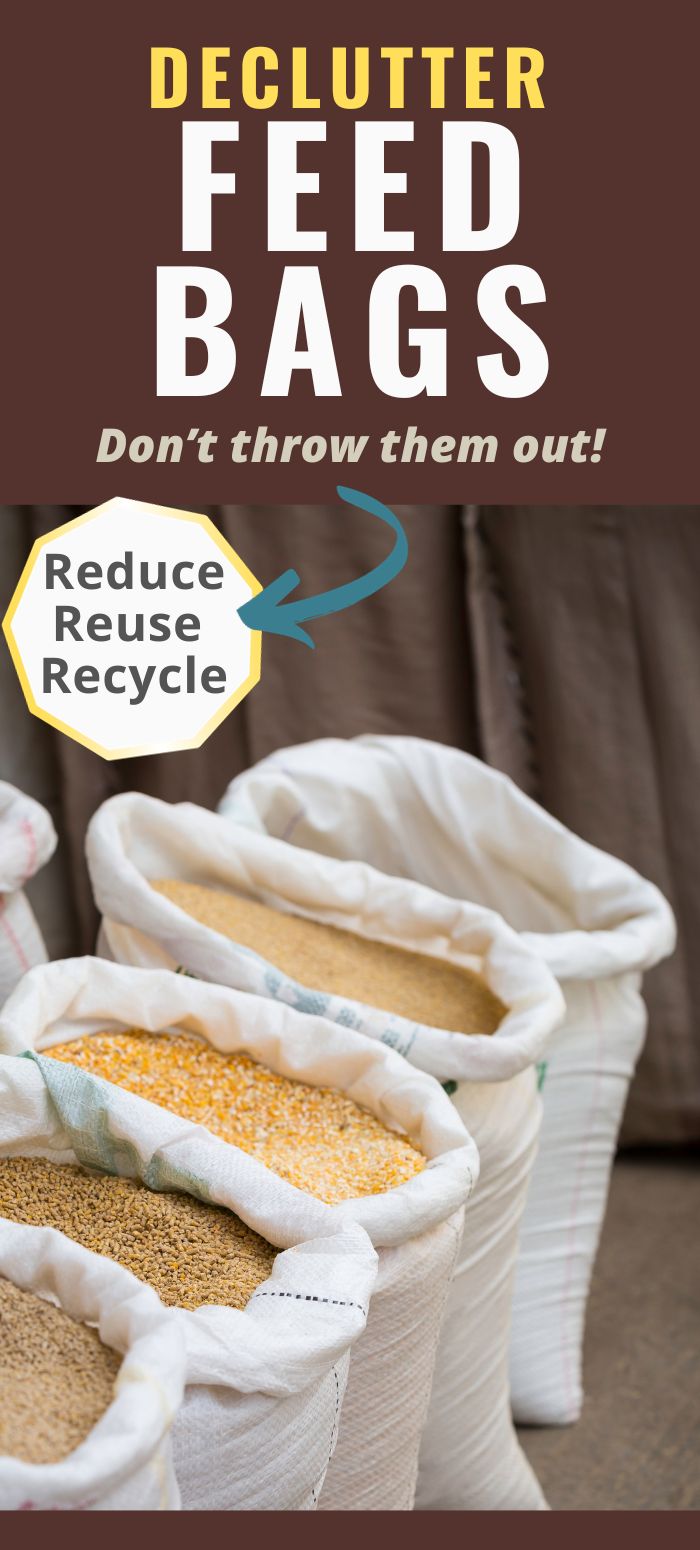
What To Do With Those Feed Bags

October 1, 2024 by Leigh Leave a Comment

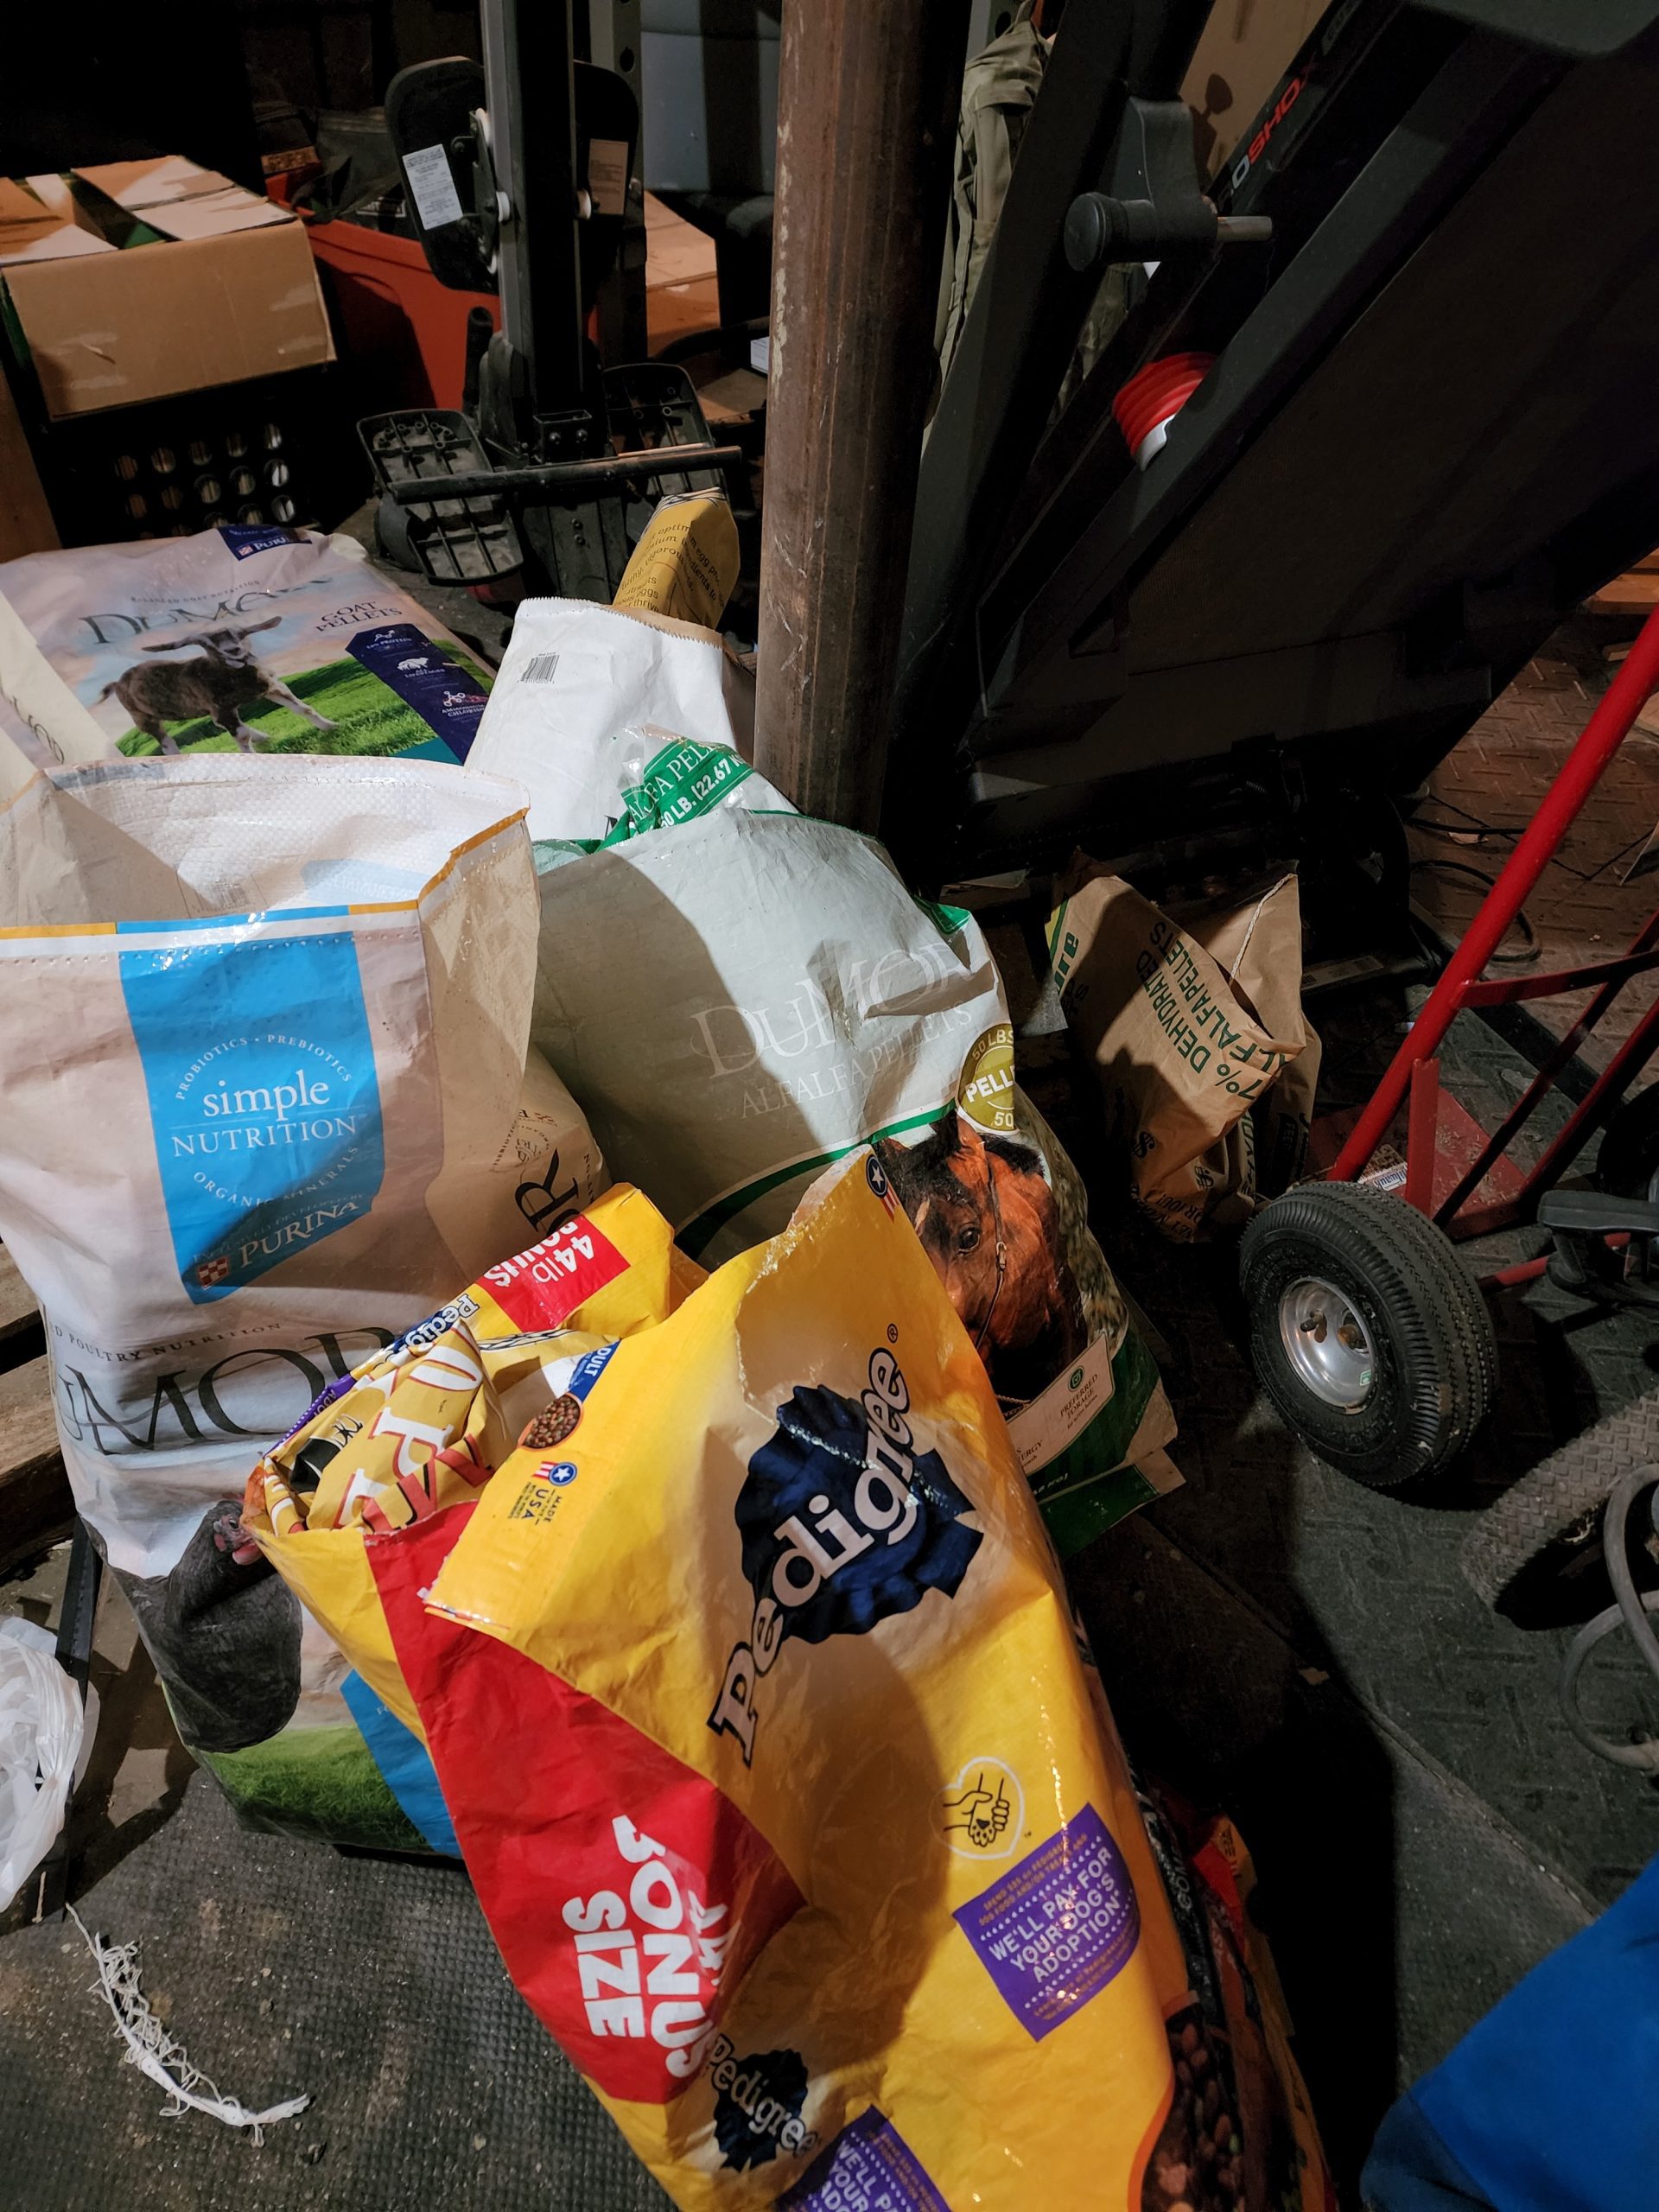
How many feed bags do you have laying around? Do you just throw them away? I’ve always been one to save dog food bags. I don’t know why. Probably the same reason so many people save shopping bags that they never, ever reuse. At least not at the rate they save them. But after cleaning up the basement for the 9 millionth time, and seeing a ton of bags, I decided enough was enough.

goat kidding

Before we get too far into this, I have a great course on the basics of goat care. I call it Goat Crash Course: Goat 101. In this course, I explain things like types of shelter, types of feeds and hays, basic assessments and so much more! Check it out!

Buy Now

What To Do With Those Feed Bags?

But how many bags do you really need? Well, according to my brain, I need all of them. It’s ridiculous. I cannot throw them away. No matter how hard I argue with myself about the fact that I don’t need to save every single one, I end up rolling it up and stowing it in another feed bag. So I started brainstorming, searching and the list below is how we reuse feed bags.

Don’t judge!

Why I save them

I feel like they are really good bags. They are made to hold 50# of food or more! That means they can hold all sorts of things. Plus, let’s be real here, you put anything sharp in a regular trash bag, even the heavy duty ones, and you are blowing a hole in it. Now, all that trash is all over the place. Not cool.

Another reason I am in favor of saving these bags is because I’ve already paid for them. Think about it, I bought the feed but I’m going to throw away a perfectly good bag because it’s empty? Absolutely not. Couple that and the fact that things are getting more and more expensive? I have all the reasons I need to hold on to and reuse feed bags.

Ways To Reuse Feed Bags

Trash Bags– Seriously, these make the most amazing trash bags! I don’t know where you live but trash bags by me are $15 for an 80ct box. When I am going and decluttering, I will reuse feed bags before I even touch my regular trash bags.

Tote Bags- Kathy over at Beyond The Chicken Coop has a great tutorial for making tote bags! These are seriously adorable and I will be making some! I love that I can make different sizes based on what I need. Plus, I know that if I can make the seams strong, they will be strong because again, they hold 50# of feed!

Hay Feeders- Danielle At DIY Danielle, talks about some of the pros and cons of doing it this way. I have found that it works well, until it doesn’t. I love the portability of this style bag, I can nail it to a tree or hang it in the goat barn. But it’s still only going to last so long.

Organizer- Yes, you read that right. We will use these bags to put all of the same type of stuff together. For example: We will store all of our nursery pots in a feed bag. Or if we are going the the back of the property to cut trees, we will put the bar oil, fuel, hatchet, etc in the bag. Now, we take them out immediately after so that we aren’t mixing chemicals if one should mysteriously open. BUT to get all those tools out to the area we are working now only takes one trip.

Logo 468x60

Planters- We have grown some amazing potatoes, carrots, and onions in these bags. But be sure to use the plastic ones for this! Patrick and Jessie at Southern Dreams Homestead has a great and in depth post about growing in containers that will help you here.

Tarps- Yea, I wasn’t sure about this one but the idea is definitely there! Sweet Meadow Sampler has a great tutorial on it. We will be trying it soon though.

https://www.wickedgoodcupcakes.com/shop-online/thinking-of-you-boxes

Flooring– I personally would do this in the winter to make clean out in the spring easier. One of the biggest headaches we have come spring, has nothing to do with the garden. It’s cleaning out the barn and coop. Having these bags would not only insulate them from the ground, it would also help clean up all the pine shavings, poop, urine and more.

Compost- it is feasible that you could compost in these bags. The plastic would trap heat and allow break down faster. The thick paper bags are compositable themselves. In theory (I have not tried this yet) you could fill a bag and empty it in your compost pile. Or you could use the bag AS your compost pile. You can go more in depth about composting with The Homestead RD, Katie has some truly amazing posts about compost. In the post I linked above, she also uses feed bags as planters and can tell you how to do it.

Weed Suppression– We have used the paper feed bags to line the bottoms of our raised beds. It works about the same as using cardboard but it is FAR more readily available for us. I don’t know that I would use the plastic ones through.

Banner 468x60

Wood- We will put our small pieces of scrap wood in these bags to help keep the basement cleaned up. We have a ton of projects around here and I’m not going to throw away or burn a piece of good wood just because it’s a smidge too small. By putting it in the feed bags, we reduce clutter and reuse the bag.

Projects– Sometimes when we have multiple projects going on, it’s hard to keep everything separated. So I will put all the supplies for a project in a feed bag and then write on the front what it’s for. This has helped a ton when it comes to organization.

If you like the content I put out, feel free to buy us a coffee! It helps keep this site running, marketing and the goats in grain!

Buy me a coffee

If you like this post, feel free to share it and follow us below on our social media accounts!

  • Facebook
  • Pinterest
  • Instagram
  • YouTube
  • TikTok
  • Spotify
  • Threads

Filed Under: Animals, Chickens, Goats, How To's, Pigs, Projects Tagged With: Canning, Chickens, Chicks, cooking, Goats, Homestead

JOIN TO OUR MAILING LIST!

Leave us your email to receive new posts and special offers for members only! Don't miss a thing!

Recent Posts

  • Fall Garden Guide
  • Top Mistakes With Goats
  • How To Bond With Your Goats

7 Most Common Mistakes For New Homesteaders

September 21, 2024 by Leigh 4 Comments

So you’ve bought your property. Congratulations! You have been dreaming, scheming, planning, watching YouTube, and reading blogs like this one to try and figure out all the things you want to do on your homestead. Once you’ve moved in and the dust has settled, you look around and ask, “What now?” If you’re anything like the the rest of us mere mortals, you’re going to jump in with both feet. Now, you are overwhelmed, underprepared and stressed to the max. It’s like I know, right? Welcome to my life for the last year. So here is my list of 7 most common mistakes for new homesteaders, and how to avoid them.

The Ultimate Homesteader’s Starter Bundle – Only $47!

Get the tools you need to stay organized, track profits, and manage your homestead with ease!

Includes:
✅ Schedule F Tracker – Simplify tax prep
✅ Profit Calculator – Track earnings
✅ Hay Calculator – Plan livestock feed
✅ Garden Journal – Digital & printable
✅ Herd Health Tracker – Monitor animal care
✅ Simple Budget – Manage finances
✅ Backyard Homestead eBook – Essential tips

$99 value – now just $47! Start your homesteading journey today!

Buy Now

Mistakes For New Homesteaders and Quick Fixes

Starting Too Big

We all want to hit the ground running when we start our homesteads. Before you know it, you’ve got chickens, ducks, turkey, rabbits, cows, and goats. Your garden is huge but not producing. The goats are sick all the time. You have no time to enjoy the life you are trying so hard to build.

Downsize– Seriously, I know you wanted all the critters when you moved in and the thought of selling or butchering them is abhorrent, but you need to think about where you are and what you are doing. If you are struggling with caring for them, you aren’t giving them their best life. So downsize the herd and move on.

cucumber seedling

Get Help– If you are able to, enlist the help of kids, family or neighbors. Worse case? Hire someone until you get it figured out. This can get expensive, but if you don’t want to downsize, there are plenty of 4H and FFA kids that are looking for farm work.

Pay someone– I know that this seems counterproductive to the whole homesteading thing, but consider it. Jared and I work full time, plus have part time jobs and homeschooling that take up a lot of time. The exterior of our house desperately needs a coat of paint, but we just don’t have the time to do it. So we are hiring it out. It’ll be the same when we put in our property fencing and expand the goat pens. We could absolutely do it, but paying someone else to do it frees up our time to do something else.

Logo 468x60

Not starting at all

Paralysis by analysis is a thing. You want to do all of these things but you get so overwhelmed with choices, decisions and options, that you do nothing. You’ve got a list that is three miles long but you’re not really sure which thing is the best to start with.

Pick one thing– When we first moved in, our list of the things we wanted to do was incredibly long. I had 3 legal pad filled with notes, lists, and more. What made it easy to start was that we prioritized a few things off that list. We got a chicken coop and chicks. We started clearing land and debris. Then we got goats. THEN we got overwhelmed.

two goats

Infrastructure– A lot of people don’t think about infrastructure when they are setting up their homesteads. They have this idea in their head about what they want but no idea how to execute. My suggestion is to come up with your Homestead Infrastructure and then start making plans based on that.

Not having a plan

You jumped in with both feet and no plan. You are stressed, overwhelmed and ready to throw in the towel. You ordered the chicks but don’t have a coop. The seedlings that you planted in January have no home because there is no garden. You lost your plan, your goals, and your mind

Write it down!- I talked about goal setting here. But while goals are great, if you don’t have a plan, they’re not really a goal. It’s a dream. So come up with a big picture goal/ dream and start laying out how to achieve it.

Save on Seeds

Create A Budget– Look into how much those goals, dreams, and plans are going to cost. Then start working it into your budget. This life is expensive, but no one wants to be shocked when they go to start building a barn and end up thousands of dollars in the hole.

Lack of Organization

I have lost two bags of chicken shrink bags. I’ve misplaced my goals list and plan. Don’t even get me started about the basement. If I don’t have a list, things don’t get done. Or I my ADD kicks in and I have cleaned the whole house, but it doesn’t look like it.

Declutter– Yes, I know. You know how to declutter but you just don’t have the time. Well, let me ask you this? How much time have you wasted looking for things? How much money have you wasted reordering things because you can’t find them? Go ahead and declutter.

Make lists– Make the lists, check it twice and then put it on your fridge!

The Ultimate Homesteader’s Starter Bundle – Only $47!

Get the tools you need to stay organized, track profits, and manage your homestead with ease!

Includes:
✅ Schedule F Tracker – Simplify tax prep
✅ Profit Calculator – Track earnings
✅ Hay Calculator – Plan livestock feed
✅ Garden Journal – Digital & printable
✅ Herd Health Tracker – Monitor animal care
✅ Simple Budget – Manage finances
✅ Backyard Homestead eBook – Essential tips

$99 value – now just $47! Start your homesteading journey today!

Buy Now

No Accountability

Let’s be real for a second. We think we want accountability, but we really don’t. But we REALLY do. Most of us are self starters and are excited to work on new projects. But when we get bored, disinterested or defeated, it’s easy to just walk away from it. If we don’t have someone to say no, do not get that herd of twenty goats, you’ll never get ahead.

brooder full of baby ducks and some chicks

Respect the no– When I brought up getting pigs to Jared, he flat out told me no. Not because he doesn’t want them. He does. He said no because we don’t have fencing, a dedicated spot, or anything else. We’ve got two pregnant goats as well as all the chickens. So I respected the no.

Learn to self motivate– While I struggle with wanting everything right now and ADD. Jared struggles with motivation. He has been working on self motivation for a while and is doing better. There are days when he’s just not feeling it. That makes it hard on all of us because he is the main builder and heavy lifter on the farm. Figure out what you can do to motivate yourself and do it, all the time.

Banner 468x60

Education

We all know that education is key to everything. If you don’t know how to do something, life is going to get hard if you’re not willing to learn.

Pick a subject– and become an expert on it. Or at least as much as an expert as you can. If you pick goats, good luck. You will never be an expert. Find someone who is an expert and learn as much as you can from them. Our neighbors have been farmers their entire lives, who better to teach us how to be farmers?

Subscribe to Craft Beer Club Today!

Don’t be afraid to learn as you go– Get a solid base knowledge of your topic and then put it to work. Jared was not a carpenter before this homestead, now? He has built chicken tractors, barns, and so much more. He built my beautiful greenhouse. Don’t be afraid to learn.

Not knowing and using your resources

I am guilty of this one. Our neighbor has goats. Have I ever asked him for help? Nope. Our other neighbor raised meat chickens for years. Did I ask him for help? Nope. It’s a flaw that I’m still working on.

jars of green beans getting ready for the canner

Social media and YouTube are all great resources, but nothing is better than having someone walk you through the process. I can watch something one time and tell you how to do it. But I don’t actually know how to do it, until I’ve done it.

Don’t Get Discouraged

There is a reason you wanted to homestead. Remember that reason at every turn. When things get hard, remember why you chose this life. When the chicken knocks over a $80 bottle of goat antibiotics because your child forgot to shut the garage door? Remember you wanted the chickens…. and the child. As you progress with your homestead and get discouraged about all the things you need to do, look back and see all of the things that you’ve already done. Even if that’s only managing to keep the children alive.

If you like the content I put out, feel free to buy us a coffee! It helps keep this site running, marketing and the goats in grain!

Buy me a coffee

If you like this post, feel free to share it and follow us below on our social media accounts!

  • Facebook
  • Pinterest
  • Instagram
  • YouTube
  • TikTok
  • Spotify
  • Threads

Filed Under: Animals, How To's, Our Homestead, Projects Tagged With: Chicks, cooking, Goats, kitchen, Welcome

JOIN TO OUR MAILING LIST!

Leave us your email to receive new posts and special offers for members only! Don't miss a thing!

Recent Posts

  • Fall Garden Guide
  • Top Mistakes With Goats
  • How To Bond With Your Goats

Is Homesteading Worth It?

September 17, 2024 by Leigh Leave a Comment

When the shutdowns hit the US, a lot of people were stuck inside with nothing to do. They were scared of the virus and scared that they couldn’t find the basic supplies they need. All of this caused a huge uptick in people learning about homesteading. Mostly because they were stuck at home and bored out of their mind. This in turn caused a lot of people to start gardens, learn how to process foods, and in general adopt the homesteaders mentality. Is homesteading worth it? Absolutely!

The Ultimate Homesteader’s Starter Bundle – Only $47!

Get the tools you need to stay organized, track profits, and manage your homestead with ease!

Includes:
✅ Schedule F Tracker – Simplify tax prep
✅ Profit Calculator – Track earnings
✅ Hay Calculator – Plan livestock feed
✅ Garden Journal – Digital & printable
✅ Herd Health Tracker – Monitor animal care
✅ Simple Budget – Manage finances
✅ Backyard Homestead eBook – Essential tips

$99 value – now just $47! Start your homesteading journey today!

Buy Now

How To Get Started

I wrote an entire blog post about how to start a homestead and how to homestead on 5 acres. You don’t need to have a million acres to homestead. To be honest, you don’t even need 5 acres. You just need the right attitude to get started. I talked, in depth about what homestead means here and the reality is that no two homesteads look the same.

An urban homestead is just as amazing as a country homestead. A 100 acre homestead is just as awesome as a 5 acre homestead. At the end of the day, it doesn’t matter what homestead means because YOU are the homestead. It’s your ideas, your dreams, and your needs, not someone else’s.

What Do You Want?

Do you want to have a veggie garden, fruit trees or a container garden? Should you have chickens, rabbits, or quail because you only have a quarter acre in the city? What about a couple of goats or pigs? What about converting your lawn into a veggie garden? Or removing non edible landscaping and replacing it with edible, like raspberry bushes, grapes, or a salad bar?

All of these questions should be floating around in your brain about how to get started. The only thing that should be limiting you, is you. Set your goals and get to work. If you are on a small property, get creative. Instead of having a huge garden plot, go vertical. There are hundreds of posts on vertical gardening but my favorite is this one from The Homesteading RD. If you follow her, especially on Instagram, you can see all the wonderful ideas she has.

I always suggest writing down all of your wants, dreams, and desires. Then pick a couple a week to really dive into. As you start educating yourself on that thing, ask yourself if this is something that you really want to do. For example, we really wanted ducks, chickens, and rabbits. After doing a deep dive into raising each, we realized that rabbits just weren’t really worth it. That’s ok! It saved us a ton of money, work and frustration just because we educated ourselves on what it would take to actually raise these animals.

Becoming Self Reliant

We are in an age where shortages are a thing. Toilet paper, baby formula, you name it. What is next? So, I’ll ask the question again: Is homesteading worth it? Yes. Because if you become self reliant, you will do yourself and your family a world of good.

2 goats

Being self reliant can mean many different things. It could mean having the ability to grow, harvest, and preserve your garden. It could mean having the knowledge and understanding of what animals can eat, how to make them grow faster for meat, and to butcher them humanely. But it also means adding new skills to your toolbox and not relying on others to fix it.

By being self reliant, you can barter for goods or services. If you suck at growing veggies but you have the space for extra meat birds. Strike a deal with someone who does grow veggies but doesn’t have the space for meat birds. If you have never canned anything, find someone who has and start learning.

We have become more and more self reliant, just by being more frugal with what we do purchase, make or use. We purchase whole ingredients instead of quick meals… for the most part. But one of the things that we decided early on was to learn the “manual” way to do something.

We wanted to be able to make pasta if we ever needed to instead of always buying it from the store. Or making bread. Learning to be more self reliant doesn’t have to mean these big huge skills like gardening, canning, butchering, etc. It can be as simple as making bread or pasta.

Is Homesteading Worth It?

At the end of the day, you need to make that decision for yourself. I can say this, it is the most amazing feeling knowing that I made most the food in my food storage room. It’s also pretty cool that if I’m out of something, I know how to make a lot of things from scratch. Like that time that Jaxson wanted hamburger helper but I haven’t bought that stuff in years. Instead, I was able to make my own cheese sauce from butter and cheese that I made.

The question is, do you want that? Do you want to cook from scratch? Does a garden appeal to you? You have to know your why.

Every decision you make and goal you have should start with a Why. Why is it so important to you? This helps keep you on track when things get hard… And they WILL get hard. If you remember your why, every single decision you make will be a lot easier.

Our Why

Our why is simple: to not rely on others for things we can do ourselves. When it comes to the blog our why is equally as simple: To help beginning homesteaders with setting up their homestead and avoid the pitfalls of doing things “wrong”.

I have said for many years, if I just had 5 years and 5 acres, I could get us about 75% self reliant in terms of produce and meat. I could get our infrastructure set up to a point were trees, bushes, and other perennials require minimal effort with major results.

While we have had some major set backs, we have made a good sized dent in our infrastructure and are working towards doing more. I have to remind myself daily that our neighbors homestead has had over 100 years of work done to it. Ours only has a couple. They may have what we are moving towards, but we are starting from scratch. We’ll get there, though, and so will you.

So Join Us

The homesteading community is an amazing resource for all of us. It doesn’t matter if you are a master gardener or a beginner. It doesn’t matter if you have 1/8th acre or 800. We are a supportive group that only wants you to be successful.

YouTube is an amazing resource, as well as Instagram. The vast majority of us want to chat about anything and everything from livestock to gardens to preserving. Don’t be afraid to reach out!

If you like the content I put out, feel free to buy us a coffee! It helps keep this site running, marketing and the goats in grain!

Buy me a coffee

If you like this post, feel free to share it and follow us below on our social media accounts!

  • Facebook
  • Pinterest
  • Instagram
  • YouTube
  • TikTok
  • Spotify
  • Threads

Filed Under: Frequently Asked Questions, Our Homestead Tagged With: Canning, Chickens, Eggs, Goats, Homestead, kitchen, Pigs

JOIN TO OUR MAILING LIST!

Leave us your email to receive new posts and special offers for members only! Don't miss a thing!

Recent Posts

  • Fall Garden Guide
  • Top Mistakes With Goats
  • How To Bond With Your Goats
  • « Go to Previous Page
  • Page 1
  • Page 2
  • Page 3
  • Page 4
  • Page 5
  • Interim pages omitted …
  • Page 8
  • Go to Next Page »

Primary Sidebar

WELCOME

WELCOME

My name is Leigh and I am the lead chaos creator here at Steel Raven Farms. You will see throughout this blog that I am the crazy goat lady.

I am married to my high school sweetheart, Jared and we have two amazing boys.

FOLLOW ME

  • Amazon
  • Facebook
  • Instagram
  • Pinterest
  • TikTok

GET UPDATES!

Leave us your email to receive new posts and special offers for members only! Don't miss a thing!

In all the years that I’ve been growing a garden, the fall garden has steadily remained my favorite. Which is funny because I don’t really like any of the brassicas, which is what most people know the fall garden for. I prefer the root vegetables and cool air. But I have learned over the years…

Read More

Secondary Sidebar

Call to Action Section

Here's a great place to write something specific that you want your visitors to read.
Buy now!

Buy now!

  • Animals
    • Chickens
    • Farm Dogs
    • Goats
  • Garden
    • Compost
    • Garden Projects
    • Seeds and Plants
    • Garden Journal
    • Working With Food
      • Recipes
      • Freezing Foods
      • Dehydrating Foods
      • Canning Tips And Tricks
        • Canning Inventory Sheets
  • Helpful Info
    • Welcome to the Homestead!
    • Emergency Preparedness
    • Frequently Asked Questions
    • Goal Setting
    • Project List
    • Shop Digital Products
      • Hay Calculator
      • Farm Expense And Income Tracker
      • Goat Crash Course: 101
      • Garden Journal Prompts
      • Schedule C Tracker
      • Schedule C Tracker
      • The Homestead Bundle
  • The Truths
  • Episode List
  • Start Here
    • Privacy Policy
    • Affiliate Disclosure
    • Let’s Get in Touch
    • Members Only Library
    • Welcome To Our Homestead

Footer

  • Email
  • Facebook
  • Instagram
  • Pinterest

COME AND GET IT!

Leave us your email to receive new posts and special offers for members only! Don't miss a thing!

· Midnight Theme

Copyright © 2026 · Midnight Theme on Genesis Framework · WordPress · Log in